1. 安裝janus
apt install janus
高版本的Ubuntu已經可以直接安裝了,不要編譯那么麻煩了
2. 安裝nginx
janus 是后端,需要nginx或者其他等提供前端頁面的服務器,此外因為這里并沒有正式的證書,只能用自簽名的證書用于https。
前端必須是https
3. janus的源碼
apt install janus的源碼安裝了之后,要么自己寫demo,要么直接用源碼里面的前端頁面。html,jquery寫的,花點時間應該也能修修改改。這里是直接復用源碼里面的例子
4. coturn
穿透用來著,如果是局域網部署的,沒有影響,如果部署到阿里云這樣的,需要這個來做NAT穿透。實際測試來看,有些網絡穿透不了。
5.配置
ngnix的配置文件
# user www-data;
worker_processes auto;
pid /run/nginx.pid;
include /etc/nginx/modules-enabled/*.conf;
user root;
events {
? ? worker_connections 4096;
? ? # multi_accept on;
}
http {
? ? server{
? ? ? ? listen 80;
? ? ? ? server_name web_dist;
? ? ? ? location /{
? ? ? ? ? ? root /opt/janus/share/janus/html;
? ? ? ? ? ? index index.html index.htm;
? ? ? ? }
? ? }
server {
? ? ? ? ssl on;
? ? ? ? listen ? ? ? 443 ssl;
? ? ? ? server_name ?localhost;
? ? ? ? root ? ? ? ? /opt/janus/share/janus/html;
? ? ? ? underscores_in_headers on;
? ? ? ? ssl_certificate "/root/cert.pem";
? ? ? ? ssl_certificate_key "/root/key.pem";
? ? ? ? location / {
? ? ? ? }
? ? ? ? location /janus/ {
? ? ? ? ? ? proxy_pass http://api_server/janus/;
? ? ? ? ? ? proxy_set_header Host $host;
? ? ? ? ? ? proxy_set_header X-Real-IP $remote_addr;
? ? ? ? ? ? proxy_set_header X-Forwarded-Server $host;
? ? ? ? ? ? proxy_set_header X-Forwarded-Proto https;
? ? ? ? }
? ? ? ? location /ws {
? ? ? ? ? ? proxy_pass http://websocket;
? ? ? ? ? ? proxy_http_version 1.1;
? ? ? ? ? ? proxy_set_header Upgrade $http_upgrade;
? ? ? ? ? ? proxy_set_header Connection $connection_upgrade;
? ? ? ? }
? ? }
? ? upstream api_server{
? ? ? ? server 0.0.0.0:8088;
? ? }
? ? map $http_upgrade $connection_upgrade {
? ? ? ? default upgrade;
? ? ? ? '' close;
? ? }
? ? upstream websocket {
? ? ? ? server 0.0.0.0:8188;
? ? }
}
注意這里的pem文件,以及代理。主要是把https的請求反射到https上。否則的話證書問題會報錯。localtion的路徑選擇源碼下載后的html目錄。
到這里應該能看到janus的demo首頁了。但是因為后端其實apt 安裝過也在監聽了。
janus的配置
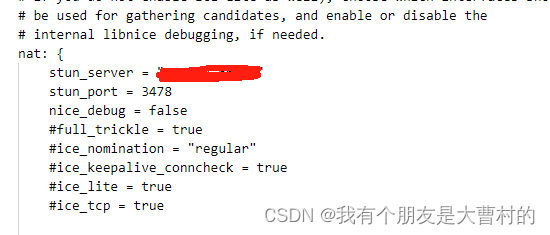
填寫自己的sturn地址,這里沒打算跑服務器的流量,所以turn沒開。默認janus安裝后,https好像沒打開,需要自己修改配置文件在janus.transport.http.cfg文件中(/etc/janus)
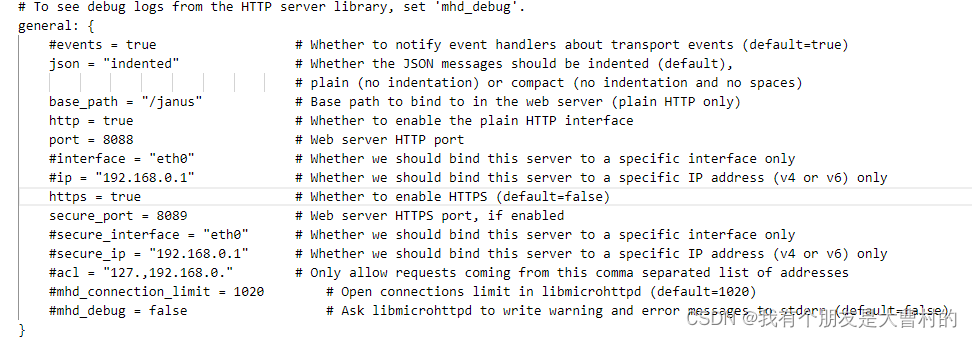
到這里重啟janus (service janus restart),然后通過netstat -tuln查看8088,8089端口是否在監聽狀態。如果再監聽,到這里基本都ready了。后面就是把前端和后端掛上即可。
前端頁面修改
目前下載的代碼,導航條會把start按鈕給覆蓋住,導致無法點擊start按鈕。先修改下前端頁面。我這里只打算搞個videocall。所以直接改對應的頁面
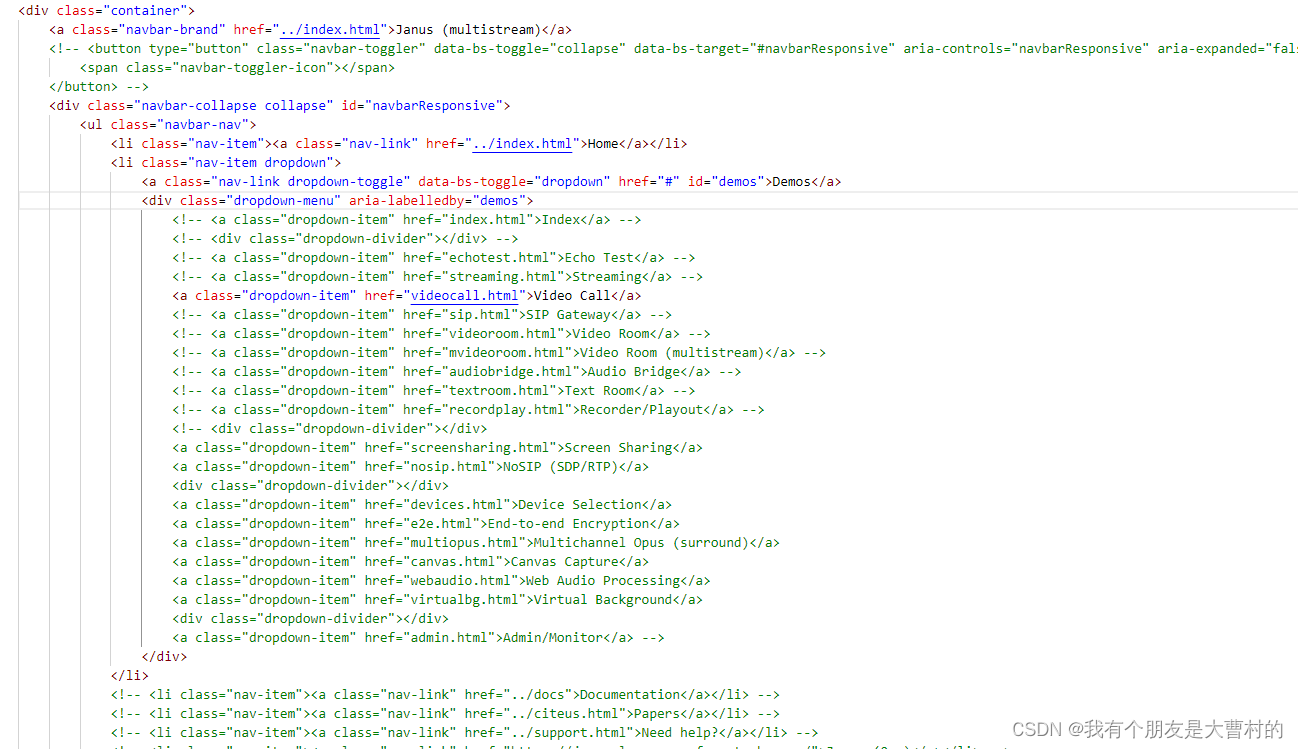
注意這里的navbar.html和上層目錄是兩個。選擇合適的文件修改。
到這里start按鈕出來了,但是點擊默認會報錯,有可能是證書ssl,等錯誤。因為默認的代碼,https是會請求8089的https請求的。可以在videocall.js里面把server變量打出來看看。
我們到settings.js文件中,把server給修改下
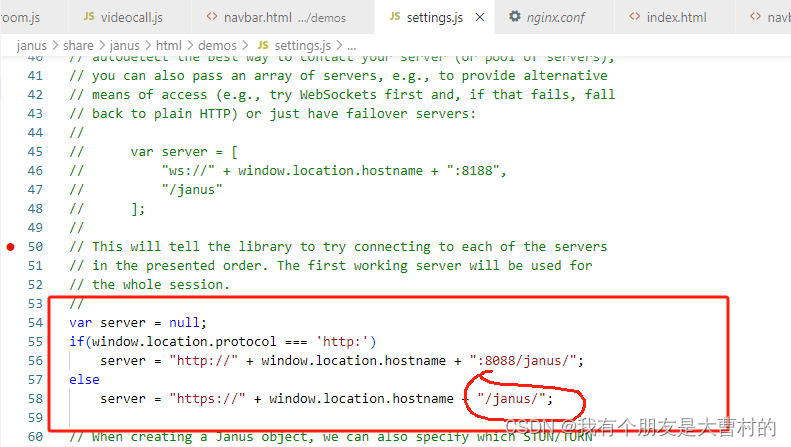
注意這里沒了端口,這里會用到nginx的反向代理。最后會把請求給8088。(這里為什么不直接給http發請求呢? 因為我們的頁面是https,這里用http會報錯,所以要用反向代理)
最后
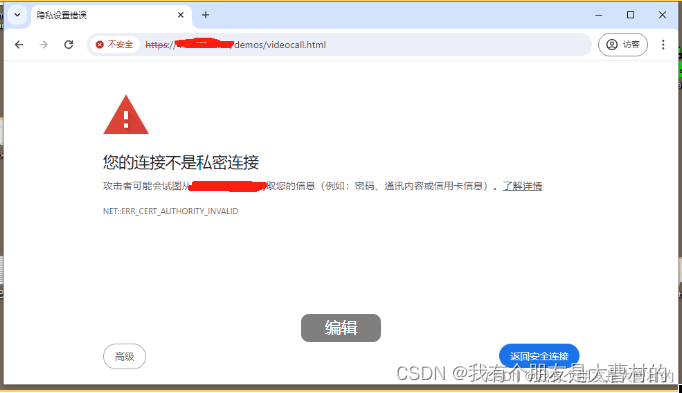
這里選擇高級,訪問

隨便注冊個名字,然后用手機打開手機網絡,這里看能不能穿透,不用和測試機一樣的網絡環境。
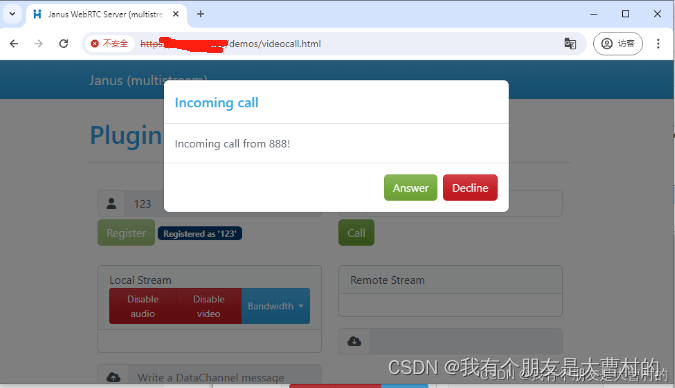
然后手機端注冊一個888
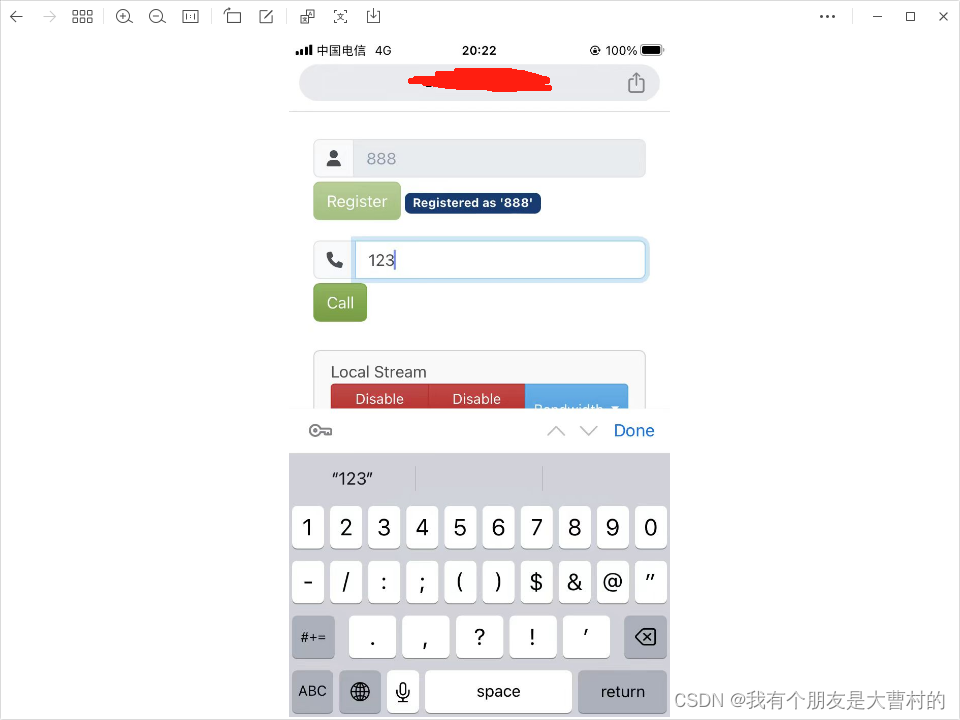
然后call就可以了

成功,這樣就部署了一個自己的私人視頻電話服務了。
最終的測試地址
https://47.103.66.95/demos/videocall.html
注意證書警告,選擇繼續


![[國產大模型簡單使用介紹] 開源與免費API](http://pic.xiahunao.cn/[國產大模型簡單使用介紹] 開源與免費API)
)


)


