一、空間使用
Framework.vue中
(1)引入接口
const api = {getUseSpace: "/getUseSpace",logout: "/logout",
};
(2)回調
// 使用空間
const useSpaceInfo = ref({ useSpace: 0, totalSpace: 1 });
const getUseSpace = async () => {// 存儲請求信息let result = await proxy.Request({// 請求路徑url: api.getUseSpace,// 不顯示加載showLoading: false,});if (!result) {return;}// 把請求到的信息存到使用空間useSpaceInfo.value = result.data;
};
// 調用
getUseSpace();
上傳文件結束后,更新使用空間:
// 上傳文件回調
const uploadCallbackHandler = () => {nextTick(() => {
...........................// 并最后調用一個函數來獲取空間使用情況。getUseSpace();});
};
(3)結構中使用
<!-- 下方空間使用 --><div class="space-info"><div>空間使用</div><div class="percent"><!-- 占用空間進度條 --><!-- 結果除以 100 是為了將前面乘以的 10000 還原為百分比形式 --><el-progress:percentage="Math.floor((useSpaceInfo.useSpace / useSpaceInfo.totalSpace) * 10000)/100"color="#409eff"/></div><!-- 文字說明和圖標 --><div class="space-use"><div class="use">{{ proxy.Utils.size2Str(useSpaceInfo.useSpace) }}/{{ proxy.Utils.size2Str(useSpaceInfo.totalSpace) }}</div><div class="iconfont icon-refresh" @click="getUseSpace"></div></div></div>效果:

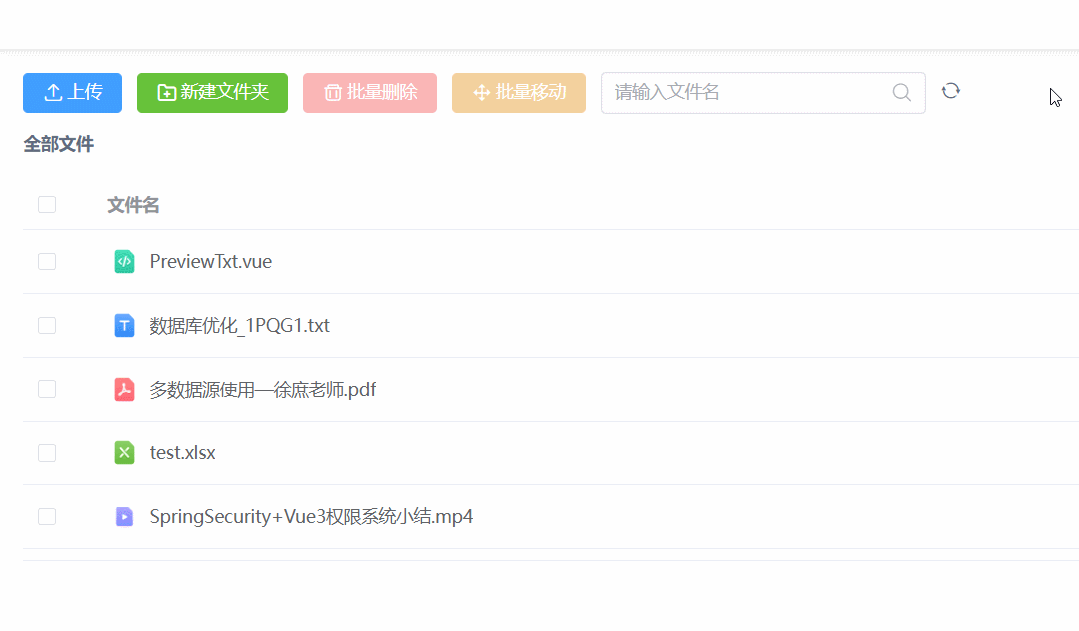
二、文件預覽(難點)
1.封裝Preview.vue組件
- 根據文件分類類型傳入不同的width給Window.vue組件,以決定展示的寬度,而Window.vue組件中,又使用計算屬性根據此傳遞的width值與當前窗口寬度作比較(width值不允許超過當前窗口寬度),返回作為windowContentWidth
- showPreview方法( 入口)暴露給父組件Main.vue調用(其實,要展示彈框有2種方法,要么在父組件中定義一個響應式數據,然后以prop傳給子組件,子組件根據此響應式數據作出對應展示。要么子組件暴露一個方法給外界調用,讓外界通過此方法傳入數據。很顯然,這里用的是第二種方式)
- 如何展示多種不同類型的文件?Main組件中使用Preview組件,調用<Preview ref=“previewRef”>組件的previewRef.value.showPreview(row, 0)方法,將文件數據傳遞了過去,并且指定url使用FILE_URL_MAP[0],然后,在<Preview>組件中,根據文件數據中的文件類型使用不同的組件作展示(不然,所有的根據文件類型展示不同的組件,都要寫在Main.vue組件中,那這樣的話,Main.vue組件就過于復雜了)
- <Preview>組件用到了Window.vue(用于模擬彈窗)配合展示不同文件類型的組件(不包括圖片類型,PreviewXXX組件) 和 <el-image-viewer>組件(專門展示圖片)
- 不同文件類型請求路徑(后端處理這些請求的詳細代碼在上面已貼出)
非視頻文件類型文件 預覽的url
0 - fileUrl: "/file/getFile"
1 - fileUrl: "/admin/getFile"
2 - fileUrl: "/showShare/getFile"
視頻文件類型文件的url取
0 - videoUrl: /file/ts/getVideoInfo"
1 - videoUrl: /admin/ts/getVideoInfo"
2 - videoUrl: /showShare/ts/getVideoInfo"
components/preview/Preview.vue
<template><PreviewImageref="imageViewerRef":imageList="[imageUrl]"v-if="fileInfo.fileCategory == 3"></PreviewImage><Window:show="windowShow"@close="closeWindow":width="fileInfo.fileCategory == 1 ? 1300 : 900":title="fileInfo.fileName":align="fileInfo.fileCategory == 1 ? 'center' : 'top'"v-else><!--  `file_type` 1:視頻 2:音頻  3:圖片 4:pdf 5:doc 6:excel 7:txt 8:code 9:zip 10:其他', --><PreviewVideo :url="url" v-if="fileInfo.fileCategory == 1"></PreviewVideo><PreviewExcel :url="url" v-if="fileInfo.fileType == 6"></PreviewExcel><PreviewDoc :url="url" v-if="fileInfo.fileType == 5"></PreviewDoc><PreviewPdf :url="url" v-if="fileInfo.fileType == 4"></PreviewPdf><PreviewTxt:url="url"v-if="fileInfo.fileType == 7 || fileInfo.fileType == 8"></PreviewTxt><PreviewMusic:url="url"v-if="fileInfo.fileCategory == 2":fileName="fileInfo.fileName"></PreviewMusic><PreviewDownload:createDownloadUrl="createDownloadUrl":downloadUrl="downloadUrl":fileInfo="fileInfo"v-if="fileInfo.fileCategory == 5 && fileInfo.fileType != 8"></PreviewDownload></Window>
</template><script setup>
// @ 符號表示一個特定路徑的別稱,這個設置可以在 build/webpack.base.conf.js中設置
import PreviewImage from "@/components/preview/PreviewImage.vue";
import PreviewVideo from "@/components/preview/PreviewVideo.vue";
import PreviewDoc from "@/components/preview/PreviewDoc.vue";
import PreviewExcel from "@/components/preview/PreviewExcel.vue";
import PreviewPdf from "@/components/preview/PreviewPdf.vue";
import PreviewTxt from "@/components/preview/PreviewTxt.vue";
import PreviewMusic from "@/components/preview/PreviewMusic.vue";
import PreviewDownload from "@/components/preview/PreviewDownload.vue";import { ref, reactive, getCurrentInstance, nextTick, computed } from "vue";
import { useRouter, useRoute } from "vue-router";
const { proxy } = getCurrentInstance();
const router = useRouter();
const route = useRoute();// 計算圖片地址(縮略圖原圖)
const imageUrl = computed(() => {return (// 區分縮略圖和原圖proxy.globalInfo.imageUrl + fileInfo.value.fileCover.replaceAll("_.", "."));
});// 默認不展示
const windowShow = ref(false);
// 關閉方法
const closeWindow = () => {windowShow.value = false;
};// 定義接口地址
const FILE_URL_MAP = {0: {fileUrl: "/file/getFile",videoUrl: "/file/ts/getVideoInfo",createDownloadUrl: "/file/createDownloadUrl",downloadUrl: "/api/file/download",},1: {fileUrl: "/admin/getFile",videoUrl: "/admin/ts/getVideoInfo",createDownloadUrl: "/admin/createDownloadUrl",downloadUrl: "/api/admin/download",},2: {fileUrl: "/showShare/getFile",videoUrl: "/showShare/ts/getVideoInfo",createDownloadUrl: "/showShare/createDownloadUrl",downloadUrl: "/api/showShare/download",},
};// 文件信息
const fileInfo = ref({});
// 視頻文件地址
const url = ref(null);const imageViewerRef = ref();// 下載地址
const createDownloadUrl = ref(null);
const downloadUrl = ref(null);
// 各種類型預覽實現
const showPreview = (data, showPart) => {fileInfo.value = data;// `file_category`  '1:視頻 2:音頻  3:圖片 4:文檔 5:其他',// 圖片if (data.fileCategory == 3) {nextTick(() => {// 圖片預覽展示imageViewerRef.value.show(0);});} else {// 如果是圖片之外的類型,就通過window組件去展示windowShow.value = true;let _url = FILE_URL_MAP[showPart].fileUrl;// 視頻地址單獨處理if (data.fileCategory == 1) {_url = FILE_URL_MAP[showPart].videoUrl;}// 文件下載let _createDownloadUrl = FILE_URL_MAP[showPart].createDownloadUrl;let _downloadUrl = FILE_URL_MAP[showPart].downloadUrl;if (showPart == 0) {_url = _url + "/" + data.fileId;_createDownloadUrl = _createDownloadUrl + "/" + data.fileId;} else if (showPart == 1) {_url = _url + "/" + data.uerId + "/" + data.fileId;_createDownloadUrl =_createDownloadUrl + "/" + data.uerId + "/" + data.fileId;} else if (showPart == 2) {_url = _url + "/" + data.shareId + "/" + data.fileId;_createDownloadUrl =_createDownloadUrl + "/" + data.shareId + "/" + data.fileId;}url.value = _url;createDownloadUrl.value = _createDownloadUrl;downloadUrl.value = _downloadUrl;}
};
// 將此方法暴露出去
defineExpose({ showPreview });
</script><style lang="scss" scoped>
</style>
Main.vue?
// 預覽
const previewRef = ref();
const preview = (data) => {// 如果是文件夾(目錄)if (data.folderType == 1) {// 就調用Navigation組件中的openFolder(打開文件夾)方法,實現預覽navigationRef.value.openFolder(data);return;}// 如果是文件if (data.status != 2) {proxy.Message.warning("文件未完成轉碼,無法預覽");return;}// 展示,傳入文件類型data,和默認不展示0previewRef.value.showPreview(data, 0);
};
2.封裝window組件
- 相當于手動封裝一個彈框組件
- 使用window.innerWidth獲取當前窗口寬度作為響應式數據windowWidth的初始值,并使用計算屬性綁定給style,并且監聽窗口大小變化事件(window.addEventListener('resize',handler),其中handler去修改計算屬性中使用的windowWidth響應式數據的值),以此達到此彈框的寬度永遠最大不能超過當前窗口的寬度(即使彈框指定的寬度大于當前窗口寬度),并且當窗口變化時,Window組件的寬度能隨著窗口變化而變化(最大不超過當前窗口寬度)。
- 使用計算屬性,計算Window組件內容居中時,距離左側的的left值,綁定給style屬性,以此達到讓彈框內容永遠居中
?components/Window.vue
<template><div class="window" v-if="show"><div class="window-mask" v-if="show" @click="close"></div><!-- x圖標 --><div class="close" @click="close"><span class="iconfont icon-close2"> </span></div><!-- 內容 --><divclass="window-content":style="{top: '0px',left: windowContentLeft + 'px',width: windowContentWidth + 'px',}"><div class="title">{{ title }}</div><div class="content-body" :style="{ 'align-items': align }"><slot></slot></div></div></div>
</template><script setup>
import { computed, onMounted, onUnmounted, ref } from "vue";// 定義數據類型
const props = defineProps({show: {type: Boolean,},width: {type: Number,default: 1000,},title: {type: String,},align: {type: String,default: "top",},
});// 窗口寬度
const windowWidth = ref(window.innerWidth);
// 窗口里面內容寬度
const windowContentWidth = computed(() => {return props.width > windowWidth.value ? windowWidth.value : props.width;
});// 計算窗口到屏幕左邊的寬度
const windowContentLeft = computed(() => {let left = windowWidth.value - props.width;return left < 0 ? 0 : left / 2;
});const emit = defineEmits(["close"]);
const close = () => {emit("close");
};// 適應屏幕寬度,窗口大小調整
const resizeWindow = () => {windowWidth.value = window.innerWidth;
};// 掛載時,處理窗口大小調整(resize)事件
onMounted(() => {// 將resizeWindow函數綁定為window對象的resize事件的事件處理器。每當窗口大小改變時,resizeWindow函數就會被調用window.addEventListener("resize", resizeWindow);
});// 卸載時
onUnmounted(() => {// 移除了之前通過addEventListener添加的resize事件監聽器。這是非常重要的,因為如果不在組件卸載時移除這個監聽器,即使組件已經被銷毀,resizeWindow函數仍然可能會在窗口大小改變時被調用,這可能會導致錯誤或不必要的計算。window.removeEventListener("resize", resizeWindow);
});
</script><style lang="scss" scoped>
.window {.window-mask {top: 0px;left: 0px;width: 100%;height: calc(100vh);z-index: 200;opacity: 0.5;background: #000;position: fixed;}.close {z-index: 202;cursor: pointer;position: absolute;top: 40px;right: 30px;width: 44px;height: 44px;border-radius: 22px;background: #606266;display: flex;justify-content: center;align-items: center;.iconfont {font-size: 20px;color: #fff;z-index: 100000;}}.window-content {top: 0px;z-index: 201;position: absolute;background: #fff;.title {text-align: center;line-height: 40px;border-bottom: 1px solid #ddd;font-weight: bold;}.content-body {height: calc(100vh - 41px);display: flex;overflow: auto;}}
}
</style>
3.圖片預覽
(1). 引用 Element UI 提供的 el-image-viewer 組件的標簽
 :initial-index="previewImgIndex"`:這個屬性用于設置初始時顯示的圖片索引。?
. hide-on-click-modal:這個屬性是一個布爾值(默認為 `false`),如果設置為 `true`,則點擊模態框時會關閉圖片查看器。
. el-image-viewer使用示例
第一種: 使用el-image - 通過點擊小圖, 然后預覽大圖, 這是官方文檔提供的方法
第二種: 使用el-image-viewer
可以通過這個示例,看下element-ui是怎么做的圖片預覽<template><div class="preview-box"><!-- 第一種: 使用el-image - 通過點擊小圖, 然后預覽大圖, 這是官方文檔提供的方法 --><el-image :preview-src-list="['/api/file/getImage/202307/3178033358P0KiZY3YV2.png','/api/file/getImage/202307/3178033358bd1LTA0mLK.png']" :initial-index="0" src="/api/file/getImage/202307/3178033358P0KiZY3YV2_.png"/><!-- 第二種: 使用el-image-viewer1. 必須使用v-if來控制預覽效果的顯示和隱藏,不能使用v-show(使用v-show無效)2. 需要監聽close事件, 當點擊蒙層 或 關閉按鈕時, 會觸發close事件, 此時需要手動關閉預覽, 否則預覽不會關閉3. initial-index屬性為顯示圖片的索引--><el-button @click="showImage(0)">顯示圖片0</el-button><el-button @click="showImage(1)">顯示圖片1</el-button><el-image-viewer v-if="show" :url-list="['/api/file/getImage/202307/3178033358P0KiZY3YV2.png','/api/file/getImage/202307/3178033358bd1LTA0mLK.png']" :initial-index="initialIndex"@close="closeImageViewer" :hide-on-click-modal="true" /></div> </template><script setup>import { ref, reactive } from 'vue'// 預覽圖片顯示的初始索引 const initialIndex = ref(0)// 是否展示圖片預覽 const show = ref(false)// 顯示圖片預覽的方法 function showImage(idx) {initialIndex.value = idxshow.value = true // 展示預覽 }// 關閉圖片預覽的方法 function closeImageViewer() {show.value = false } </script><style lang="scss"></style>
(2)區分縮略圖和原圖
不需要存兩張圖片,只需要計算圖片地址
首先,從 fileInfo.value.fileCover 中獲取文件名或路徑,并將其中的所有 "_." 替換為 "."。
然后,將這個修改后的文件名或路徑與 proxy.globalInfo.imageUrl 拼接起來,以形成一個完整的圖片URL。
例如,如果:
proxy.globalInfo.imageUrl 是 "https://example.com/images/"
fileInfo.value.fileCover 是 "cover_123_.jpg"
那么,上述代碼將返回 "https://example.com/images/cover_123.jpg"。
(3)在使用滾輪縮放預覽圖片時,禁止頁面跟隨滾動
components/preview/PreviewImage.vue
<template><div class="image-viewer"><!-- * `:initial-index="previewImgIndex"`:這個屬性用于設置初始時顯示的圖片索引。`previewImgIndex` 是 Vue 組件中的一個數據屬性(data property),它應該是一個數字,表示圖片列表中的位置。  * `hide-on-click-modal`:這個屬性是一個布爾值(默認為 `false`),如果設置為 `true`,則點擊模態框時會關閉圖片查看器。  --><el-image-viewer:initial-index="previewImgIndex"hide-on-click-modal:url-list="imageList"@close="closeImgViewer"v-if="previewImgIndex != null"></el-image-viewer></div>
</template><script setup>
import { ref } from "vue";
const props = defineProps({imageList: {type: Array,},
});const previewImgIndex = ref(null);const show = (index) => {// 縮小放大圖片時,禁止頁面滾動stopScroll();previewImgIndex.value = index;
};
defineExpose({ show });const closeImgViewer = () => {// 關閉預覽時,允許頁面滾動startScroll();previewImgIndex.value = null;
};//禁止滾動
const stopScroll = () => {document.body.style.overflow = "hidden";
};// 開始滾動
const startScroll = () => {document.body.style.overflow = "auto";
};
</script><style lang="scss" scoped>
.image-viewer {.el-image-viewer__mask {opacity: 0.7;}
}
</style>
圖片預覽效果

3.視頻預覽
- 使用DPlayer
- 引入hls(如果導入hls的包報錯的話,可考慮在index.html中直接cdn引入hls.min.js)
components/preview/PreviewVideo.vue
<template><div ref="player" id="player"></div>
</template><script setup>
import DPlayer from "dplayer";
import { nextTick, onMounted, ref, getCurrentInstance } from "vue";const { proxy } = getCurrentInstance();// 定義數據
const props = defineProps({url: {type: String,},
});const videoInfo = ref({video: null,
});const player = ref();
const initPlayer = () => {// theme	'#b7daff'	主題色// screenshot	false	開啟截圖,如果開啟,視頻和視頻封面需要允許跨域// video	-	視頻信息// video.url	-	視頻鏈接// video.type	'auto'	可選值: 'auto', 'hls', 'flv', 'dash', 'webtorrent', 'normal' 或其他自定義類型,// video.customType	-	自定義類型const dp = new DPlayer({element: player.value,theme: "#b7daff",screenshot: true,video: {url: `/api${props.url}`,type: "customHls",customType: {customHls: function (video, player) {const hls = new Hls();hls.loadSource(video.src);hls.attachMedia(video);},},},});
};onMounted(() => {initPlayer();
});
</script><style lang="scss" scoped>
#player {width: 100%;:deep .dplayer-video-wrap {text-align: center;.dplayer-video {margin: 0px auto;max-height: calc(100vh - 41px);}}
}
</style>
DPlayer使用
<template><div class="preview-box"><div id="dplayer"></div><el-button @click="changeVideo">切換視頻</el-button></div>
</template><script setup>import { ref, reactive, onMounted } from 'vue'
import Hls from 'hls.js';
import DPlayer from 'dplayer';// DPlayers實例
let dp = null// 另一種方式,使用 customType
onMounted(() => {dp = new DPlayer({container: document.getElementById('dplayer'),video: {url: '/api/file/ts/getVideoInfo/zwizcojhc7',// url: '/api/file/ts/getVideoInfo/PakZTUpyp9',type: 'customHls',customType: {customHls: function (video, player) {let config = {xhrSetup: function (xhr, url) {xhr.withCredentials = true; // 會攜帶cookiexhr.setRequestHeader('token', "my-token")},}const hls = new Hls(config);hls.loadSource(video.src);hls.attachMedia(video);},},},});
})// 切換視頻
function changeVideo() {dp.switchVideo({// url: '/api/file/ts/getVideoInfo/zwizcojhc7',url: '/api/file/ts/getVideoInfo/PakZTUpyp9',type: 'customHls',customType: {customHls: function (video, player) {let config = {xhrSetup: function (xhr, url) {xhr.withCredentials = true; // 會攜帶cookiexhr.setRequestHeader('token', "my-token")},}const hls = new Hls(config);hls.loadSource(video.src);hls.attachMedia(video);},},})
}</script><style lang="scss">
#dplayer {width: 600px;height: 300px;
}
</style>
4.Docx文檔預覽
PreviewDocx.vue組件
- 使用docx-preview這個插件(npm i docx-preview -S)
- axios的responseType配置為blob
- 后臺返回的是二進制數據(后臺讀取文件流,將流數據寫入response),前端接受此流數據,傳入給docx-preview插件處理
<template><div ref="docRef" class="doc-content"></div>
</template><script setup>
import * as docx from "docx-preview";
import { ref, reactive, getCurrentInstance, onMounted } from "vue";
const { proxy } = getCurrentInstance();const props = defineProps({url: {type: String,},
});const docRef = ref();const initDoc = async () => {// 它向 props.url 指定的 URL 發起請求,并設置響應類型為 "blob"。Blob 對象表示一個不可變、原始數據的類文件對象。let result = await proxy.Request({url: props.url,responseType: "blob",});if (!result) {return;}// 來渲染從服務器獲取的 Blobdocx.renderAsync(result, docRef.value);
};onMounted(() => {initDoc();
});
</script><style lang="scss" scoped>
.doc-content {margin: 0px auto;:deep .docx-wrapper {background: #fff;padding: 10px 0px;}:deep .docx-wrapper > section.docx {margin-bottom: 0px;}
}
</style>
 docx-preview使用示例
<template><div class="doc-box"><div ref="docRef" id="doc-content"></div></div>
</template><script setup>
import { ref,reactive } from 'vue'
import axios from 'axios'
import {renderAsync} from 'docx-preview'const props = defineProps({url:{type: String},fileInfo: {type: Object}
})
const docRef = ref()
axios({url:`${props.url}${props.fileInfo.fileId}`,method: 'POST',responseType: 'blob',
}).then(res=>{console.log(res.data,'res.data');renderAsync(res.data, docRef.value)
})</script><style lang="scss" scoped>.doc-box {height: 100%;overflow: auto;
}
</style>
?5.Excel文件預覽
PreviewExcel.vue組件
- 安裝xlsx這個插件
- axios的responseType配置為arraybuffer(注意都是小寫)
- 后臺返回的是二進制數據(后臺讀取文件流,將流數據寫入response),前端接受此流數據,傳入給xlsx插件處理
- l將插件處理得到的html,使用v-html 插入到 div標簽中
<template><div v-html="excelContent" class="talbe-info"></div>
</template><script setup>
import * as XLSX from "xlsx";
import { ref, reactive, getCurrentInstance, onMounted } from "vue";
const { proxy } = getCurrentInstance();const props = defineProps({url: {type: String,},
});const excelContent = ref();const initExcel = async () => {let result = await proxy.Request({url: props.url,responseType: "arraybuffer",});if (!result) {return;}// 使用 XLSX.read 方法來解析一個 Uint8Array,這個 Uint8Array 很可能是從一個 Excel 文件(如 XLSX 格式)的 Blob 數據中得到的。{ type: "array" } 選項告訴 XLSX.read 方法輸入數據的類型是一個數組。let workbook = XLSX.read(new Uint8Array(result), { type: "array" }); // 解析數據// 通過 workbook.SheetNames 獲取工作簿中所有工作表的名字數組。然后,通過索引 [0] 獲取第一個工作表的名字。最后,使用這個名字從 workbook.Sheets 對象中取出對應的工作表對象。var worksheet = workbook.Sheets[workbook.SheetNames[0]]; // workbook.SheetNames 下存的是該文件每個工作表名字,這里取出第一個工作表// 將工作表對象轉換為 HTML 字符串excelContent.value = XLSX.utils.sheet_to_html(worksheet);
};onMounted(() => {initExcel();
});
</script><style lang="scss" scoped>
.talbe-info {width: 100%;padding: 10px;:deep table {width: 100%;border-collapse: collapse;td {border: 1px solid #ddd;border-collapse: collapse;padding: 5px;height: 30px;min-width: 50px;}}
}
</style>

Xlsx組件使用示例
下面的responseType一定要寫成arraybuffer
如果responseType寫的是blob的話,那么一定要調用res.data.arraybuffer(),這個調用返回結果是個Promise,把此Promise得到的結果給到new Uint8Array(promise的結果)也可以
<template><div class="xlsx-box"><div ref="xlsxRef" id="xlsx-content" v-html="excelContent"></div></div></template><script setup>import { ref,reactive } from 'vue'import axios from 'axios'import * as XLSX from 'xlsx'const props = defineProps({url:{type: String},fileInfo: {type: Object}})
const excelContent = ref();axios({url:`${props.url}${props.fileInfo.fileId}`,method: 'POST',responseType: 'arraybuffer',}).then(res=>{console.log(res.data,'res.data');let workbook = XLSX.read(new Uint8Array(res.data), { type: "array" });var worksheet = workbook.Sheets[workbook.SheetNames[0]];excelContent.value = XLSX.utils.sheet_to_html(worksheet);})</script><style lang="scss" scoped>.xlsx-box {height: 100%;width: 100%;overflow: auto;padding: 20px;:deep table {width: 100%;border-collapse: collapse;td {border: 1px solid #ddd;line-height: 2;padding: 0 5px 0;min-width: 30px;height: 30px;}}}</style>
6.PDF預覽
PreviewPDF.vue
- 須安裝VuePdfEmbed 、vue3-pdfjs插件
<template><div class="pdf"><vue-pdf-embedref="pdfRef":source="state.url"class="vue-pdf-embed"width="850":page="state.pageNum"></vue-pdf-embed></div>
</template><script setup>
import VuePdfEmbed from "vue-pdf-embed";
import { ref, reactive, getCurrentInstance, onMounted } from "vue";
const { proxy } = getCurrentInstance();const props = defineProps({url: {type: String,},
});const state = ref({// 預覽pdf文件地址url: "",// 當前頁面pageNum: 0,// 總頁數numPages: 0,
});const initPdf = async () => {state.value.url = "/api" + props.url;
};initPdf();
</script><style lang="scss" scoped>
.pdf {width: 100%;
}
</style>

7.文本預覽
PreviewTxt.vue
-
允許手動選擇編碼格式(使用了FileReader#readAsText(blob,encode)指定編碼,將文件流讀取為文本字符串)
-
如果是代碼,允許復制(使用了vue-clipboard3插件)
-
代碼高亮(使用了@highlightjs/vue-plugin插件)
<template><div class="code"><div class="top-op"><div class="encode-select"><el-selectplaceholder="請選擇編碼"v-model="encode"@change="changeEncode"><el-option value="utf8" label="utf8編碼"></el-option><el-option value="gbk" label="gbk編碼"></el-option></el-select><div class="tips">亂碼了?切換編碼試試</div></div><div class="copy-btn"><el-button type="primary" @click="copy">復制</el-button></div></div><!-- 代碼高亮 --><highlightjs autodetect :code="txtContent" /></div>
</template><script setup>
// 引入實現復制的文件
import useClipboard from "vue-clipboard3";
const { toClipboard } = useClipboard();import { ref, reactive, getCurrentInstance, onMounted, nextTick } from "vue";
const { proxy } = getCurrentInstance();const props = defineProps({url: {type: String,},
});// 文本內容
const txtContent = ref("");
// 文本流結果
const blobResult = ref();
// 編碼類型
const encode = ref("utf8");const readTxt = async () => {let result = await proxy.Request({url: props.url,responseType: "blob",});if (!result) {return;}blobResult.value = result;showTxt();
};// 選擇編碼
const changeEncode = (e) => {encode.value = e;showTxt();
};const showTxt = () => {const reader = new FileReader();// 當讀取操作成功完成時調用// 2. 再執行該異步操作reader.onload = () => {let txt = reader.result;txtContent.value = txt; //獲取的數據data};// 異步按字符讀取文件內容,結果用字符串形式表示// 1. 先走這步,獲取讀取文件操作reader.readAsText(blobResult.value, encode.value);
};
onMounted(() => {readTxt();
});const copy = async () => {await toClipboard(txtContent.value);proxy.Message.success("復制成功");
};
</script><style lang="scss" scoped>
.code {width: 100%;.top-op {display: flex;align-items: center;justify-content: space-around;}.encode-select {flex: 1;display: flex;align-items: center;margin: 5px 10px;.tips {margin-left: 10px;color: #828282;}}.copy-btn {margin-right: 10px;}pre {margin: 0px;}
}
</style>
// main.js中引入代碼高亮//引入代碼高亮
import HljsVuePlugin from '@highlightjs/vue-plugin'
import "highlight.js/styles/atom-one-light.css";
import 'highlight.js/lib/common'
8. 音頻預覽
PreviewVideo.vue
- 使用APlayer,官方使用文檔:APlayer
- 使用new URL(`@/assets/music_icon.png`, import.meta.url).href,引入本地圖片做封面,這個是寫在script標簽里用的(而在模板中仍然用的是使用@/assets/music_cover.png去引用)
<template><div class="music"><div class="body-content"><div class="cover"><img src="@/assets/music_cover.png" /></div><div ref="playerRef" class="music-player"></div></div></div>
</template><script setup>
import APlayer from "APlayer";
import "APlayer/dist/APlayer.min.css";import {ref,reactive,getCurrentInstance,computed,onMounted,onUnmounted,
} from "vue";
import { useRouter, useRoute } from "vue-router";
const { proxy } = getCurrentInstance();
const router = useRouter();
const route = useRoute();const props = defineProps({url: {type: String,},fileName: {type: String,},
});const playerRef = ref();
const player = ref();onMounted(() => {player.value = new APlayer({container: playerRef.value,audio: {url: `/api${props.url}`,name: `${props.fileName}`,cover: new URL(`@/assets/music_icon.png`, import.meta.url).href,artist: "",},});
});onUnmounted(() => {player.value.destroy();
});
</script><style lang="scss" scoped>
.music {display: flex;align-items: center;justify-content: center;width: 100%;.body-content {text-align: center;width: 80%;.cover {margin: 0px auto;width: 200px;text-align: center;img {width: 100%;}}.music-player {margin-top: 20px;}}
}
</style>
9.文件下載?
PreviewDowndload.vue
- 先獲取一個臨時的code,再以此code請求另外一個下載鏈接(直接使用location.href指向下載鏈接去做下載,如果當前地址欄有地址,則不會地址欄;如果當前地址欄是空的-比如瀏覽器直接打開一個空白網頁,然后在控制臺輸入location.href=‘下載地址’,此時地址欄就會變成下載地址)
- 文件列表中的下載也是同樣的做法
- 不支持預覽,下載之后查看
<template><div class="others"><div class="body-content"><div><Icon:iconName="fileInfo.fileType == 9 ? 'zip' : 'others'":width="80"></Icon></div><div class="file-name">{{ fileInfo.fileName }}</div><div class="tips">該類型的文件暫不支持預覽,請下載后查看</div><div class="download-btn"><el-button type="primary" @click="download">點擊下載 {{ proxy.Utils.size2Str(fileInfo.fileSize) }}</el-button></div></div></div>
</template><script setup>
import { ref, reactive, getCurrentInstance } from "vue";
import { useRouter, useRoute } from "vue-router";
const { proxy } = getCurrentInstance();
const router = useRouter();
const route = useRoute();const props = defineProps({createDownloadUrl: {type: String,},downloadUrl: {type: String,},fileInfo: {type: Object,},
});const download = async () => {let result = await proxy.Request({url: props.createDownloadUrl,});if (!result) {return;}window.location.href = props.downloadUrl + "/" + result.data;
};
</script><style lang="scss" scoped>
.others {display: flex;align-items: center;justify-content: center;width: 100%;.body-content {text-align: center;.file-name {font-weight: bold;}.tips {color: #999898;margin-top: 5px;font-size: 13px;}.download-btn {margin-top: 20px;}}
}
</style>
?Main.vue中
// 下載文件
const download = async (row) => {let result = await proxy.Request({url: api.createDownloadUrl + "/" + row.fileId,});if (!result) {return;}window.location.href = api.download + "/" + result.data;
};
參考:easypan前端學習(二)_easypan源碼-CSDN博客


![[數據集][目標檢測]吸煙檢測數據集VOC+YOLO格式1449張1類別](http://pic.xiahunao.cn/[數據集][目標檢測]吸煙檢測數據集VOC+YOLO格式1449張1類別)


)


-不要驚慌)