流水賬記錄一下yolo目標檢測
1.搭建pytorch 不做解釋 看以往博客或網上搜都行
2.下載yolo源碼 : https://github.com/ultralytics/ultralytics
3.樣本標注工具:labelme 自己下載
4.準備數據集
4.1 新建一個放置數據集的路徑
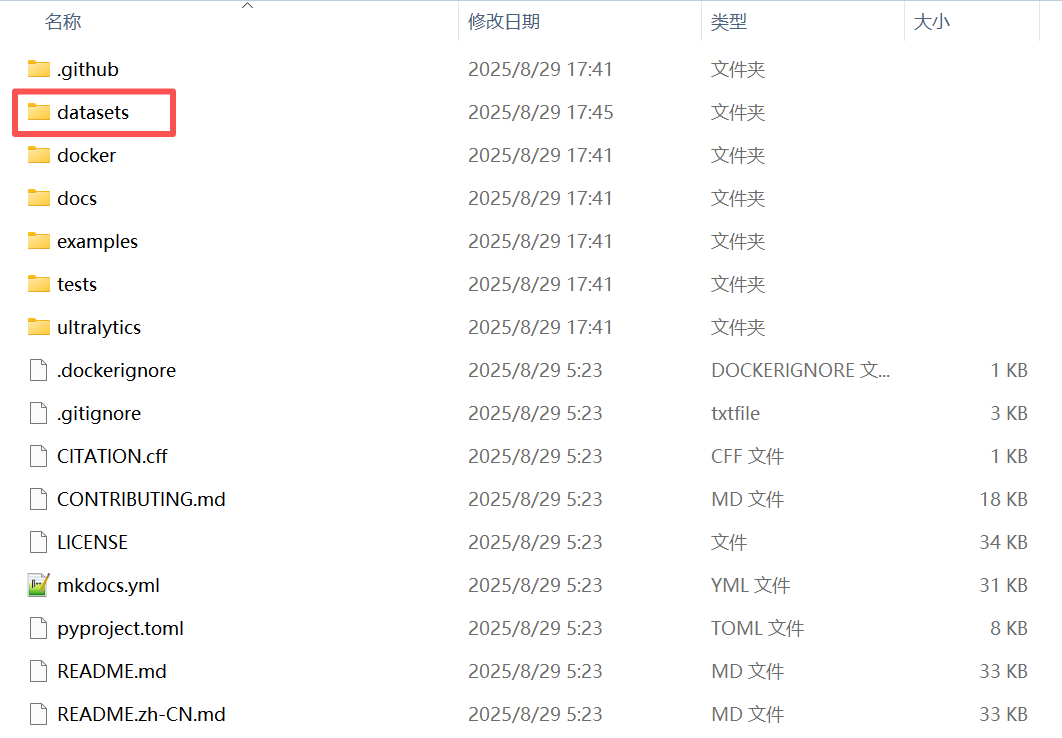

4.2 構建訓練集和測試集
運行以下腳本,將數據集劃分為訓練集和測試集,比例是7:3,看自己需求
import os
import shutilfrom tqdm import tqdm
import random""" 使用:只需要修改 1. Dataset_folde,    2. os.chdir(os.path.join(Dataset_folder, 'images'))里的 images, 3. val_scal = 0.2 4. os.chdir('../label_json')          label_json換成自己json標簽文件夾名稱   """# 圖片文件夾與json標簽文件夾的根目錄
Dataset_folder = r'D:\Software\Python\deeplearing\PytorchTest\ultralytics-main\datasets\PepperGrab'
# 把當前工作目錄改為指定路徑
os.chdir(os.path.join(Dataset_folder, 'images'))  # images : 圖片文件夾的名稱
folder = '.'  # 代表os.chdir(os.path.join(Dataset_folder, 'images'))這個路徑
imgs_list = os.listdir(folder)
random.seed(123)  # 固定隨機種子,防止運行時出現bug后再次運行導致imgs_list 里面的圖片名稱順序不一致
random.shuffle(imgs_list)  # 打亂
val_scal = 0.3  # 驗證集比列
val_number = int(len(imgs_list) * val_scal)
val_files = imgs_list[:val_number]
train_files = imgs_list[val_number:]
print('all_files:', len(imgs_list))
print('train_files:', len(train_files))
print('val_files:', len(val_files))
os.mkdir('train')
for each in tqdm(train_files):shutil.move(each, 'train')
os.mkdir('val')
for each in tqdm(val_files):shutil.move(each, 'val')
os.chdir('../label_json')
os.mkdir('train')
for each in tqdm(train_files):json_file = os.path.splitext(each)[0] + '.json'shutil.move(json_file, 'train')
os.mkdir('val')
for each in tqdm(val_files):json_file = os.path.splitext(each)[0] + '.json'shutil.move(json_file, 'val')
print('劃分完成')

4.2 然后就開始標樣本了,用labelme標,本次測試出了目標檢測外,還需要檢測關鍵點,類似標成下面這種,我之前標過一次樣本,圖就不展示了,不安全.3 因為labelme標注完是json格式,要轉化為yolo格式,運行以下腳本
import os
import json
import shutil
import numpy as np
from tqdm import tqdm""""#使用:1.改 bbox_class = {'sjb_rect': 0},我的框的類別是sjb_rect,賦值它為0,如你是dog則改成:bbox_cls = {'dog': 0}2.改 keypoint_class = ['angle_30', 'angle_60', 'angle_90'],我的關鍵點類別是三個,分別是'angle_30', 'angle_60', 'angle_90'  3.改 Dataset_root 成你自己的圖片與json文件的路徑 4.改 os.chdir('json_label/train')與os.chdir('json_label/val') 成你的json文件夾下的train與val文件夾 """# 數據集根慕錄(即圖片文件夾與標簽文件夾的上一級目錄)
Dataset_root = r'D:\Software\Python\deeplearing\PytorchTest\ultralytics-main\datasets\PepperGrab'# 框的類別
bbox_class = {'pepper': 0
}# 關鍵點的類別
keypoint_class = ['head', 'end']  # 這里類別放的順序對應關鍵點類別的標簽 0,1,2os.chdir(Dataset_root)os.mkdir('labels')
os.mkdir('labels/train')
os.mkdir('labels/val')def process_single_json(labelme_path, save_folder='../../labels/train'):with open(labelme_path, 'r', encoding='utf-8') as f:labelme = json.load(f)img_width = labelme['imageWidth']  # 圖像寬度img_height = labelme['imageHeight']  # 圖像高度# 生成 YOLO 格式的 txt 文件suffix = labelme_path.split('.')[-2]yolo_txt_path = suffix + '.txt'with open(yolo_txt_path, 'w', encoding='utf-8') as f:for each_ann in labelme['shapes']:  # 遍歷每個標注if each_ann['shape_type'] == 'rectangle':  # 每個框,在 txt 里寫一行yolo_str = ''## 框的信息# 框的類別 IDbbox_class_id = bbox_class[each_ann['label']]yolo_str += '{} '.format(bbox_class_id)# 左上角和右下角的 XY 像素坐標bbox_top_left_x = int(min(each_ann['points'][0][0], each_ann['points'][1][0]))bbox_bottom_right_x = int(max(each_ann['points'][0][0], each_ann['points'][1][0]))bbox_top_left_y = int(min(each_ann['points'][0][1], each_ann['points'][1][1]))bbox_bottom_right_y = int(max(each_ann['points'][0][1], each_ann['points'][1][1]))# 框中心點的 XY 像素坐標bbox_center_x = int((bbox_top_left_x + bbox_bottom_right_x) / 2)bbox_center_y = int((bbox_top_left_y + bbox_bottom_right_y) / 2)# 框寬度bbox_width = bbox_bottom_right_x - bbox_top_left_x# 框高度bbox_height = bbox_bottom_right_y - bbox_top_left_y# 框中心點歸一化坐標bbox_center_x_norm = bbox_center_x / img_widthbbox_center_y_norm = bbox_center_y / img_height# 框歸一化寬度bbox_width_norm = bbox_width / img_width# 框歸一化高度bbox_height_norm = bbox_height / img_heightyolo_str += '{:.5f} {:.5f} {:.5f} {:.5f} '.format(bbox_center_x_norm, bbox_center_y_norm,bbox_width_norm, bbox_height_norm)## 找到該框中所有關鍵點,存在字典 bbox_keypoints_dict 中bbox_keypoints_dict = {}for each_ann in labelme['shapes']:  # 遍歷所有標注if each_ann['shape_type'] == 'point':  # 篩選出關鍵點標注# 關鍵點XY坐標、類別x = int(each_ann['points'][0][0])y = int(each_ann['points'][0][1])label = each_ann['label']if (x > bbox_top_left_x) & (x < bbox_bottom_right_x) & (y < bbox_bottom_right_y) & (y > bbox_top_left_y):  # 篩選出在該個體框中的關鍵點bbox_keypoints_dict[label] = [x, y]## 把關鍵點按順序排好for each_class in keypoint_class:  # 遍歷每一類關鍵點if each_class in bbox_keypoints_dict:keypoint_x_norm = bbox_keypoints_dict[each_class][0] / img_widthkeypoint_y_norm = bbox_keypoints_dict[each_class][1] / img_heightyolo_str += '{:.5f} {:.5f} {} '.format(keypoint_x_norm, keypoint_y_norm,2)  # 2-可見不遮擋 1-遮擋 0-沒有點else:  # 不存在的點,一律為0yolo_str += '0 0 0 '# 寫入 txt 文件中f.write(yolo_str + '\n')shutil.move(yolo_txt_path, save_folder)print('{} --> {} 轉換完成'.format(labelme_path, yolo_txt_path))os.chdir('label_json/train')save_folder = '../../labels/train'
for labelme_path in os.listdir():try:process_single_json(labelme_path, save_folder=save_folder)except:print('******有誤******', labelme_path)
print('YOLO格式的txt標注文件已保存至 ', save_folder)os.chdir('../../')os.chdir('label_json/val')save_folder = '../../labels/val'
for labelme_path in os.listdir():try:process_single_json(labelme_path, save_folder=save_folder)except:print('******有誤******', labelme_path)
print('YOLO格式的txt標注文件已保存至 ', save_folder)os.chdir('../../')os.chdir('../')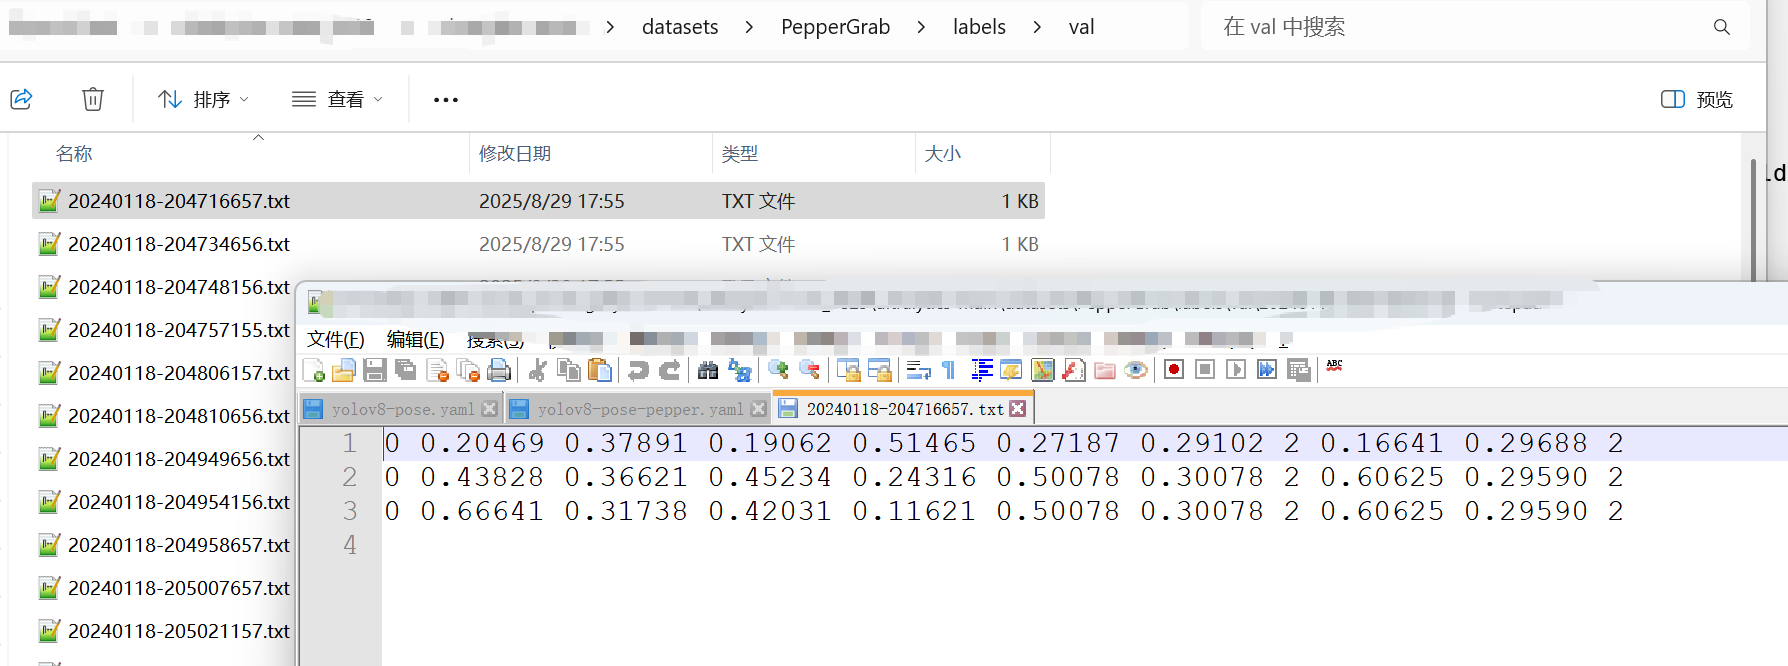
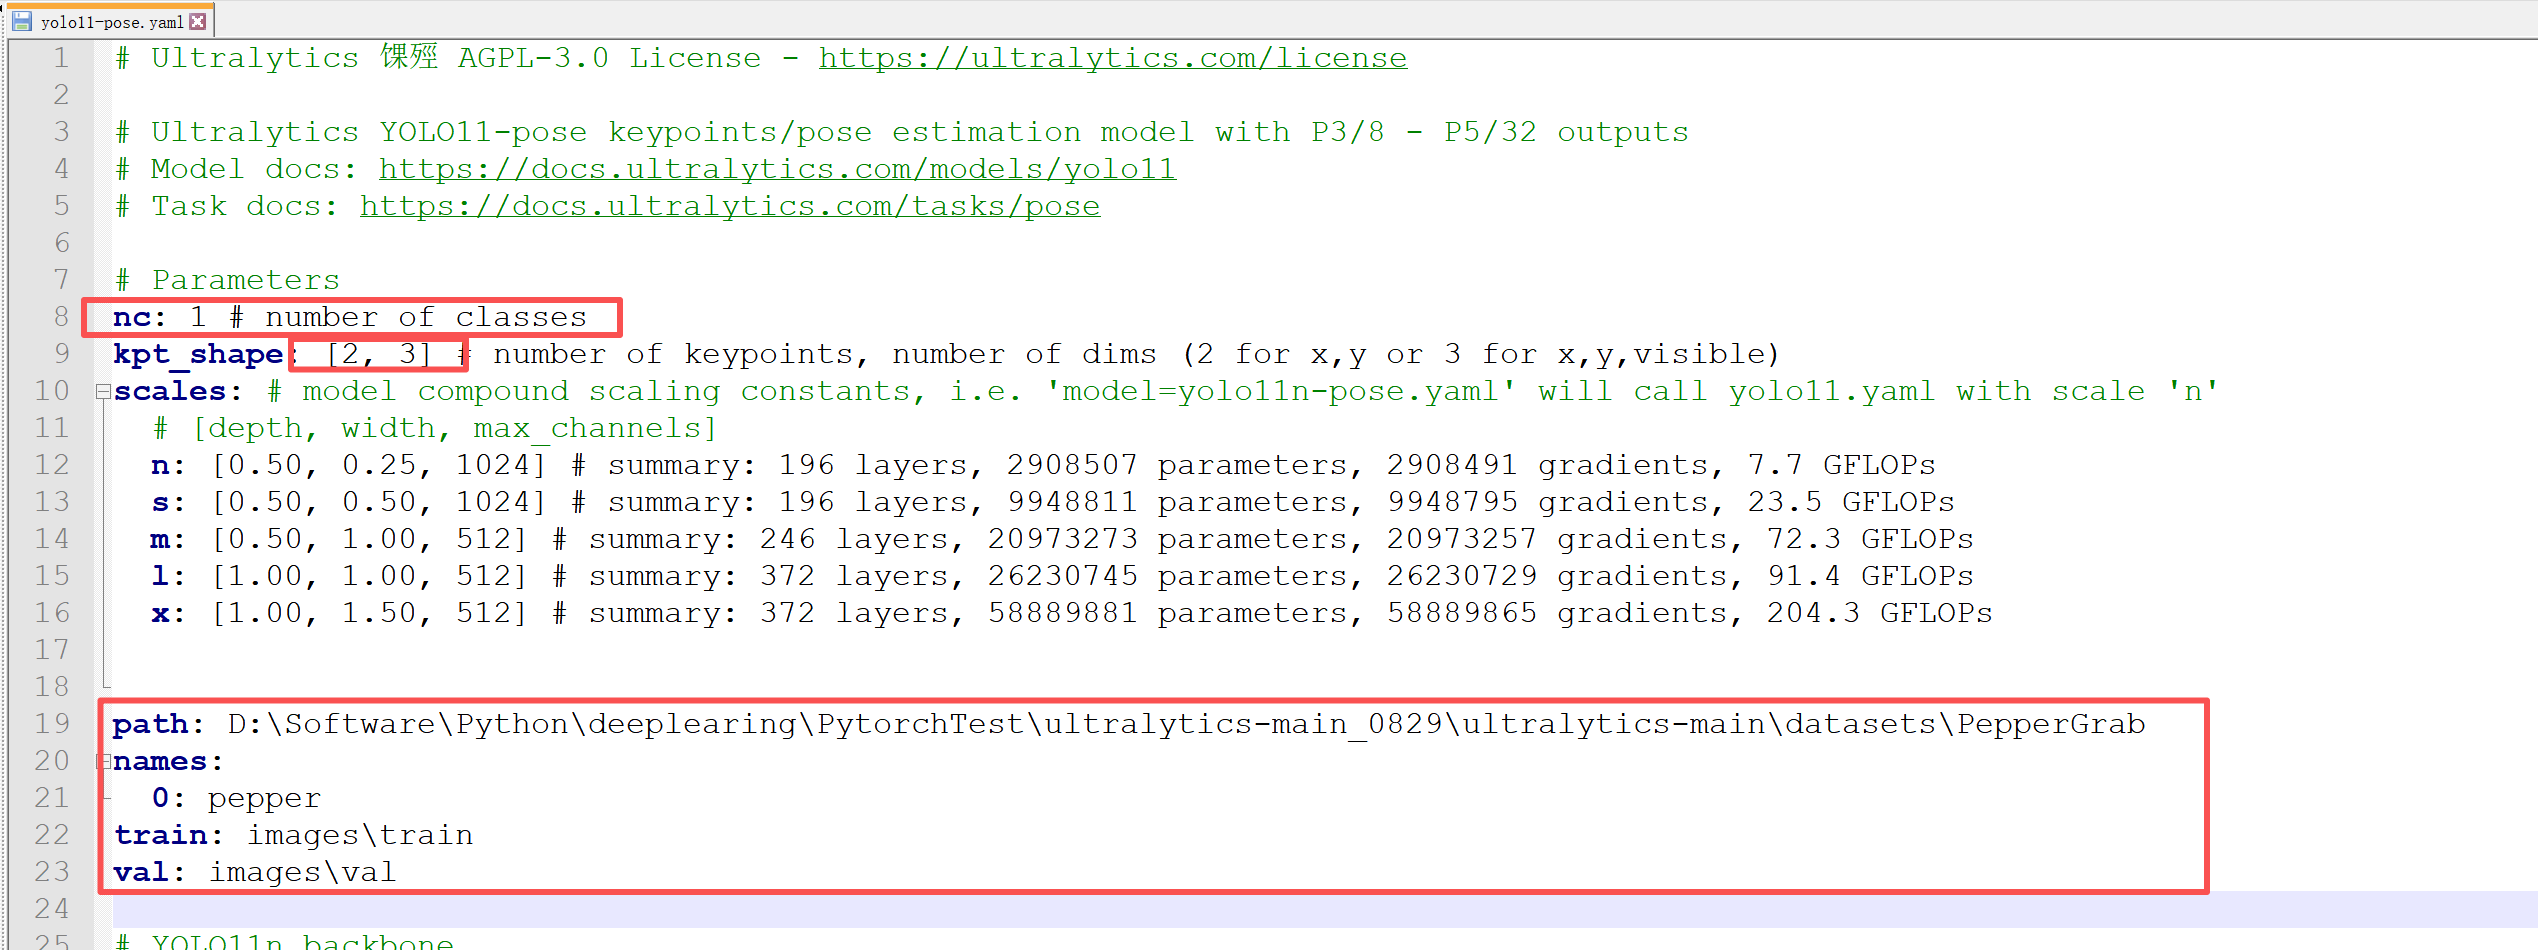
4.3 構造yaml
直接拷貝…\ultralytics-main\ultralytics\cfg\models\11\yolo11-pose.yaml
修改內容如下:
4.4 開始訓練模型
先下載預訓練模型 yolo11n.pt yolo11n-pose.pt
然后直接訓練,先不看詳細訓練參數,先能跑起來
from ultralytics import YOLO
import cv2
# #訓練
model = YOLO("./yolo11n-pose.pt")
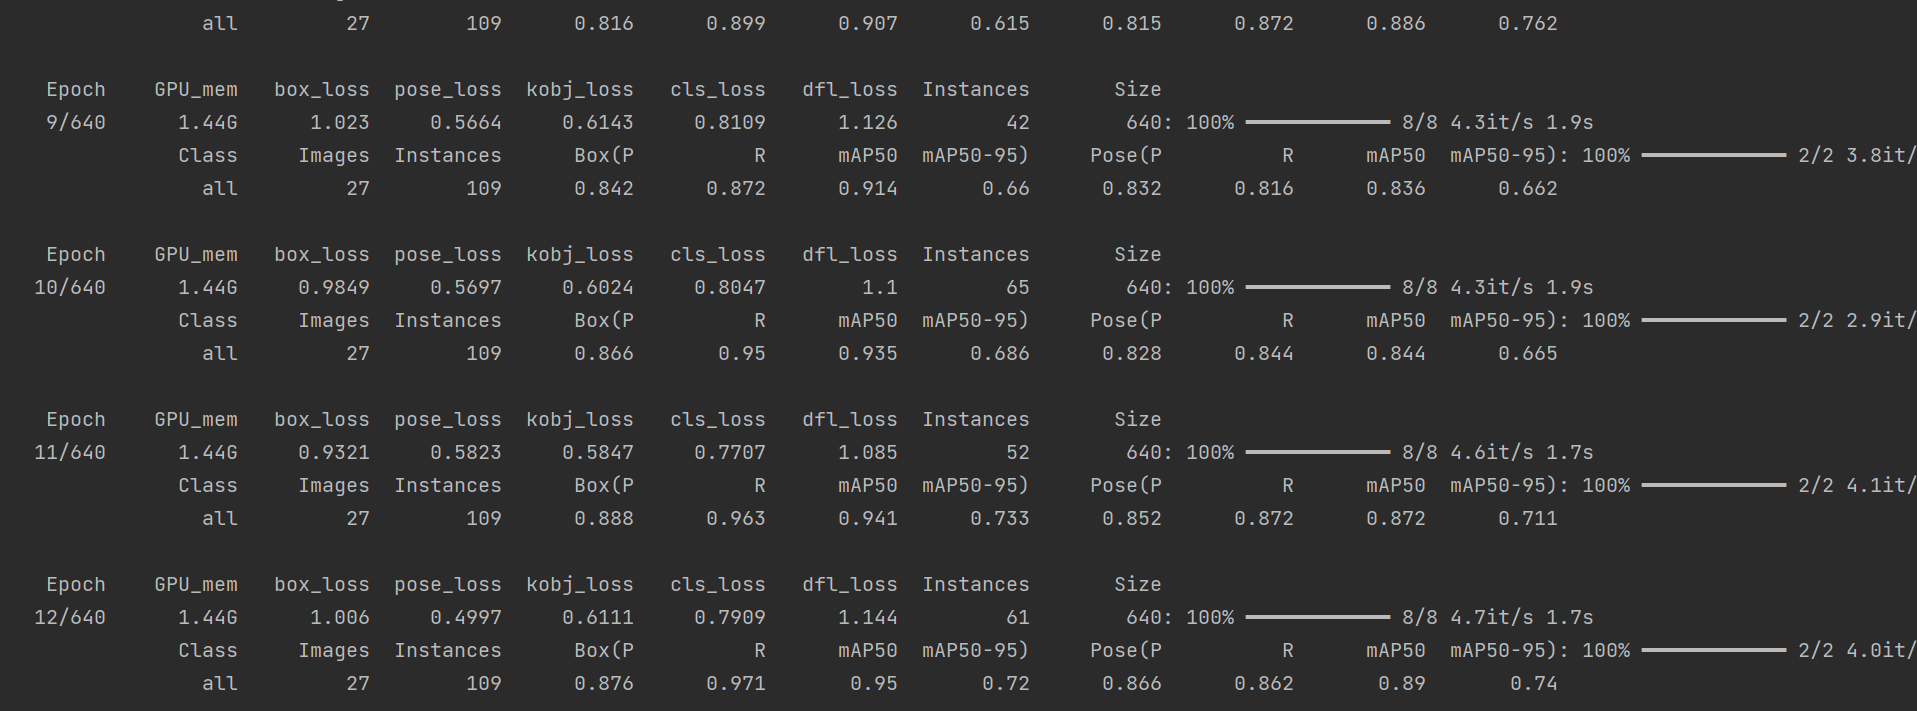
model.train(data = "...../ultralytics-main_0829/ultralytics-main/yolo11-pose.yaml",workers=0,epochs=640,batch=8)
跑起來了
4.5 開始預測結果
yolo = YOLO("best.pt", task = "detect")
result = yolo(source=".../ultralytics-main_0829/ultralytics-main/datasets/PepperGrab/images/val",conf=0.4,vid_stride=1,iou=0.3,save = True)
圖已刪
效果一般般,起碼是把流程走通了,精度后面再看吧
4.6 移植到C++測試
后面再說吧


_前綴和與差分)


)


