目錄
一、基本步驟
1、新建項目 :新建一個新的爬蟲項目
2、明確目標 (items.py):明確你想要抓取的目標
?3、制作爬蟲 (spiders/xxspider.py):制作爬蟲開始爬取網頁
?4、存儲內容 (pipelines.py):設計管道存儲爬取內容
?5、運行爬蟲
二、實戰:爬取當當圖書?
接下來介紹一個簡單的項目,完成一遍 Scrapy 抓取流程。
一、基本步驟
1、新建項目 :新建一個新的爬蟲項目
1 創建一個scrapy項目
scrapy startproject mySpider(文件夾名稱)
2、明確目標 (items.py):明確你想要抓取的目標
選擇你需要爬取的內容,例如作者名字、小說名、封面圖片等
在items.py文件中定義
?3、制作爬蟲 (spiders/xxspider.py):制作爬蟲開始爬取網頁
 生成一個爬蟲
scrapy genspider  爬蟲文件的名字 要爬的網頁
eg:[不需要加https]
https://www.baidu.com/ --> baidu.com
https://www.douban.com/  --> douban.com
scrapy genspider baidu www.baidu.com
EG 爬蟲文件解釋:
import scrapy
class BaiduSpider(scrapy.Spider):# 爬蟲的名字 一般運行爬蟲的時候 使用的值name = 'baidu'# 允許訪問的域名allowed_domains = ['www.baidu.com']# 起始的url地址  指的是第一次要訪問的域名# start_urls   是在allowed_domains的前面添加一個http://#              是在allowed_domains的后面添加一個/# 如果以html結尾 就不用加/ 否則網站進不去  報錯start_urls = ['http://www.baidu.com/']# 是執行了start_urls之后  執行的方法# 方法中的response  就是返回的那個對象# 相當于 response = urllib.request.urlopen()#       response = requests.get()def parse(self, response):pass
4、 配置中間件(middlewares.py防反爬)
# middlewares.py 添加隨機請求頭和代理
import random
from fake_useragent import UserAgentclass CustomMiddleware:def process_request(self, request, spider):# 隨機UA(偽裝不同瀏覽器)request.headers['User-Agent'] = UserAgent().random# 使用代理IP(示例用阿布云代理)request.meta['proxy'] = "http://http-dyn.abuyun.com:9020"request.headers['Proxy-Authorization'] = basic_auth_header('H01234567890123D', '0123456789012345')
?【本項目沒有防反爬機制,不用管這個文件】
?4、存儲內容 (pipelines.py):設計管道存儲爬取內容
如果想使用管道的話 那么就必須在settings中開啟管道
ITEM_PIPELINES = {# 管道可以有很多個 那么管道是有優先級 優先級的范圍是1到1000 值越小優先級越高'scrapy_dangdang.pipelines.ScrapyDangdangPipeline': 300,
}# 將在settings.py中這段話取消注釋,則打開了通道。
然后去pippelines.py中設計管道:
class ScrapyDangdangPipeline:def open_spider(self,spider):self.fp = open('book.json','w',encoding='utf-8')# item就是yield后面的對象def process_item(self, item, spider): self.fp.write(str(item))return itemdef close_spider(self,spider):self.fp.close()
?5、運行爬蟲
在cmd中輸入:scrapy crawl 爬蟲的名字eg:scrapy crawl baidu
二、實戰:爬取當當圖書?
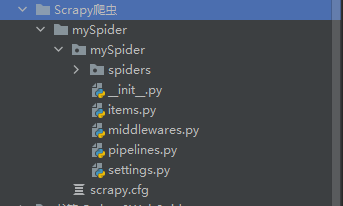
創建項目
上一節我們已經創建好了文件夾
 ?
?
????????創建好文件夾之后,通過cd mySprider進入到文件夾內部,創建通過scrapy genspider 爬蟲程序了,這里創建爬蟲文件,scrapy genspider dang category.dangdang.com

爬蟲文件已經創建完成,通過mySprider,spiders目錄下看到創建好的db文件。?
 ?
?
明確目標 (items.py):明確你想要抓取的目標?
-
確定需要下載的數據,去items.py文件中添加。這里我們準備存儲圖片、名字和價格
# Define here the models for your scraped items
#
# See documentation in:
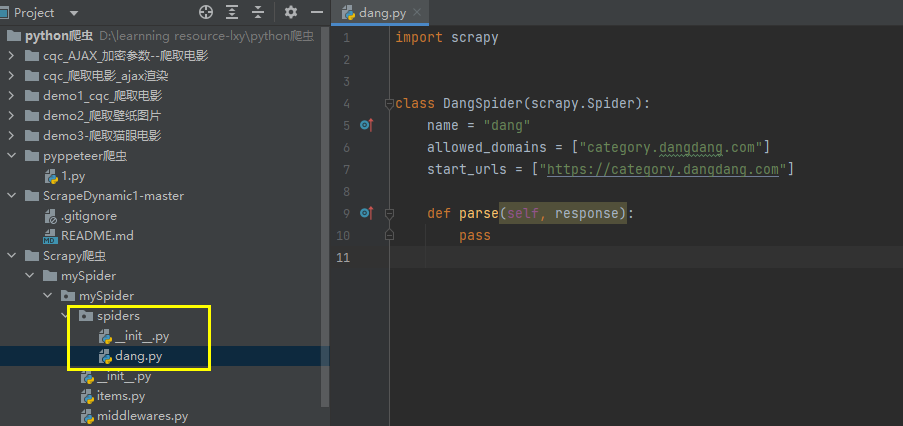
# https://docs.scrapy.org/en/latest/topics/items.htmlimport scrapyclass MyspiderItem(scrapy.Item):# define the fields for your item here like:# name = scrapy.Field()src = scrapy.Field()# 名字name = scrapy.Field()# 價格price = scrapy.Field()pass去爬蟲文件中去爬取我們需要的內容了(這里是在dang.py文件中)
?
import scrapy
from ..items import MyspiderItemclass DangSpider(scrapy.Spider):# 爬蟲的名字 一般運行爬蟲的時候 使用的值name = 'dang'# 允許訪問的域名# 如果是多頁下載的話 那么必須要調整的是allowed_domains的范圍 一般情況下只寫域名allowed_domains = ['category.dangdang.com']# 起始的url地址  指的是第一次要訪問的域名# start_urls   是在allowed_domains的前面添加一個http://#              是在allowed_domains的后面添加一個/# 如果以html結尾 就不用加/start_urls = ['http://category.dangdang.com/cp01.01.02.00.00.00.html']base_url = 'http://category.dangdang.com/pg'page = 1# 是執行了start_urls之后  執行的方法# 方法中的response  就是返回的那個對象# 相當于 response = urllib.request.urlopen()#       response = requests.get()def parse(self, response):# pipelines     下載數據# items         定義數據結構的# src = //ul[@id="component_59"]/li//img/@src# alt = //ul[@id="component_59"]/li//img/@alt# price = //ul[@id="component_59"]/li//p[@class="price"]/span[1]/text()# 所有的seletor的對象 都可以再次調用xpath方法li_list = response.xpath('//ul[@id="component_59"]/li')for li in li_list:#  第一張圖片和其他的圖片的標簽是屬性是不一樣的#  第一張圖片src是可以使用的 其他圖片的地址data-originalsrc = li.xpath('.//img/@data-original').extract_first()if src:src = srcelse:src = li.xpath('.//img/@src').extract_first()name = li.xpath('.//img/@alt').extract_first()price = li.xpath('.//p[@class="price"]/span[1]/text()').extract_first()book = MyspiderItem(src=src,name=name,price=price)# 獲取一個book就交給pipelinesyield book# 每一頁爬取的業務邏輯都是一樣的# 所以我們只需要將執行的那個頁的請求再次調用parse方法就可以了if self.page < 100:self.page = self.page + 1url = self.base_url + str(self.page) + '-cp01.01.02.00.00.00.html'# 怎么去調用parse方法# scrapy.Request就是scrpay的get方法# url就是請求地址# callback是你要執行的那個函數 注意不需要加圓括號yield scrapy.Request(url=url,callback=self.parse)
通過解析拿到數據之后,我們就可以去通道中添加保存的方法了(pippelines.py)
去settings.py在打開通道和添加通道,完成之后進行下一步
ITEM_PIPELINES = {# 管道可以有很多個 那么管道是有優先級 優先級的范圍是1到1000 值越小優先級越高'mySpider.pipelines.ScrapyDangdangPipeline': 300,'mySpider.pipelines.DangDangDownloadPiepline': 301,
}
?注意
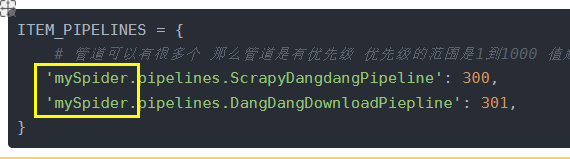
黃色框起來的是你的文件名,自行修改!
- 通道打開后,在pippelines.py完成下列操作
import os
# 如果想使用管道的話 那么就必須在settings中開啟管道
class ScrapyDangdangPipeline:def open_spider(self,spider):self.fp = open('book.json','w',encoding='utf-8')# item就是yield后面的book對象def process_item(self, item, spider):# 一下這種模式不推薦 因為每傳遞一個對象 那么就打開一次文件對文件的操作過于頻繁# # write方法必須要寫一個字符串 而不能是其他的對象# # w模式 會每一個對象都打開一次文件 覆蓋之前的內容# with open('book.json','a',encoding='utf-8') as fp:#     fp.write(str(item))self.fp.write(str(item))return itemdef close_spider(self,spider):self.fp.close()# 多條管道開啟# 定義管道類# 在settings中開啟管道# 'scrapy_dangdang.pipelines.DangDangDownloadPiepline': 301,
import urllib.requestclass DangDangDownloadPiepline:def process_item(self,item,spider):url = 'http:' + item.get('src')if not os.path.exists('./books/'):os.mkdir('./books/')filename = './books/' + item.get('name') + '.jpg'urllib.request.urlretrieve(url=url,filename=filename)return item
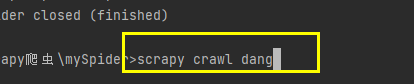
- 最后在cmd中輸入:scrapy crawl dang
- 完成之后就開始下載了,全部完成之后你就會看到多了book.json文件和books文件夾在自己的項目中。里面有數據,則表示項目成功了。
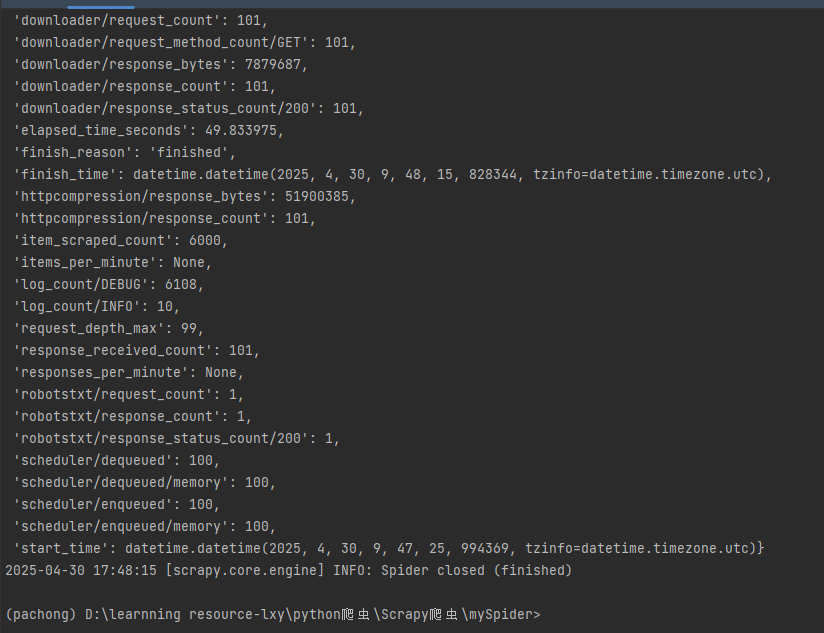
運行結果
 ?
?
三、總結?
一定要記得!!在setting開啟管道設置 ,設置的時候注意路徑名稱,在這卡了半天
? spiders/ 里的爬蟲邏輯(怎么抓,主要抓取數據的文件)
? pipelines.py 里的存儲邏輯,處理抓到的數據(怎么存,定義文件存儲方式等等)
? settings.py 里的配置參數(怎么調優)? ? ? ? 總的來說,簡單一點的爬蟲用scrapy實現時需要先創建好項目-->明確要爬取的目標--->分析頁面,看看數據存在什么標簽中,寫爬取的py文件--->看看是否有反爬機制--->在管道文件中添加對數據的處理方式。
? ? ? ?


 中配置和安裝 Linux 環境)


的模糊車牌圖像清晰化復原算法設計與實現(含Github代碼+Web端在線體驗鏈接))
Gin學習筆記(四)Gin的數據渲染和中間件的使用:數據渲染、返回JSON、淺.JSON()源碼、中間件、Next()方法)


基礎教程七 深度模板視圖\剔除\謂詞)
穩定性優化:從實驗室到量產的關鍵技術)

—重要API》)


