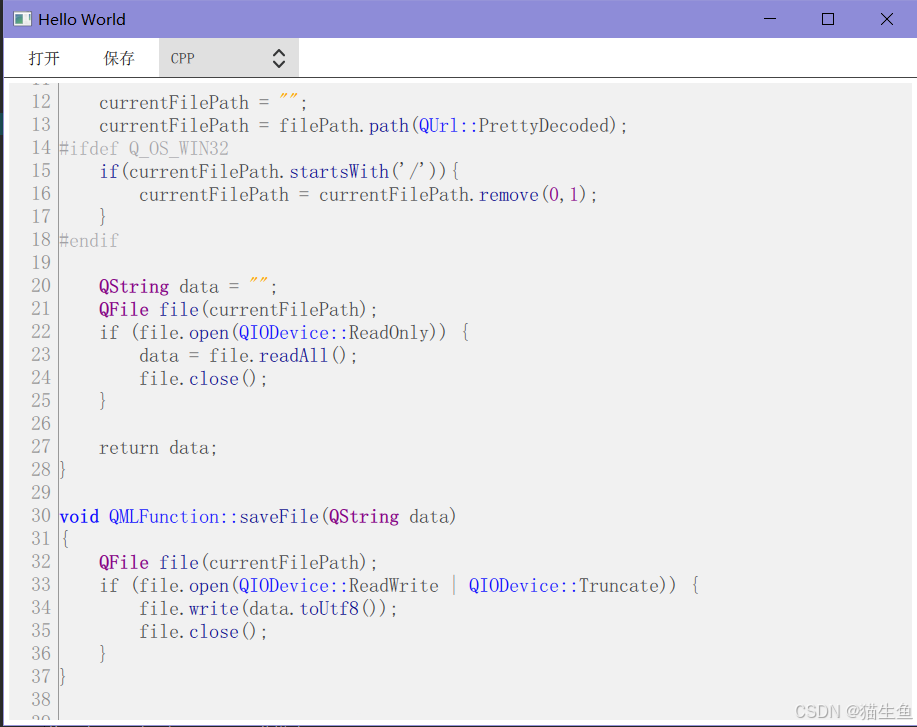
效果圖,左側顯示行號,右側用TextArea顯示文本內容,并且語法高亮。
2025年5月8號更新
1、多行文本注釋
多行文本注釋跟普通的高亮規則代碼不太一樣,代碼需要修改,這里以JavaScript舉例。
先制定多行文本注釋規則:
QVector<QPair<QRegularExpression, QTextCharFormat>> getJSMultiLineRules()
{QTextCharFormat multiLineCommentFormat;multiLineCommentFormat.setForeground(Qt::darkGreen);multiLineCommentFormat.setFontItalic(true);QVector<QPair<QRegularExpression, QTextCharFormat>> m_rules;m_rules << qMakePair(QRegularExpression("/\\*"), multiLineCommentFormat); // startm_rules << qMakePair(QRegularExpression("\\*/"), multiLineCommentFormat); // endreturn m_rules;
}
然后我們設置規則的時候,需要先設置完普通的規則,再設置多行文本規則:
void SyntaxHighlighter::highlightBlock(const QString &text)
{for (const auto &rule : m_rules) {QRegularExpressionMatchIterator it = rule.first.globalMatch(text);while (it.hasNext()) {QRegularExpressionMatch match = it.next();setFormat(match.capturedStart(), match.capturedLength(), rule.second);}}// 再設置多行規則setCurrentBlockState(0);if (m_language == JavaScript) {QVector<QPair<QRegularExpression, QTextCharFormat>> rules = getJSMultiLineRules();for (int i = 0; i < rules.size(); i+=2) { // +=2是因為多行的開頭和結尾是一個配對,有兩條規則QPair<QRegularExpression, QTextCharFormat> startRules = rules[i];QPair<QRegularExpression, QTextCharFormat> endRules = rules[i+1];int startIndex = 0;if (previousBlockState() != 1)startIndex = text.indexOf(startRules.first);while (startIndex >= 0) {QRegularExpressionMatch match = endRules.first.match(text, startIndex);int endIndex = match.capturedStart();int commentLength = 0;if (endIndex == -1) {setCurrentBlockState(1);commentLength = text.length() - startIndex;} else {commentLength = endIndex - startIndex + match.capturedLength();}setFormat(startIndex, commentLength, startRules.second);startIndex = text.indexOf(startRules.first, startIndex + commentLength);}}}
}
最后實現結果:
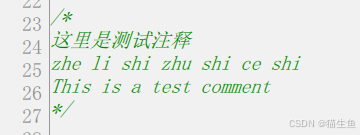
2、單行文本注釋
單行文本注釋,需要放在所有普通注釋的規則之后,以免被覆蓋。
否則就會出現這種情況,舉個例子:

以下是正文
需要實現的功能:
1、左側顯示行號
2、右側TextArea
3、可顯示語法高亮
1、左側顯示行號
這里我用了一個ListView,讓它跟TextView的行數對應起來,并且可以一起滾動。
簡單的做法是,將ListView和TextView都放在一個ScrollView中,這樣滾動的時候就可以讓TextView和ListView一起滾動了。
我之前就是這么做的,但是后面發現TextView中有過長的內容時,橫向滾動會把ListView滾走,這不是我想要的……
所以,我把ListView放在ScrollView的外面,看代碼:
import QtQuick 2.15
import QtQuick.Controls 2.15
import QtQuick.Layouts 1.15Rectangle {id: breakListRecx: 5width: 50height: textArea.heightanchors.verticalCenter: textArea.verticalCentercolor: "#F1F1F1"clip: trueListView {id: breakListViewanchors.fill: parentmodel: textArea.lineCountclip: truecontentY: textArea.contentYinteractive: falsedelegate: Item {width: breakListView.widthheight: index === 0 ?  (textArea.lineHeight + textArea.topPadding/2) : textArea.lineHeightRectangle {width: 1height: parent.heightcolor: "#999999"anchors.right: parent.right}Text {text: qsTr(String(index+1))anchors.verticalCenter: parent.verticalCenteranchors.right: parent.rightanchors.rightMargin: 8font.pixelSize: 20color: "#888888"}}}}
這里的幾個重點:
1、ListView的model為textArea的lineCount;
2、ListView的contentY綁定到TextArea的contentY屬性上,當然TextArea本身是沒有這個屬性的,這是我自己自定義算出來的;
3、ListView中的delegate的height,如果是第一行的話,需要注意的是TextArea本身有一個topPadding,所以要把這個也帶上,然后TextArea本身也是沒有lineHeight屬性的,這個也是我自定義算出來的;
2、右側TextArea
再看看右側的TextArea怎么實現的,首先它肯定是放在一個ScrollView中的,其次我們需要實現行號需要的那幾個屬性值,看代碼:
Item {anchors.right: parent.rightanchors.rightMargin: 5anchors.left: breakListRec.rightanchors.top: header.bottomanchors.topMargin: 5anchors.bottom: parent.bottomanchors.bottomMargin: 5property int lineCount: textArea.lineCountproperty int lineHeight: textArea.cursorRectangle.heightproperty real contentY: textAreaScroll.contentHeight * textAreaScroll.ScrollBar.vertical.positionproperty int topPadding: textArea.topPaddingScrollView {id: textAreaScrollanchors.fill: parentclip: truebackground: Rectangle { color: "#F1F1F1" }TextArea {id: textAreabackground: Rectangle { color: "#F1F1F1" }font.pixelSize: 20selectByMouse: trueselectionColor: "#87cefa"leftPadding: 0}}
}
textArea.cursorRectangle.height可以獲取到TextArea中一行的真實高度;
contentY需要用到滾動條的position來進行計算;
3、可顯示語法高亮
這是本文的重點,這里采用了cpp中的QSyntaxHighlighter類,能更方便地定制高亮規則。
我這里簡單定制了JSON, CPP, Python, JavaScript四種規則,可以相互切換;
首先我們先定義一個類SyntaxHighlighter,來繼承QSyntaxHighlighter;
class SyntaxHighlighter : public QSyntaxHighlighter {}
其次,我們需要在類SyntaxHighlighter中重新實現函數highlightBlock;highlightBlock函數就是能讓TextArea應用高亮的函數,在更改完高亮風格后,都必須要重新調用這個函數,以讓TextArea刷新高亮風格;
void highlightBlock(const QString &text) override;
然后我們還需要將屬性document和language暴露出來,給到qml使用;
Q_PROPERTY(QQuickTextDocument* document READ document WRITE setDocument NOTIFY documentChanged)
Q_PROPERTY(Language language READ language WRITE setLanguage NOTIFY languageChanged)public:enum Language { JSON, CPP, Python, JavaScript };// 設置語法格式Language language() const;void setLanguage(Language lang);// 設置文本內容QQuickTextDocument* document() const { return m_quickDocument; }void setDocument(QQuickTextDocument* doc);signals:void documentChanged();void languageChanged();
另外,我們還需要學習兩個類,QRegularExpression和QTextCharFormat。
QRegularExpression是用來定制語法識別規則的,比如這樣可以識別到單行注釋:
QRegularExpression("//[^\n]*")
QTextCharFormat則是用來制定高亮風格的,比如這樣可以制定高亮為加粗、藍色:
QTextCharFormat keywordFormat;
keywordFormat.setForeground(Qt::blue);
keywordFormat.setFontWeight(QFont::Bold);
最后,我們還需要在main中注冊這個類,這樣qml才能使用:
qmlRegisterType<SyntaxHighlighter>("CustomHighlighter", 1, 0, "SyntaxHighlighter");
我們看看qml怎么使用這個類:
TextArea {id: textAreabackground: Rectangle { color: "#F1F1F1" }font.pixelSize: 20selectByMouse: trueselectionColor: "#87cefa"leftPadding: 0SyntaxHighlighter {id: highlighterdocument: textArea.textDocumentlanguage: SyntaxHighlighter.CPPonLanguageChanged: {var data = textArea.texttextArea.text = ""textArea.text = data}}}
☆☆ 好了,現在來看完整代碼
先制定四種語法規則:
CPPRules.h
#ifndef CPPRULES_H
#define CPPRULES_H#include <QObject>
#include <QTextCharFormat>
#include <QRegularExpression>QVector<QPair<QRegularExpression, QTextCharFormat>> getCPPRules()
{QVector<QPair<QRegularExpression, QTextCharFormat> > m_rules;// 1. 關鍵字(藍色加粗)QTextCharFormat keywordFormat;keywordFormat.setForeground(Qt::blue);keywordFormat.setFontWeight(QFont::Bold);QStringList keywords = {"char", "class", "const","double", "enum", "explicit","friend", "inline", "int","long", "namespace", "operator","private", "protected", "public","short", "signals", "signed","slots", "static", "struct","template", "typedef", "typename","union", "unsigned", "virtual","void", "volatile", "bool"};for (const QString &kw : keywords) {m_rules << qMakePair(QRegularExpression("\\b" + kw + "\\b"), keywordFormat);}// 2.類名QTextCharFormat classFormat;classFormat.setFontWeight(QFont::Bold);classFormat.setForeground(Qt::darkMagenta);m_rules << qMakePair(QRegularExpression("\\bQ[A-Za-z]+\\b"), classFormat);// 3. 單行注釋(綠色)QTextCharFormat singleLineCommentFormat;singleLineCommentFormat.setForeground(Qt::darkGreen);m_rules << qMakePair(QRegularExpression("//[^\n]*"), singleLineCommentFormat);// 4. 多行注釋(綠色斜體)QTextCharFormat multiLineCommentFormat;multiLineCommentFormat.setForeground(Qt::darkGreen);multiLineCommentFormat.setFontItalic(true);m_rules << qMakePair(QRegularExpression("/\\*.*?\\*/"), multiLineCommentFormat);// 5. 字符串(橙色)QTextCharFormat stringFormat;stringFormat.setForeground(QColor(255, 165, 0)); // 橙色m_rules << qMakePair(QRegularExpression("\".*\""), stringFormat);// 6. 數字(紫色)QTextCharFormat numberFormat;numberFormat.setForeground(Qt::darkMagenta);m_rules << qMakePair(QRegularExpression("\\b\\d+\\b"), numberFormat);// 7. 預處理指令(灰色)QTextCharFormat preprocessorFormat;preprocessorFormat.setForeground(Qt::gray);m_rules << qMakePair(QRegularExpression("#.*"), preprocessorFormat);// 8.函數名QTextCharFormat functionFormat;functionFormat.setForeground(Qt::blue);m_rules << qMakePair(QRegularExpression("(\\w+)::"), functionFormat);// 9.被引用,如A::Test中的TestQTextCharFormat functionTwoFormat;functionTwoFormat.setForeground(Qt::darkBlue);m_rules << qMakePair(QRegularExpression("\\b[A-Za-z0-9_]+(?=\\()"), functionTwoFormat);return m_rules;
}#endif // CPPRULES_H
JavaScriptRules.h
#ifndef JAVASCRIPTRULES_H
#define JAVASCRIPTRULES_H#include <QObject>
#include <QTextCharFormat>
#include <QRegularExpression>QVector<QPair<QRegularExpression, QTextCharFormat>> getJavaScriptRules() {QVector<QPair<QRegularExpression, QTextCharFormat> > m_rules;// 1. 關鍵字(藍色加粗)QTextCharFormat keywordFormat;keywordFormat.setForeground(Qt::blue);keywordFormat.setFontWeight(QFont::Bold);QStringList keywords = {"function", "if", "else", "for", "while", "do", "switch", "case", "break","return", "var", "let", "const", "new", "this", "true", "false", "null","undefined", "try", "catch", "finally", "throw", "class", "extends", "import","export", "async", "await", "yield"};for (const QString &kw : keywords) {m_rules << qMakePair(QRegularExpression("\\b" + kw + "\\b"), keywordFormat);}// 2. 內置對象和方法(深藍色)QTextCharFormat builtinFormat;builtinFormat.setForeground(QColor(0, 0, 139)); // 深藍色QStringList builtins = {"console", "Object", "Array", "String", "Number", "Math", "JSON", "Promise","setTimeout", "fetch", "document", "window", "require"};for (const QString &bn : builtins) {m_rules << qMakePair(QRegularExpression("\\b" + bn + "\\b"), builtinFormat);}// 3. 單行注釋(綠色)QTextCharFormat singleLineCommentFormat;singleLineCommentFormat.setForeground(Qt::darkGreen);m_rules << qMakePair(QRegularExpression("//[^\n]*"), singleLineCommentFormat);// 4. 多行注釋(綠色斜體)QTextCharFormat multiLineCommentFormat;multiLineCommentFormat.setForeground(Qt::darkGreen);multiLineCommentFormat.setFontItalic(true);m_rules << qMakePair(QRegularExpression("/\\*.*?\\*/"), multiLineCommentFormat);// 5. 字符串(橙色)QTextCharFormat stringFormat;stringFormat.setForeground(QColor(255, 165, 0)); // 橙色// 匹配單引號、雙引號、模板字符串m_rules << qMakePair(QRegularExpression("\".*?\""), stringFormat);m_rules << qMakePair(QRegularExpression("'.*?'"), stringFormat);m_rules << qMakePair(QRegularExpression("`.*?`"), stringFormat);// 6. 正則表達式(紫色)QTextCharFormat regexFormat;regexFormat.setForeground(Qt::darkMagenta);m_rules << qMakePair(QRegularExpression("/.+?/[gimuy]*"), regexFormat);// 7. 數字(紫色)QTextCharFormat numberFormat;numberFormat.setForeground(Qt::darkMagenta);m_rules << qMakePair(QRegularExpression("\\b\\d+\\.?\\d*\\b"), numberFormat);// 8. 函數定義(深紅色)QTextCharFormat functionDefFormat;functionDefFormat.setForeground(QColor(139, 0, 0)); // 深紅色m_rules << qMakePair(QRegularExpression("\\bfunction\\s+(\\w+)"), functionDefFormat);m_rules << qMakePair(QRegularExpression("\\b(\\w+)\\s*=\\s*function\\b"), functionDefFormat);// 9. 箭頭函數(深青色)QTextCharFormat arrowFunctionFormat;arrowFunctionFormat.setForeground(QColor(0, 139, 139)); // 深青色m_rules << qMakePair(QRegularExpression("\\b(\\w+)\\s*=>"), arrowFunctionFormat);return m_rules;
}#endif // JAVASCRIPTRULES_H
JsonRules.h
#ifndef JSONRULES_H
#define JSONRULES_H#include <QObject>
#include <QTextCharFormat>
#include <QRegularExpression>QVector<QPair<QRegularExpression, QTextCharFormat>> getJsonRules() {QVector<QPair<QRegularExpression, QTextCharFormat> > m_rules;// 1. JSON Key(深藍色加粗)QTextCharFormat keyFormat;keyFormat.setForeground(Qt::darkBlue);keyFormat.setFontWeight(QFont::Bold);m_rules << qMakePair(QRegularExpression("\"(\\w+)\"\\s*:"), keyFormat);// 2. JSON String Value(綠色)QTextCharFormat stringValueFormat;stringValueFormat.setForeground(Qt::darkGreen);m_rules << qMakePair(QRegularExpression("\".*\""), stringValueFormat);// 3. JSON Number(紫色)QTextCharFormat numberFormat;numberFormat.setForeground(Qt::darkMagenta);m_rules << qMakePair(QRegularExpression("\\b\\d+\\b"), numberFormat);return m_rules;
}#endif // JSONRULES_H
PythonRules.h
#ifndef PYTHONRULES_H
#define PYTHONRULES_H#include <QObject>
#include <QTextCharFormat>
#include <QRegularExpression>QVector<QPair<QRegularExpression, QTextCharFormat>> getPythonRules() {QVector<QPair<QRegularExpression, QTextCharFormat> > m_rules;// 1. 關鍵字(藍色加粗)QTextCharFormat keywordFormat;keywordFormat.setForeground(Qt::blue);keywordFormat.setFontWeight(QFont::Bold);QStringList keywords = {"def", "class", "if", "elif", "else", "for", "while","try", "except", "finally", "with", "import", "from","as", "return", "yield", "lambda", "nonlocal", "global"};for (const QString &kw : keywords) {m_rules << qMakePair(QRegularExpression("\\b" + kw + "\\b"), keywordFormat);}// 2. 內置函數和類型(深藍色)QTextCharFormat builtinFormat;builtinFormat.setForeground(QColor(0, 0, 139)); // 深藍色QStringList builtins = {"print", "len", "range", "list", "dict", "str", "int","float", "True", "False", "None", "self"};for (const QString &bn : builtins) {m_rules << qMakePair(QRegularExpression("\\b" + bn + "\\b"), builtinFormat);}// 3. 單行注釋(綠色)QTextCharFormat commentFormat;commentFormat.setForeground(Qt::darkGreen);m_rules << qMakePair(QRegularExpression("#[^\n]*"), commentFormat);// 4. 字符串(橙色)QTextCharFormat stringFormat;stringFormat.setForeground(QColor(255, 165, 0)); // 橙色// 匹配單引號、雙引號、三引號字符串m_rules << qMakePair(QRegularExpression("\"\"\".*?\"\"\""), stringFormat);m_rules << qMakePair(QRegularExpression("'''.*?'''"), stringFormat);m_rules << qMakePair(QRegularExpression("\".*?\""), stringFormat);m_rules << qMakePair(QRegularExpression("'.*?'"), stringFormat);// 5. 裝飾器(紫色)QTextCharFormat decoratorFormat;decoratorFormat.setForeground(Qt::darkMagenta);m_rules << qMakePair(QRegularExpression("@\\w+"), decoratorFormat);// 6. 數字(紫色)QTextCharFormat numberFormat;numberFormat.setForeground(Qt::darkMagenta);m_rules << qMakePair(QRegularExpression("\\b\\d+\\.?\\d*\\b"), numberFormat);// 7. 函數定義(深紅色)QTextCharFormat functionDefFormat;functionDefFormat.setForeground(QColor(139, 0, 0)); // 深紅色m_rules << qMakePair(QRegularExpression("\\bdef\\s+(\\w+)"), functionDefFormat);return m_rules;
}#endif // PYTHONRULES_H
再寫一個QMLFunction類,用來給qml讀取文件等信息
QMLFunction.h
#ifndef QMLFUNCTION_H
#define QMLFUNCTION_H#include <QUrl>
#include <QFile>
#include <QObject>
#include <QFileInfo>class QMLFunction : public QObject
{Q_OBJECT
public:explicit QMLFunction(QObject *parent = nullptr);Q_INVOKABLE QString readFile(QUrl filePath);Q_INVOKABLE void saveFile(QString data);Q_INVOKABLE int fileLanguage();private:QString currentFilePath;signals:};#endif // QMLFUNCTION_H
QMLFunction.cpp
#include "QMLFunction.h"
#include "SyntaxHighlighter.h"QMLFunction::QMLFunction(QObject *parent): QObject{parent}
{}QString QMLFunction::readFile(QUrl filePath)
{currentFilePath = "";currentFilePath = filePath.path(QUrl::PrettyDecoded);
#ifdef Q_OS_WIN32if(currentFilePath.startsWith('/')){currentFilePath = currentFilePath.remove(0,1);}
#endifQString data = "";QFile file(currentFilePath);if (file.open(QIODevice::ReadOnly)) {data = file.readAll();file.close();}return data;
}void QMLFunction::saveFile(QString data)
{QFile file(currentFilePath);if (file.open(QIODevice::ReadWrite | QIODevice::Truncate)) {file.write(data.toUtf8());file.close();}
}int QMLFunction::fileLanguage()
{QFileInfo info(currentFilePath);QString suffix = info.suffix();if (suffix == "CPP") {return SyntaxHighlighter::CPP;} else if (suffix == "json") {return SyntaxHighlighter::JSON;} else if (suffix == "h") {return SyntaxHighlighter::CPP;} else if (suffix == "js") {return SyntaxHighlighter::JavaScript;} else if (suffix == "py") {return SyntaxHighlighter::Python;} else {return SyntaxHighlighter::CPP;}
}
再寫高亮的主要類SyntaxHighlighter
SyntaxHighlighter.h
#ifndef SYNTAXHIGHLIGHTER_H
#define SYNTAXHIGHLIGHTER_H#include <QObject>
#include <QQuickTextDocument>
#include <QSyntaxHighlighter>
#include <QRegularExpression>class SyntaxHighlighter : public QSyntaxHighlighter
{Q_OBJECTQ_PROPERTY(QQuickTextDocument* document READ document WRITE setDocument NOTIFY documentChanged)Q_PROPERTY(Language language READ language WRITE setLanguage NOTIFY languageChanged)
public:enum Language { JSON, CPP, Python, JavaScript };Q_ENUM(Language)SyntaxHighlighter(QTextDocument *parent = nullptr);// 設置語法格式Language language() const;void setLanguage(Language lang);// 設置文本內容QQuickTextDocument* document() const { return m_quickDocument; }void setDocument(QQuickTextDocument* doc);protected:void highlightBlock(const QString &text) override;private:QQuickTextDocument* m_quickDocument = nullptr;Language m_language;QVector<QPair<QRegularExpression, QTextCharFormat>> m_rules;signals:void documentChanged();void languageChanged();};#endif // SYNTAXHIGHLIGHTER_H
SyntaxHighlighter.cpp
#include "SyntaxHighlighter.h"
#include "CPPRules.h"
#include "JavaScriptRules.h"
#include "PythonRules.h"
#include "JsonRules.h"// SyntaxHighlighter.cpp
SyntaxHighlighter::SyntaxHighlighter(QTextDocument *parent) : QSyntaxHighlighter(parent) {
}SyntaxHighlighter::Language SyntaxHighlighter::language() const
{return m_language;
}void SyntaxHighlighter::setLanguage(Language lang)
{if (m_language == lang) return ;m_language = lang;m_rules.clear();switch (lang) {case JSON: {m_rules = getJsonRules();break;}case CPP: {m_rules = getCPPRules();break;}case Python: {m_rules = getPythonRules();break;}case JavaScript:{m_rules = getJavaScriptRules();break;}}rehighlight(); // 重新應用高亮emit languageChanged(); // 觸發信號
}void SyntaxHighlighter::setDocument(QQuickTextDocument *doc)
{if (doc != m_quickDocument) {m_quickDocument = doc;QSyntaxHighlighter::setDocument(doc->textDocument()); // 關鍵轉換emit documentChanged();}
}void SyntaxHighlighter::highlightBlock(const QString &text)
{for (const auto &rule : m_rules) {QRegularExpressionMatchIterator it = rule.first.globalMatch(text);while (it.hasNext()) {QRegularExpressionMatch match = it.next();setFormat(match.capturedStart(), match.capturedLength(), rule.second);}}
}
main.cpp
#include <QQmlContext>
#include <QGuiApplication>
#include <QQmlApplicationEngine>
#include "QMLFunction.h"
#include "SyntaxHighlighter.h"int main(int argc, char *argv[])
{
#if QT_VERSION < QT_VERSION_CHECK(6, 0, 0)QCoreApplication::setAttribute(Qt::AA_EnableHighDpiScaling);
#endifQGuiApplication app(argc, argv);qmlRegisterType<SyntaxHighlighter>("CustomHighlighter", 1, 0, "SyntaxHighlighter");QQmlApplicationEngine engine;QMLFunction qmlFunction;engine.rootContext()->setContextProperty("QMLFunc", &qmlFunction);qmlRegisterType<QMLFunction>("QMLEnum",1,0,"QMLEnum");const QUrl url(QStringLiteral("qrc:/main.qml"));QObject::connect(&engine, &QQmlApplicationEngine::objectCreated,&app, [url](QObject *obj, const QUrl &objUrl) {if (!obj && url == objUrl)QCoreApplication::exit(-1);}, Qt::QueuedConnection);engine.load(url);return app.exec();
}
再看一下qml的文件代碼
main.qml
import QtQuick 2.15
import QtQuick.Window 2.15Window {id: window_width: 640height: 480visible: truetitle: qsTr("Hello World")Item {anchors.fill: parentHeader{id: header}LineCountList {id: breakListRec}MyTextArea {id: textArea}}
}
Header.qml
import QtQuick 2.15
import QtQuick.Dialogs 1.3
import QtQuick.Controls 2.15Item {id: headerwidth: parent.widthheight: 40Row {height: parent.heightwidth: parent.width - 10anchors.horizontalCenter: parent.horizontalCenterspacing: 5Rectangle {id: fileOpenwidth: 70height: 30color: fileOpenMouse.pressed ? "#dcdcdc" : "transparent"border.width: fileOpenMouse.pressed ? 1 : 0border.color: "#bcbcbc"anchors.verticalCenter: parent.verticalCenterToolTip.visible: fileOpenMouse.entered_ToolTip.text: qsTr("快捷鍵 Ctrl+O")Text {text: qsTr("打開")anchors.centerIn: parentfont.pixelSize: 16}MouseArea {id: fileOpenMouseanchors.fill: parenthoverEnabled: trueproperty bool entered_: falseonClicked: {fileDialog.open()}onEntered: {entered_ = true}onExited: {entered_ = false}}}Rectangle {id: fileSavewidth: 70height: 30color: fileSaveMouse.pressed ? "#dcdcdc" : "transparent"border.width: fileSaveMouse.pressed ? 1 : 0border.color: "#bcbcbc"anchors.verticalCenter: parent.verticalCenterToolTip.visible: fileSaveMouse.entered_ToolTip.text: qsTr("快捷鍵 Ctrl+O")Text {text: qsTr("保存")anchors.centerIn: parentfont.pixelSize: 16}MouseArea {id: fileSaveMouseanchors.fill: parenthoverEnabled: trueproperty bool entered_: falseonClicked: {QMLFunc.saveFile(textArea.getText())}onEntered: {entered_ = true}onExited: {entered_ = false}}}Item {id: languageItemwidth: 150height: 35Text {id: languageTitletext: qsTr("語法選擇")anchors.verticalCenter: parent.verticalCenterfont.pixelSize: 16}ComboBox {id: languageSelectmodel: ["JSON", "CPP", "Python", "JavaScript"]onCurrentIndexChanged: {if (currentIndex !== textArea.getLanguage()) {textArea.setLanguage(currentIndex)}}}}}Rectangle {width: parent.widthheight: 1color: "#444444"anchors.bottom: parent.bottom}FileDialog {id: fileDialogonAccepted: {var data = QMLFunc.readFile(fileUrl)textArea.setText(data)textArea.setLanguage(QMLFunc.fileLanguage())languageSelect.currentIndex = QMLFunc.fileLanguage()}}Shortcut {sequence: "Ctrl+O"onActivated: {fileDialog.open()}}Shortcut {sequence: "Ctrl+S"onActivated: {QMLFunc.saveFile(textArea.getText())}}}
LineCountList.qml
import QtQuick 2.15
import QtQuick.Controls 2.15
import QtQuick.Layouts 1.15Rectangle {id: breakListRecx: 5width: 50height: textArea.heightanchors.verticalCenter: textArea.verticalCentercolor: "#F1F1F1"clip: trueListView {id: breakListViewanchors.fill: parentmodel: textArea.lineCountclip: truecontentY: textArea.contentYinteractive: falsedelegate: Item {width: breakListView.widthheight: index === 0 ?  (textArea.lineHeight + textArea.topPadding/2) : textArea.lineHeightRectangle {width: 1height: parent.heightcolor: "#999999"anchors.right: parent.right}Text {text: qsTr(String(index+1))anchors.verticalCenter: parent.verticalCenteranchors.right: parent.rightanchors.rightMargin: 8font.pixelSize: 20color: "#888888"}MouseArea {anchors.fill: parentonClicked: {textArea.selectLine(index)}}}}}
MyTextArea.qml
import QtQuick 2.15
import QtQuick.Controls 2.15
import QtQuick.Layouts 1.15
import CustomHighlighter 1.0Item {anchors.right: parent.rightanchors.rightMargin: 5anchors.left: breakListRec.rightanchors.top: header.bottomanchors.topMargin: 5anchors.bottom: parent.bottomanchors.bottomMargin: 5property int lineCount: textArea.lineCountproperty int lineHeight: textArea.cursorRectangle.heightproperty real contentY: textAreaScroll.contentHeight * textAreaScroll.ScrollBar.vertical.positionproperty int topPadding: textArea.topPaddingScrollView {id: textAreaScrollanchors.fill: parentclip: truebackground: Rectangle { color: "#F1F1F1" }TextArea {id: textAreabackground: Rectangle { color: "#F1F1F1" }font.pixelSize: 20selectByMouse: trueselectionColor: "#87cefa"leftPadding: 0SyntaxHighlighter {id: highlighterdocument: textArea.textDocumentlanguage: SyntaxHighlighter.CPPonLanguageChanged: {var data = textArea.texttextArea.text = ""textArea.text = data}}}}function setText(text) {textArea.text = text}function getText() {return textArea.text}// 選中指定行的函數function selectLine(lineIndex) {var lines = textArea.text.split("\n");if (lineIndex < 0 || lineIndex >= lines.length) return;// 計算行首位置var startPos = 0;for (var i = 0; i < lineIndex; i++) {startPos += lines[i].length + 1; // +1 是換行符}// 計算行尾位置var endPos = startPos + lines[lineIndex].length+1;// 選中行并更新當前行textArea.select(startPos, endPos);forceActiveFocus();}function setLanguage(type) {highlighter.language = type}function getLanguage() {return highlighter.language;}}


)

)


)


開發中Maven的管理)

