嗯。調試時總發現自己打印的調試信息太過普通、單調,于是乎……
Notice
要在終端實現字體的特殊樣式,通常通過使用特殊的控制字符來實現,而不是通過某語言本身的功能來實現。
在大多數終端中,可以使用 ANSI 轉義序列來設置字體的顏色。ANSI 轉義序列是一系列以 ESC 開頭的字符,用于控制文本終端的屬性,包括顏色、格式和光標位置等。ANSI 轉義序列以 \033[ 開頭,后跟屬性代碼,以設置不同的終端屬性。
請注意,不同的終端可能對 ANSI 轉義序列的支持程度不同。大多數 Unix/Linux 終端和 Windows 上的一些控制臺仿真器(如 ConEmu、Cygwin 和 Windows Terminal)都支持 ANSI 轉義序列。
Color
包括前景色和背景色。前景色指的是字體本身的顏色,背景色指的是字體的背景顏色。
一些常見顏色:黑色、紅色、綠色、黃色、藍色、洋紅色、青色、白色。
先來看一下效果:
#define
見名知意,不再贅述。
#define ANSI_COLOR_RESET   "\x1b[0m"		// 重置#define ANSI_COLOR_BLACK   "\033[30m"		// 前景色
#define ANSI_COLOR_RED     "\x1b[31m"
#define ANSI_COLOR_GREEN   "\x1b[32m"
#define ANSI_COLOR_YELLOW  "\x1b[33m"
#define ANSI_COLOR_BLUE    "\x1b[34m"
#define ANSI_COLOR_MAGENTA "\x1b[35m"
#define ANSI_COLOR_CYAN    "\x1b[36m"
#define ANSI_COLOR_WHITE   "\033[37m"#define ANSI_BG_BLACK       "\x1b[40m"		// 背景色
#define ANSI_BG_RED         "\x1b[41m"
#define ANSI_BG_GREEN       "\x1b[42m"
#define ANSI_BG_YELLOW      "\x1b[43m"
#define ANSI_BG_BLUE        "\x1b[44m"
#define ANSI_BG_MAGENTA     "\x1b[45m"
#define ANSI_BG_CYAN        "\x1b[46m"
#define ANSI_BG_WHITE       "\x1b[47m"#define ANSI_COLOR_BRIGHT_BLACK   "\x1b[90m"		// 前景亮色
#define ANSI_COLOR_BRIGHT_RED     "\x1b[91m"
#define ANSI_COLOR_BRIGHT_GREEN   "\x1b[92m"
#define ANSI_COLOR_BRIGHT_YELLOW  "\x1b[93m"
#define ANSI_COLOR_BRIGHT_BLUE    "\x1b[94m"
#define ANSI_COLOR_BRIGHT_MAGENTA "\x1b[95m"
#define ANSI_COLOR_BRIGHT_CYAN    "\x1b[96m"
#define ANSI_COLOR_BRIGHT_WHITE   "\x1b[97m"#define ANSI_BG_BRIGHT_BLACK       "\x1b[100m"		// 背景亮色
#define ANSI_BG_BRIGHT_RED         "\x1b[101m"
#define ANSI_BG_BRIGHT_GREEN       "\x1b[102m"
#define ANSI_BG_BRIGHT_YELLOW      "\x1b[103m"
#define ANSI_BG_BRIGHT_BLUE        "\x1b[104m"
#define ANSI_BG_BRIGHT_MAGENTA     "\x1b[105m"
#define ANSI_BG_BRIGHT_CYAN        "\x1b[106m"
#define ANSI_BG_BRIGHT_WHITE       "\x1b[107m"
Example
#include <iostream>// 有的宏定義沒有用到,但懶得刪掉了 ×_×#define ANSI_COLOR_BLACK "\033[30m"
#define ANSI_COLOR_RED "\x1b[31m"
#define ANSI_COLOR_GREEN "\x1b[32m"
#define ANSI_COLOR_YELLOW "\x1b[33m"
#define ANSI_COLOR_BLUE "\x1b[34m"
#define ANSI_COLOR_MAGENTA "\x1b[35m"
#define ANSI_COLOR_CYAN "\x1b[36m"
#define ANSI_COLOR_WHITE "\033[37m"#define ANSI_COLOR_RESET "\x1b[0m"#define ANSI_BG_BLACK "\x1b[40m"
#define ANSI_BG_RED "\x1b[41m"
#define ANSI_BG_GREEN "\x1b[42m"
#define ANSI_BG_YELLOW "\x1b[43m"
#define ANSI_BG_BLUE "\x1b[44m"
#define ANSI_BG_MAGENTA "\x1b[45m"
#define ANSI_BG_CYAN "\x1b[46m"
#define ANSI_BG_WHITE "\x1b[47m"#define ANSI_COLOR_BRIGHT_RED "\x1b[91m"
#define ANSI_COLOR_BRIGHT_GREEN "\x1b[92m"
#define ANSI_COLOR_BRIGHT_YELLOW "\x1b[93m"
#define ANSI_COLOR_BRIGHT_BLUE "\x1b[94m"
#define ANSI_COLOR_BRIGHT_MAGENTA "\x1b[95m"
#define ANSI_COLOR_BRIGHT_CYAN "\x1b[96m"
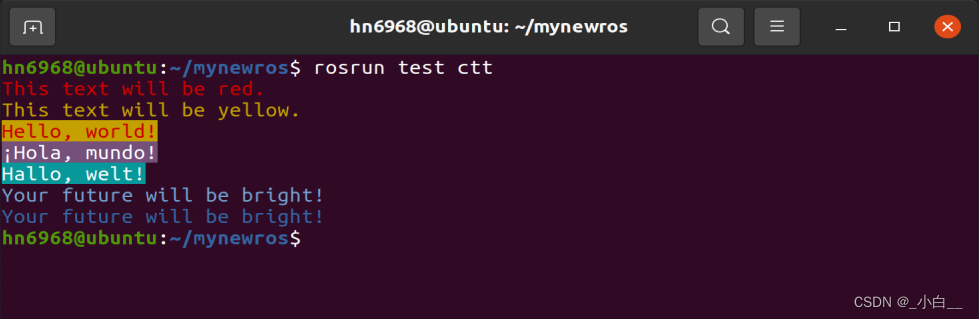
#define ANSI_COLOR_BRIGHT_WHITE "\x1b[97m"#define ANSI_BG_BRIGHT_BLACK "\x1b[100m"int main() {std::cout << "\033[31mThis text will be red. \033[0m" << std::endl;std::cout << "\x1b[33mThis text will be yellow. \033[0m" << std::endl;std::cout << ANSI_COLOR_RED << ANSI_BG_YELLOW << "Hello, world!" << ANSI_COLOR_RESET << std::endl;std::cout << ANSI_BG_GREEN << ANSI_BG_MAGENTA << "?Hola, mundo!" << ANSI_COLOR_RESET << std::endl;std::cout << ANSI_BG_YELLOW << ANSI_BG_CYAN << "Hallo, welt!" << ANSI_COLOR_RESET << std::endl;std::cout << ANSI_COLOR_BRIGHT_BLUE << "Your future will be bright!" << ANSI_COLOR_RESET << std::endl;std::cout << ANSI_COLOR_BLUE << "Your future will be bright!" << ANSI_COLOR_RESET << std::endl;std::cout << ANSI_COLOR_WHITE << "This is white. " << ANSI_COLOR_RESET << std::endl;std::cout << ANSI_COLOR_BRIGHT_WHITE << "This is bright white. " << ANSI_COLOR_RESET << std::endl;std::cout << ANSI_COLOR_WHITE << ANSI_BG_BRIGHT_BLACK << "BrightBlack. " << ANSI_COLOR_RESET << std::endl;std::cout << ANSI_COLOR_WHITE << ANSI_BG_BLACK << "Black. " << ANSI_COLOR_RESET << std::endl;return 0;
}
outcome
實現效果如下:

ROS_INFO
那么如何使用 ROS_INFO 來輸出彩色字體呢?
// 創建一個字符串流std::stringstream ss;// 向字符串流中添加需要的信息和 ANSI 轉義序列ss << "\x1b[31m\x1b[43m" << "Hello, world!" << "\x1b[0m";// 使用 ROS_INFO 輸出字符串流中的內容ROS_INFO("%s", ss.str().c_str());
以上代碼來自 GPT。但保險起見,在向流中添加信息和轉義序列時,尤其需要反復使用同一字符串流時,最好先執行以下操作:
ss.str("");
Bold & Underline
#define
見名知意,不再贅述。
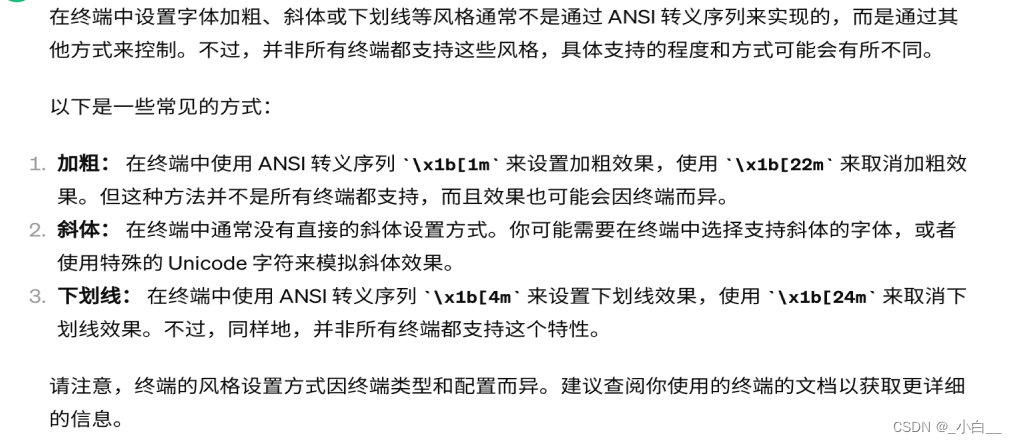
#define ANSI_BOLD_ON        "\x1b[1m"
#define ANSI_BOLD_OFF       "\x1b[22m"#define ANSI_UNDERLINE_ON   "\x1b[4m"
#define ANSI_UNDERLINE_OFF  "\x1b[24m"#define ANSI_COLOR_RESET    "\x1b[0m"
Example
#include <iostream>// ANSI 轉義序列,用于設置字體加粗和取消加粗
#define ANSI_BOLD_ON      "\x1b[1m"
#define ANSI_BOLD_OFF     "\x1b[22m"// ANSI 轉義序列,用于設置下劃線和取消下劃線
#define ANSI_UNDERLINE_ON   "\x1b[4m"
#define ANSI_UNDERLINE_OFF  "\x1b[24m"// ANSI 轉義序列,用于重置終端顏色
#define ANSI_COLOR_RESET    "\x1b[0m"int main() {// 輸出加粗文字std::cout << ANSI_BOLD_ON << "Bold Text" << ANSI_COLOR_RESET << std::endl;// 輸出帶下劃線的文字std::cout << ANSI_UNDERLINE_ON << "Underlined Text" << ANSI_COLOR_RESET << std::endl;return 0;
}
outcome
實現效果如下:

ROS_INFO
同上。
Other styles
#define
見名知意,不再贅述。
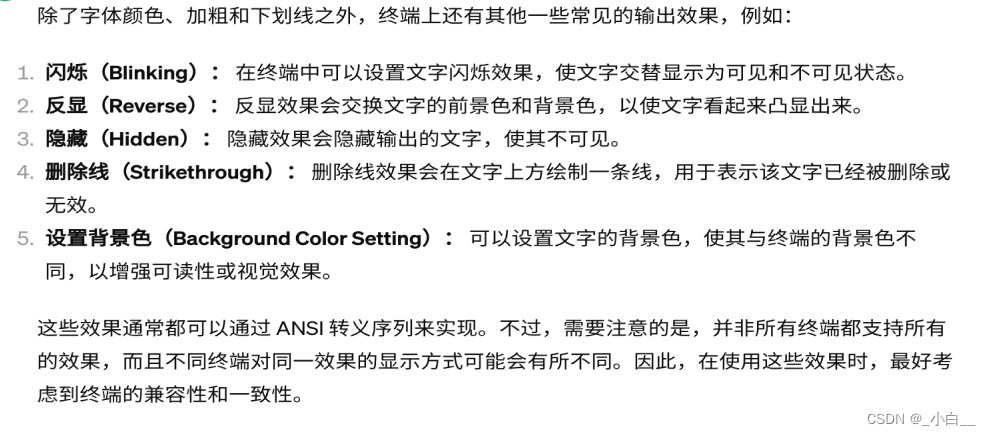
#define ANSI_BLINK_ON       "\x1b[5m"   // 開啟閃爍
#define ANSI_BLINK_OFF      "\x1b[25m"  // 關閉閃爍#define ANSI_REVERSE_ON     "\x1b[7m"   // 開啟反顯
#define ANSI_REVERSE_OFF    "\x1b[27m"  // 關閉反顯#define ANSI_HIDDEN_ON      "\x1b[8m"   // 開啟隱藏
#define ANSI_HIDDEN_OFF     "\x1b[28m"  // 關閉隱藏#define ANSI_STRIKETHROUGH  "\x1b[9m"   // 開啟刪除線
#define ANSI_STRIKETHROUGH  "\x1b[99m"  // 關閉刪除線#define ANSI_RESET          "\x1b[0m"
Example
#include <iostream>// ANSI 轉義序列,用于設置終端效果
#define ANSI_BLINK_ON "\x1b[5m" // 開啟閃爍
#define ANSI_BLINK_OFF "\x1b[25m" // 關閉閃爍
#define ANSI_REVERSE_ON "\x1b[7m" // 開啟反顯
#define ANSI_REVERSE_OFF "\x1b[27m" // 關閉反顯
#define ANSI_HIDDEN_ON "\x1b[8m" // 開啟隱藏
#define ANSI_HIDDEN_OFF "\x1b[28m" // 關閉隱藏
#define ANSI_STRIKETHROUGH "\x1b[9m" // 開啟刪除線// ANSI 轉義序列,用于重置終端效果
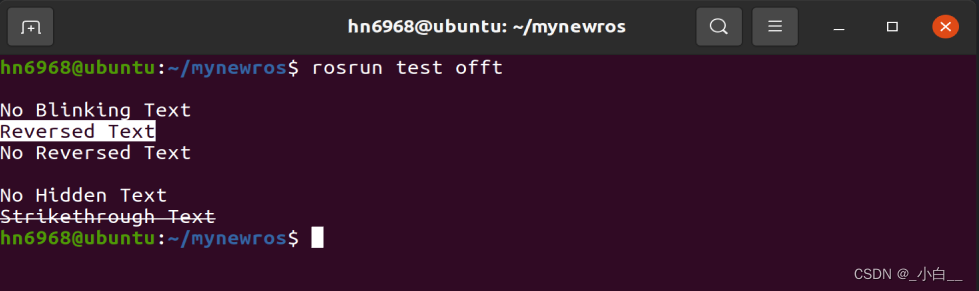
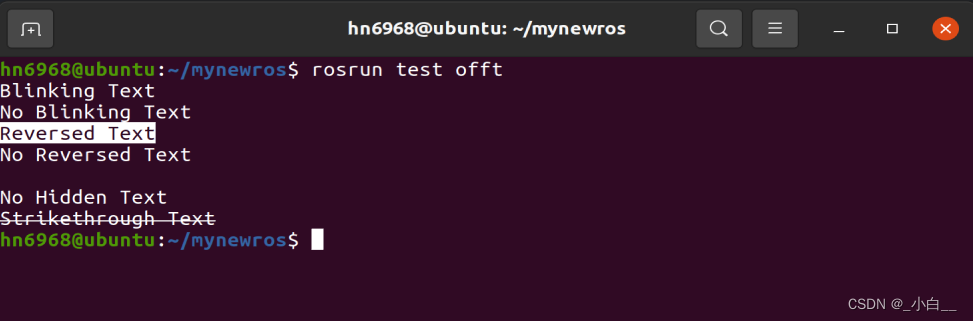
#define ANSI_RESET "\x1b[0m"int main() {// 閃爍效果std::cout << ANSI_BLINK_ON << "Blinking Text" << ANSI_RESET << std::endl;std::cout << ANSI_BLINK_OFF << "No Blinking Text" << ANSI_RESET << std::endl;// 反顯效果std::cout << ANSI_REVERSE_ON << "Reversed Text" << ANSI_RESET << std::endl;std::cout << ANSI_REVERSE_OFF << "No Reversed Text" << ANSI_RESET << std::endl;// 隱藏效果std::cout << ANSI_HIDDEN_ON << "Hidden Text" << ANSI_RESET << std::endl;std::cout << ANSI_HIDDEN_OFF << "No Hidden Text" << ANSI_RESET << std::endl;// 刪除線效果std::cout << ANSI_STRIKETHROUGH << "Strikethrough Text" << ANSI_RESET << std::endl;return 0;
}
outcome
實現效果如下:
ROS_INFO
#include <ros/ros.h>
#include <sstream>// 自定義的打印函數,用于在ROS_INFO中使用特定標記實現效果
void customInfo(const std::string& message) {std::cout << message << std::endl;
}int main(int argc, char** argv) {ros::init(argc, argv, "example_node");ros::NodeHandle nh;// 創建一個字符串流std::stringstream ss;// 向字符串流中添加需要的信息,并使用特定標記來表示效果ss << "[blink]Hello, world![/blink] ";ss << "[reverse]Reversed Text[/reverse] ";ss << "[hidden]Hidden Text[/hidden] ";ss << "[strikethrough]Strikethrough Text[/strikethrough]";// 使用自定義的打印函數打印信息customInfo(ss.str());ros::spin();return 0;
}
Combination
以上(并不互相沖突的)諸多效果可組合使用。略。


)


