今天翻了下墻,解決了一直以來的疑惑問題:
為什么Android5.0以及6.0的recovery版本,機器人動畫怎么就只有一張圖片?
這個問題,我百思不得其解,看了很多網文,也只是有了個概念。
請參考以下文檔,這是我從谷歌Android開源網拉下來的原文:
https://source.android.com/devices/tech/ota/device_code
Recovery UI images
Android 5.x
The recovery user interface consists images. Ideally, users never interact with the UI: During a normal update, the phone boots into recovery, fills the installation progress bar, and boots back into the new system without input from the user. In the event of a system update problem, the only user action that can be taken is to call customer care.
An image-only interface obviates the need for localization. However, as of Android 5.x the update can display a string of text (e.g. "Installing system update...") along with the image. For details, see?Localized recovery text.
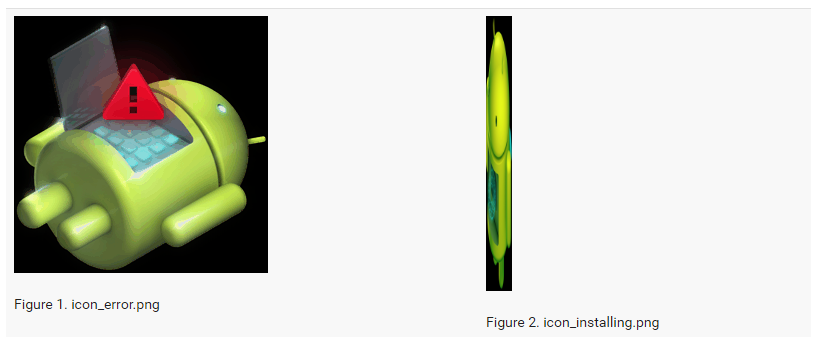
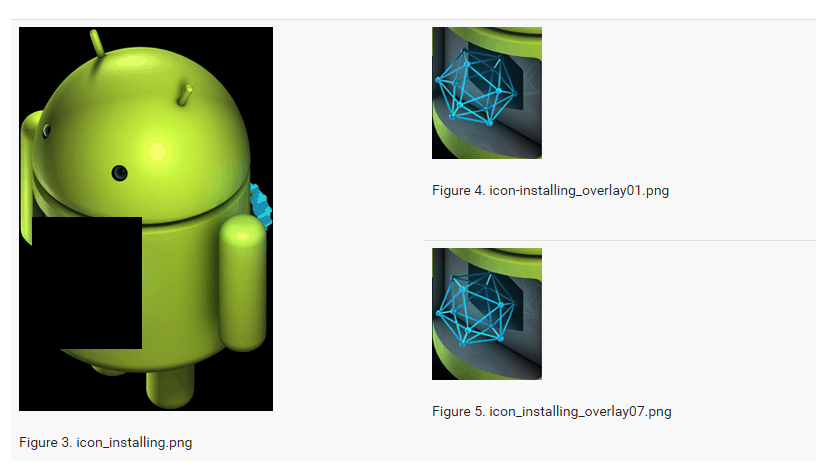
The installing animation is represented as a single PNG image with different frames of the animation interlaced by row (which is why Figure 2 appears squished). For example, for a 200x200 seven-frame animation, create a single 200x1400 image where first frame is rows 0, 7, 14, 21, ...; the second frame is rows 1, 8, 15, 22, ...; etc. The combined image includes a text chunk that indicates the number of animation frames and the number of frames per second (FPS). The toolbootable/recovery/interlace-frames.pytakes a set of input frames and combines them into the necessary composite image used by recovery.
efault images are available in different densities and are located inbootable/recovery/res$DENSITY/images(e.g.,bootable/recovery/res-hdpi/images). To use a static image during installation, you need only provide the icon_installing.png image and set the number of frames in the animation to 0 (the error icon is not animated; it is always a static image).
以上文檔意思就是說,Android5.x以上的版本,機器人的動畫是PNG圖片和幀動畫組成的,我們可以使用recovery目錄下的interlace-frames.py這個python腳本來進行合成,具體的合成方法可以參考這位新浪網友的文章,親身試過,問題已經解決,那么,既然可以這么來合成,我就可以把android原生態的動畫給換了,因為這個機器人實在是丑。
Android 4.x and earlier
The Android 4.x and earlier recovery UI uses the error image (shown above) and the installing animation plus several overlay images:
During installation, the on-screen display is constructed by drawing the icon_installing.png image, then drawing one of the overlay frames on top of it at the proper offset. Here, a red box is superimposed to highlight where the overlay is placed on top of the base image:
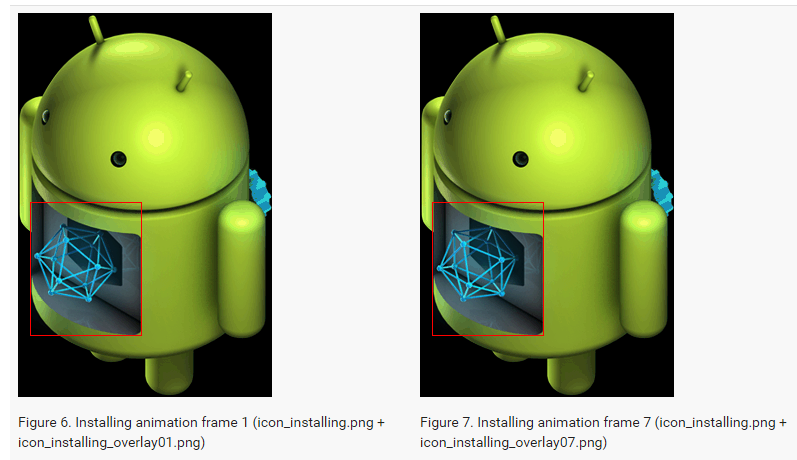
Subsequent frames are displayed by drawing only the next overlay image atop what's already there; the base image is not redrawn.
The number of frames in the animation, desired speed, and x- and y-offsets of the overlay relative to the base are set by member variables of the ScreenRecoveryUI class. When using custom images instead of default images, override the Init() method in your subclass to change these values for your custom images (for details, see ScreenRecoveryUI). The script bootable/recovery/make-overlay.py can assist in converting a set of image frames to the "base image + overlay images" form needed by recovery, including computing of the necessary offsets.
Default images are located in bootable/recovery/res/images. To use a static image during installation, you need only provide the icon_installing.png image and set the number of frames in the animation to 0 (the error icon is not animated; it is always a static image).
上面說了這么多,其實也是把這上面的圖片通過make-overlay.py這個python腳本來對4.x以及早期版本的android recovery的圖片進行合成,中間讓我們看到的轉轉轉那個overlay的效果就是上面這些組圖合成的,合成最終的圖片存放在bootable/recovery/res/images這個路徑下。


中,“:hover”樣式的設置問題?)

)


等方式接入Internet。...)
一種納米硅質絕熱材料及其制備方法...)


