文章目錄
- 0.思路引導
- 1.[最新文章] 模板標簽
- 2.[歸檔] 模板標簽
- 3.[分類] 模板標簽
- 4.[標簽云] 模板標簽
- 5.使用自定義的模板標簽
0.思路引導
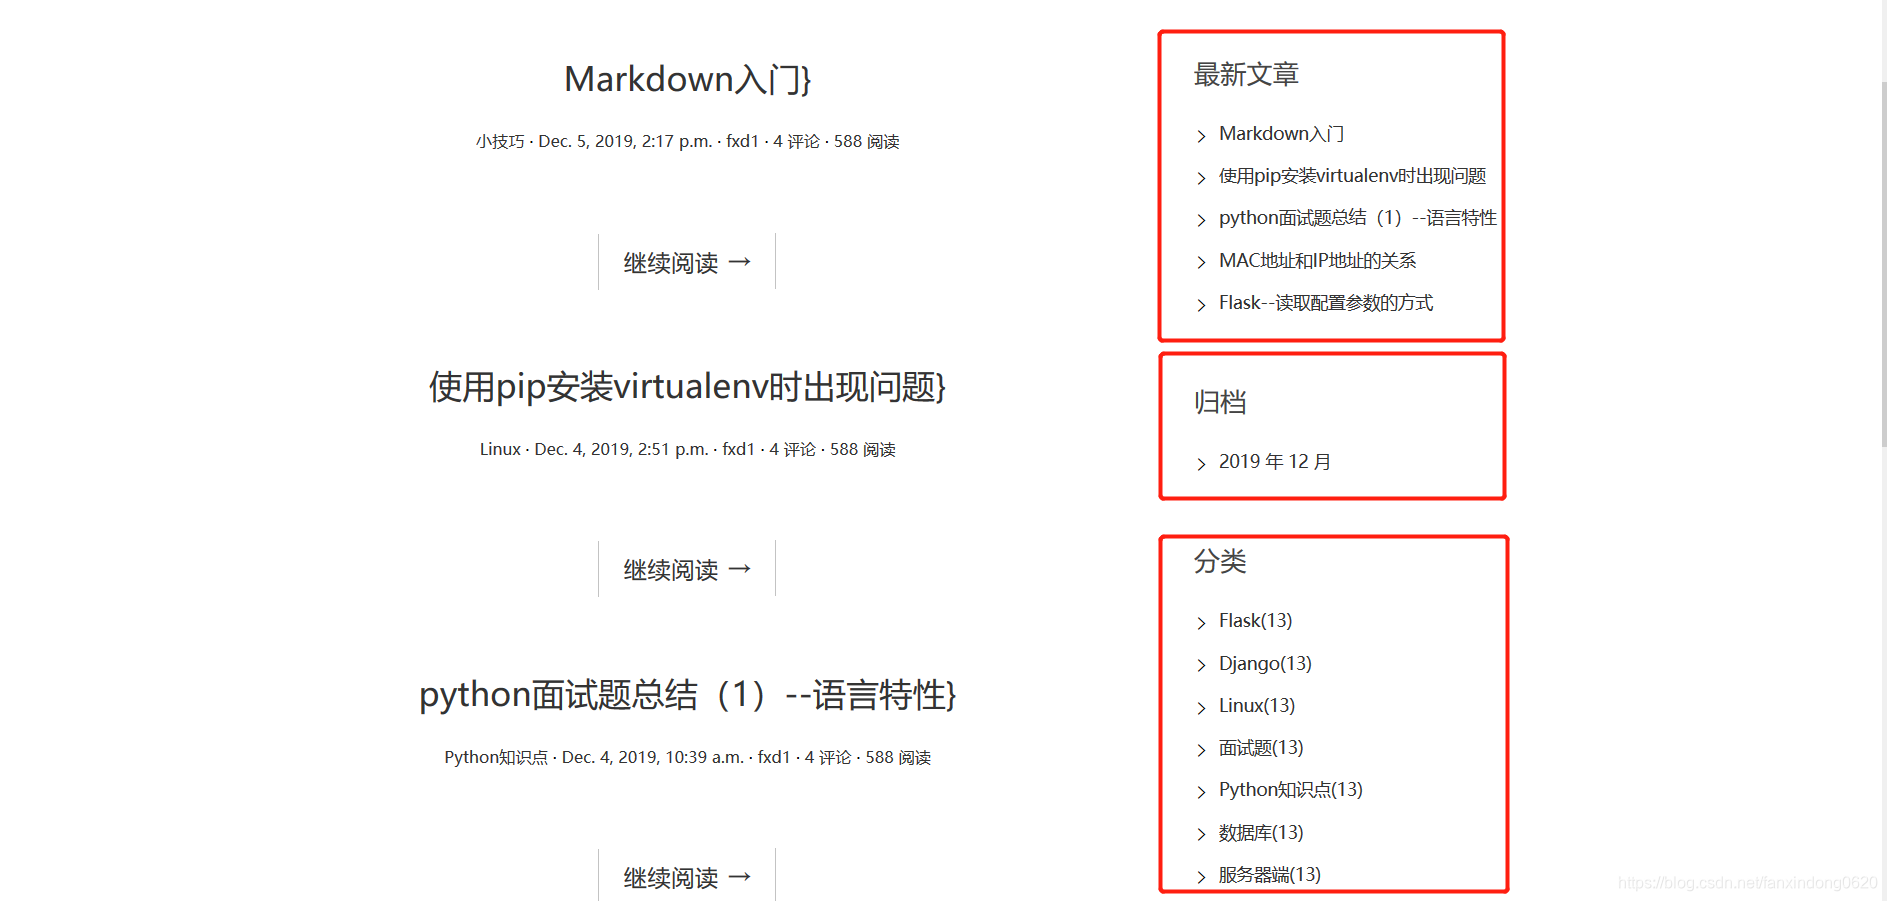
博客側邊欄有四項內容:最新文章、歸檔、分類和標簽云,效果展示如下:
這些內容相對比較固定和獨立,且在各個頁面都會顯示,如果像文章列表或者文章詳情一樣,從視圖函數中獲取這些數據然后傳遞給模板,則每個頁面對應的視圖函數里都要寫一段獲取這些內容的代碼,這會導致很多重復代碼。
更好的解決方案是直接在模板中獲取,為此,我們使用 django 的一個新技術:自定義模板標簽來完成任務。
我們前面已經接觸過一些 django 內置的模板標簽,比如比較簡單的 {% static %} 模板標簽,這個標簽幫助我們在模板中引入靜態文件。還有比較復雜的如 {% for %} {% endfor%} 標簽。
這里我們希望自己定義一個模板標簽,例如名為 show_recent_posts 的模板標簽,它可以這樣工作:我們只要在模板中寫入 {% show_recent_posts %},那么模板中就會渲染一個最新文章列表頁面,這和我們在編寫博客首頁面視圖函數是類似的。
首頁視圖函數中從數據庫獲取文章列表并保存到 post_list 變量,然后把這個 post_list 變量傳給模板,模板使用 for 模板標簽循環這個文章列表變量,從而展示一篇篇文章。
這里唯一的不同是我們從數據庫獲取文章列表的操作不是在視圖函數中進行,而是在模板中通過自定義的 {% show_recent_posts %} 模板標簽進行。
1.[最新文章] 模板標簽
首先在 blog 應用下創建一個 templatetags 文件夾。然后在這個文件夾下創建一個 init.py 文件,使這個文件夾成為一個 Python 包,之后在 templatetags\ 目錄下創建一個 blog_extras.py 文件,這個文件存放自定義的模板標簽代碼。
文件位置:blog/templatetags/blog_extras.py
from django import templatefrom ..models import Post, Category, Tagregister = template.Library()@register.inclusion_tag('blog/inclusions/_recent_posts.html', takes_context=True)
def show_recent_posts(context, num=5):return {'recent_post_list': Post.objects.all().order_by('-created_time')[:num],}
這里我們首先導入 template 這個模塊,然后實例化了一個 template.Library 類,并將函數 show_recent_posts 裝飾為 register.inclusion_tag,這樣就告訴 django,這個函數是我們自定義的一個類型為 inclusion_tag 的模板標簽。
inclusion_tag 模板標簽和視圖函數的功能類似,它返回一個字典值,字典中的值將作為模板變量,傳入由 inclusion_tag 裝飾器第一個參數指定的模板blog/inclusions/_recent_posts.html。
當我們在模板中(base.html)通過 {% show_recent_posts %}使用自己定義的模板標簽時,django 會將指定模板的內容使用模板標簽 {% show_recent_posts %}返回的模板變量渲染后替換。
接下來就是定義模板 _recent_posts.html 的內容。在 templates\blogs 目錄下創建一個 inclusions 文件夾,然后創建一個 _recent_posts.html 文件,內容如下:
文件位置:templates\blogs\inclusions _recent_posts.html
<div class="widget widget-recent-posts"><h3 class="widget-title">最新文章</h3><ul>{% for post in recent_post_list %}<li><a href="{{ post.get_absolute_url }}">{{ post.title }}</a></li>{% empty %}暫無文章!{% endfor %}</ul>
</div>
循環由{% show_recent_posts %}傳遞的模板變量 recent_post_list 即可,和 index.html 中循環顯示文章列表是一樣的。
2.[歸檔] 模板標簽
和上一部分類似,接下來對其余部分代碼進行補充。
文件位置:blog/templatetags/blog_extras.py
@register.inclusion_tag('blog/inclusions/_archives.html', takes_context=True)
def show_archives(context):return {'date_list': Post.objects.dates('created_time', 'month', order='DESC'),}
文件位置:templates\blogs\inclusions _archives.html
<div class="widget widget-archives"><h3 class="widget-title">歸檔</h3><ul>{% for date in date_list %}<li><a href="#">{{ date.year }} 年 {{ date.month }} 月</a></li>{% empty %}暫無歸檔!{% endfor %}</ul>
</div>
3.[分類] 模板標簽
文件位置:blog/templatetags/blog_extras.py
@register.inclusion_tag('blog/inclusions/_categories.html', takes_context=True)
def show_categories(context):return {'category_list': Category.objects.all(),}
文件位置:templates\blogs\inclusions _categories.html
<div class="widget widget-category"><h3 class="widget-title">分類</h3><ul>{% for category in category_list %}<li><a href="#">{{ category.name }} <span class="post-count">(13)</span></a></li>{% empty %}暫無分類!{% endfor %}</ul>
</div>
4.[標簽云] 模板標簽
文件位置:blog/templatetags/blog_extras.py
@register.inclusion_tag('blog/inclusions/_tags.html', takes_context=True)
def show_tags(context):return {'tag_list': Tag.objects.all(),}
文件位置:templates\blogs\inclusions _tags.html
<div class="widget widget-tag-cloud"><h3 class="widget-title">標簽云</h3><ul>{% for tag in tag_list %}<li><a href="#">{{ tag.name }}</a></li>{% empty %}暫無標簽!{% endfor %}</ul>
</div>
5.使用自定義的模板標簽
打開 base.html,為了使用剛才定義的模板標簽,我們首先需要在模板中導入存放這些模板標簽的模塊,這里是 blog_extras.py 模塊。當時我們為了使用 static 模板標簽時曾經導入過 {% load static %},這次在 {% load static %} 下再導入 blog_extras:
文件位置:templates/base.html
{% load static %}
{% load blog_extras %}
<!DOCTYPE html>
<html>
...
</html>
然后找到側邊欄各項,將他們都替換成對應的模板標簽:
文件位置:templates/base.html
<aside class="col-md-4">{% block toc %}{% endblock toc %}{% show_recent_posts %}{% show_archives %}{% show_categories %}{% show_tags %}<div class="rss"><a href=""><span class="ion-social-rss-outline"></span> RSS 訂閱</a></div>
</aside>
此前側邊欄中各個功能塊都替換成了模板標簽,其實實際內容還是一樣的,只是我們將其挪到了模塊化的模板中,并有這些自定義的模板標簽負責渲染這些內容。
此外我們定義的 show_recent_posts 標簽可以接收參數,默認為 5,即顯示 5 篇文章,如果要控制其顯示 10 篇文章,可以使用 {% show_recent_posts 10 %} 這種方式傳入參數。
現在運行開發服務器,可以看到側邊欄顯示的數據已經不再是之前的占位數據,而是我們保存在數據庫中的數據了。


表達式)


的使用)

)
)


