實現隨機多個三角形隨機位置隨機顏色展示效果
這是一個非常簡單基礎的threejs的學習應用!本節主要學習的是球面緩沖幾何體在環境光合直線光源下的效果,可以學習到環境光和直線光源的生成效果等功能!主要使用的是球緩沖幾何體對象SphereGeometry,直線光源對象DirectionalLight,環境光對象AmbientLight!
實現效果
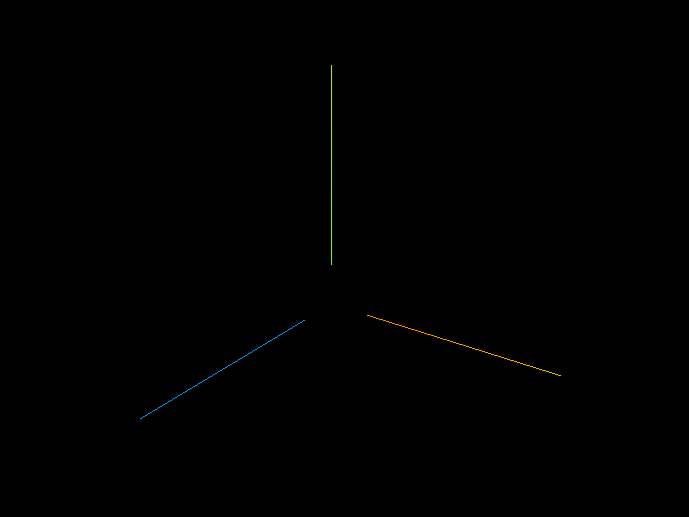
沒有光源的效果如下:
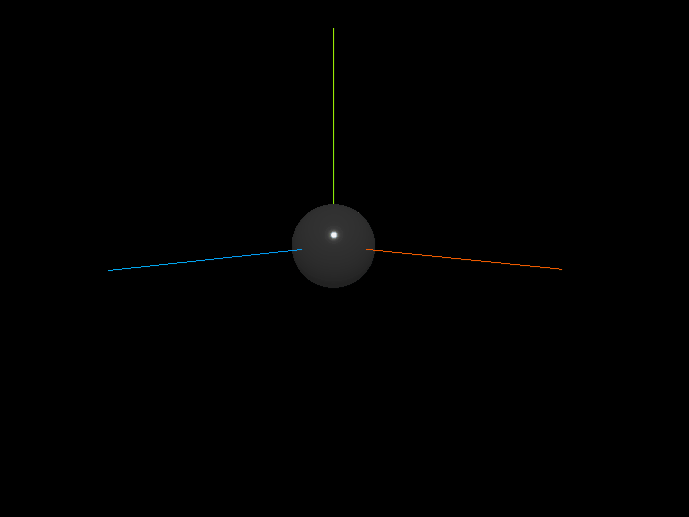
只有直線光源的效果如下:
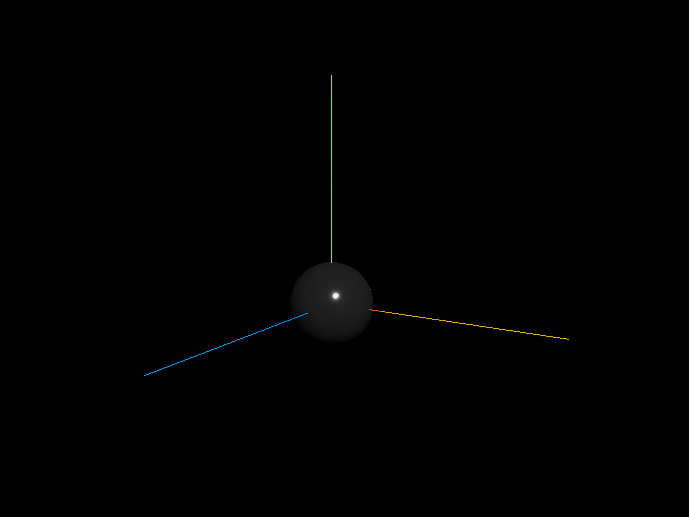
只有環境光源的效果如下:

直線光源和環境光源配合效果如下:

準備工作
使用vue創建項目,然后實現以上功能需要安裝一些插件:threejs
yarn add three
在index.html中引入main.js
<script src="./main/main.js" type="module"></script>
然后我們編寫的Threejs代碼都在main.js中編寫!
設計效果
引入OrbitControls鼠標控制插件
import * as THREE from 'three'
import { OrbitControls } from 'three/examples/jsm/controls/OrbitControls';
創建一個場景
//創建一個場景
const scene = new THREE.Scene();
創建一個透視相機
/*** 創建一個相機(透視相機)* fov — 攝像機視錐體垂直視野角度aspect — 攝像機視錐體長寬比near — 攝像機視錐體近端面far — 攝像機視錐體遠端面*/
const camera = new THREE.PerspectiveCamera(90,window.innerWidth/window.innerHeight,1,1000);
設置相機對象位置以及將相機加入場景中
//設置相機對象 x y z
camera.position.set(0,0,10);
//相機加入場景中
scene.add(camera);
接下來我們循環創建球緩沖幾何體對象,并設置球緩沖幾何體的材質,這里我們主要設置材質的金屬材質metalness以及光滑程度roughness,然后根據球緩沖幾何體以及材質創建一個網格物體,最后將物體添加到場景中。
//球緩沖幾何體
const sphereGeometry = new THREE.SphereGeometry(1,30,30);
const material = new THREE.MeshStandardMaterial({metalness:0.9,  // 金屬材質 1 黑roughness:0.1   //光滑
});
//新建物體
const sphere = new THREE.Mesh(sphereGeometry,material);
//將綁定的物體添加到場景中
scene.add(sphere);設置three渲染器并初始化渲染器大小并把渲染器添加到場景中!
//初始化渲染器
const render = new THREE.WebGLRenderer();
//設置渲染尺寸大小
render.setSize(window.innerWidth,window.innerHeight);//將webgl渲染的canvas內容添加到body
document.body.appendChild(render.domElement)
最后我們添加坐標軸輔助器,并加入場景中!以及我們的控制器可以使得鼠標能夠轉動場景內容!
//創建坐標軸輔助器
const axes = new THREE.AxesHelper(5);
scene.add(axes);//添加控制器
const control = new OrbitControls(camera,render.domElement)
control.update();//設置時鐘
render.render(scene,camera);
function animate(){requestAnimationFrame(animate)//使用渲染器  通過相機將場景渲染render.render(scene,camera);
}
animate()
以上就在頁面可以看到一個黑色的球了!
下面我們添加環境光,這里使用AmbientLight對象創建一個白光以及光照強度為0.5的環境光!
//環境光  二個參數   光顏色以及光照強度
const light = new THREE.AmbientLight(0xffffff,0.5);
//環境光添加到場景中
scene.add(light);
這樣就有了環境光的效果了:

接下來我們把環境光去掉,加入直線光源試試!我們使用DirectionalLight對象設置直線光源,并設置直線光源的位置為(10,10,10)的位置:
//創建直線光源
const directionalLight = new THREE.DirectionalLight(0xffffff,0.5);
//設置直線光源的位置
directionalLight.position.set(10,10,10);
//添加到場景中
scene.add(directionalLight);
效果:
接下來我們把環境光和直線光都加上就能顯著的看到效果了!
小demo完成!!有點小意思!!
完整代碼如下:
import * as THREE from 'three'
import { OrbitControls } from 'three/examples/jsm/controls/OrbitControls';
//加載
import { RGBELoader } from 'three/examples/jsm/loaders/RGBELoader'//了解thres最基本用法
const camera = new THREE.PerspectiveCamera(90,window.innerWidth/window.innerHeight,1,1000);//1.創建一個場景
const  scene = new THREE.Scene();//設置相機對象 x y z
camera.position.set(0,0,10);
//相機加入場景中
scene.add(camera);
//球緩沖幾何體
const sphereGeometry = new THREE.SphereGeometry(1,30,30);
const material = new THREE.MeshStandardMaterial({metalness:0.9,  // 金屬材質 1 黑roughness:0.1   //光滑
});
//新建物體
const sphere = new THREE.Mesh(sphereGeometry,material);
//將綁定的物體添加到場景中
scene.add(sphere);//初始化渲染器
const render = new THREE.WebGLRenderer();
//設置渲染尺寸大小
render.setSize(window.innerWidth,window.innerHeight);//將webgl渲染的canvas內容添加到body
document.body.appendChild(render.domElement)//創建坐標軸輔助器
const axes = new THREE.AxesHelper(5);
scene.add(axes);//添加控制器
const control = new OrbitControls(camera,render.domElement)
control.update();//設置時鐘
render.render(scene,camera);
function animate(){requestAnimationFrame(animate)//使用渲染器  通過相機將場景渲染render.render(scene,camera);
}
animate()//環境光
const light = new THREE.AmbientLight(0xffffff,0.5);
scene.add(light);
//直線光源
const directionalLight = new THREE.DirectionalLight(0xffffff,0.5);
directionalLight.position.set(10,10,10);
scene.add(directionalLight);
目前還在學習threejs,有寫錯誤的地方請指出!!現在只是一個菜鳥,不喜勿噴!!


)

![[leetcode] 707 設計鏈表](http://pic.xiahunao.cn/[leetcode] 707 設計鏈表)


)

