plotly django
Hello everyone! Recently I had to do some visualizations for my university project, I’ve done some googling and haven’t found any simple guides on how to put Plotly plots on an HTML page.
大家好! 最近,我不得不為我的大學項目做一些可視化處理,做了一些谷歌搜索,還沒有找到任何有關如何在HTML頁面上放置Plotly圖的簡單指南。
Before we start I assume that you have running the Django HTML page. Why Plotly? Plotly allows you to make interactive, beautifully designed plots in a matter of minutes. Despite that originally Plotly is a Python library, we won’t use any Python programming today.
在開始之前,我假設您已經運行了Django HTML頁面。 為什么情節? 通過Plotly,您可以在幾分鐘內完成交互式 ,設計精美的繪圖。 盡管Plotly最初是一個Python庫,但今天我們不會使用任何Python編程。
對于那些沒有太多時間的人,這里是簡短指南: (For those who don’t have much time, here is the short guide:)
Go to Plotly Chart Studio, create your account.
轉到Plotly Chart Studio ,創建您的帳戶。
- Click on the “Create” button and choose “Chart”. 單擊“創建”按鈕,然后選擇“圖表”。
- Import your data and click on the “Trace” button. 導入數據,然后單擊“跟蹤”按鈕。
- Choose the type of plot you want. 選擇所需的繪圖類型。
- Once you made your dream-plot, save it, setting all the settings to “Public”. 完成夢境圖后,將其保存,將所有設置都設置為“公共”。
- Share your plot, by copying iframe code from the “Embed” tab and past it to the body of your HTML page. 通過從“嵌入”標簽復制iframe代碼并將其粘貼到HTML頁面的正文中,共享繪圖。
Now for those who have time, let’s see in detail how we can get the same result, as you saw at the beginning.
現在,對于那些有時間的人,讓我們詳細了解如何獲得與您一開始看到的結果相同的結果。
步驟1.創建一個帳戶并上傳數據。 (Step 1. Creating an account and uploading the data.)

We will use Plotly Chart Studio. Once you’ve signed up, you’ll see “Create” in the upper-right corner.
我們將使用Plotly Chart Studio 。 注冊后,您會在右上角看到“創建”。
To create our visualizations we have to import our data first. The data can be either CSV, single-sheet Excel file, link to a CSV file or the data got using SQL and Falcon SQL client.
要創建可視化,我們必須首先導入數據。 數據可以是CSV,單頁Excel文件,鏈接到CSV文件或使用SQL和Falcon SQL客戶端獲取的數據。
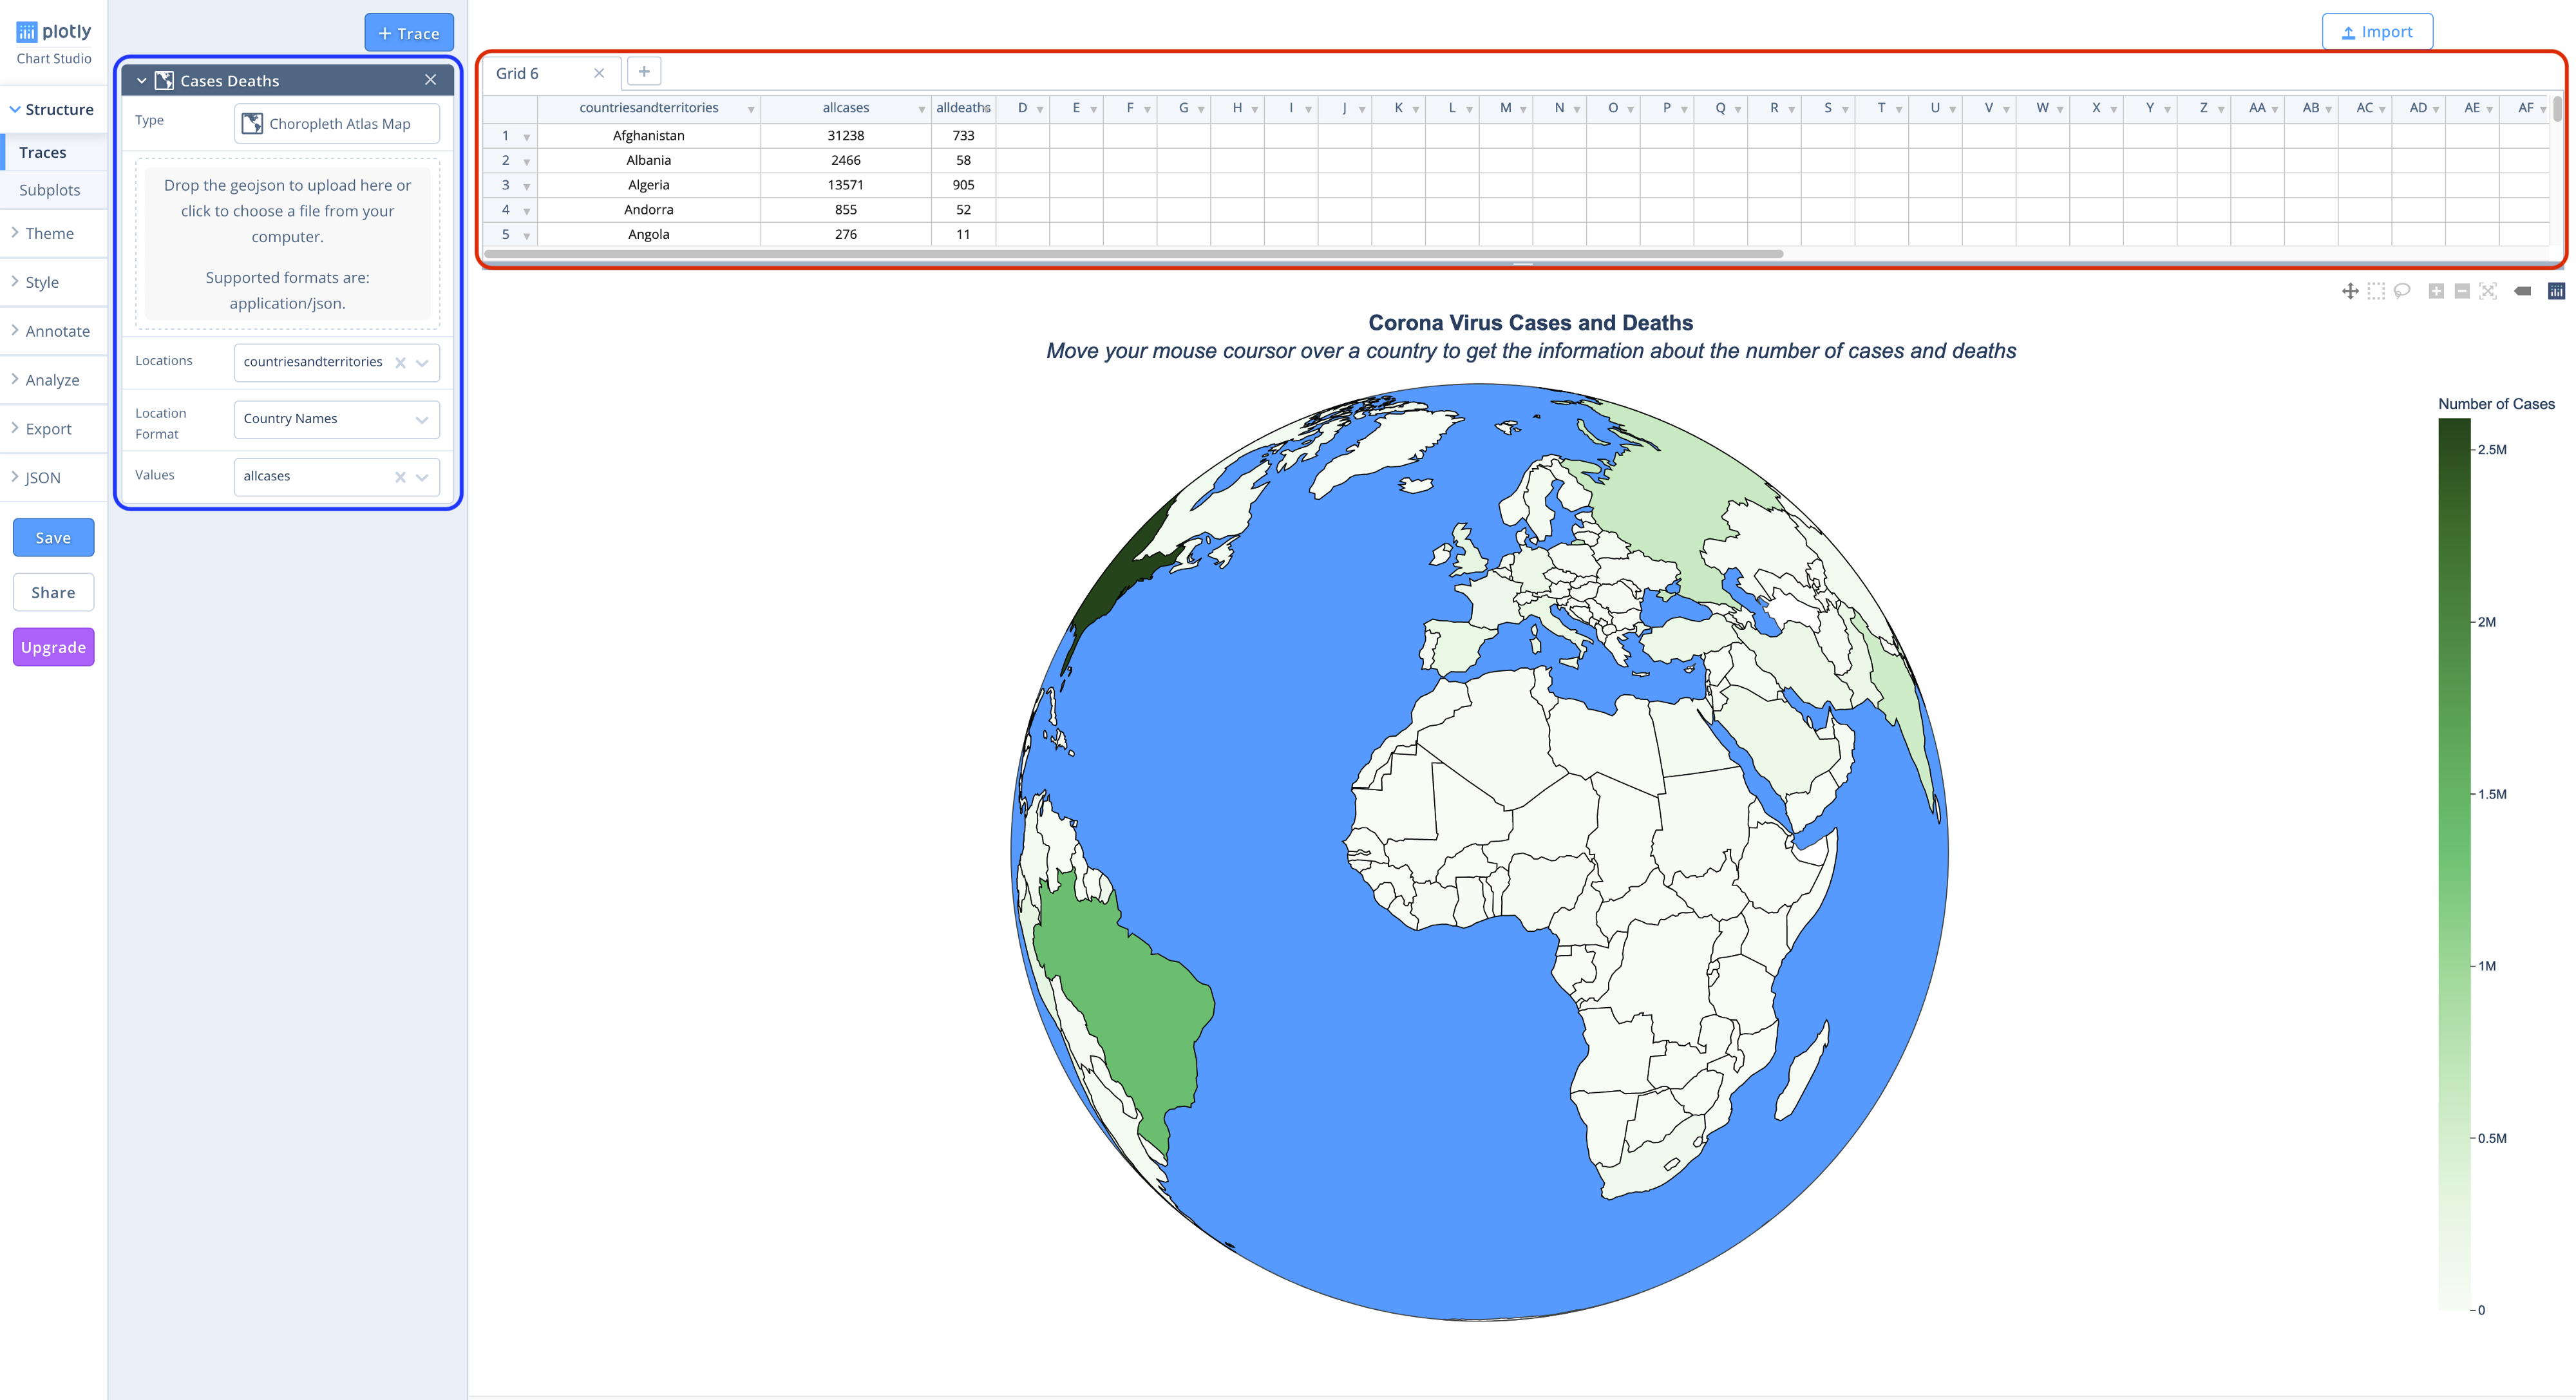
Once you uploaded your data, you’ll see it in the table (red square) on the top of your screen.
上傳數據后,您會在屏幕頂部的表格(紅色正方形)中看到該數據。
步驟2.選擇圖的類型并跟蹤數據。 (Step 2. Choosing the type of plot and tracing the data.)
Now let’s look at the blue square on the picture and trace some data.
現在,讓我們看一下圖片上的藍色方塊并跟蹤一些數據。
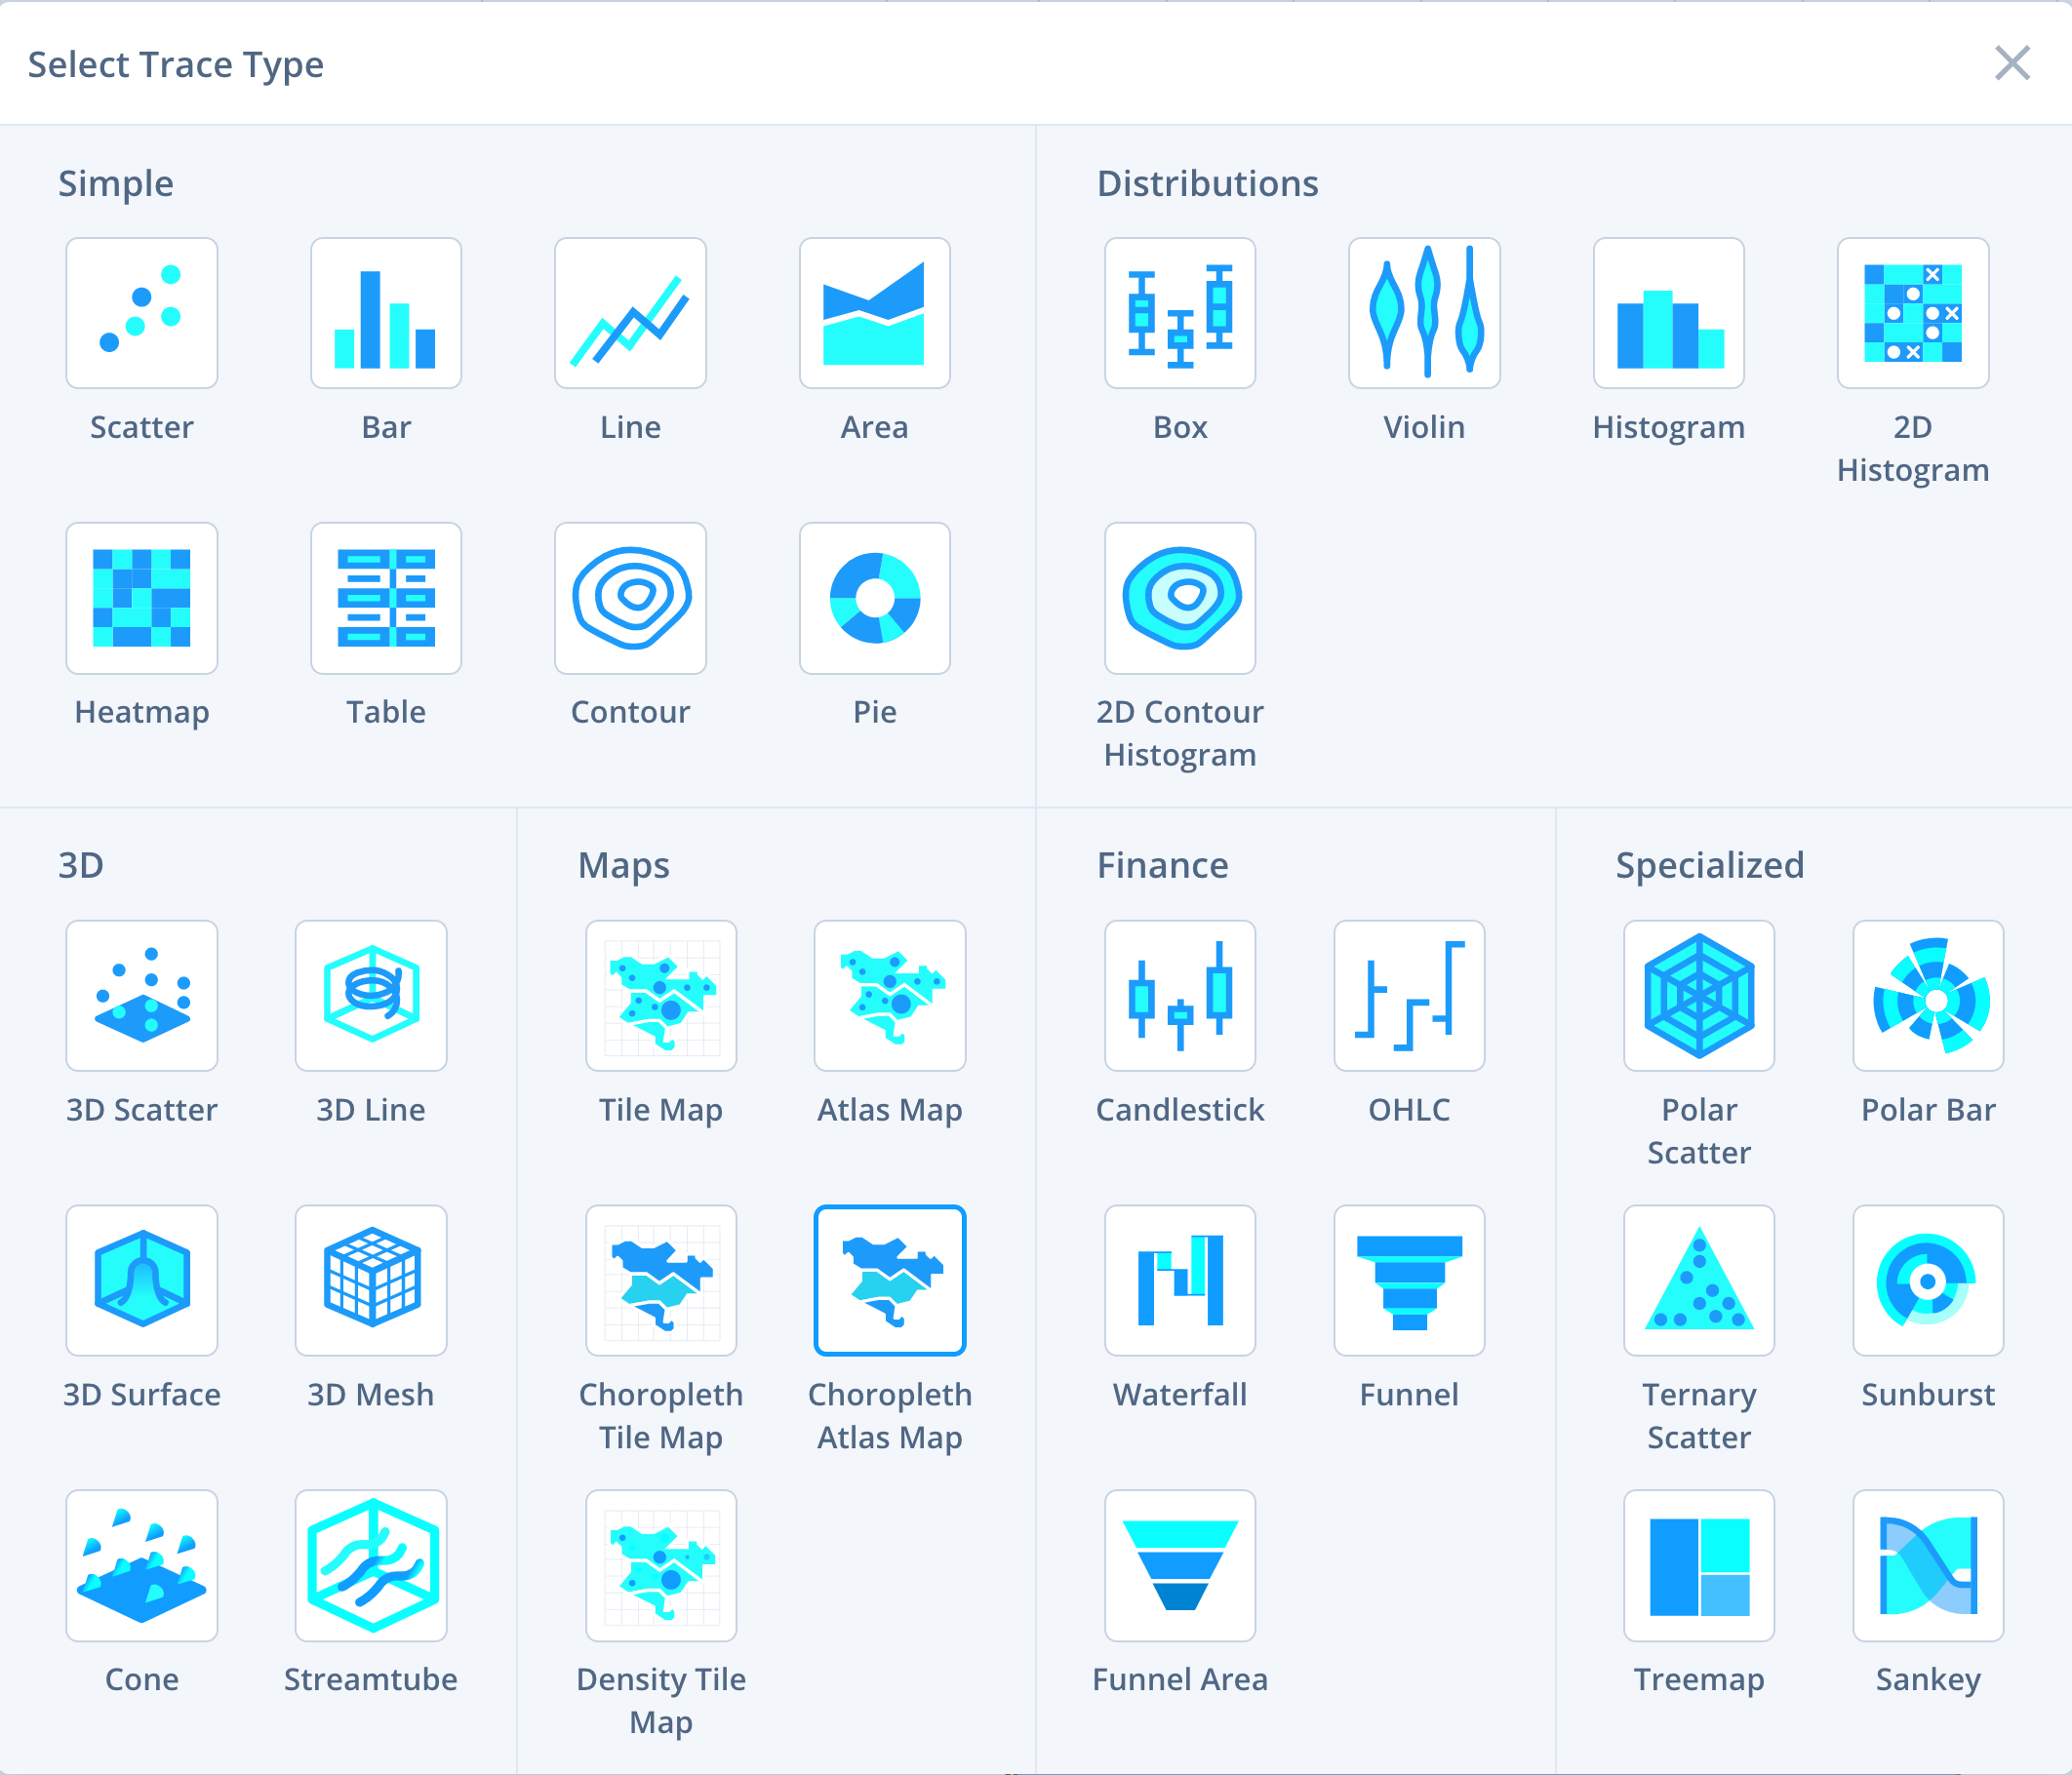
You can choose between different types of plots. Here I chose the Choropleth Atlas Map since it allows me to get this nice Earth visualization.
您可以在不同類型的圖之間進行選擇。 在這里,我選擇了Choropleth Atlas地圖,因為它可以使我獲得很好的地球可視化效果。
步驟3.指定位置和值。 (Step 3. Specifying location and values.)
Then you have to specify columns that will be used as locations and values. You also have to choose the location format, since it can be countries’ names or abbreviations and so on.
然后,您必須指定將用作位置和值的列。 您還必須選擇位置格式,因為它可以是國家或地區的名稱或縮寫等。
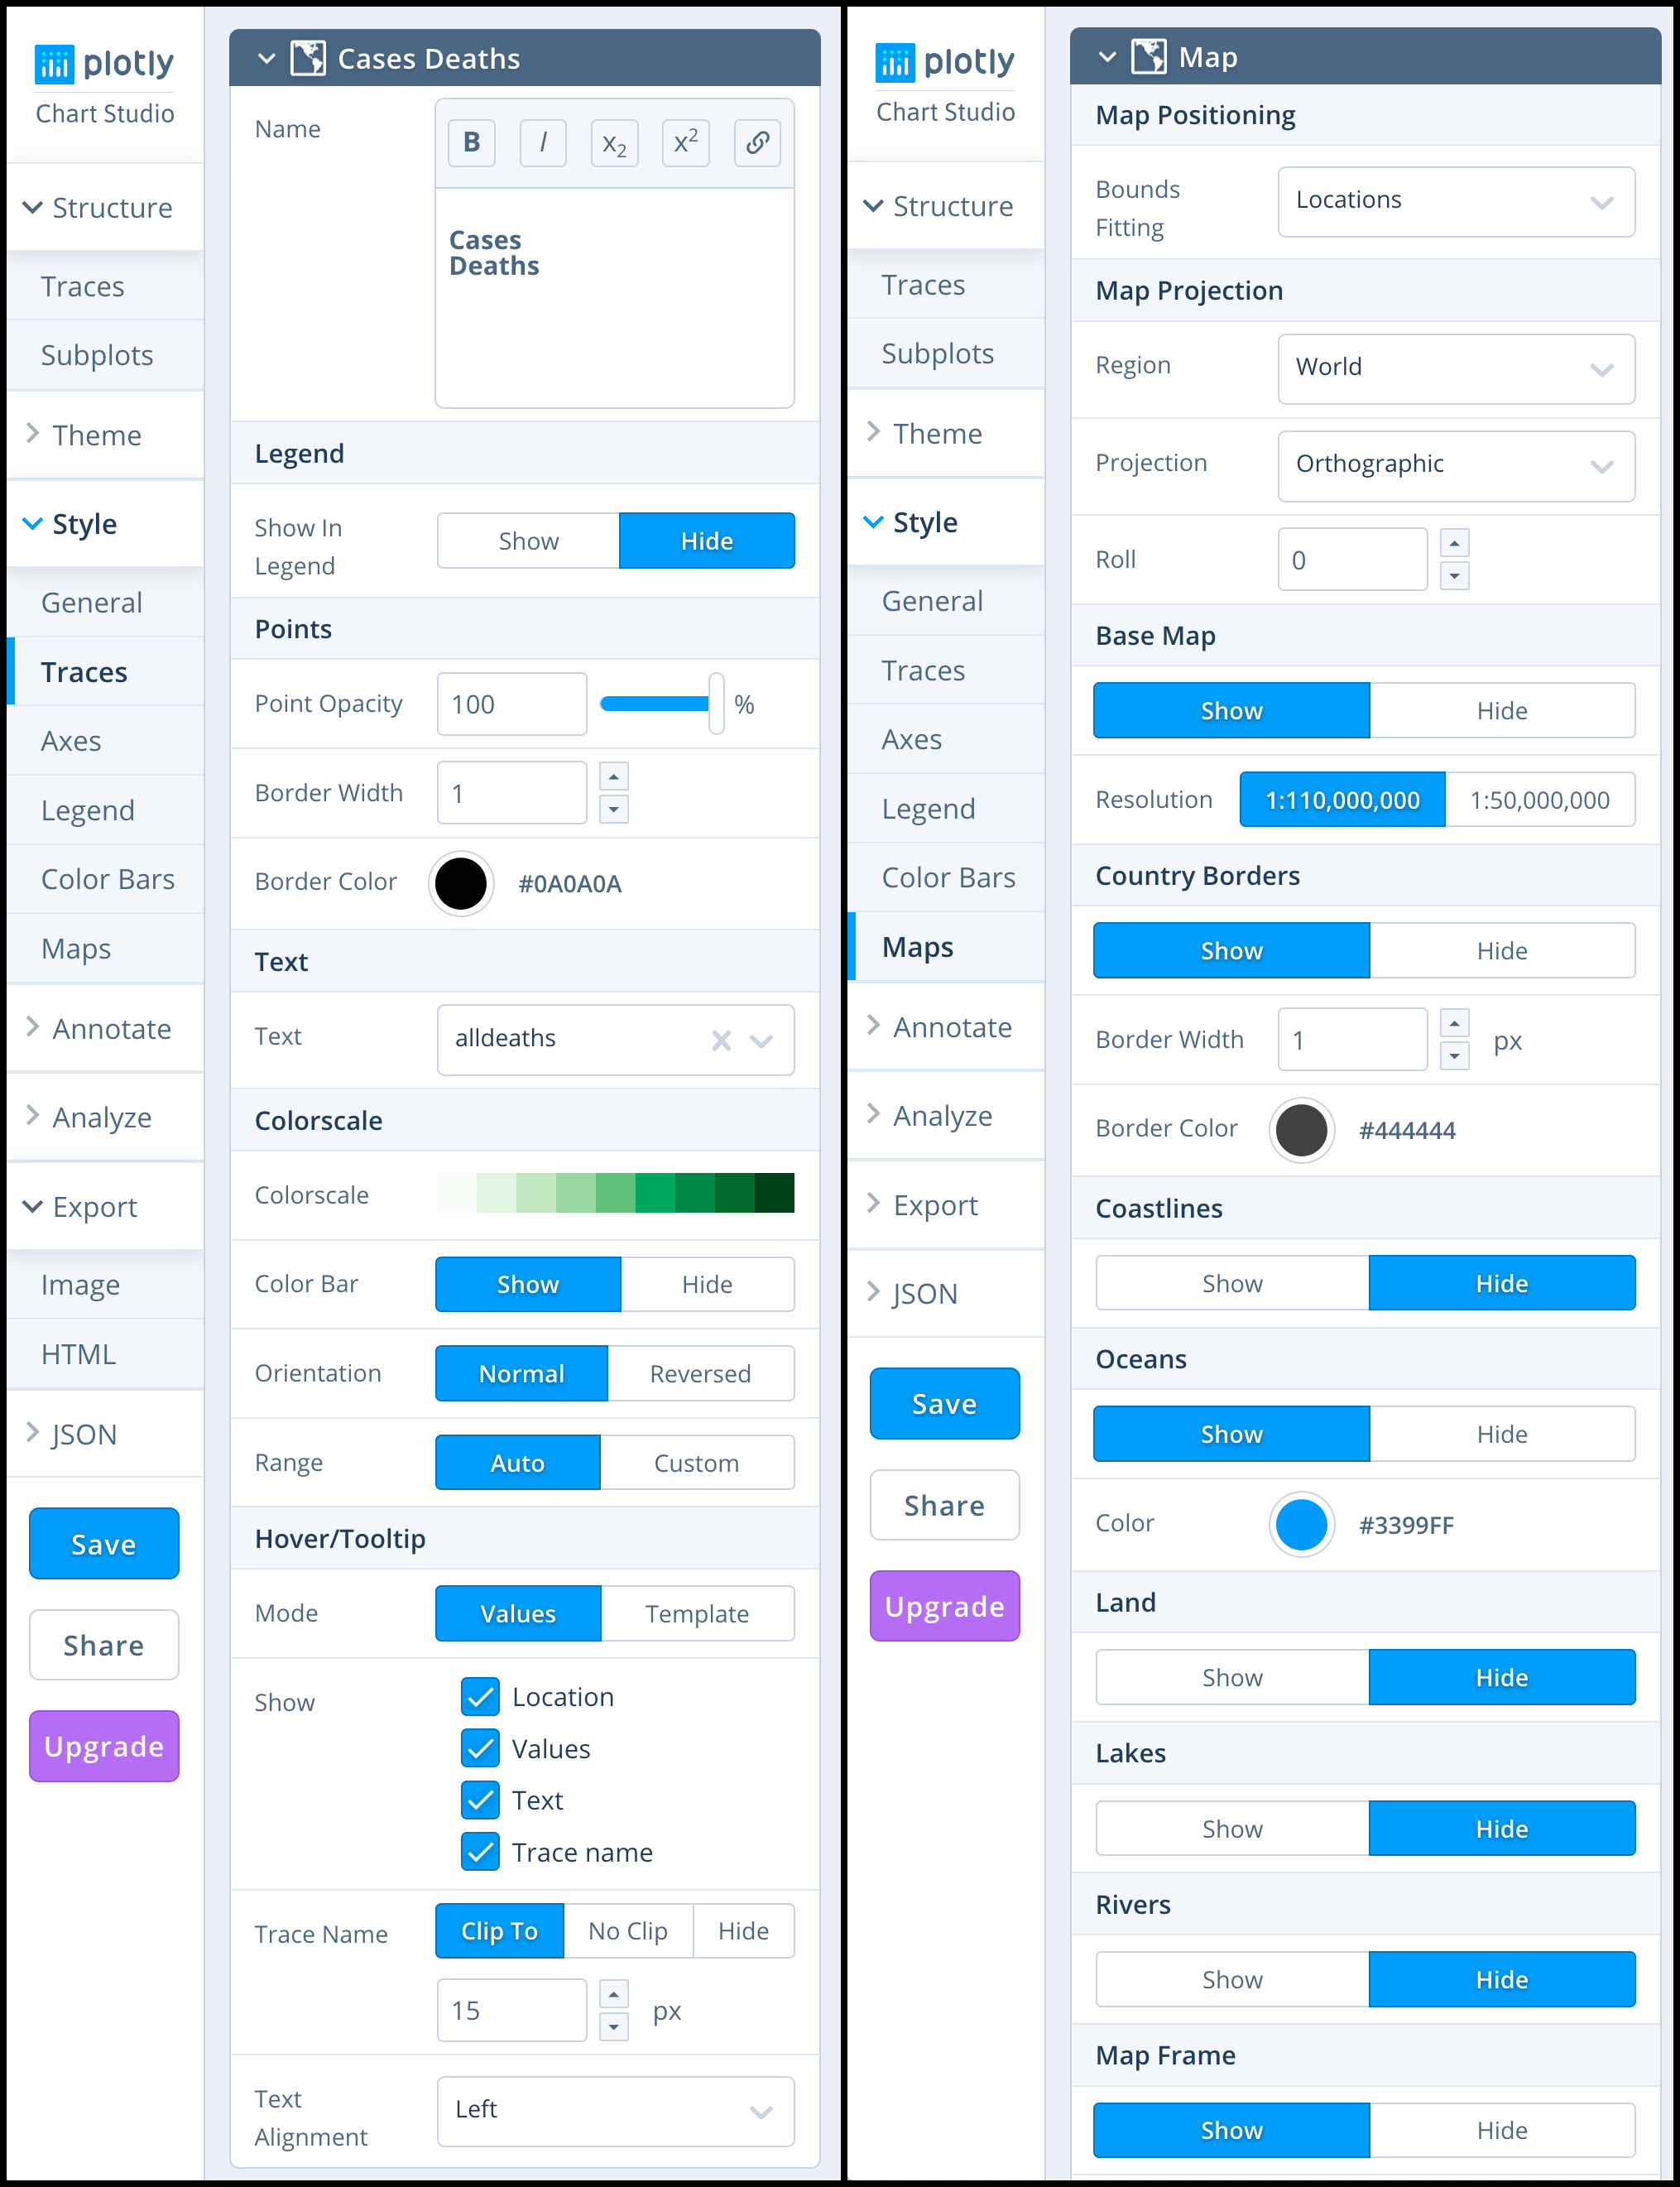
Here you can see all my settings, which you can use to get the same result as mine.
在這里,您可以看到我的所有設置,可以用來獲得與我相同的結果。
步驟4.保存和共享圖。 (Step 4. Saving and sharing the plot.)
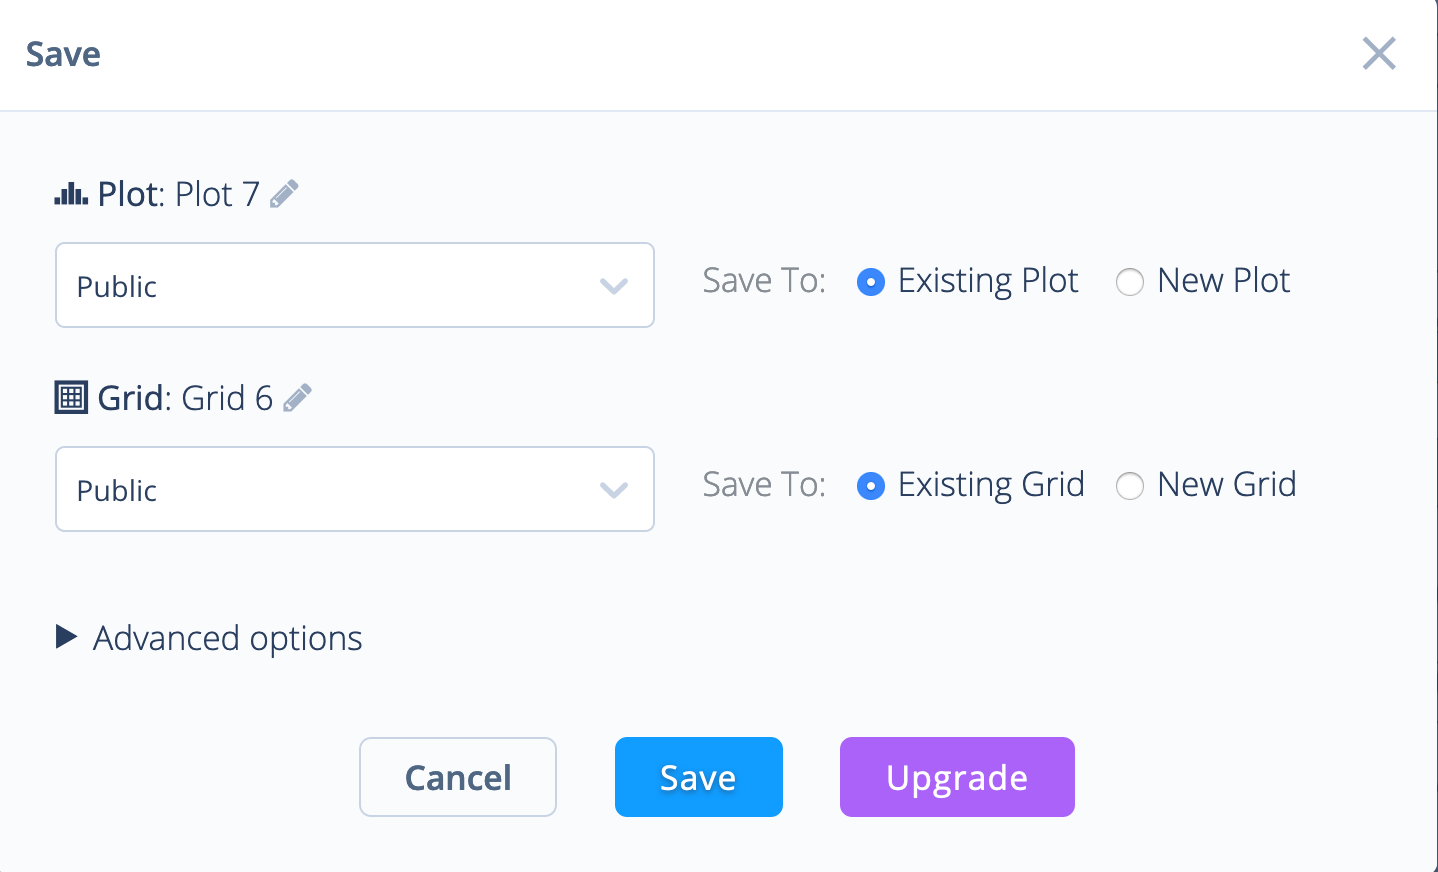
We are almost there! Click the “Save” button and choose “Public” for Plot and Grid.
我們就快到了! 單擊“保存”按鈕,然后為“圖和網格”選擇“公共”。
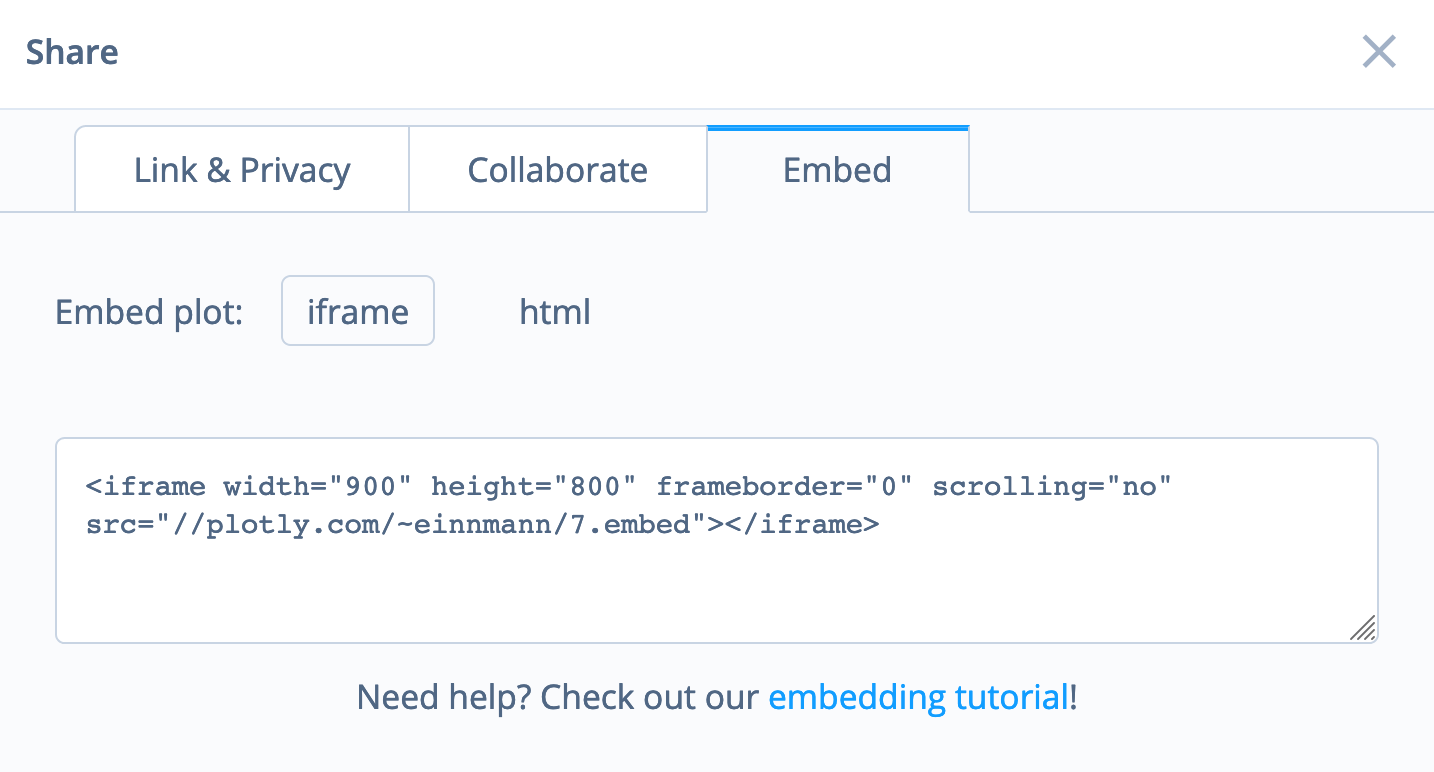
Finally, you click the “Share” button, choose “Embed” and copy iframe HTML code, which you can pass in the body of your HTML page.
最后,您點擊“共享”按鈕,選擇“嵌入”并復制iframe HTML代碼,您可以將其傳遞到HTML頁面的正文中。
Thank you for reading!
感謝您的閱讀!
翻譯自: https://towardsdatascience.com/making-beautiful-visualizations-for-a-django-html-page-using-plotly-f4e97d3f6bc7
plotly django
本文來自互聯網用戶投稿,該文觀點僅代表作者本人,不代表本站立場。本站僅提供信息存儲空間服務,不擁有所有權,不承擔相關法律責任。 如若轉載,請注明出處:http://www.pswp.cn/news/389106.shtml 繁體地址,請注明出處:http://hk.pswp.cn/news/389106.shtml 英文地址,請注明出處:http://en.pswp.cn/news/389106.shtml
如若內容造成侵權/違法違規/事實不符,請聯系多彩編程網進行投訴反饋email:809451989@qq.com,一經查實,立即刪除!相關文章

roce和iwarp_VIA、IB、RDMA、RoCE、iWARP、DPDK的發展與糾纏?


handler 消息處理機制


軟件工程方法學要素含義_日期時間數據的要素工程
)
洛谷P1605:迷宮(DFS)

vue圖片壓縮不失真_圖片壓縮會失真?快試試這幾個無損壓縮神器。

remoteing2

android 線程池

datatable轉化泛型
...)
【躍遷之路】【651天】程序員高效學習方法論探索系列(實驗階段408-2018.11.24)...

更換mysql_Docker搭建MySQL主從復制

dll文件的c++制作dll文件的c++制作

理解ConstraintLayout 對性能的好處

數據湖 data lake_在Data Lake中高效更新TB級數據的模式


advanced installer更換程序id_好程序員web前端培訓分享kbone高級-事件系統

ai對話機器人實現方案_顯然地引入了AI —無代碼機器學習解決方案

