從今天開始,我們開始正式的學習osg框架,今天我們學習的是osg的渲染模塊,我們來看一下代碼結構。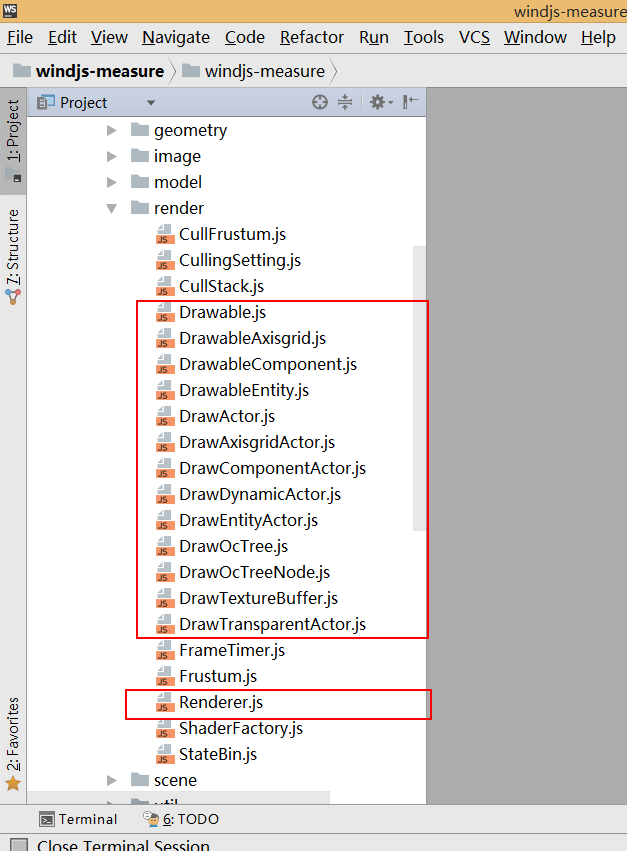
所有DrawXXX的js模塊都是渲染的模塊,我們逐一來簡單介紹一下,第一個Drawable.js,這個模塊是描述可繪制對象的類,也是我們今天要討論的類。在osg框架中,渲染管道在準備時期首先要統計管理可繪制對象,我們來看看Drawable模塊到底做了什么操作,進行了哪些管理。先貼出代碼。
/*
可繪制對象*/
let StateBin = require('./StateBin');
let BoundingBox = require('../util/BoundingBox');
let BoundingSphere = require('../util/BoundingSphere');
let Vec3 = require('../util/Vec3');let Drawable = function (actor) {this._drawActor = actor;//關聯的DrawActorthis._geometry = undefined;//渲染的幾何Geometrythis._transform = undefined;//世界變換 FloatArray(16)this._statebin = undefined;//狀態結點,原始的狀態,沒有額外功能時的狀態this._curStatebin = undefined;//如果狀態會動態變化,這里存儲每一幀繪制時的狀態結點this._depth = 0.0;//場景深度值,透明需要按深度排序繪制this._boundingBox = undefined;//包圍盒this._boundingSphere = undefined;//包圍球
};
Drawable.prototype = {setGeometry: function (g, transform) {this._geometry = g;this._transform = transform;},getGeometry: function () {return this._geometry;},getTransform: function () {return this._transform;},setStateBin: function (sb) {this._statebin = sb;},getStateBin: function () {return this._statebin;},getCurrentStateBin: function () {return this._curStatebin;},// setDepth: function (d) {//     this._depth = d;// },getDepth: function () {return this._depth;},reset: function () {this._geometry = undefined;this._transform = undefined;this._statebin = undefined;this._curStatebin = undefined;this._depth = 0.0;this._boundingBox = undefined;this._boundingSphere = undefined;},valid: function () {if (this._drawActor.getBaseCamera().isBoundingBoxCulled(this.getBoundingBox())) {return false;}return true;},isTransparent: function () {return false;},//計算深度值computeDepth: function () {//根據包圍盒和相機變換矩陣,確認中心點的Z值let mvmatrix = this._drawActor.getBaseCamera().getModelViewMatrix();let temp = Vec3.MemoryPool.alloc();this._depth = this.distanceZ(this.getBoundingBox().getCenter(temp), mvmatrix);Vec3.MemoryPool.free(temp);//drawable.setDepth(depth);
    },//相機的矩陣要取反distanceZ: function (coord, matrix) {return -(coord[0] * matrix[2] + coord[1] * matrix[6] + coord[2] * matrix[10] + matrix[14]);},getBoundingBox: function () {if(this._boundingBox === undefined){this._boundingBox = new BoundingBox();this._boundingBox.copy(this._geometry.getBoundingBox(true));if(this._transform){this._boundingBox.transformMat4(this._transform);}}return this._boundingBox;},getBoundingSphere: function () {if(this._boundingSphere === undefined) {this._boundingSphere = new BoundingSphere();let bb = this.getBoundingBox();this._boundingSphere.expandByBoundingBox(bb);}return this._boundingSphere;},getRadius: function () {return this.getBoundingSphere().getRadius();},// There are 3 cases when there is a prev / current render leaf// pSG: previousStateGraph// cSG: currentStateGraph// pRL: previousRenderLeaf// cRL: currentRenderLeaf//
    //          A                        B                       C// +-----+     +-----+            +-----+                 +-----+// | pSG |     | cSG |         +--+ SG  +--+              | SG  |// +--+--+     +--+--+         |  +-----+  |              +--+--+//    |           |            |           |                 |// +--v--+     +--v--+      +--v--+     +--v--+           +--v--+// | pSG |     | cSG |      | pSG |     | cSG |        +--+ SG  +--+// +--+--+     +--+--+      +--+--+     +--+--+        |  +-----+  |//    |           |            |           |           |           |// +--v--+     +--v--+      +--v--+     +--v--+     +--v--+     +--v--+// | pRL |     | cRL |      | pRL |     | cRL |     | pRL |     | cRL |// +-----+     +-----+      +-----+     +-----+     +-----+     +-----+//
    //
    // Case A// no common parent StateGraphNode we need to// popStateSet until we find the common parent and then// pushStateSet from the common parent to the current RenderLeaf//
    // Case B// common parent StateGraphNode so we apply the current stateSet//
    // Case C// the StateGraphNode is common to the previous RenderLeaf so we dont need// to do anything except if we used an insertStateSetdraw: function (glstate, preDrawable) {//先接受狀態,再渲染幾何let curStateGraph = this._statebin;let curStateGraphStateSet = curStateGraph.getStateSet();let curStateGraphParent = curStateGraph.getParent();let preStateGraph;let preStateGraphParent;if(preDrawable !== undefined){preStateGraph = preDrawable._statebin;preStateGraphParent = preStateGraph.getParent();if(preStateGraphParent !== curStateGraphParent){//A
                StateBin.moveStateBin(glstate, preStateGraphParent, curStateGraphParent);glstate.applyStateSet(curStateGraphStateSet);}else if(preStateGraph !== curStateGraph){//B
                glstate.applyStateSet(curStateGraphStateSet);}else{// in osg we call apply but actually we dont need// except if the stateSetStack changed.// for example if insert/remove StateSet has been used// if (glstate._stateSetStackChanged(idLastDraw, lastStateSetStackSize )) {//     glstate.applyStateSet(curStateGraphStateSet);// }
            }}else{//如果preLeaf為空,第一個繪制的幾何,狀態遍歷到根節點全部push到GLState中
            StateBin.moveStateBin(glstate, undefined, curStateGraphParent);glstate.applyStateSet(curStateGraphStateSet);}let camera = this._drawActor.getBaseCamera();glstate.applyModelMatrix(this._transform, camera.getModelViewMatrix(), camera.getProjectionMatrix());this._geometry.draw(glstate);return true;},
};
module.exports = Drawable;// set: function (stateGraph, geometry, , depth) {
//     this._statebin = stateGraph;
//     this._geometry = geometry;
//
//     this._depth = depth;
// },
// drawGeometry: function (glstate) {
//     //let program = glstate.getLastProgramApplied();
//     //let programID = program.getID();
//     //let programCaches = glstate.getProgramCaches();
//     //let obj = programCaches[programID];
//     // if(!obj){//程序不存在,創建一個新的
//     //     obj = new CacheUniformApply(glstate, program);
//     //     programCaches[programID] = obj;
//     // }
//
//     //從相機獲取modelview和projection
//     //著色器暫時不需要透視矩陣
//     //let modelview = this._camera.get
//
//
//
//     //glstate.applyModelViewMatrix(this._modelview);
//     //glstate.applyProjectionMatrix(this._projection);
//     glstate.applyTransformMatrix(this._transform);
//     //this._modelview = this._camera.getModelViewMatrix();
//     //Mat4.mul(this._modelview, this._modelview, this._transform);
//     //this._projection = this._camera.getProjectionMatrix();
//     glstate.applyModelMatrix(this._transform, this._camera.getModelViewMatrix(), this._camera.getProjectionMatrix());
//
//
//     //let gluniforms = program.getGLUniformsCache();
//     //let modelviewloc = gluniforms[glstate._modelViewMatrixUniform.getName()];
//     //let viewloc = gluniforms[glstate._viewMatrixUniform.getName()];
//
//     //obj.apply(glstate, this._modelview, this._modelworld, this._view, this._projection, this._normal);
//     this._geometry.draw(glstate);
// },
我們先來看看Drawable的構造函數,截取構造函數代碼
let Drawable = function (actor) {this._drawActor = actor;//關聯的DrawActorthis._geometry = undefined;//渲染的幾何Geometrythis._transform = undefined;//世界變換 FloatArray(16)this._statebin = undefined;//狀態結點,原始的狀態,沒有額外功能時的狀態this._curStatebin = undefined;//如果狀態會動態變化,這里存儲每一幀繪制時的狀態結點this._depth = 0.0;//場景深度值,透明需要按深度排序繪制this._boundingBox = undefined;//包圍盒this._boundingSphere = undefined;//包圍球
};
首先我們看到第一個私有屬性是DrawActor,我們看看DrawActor是個什么模塊,先貼出DrawActor類代碼。
/*
繪制對象角色每個DrawActor管理自己的渲染數據,自己的狀態樹,自己的相機樹
如果該功能銷毀直接銷毀對應的DrawActor資源
但是他引用的狀態,相機并不是他管理
不想把各個DrawActor攪和在一起,邏輯混亂繪制分幾種情況,全自動,全手動,半自動
全自動-所有的繪制流程從一開始數據構造好后就不會再變更,只需在初始化時確認好 后續直接渲染即可
半自動-部分繪制流程是固定的,部分繪制流程是動態的,比如構件場景下,需要點選高亮等功能變化
全手動-所有的繪制流程都是動態的,每一幀都需要重新構造每個drawable,部分功能數據*/
let Drawable = require('./Drawable');
let StateBin = require('./StateBin');
let NodeVisitor = require('../util/NodeVisitor');
let CullStack = require('./CullStack');
let Mat4 = require('../util/Mat4');
let Group = require('../core/Group');
let Geode = require('../core/Geode');
let MatrixTrasform = require('../core/MatrixTransform');
let SceneRoot = require('../scene/SceneRoot');
let Geometry = require('../core/Geometry');let DrawActor = function (renderer) {NodeVisitor.call(this, NodeVisitor.TRAVERSE_CHILDREN);CullStack.call(this);//為正確渲染準備的數據this._renderer = renderer;//所屬的渲染器,固有資產,不會變更this._baseCamera = this._renderer.getMainCamera();//相機,默認為主相機this._baseState = new StateBin();//狀態this._sceneRoot = undefined;//所屬的場景根節點//渲染的對象this._drawables = [];//
    this._drawIndex = 0;//當前繪制的索引數,需要固定幀率渲染的地方使用//
    this._currentStateBin = undefined;//當前處理的狀態樹結點,臨時數據//
    //this._fixed = false;//是否啟用固定幀率this._valid = true;//直接屏蔽渲染的標記
};DrawActor.prototype = Object.create(NodeVisitor.prototype);
Object.assign(DrawActor.prototype, CullStack.prototype);
DrawActor.prototype.constructor = DrawActor;
Object.assign(DrawActor.prototype, {setBaseCamera: function (camera) {//設置當前相機,可以自由設置自己獨特的相機this._baseCamera = camera;},getBaseCamera: function () {return this._baseCamera;},getBaseStateBin: function () {return this._baseState;},getBaseStateSet: function () {return this._baseState.getStateSet();},//復原場景根節點的狀態revertBaseState: function () {if (this._sceneRoot) {this._baseState.setStateSet(this._sceneRoot.getStateSet());}},//與場景的唯一聯系,一定要先定義好場景的幾何和狀態再調用setSceneRootsetSceneRoot: function (root) {this._sceneRoot = root;//一定要先定義好場景根節點的狀態,否則會出錯!!!//this._baseState.setStateSet(root.getStateSet());
    },createDrawable: function () {//base overridereturn new Drawable(this);//創建對應類型的Drawable
    },addDrawable: function (drawable) {this._drawables.push(drawable);},getDrawables: function () {return this._drawables;},valid: function (valid) {if (valid !== undefined) {this._valid = valid;}return this._valid;},//遍歷apply: function (node) {this[node.typeID](node);},//重載,壓入一個狀態pushStateSet: function (stateset) {if (stateset) {//添加StateGraph子節點,更新當前活動的StateGraph為新的狀態this._currentStateBin = this._currentStateBin.addStateSetChild(stateset);}},//重載,彈出一個狀態popStateSet: function (stateset) {if (stateset) {this._currentStateBin = this._currentStateBin.getParent();}},//重載pushDrawable: function (geometry) {let drawable = this.createDrawable();drawable.setStateBin(this._currentStateBin);drawable.setGeometry(geometry, this.getCurrentTransformMatrix());this.addDrawable(drawable);},//根重載,繪制當前Actor下的drawables,繪制不需要固定幀率,永遠在第一幀里繪制完畢draw: function (glstate, preCamera) {if (!this._valid) {//不再繪制return preCamera;}this.drawCamera(preCamera);//循環遍歷一遍drawables,繪制實體let preDrawable = undefined;let l = this._drawables.length;for (let i = this._drawIndex; i < l; i++) {let drawable = this._drawables[i];if (drawable.valid()) {drawable.draw(glstate, preDrawable);//成功繪制的preDrawable = drawable;}this._drawIndex++;}return this._baseCamera;},//每個新幀繪制之前的重置工作drawReset: function () {this._baseCamera.setClearFlag(false);this._drawIndex = 0;},//當前Actor的對象是否全部繪制完畢drawFinished: function () {return this._drawables.length === this._drawIndex;},//繪制相機狀態(視口,清空)drawCamera: function (preCamera) {if (preCamera === this._baseCamera) {//重復的不再處理return;}//視口何時都需要設置let glstate = this._renderer.getGLState();glstate.applyAttribute(this._baseCamera.getViewport());//以下是每個相機只需要處理一次的事情if (!this._baseCamera.getClearFlag()) {//更新視錐體,確保剔除正確,每幀相機的投影矩陣和視圖矩陣可能都會變化this._baseCamera.updateCullFrustum();//清空顏色和深度,但如果是主相機不再需要,在最開始就已經清空let clearmask = this._baseCamera.getClearMask();if (clearmask !== 0x0) {let gl = glstate.getWebGLContext();if (clearmask & gl.COLOR_BUFFER_BIT) {let color = this._baseCamera.getClearColor();//清空顏色gl.clearColor(color[0], color[1], color[2], color[3]);}if (clearmask & gl.DEPTH_BUFFER_BIT) {let depth = this._baseCamera.getClearDepth();//清空深度gl.depthMask(true);gl.clearDepth(depth);}gl.clear(clearmask);}this._baseCamera.setClearFlag(true);}},//根重載,線段求交,返回相交的drawable對象linesegmentIntersect: function (start, end, threshold) {let LineSegmentIntersector = require('../util/LineSegmentIntersector');let intersector = new LineSegmentIntersector();intersector.initialize(start, end, threshold);let length = this._drawables.length;for (let i = 0; i < length; i++) {let drawable = this._drawables[i];if (drawable.valid()) {//沒有隱藏,沒有被剔除的drawable進行相交運算
                intersector.intersect(drawable);}}//線段求交結果需要根據ratio排序return intersector.getIntersections();},
});DrawActor.prototype[SceneRoot.typeID] = function (root) {this._baseState.removeChildren();this._baseState.setStateSet(root.getStateSet());this._currentStateBin = this._baseState;this.pushTransformMatrix(root.getRootTransform());//變換矩陣中先推入一個單位矩陣作為根節點,非常重要this.traverse(root);this.popTransformMatrix();this._currentStateBin = undefined;
};
DrawActor.prototype[MatrixTrasform.typeID] = function (node) {//模型矩陣變換let lastModelMatrix = this.getCurrentTransformMatrix();let mmatrix = undefined;if (lastModelMatrix) {mmatrix = Mat4.clone(lastModelMatrix);} else {mmatrix = Mat4.new();}node.computeLocalToWorldMatrix(mmatrix);this.pushTransformMatrix(mmatrix);//狀態let stateset = node.getStateSet();this.pushStateSet(stateset);this.traverse(node);this.popStateSet(stateset);this.popTransformMatrix();
};
DrawActor.prototype[Geode.typeID] = function (geode) {this[Group.typeID](geode);
};
DrawActor.prototype[Group.typeID] = function (group) {let stateset = group.getStateSet();this.pushStateSet(stateset);this.traverse(group);this.popStateSet(stateset);
};
DrawActor.prototype[Geometry.typeID] = function (geometry) {//Geometry已經是葉子,不需要繼續遞歸了let stateset = geometry.getStateSet();this.pushStateSet(stateset);this.pushDrawable(geometry);this.popStateSet(stateset);
};
module.exports = DrawActor;
// reset: function () {
//     this._drawables.length = 0;//置空
//     this._sceneRoot = undefined;
// },
// polytopeIntersect: function () {
//
// },
// sphereIntersect: function () {
//
// },
我們可以看到,DrawActor是將要被繪制的對象,分成全自動(初始化模型數據就構造Drawable,準備渲染)、半自動(事件觸發后構造Drawable,等待渲染)、全手動(用戶自己構造Drawable,用戶自己將Drawable排入渲染隊列)。我們看到,DrawActor的構造函數包含的私有屬性有this._renderer渲染器、this._baseCamera待渲染模塊所屬相機、this._baseState狀態(對應shader里的uniform參數)、this._sceneRoot所屬場景根節點、this._drawables包含的渲染對象、this._drawIndex當前繪制的索引數(代表本次繪制是第幾次繪制,如果一此不能全部繪制完,就分多次繪制,例如模型增長)、this._currentStateBin當前處理的狀態樹節點、this._valid屏蔽渲染的標記(true:加入渲染隊列,false:不加入渲染隊列)。
我們再來看看DrawActor的成員函數都做了什么,我們依次來看。
1.setBaseCamera設置參考相機,這就是設置當前繪制對象的觀察相機。2.getBaseCamera獲取參考相機。3.getbaseStateBin獲取狀態信息,包括當前渲染對象綁定的shader,uniform參數以及frameBuffer材質。4.getBaseStateSet同樣是獲取當前渲染對象的狀態信息,shader,uniform,材質信息,depth深度緩沖等。5.revertBaseState恢復場景根節點狀態,包括shader,uniform參數,材質信息,depth深度緩存。6.setSceneRoot設置場景根節點。7.createDrawable創建渲染對象。8.addDrawable追加渲染對象進入繪制對象數組。9.getDrawable返回渲染對象數組。10.valid標記當前渲染對象是否被屏蔽。11.apply取出每個渲染節點。12.pushStateSet向stateBin中加入stateSet,這里說明一點,stateSet是stateBin的屬性。13.popStateSet從stateBin中取出stateSet屬性參數。14.pushDrawable創建渲染對象drawable然后加入drawActor的drawable渲染對象數組。15.draw這才是drawActor的核心功能函數,同學們,鯽魚為大家隆重介紹繪制函數,或者叫渲染函數,這就是將所有的drawable渲染對象進行遍歷渲染的功能函數。16.drawReset每一幀繪制之前的整理重置。17.drawFinished判斷當前drawActor繪制對象是否全部將drawable數組中的渲染對象繪制完畢。18.drawCamera繪制相機狀態(視口,深度緩沖),如果沒有渲染對象私有獨立的相機,就操作主相機。19.linesegmentIntersection射線碰撞,重載父類方法。
依次看一下上面的函數,我們大致了解了DrawActor類處理的是渲染流程管理的工作。我們接下來繼續看Drawable類的其他屬性。我們再貼出一次drawable的構造函數。
let Drawable = function (actor) {this._drawActor = actor;//關聯的DrawActorthis._geometry = undefined;//渲染的幾何Geometrythis._transform = undefined;//世界變換 FloatArray(16)this._statebin = undefined;//狀態結點,原始的狀態,沒有額外功能時的狀態this._curStatebin = undefined;//如果狀態會動態變化,這里存儲每一幀繪制時的狀態結點this._depth = 0.0;//場景深度值,透明需要按深度排序繪制this._boundingBox = undefined;//包圍盒this._boundingSphere = undefined;//包圍球
};
我們已經看過了this._drawActor,也知道了drawActor是管理渲染的類。接下來我們看this._geometry渲染的幾何體成員對象。this._transform空間變換矩陣。this._statebin狀態節點,用來添加stateSet狀態參數對象。this._currStatebin,保存每一幀的臨時狀態stateSet。this._depth場景深度值,作用于主相機或渲染對象私有相機(如果有私有相機的話)。this._boundingBox包圍盒。this._boundingSphere包圍球。這些就是Drawable類的成員。我們馬上來看一下Drawable的成員函數。
Drawable成員函數。貼出代碼。
setGeometry: function (g, transform) {this._geometry = g;this._transform = transform;},getGeometry: function () {return this._geometry;},getTransform: function () {return this._transform;},setStateBin: function (sb) {this._statebin = sb;},getStateBin: function () {return this._statebin;},getCurrentStateBin: function () {return this._curStatebin;},// setDepth: function (d) {//     this._depth = d;// },getDepth: function () {return this._depth;},reset: function () {this._geometry = undefined;this._transform = undefined;this._statebin = undefined;this._curStatebin = undefined;this._depth = 0.0;this._boundingBox = undefined;this._boundingSphere = undefined;},valid: function () {if (this._drawActor.getBaseCamera().isBoundingBoxCulled(this.getBoundingBox())) {return false;}return true;},isTransparent: function () {return false;},//計算深度值computeDepth: function () {//根據包圍盒和相機變換矩陣,確認中心點的Z值let mvmatrix = this._drawActor.getBaseCamera().getModelViewMatrix();let temp = Vec3.MemoryPool.alloc();this._depth = this.distanceZ(this.getBoundingBox().getCenter(temp), mvmatrix);Vec3.MemoryPool.free(temp);//drawable.setDepth(depth);
    },//相機的矩陣要取反distanceZ: function (coord, matrix) {return -(coord[0] * matrix[2] + coord[1] * matrix[6] + coord[2] * matrix[10] + matrix[14]);},getBoundingBox: function () {if(this._boundingBox === undefined){this._boundingBox = new BoundingBox();this._boundingBox.copy(this._geometry.getBoundingBox(true));if(this._transform){this._boundingBox.transformMat4(this._transform);}}return this._boundingBox;},getBoundingSphere: function () {if(this._boundingSphere === undefined) {this._boundingSphere = new BoundingSphere();let bb = this.getBoundingBox();this._boundingSphere.expandByBoundingBox(bb);}return this._boundingSphere;},getRadius: function () {return this.getBoundingSphere().getRadius();},
都是設置和獲取屬性的函數,包括包圍盒和包圍球。接下來我們來看看最核心的部分,隆重介紹draw繪制函數,請看代碼。
// There are 3 cases when there is a prev / current render leaf// pSG: previousStateGraph// cSG: currentStateGraph// pRL: previousRenderLeaf// cRL: currentRenderLeaf//
    //          A                        B                       C// +-----+     +-----+            +-----+                 +-----+// | pSG |     | cSG |         +--+ SG  +--+              | SG  |// +--+--+     +--+--+         |  +-----+  |              +--+--+//    |           |            |           |                 |// +--v--+     +--v--+      +--v--+     +--v--+           +--v--+// | pSG |     | cSG |      | pSG |     | cSG |        +--+ SG  +--+// +--+--+     +--+--+      +--+--+     +--+--+        |  +-----+  |//    |           |            |           |           |           |// +--v--+     +--v--+      +--v--+     +--v--+     +--v--+     +--v--+// | pRL |     | cRL |      | pRL |     | cRL |     | pRL |     | cRL |// +-----+     +-----+      +-----+     +-----+     +-----+     +-----+//
    //
    // Case A// no common parent StateGraphNode we need to// popStateSet until we find the common parent and then// pushStateSet from the common parent to the current RenderLeaf//
    // Case B// common parent StateGraphNode so we apply the current stateSet//
    // Case C// the StateGraphNode is common to the previous RenderLeaf so we dont need// to do anything except if we used an insertStateSetdraw: function (glstate, preDrawable) {//先接受狀態,再渲染幾何let curStateGraph = this._statebin;let curStateGraphStateSet = curStateGraph.getStateSet();let curStateGraphParent = curStateGraph.getParent();let preStateGraph;let preStateGraphParent;if(preDrawable !== undefined){preStateGraph = preDrawable._statebin;preStateGraphParent = preStateGraph.getParent();if(preStateGraphParent !== curStateGraphParent){//A
                StateBin.moveStateBin(glstate, preStateGraphParent, curStateGraphParent);glstate.applyStateSet(curStateGraphStateSet);}else if(preStateGraph !== curStateGraph){//B
                glstate.applyStateSet(curStateGraphStateSet);}else{// in osg we call apply but actually we dont need// except if the stateSetStack changed.// for example if insert/remove StateSet has been used// if (glstate._stateSetStackChanged(idLastDraw, lastStateSetStackSize )) {//     glstate.applyStateSet(curStateGraphStateSet);// }
            }}else{//如果preLeaf為空,第一個繪制的幾何,狀態遍歷到根節點全部push到GLState中
            StateBin.moveStateBin(glstate, undefined, curStateGraphParent);glstate.applyStateSet(curStateGraphStateSet);}let camera = this._drawActor.getBaseCamera();glstate.applyModelMatrix(this._transform, camera.getModelViewMatrix(), camera.getProjectionMatrix());this._geometry.draw(glstate);return true;},
我將注釋也貼了出來,我們可以看到,渲染繪制是分三種情況的,首先我們要了解一下StateGraph渲染屬性這個來源于osg的概念。stateGraph是渲染的狀態屬性,包括本次渲染綁定的shader,uniform參數,frameBuffer材質屬性,depth深度屬性。好了,大致了解了StateGraph后我們再來了解一下RenderLeaf渲染葉這個同樣來自osg的概念。RenderLeaf是渲染葉,需要注意的是渲染葉保存的是sceneTree的節點狀態,而不是場景樹的幾何和transform信息。好了,了解了這兩個概念我們來看看這三種情況。A.前一幀stateGraph和后一幀stateGraph沒有同一個父節點;B.前后兩幀stateGraph有同一個父節點;C.前后兩幀renderLeaf有共同父節點。針對這三種情況,處理的方式不同,需要注意。鯽魚也才開始逐步研究osg框架,理解不到位之處請各位方家海涵。
好了,今天講述的是osg的渲染模塊中的一部分DrawActor和Drawable兩個模塊。下一篇會進一步講述渲染模塊。歡迎大家討論,祝大家元旦快樂。本文系原創,如需引用,請注明出處:https://www.cnblogs.com/ccentry/p/10199157.html???????????????????????
?


)


)
![[EmguCV|C#]使用CvInvoke自己繪製色彩直方圖-直方圖(Hitsogram)系列(4)](http://pic.xiahunao.cn/[EmguCV|C#]使用CvInvoke自己繪製色彩直方圖-直方圖(Hitsogram)系列(4))

)


