一、Ant 打包:(下載ant、配置環境變量就不說了)
1、進入命令行模式,并切換到項目文件夾。運行例如以下命令為ADT創建的項目加入ant build支持:
android update project -p . -t ?"android-17"
2、build腳本默認target是help。所以會顯示如上信息,改動target為debug或release就能夠像無ant時一樣編譯、生成以及調試了。
3、使用release時 ?在local.properties加入簽名信息
#keystore
key.store=xx.p12
key.alias=xxx
key.store.password=xxx
key.alias.password=xxx
4、命令行運行build.xml: ? ?ant -buildfile build.xml
5、error 處理
> BUILD FAILED
> C:\Android\android-sdk\tools\ant\build.xml:601: The following error occurred while executing this line:
> C:\Android\android-sdk\tools\ant\build.xml:653: The following error occurred while executing this line:
> C:\Android\android-sdk\tools\ant\build.xml:698: null returned: 1
Also, if eclipse is set to 'build automatically' then this could keep popping up because eclipse will keep regenerating into the bin folder.
just run 'ant clean release' instead of 'ant release' when you are building this. rm -fR $(find . -type d -name crunch|xargs)
假設遇到上述error 就運行 ant clean release 能夠參考我的項目:https://github.com/mentor811/Android-Batch-Pack
二、gradle 打包
1、下載gradle ?1.10 配置環境變量
2、配置android 環境變量?ANDROID_HOME?
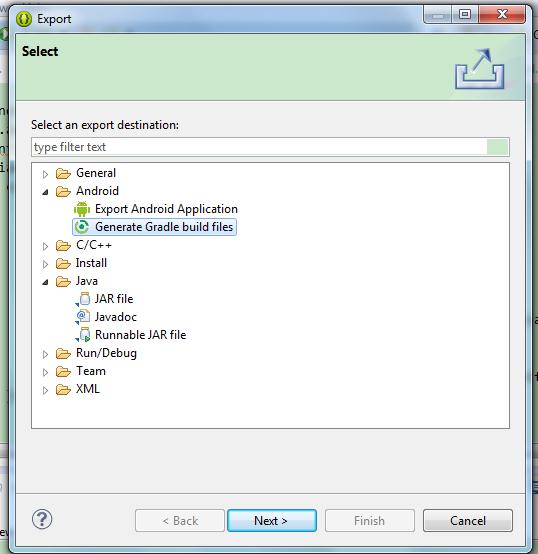
3、導出build文件
4、改動build文件
參考:https://github.com/umeng/umeng-muti-channel-build-tool/tree/master/Gradle
5、運行
gradle clean
gradle build
三、gradle 和 ant 的比較
1、本人用起來感覺 gradle 比較苛刻
a、AndroidManifest.xml里的凝視必須<!-- 前后必需要有空格 -->
b、中文凝視可能會有亂碼
c、各個library project 里的 minsdk 和targetsdk 要和主工程保持一致
d、對png 圖片的格式非常嚴格
e、lint
而 ?使用Ant 時。沒有遇到上述問題,直接就成功了。
2、gradle 會把library project 里Androidmanifest.xml 合并到主工程,ant不會
3、靈活性上 絕對是gradle,配置友盟多渠道、改包名 配置一下就ok。而ant非常費勁。
4、打包效率對照:
第一次運行時 之前沒有build的的項目?
gradle 2min ? 53 ? pk ? ?ant ?2min 54
下圖是 已經運行過一個build后的打包時間:
左邊gradle ?右邊 ant

)


最大數maxnumber(Fenwick Tree)](http://pic.xiahunao.cn/[bzoj1012](JSOI2008)最大數maxnumber(Fenwick Tree))


)

)


