我們來看一個灰度圖像,讓 表示灰度
表示灰度 出現的次數,這樣圖像中灰度為?的像素的出現概率是

 ?是圖像中全部的灰度數,
 ?是圖像中全部的像素數,?
 ?實際上是圖像的直方圖,歸一化到?
 。
。
把? ?作為相應于??的累計概率函數, 定義為:
?是圖像的累計歸一化直方圖。
我們創建一個形式為? ?的變化,對于原始圖像中的每一個值它就產生一個?
 ,這樣??的累計概率函數就能夠在全部值范圍內進行線性化,轉換公式定義為:

注意 T 將不同的等級映射到? ?域。為了將這些值映射回它們最初的域,須要在結果上應用以下的簡單變換:

上面描寫敘述了灰度圖像上使用直方圖均衡化的方法。可是通過將這樣的方法分別用于圖像RGB顏色值的紅色、綠色和藍色分量,從而也能夠對彩色圖像進行處理。
- C:?void?cvEqualizeHist(const CvArr*?src, CvArr*?dst)
Parameters: - src?– Source 8-bit single channel image.
- dst?– Destination image of the same size and type as?src?.
The function equalizes the histogram of the input image using the following algorithm:
Calculate the histogram?
 ?for?src?.
Normalize the histogram so that the sum of histogram bins is 255.
Compute the integral of the histogram:

Transform the image using?
 ?as a look-up table:?
The algorithm normalizes the brightness and increases the contrast of the image.?
# -*- coding: utf-8 -*-
#code:myhaspl@myhaspl.com
import cv2
fn="test1.jpg"
myimg=cv2.imread(fn)
img=cv2.cvtColor(myimg,cv2.COLOR_BGR2GRAY)
newimg=cv2.equalizeHist(img)
cv2.imshow('src',img)
cv2.imshow('dst',newimg)
cv2.waitKey()
cv2.destroyAllWindows()
本博客全部內容是原創,假設轉載請注明來源
http://blog.csdn.net/myhaspl/
以下右圖是經過增強化的圖
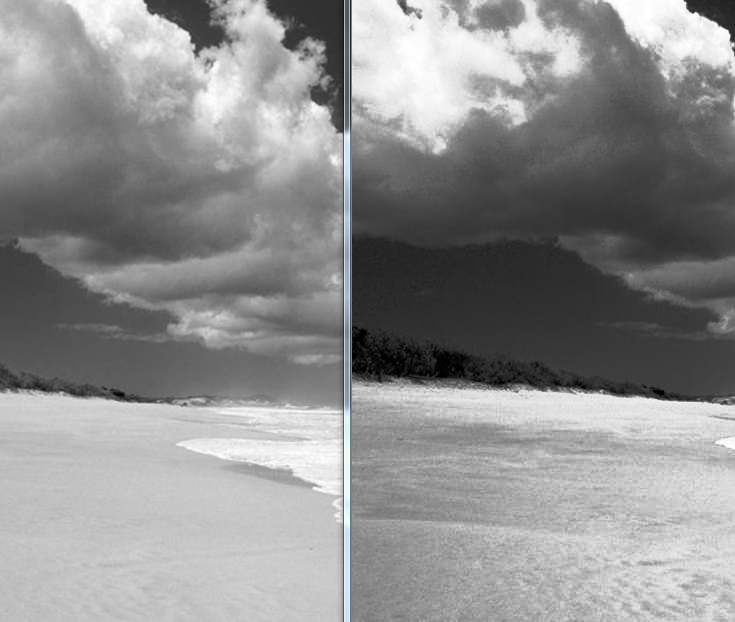
直方圖均衡化通經常使用來添加很多圖像的全局對照度,尤其是當圖像的實用數據的對照度相當接近的時候。
通過這樣的方法,
亮度能夠更好地在直方圖上分布。這樣就能夠用于增強局部的對照度而不影響總體的對照度本博客全部內容是原創,假設轉載請注明來源
http://blog.csdn.net/myhaspl/
以下部分代碼驗證實現了算法
# -*- coding: utf-8 -*-
#code:myhaspl@myhaspl.com
#直方圖均衡化
import cv2
import numpy as np
fn="test5.jpg"
myimg=cv2.imread(fn)
img=cv2.cvtColor(myimg,cv2.COLOR_BGR2GRAY)
h=img.shape[0]
w=img.shape[1]
newimg=np.zeros((h,w),np.uint8)
scount=0.0
#原始圖像灰度級
scol={}
#目標圖像灰度級
dcol={}
#原始圖像頻度
Ps={}
#累計概率
Cs={}#統計原始圖像灰度級
for m in xrange(h):for n in xrange(w):scol[img[m,n]]=scol.setdefault(img[m,n],0)+1scount+=1
下圖左為源圖。右圖為進行直方圖均衡化后的圖


![[奇葩 bug]視圖在 ipad5 上正常顯示,在 iPad3上超出了邊界](http://pic.xiahunao.cn/[奇葩 bug]視圖在 ipad5 上正常顯示,在 iPad3上超出了邊界)

)


