無條件圖像生成是擴散模型的一種流行應用,它生成的圖像看起來像用于訓練的數據集中的圖像。與文本或圖像到圖像模型不同,無條件圖像生成不依賴于任何文本或圖像。它只生成與其訓練數據分布相似的圖像。通常,通過在特定數據集上微調預訓練模型可以獲得最佳結果。
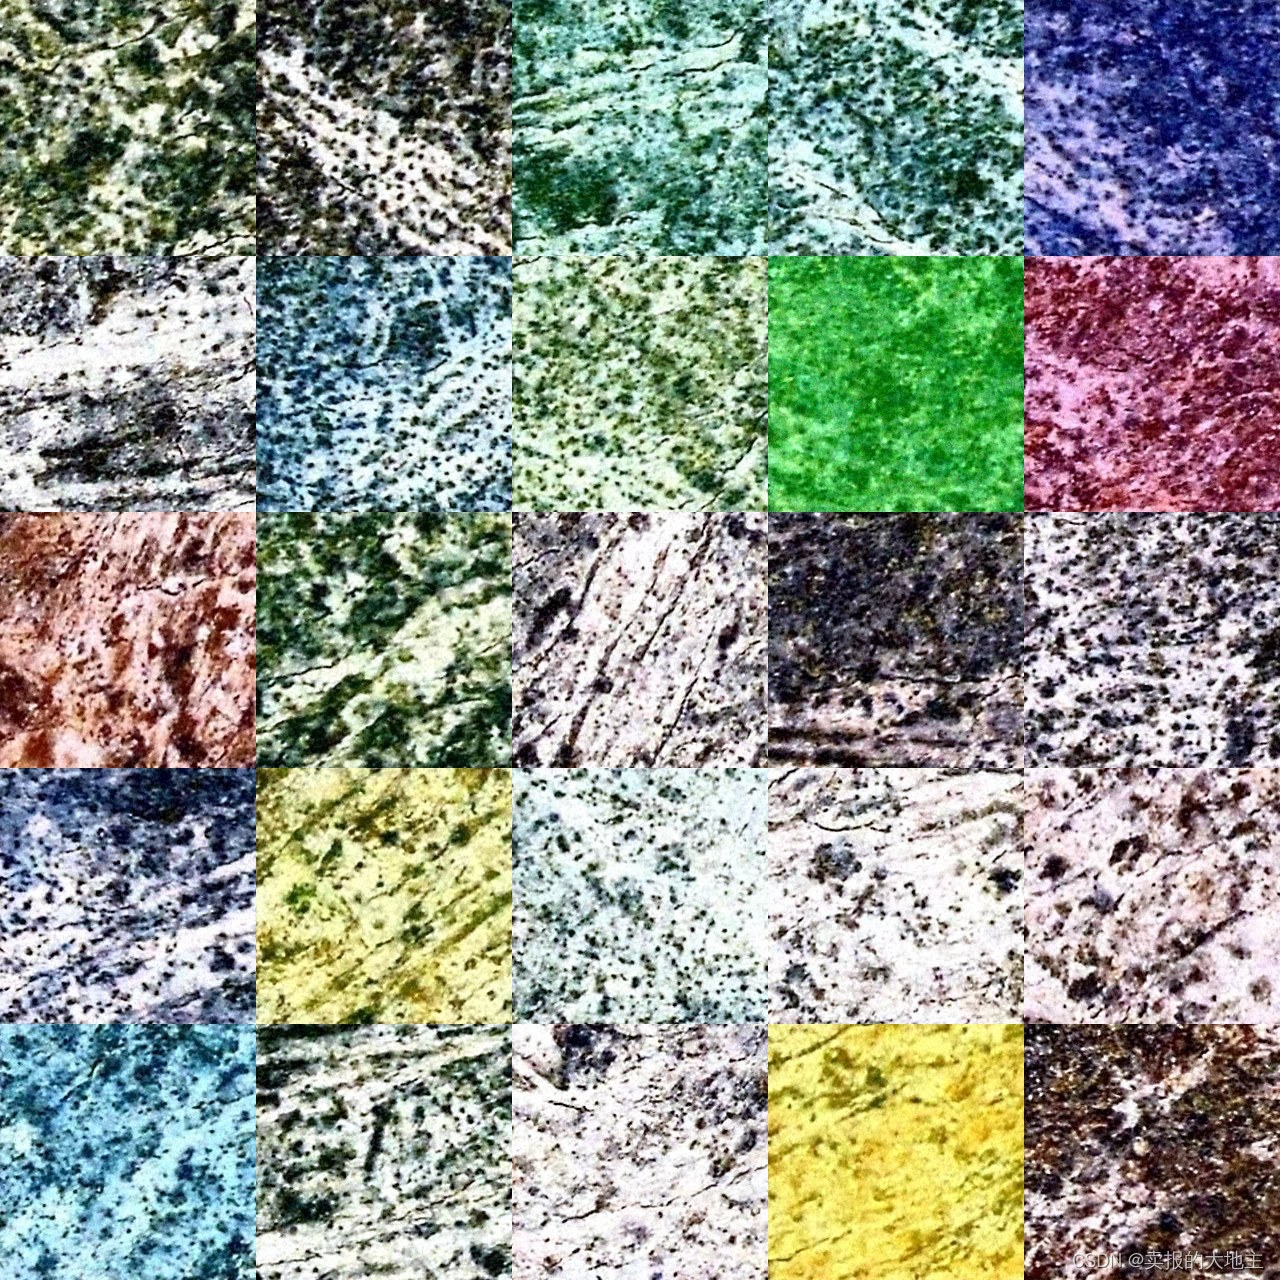
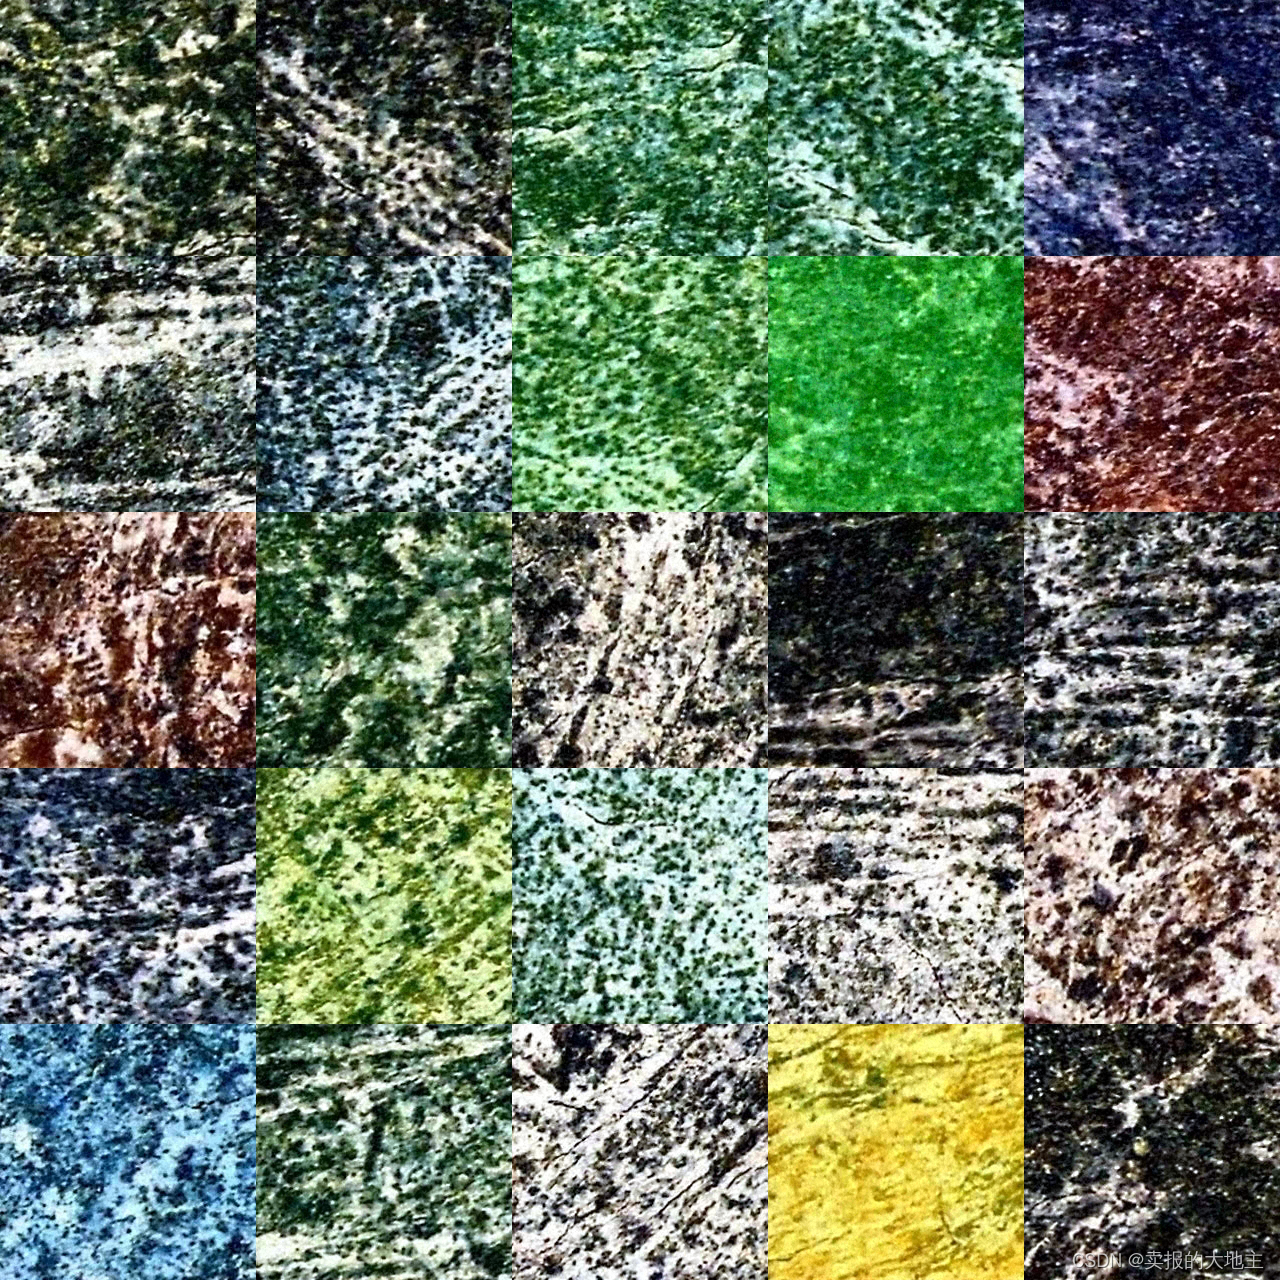
本教程主要來自huggingface官方教程,結合一些自己的修改,以支持訓練本地數據集。我們首先依據官方教程,利用史密森尼蝴蝶數據集的子集上從頭開始訓練UNet2DModel,以生我們自己的的🦋蝴蝶🦋。最后因為我是搞遙感方向的(測繪小卡拉米),所以利用遙感數據進行訓練嘗試,遙感影像使用的是煤礦區的無人機遙感影像,主要就是裸地和枯草,有的還有一些因為煤礦開采導致的地裂縫。
1、Train配置
為方便起見,創建一個包含訓練超參數的TrainingConfig類(請隨意調整它們):
from dataclasses import dataclass@dataclass
class TrainingConfig:image_size = 128  # the generated image resolutiontrain_batch_size = 16eval_batch_size = 16  # how many images to sample during evaluationnum_epochs = 50gradient_accumulation_steps = 1learning_rate = 1e-4lr_warmup_steps = 500save_image_epochs = 10save_model_epochs = 30mixed_precision = "fp16"  # `no` for float32, `fp16` for automatic mixed precisionoutput_dir = "ddpm-butterflies-128"  # the model name locally and on the HF Hubpush_to_hub = True  # whether to upload the saved model to the HF Hubhub_private_repo = Falseoverwrite_output_dir = True  # overwrite the old model when re-running the notebookseed = 0config = TrainingConfig()
2、加載數據集
對于在hug 倉庫空開的數據集可以使用🤗 Datasets依賴庫輕松加載,比如本次的Smithsonian Butterflies:
from datasets import load_datasetconfig.dataset_name = "huggan/smithsonian_butterflies_subset"
dataset = load_dataset(config.dataset_name, split="train")
對于本地數據請用一下代碼進行加載(請根據自己情況進行修改):
from datasets import load_datasetdata_dir = "/home/diffusers/datasets/isprsdataset"
dataset = load_dataset('imagefolder', data_dir=data_dir, split='train')
🤗 Datasets使用圖像功能自動解碼圖像數據并將其加載為PIL. Image,我們可以將其可視化:
import matplotlib.pyplot as pltfig, axs = plt.subplots(1, 4, figsize=(16, 4))
for i, image in enumerate(dataset[:4]["image"]):axs[i].imshow(image)axs[i].set_axis_off()
fig.show()

3、圖像預處理
由于圖像大小不同,所以需要先對其進行預處理,也就是常規的圖像增強:
- 調整大小將圖像大小更改為配置文件中定義的圖像大小—
image_size。 RandomHorizontalFlip通過隨機鏡像圖像來增強數據集。Normalize對于將像素值重新縮放到[-1,1]范圍內很重要,這是模型所期望的。
from torchvision import transformspreprocess = transforms.Compose([transforms.Resize((config.image_size, config.image_size)),transforms.RandomHorizontalFlip(),transforms.ToTensor(),transforms.Normalize([0.5835, 0.5820, 0.5841], [0.1149, 0.1111, 0.1064]), # isprs# transforms.Normalize([0.5], [0.5]),]
)
這里使用的是Pytorch自帶的數據增強接口,這里我推薦大家使用albumentations數據增強庫。
使用🤗Datasets的set_transform方法在訓練期間動態應用預處理函數:
def transform(examples):images = [preprocess(image.convert("RGB")) for image in examples["image"]]return {"images": images}dataset.set_transform(transform)
現在將數據集包裝在DataLoader中進行訓練:
import torch
python
train_dataloader = torch.utils.data.DataLoader(dataset, batch_size=config.train_batch_size, shuffle=True)
4、創建UNet2DModel
🧨 Diffusers 中的預訓練模型可以使用您想要的參數從它們的模型類輕松創建。例如,要創建UNet2DModel:
from diffusers import UNet2DModelmodel = UNet2DModel(sample_size=config.image_size,  # the target image resolutionin_channels=3,  # the number of input channels, 3 for RGB imagesout_channels=3,  # the number of output channelslayers_per_block=2,  # how many ResNet layers to use per UNet blockblock_out_channels=(128, 128, 256, 256, 512, 512),  # the number of output channels for each UNet blockdown_block_types=("DownBlock2D",  # a regular ResNet downsampling block"DownBlock2D","DownBlock2D","DownBlock2D","AttnDownBlock2D",  # a ResNet downsampling block with spatial self-attention"DownBlock2D",),up_block_types=("UpBlock2D",  # a regular ResNet upsampling block"AttnUpBlock2D",  # a ResNet upsampling block with spatial self-attention"UpBlock2D","UpBlock2D","UpBlock2D","UpBlock2D",),
)
檢查樣本圖像形狀與模型輸出形狀是否匹配:
sample_image = dataset[0]["images"].unsqueeze(0)
print("Input shape:", sample_image.shape)print("Output shape:", model(sample_image, timestep=0).sample.shape)
接下來創建一個scheduler為圖像添加一些噪點。
5、創建scheduler
根據您是使用模型進行訓練還是推理,scheduler的行為會有所不同。在推理期間,scheduler從噪聲中生成圖像。在訓練期間,scheduler從擴散過程中的特定點獲取模型輸出或樣本,并根據噪聲時間表和更新規則(比如我們本系列第一張所說的step)將噪聲應用于圖像。(我們可以看到,遙感影像生成的結果還行,已經能明顯的看清楚地表和枯草,甚至能夠出現可看清的地裂縫!)
讓我們看看DDPMScheduler并使用add_noise方法向之前的sample_image添加一些隨機噪聲:
import torch
from PIL import Image
from diffusers import DDPMSchedulernoise_scheduler = DDPMScheduler(num_train_timesteps=1000)
noise = torch.randn(sample_image.shape)
timesteps = torch.LongTensor([50])
noisy_image = noise_scheduler.add_noise(sample_image, noise, timesteps)Image.fromarray(((noisy_image.permute(0, 2, 3, 1) + 1.0) * 127.5).type(torch.uint8).numpy()[0])

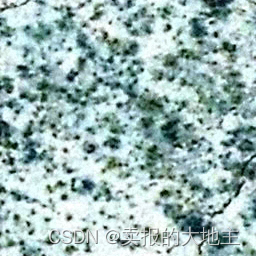
模型的訓練目標是預測添加到圖像中的噪聲。該步驟的損失可以通過以下方式計算,這里官方教程使用的是mse損失函數:
import torch.nn.functional as Fnoise_pred = model(noisy_image, timesteps).sample
loss = F.mse_loss(noise_pred, noise)
6、訓練模型
到目前為止,已經有了開始訓練模型的大部分部分,剩下的就是把所有東西放在一起。 首先,您需要一個優化器和一個學習率調度器:
from diffusers.optimization import get_cosine_schedule_with_warmupoptimizer = torch.optim.AdamW(model.parameters(), lr=config.learning_rate)
lr_scheduler = get_cosine_schedule_with_warmup(optimizer=optimizer,num_warmup_steps=config.lr_warmup_steps,num_training_steps=(len(train_dataloader) * config.num_epochs),
)
然后,您需要一種評估模型的方法。對于評估,您可以使用DDPMPipeline生成一批示例圖像并將其保存為網格格式(官方輸出為格網,大家也可自行修改為單張保存):
from diffusers import DDPMPipeline
import math
import osdef make_grid(images, rows, cols):w, h = images[0].sizegrid = Image.new("RGB", size=(cols * w, rows * h))for i, image in enumerate(images):grid.paste(image, box=(i % cols * w, i // cols * h))return griddef evaluate(config, epoch, pipeline):# Sample some images from random noise (this is the backward diffusion process).# The default pipeline output type is `List[PIL.Image]`images = pipeline(batch_size=config.eval_batch_size,generator=torch.manual_seed(config.seed),).images# Make a grid out of the imagesimage_grid = make_grid(images, rows=2, cols=3)# Save the imagestest_dir = os.path.join(config.output_dir, "samples")os.makedirs(test_dir, exist_ok=True)image_grid.save(f"{test_dir}/{epoch + 1:04d}.png")
現在,可以使用🤗Accelerate將所有這些組件包裝在一個訓練循環中,以便于TensorBoard日志記錄、梯度累積和混合精度訓練。
def train_loop(config, model, noise_scheduler, optimizer, train_dataloader, lr_scheduler):# Initialize accelerator and tensorboard loggingaccelerator = Accelerator(mixed_precision=config.mixed_precision,gradient_accumulation_steps=config.gradient_accumulation_steps,log_with="tensorboard",project_dir=os.path.join(config.output_dir, "logs"),)if accelerator.is_main_process:if config.push_to_hub:repo_name = get_full_repo_name(Path(config.output_dir).name)repo = Repository(config.output_dir, clone_from=repo_name)elif config.output_dir is not None:os.makedirs(config.output_dir, exist_ok=True)accelerator.init_trackers("train_example")# Prepare everything# There is no specific order to remember, you just need to unpack the# objects in the same order you gave them to the prepare method.model, optimizer, train_dataloader, lr_scheduler = accelerator.prepare(model, optimizer, train_dataloader, lr_scheduler)global_step = 0# Now you train the modelfor epoch in range(config.num_epochs):progress_bar = tqdm(total=len(train_dataloader), disable=not accelerator.is_local_main_process)progress_bar.set_description(f"Epoch {epoch + 1}")for step, batch in enumerate(train_dataloader):clean_images = batch["images"]# Sample noise to add to the imagesnoise = torch.randn(clean_images.shape).to(clean_images.device)bs = clean_images.shape[0]# Sample a random timestep for each imagetimesteps = torch.randint(0, noise_scheduler.config.num_train_timesteps, (bs,), device=clean_images.device).long()# Add noise to the clean images according to the noise magnitude at each timestep# (this is the forward diffusion process)noisy_images = noise_scheduler.add_noise(clean_images, noise, timesteps)with accelerator.accumulate(model):# Predict the noise residualnoise_pred = model(noisy_images, timesteps, return_dict=False)[0]loss = F.mse_loss(noise_pred, noise)accelerator.backward(loss)accelerator.clip_grad_norm_(model.parameters(), 1.0)optimizer.step()lr_scheduler.step()optimizer.zero_grad()progress_bar.update(1)logs = {"loss": loss.detach().item(), "lr": lr_scheduler.get_last_lr()[0], "step": global_step}progress_bar.set_postfix(**logs)accelerator.log(logs, step=global_step)global_step += 1# After each epoch you optionally sample some demo images with evaluate() and save the modelif accelerator.is_main_process:pipeline = DDPMPipeline(unet=accelerator.unwrap_model(model), scheduler=noise_scheduler)if (epoch + 1) % config.save_image_epochs == 0 or epoch == config.num_epochs - 1:print(f'----------------------------------------------------- Evaluate Iter [{(epoch + 1) // config.save_image_epochs}] ------------------------------------------------------------------')evaluate(config, epoch, pipeline)if (epoch + 1) % config.save_model_epochs == 0 or epoch == config.num_epochs - 1:pipeline.save_pretrained(config.output_dir)接下來使用🤗Accelerate的notebook_launcher函數啟動訓練了。將訓練循環、所有訓練參數和進程數(可以將此值更改為可用于訓練的GPU數)傳遞給該函數:
from accelerate import notebook_launcherargs = (config, model, noise_scheduler, optimizer, train_dataloader, lr_scheduler)notebook_launcher(train_loop, args, num_processes=1)
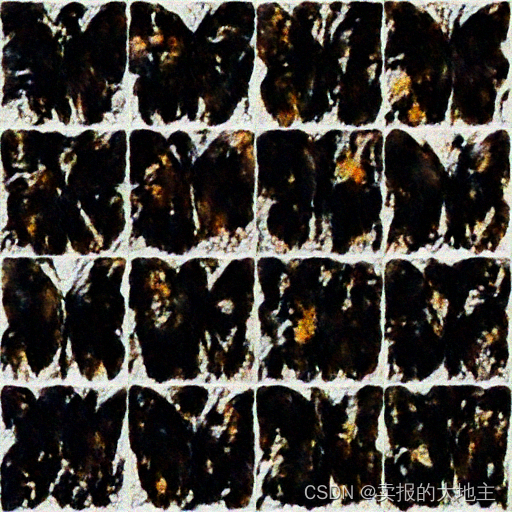
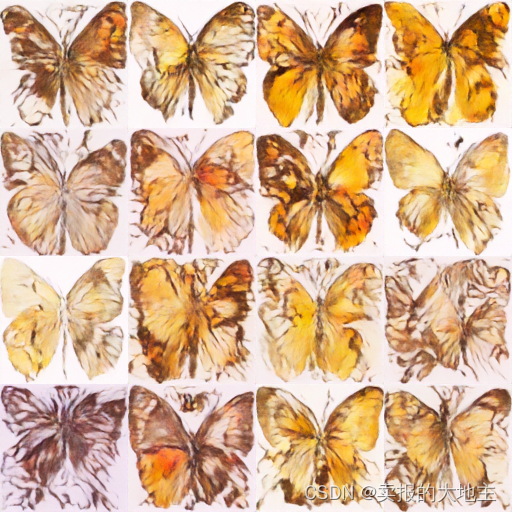
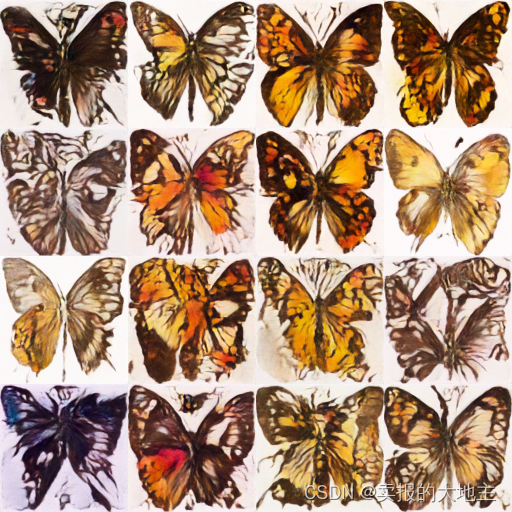
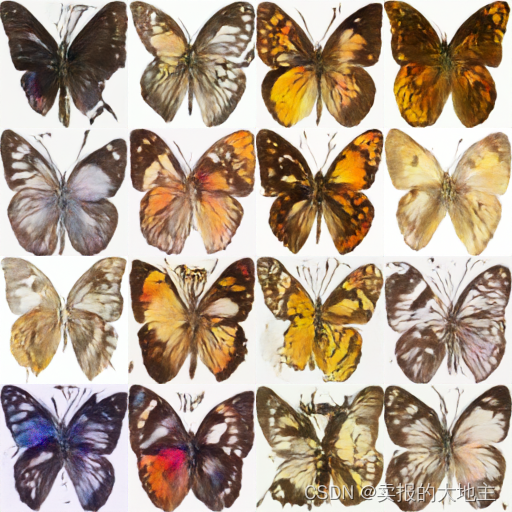
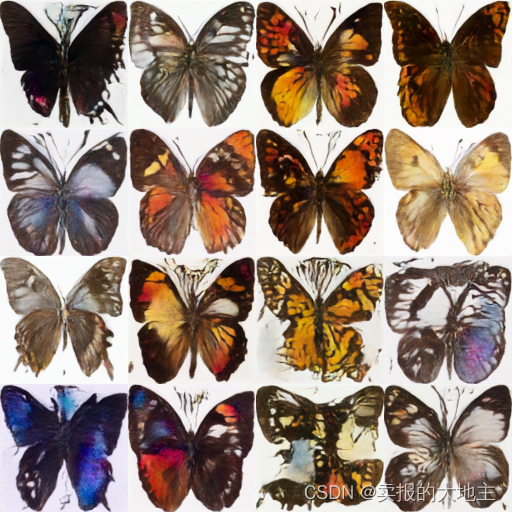
訓練完成后,看看擴散模型生成的最終🦋圖像(🦋我隔10個epoch生成一次,在下面給大家瞅瞅)和遙感影像(因為我電腦的原因,遙感影像跑了一半停了,不過也保存了一些,感慨一下,擴散模型太吃顯存了,比之前跑分割檢測啥的更加依賴,可能是我圖像整的太大了,之后裁小一點試一試,感覺生成模型用于遙感領域,又困難,也有無限可能!這只是一個簡單的擴散生成示例模型,還得再深入研究研究,以后再和大家分享其他更新又有意思的生成模型。
import globsample_images = sorted(glob.glob(f"{config.output_dir}/samples/*.png"))
Image.open(sample_images[-1])





【前后端不分離】自定義View)


