
android 指紋添加
So you have a shiny new Android phone, equipped with a security-friendly?fingerprint scanner. Congratulations! But did you know that, while useful on its own, you can actually make the fingerprint scanner do more than just unlock your phone? An app called Fingerprint Gestures?can take that little scanner to the next level.
因此,您將擁有一臺閃亮的新Android手機,并配備了安全友好的指紋掃描儀。 恭喜你! 但是您知道嗎,盡管它本身很有用,但實際上可以使指紋掃描儀做更多的事情,而不僅僅是解鎖手機嗎? 名為“指紋手勢”的應用程序可以將小型掃描儀帶入新的高度。
Basically, this app allows you to do more with your phone’s fingerprint scanner. Much like the way Google’s Pixel phones can use the swipe down gesture on the scanner to show the notification shade, Fingerprint Gestures can bring this functionality (and a lot more) to basically any phone with a fingerprint scanner.
基本上,此應用可讓您使用手機的指紋掃描儀執行更多操作。 就像Google的Pixel手機可以使用掃描儀上的向下滑動手勢來顯示通知陰影的方式一樣,指紋手勢可以將此功能(以及更多功能)帶給任何配備指紋掃描儀的手機。
Go?ahead and give it an install using the link above—it’s free to install and use, though there’s a $1.49 Premium option to get rid of ads and unlock all the app’s features. Let’s talk about some of the stuff it can do.
繼續并使用上面的鏈接進行安裝-盡管可以使用$ 1.49的高級選項來擺脫廣告并解鎖應用程序的所有功能,但可以免費安裝和使用。 讓我們談談它可以做的一些事情。
NOTE: Fingerprint Gestures will not work if you’re using an older device that doesn’t have either Google’s or Samsung’s fingerprint APIs enabled. So some older devices with fingerprint scanners may not be supported. Similarly, if you’re using a more affordable handset with a fingerprint scanner, there’s a chance it could be using its own system instead of Google’s API. A surefire way to know if it’s?not?using Google’s API is to check your Android version: if it’s Lollipop or below, then it’s not using Google’s API and Fingerprint Gestures won’t work.
注意:如果您使用的舊設備未啟用Google或Samsung的指紋API,則指紋手勢將不起作用。 因此,可能不支持某些帶有指紋掃描儀的舊設備。 同樣,如果您使用價格更便宜的手持設備和指紋掃描儀,則很有可能會使用自己的系統而不是Google的API。 確定是否不使用Google API的一種可靠方法是檢查您的Android版本:如果是Lollipop或更低版本,則說明它不使用Google API,并且指紋手勢將不起作用。
Also, Fingerprint Gestures will put a persistent notification in your notification shade. This is a sticking point for a lot of people, but I haven’t found it to be all that intrusive. It offers access to the app’s settings for quick changes and modifications, which I can appreciate. Unfortunately, there’s no way to disable it at this time, so it’s all or nothing.
另外,“指紋手勢”將在您的通知陰影中放置一個持久性通知。 這是很多人的癥結所在,但我還沒有發現它那么麻煩。 它提供了對應用程序設置的訪問權限,可進行快速更改和修改,我非常感謝。 不幸的是,目前無法禁用它,因此全部或全部無效。
Fine with both of those? Alright, let’s get started.
這兩個都好嗎? 好吧,讓我們開始吧。
指紋手勢入門 (Getting Started with Fingerprint Gestures)
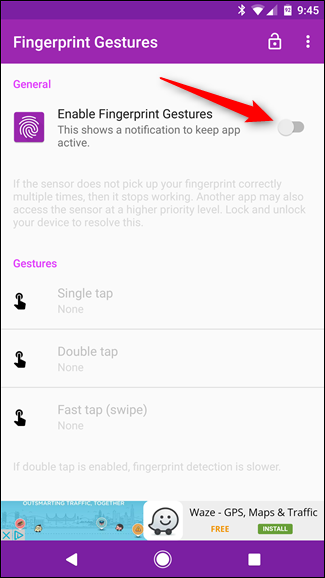
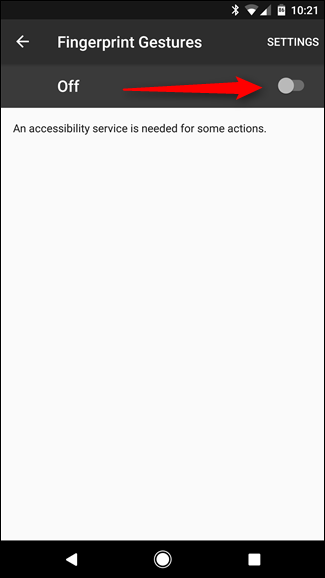
Once you fire the app up, the first thing you’ll need to do is enable it. Toggle that little slider at the top to start using the app.
啟動應用程序后,您需要做的第一件事就是啟用它。 切換頂部的小滑塊即可開始使用該應用程序。
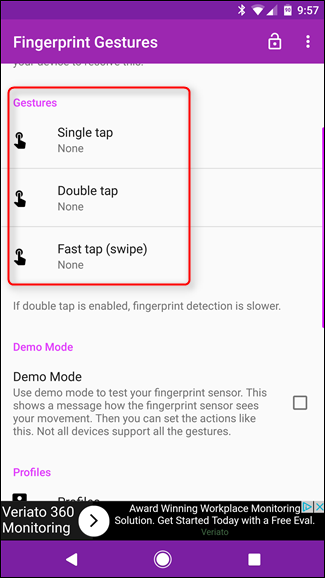
With the app enabled, you?could?start setting up your gestures for Single Tap, Double Tap, and Fast Tap/Swipe gestures. But! I’d actually recommend scrolling down a bit and checking out Demo Mode first.
啟用該應用程序后,您可以開始為“單擊”,“雙擊”和“快速點擊/滑動”手勢設置手勢。 但! 我實際上建議您向下滾動一點,然后先查看演示模式。
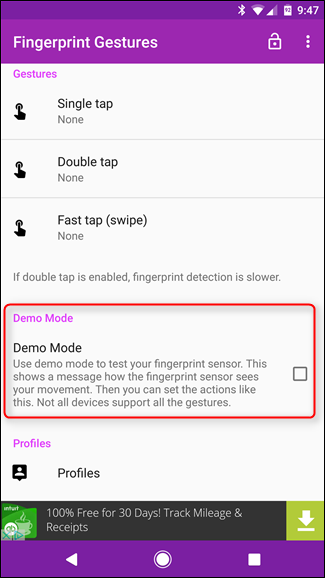
Basically, demo mode gives you an easy way to test out how Fingerprint Gestures is going to react with your phone’s particular model of fingerprint scanner. With this mode enabled, you’ll get a toast notification showing how the app sees each particular action—go through each one (single tap, double tap, and swipe) to get a feel for how?the app will react to the specific actions. This will help you a lot when trying to actually use it later.
基本上,演示模式為您提供了一種簡單的方法來測試“指紋手勢”將如何與手機的特定型號的指紋掃描儀React。 啟用此模式后,您將收到一個吐司通知,其中顯示了應用程序如何看待每個特定操作-逐一(單擊,雙擊和輕掃)以了解應用程序對特定操作的React。 當以后嘗試實際使用它時,這將對您有很大幫助。
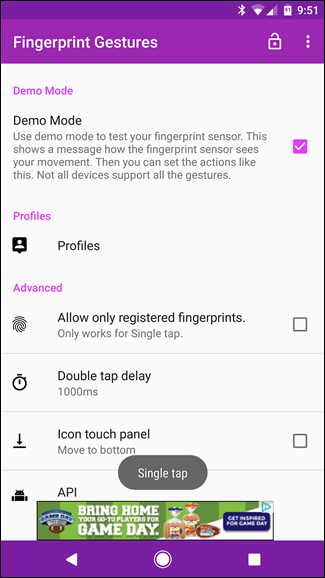

After you’ve played with that for a while, you can go ahead and disable it, otherwise you’ll get a toast notification every time you touch the fingerprint scanner. That could get annoying fast.
玩了一段時間后,可以繼續禁用它,否則,每次觸摸指紋掃描儀時,您都會收到吐司通知。 那可能會很快變得煩人。
設置手勢 (Setting Up Your Gestures)
Scrolling back up to the “Gestures” section, you can now start customizing each gesture. Tap on and gesture?to set its action.
向上滾動回到“手勢”部分,您現在可以開始自定義每個手勢。 點按并手勢以設置其動作。
There are a?slew of options to choose from here. This is probably a good time to point out that if you’re using a rooted device, Fingerprint Gestures is incredibly powerful. You can definitely still use it on a non-rooted handset, but to get access to everything it can do, a rooted phone will be required.
還有的選擇擺在這里選擇。 這可能是一個指出的好時機,如果您使用的是植根設備,則“指紋手勢”功能非常強大。 當然,您仍然可以在沒有根目錄的手機上使用它,但是要訪問它可以執行的所有操作,將需要有根目錄的手機。
That said, let’s take a quick look at everything you can get the app to do:
也就是說,讓我們快速看一下可以讓應用程序執行的所有操作:
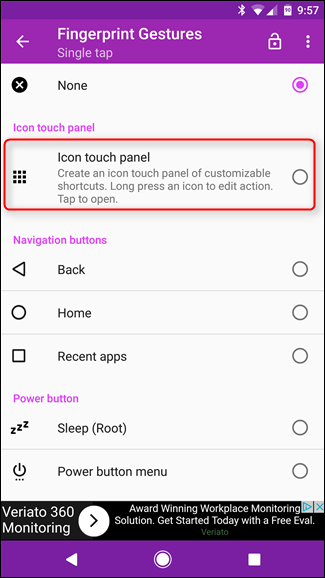
Icon Touch Panel: This brings up a panel with nine customizable shortcuts.
圖標觸摸面板:這將顯示一個帶有9個可自定義快捷方式的面板。
Navigation: Back, Home, and Recent app keys, all from your fingerprint scanner.
導航:返回,首頁和最近使用的應用程序密鑰,全部來自指紋掃描儀。
Power Button: Bring up the power menu, and even restart the phone on rooted handsets.
電源按鈕:調出電源菜單,甚至在植根手機上重新啟動手機。
Scrolling (Root required): Scroll up or down in apps.
滾動(需要Root):在應用中向上或向下滾動。
Notifications:?Open or toggle the notification or quick settings panels.
通知:打開或切換通知或快速設置面板。
Media Controls (Android 6.0+):?Play/Pause, skip song, or play previous track.
媒體控件(Android 6.0+):播放/暫停,跳過歌曲或播放上一曲目。
Settings: Toggle auto-rotate (6.0+), turn on the flashlight (6.0+), or toggle the ringer.
設置:切換自動旋轉(6.0+),打開手電筒(6.0+)或切換鈴聲。
App: Launch an app or app shortcut (like Nova activity, for example).
應用程序:啟動應用程序或應用程序快捷方式(例如,Nova活動)。
Other: Search, take a screenshot (root only), launch Google Assistant (root only), toggle multi-window (7.0+), or switch to the previous app (7.0+).
其他:搜索,截屏(僅root用戶),啟動Google Assistant(僅root用戶),切換多窗口(7.0+)或切換到上一個應用程序(7.0+)。
Like I said, it can do?a lot.
就像我說的,它可以做很多事情。
To set an action, simply tap on it. Some of the choices will require a bit more interaction, but it all depends on which one you choose. The one that will require the most setup is Icon Touch Panel, but you won’t actually do anything more with it until the first time you launch it. With that, let’s take a closer look at it before we move on to the rest of the features.
要設置一個動作,只需點擊它。 有些選擇將需要更多交互,但是這完全取決于您選擇哪一個。 需要最多設置的一個是Icon Touch Panel,但是直到第一次啟動它,您實際上不會對其進行任何操作。 這樣一來,讓我們在繼續其余功能之前仔細研究一下。
So, for the sake of this example, let’s say you selected Icon Touch Panel as your double tap feature. When you execute this command, the panel will show up with blank options that look like fingerprints—tap any of them to set that particular shortcut. The center option leads back to the main Fingerprint Gestures settings.
因此,就本例而言,假設您選擇了“圖標觸摸面板”作為雙擊功能。 當您執行此命令時,面板將顯示空白選項,看起來像指紋-輕按任意一個以設置特定的快捷方式。 中間選項返回到主要的“指紋手勢”設置。
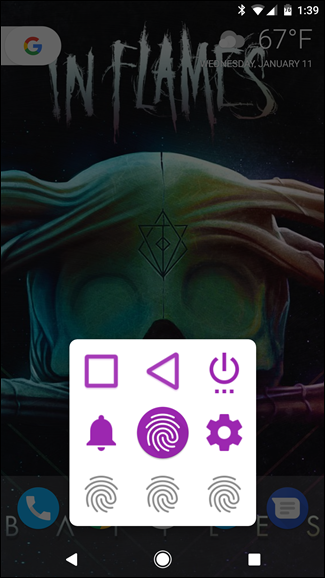
Once you’ve set a gesture for the entries, you’re all set. It’s basically a quick way to access a lot of the things that Fingerprint Gestures can do all in one place. It’s neat.
為條目設置手勢后,就一切就緒。 基本上,這是一種快速訪問指紋手勢可以在一個地方完成的所有事情的方法。 干凈利落
It’s also worth mentioning that certain functions of the app—like launching the Recents menu, for example—will require Accessibility access. The good news is then you try to set any gesture that requires this, it will let you know with a popup. Just tap “OK” to automatically be transported to Accessibility.
還值得一提的是,應用程序的某些功能(例如,啟動“最近”菜單)將需要訪問輔助功能。 好消息是,您嘗試設置需要此操作的任何手勢時,都會彈出一個窗口,讓您知道。 只需點擊“確定”即可自動傳輸到輔助功能。
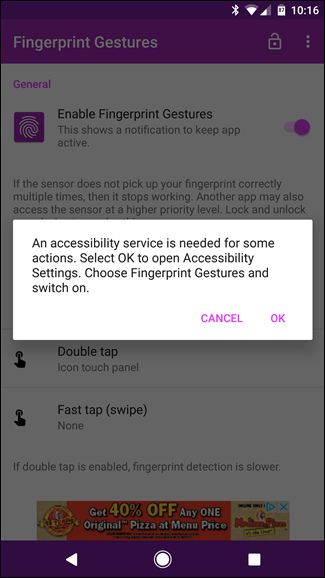
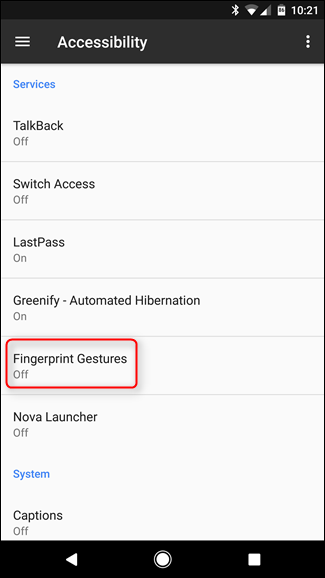
From here, find “Fingerprint Gestures,” tap that entry, and turn it on. Easy peasy. You can back out of this setting once it’s on.
在這里找到“指紋手勢”,點擊該條目,然后將其打開。 十分簡單。 啟用后,您可以退出此設置。
And that’s pretty much all there is to setting Fingerprint Gestures up. It’s really simple, but incredibly effective.
設置指紋手勢幾乎就是了。 這確實很簡單,但是卻非常有效。
設置指紋手勢的配置文件和高級選項 (Setting Fingerprint Gestures’ Profiles and Advanced Options)
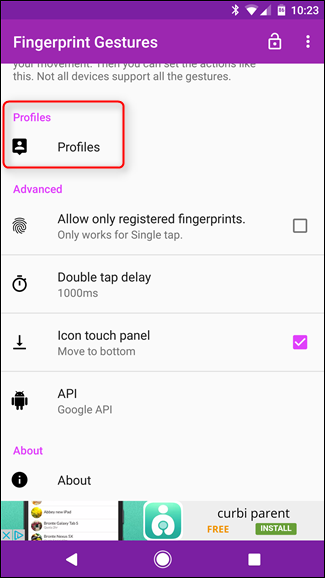
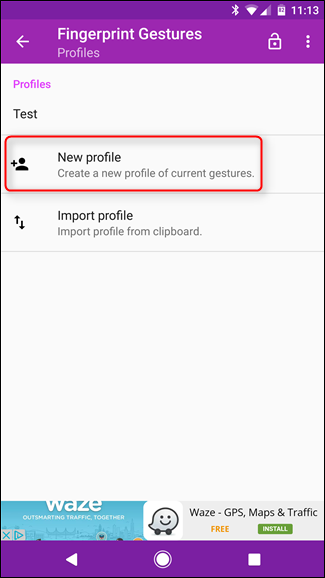
You can also?set particular profiles in Fingerprint Gestures. This means you could set the app up for different situations—like work or home, for example. To save a profile, simply jump into the Profiles menu, then tap “New profile.” Name the profile, then tap “Create” to save it.
您還可以在“指紋手勢”中設置特定的配置文件。 這意味著您可以針對不同的情況(例如工作或家庭)設置應用程序。 要保存配置文件,只需跳入“配置文件”菜單,然后點擊“新配置文件”。 命名配置文件,然后點擊“創建”以保存它。
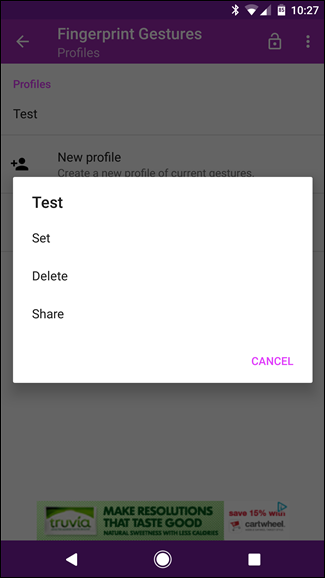
From that point forward, if you ever want to revert back to those particular settings, you’ll just have to head back into the Profiles menu, select it, and choose “Set”.
從那時起,如果您想恢復到那些特定的設置,則只需回到“個人檔案”菜單,選擇它,然后選擇“設置”即可。
There are also a handful of advanced options in Fingerprint Gestures, with “Allow only registered fingerprints” being one of my personal favorites. Basically, with this enabled, only?your fingerprints will be able to execute the Single Tap gesture. That’s only one of the gestures, but still?better than nothing.
指紋手勢中還有一些高級選項,“僅允許注冊的指紋”是我個人最喜歡的之一。 基本上,啟用此功能后,只有您的指紋才能執行“單擊”手勢。 那只是手勢之一,但總比沒有好。
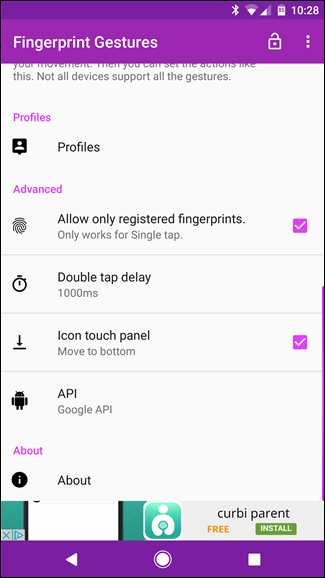
Otherwise, you can set the double tap delay time if you’d like (though I find the default 1000ms option to be perfect), as well as move the Icon Touch Panel to the bottom of the screen instead of the middle, and switch from the Google API to the Samsung API?(which is only for Samsung users on Lollipop or above).
否則,您可以根據需要設置雙擊延遲時間(盡管我發現默認的1000ms選項是完美的),也可以將Icon Touch Panel移到屏幕底部而不是中間,然后從Google API轉換為Samsung API(僅適用于Lollipop或更高版本的Samsung用戶)。
翻譯自: https://www.howtogeek.com/288109/how-to-add-gestures-to-your-android-phones-fingerprint-scanner/
android 指紋添加


:linux下安裝python+chrome+Xvfb)

)
使用numpy.savez保存字典后讀取的問題)


