If you have a spare Nintendo Wii remote with the Motion Plus add-on, you can use it to control your Windows PC from across the room. Here’s how to get it working in a couple of easy steps.
如果您有帶Motion Plus附加組件的備用Nintendo Wii遙控器,則可以使用它在整個房間內控制Windows PC。 這是通過幾個簡單的步驟使其運行的方法。
Using the Wii’s Motion Plus add-on and some software, you can easily control presentations or your home theater PC.? You will need:
使用Wii的Motion Plus附加組件和某些軟件,您可以輕松控制演示文稿或家庭影院PC。 你會需要:
- A Wii remote (obviously) Wii遙控器(顯然)
- The Motion Plus add-on Motion Plus附加組件
- Windows XP, Vista, or 7 Windows XP,Vista或7
- A Bluetooth dongle for your PC 適用于PC的藍牙加密狗
The WIDCOMM Bluetooth stack (from Broadcom’s website) (version 6.2.1.100 at the time of writing)
WIDCOMM藍牙堆棧(來自Broadcom的網站) (在撰寫本文時為版本6.2.1.100)
GlovePIE with Emotiv support (from the GlovePIE Project website) (version 0.43 at the time of writing)
在Emotiv支持下的GlovePIE(來自GlovePIE Project網站) (撰寫本文時為0.43版)
軟體 (The Software)
The WIDCOMM Bluetooth stack allows you to pair your computer with the Wii remote without using a code.? That’s the key piece to getting it working, and although the BlueSoleil stack can do this as well if not better, it’s not free.? After the pairing is complete, the GlovePIE application will run a script that takes your controller input and translate that into mouse emulation.? With some tweaking, you can extend the functionality of your makeshift mouse and even use it as a joystick/gamepad.
WIDCOMM藍牙堆棧使您無需使用代碼即可將計算機與Wii遙控器配對。 這是使其正常工作的關鍵,盡管BlueSoleil堆棧即使不是更好也可以做到這一點,但它不是免費的。 配對完成后,GlovePIE應用程序將運行一個腳本,該腳本接受您的控制器輸入并將其轉換為鼠標仿真。 通過一些調整,您可以擴展臨時鼠標的功能,甚至可以將其用作操縱桿/游戲手柄。
硬體 (The Hardware)
You need a compatible Bluetooth dongle to communicate with your Wii remote, and they can be found cheaply online if your computer doesn’t have one built-in already.? Using an alternative Bluetooth stack actually allows a wider compatibility with adapters, a very useful side-effect.? You can even use one that’s meant for wireless headphones or the like, as long as it uses Bluetooth.
您需要一個兼容的藍牙加密狗才能與Wii遙控器進行通信,如果您的計算機尚沒有內置的加密狗,可以在網上便宜地找到它們。 實際上,使用備用藍牙堆棧可以實現與適配器的廣泛兼容性,這是非常有用的副作用。 您甚至可以使用無線耳機之類的耳機,只要它使用藍牙即可。
Strictly speaking, you don’t need the Motion Plus add-on.? GlovePIE can take Wii remote input and use the pitch and yaw to move the cursor, but this doesn’t work very fluidly.? The controller can also use two IR light sources as an absolute reference point, which is how it works with the Wii itself, and get a more fluid movement.? You can even use two candles to get the same effect.? What makes the Motion Plus approach worthwhile is that you get a more fluid movement than using just the controller, while simultaneously not having to rely on the IR sources.? This makes it ideal for a quick setup for presentations, or when you’ve got daylight streaming in on your home theater setup.
嚴格來說,您不需要Motion Plus附加組件。 GlovePIE可以接受Wii遠程輸入,并使用音高和偏航來移動光標,但這并不是很流暢。 控制器還可以使用兩個IR光源作為絕對參考點,這就是它與Wii本身一起工作的方式,并獲得了更加流暢的運動。 您甚至可以使用兩支蠟燭來獲得相同的效果。 使Motion Plus方法值得的是,與僅使用控制器相比,您獲得了更多的流暢運動,同時又不必依賴紅外光源。 這使得它非常適合用于演示文稿的快速設置,或者在家庭影院設置中有日光流進時。
安裝軟件 (Installing the Software)
First, get your Bluetooth dongle plugged in and enabled.? This will vary from computer to computer and dongle to dongle, but you can skip installing drivers and extra software if you only want to use it for this, as the WIDCOMM stack includes its own drivers.
首先,插入并啟用藍牙加密狗。 這將因計算機的不同而有所不同,從軟件狗到軟件狗也有所不同,但是如果您只想為此使用驅動程序和其他軟件,則可以跳過安裝驅動程序和其他軟件的步驟,因為WIDCOMM堆棧包括其自己的驅動程序。
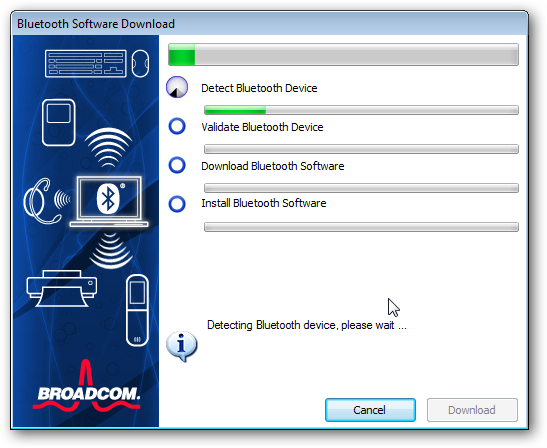
Next, download the WIDCOMM Bluetooth stack and double-click to install it.? Accept the license agreement and agree when it prompts you to install software.
接下來,下載WIDCOMM藍牙堆棧并雙擊以安裝它。 接受許可協議并在提示您安裝軟件時同意。

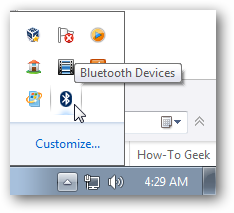
After the installation is finished, you should see a Bluetooth icon in your system tray, like so:
安裝完成后,您應該在系統托盤中看到一個藍牙圖標,如下所示:
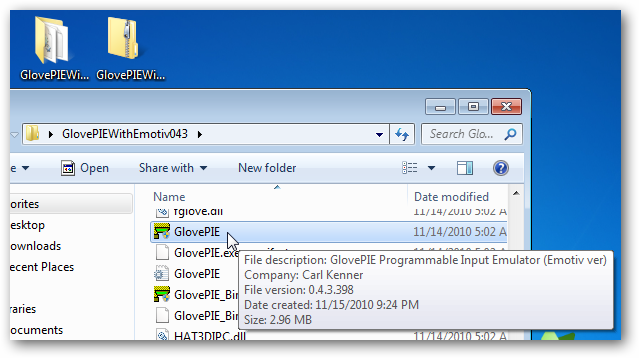
That takes care of half of the software.? Next, download GlovePIE (with Emotiv support) and unzip the file.? Inside the folder you’ve just created, you’ll see a file called GlovePIE, which is what we’ll use to script the inputs.
這將處理一半的軟件。 接下來,下載GlovePIE(具有Emotiv支持)并解壓縮文件。 在剛創建的文件夾中,您會看到一個名為GlovePIE的文件,這是我們用來編寫輸入腳本的文件。
連接Wii遙控器 (Connecting the Wii Remote)
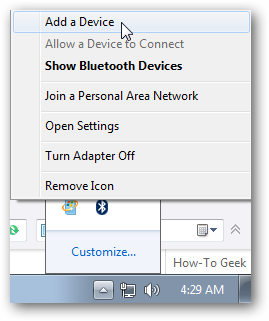
Right-click on the system tray icon, and go to “Add a Device.”
右鍵單擊系統任務欄圖標,然后轉到“添加設備”。
Next up, you’ll see a screen that says it’s searching for Bluetooth-enabled devices.? Hit the 1 + 2 buttons on your Wii remote now.
接下來,您將看到一個屏幕,顯示正在搜索支持藍牙的設備。 立即點擊Wii遙控器上的1 + 2按鈕。

You’ll see an input device named “Nintendo RVL-CNT-01” pop up in the window.? Select it and hit Next.
您會在窗口中看到一個名為“ Nintendo RVL-CNT-01”的輸入設備。 選擇它,然后單擊下一步。

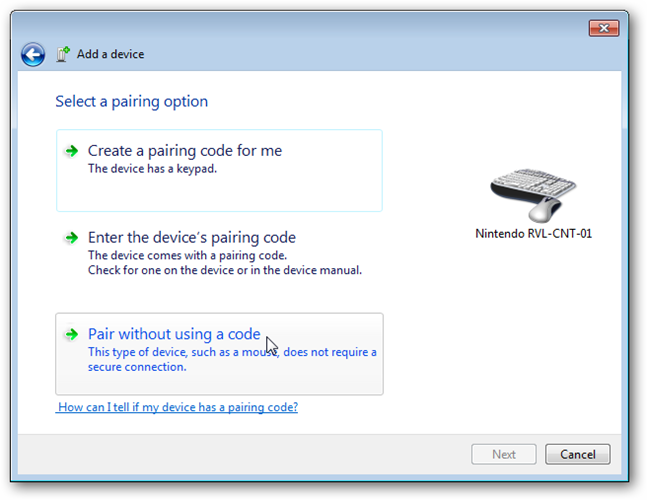
In the next pane, you’ll be asked how you’d like to pair with the device.? Choose “Pair without using a code.”
在下一個窗格中,將詢問您如何與設備配對。 選擇“無需使用代碼即可配對”。
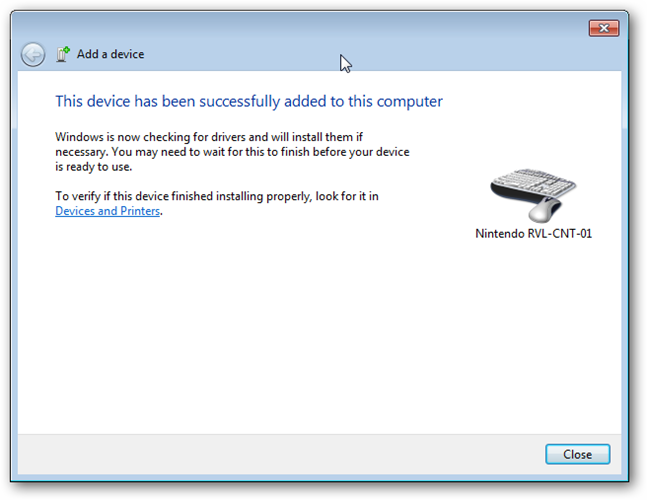
You should then see a screen that says it’s been paired and Windows is installing the necessary drivers for the device.
然后,您應該看到一個屏幕,上面顯示已配對,并且Windows正在為設備安裝必要的驅動程序。
GlovePIE設置 (GlovePIE Setup)
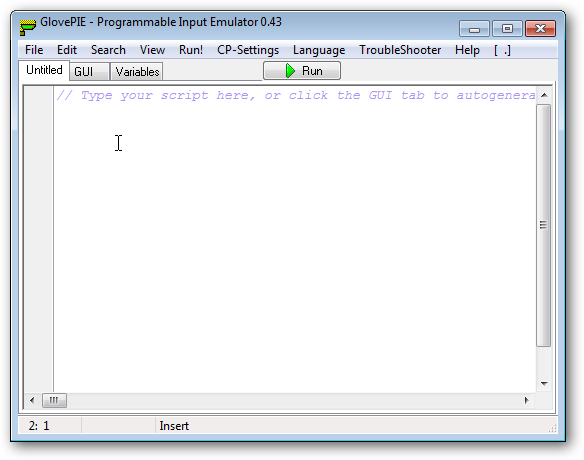
Open up GlovePIE with a quick double-click, and hit “Yes” at the security prompt.? You’ll see a complicated looking window like this:
快速雙擊打開GlovePIE,然后在安全提示下單擊“是”。 您會看到一個看起來很復雜的窗口,如下所示:
Don’t let that intimidate you!? Just go to File > Open, navigate into your GlovePIE folder, and head into the “WiimoteScripts” folder.
不要讓那嚇到你! 只需轉到“文件”>“打開”,導航到您的GlovePIE文件夾,然后轉到“ WiimoteScripts”文件夾。
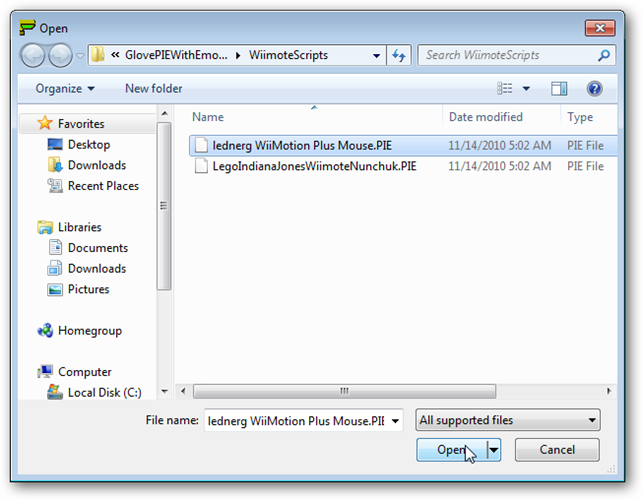
Choose the “lednerg WiiMotion Plus Mouse.PIE” script, and click Open.? You’ll see the main GlovePIE window displaying the script.
選擇“ lednerg WiiMotion Plus Mouse.PIE”腳本,然后單擊“打開”。 您將看到GlovePIE主窗口顯示該腳本。
Click on the “Run” button to execute the script.? You should see your Wii remote’s LEDs change configuration, from 1 and 4 being lit, to 2 and 3 being lit, and finally, only 1 will be lit.
單擊“運行”按鈕執行腳本。 您應該看到Wii遙控器的LED更改配置,從1和4點亮到2和3點亮,最后只有1點亮。

If you see a little sign next to the “Run” button that says “Motion Plus not detected!” just click “Stop,” make sure it’s inserted properly into the Wii remote, and try again.? It may take one or two tries but soon it’ll be properly interfacing with GlovePIE.
如果您在“運行”按鈕旁邊看到一個小標志,上面寫著“未檢測到Motion Plus!” 只需單擊“停止”,確保將其正確插入Wii遙控器,然后重試。 可能需要一兩次嘗試,但很快它將與GlovePIE正確連接。
使用陀螺儀鼠標 (Using Your Gyroscopic Mouse)
The “B” button on the bottom of the controller enables the cursor to move.? If you let go of it and reposition the controller, when you hit B next, it will continue holding the cursor from that position.? The movement sort of like using a touchpad on a laptop, where holding “B” is like having your finger touch the pad.? Sometimes, you’ve moved too far on the pad and need to lift your finger and move it to continue pushing the cursor.
控制器底部的“ B”按鈕使光標移動。 如果放開它并重新定位控制器,則當下次按下B時,它將繼續從該位置保持光標。 動作就像在筆記本電腦上使用觸摸板一樣,按住“ B”就像是用手指觸摸觸摸板一樣。 有時,您在墊板上的移動距離過長,需要抬起手指并移動它才能繼續按光標。
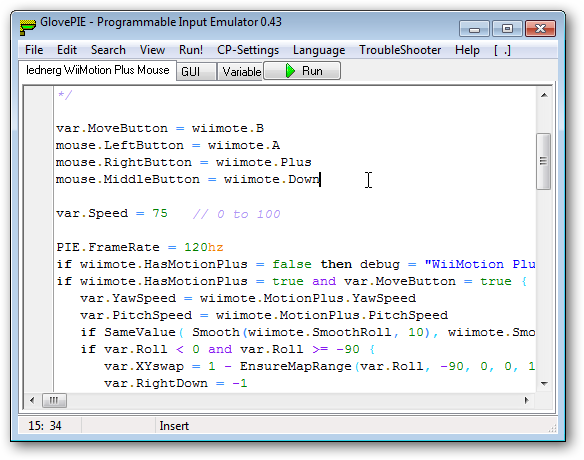
The “A” button acts as a left-click, the “Plus” button acts as a right-click, and “Down” on the directional pad acts as a middle-click.? The buttons work just like mouse buttons; they click when you push down on the button and unclick when you let go.
“ A”按鈕充當左鍵單擊,“ Plus”按鈕充當右鍵單擊,方向盤上的“ Down”充當中鍵單擊。 這些按鈕的工作方式類似于鼠標按鈕。 當您按下按鈕時它們會單擊,放開時它們會單擊取消。
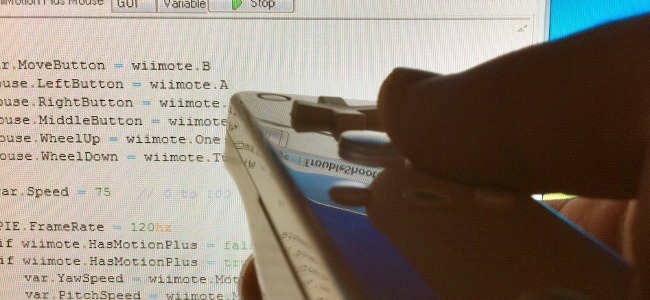
Almost happy with the script, I’ve ended up tweaking it to my favor.? After the first block of text, you can insert the following lines:
我幾乎對腳本感到滿意,但最終對其進行了調整,使其對我有利。 在第一段文本之后,您可以插入以下行:
mouse.WheelUp = wiimote.Onemouse.WheelDown = wiimote.Two
mouse.WheelUp = wiimote.Onemouse.WheelDown = wiimote.Two
It should look like this:
它看起來應該像這樣:
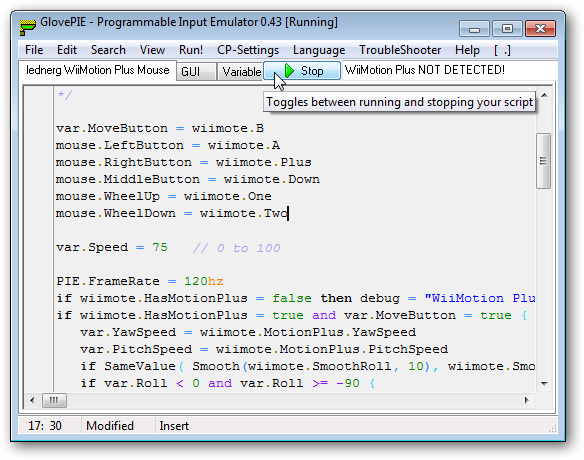
When this is run, you’ll get the added benefit of being able to use the 1 and 2 buttons to scroll up and down, respectively.? If you want to disconnect your controller, hold the power button until the LEDs turn off, and to reconnect, just hold down the 1 + 2 buttons to auto-pair with your PC.
運行此命令時,您將獲得額外的好處,即能夠分別使用1和2按鈕上下滾動。 如果要斷開控制器的連接,請按住電源按鈕直到LED熄滅,然后重新連接,只需按住1 + 2按鈕即可與PC自動配對。
Come up with clever uses of your own, or have a favorite GlovePIE script?? Be sure to share with us in the comments.
想出自己的聰明用法,還是喜歡一個GlovePIE腳本? 請務必在評論中與我們分享。
翻譯自: https://www.howtogeek.com/howto/35470/how-to-use-your-wii-remote-as-a-gyroscopic-mouse/
)


![[CQOI2012]模擬工廠 題解(搜索+貪心)](http://pic.xiahunao.cn/[CQOI2012]模擬工廠 題解(搜索+貪心))


