layui選項卡嵌套選項卡
One of the powerful features of ProtoPie is the ability to build fully portable and interactive UI components. We are going to make use of nested components, SVG icons, and layout constraints to build a tab bar UI component that is self-contained and flexible enough to reuse in any future project.
ProtoPie的強大功能之一是能夠構建完全可移植的交互式UI組件。 我們將利用嵌套的組件,SVG圖標和布局約束來構建選項卡式UI組件,該組件是獨立的并且足夠靈活,可以在以后的任何項目中重復使用。
01.導入SVG圖標 (01. Importing the SVG icons)
I’m using the following icons downloaded from Feather icons. To follow along download Home, Activity, Bell, and Settings.
我正在使用從Feather圖標下載的以下圖標 。 要繼續下載家庭,活動,鈴聲和設置。
Import your icons via Image import. You can shift-select and import them all in one go if you like
通過Image import導入圖標。 如果愿意,您可以一次選擇并導入所有內容
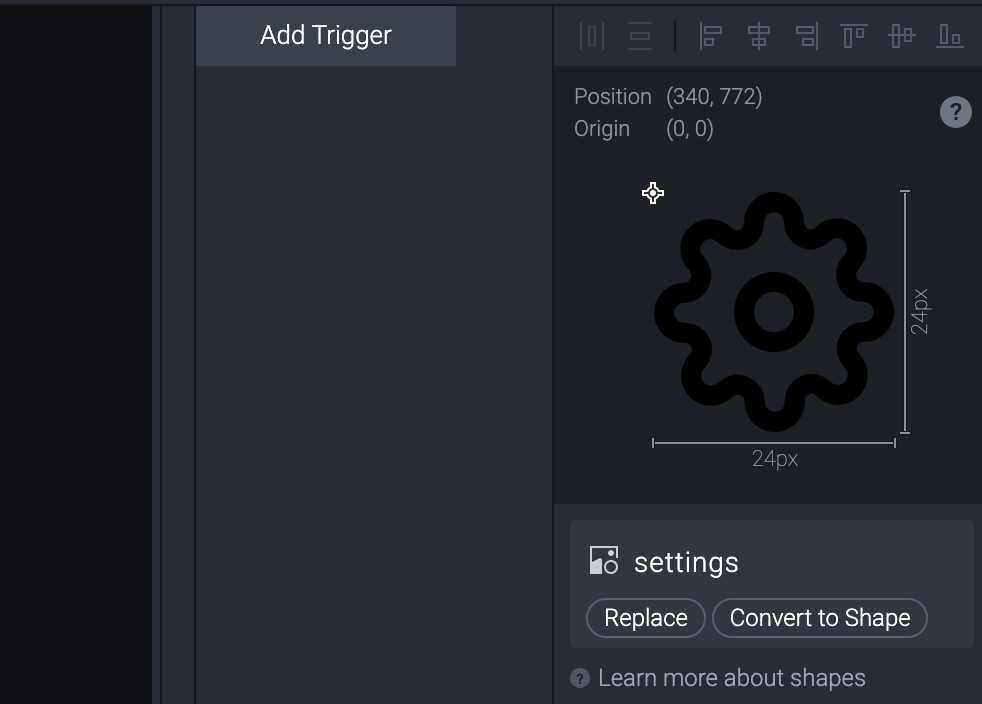
Currently, There’s a bug in ProtoPie which causes the icons to import at a smaller size so let’s fix that (not the bug obviously!). Taking each icon, in turn, make them 24 px (check that the padlock icon is locked to preserve the aspect ratio)
當前,ProtoPie中存在一個錯誤,該錯誤會導致圖標以較小的尺寸導入,因此讓我們對其進行修復(顯然不是該錯誤!)。 依次將每個圖標設為24像素 (檢查掛鎖圖標是否已鎖定以保持寬高比)
Select the first icon and tap Convert to Shape (you’ll find this under the image preview in the top right)
選擇第一個圖標,然后點擊“ 轉換為形狀” (您會在右上角的圖像預覽下找到它)
Choose a border color for your icon (I chose #228BE6)
為圖標選擇邊框顏色(我選擇了#228BE6 )
- Repeat for 3 more icons 重復3個以上的圖標
- Organize the icons in the layer panel with your left most icon being at the top and the right-most icon at the bottom. The order I’m using is Home, Activity, Bell, Settings 在圖層面板中組織圖標,最左邊的圖標在頂部,最右邊的圖標在底部。 我使用的順序是家庭,活動,響鈴,設置
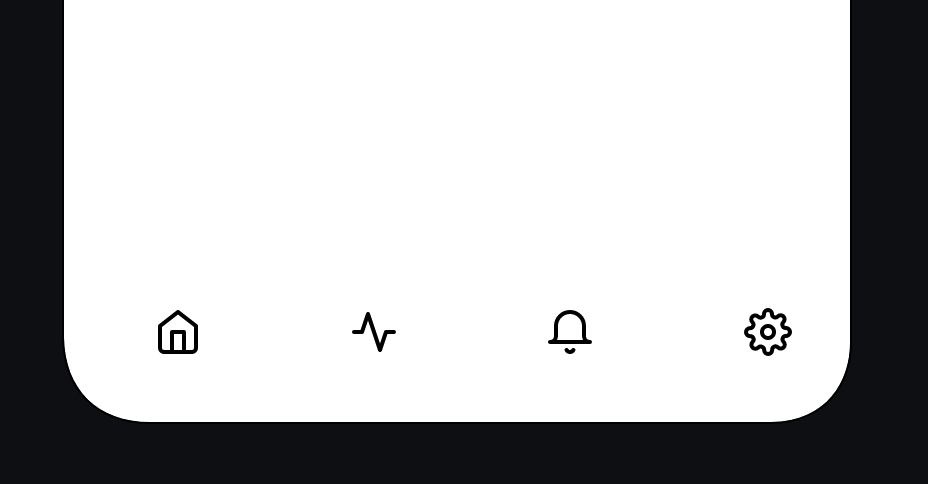
- Position the icons roughly in the tab bar location across the bottom of the screen 將圖標大致放置在屏幕底部的標簽欄位置
02.創建選項卡 (02. Creating the tabs)
We are going to have 4 tab items that will link to 4 separate scenes. Let’s create the Home tab first.
我們將有4個選項卡項目,它們將鏈接到4個單獨的場景。 首先創建“ 主頁”選項卡。
Use the Shape menu to create a rectangle (or press R on your keyboard) and make it 56 px high. Type 25% in the width field to get a width exactly one-quarter of the width of your prototype; The value will be converted to pixels for you.
使用“形狀”菜單創建一個矩形(或按鍵盤上的R)并將其設為56 px高。 在width字段中輸入25% ,以獲得正好等于原型寬度四分之一的寬度; 該值將為您轉換為像素。
- Move the rectangle into the bottom left of your screen until it snaps into place and positions it under the home icon layer. 將矩形移到屏幕的左下方,直到其固定到位并將其放置在主圖標層下。
- Move the Home icon into the center of the rectangle so it is both vertically and horizontally centered. You will know when it’s in the center when you see the red alignment lines or you could use the alignment tools located in the top right of the screen above the image preview window; to do this select both the rectangle and the Home icon and select the center horizontal and vertical 將主屏幕圖標移到矩形的中心,使其在垂直和水平方向上居中。 當您看到紅色的對齊線時,您將知道它何時位于中心,或者您可以使用圖像預覽窗口上方屏幕右上方的對齊工具; 為此,選擇矩形和“主頁”圖標,然后選擇水平和垂直居中
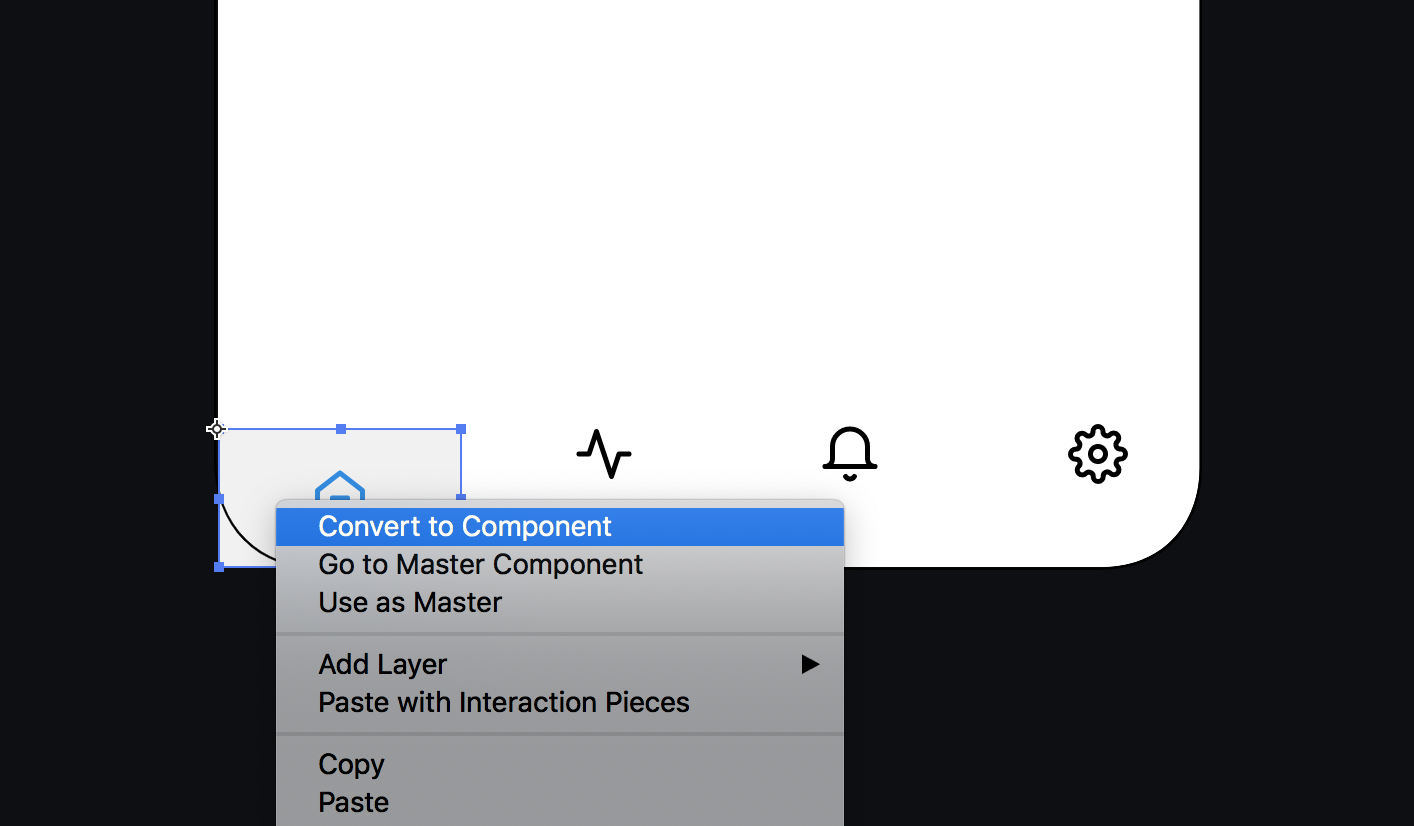
With both layers selected tap the component tool or right-click Convert to Component
選中兩個圖層后,點擊組件工具或右鍵單擊“ 轉換為組件”
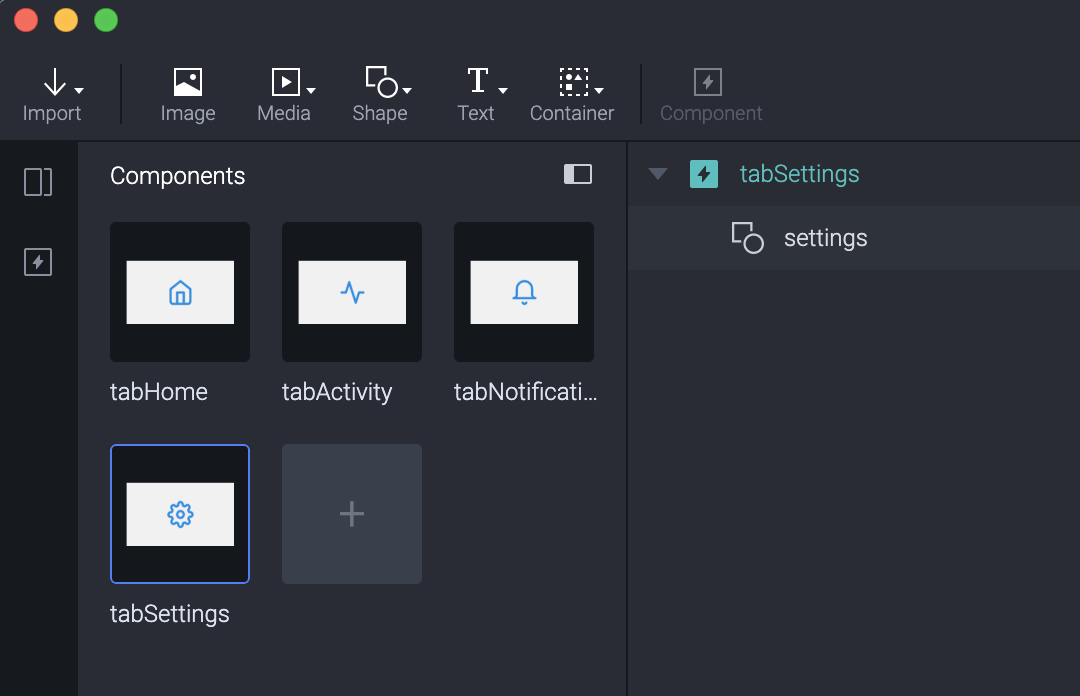
- Open the components panel and double-click on the ‘component 1’ 打開組件面板,然后雙擊“組件1”
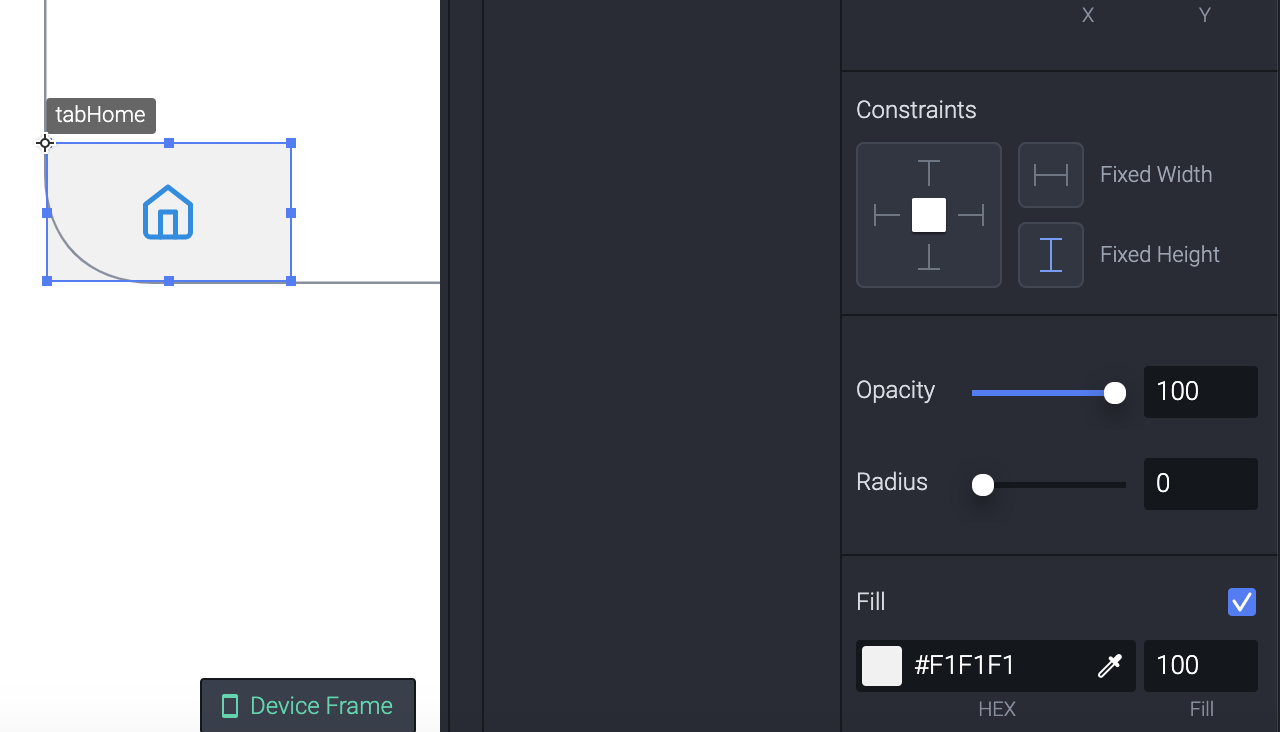
You’ll see a special group icon with the lightning bolt icon on it. Double-click the name and rename it to tabHome
您會看到一個特殊的組圖標,上面帶有閃電圖標。 雙擊名稱并將其重命名為tabHome
We can now remove the rectangle and instead apply the fill color to the group container instead. Select the component in the layers panel and change the fill color to #F1F1F1 and the fill opacity to 100.
現在,我們可以刪除矩形,而是將填充顏色應用于組容器。 在“圖層”面板中選擇組件,然后將填充顏色更改為#F1F1F1 ,并將填充不透明度更改為100 。
設定約束 (Set constraints)
Next, we want to set some constraints so the tab can expand to any size. Select the tabHome component in the layers panel and find the constraints in the properties panel on the right of the interface. Constraints break down into 3 boxes here. The left box is the pin constraints, the top right, and bottom right boxes are the size constraints. Any applied constraints will show as blue so tap them to toggle them off, we don’t want any constraints applied here
接下來,我們要設置一些約束,以便選項卡可以擴展到任何大小。 在“圖層”面板中選擇tabHome組件,然后在界面右側的屬性面板中找到約束。 約束在這里分為3個框。 左邊的框是管腳約束,右上方的框和右下方的框是尺寸約束。 任何應用的約束都將顯示為藍色,因此請點按以將其關閉,我們不想在此處應用任何約束
- Next, select the icon, we want to still constrain its aspect ratio so keep the size constraints set to on but remove all of the pin constraints. If you drag the middle -right container handle out now you should see that you have a flexible tab 接下來,選擇圖標,我們仍要限制其寬高比,因此將尺寸限制設置為開,但刪除所有的引腳限制。 如果現在將中間右容器的手柄拖出,則應該看到有一個靈活的選項卡
Tap the back button (top left) or double-click Scene 1 to navigate back to the scene
點擊后退按鈕(左上方)或雙擊場景1導航回到場景
- We now need to create the other 3 tabs 現在,我們需要創建其他3個標簽
Go to the Components panel and duplicate tabHome by selecting it and typing Cmd+D (Ctrl+D Windows)
轉到“ 組件”面板并復制“ 選項卡”主頁,方法是選擇它并鍵入Cmd + D (Ctrl + D Windows)
Double-click the name and rename it tabActivity
雙擊名稱并將其重命名為tabActivity
repeat steps for the other 2 tabs calling them tabNotifications and tabSettings respectively
對其他兩個選項卡分別重復步驟,分別稱為tabNotifications和tabSettings
Copy the activity icon and open tabActivity by double-clicking it in the component panel
復制活動圖標并在組件面板中雙擊以打開tabActivity
Paste the icon and position its correctly then delete the old icon making sure you remove the pin constraints from the newly pasted icon
粘貼圖標并正確放置其位置,然后刪除舊圖標,確保從新粘貼的圖標中刪除了引腳約束
- repeat 8–9 for the other two tabs 對其他兩個選項卡重復8–9
- Delete any loose icons from the main scene leaving only the home tab component 從主場景中刪除任何寬松的圖標,僅保留主選項卡組件
Congratulations you should now have four flexible tabs in your components panel for your 4 app sections.
恭喜,您現在應該在組件面板中為4個應用程序部分提供了四個靈活的標簽。
Next up we are going to create the TabBar
接下來,我們將創建TabBar
03.創建選項卡欄 (03. Creating the Tab Bar)
Next, we want to create the tab bar that the tabs will nest inside. This will give us a single tab bar component that we can reuse.
接下來,我們要創建標簽欄,標簽將嵌套在其中。 這將為我們提供一個可重復使用的選項卡欄組件。
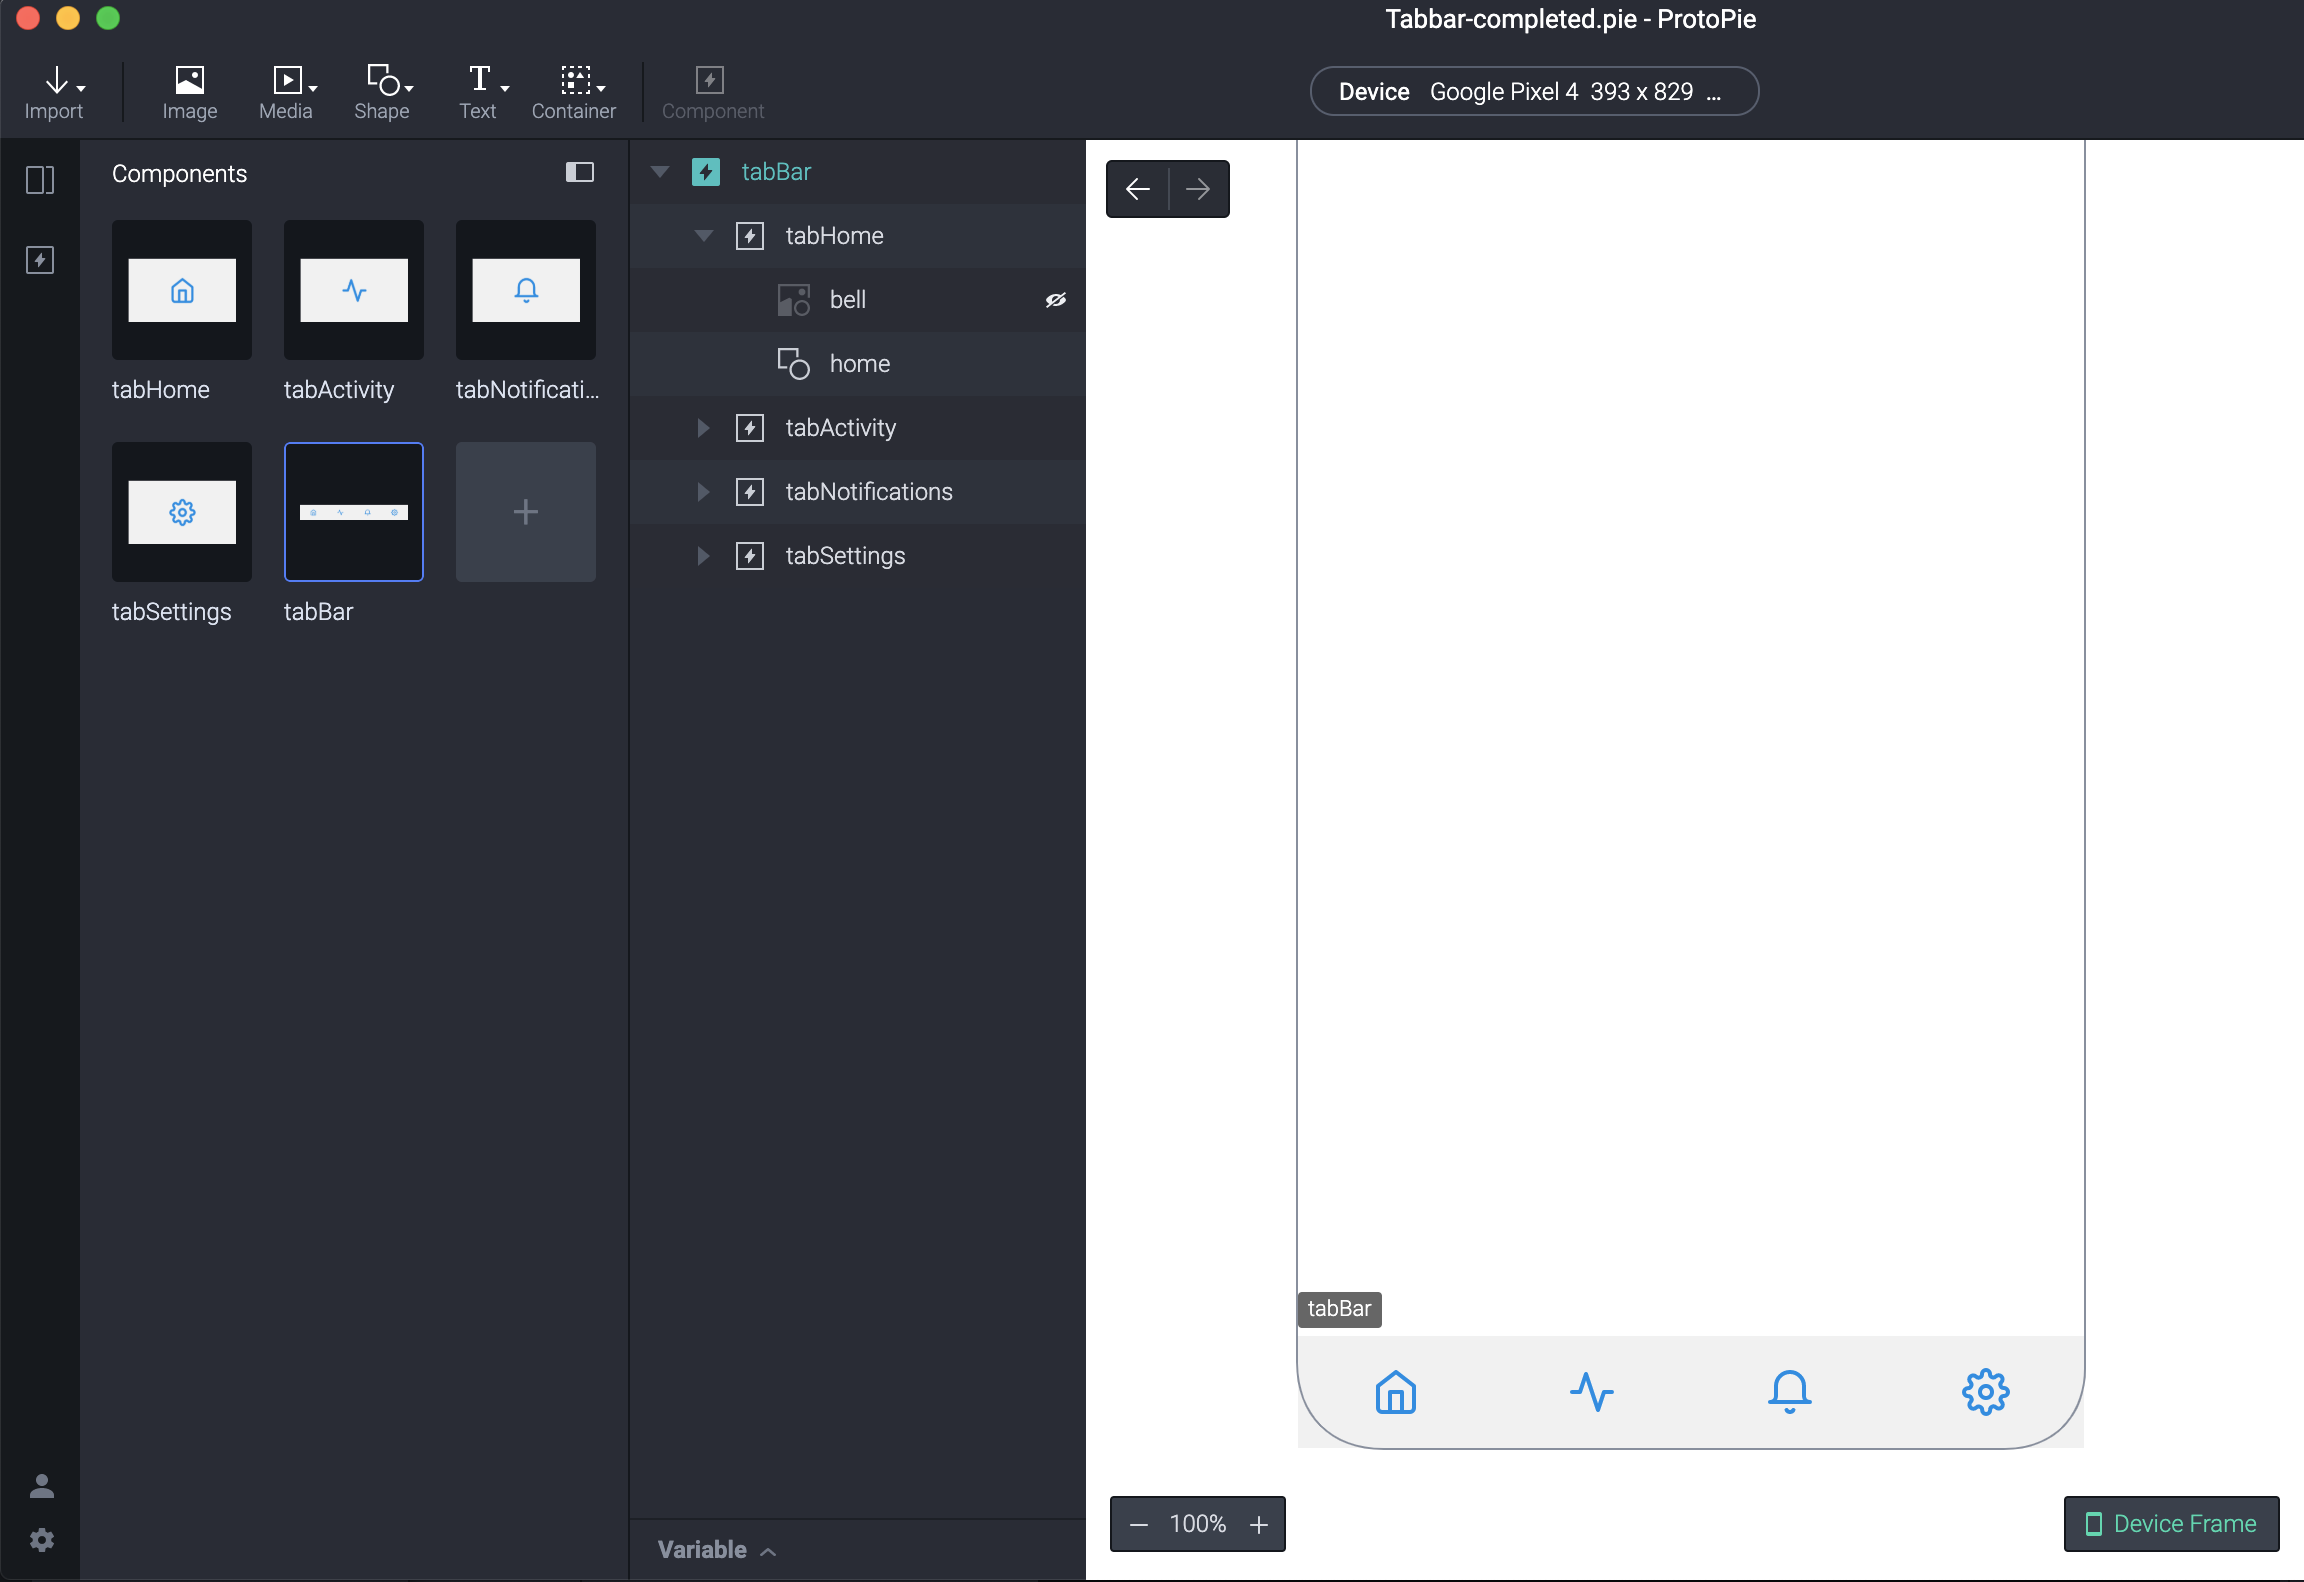
- Drag out an instance of each tab so that you have 4 tabs in the scene and position them at the bottom ordering them from left to right Home, Activity, Notifications, and Settings. You may notice some slight gaps between the tabs but don’t worry about that, we’ll fix it later 拖出每個選項卡的一個實例,以使您在場景中擁有4個選項卡,并將它們放置在底部,以從左到右的順序依次按“首頁”,“活動”,“通知”和“設置”。 您可能會注意到各個標簽之間存在一些細微的間隔,但不必擔心,我們稍后會修復
- You now have four tab copies which we call ‘instances’ in your scene. Rename the layers to read TabHome, TabActivity, TabNotifications, and TabSettings. I like to order the layers top to bottom to match the order of left to right as well 現在,您有四個選項卡副本,我們在您的場景中稱其為“實例”。 重命名圖層以讀取TabHome,TabActivity,TabNotifications和TabSettings。 我喜歡按從上到下的順序排列圖層,以匹配從左到右的順序
- Select all of the layers and right-click (Ctrl-click) and select Convert to component. You will now have a new in the layers panel 選擇所有圖層,然后單擊鼠標右鍵(Ctrl單擊),然后選擇“轉換為零部件”。 現在,“圖層”面板中將有一個新的
- Rename the component instance TabBar. You will have to do this as well to the component in the Components panel 重命名組件實例TabBar。 您還必須對“組件”面板中的組件執行此操作
- Open the TabBar component and select the component group. We need to fix and gaps we might have between the tab items. 打開TabBar組件,然后選擇組件組。 我們需要修復選項卡項目之間可能存在的差距。
- Change the fill to #F1F1F1 and set the fill to 100 將填充更改為#F1F1F1并將填充設置為100
We now have a fully constructed flexible Tabbar. Try dragging the width out and all of the tabs should expand as a flexible liquid component.
現在,我們有了一個完全構建的靈活的Tabbar。 嘗試將寬度拉出,所有選項卡應作為一種靈活的液體成分展開。
04.設置選項卡項目狀態 (04. Setting up the Tab Item states)
So at the moment, our Tabbar doesn’t do anything. The way we are going to set up our app to make use of this tab bar is to create a scene for each tab section. When each tab is tapped the prototype will change to the selected scene and the visual appearance of the selected item is going to change so that it looks active.
因此,目前,我們的Tabbar無效。 我們設置應用程序以使用此標簽欄的方法是為每個標簽部分創建一個場景。 輕觸每個選項卡后,原型將更改為所選場景,并且所選項目的視覺外觀也將更改,以使其看起來很活躍。
To trigger responses inside of our components we are going to use a special trigger and response that work together. These are called Send and Receive.
為了在組件內部觸發響應,我們將使用特殊的觸發和響應一起工作。 這些稱為發送和接收 。
We are going to use the Send response to send a message to the nested tabs so that when each tab is tapped the app will move to the selected scene and make that tab active.
我們將使用“發送”響應將消息發送到嵌套的選項卡,以便在點擊每個選項卡時,應用程序將移動到所選場景并使該選項卡處于活動狀態。
設置場景 (Setting up the scenes)
- Lets first create the 4 sections of our app by duplicating the current scene three times (Cmd+D Mac / Ctrl+D Windows 首先,通過將當前場景復制三遍來創建應用程序的4個部分(Cmd + D Mac / Ctrl + D Windows
- Rename the scenes by double-clicking their names in the scenes panel Home, Activity, Notifications, Settings 通過在場景面板“主頁”,“活動”,“通知”,“設置”中雙擊它們的名稱來重命名場景

Next, we want to set the triggers inside of the tabBar so that when each tab is tapped the prototype navigates to the correct scene.
接下來,我們要在tabBar內設置觸發器,以便在點擊每個選項卡時,原型導航到正確的場景。
First, let’s add a title on each scene so that we know the navigation is working properly. On each scene add a text label by going to the Text tool and choosing Text. Then type in the name of the scene. You can style it how you want. Do this for all four scenes
首先,讓我們在每個場景上添加一個標題,以便我們知道導航工作正常。 在每個場景上,通過轉到“ 文本”工具并選擇“ 文本”來添加文本標簽。 然后輸入場景名稱。 您可以根據需要設置樣式。 對所有四個場景都這樣做
- Ok so now we need to add the actual navigation responses so go to the components panel and open the TabBar 好的,現在我們需要添加實際的導航響應,因此轉到組件面板并打開TabBar
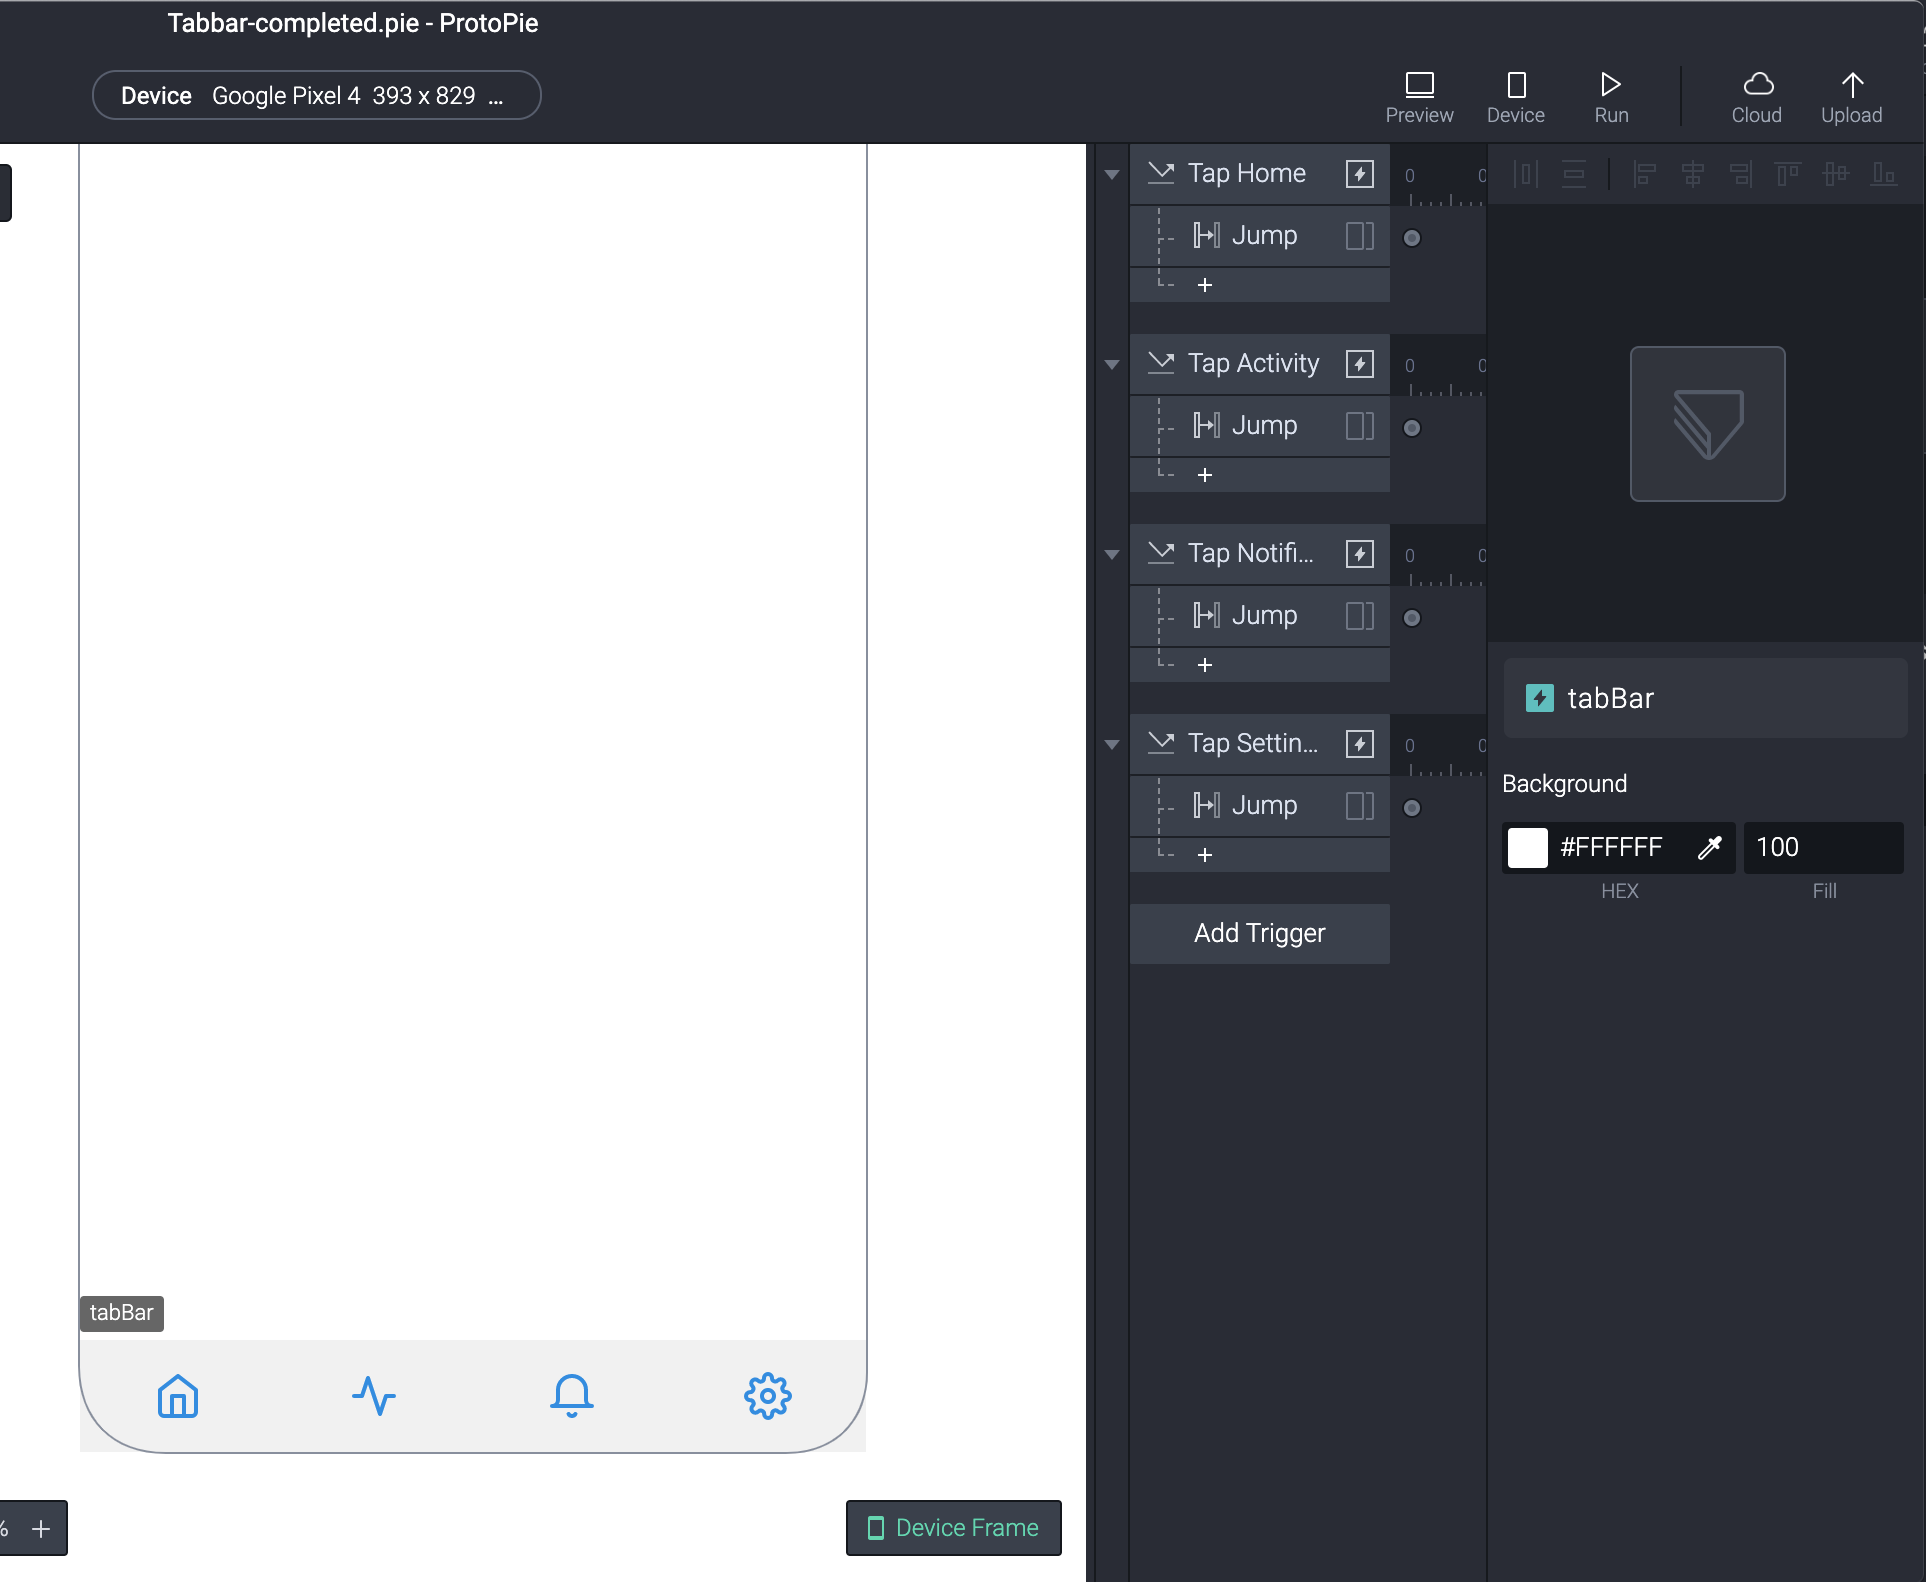
We are now going to add the jump response which is what we use to navigate from scene to scene. Select tabHome and select Add Trigger and choose Tap
現在,我們將添加跳轉響應,這是我們用來在場景之間導航的內容。 選擇選項卡主頁,然后選擇添加觸發器,然后選擇點擊
Now add the response Jump
現在添加響應跳轉
From the scene menu select Home. We are going to leave the transition as None as tabs typically have no animation between them
從場景菜單中選擇“ 主頁”。 我們將過渡設置為“無”,因為標簽之間通常沒有動畫
- Repeat steps 3–4 for the other 3 tabs 對其他3個選項卡重復步驟3-4
留言內容 (Messages)
Before we move on let’s chat a bit about messages. Messages are the mechanism we use to trigger actions within components and scenes. You can send any text message you like. It’s essentially something unique that you are matching so that you can trigger an action. There are however some important things to remember:
在繼續之前,我們先聊一些消息。 消息是我們用來觸發組件和場景中的動作的機制。 您可以發送任何您喜歡的短信。 實際上,這是您要匹配的唯一事物,因此您可以觸發操作。 但是,有一些重要的事情要記住:
- Messages are case sensitive, HOME and home are two different messages 消息區分大小寫,HOME和home是兩種不同的消息
- Messages need to be unique as they are being matched 消息在匹配時需要唯一
- Messages should be clear and descriptive 消息應清晰,描述性
I use a special format for all of my messages borrowed from programming. I type them in all caps and use underscores to separate words e.g MY_MESSAGE. You can, of course, use any format you like.
對于從編程中借來的所有消息,我都使用一種特殊的格式。 我用大寫字母輸入,并用下劃線分隔單詞,例如MY_MESSAGE。 當然,您可以使用任何喜歡的格式。
In the case of our tab bar, we are going to use messages to trigger the selected states so lets set that up now.
就我們的標簽欄而言,我們將使用消息來觸發所選狀態,因此現在就進行設置。

- Navigate to the Home scene 導航到家庭場景
Add a Start trigger to the scene
向場景添加開始觸發器
Add a Send response to the Start trigger and choose Send to Current Scene from the Channel menu
將發送響應添加到“開始”觸發器,然后從“通道”菜單中選擇“ 發送到當前場景 ”
In the Message field for our Send response type HOME_SELECTED
在我們發送回復的消息字段中,輸入HOME_SELECTED
Repeat 1–3 for the other 3 scenes using the messages ACTIVITY_SELECTED, NOTIFICATIONS_SELECTED AND SETTINGS_SELECTED. To speed things up you can copy the first Start interaction you created by selecting the Start trigger and pressing Cmd+C (Ctrl+C Windows) and then paste it onto the other scenes before making the necessary changes
使用消息ACTIVITY_SELECTED , NOTIFICATIONS_SELECTED和SETTINGS_SELECTED對其他3個場景重復1-3。 為了加快速度,您可以通過選擇開始觸發器并按Cmd + C(Ctrl + C Windows)復制您創建的第一個開始交互,然后將其粘貼到其他場景上,然后進行必要的更改
選項卡選擇狀態 (The tab selected state)
We now need to change the visual appearance of the tab so that it looks active. I’m going to style it like this:
現在,我們需要更改選項卡的外觀,使其看起來處于活動狀態。 我將按以下方式對其進行樣式設置:

- Double-click the ‘tabHome’ component in the components panel 在組件面板中雙擊“ tabHome”組件
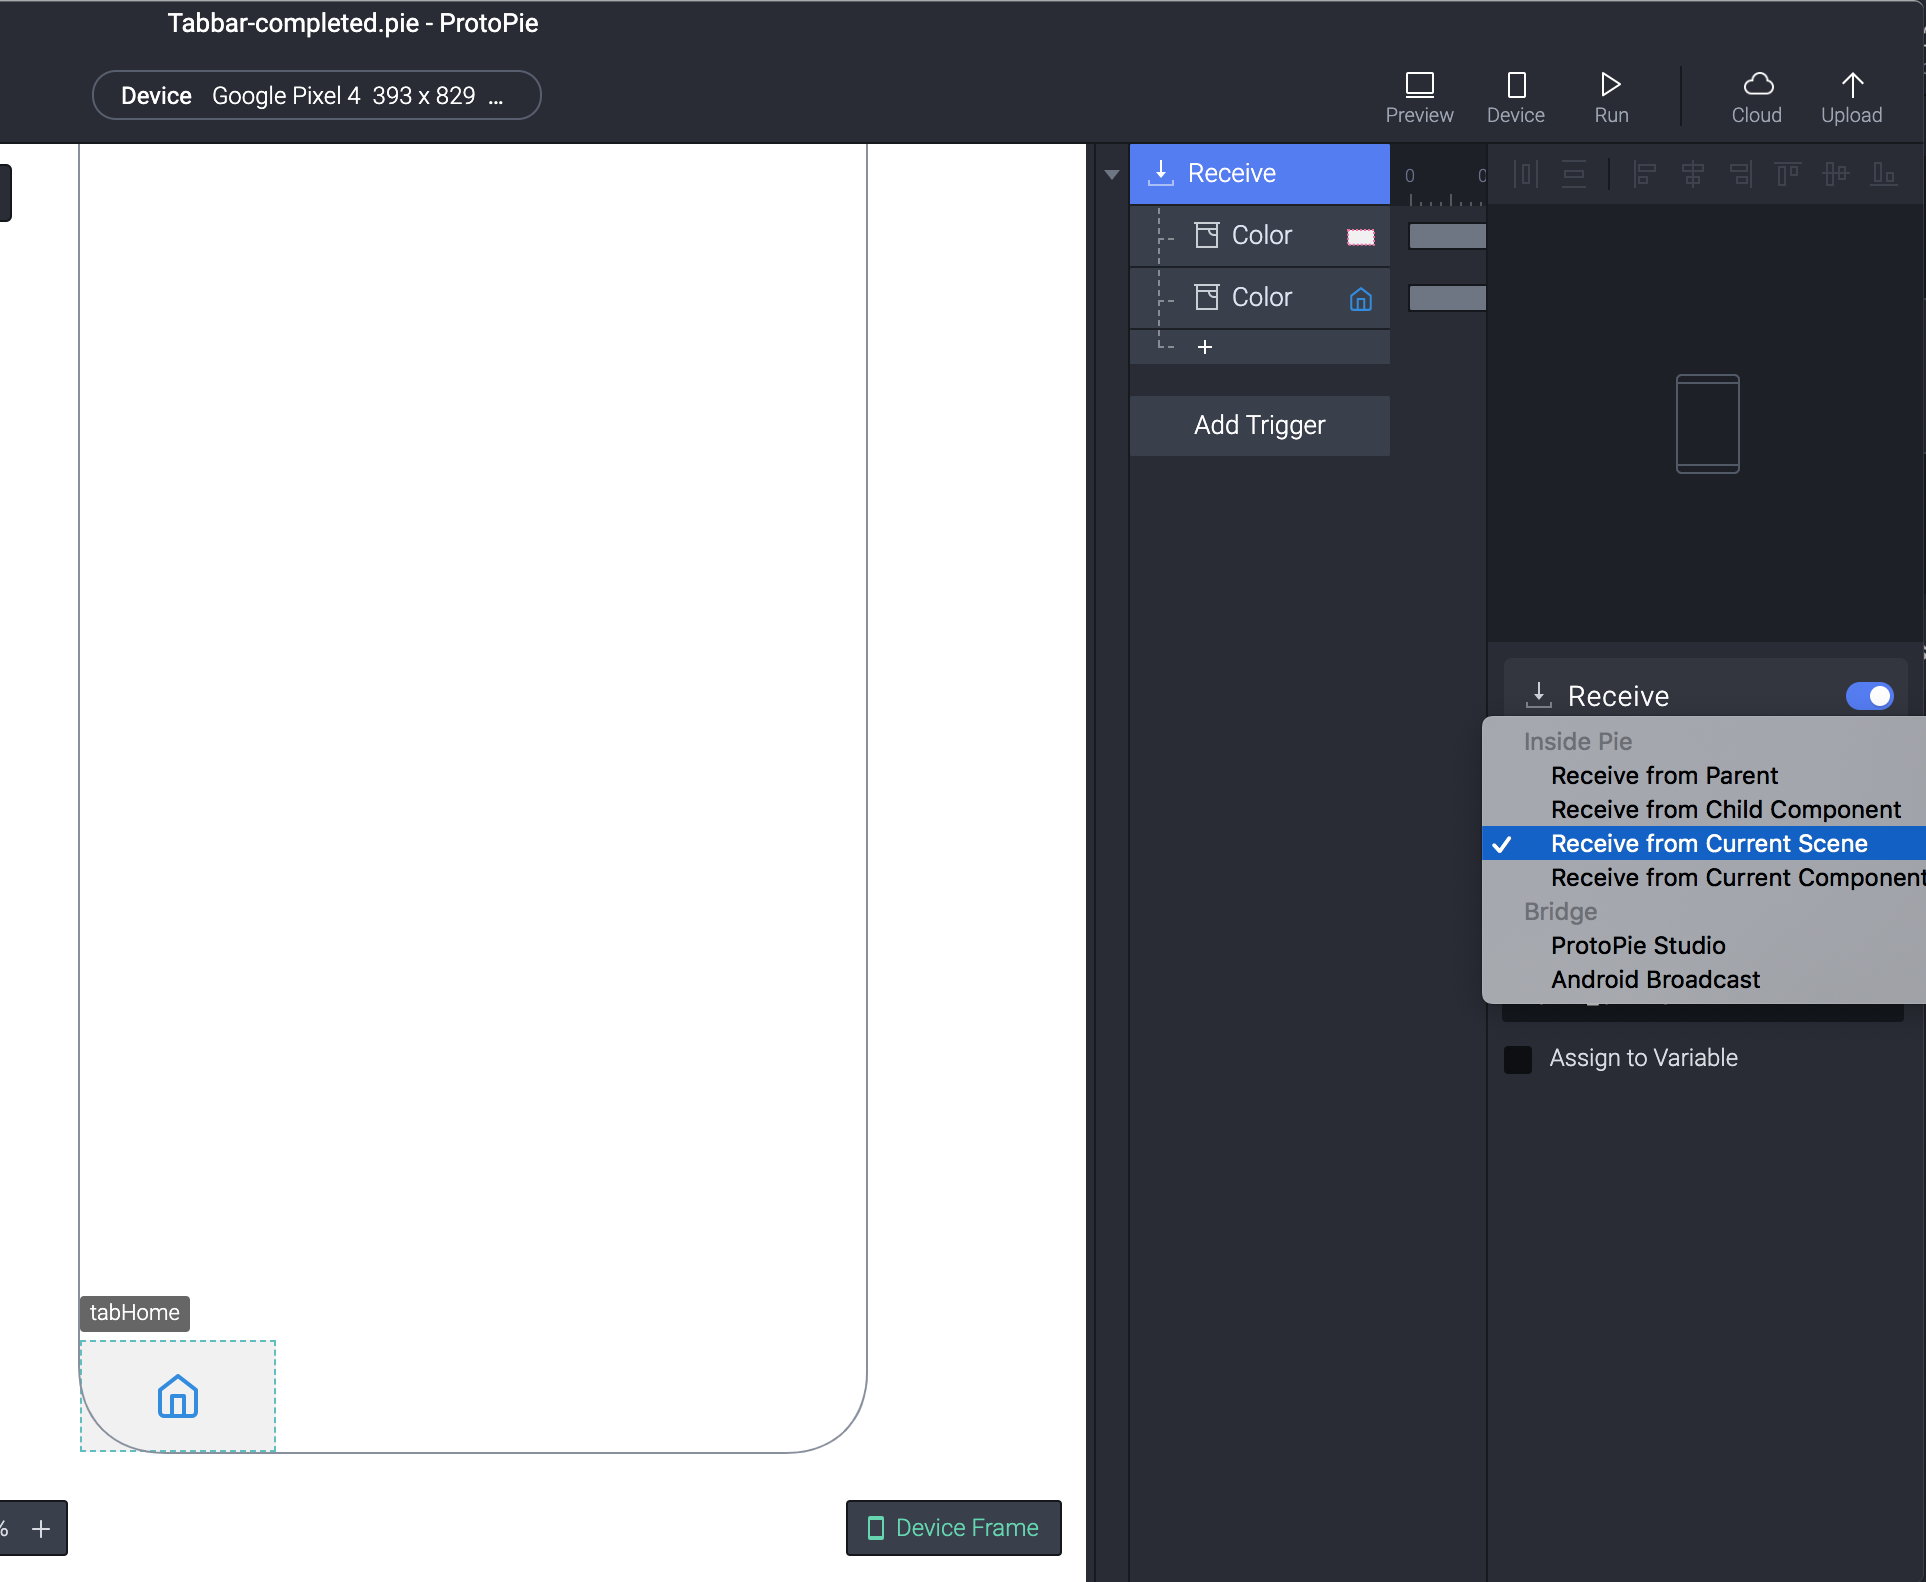
Add a Receive trigger and select Receive from Current Scene from the Channel list
添加一個接收觸發器,然后從“通道”列表中選擇“ 從當前場景接收”
Tap in the Message field and type HOME_SELECTED, currently, auto-fill doesn’t work for this type of connection so we have to type it in.
在“消息”字段中點擊,然后鍵入HOME_SELECTED ,當前,自動填充不適用于這種類型的連接,因此我們必須輸入它。
Select TabHome and add a Color response. Change the fill property to #228BE6 and set the fill to 100
選擇TabHome并添加顏色響應。 將填充屬性更改為#228BE6并將填充設置為100
Add another Color response, this time for the icon. Check the Border checkbox and set it to #FFFFFF and the fill to 100.
添加另一個顏色響應,這次添加圖標。 選中邊框復選框 并將其設置為#FFFFFF ,并將填充設置為100 。
- Repeat steps 1–5 for the other tab components replacing the relevant message (ACTIVITY_SELECTED, NOTIFICATIONS_SELECTED AND SETTINGS_SELECTED) in the receive trigger. Remember you can use copy/paste 對其他選項卡組件重復步驟1-5,以替換接收觸發器中的相關消息(ACTIVITY_SELECTED,NOTIFICATIONS_SELECTED和SETTINGS_SELECTED)。 請記住,您可以使用復制/粘貼
- Return to the Home scene and tap preview to see your tab bar working 返回主屏幕并點擊預覽以查看選項卡欄的工作情況
You have now completed a reusable tab component within ProtoPie. You can now copy and paste this across your prototypes. The only extra work you’ll need to do is copy the Start interaction group across that you added to each scene. You can do this by selecting it and simply performing a copy & paste.
現在,您已經完成了ProtoPie中的可重用選項卡組件。 您現在可以在整個原型中復制并粘貼它。 您唯一需要做的額外工作是復制添加到每個場景的“ 開始”交互組。 您可以選擇它,然后簡單地執行復制和粘貼操作。
There’s a lot more to explore with components but hopefully, you can see how useful they are and how you can create your UI in a reusable way
關于組件,還有很多要探索的東西,但是希望,您可以看到它們的有用性以及如何以可重用的方式創建UI
If you want to follow on by video check out the video here at ProtoPilot.
如果您想繼續觀看視頻,請在ProtoPilot上觀看視頻。
Happy ProtoPie-ing!
快樂的原型制作!
翻譯自: https://uxdesign.cc/building-a-tab-bar-with-nested-components-in-protopie-fcff8915b3b7
layui選項卡嵌套選項卡
本文來自互聯網用戶投稿,該文觀點僅代表作者本人,不代表本站立場。本站僅提供信息存儲空間服務,不擁有所有權,不承擔相關法律責任。 如若轉載,請注明出處:http://www.pswp.cn/news/275442.shtml 繁體地址,請注明出處:http://hk.pswp.cn/news/275442.shtml 英文地址,請注明出處:http://en.pswp.cn/news/275442.shtml
如若內容造成侵權/違法違規/事實不符,請聯系多彩編程網進行投訴反饋email:809451989@qq.com,一經查實,立即刪除!相關文章

50行代碼串行Promise,koa洋蔥模型原來這么有趣?
)
如何定位死循環或高CPU使用率(linux)

js 用迭代器模式優雅的處理遞歸問題

如何抓取html請求,請求獲取網頁的response,獲取網頁的html 怎么那么慢

Serverless 究竟是什么?

instagram.apk_評論:Instagram Reels vs.TikTok

240多個jQuery常用到的插件

華為首款鴻蒙設備正式入網,華為首款鴻蒙設備正式入網:麒麟9000+挖孔全面屏,價格感人!...


myeclipse深色模式_完善深色模式的調色板

微軟悄悄發布了 Web 版的 VsCode

html中樣式表的三種形式,CSS樣式表有幾種存在方式

figma設計_設計原型的最簡單方法:Figma速成課程
)
《大話數據結構》讀后總結(九)

關于router name 的url重寫 --frontname rewrite frontname重寫!

初中級工程師如何快速成長和尋求突破
后樣式無效,jquery.ajax使用字符串拼接后內聯css樣式失效)
ajax使用html()后樣式無效,jquery.ajax使用字符串拼接后內聯css樣式失效

ios 按鈕圖片充滿按鈕_iOS有一些非常危險的按鈕-UX評論

