在編寫自己定義滑動控件時經常會用到Android觸摸機制和Scroller及VelocityTracker。Android Touch系統簡單介紹(二):實例具體解釋onInterceptTouchEvent與onTouchEvent的調用過程對Android觸摸機制須要用到的函數進行了具體的解釋。本文主要介紹兩個重要的類:Scroller及VelocityTracker。利用上述知識,最后給出了一個自己定義滑動控件的demo,該demo類似于ImageGallery。
ImageGallery通常是用GridView來實現的,能夠左右滑動。本樣例實現的控件直接繼承一個ViewGroup,對其回調函數如 onTouchEvent、onInterceptTouchEvent、computeScroll等進行重載。弄懂該代碼。對Android touch的認識將會更深一層。
VelocityTracker:用于對觸摸點的速度跟蹤,方便獲取觸摸點的速度。
使用方法:一般在onTouchEvent事件中被調用。先在down事件中獲取一個VecolityTracker對象,然后在move或up事件中獲取速度,調用流程可例如以下列所看到的:
VelocityTracker vTracker = null;
@Override
public boolean onTouchEvent(MotionEvent event){  int action = event.getAction();  switch(action){  case MotionEvent.ACTION_DOWN:  if(vTracker == null){  vTracker = VelocityTracker.obtain();  }else{  vTracker.clear();  }  vTracker.addMovement(event);  break;  case MotionEvent.ACTION_MOVE:  vTracker.addMovement(event);  //設置單位,1000 表示每秒多少像素(pix/second),1代表每微秒多少像素(pix/millisecond)。 vTracker.computeCurrentVelocity(1000);  //從左向右劃返回正數,從右向左劃返回負數System.out.println("the x velocity is "+vTracker.getXVelocity());  //從上往下劃返回正數,從下往上劃返回負數System.out.println("the y velocity is "+vTracker.getYVelocity());  break;  case MotionEvent.ACTION_UP:  case MotionEvent.ACTION_CANCEL:  vTracker.recycle();  break;  }  return true;
}
Scroller:用于跟蹤控件滑動的軌跡。此類不會移動控件,須要你在View的一個回調函數computerScroll()中使用Scroller對象還獲取滑動的數據來控制某個View。
  /*** Called by a parent to request that a child update its values for mScrollX* and mScrollY if necessary. This will typically be done if the child is* animating a scroll using a {@link android.widget.Scroller Scroller}* object.*/
public void computeScroll()
{
}以下給出一段代碼:
@Override
public void computeScroll() {	// TODO Auto-generated method stubLog.e(TAG, "computeScroll");if (mScroller.computeScrollOffset()) { //or !mScroller.isFinished()Log.e(TAG, mScroller.getCurrX() + "======" + mScroller.getCurrY());scrollTo(mScroller.getCurrX(), mScroller.getCurrY());Log.e(TAG, "### getleft is " + getLeft() + " ### getRight is " + getRight());postInvalidate();}elseLog.i(TAG, "have done the scoller -----");
}
/*** Call this when you want to know the new location.  If it returns true,* the animation is not yet finished.*/
public boolean computeScrollOffset() {if (mFinished) {return false;}//滑動已經持續的時間int timePassed = (int)(AnimationUtils.currentAnimationTimeMillis() - mStartTime);//若在規定時間還未用完,則繼續設置新的滑動位置mCurrX和mCurryif (timePassed < mDuration) {switch (mMode) {case SCROLL_MODE:float x = timePassed * mDurationReciprocal;if (mInterpolator == null)x = viscousFluid(x); elsex = mInterpolator.getInterpolation(x);mCurrX = mStartX + Math.round(x * mDeltaX);mCurrY = mStartY + Math.round(x * mDeltaY);break;case FLING_MODE:final float t = (float) timePassed / mDuration;final int index = (int) (NB_SAMPLES * t);float distanceCoef = 1.f;float velocityCoef = 0.f;if (index < NB_SAMPLES) {final float t_inf = (float) index / NB_SAMPLES;final float t_sup = (float) (index + 1) / NB_SAMPLES;final float d_inf = SPLINE_POSITION[index];final float d_sup = SPLINE_POSITION[index + 1];velocityCoef = (d_sup - d_inf) / (t_sup - t_inf);distanceCoef = d_inf + (t - t_inf) * velocityCoef;}mCurrVelocity = velocityCoef * mDistance / mDuration * 1000.0f;mCurrX = mStartX + Math.round(distanceCoef * (mFinalX - mStartX));// Pin to mMinX <= mCurrX <= mMaxXmCurrX = Math.min(mCurrX, mMaxX);mCurrX = Math.max(mCurrX, mMinX);mCurrY = mStartY + Math.round(distanceCoef * (mFinalY - mStartY));// Pin to mMinY <= mCurrY <= mMaxYmCurrY = Math.min(mCurrY, mMaxY);mCurrY = Math.max(mCurrY, mMinY);if (mCurrX == mFinalX && mCurrY == mFinalY) {mFinished = true;}break;}}else {mCurrX = mFinalX;mCurrY = mFinalY;mFinished = true;}return true;
}當我們運行ontouch或invalidate()或postInvalidate()都會導致這種方法的運行。
我們在開發控件時。常會有這種需求:當單機某個button時。某個圖片會在規定的時間內滑出窗體。而不是一下子進入窗體。實現這個功能能夠使用Scroller來實現。
以下給出一段代碼,該代碼控制下一個界面在3秒時間內緩慢進入的效果。
public void moveToRightSide(){if (curScreen <= 0) {return;}curScreen-- ;Log.i(TAG, "----moveToRightSide---- curScreen " + curScreen);mScroller.startScroll((curScreen + 1) * getWidth(), 0, -getWidth(), 0, 3000);scrollTo(curScreen * getWidth(), 0);invalidate();
}當startScroll運行過程中即在duration時間內,computeScrollOffset ?方法會一直返回true,但當動畫運行完畢后會返回返加false.
這個函數的源代碼例如以下所看到的,主要用于設置滑動參數
/*** Start scrolling by providing a starting point, the distance to travel,* and the duration of the scroll.* * @param startX Starting horizontal scroll offset in pixels. Positive*        numbers will scroll the content to the left.* @param startY Starting vertical scroll offset in pixels. Positive numbers*        will scroll the content up.* @param dx Horizontal distance to travel. Positive numbers will scroll the*        content to the left.* @param dy Vertical distance to travel. Positive numbers will scroll the*        content up.* @param duration Duration of the scroll in milliseconds.*/
public void startScroll(int startX, int startY, int dx, int dy, int duration) {mMode = SCROLL_MODE;mFinished = false;mDuration = duration;mStartTime = AnimationUtils.currentAnimationTimeMillis();mStartX = startX;mStartY = startY;mFinalX = startX + dx;mFinalY = startY + dy;mDeltaX = dx;mDeltaY = dy;mDurationReciprocal = 1.0f / (float) mDuration;
}
附上完整的實例代碼:
自己定義Android可滑動控件源代碼
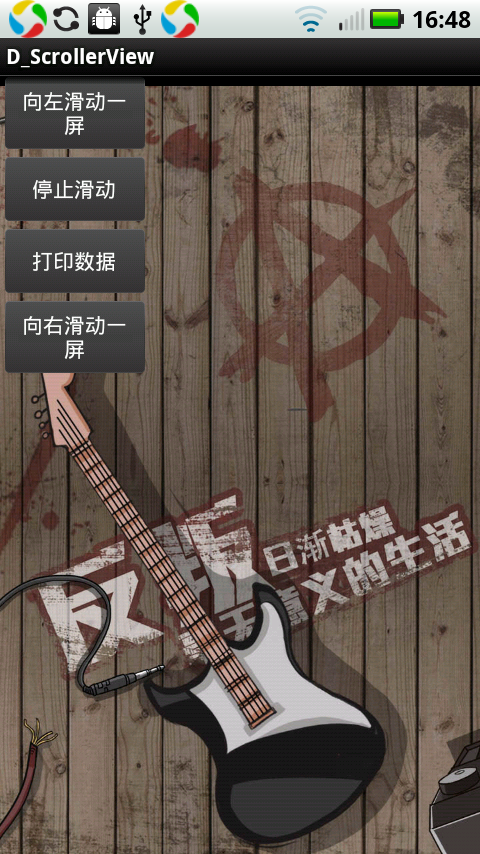
執行效果圖例如以下,滑動屏幕會顯示不同的圖片。
 盡量使用成員函數代替同名的算法)
編譯portmap和nfs-utils)


:搭建第一個應用程序)


