背景:前面用了幾篇文章來記錄和總結了,我在研究bundlefusion過程中遇到的一些問題以及解決方法,本來想實現給bundlefusion輸入先驗軌跡,然后讓其根據給定的軌跡進行重建,這樣即便在環境比較惡劣的情況下,也可以使用給定的位姿完成重建任務,但是這段時間對bundlefusion有了新的認識,意識到這件事沒有我想象的那么簡單。bundlefusion的研究工作就要告一段落了,所以最后我對bundlefusion做一個大的總結,把網絡上一些經典的文章,整合起來。
一、 首先是先明白bundlefusion的工作原理,當然要閱讀他的論文,英文的論文也不是很難讀,當然也可以看我師兄的總結文章:https://blog.csdn.net/fuxingyin/article/details/52921958,有了這篇文章,如果想了解的更具體,那么就認真閱讀一遍,bundlefusion的論文,主要關注一下bf的優化機制。
二、 另外一個重點當然是讀代碼了,說實話代碼我讀的不是很通透,主要是參考這篇文章,https://zhuanlan.zhihu.com/p/86718461?了解了代碼的脈絡,在這里,我將在這篇文章的基礎上添加一些細節,這樣不僅讓我自己對bf的代碼有更加深刻的理解,同時也希望能給志同道合的小伙伴更加高效的學習bf的方法。
三、制作.sens數據集可以參考我前一段時間寫的博客:https://blog.csdn.net/weixin_38636815/article/details/107694846
四、BundleFusion代碼講解
1. bundlefusion中的主要參數
bundlefusion工程中有很多參數,眾多的參數被分到兩個文件中,zParametersBundlingDefault.txt和zParametersDefault.txt。
在zParametersBundlingDefault.txt中重要參數如下:
?
- s_numLocalNonLinIterations = 2; //局部非線性優化迭代次數
- s_numLocalLinIterations = 100; //局部線性優化迭代次數
- s_numGlobalNonLinIterations = 3; //全局非線性優化迭代次數
- s_numGlobalLinIterations = 150; //全局線性優化迭代次數
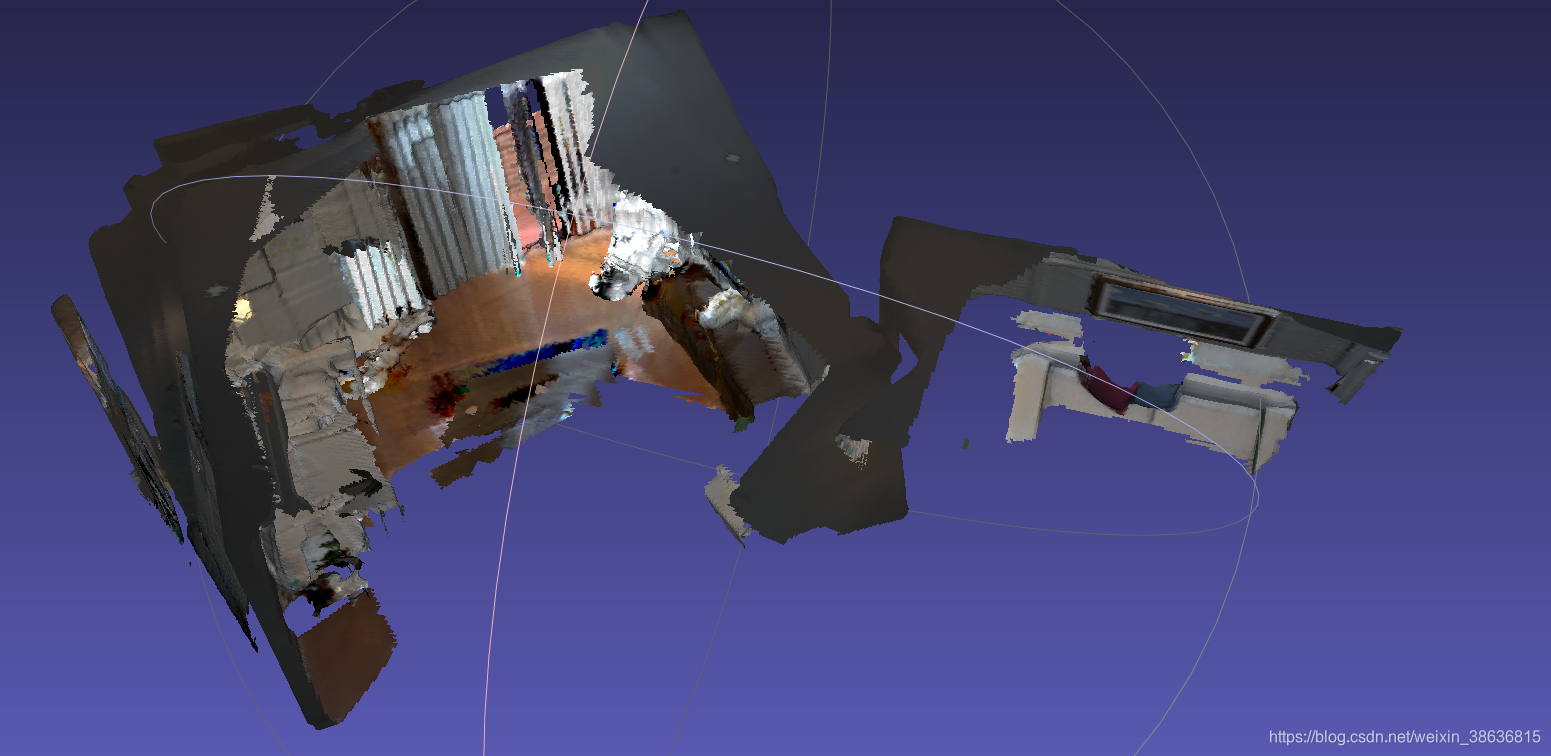
在上面的這四個參數中,s_numLocalLinIterations 起到了關鍵的作用,下面是我在ICL_NUIM數據集上測試的幾組參數的模型效果,也可以看出s_numLocalLinIterations 起到了重要的作用。
s_numLocalNonLinIterations = 1;
s_numLocalLinIterations = 1;
s_numGlobalNonLinIterations = 1;
s_numGlobalLinIterations = 1;

s_numLocalNonLinIterations = 1;
s_numLocalLinIterations = 50;
s_numGlobalNonLinIterations = 1;
s_numGlobalLinIterations = 1;
?
s_numLocalNonLinIterations = 1;
s_numLocalLinIterations = 1;
s_numGlobalNonLinIterations = 1;
s_numGlobalLinIterations = 100;?
- s_downsampledWidth = 80;
- s_downsampledHeight = 60;
上面兩個參數主要是用于Correspondence Filtering中的dense verification中,如果設置的不恰當,會導致在跟蹤過程中,容易跟蹤失敗,導致重建的稠密模型確實。我測試自己的數據集時,使用的是kinectv2深度相機獲取的960x540的圖像,發現在測試一次采集的數據時,有很長一段距離跟蹤失敗,導致最終重建的模型確實一大塊,我抱著試試看的態度,調試參數,在修改了這兩個參數后,之前跟丟的部分竟然跟蹤上了。所以要根據你實際使用的圖像的分辨率來調節這兩個參數。
在zParametersDefault.txt文件中
- s_maxNumKeysPerImage = 1024; //每一幀圖像上檢測的最多的sift特征點的個數。
- s_widthSIFT = 640;
- s_heightSIFT = 480;
- s_windowWidth = 640;?? ??? ?//render window width
- s_windowHeight = 480;
- s_integrationWidth = 320;?? ?//input depth gets re-sampled to this width (decrease to improve perf.)
- s_integrationHeight = 240;?? ?//input depth gets re-sampled to this height (decrease to improve perf.)
- s_rayCastWidth = 320;?? ??? ?//should be same as integration except if rendering video
- s_rayCastHeight = 240;
上面這些跟輸入的圖像的分辨率有關的參數也一定要根據自己使用的數據來響應的修改。
2. 不怕大家見笑,我剛開始讀orb-slam2代碼的時候,過了好久才想到,我還一直沒有去看程序的主函數呢?哈哈,現在想想這真是作為程序員的恥辱。以后無論讀什么代碼我都必須先找到main函數,然后去先捋清楚代碼的主干脈絡,并且使用xmind軟件將代碼的思維導圖畫出來,這樣整個工程的主干就很清楚了。
?
- main()?FriedLiver:程序入口
- g_RGBDSensor = getRGBDSensor();//根據你設置的s_sensorIdx來判斷你輸入的數據的形式,是深度相機還是.sens文件。
- g_RGBDSensor->createFirstConnected(); //這個函數主要是讀取輸入的.sens文件中的數據,彩色圖,深度圖,pose,還有info.txt
- std::thread bundlingThread(bundlingThreadFunc); //開啟多線程,進行跟蹤和優化。
- ?std::thread(bundlingOptimizationThreadFunc);
- bundlingOptimization();
- g_bundler->process()
- optimizeLocal()
- ?processGlobal()
- optimizeGlobal()
- g_bundler->process()
- bundlingOptimization();
- ?std::thread(bundlingOptimizationThreadFunc);
- startDepthSensing(g_bundler, getRGBDSensor(), g_imageManager); //重建
- startDepthSensing
- OnD3D11FrameRender
- bool bGotDepth = g_CudaImageManager->process();?// Read Input
- reintegrate(); //更新模型,包括:deintegrate和integrate
- integrate(depthCameraData, transformation); //Reconstruction of current frame
- Render
- StopScanningAndExit(); //這個函數中實現將計算的位姿保存的.sens中的pose數據,并且生成.ply模型
- OnD3D11FrameRender
- OnlineBundler
- OnlineBundler()
- m_bHasProcessedInputFrame=false
- m_bExitBundlingThread=false
- m_lastFrameProcessed = -1
- getCurrentFrame()
- processInput()
- ?Bundler::detectFeatures()
- ?Bundler::storeCachedFrame()
- ?Bundler::matchAndFilter()
- process()//BundleFusion Optimization
- optimizeLocal()
- ?processGlobal()
- optimizeGlobal()
- OnlineBundler()
- Bundler
- detectFeatures() //檢測圖像sift特征點
- storeCachedFrame() //緩存數據
- matchAndFilter() //匹配和過濾當前幀和之前所有幀的sift特征點,計算3D點。
- optimize() //稀疏點優化
- CUDASolverBundling 求解器
?
BundleFusion代碼對于我來說還是太龐大了,在短時間內很難吃透很多細節,這一階段的bundlefusion的研究就暫時告一段落了,如果以后有機會,重新開始研究他。
?
?
?


與重載(overload)區別)

—— SVN版本控制工具)
CPU篇)
)


