Faster R-CNN pytorch源碼血細胞檢測實戰(二)數據增強
文章目錄
- Faster R-CNN pytorch源碼血細胞檢測實戰(二)數據增強
- 1. 資源&參考
- 2. 數據增強
- 2.1 代碼運行
- 2.2 文件存放
- 3 數據集劃分
- 4. 訓練&測試
- 5. 總結
1. 資源&參考
Faster R-CNN pytorch版源碼調試過程參考:Faster R-CNN pytorch源碼血細胞檢測實戰(詳細版)
數據增強源碼參考:voc數據集對有標簽的數據集數據增強
其它參考:
imgaug使用文檔
2. 數據增強
在Faster R-CNN pytorch源碼血細胞檢測實戰(詳細版)的基礎上,我們完成了對Faster RCNN pytorch版代碼的運行,并且基于公共血細胞數據集實現了對多血細胞的檢測。現在,在前文的基礎上,我們對數據進行增強,并基于增強后的數據對Faster RCNN進行訓練,進而測試應用數據增強技術后的訓練模型的檢測精度。
2.1 代碼運行
數據增強源碼參考了這篇voc數據集對有標簽的數據集數據增強,如下所示:
'''
Author: CodingWZP
Email: codingwzp@gmail.com
Date: 2021-08-06 10:51:35
LastEditTime: 2021-08-09 10:53:43
Description: Image augmentation with label.
'''
import xml.etree.ElementTree as ET
import os
import imgaug as ia
import numpy as np
import shutil
from tqdm import tqdm
from PIL import Image
from imgaug import augmenters as iaaia.seed(1)def read_xml_annotation(root, image_id):in_file = open(os.path.join(root, image_id))tree = ET.parse(in_file)root = tree.getroot()bndboxlist = []for object in root.findall('object'): # 找到root節點下的所有country節點bndbox = object.find('bndbox') # 子節點下節點rank的值xmin = int(bndbox.find('xmin').text)xmax = int(bndbox.find('xmax').text)ymin = int(bndbox.find('ymin').text)ymax = int(bndbox.find('ymax').text)# print(xmin,ymin,xmax,ymax)bndboxlist.append([xmin, ymin, xmax, ymax])# print(bndboxlist)bndbox = root.find('object').find('bndbox')return bndboxlistdef change_xml_list_annotation(root, image_id, new_target, saveroot, id):in_file = open(os.path.join(root, str(image_id) + '.xml')) # 這里root分別由兩個意思tree = ET.parse(in_file)# 修改增強后的xml文件中的filenameelem = tree.find('filename')elem.text = (str(id) + '.jpg')xmlroot = tree.getroot()# 修改增強后的xml文件中的pathelem = tree.find('path')if elem != None:elem.text = (saveroot + str(id) + '.jpg')index = 0for object in xmlroot.findall('object'): # 找到root節點下的所有country節點bndbox = object.find('bndbox') # 子節點下節點rank的值# xmin = int(bndbox.find('xmin').text)# xmax = int(bndbox.find('xmax').text)# ymin = int(bndbox.find('ymin').text)# ymax = int(bndbox.find('ymax').text)new_xmin = new_target[index][0]new_ymin = new_target[index][1]new_xmax = new_target[index][2]new_ymax = new_target[index][3]xmin = bndbox.find('xmin')xmin.text = str(new_xmin)ymin = bndbox.find('ymin')ymin.text = str(new_ymin)xmax = bndbox.find('xmax')xmax.text = str(new_xmax)ymax = bndbox.find('ymax')ymax.text = str(new_ymax)index = index + 1tree.write(os.path.join(saveroot, str(id + '.xml')))def mkdir(path):# 去除首位空格path = path.strip()# 去除尾部 \ 符號path = path.rstrip("\\")# 判斷路徑是否存在# 存在 True# 不存在 FalseisExists = os.path.exists(path)# 判斷結果if not isExists:# 如果不存在則創建目錄# 創建目錄操作函數os.makedirs(path)print(path + ' 創建成功')return Trueelse:# 如果目錄存在則不創建,并提示目錄已存在print(path + ' 目錄已存在')return Falseif __name__ == "__main__":IMG_DIR = "./JPEGImages/"XML_DIR = "./Annotations/"AUG_XML_DIR = "./AUG/Annotations/" # 存儲增強后的XML文件夾路徑try:shutil.rmtree(AUG_XML_DIR)except FileNotFoundError as e:a = 1mkdir(AUG_XML_DIR)AUG_IMG_DIR = "./AUG/JPEGImages/" # 存儲增強后的影像文件夾路徑try:shutil.rmtree(AUG_IMG_DIR)except FileNotFoundError as e:a = 1mkdir(AUG_IMG_DIR)AUGLOOP = 5 # 每張影像增強的數量boxes_img_aug_list = []new_bndbox = []new_bndbox_list = []# 影像增強seq = iaa.Sequential([iaa.Invert(0.5),iaa.Fliplr(0.5), # 鏡像iaa.Multiply((1.2, 1.5)), # change brightness, doesn't affect BBsiaa.GaussianBlur(sigma=(0, 3.0)), # iaa.GaussianBlur(0.5),iaa.Affine(translate_px={"x": 15, "y": 15},scale=(0.8, 0.95),) # translate by 40/60px on x/y axis, and scale to 50-70%, affects BBs])for name in tqdm(os.listdir(XML_DIR), desc='Processing'):bndbox = read_xml_annotation(XML_DIR, name)# 保存原xml文件shutil.copy(os.path.join(XML_DIR, name), AUG_XML_DIR)# 保存原圖og_img = Image.open(IMG_DIR + '/' + name[:-4] + '.jpg')og_img.convert('RGB').save(AUG_IMG_DIR + name[:-4] + '.jpg', 'JPEG')og_xml = open(os.path.join(XML_DIR, name))tree = ET.parse(og_xml)# 修改增強后的xml文件中的filenameelem = tree.find('filename')elem.text = (name[:-4] + '.jpg')tree.write(os.path.join(AUG_XML_DIR, name))for epoch in range(AUGLOOP):seq_det = seq.to_deterministic() # 保持坐標和圖像同步改變,而不是隨機# 讀取圖片img = Image.open(os.path.join(IMG_DIR, name[:-4] + '.jpg'))# sp = img.sizeimg = np.asarray(img)# bndbox 坐標增強for i in range(len(bndbox)):bbs = ia.BoundingBoxesOnImage([ia.BoundingBox(x1=bndbox[i][0], y1=bndbox[i][1], x2=bndbox[i][2], y2=bndbox[i][3]),], shape=img.shape)bbs_aug = seq_det.augment_bounding_boxes([bbs])[0]boxes_img_aug_list.append(bbs_aug)# new_bndbox_list:[[x1,y1,x2,y2],...[],[]]n_x1 = int(max(1, min(img.shape[1], bbs_aug.bounding_boxes[0].x1)))n_y1 = int(max(1, min(img.shape[0], bbs_aug.bounding_boxes[0].y1)))n_x2 = int(max(1, min(img.shape[1], bbs_aug.bounding_boxes[0].x2)))n_y2 = int(max(1, min(img.shape[0], bbs_aug.bounding_boxes[0].y2)))if n_x1 == 1 and n_x1 == n_x2:n_x2 += 1if n_y1 == 1 and n_y2 == n_y1:n_y2 += 1if n_x1 >= n_x2 or n_y1 >= n_y2:print('error', name)new_bndbox_list.append([n_x1, n_y1, n_x2, n_y2])# 存儲變化后的圖片image_aug = seq_det.augment_images([img])[0]path = os.path.join(AUG_IMG_DIR,str(str(name[:-4]) + '_' + str(epoch)) + '.jpg')image_auged = bbs.draw_on_image(image_aug, size=0)Image.fromarray(image_auged).convert('RGB').save(path)# 存儲變化后的XMLchange_xml_list_annotation(XML_DIR, name[:-4], new_bndbox_list, AUG_XML_DIR,str(name[:-4]) + '_' + str(epoch))# print(str(str(name[:-4]) + '_' + str(epoch)) + '.jpg')new_bndbox_list = []print('Finish!')建一個新的python文件,命名為img_augmentation.py,放在faster-rcnn.pytorch-pytorch-1.0\data\VOCdevkit2007\VOC2007目錄下即可。
用命令python img_augmentation.py運行上述代碼,會在VOC2007目錄下生成一個AUG文件夾,里面存放好了JPEGImages和Annotations文件夾,如下圖所示:
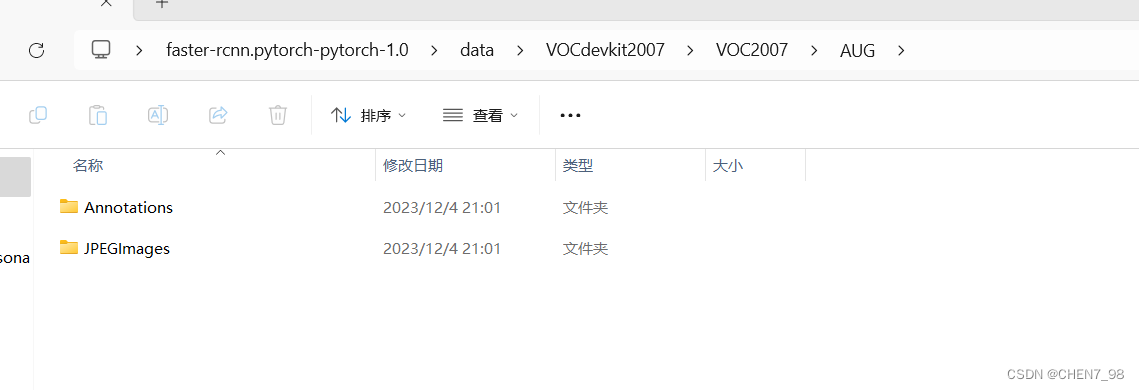
而這兩個文件夾則分別存放了包括原圖和增強圖像在內的2184張圖像(384+384×5=2184),具體生成多少張,應用怎么樣的增強,可以修改上述代碼來實現,這里是對每張原圖生成5張增強圖像。
2.2 文件存放
正常來說,應該是將增強后的圖像單獨存放在faster-rcnn.pytorch-pytorch-1.0\data\目錄下,并寫一個讀取該目錄的類,但是,最近沒啥時間來專門coding了,所以這里為了求快,直接按照以下懶人版方法修改文件即可。
對2.1中生成的AUG文件夾,直接用該文件夾下的JPEGImages和Annotations文件夾替換faster-rcnn.pytorch-pytorch-1.0\data\VOCdevkit2007\VOC2007的JPEGImages和Annotations。
3 數據集劃分
建一個新的python文件,命名為img_split.py,放在faster-rcnn.pytorch-pytorch-1.0\data\VOCdevkit2007\VOC2007目錄下,代碼內容如下所示:
import os
import randompath = './'  # 設置path為VOC2007文件夾即可,也就是當前文件夾
trainval_percent = 0.8  # 訓練+驗證占80%
train_percent = 0.75  # 訓練集占訓練+驗證的75%,也就是0.8×0.75=0.6xmlfilepath = os.path.join(path, 'Annotations')  # xml文件保存地址
txtsavepath = os.path.join(path, 'ImageSets/Main')  # txt文件保存地址
total_xml = os.listdir(xmlfilepath)  # 解析
original_xml = [f for f in total_xml if f.endswith('.xml') and len(os.path.splitext(f)[0].split('_')) == 2]
# print(original_xml)num = len(original_xml)
list = range(num)
tv = int(num * trainval_percent)
tr = int(tv * train_percent)
trainval = random.sample(list, tv)
train = random.sample(trainval, tr)ftrainval = open(os.path.join(txtsavepath, 'trainval.txt'), 'w')
ftest = open(os.path.join(txtsavepath, 'test.txt'), 'w')
ftrain = open(os.path.join(txtsavepath, 'train.txt'), 'w')
fval = open(os.path.join(txtsavepath, 'val.txt'), 'w')# 獲取所有圖像文件(原始和增強)
image_files = [f.replace('.xml', '') for f in os.listdir(os.path.join(path, 'JPEGImages')) if f.endswith('.jpg')]# 用于記錄已經寫入的圖像名
written_images = set()for i in list:name = original_xml[i][:-4]  # 獲取原始圖像的文件名,不包括擴展名# print(name)if i in trainval:ftrainval.write(name + '\n')if i in train:ftrain.write(name + '\n')# 找到對應的增強圖像并寫入訓練集for k in range(0, 5):  # 假設每張圖像有5次增強augmented_name = f"{name}_{k}"if augmented_name not in written_images:ftrain.write(augmented_name + '\n')written_images.add(augmented_name)else:fval.write(name + '\n')else:ftest.write(name + '\n')ftrainval.close()
ftrain.close()
fval.close()
ftest.close()
用命令python img_split.py運行上述代碼,會在faster-rcnn.pytorch-pytorch-1.0\data\VOCdevkit2007\VOC2007\ImageSets\Main\生成劃分數據集的txt文件。
注意img_split.py和img_augmentation.py是對應的,可以看到我在img_augmentation.py中對每張圖片都增強了5次,所以在img_split.py中也是每次讀取原始圖像的5個增強圖像文件。
為了防止數據泄露,所以在img_split.py中,只用增強后的數據來對模型進行訓練,而不用于驗證和測試,可以看到在img_split.py中的這幾行:
# 只有訓練集中添加了增強后的圖像
if i in trainval:ftrainval.write(name + '\n')if i in train:ftrain.write(name + '\n')# 找到對應的增強圖像并寫入訓練集for k in range(0, 5):  # 假設每張圖像有5次增強augmented_name = f"{name}_{k}"if augmented_name not in written_images:ftrain.write(augmented_name + '\n')written_images.add(augmented_name)else:fval.write(name + '\n')else:ftest.write(name + '\n')
4. 訓練&測試
在開始訓練之前,還需要把之前訓練產生的模型以及cache刪除掉,分別在下面三個路徑下:
faster-rcnn.pytorch-pytorch-1.0\output\res101\voc_2007_test\faster_rcnn_10\
faster-rcnn.pytorch-pytorch-1.0\data\cache\
faster-rcnn.pytorch-pytorch-1.0\data\VOCdevkit2007\annotations_cache\
之后,參照Faster R-CNN pytorch源碼血細胞檢測實戰(詳細版)中即可。
5. 總結
這次代碼調試過程還是讓我學到了很多的,由于pytorch版Faster RCNN源碼的實現和運行比較復雜,因此點到為止,只要求能成功復現實驗,并且了解了怎么調參即可,代碼的實現細節可以參考其它的開源倉庫,據我所知好像mmdetection對Faster RCNN的實現就比較簡潔,且易于運行。


(模擬,c++,vector建二叉樹))


