此文章主要介紹carla前后左右攝像頭畫面拼接到pygame上
文章目錄
- 前言
- 一、要點分析
- 二、完整代碼
- 三、拼接效果
- 四、總結
前言
1、使用carla做仿真測試或者開發時,如果能夠將車輛周邊的畫面拼接并渲染,可以直觀地查看周圍地環境,便于調試。本文將介紹使用carla中的camera傳感器監控自車周邊的畫面,并通過pygame可視化。
一、要點分析
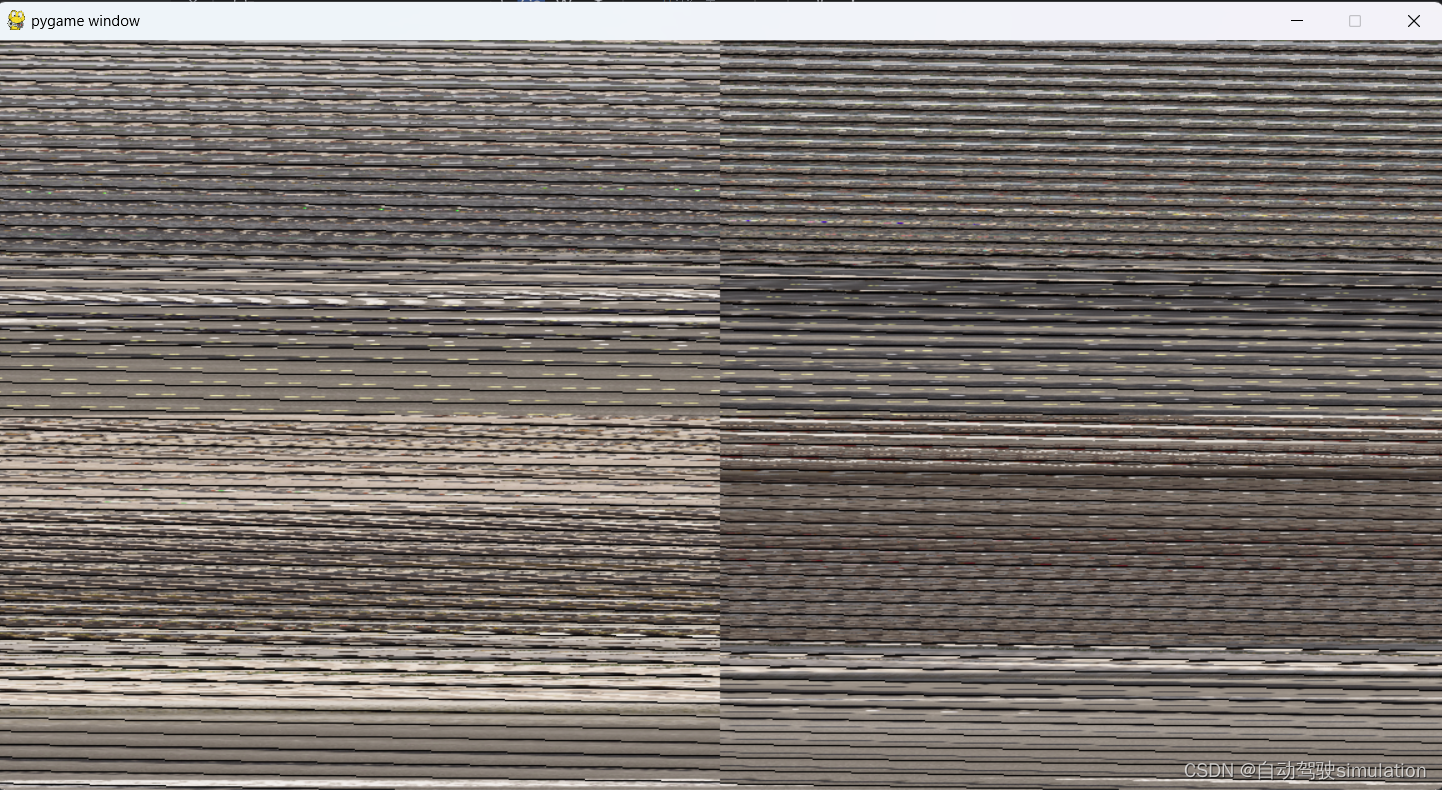
1、如果攝像頭的橫向分辨率image_x如果不為192的倍數,可能會導致內存對齊問題,拼接效果則會出現閃屏;調試了很久才發現這個規律,知道具體原因的大佬可以交流下,猜測是顯卡解析相關導致。即:Image_x = 192 * N (N為正整數),下圖為分辨率不為192倍數的拼接情況。
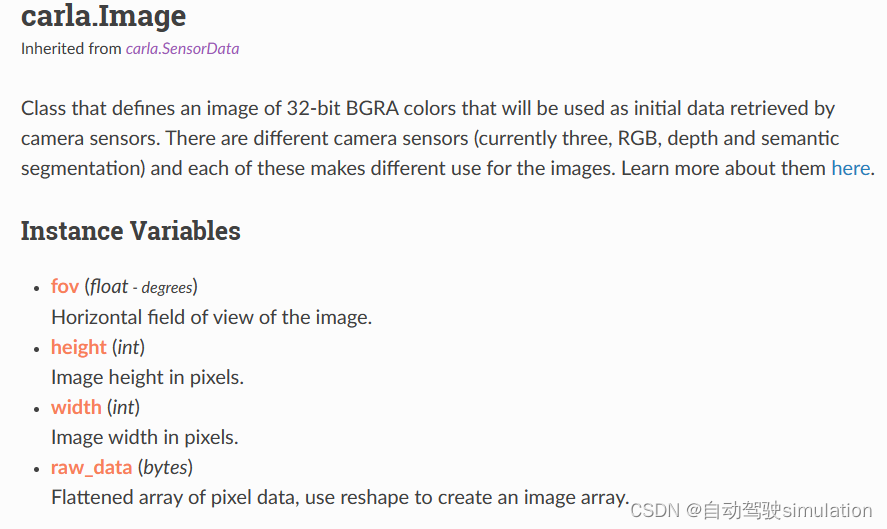
2、camera.listen(lambda data : callback(data)),listen方法是carla中用于設置攝像頭傳感器的回調函數的。當攝像頭傳感器捕獲到新的圖像數據image時,它會調用這個回調函數,并將圖像數據image作為參數傳遞給它。下圖中的cala.SensorData就是carla.Image,具體更多內容可以到carla官網查看。

3、使用np.concatenate拼接不同攝像頭的數據。
1)numpy.concatenate是一個用于將多個數組沿指定軸連接在一起的函數。它的基本語法如下:
numpy.concatenate((a1, a2, ...), axis=0)
2)其中,a1, a2, …是你想要連接的數組,axis參數指定了連接的軸。默認情況下,axis是0,這意味著數組將在垂直方向上(即行方向)連接,當axis=1時,數組將在水平方向上(即列方向)連接。
import numpy as npa = np.array([1, 2])
b = np.array([3, 4])
c = np.concatenate((a, b), axis=0)print(c)  # 輸出:[1 2 3 4]==============================a1 = np.array([[1, 2], [3, 4]])
a2 = np.array([[5, 6], [7, 8]])c = np.concatenate((a1, a2), axis=1)print(c)
#輸出
[[1 2 5 6][3 4 7 8]]
二、完整代碼
import carla
import random
import pygame
import numpy as np# 渲染對象來保持和傳遞 PyGame 表面
class RenderObject(object):def __init__(self, width, height):init_image = np.random.randint(0, 255, (height, width, 3), dtype='uint8')self.surface = pygame.surfarray.make_surface(init_image.swapaxes(0, 1))# 相機傳感器回調,將相機的原始數據重塑為 2D RGB,并應用于 PyGame 表面
def pygame_callback(image, side):img = np.reshape(np.copy(image.raw_data), (image.height, image.width, 4))img = img[:, :, :3]img = img[:, :, ::-1]if side == 'Front':global FrontFront = imgelif side == 'Rear':global RearRear = imgelif side == 'Left':global LeftLeft = imgelif side == 'Right':global RightRight = imgif ('Front' in globals() and 'Rear' in globals()and "Left" in globals()and 'Right' in globals()):# 橫向拼接(前后)(左右)攝像頭的畫面img_combined_front = np.concatenate((Front, Rear), axis=1)img_combined_rear = np.concatenate((Left, Right), axis=1)# 縱向拼接(前后)(左右)攝像頭的畫面img_combined = np.concatenate((img_combined_front, img_combined_rear), axis=0)renderObject.surface = pygame.surfarray.make_surface(img_combined.swapaxes(0, 1))class cameraManage():def __init__(self, world, ego_vehicle, pygame_size):self.world = worldself.cameras = {}self.ego_vehicle = ego_vehicleself.image_size_x = int(pygame_size.get("image_x") / 2)  # 橫向放置兩個攝像頭的畫面self.image_size_y = int(pygame_size.get("image_y") / 2)  # 縱向放置兩個攝像頭的畫面def camaraGenarate(self):cameras_transform = [(carla.Transform(carla.Location(x=2.0, y=0.0, z=1.3),  # 前側攝像頭安裝位置carla.Rotation(pitch=0, yaw=0, roll=0)), "Front"),(carla.Transform(carla.Location(x=-2.0, y=0.0, z=1.3),  # 后側攝像頭安裝位置carla.Rotation(pitch=0, yaw=180, roll=0)), "Rear"),(carla.Transform(carla.Location(x=0.0, y=2.0, z=1.3),  # 左側攝像頭安裝位置carla.Rotation(pitch=0, yaw=90, roll=0)), "Left"),(carla.Transform(carla.Location(x=0.0, y=-2.0, z=1.3),  # 右側的攝像頭安裝位置carla.Rotation(pitch=0, yaw=-90, roll=0)), "Right")]# 查找RGB相機藍圖camera_bp = self.world.get_blueprint_library().find('sensor.camera.rgb')# 設置攝像頭的fov為90°camera_bp.set_attribute('fov', "90")# 設置攝像頭的分辨率camera_bp.set_attribute('image_size_x', str(self.image_size_x))camera_bp.set_attribute('image_size_y', str(self.image_size_y))# 生成攝像頭for index, (camera_ts, camera_sd) in enumerate(cameras_transform):camera = self.world.spawn_actor(camera_bp, camera_ts, attach_to=self.ego_vehicle)self.cameras[camera_sd] = camerareturn self.camerasif __name__ == "__main__":# 連接到客戶端并檢索世界對象client = carla.Client('localhost', 2000)world = client.get_world()# 獲取地圖的刷出點spawn_point = random.choice(world.get_map().get_spawn_points())# 生成車輛并設置自動駕駛vehicle_bp = world.get_blueprint_library().filter('*vehicle*').filter('vehicle.tesla.*')[0]ego_vehicle = world.spawn_actor(vehicle_bp, spawn_point)# ego_vehicle.set_autopilot(True)#設置pygame窗口size,image_x為192的整數倍,用其他分辨率會閃屏,可能是顯卡解析原因導致。pygame_size = {"image_x": 1152,"image_y": 600}#調用cameraManage類,生成攝像頭cameras = cameraManage(world, ego_vehicle, pygame_size).camaraGenarate()#采集carla世界中camera的圖像cameras.get("Front").listen(lambda image: pygame_callback(image, 'Front'))cameras.get("Rear").listen(lambda image: pygame_callback(image, 'Rear'))cameras.get("Left").listen(lambda image: pygame_callback(image, 'Left'))cameras.get("Right").listen(lambda image: pygame_callback(image, 'Right'))# 為渲染實例化對象renderObject = RenderObject(pygame_size.get("image_x"), pygame_size.get("image_y"))# 初始化pygame顯示pygame.init()gameDisplay = pygame.display.set_mode((pygame_size.get("image_x"), pygame_size.get("image_y")),pygame.HWSURFACE | pygame.DOUBLEBUF)# 循環執行crashed = Falsewhile not crashed:# 等待同步world.tick()# 按幀更新渲染的 Camera 畫面gameDisplay.blit(renderObject.surface, (0, 0))pygame.display.flip()# 獲取 pygame 事件for event in pygame.event.get():# If the window is closed, break the while loopif event.type == pygame.QUIT:crashed = True# 結束ego_vehicle.destroy()camera = cameras.values()for cam in camera:cam.stoppygame.quit()
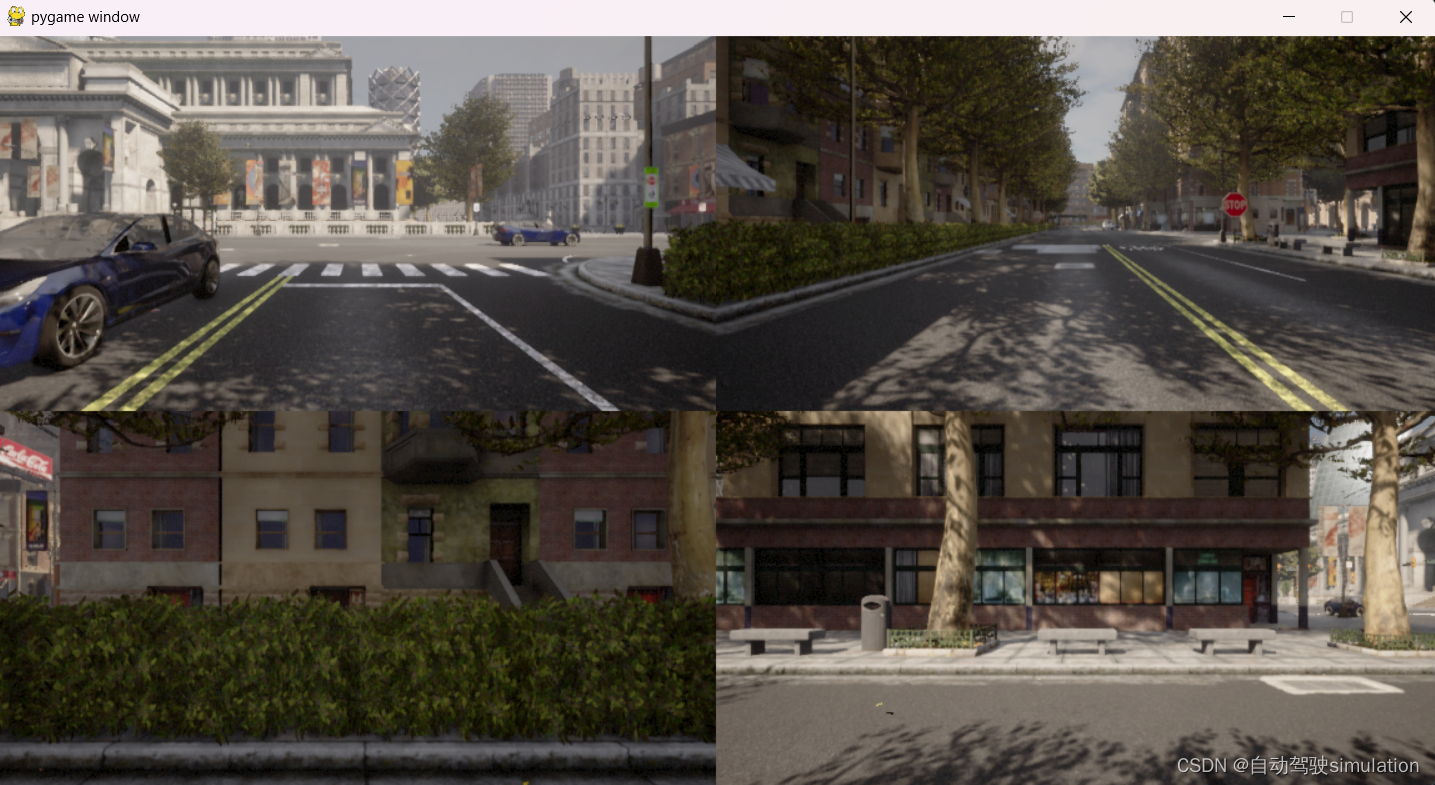
三、拼接效果
四、總結
歡迎各位大佬來交流,特別是為什么只支持192倍數的分辨率設置,還是說我的方法不嚴謹,歡迎交流。


![[報錯]記錄IDEA遠程開發報錯:java: Cannot run program.....](http://pic.xiahunao.cn/[報錯]記錄IDEA遠程開發報錯:java: Cannot run program.....)

EL——優化登錄界面,獲取對象,獲取數據)
)


——目錄與傳送門)
)


