Ble藍牙App(二)連接與發現服務
- 前言
- 正文
- 一、BlePeripheral回調
- 二、連接和斷連
- 三、連接狀態回調
- 四、發現服務
- 五、服務提供者
- 六、顯示服務
- 七、源碼
前言
??在上一篇中我們進行掃描設備的處理,本文中進行連接和發現服務的數據處理,運行效果圖如下所示:

正文
??現在我們在ScanSlice掃描設備,選中一個設備進入MainAbilitySlice,下面要對選中的設備進行處理,首先我們來做連接。
一、BlePeripheral回調
??在之前我們寫了一個BleCore,這里面是對掃描的封裝,那么對于連接來說我們同樣可以封裝到這里,我們可以在BleCore中寫一個BleDeviceCallback 類,繼承自BlePeripheralCallback, 代碼如下所示:
private class BleDeviceCallback extends BlePeripheralCallback {/*** 連接狀態改變* @param connectionState 狀態碼*/@Overridepublic void connectionStateChangeEvent(int connectionState) {}/*** 發現服務* @param status 狀態*/@Overridepublic void servicesDiscoveredEvent(int status) {}}
??因為本文要做的事情是連接和發現服務,所以我們就先重寫這兩個方法,注意一點的是,藍牙的操作都是在子線程中進行的,如果我們需要知道當前是否連接,則需要寫一個接口用于回調到MainAbilitySlice中,在core包下新建一個BleCallback接口,代碼如下所示:
public interface BleCallback {/*** 設備的所有信息** @param info 信息*/void deviceInfo(String info);/*** 連接狀態** @param state true or false*/void connectionStateChange(boolean state);/*** 發現服務** @param services 服務列表*/void servicesDiscovered(List<GattService> services);
}
??接口中定義了三個方法,通過注釋我們清晰的知道都是什么作用,這里著重介紹第一個函數,這個函數會顯示設備各個時候的狀態信息,從連接之后的所有動作,如果我們需要保存設備的操作日志的話,可以通過這個來進行處理保存。
然后回到BleCore,聲明變量和設置接口回調的方法:
private final BleDeviceCallback mBleDeviceCallback;private BleCallback bleCallback;private BlePeripheralDevice mDevice;private boolean mIsConnected;public BleCore(Context context) {...//藍牙設備類mBleDeviceCallback = new BleDeviceCallback();} public void setBleCallback(BleCallback bleCallback) {this.bleCallback = bleCallback;}private void deviceInfo(String info) {if (bleCallback != null) {bleCallback.deviceInfo(info);}}private void connectState(boolean state) {mIsConnected = state;if (bleCallback != null) {bleCallback.connectionStateChange(state);}}public void setDevice(BlePeripheralDevice device) {mDevice = device;}
這里就是對設備信息和連接做了一個處理,下面我們增加連接和斷連的方法。
二、連接和斷連
在BleCore中增加如下代碼:
public boolean isConnected() {return mIsConnected;}public void connect() {if (mDevice == null) return;deviceInfo("連接設備...");mDevice.connect(false, mBleDeviceCallback);}public void disconnect() {if (mDevice == null) return;deviceInfo("斷開連接設備...");mDevice.disconnect();}
連接與斷開連接,調用時會觸發connectionStateChangeEvent()方法。
三、連接狀態回調
下面修改這個方法的代碼,如下所示:
@Overridepublic void connectionStateChangeEvent(int connectionState) {String address = mDevice.getDeviceAddr();if (connectionState == ProfileBase.STATE_CONNECTED) {deviceInfo("連接成功:" + address);connectState(true);} else if (connectionState == ProfileBase.STATE_DISCONNECTED) {deviceInfo("斷開連接成功:" + address);connectState(false);mDevice.close();}}
??在回調中,連接成功和斷開連接都會有一個對應的狀態碼,通過狀態回調到接口函數中,然后回到MainAbilitySlice中使用一下這個回調,首先我們修改一下ability_main.xml中的代碼,如下所示:
<?xml version="1.0" encoding="utf-8"?>
<DirectionalLayoutxmlns:ohos="http://schemas.huawei.com/res/ohos"ohos:height="match_parent"ohos:width="match_parent"ohos:alignment="center"ohos:background_element="$color:bg_color"ohos:orientation="vertical"><DirectionalLayoutohos:height="50vp"ohos:width="match_parent"ohos:alignment="vertical_center"ohos:background_element="$color:blue"ohos:orientation="horizontal"ohos:start_padding="12vp"><Textohos:height="match_content"ohos:width="match_content"ohos:text="操作設備"ohos:text_color="#FFF"ohos:text_font="HwChinese-medium"ohos:text_size="18fp"ohos:weight="1"/><Textohos:id="$+id:tx_disconnect"ohos:height="match_content"ohos:width="match_content"ohos:end_margin="6vp"ohos:padding="8vp"ohos:text="斷開連接"ohos:text_color="#FFF"ohos:text_size="14fp"/></DirectionalLayout><Textohos:id="$+id:tx_device_info"ohos:height="match_content"ohos:width="match_parent"ohos:text="設備信息"ohos:padding="12vp"ohos:text_size="14fp"/><ListContainerohos:id="$+id:lc_service"ohos:height="match_parent"ohos:width="match_parent"/></DirectionalLayout>
??在XML中只增加了兩個Text,分別用于斷連和顯示設備狀態,下面我們寫Slice之間的跳轉,也就是從ScanSlice跳轉到MainAbilitySlice。首先我們在MainAbility中增加action,代碼如下所示:
public class MainAbility extends Ability {@Overridepublic void onStart(Intent intent) {...// add action for abilityaddActionRoute("action.main", MainAbilitySlice.class.getName());}
}
然后去config.json中增加配置,如下圖所示:

然后我們回到ScanSlice中,在Item的點擊事件中添加如下代碼:
//列表item點擊監聽lcDevice.setItemClickedListener((listContainer, component, position, id) -> {//設置設備bleCore.setDevice(mList.get(position).getDevice());Intent jumpIntent = new Intent();Operation operation = new Intent.OperationBuilder().withAction("action.main").withDeviceId("").withBundleName("com.llw.ble").withAbilityName("com.llw.ble.MainAbility").build();jumpIntent.setOperation(operation);startAbility(jumpIntent);});
??這里跳轉的代碼比較多,跳轉之前設置了設備進去,這種方式也是官方推薦的方式。然后我們修改MainAbility中的代碼,如下所示:
public class MainAbilitySlice extends AbilitySlice implements BleCallback {private static final String TAG = MainAbilitySlice.class.getSimpleName();private Text txDisconnect;private Text txDeviceInfo;private ListContainer lcService;private BleCore bleCore;@Overridepublic void onStart(Intent intent) {super.onStart(intent);super.setUIContent(ResourceTable.Layout_ability_main);txDisconnect = (Text) findComponentById(ResourceTable.Id_tx_disconnect);txDeviceInfo = (Text) findComponentById(ResourceTable.Id_tx_device_info);lcService = (ListContainer) findComponentById(ResourceTable.Id_lc_service);bleCore = BleApp.getBleCore();bleCore.setBleCallback(this);//連接設備bleCore.connect();txDisconnect.setClickedListener(component -> {if (bleCore.isConnected()) {bleCore.disconnect();} else {bleCore.connect();}});}@Overridepublic void deviceInfo(String info) {getUITaskDispatcher().asyncDispatch(() -> {LogUtils.LogD(TAG, info);txDeviceInfo.setText(info);});}@Overridepublic void connectionStateChange(boolean state) {getUITaskDispatcher().asyncDispatch(() -> txDisconnect.setText(state ? "斷開連接" : "連接"));}@Overridepublic void servicesDiscovered(List<GattService> services) {}
}
??使用BleCore的connect()方法進行連接設備,在onStart()方法中進行BleCore的賦值,然后設置Ble的回調,實現BleCallback接口,重寫里面的函數,當連接成功之后會通過回調deviceInfo()得到設備狀態,因為是子線程所以在ui線程中渲染UI。而connectionStateChange()函數,回調連接成功或者失敗,如果成功則為ture,就顯示txDisconnect控件,此時連接成功,點擊這個txDisconnect就會斷開連接,點擊監聽就在onStart()中寫好了,下面我們運行一下看看效果。

從這個效果圖來看,我們連接成功之后有狀態,點擊斷開連接也會有狀態改變,那么連接就寫好了。
四、發現服務
??連接寫好了,下面可以寫發現服務了,我們可以在連接成功的處理中進行發現服務,下面我們修改一下BleDeviceCallback中的connectionStateChangeEvent()方法中的代碼,如下圖所示:
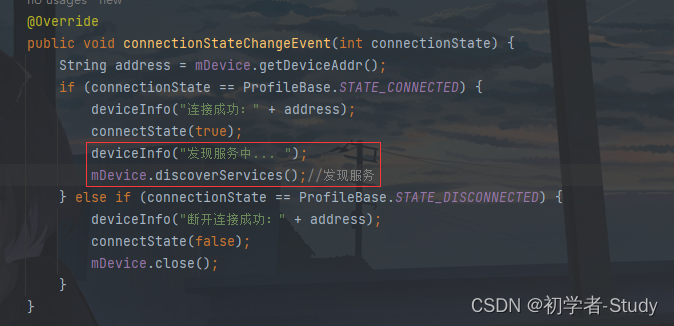
通過mDevice.discoverServices()進行發現服務的動作,在此之前通過deviceInfo()設置當前的動作狀態,發現服務執行會觸發servicesDiscoveredEvent()回調,在這個回調中我們可以回調到頁面,修改代碼如下所示:
@Overridepublic void servicesDiscoveredEvent(int status) {if (status == BlePeripheralDevice.OPERATION_SUCC) {deviceInfo("發現" + mDevice.getServices().size() + "服務");if (bleCallback != null) {bleCallback.servicesDiscovered(mDevice.getServices());}}}
??在回調中設置發現服務的個數,然后回調,因為服務是多個的,那么下面我們就需要使用一個列表是裝載服務,之前我們就已經在ability_main.xml中寫好了。
五、服務提供者
??要顯示服務列表數據,首先需要一個提供者,而提供者又需要一個item去渲染數據,下面我們在layout下創建一個item_service.xml,代碼如下所示:
<?xml version="1.0" encoding="utf-8"?>
<DependentLayoutxmlns:ohos="http://schemas.huawei.com/res/ohos"ohos:height="match_content"ohos:width="match_parent"ohos:background_element="$color:white"ohos:bottom_margin="2vp"ohos:bottom_padding="8vp"ohos:end_padding="16vp"ohos:start_padding="16vp"ohos:top_padding="8vp"><Textohos:id="$+id:tx_service_name"ohos:height="match_content"ohos:width="match_content"ohos:text="服務"ohos:text_size="16fp"/><Buttonohos:id="$+id:tx_uuid_title"ohos:height="match_content"ohos:width="match_content"ohos:below="$id:tx_service_name"ohos:text="UUID:"ohos:text_color="$color:gray"ohos:text_size="16fp"ohos:top_margin="2vp"/><Buttonohos:id="$+id:tx_uuid"ohos:height="match_content"ohos:width="match_content"ohos:below="$id:tx_service_name"ohos:end_of="$id:tx_uuid_title"ohos:text="UUID"ohos:text_size="16fp"ohos:top_margin="2vp"/><Buttonohos:id="$+id:tx_service_info"ohos:height="match_content"ohos:width="match_content"ohos:below="$id:tx_uuid_title"ohos:text="PRIMARY SERVICE"ohos:text_color="$color:gray"ohos:text_size="16fp"ohos:top_margin="2vp"/></DependentLayout>
下面我們在ble包下新建一個BleUtils類,代碼如下所示:
public class BleUtils {public static final String generic = "-0000-1000-8000-00805F9B34FB";public static String getServiceUUID(UUID uuid) {return "0x" + uuid.toString().substring(4, 8).toUpperCase();}/*** 獲取藍牙服務名稱** @param uuid UUID*/public static String getServiceName(UUID uuid) {String targetUuid = getServiceUUID(uuid);switch (targetUuid) {case "0x1800":return "Generic Access service";case "0x1801":return "Generic Attribute service";case "0x1802":return "Immediate Alert service";case "0x1803":return "Link Loss service";case "0x1804":return "Tx Power service";case "0x1805":return "Current Time service";case "0x1806":return "Reference Time Update service";case "0x1807":return "Next DST Change service";case "0x1808":return "Glucose service";case "0x1809":return "Health Thermometer service";case "0x180A":return "Device Information service";case "0x180D":return "Heart Rate service";case "0x180E":return "Phone Alert Status service";case "0x180F":return "Battery service";case "0x1810":return "Blood Pressure service";case "0x1811":return "Alert Notification service";case "0x1812":return "Human Interface Device service";case "0x1813":return "Scan Parameters service";case "0x1814":return "Running Speed and Cadence service";case "0x1815":return "Automation IO service";case "0x1816":return "Cycling Speed and Cadence service";case "0x1818":return "Cycling Power service";case "0x1819":return "Location and Navigation service";case "0x181A":return "Environmental Sensing service";case "0x181B":return "Body Composition service";case "0x181C":return "User Data service";case "0x181D":return "Weight Scale service";case "0x181E":return "Bond Management service";case "0x181F":return "Continuous Glucose Monitoring service";case "0x1820":return "Internet Protocol Support service";case "0x1821":return "Indoor Positioning service";case "0x1822":return "Pulse Oximeter service";case "0x1823":return "HTTP Proxy service";case "0x1824":return "Transport Discovery service";case "0x1825":return "Object Transfer service";case "0x1826":return "Fitness Machine service";case "0x1827":return "Mesh Provisioning service";case "0x1828":return "Mesh Proxy service";case "0x1829":return "Reconnection Configuration service";case "0x183A":return "Insulin Delivery service";case "0x183B":return "Binary Sensor service";case "0x183C":return "Emergency Configuration service";case "0x183D":return "Authorization Control service";case "0x183E":return "Physical Activity Monitor service";case "0x183F":return "Elapsed Time service";case "0x1840":return "Generic Health Sensor service";case "0x1843":return "Audio Input Control service";case "0x1844":return "Volume Control service";case "0x1845":return "Volume Offset Control service";case "0x1846":return "Coordinated Set Identification service";case "0x1847":return "Device Time service";case "0x1848":return "Media Control service";case "0x1849":return "Generic Media Control service";case "0x184A":return "Constant Tone Extension service";case "0x184B":return "Telephone Bearer service";case "0x184C":return "Generic Telephone Bearer service";case "0x184D":return "Microphone Control service";case "0x184E":return "Audio Stream Control service";case "0x184F":return "Broadcast Audio Scan service";case "0x1850":return " Published Audio Capabilities service";case "0x1851":return "Basic Audio Announcement service";case "0x1852":return "Broadcast Audio Announcement service";case "0x1853":return "Common Audio service";case "0x1854":return "Hearing Access service";case "0x1855":return "Telephony and Media Audio service";case "0x1856":return "Public Broadcast Announcement service";case "0x1857":return "Electronic Shelf Label service";default:return "Unknown Service";}}
}
??這里需要說明一下藍牙的UUID,藍牙UUID(Universally Unique Identifier)是用于唯一標識藍牙設備和服務的一種標識符。它是一個128位長的數字,在藍牙通信中起到唯一標識的作用。藍牙UUID按照標準分為兩種類型:
-
16位UUID:這些UUID通常用于藍牙標準定義的一些通用服務和特性。例如,設備名稱服務的UUID是 00001800-0000-1000-8000-00805F9B34FB。
-
128位UUID:這些UUID通常用于自定義的服務和特性,以確保全球唯一性。可以自行生成一個128位的UUID作為自定義的服務或特性標識。例如,一個自定義的服務UUID可以是 0000XXXX-0000-1000-8000-00805F9B34FB,其中的 XXXX 部分可以是任意的16進制數字。
在藍牙通信中,設備使用UUID來發布和查找服務以及識別特性。UUID是藍牙設備之間進行通信時的重要標識,確保了設備和服務的唯一性。
那么getServiceName()中的鍵你就知道是什么意思了,0x1800就是16進制數字,而對應的值則是SIG定義的,可以參考這個文檔:Assigned_Numbers.pdf。如果你的值找不到對應的,那說明它不是SIG規范的,你這個服務UUID就是自己公司自定義的。
下面我們寫提供者,在provider包下新建一個ServiceProvider類,代碼如下所示:
public class ServiceProvider extends BaseItemProvider {private final List<GattService> serviceList;private final AbilitySlice slice;public ServiceProvider(List<GattService> list, AbilitySlice slice) {this.serviceList = list;this.slice = slice;}@Overridepublic int getCount() {return serviceList == null ? 0 : serviceList.size();}@Overridepublic Object getItem(int position) {if (serviceList != null && position >= 0 && position < serviceList.size()) {return serviceList.get(position);}return null;}@Overridepublic long getItemId(int position) {return position;}@Overridepublic Component getComponent(int position, Component component, ComponentContainer componentContainer) {final Component cpt;ServiceHolder holder;GattService service = serviceList.get(position);if (component == null) {cpt = LayoutScatter.getInstance(slice).parse(ResourceTable.Layout_item_service, null, false);holder = new ServiceHolder(cpt);//將獲取到的子組件信息綁定到列表項的實例中cpt.setTag(holder);} else {cpt = component;// 從緩存中獲取到列表項實例后,直接使用綁定的子組件信息進行數據填充。holder = (ServiceHolder) cpt.getTag();}holder.txServiceName.setText(BleUtils.getServiceName(service.getUuid()));holder.txUuid.setText(BleUtils.getServiceUUID(service.getUuid()));return cpt;}/*** 用于保存列表項的子組件信息*/public static class ServiceHolder {Text txServiceName;Text txUuid;public ServiceHolder(Component component) {txServiceName = (Text) component.findComponentById(ResourceTable.Id_tx_service_name);txUuid = (Text) component.findComponentById(ResourceTable.Id_tx_uuid);}}
}
這里的代碼就是比較簡單的,就是基本的寫法,下面回到MainAbilitySlice中進行顯示數據。
六、顯示服務
首先聲明變量:
private final List<GattService> serviceList = new ArrayList<>();private ServiceProvider serviceProvider;
然后實現OnItemClickListener 接口
public class MainAbilitySlice extends AbilitySlice implements BleCallback, ListContainer.ItemClickedListener {
重寫onItemClicked()方法,并且增加了一個showMsg,這個Toast的可定制化做的很多。
@Overridepublic void onItemClicked(ListContainer listContainer, Component component, int position, long id) {showMsg(serviceList.get(position).getUuid().toString());}private void showMsg(String msg) {ToastDialog toastDialog = new ToastDialog(getContext());toastDialog.setSize(DirectionalLayout.LayoutConfig.MATCH_CONTENT, DirectionalLayout.LayoutConfig.MATCH_CONTENT);toastDialog.setDuration(2000);toastDialog.setText(msg);toastDialog.setAlignment(LayoutAlignment.CENTER);Text toastText = (Text) toastDialog.getComponent();if (toastText != null) {toastText.setMultipleLine(true);toastText.setTextSize(14, Text.TextSizeType.FP);toastText.setTextColor(Color.WHITE);toastText.setPadding(40, 20, 40, 20);ShapeElement toastBackground = new ShapeElement();toastBackground.setRgbColor(new RgbColor(24, 196, 124));toastBackground.setCornerRadius(60f);toastText.setBackground(toastBackground);}toastDialog.show();}
然后在onStart()方法中初始化服務提供者,代碼如下所示:
@Overridepublic void onStart(Intent intent) {...serviceProvider = new ServiceProvider(serviceList, this);lcService.setItemProvider(serviceProvider);lcService.setItemClickedListener(this);}
修改servicesDiscovered()方法,代碼如下所示:
@Overridepublic void servicesDiscovered(List<GattService> services) {getUITaskDispatcher().asyncDispatch(() -> {serviceList.clear();serviceList.addAll(services);serviceProvider.notifyDataChanged();});}
這里的寫法其實和掃描設備哪里如出一轍,下面我們運行一下看看,什么效果。
七、源碼
如果對你有所幫助的話,不妨 Star 或 Fork,山高水長,后會有期~
源碼地址:HarmonyBle-Java


)


![[23] 4K4D: Real-Time 4D View Synthesis at 4K Resolution](http://pic.xiahunao.cn/[23] 4K4D: Real-Time 4D View Synthesis at 4K Resolution)


)


