| Unity3D特效百例 | 案例項目實戰源碼 | Android-Unity實戰問題匯總 |
|---|---|---|
| 游戲腳本-輔助自動化 | Android控件全解手冊 | 再戰Android系列 |
| Scratch編程案例 | 軟考全系列 | Unity3D學習專欄 |
| 藍橋系列 | ChatGPT和AIGC |
👉關于作者
專注于Android/Unity和各種游戲開發技巧,以及各種資源分享(網站、工具、素材、源碼、游戲等)
有什么需要歡迎底部卡片私我,交流讓學習不再孤單。

👉實踐過程
😜超出父布局顯示
我們實現一個 LinearLayout 布局,寬高是200,里面嵌套一個 Button ,默認是展示出來的。
<RelativeLayoutandroid:layout_width="200mm"android:layout_height="200mm"android:background="@color/crane_swl_color_3"><Buttonandroid:id="@+id/idBtnText"android:layout_width="wrap_content"android:layout_height="wrap_content"android:text="Excel"android:textSize="26mm" />
</RelativeLayout>
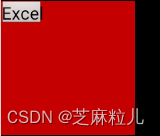
但是我們將 Button 的間距設置超出父布局。默認是不會展示出來的。
<RelativeLayoutandroid:layout_width="200mm"android:layout_height="200mm"android:background="@color/crane_swl_color_3"><Buttonandroid:id="@+id/idBtnText"android:layout_width="wrap_content"android:layout_height="wrap_content"android:text="Excel"android:textSize="26mm" />
</RelativeLayout>
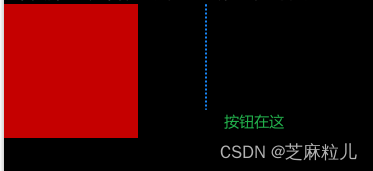
我們需要借住屬性:
android:clipChildren="false"
android:clipToPadding="false"
官方對于第一行的解釋:
Defines whether a child is limited to draw inside of its bounds or not.
翻譯:定義一個子視圖是否局限于它的范圍內。
所以我們設置為false,讓子視圖不局限與自己;
官方對于第二行的解釋:
Defines whether the ViewGroup will clip its drawing surface so as to exclude the padding area.
翻譯:定義ViewGroup是否將剪輯其繪圖表面以排除填充區域。
要特別注意
- 如果你某個子 View 嵌套了多層,然后超出了父布局,需要所有的父布局都攜帶 clipChildren 屬性。
- 這個子 View 的最近父布局需要是 RelativeLayout ,博主摸了摸秀發,并沒有去深究為什么其他 ViewGroup 為什么不行。
如下:
<?xml version="1.0" encoding="utf-8"?>
<LinearLayout xmlns:android="http://schemas.android.com/apk/res/android"xmlns:app="http://schemas.android.com/apk/res-auto"xmlns:tools="http://schemas.android.com/tools"android:layout_width="match_parent"android:layout_height="match_parent"android:clipChildren="false"android:clipToPadding="false"android:orientation="vertical"tools:context=".MainActivity"tools:ignore="HardcodedText,InOrMmUsage"><RelativeLayoutandroid:layout_width="200mm"android:layout_height="200mm"android:background="@color/crane_swl_color_3"android:clipChildren="false"android:clipToPadding="false"><Buttonandroid:id="@+id/idBtnText"android:layout_width="wrap_content"android:layout_height="wrap_content"android:layout_marginStart="300mm"android:text="Excel"android:textSize="26mm" /></RelativeLayout>
</LinearLayout>
😜溢出的按鈕可以點擊
有兩種方案
方案一
方案一是在整個Activity窗口捕捉點擊事件。
@Override
public boolean onTouchEvent(MotionEvent event) {//首先定義一個數組用來接收按鈕的坐標xy值int[] xy = new int[2];//獲取按鈕的top/left xy值//button變量我在onCreat()函數中已經獲取了控件,具體按實際情況寫button.getLocationOnScreen(xy);//再定義一個數組用來計算控件的bottom/right xy值int[] xy_end = new int[2];xy_end[0] = buttom.getWidth() + xy[0];xy_end[1] = buttom.getHeight() + xy[1];//現在我們已經得到了按鈕的左上坐標和右下坐標//兩個點可以確定一個矩形嘛  event里包含了點擊的信息;//我們判斷點擊的坐標是否在按鈕坐標內,實際就是判斷點擊的xy值是否在上述矩形中;if (event.getX() >= xy[0] && event.getX() <= xy_end[0]&& event.getY() >= xy[1] && event.getY() <= xy_end[1]) {//如果是,那么就執行里邊的代碼,在這里我們可以callOnClick()按鈕//實際體驗了一番,發現輕點一下和長按均可以激活按鈕;//但是,我的按鈕擁有animate()事件,所以連續點擊會在動畫未完成時再次點擊按鈕,//所以我做了個判斷,讓動畫未完成時不再執行點擊,機制如我//實際中,讀者完全不用這兩行代碼//讓我看看有哪些讀者看都不看直接復制代碼--手動滑稽//雖說站在巨人肩膀上,但是也要搞懂其原理才不會摔下來。if (isMoreShow == false && xy[0] >= button.getHeight())return false;//我們callOnClick了按鈕,也就是模擬點擊了按鈕;button.callOnClick();return false;}return super.onTouchEvent(event);
}
不足之處也很明顯,如果頁面點擊事件要素過多,寫入的判斷就很多了,畢竟你是整個 Activity 自己處理事件了。
推薦方案二:委托
小應用場景:有時候一個按鈕效果很小,就很難觸發點擊事件,我們通常會增大下這個點擊區間范圍。
大應用場景:我實現了多個腦圖的功能,里面因為方便畫線穿插過某個UI,就用到了此類知識。
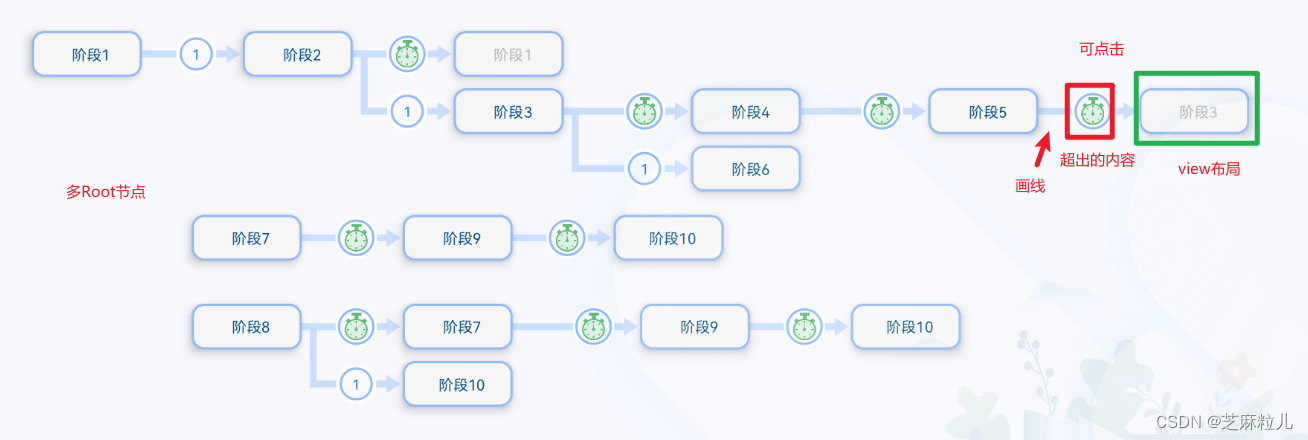
其他情況多種多樣,相信看這篇文章的你也是因為有這個需求才查找的。
小應用場景的實現很簡單:
- 直接增大 View 的寬高,然后給View設置內邊距 padding ;或者直接嵌套一層給這個父設置點擊,但這會增加布局嵌套進而消耗性能。
- 利用委托功能直接增大點擊的區間范圍。
/*** 擴展點擊區域的范圍* @param view 需要擴展的元素,此元素必需要有父級元素* @param expendSize 需要擴展的尺寸,當然也可以分別設置增大范圍*/public static void expendTouchArea(final View view, final int expendSize) {if (view != null) {final View parentView = (View) view.getParent();parentView.post(new Runnable() {@Overridepublic void run() {Rect rect = new Rect();view.getHitRect(rect); rect.left -= expendSize;rect.top -= expendSize;rect.right += expendSize;rect.bottom += expendSize;parentView.setTouchDelegate(new TouchDelegate(rect, view));}});}}事實是,委托就是系統給我們提供的擴大控件點擊區域判斷范圍的代理方式,我們看下View類的源碼。
class View{/*** The delegate to handle touch events that are physically in this view* but should be handled by another view.*/private TouchDelegate mTouchDelegate = null;public boolean onTouchEvent(MotionEvent event) {//...if (mTouchDelegate != null) {if (mTouchDelegate.onTouchEvent(event)) {return true;}}}/*** Sets the TouchDelegate for this View.*/public void setTouchDelegate(TouchDelegate delegate) {mTouchDelegate = delegate;}
}
從源碼中可以看到如果設置了TouchDelegate,touchEvent會優先交給TouchDelegate來處理。
package android.view;
import android.graphics.Rect;
/*** Helper class to handle situations where you want a view to have a larger touch area than its* actual view bounds. The view whose touch area is changed is called the delegate view. This* class should be used by an ancestor of the delegate. To use a TouchDelegate, first create an* instance that specifies the bounds that should be mapped to the delegate and the delegate* view itself.* The ancestor should then forward all of its touch events received in its* {@link android.view.View#onTouchEvent(MotionEvent)} to {@link #onTouchEvent(MotionEvent)}.*/
public class TouchDelegate {private View mDelegateView;private Rect mBounds;private boolean mDelegateTargeted;public TouchDelegate(Rect bounds, View delegateView) {mBounds = bounds;mDelegateView = delegateView;}public boolean onTouchEvent(MotionEvent event) {int x = (int) event.getX();int y = (int) event.getY();boolean sendToDelegate = false;boolean hit = true;boolean handled = false;switch (event.getActionMasked()) {case MotionEvent.ACTION_DOWN:mDelegateTargeted = mBounds.contains(x, y);sendToDelegate = mDelegateTargeted;break;//...}if (sendToDelegate) {final View delegateView = mDelegateView;if (hit) {// Offset event coordinates to be inside the target viewevent.setLocation(delegateView.getWidth() / 2, delegateView.getHeight() / 2);} else {// Offset event coordinates to be outside the target view (in case it does// something like tracking pressed state)int slop = mSlop;event.setLocation(-(slop * 2), -(slop * 2));}handled = delegateView.dispatchTouchEvent(event);}return handled;}
}
從源碼中 可以看到,創建TouchDelegate 需要傳入一個Rect(left,top,right,bottom) 和delegateView, onTouchEvent觸發時,會通過這個Rect來判斷點擊事件是否落在區域內,如果是 則轉發給代理view來處理該事件。
復雜場景實現-重點
子 View 超出父布局顯示,然后觸發點擊事件,同樣利用的委托功能,但是因為要處理 Touch 需要自定義一下。
<?xml version="1.0" encoding="utf-8"?>
<LinearLayout xmlns:android="http://schemas.android.com/apk/res/android"xmlns:app="http://schemas.android.com/apk/res-auto"xmlns:tools="http://schemas.android.com/tools"android:layout_width="match_parent"android:layout_height="match_parent"android:clipChildren="false"android:clipToPadding="false"android:id="@+id/rootLay"android:orientation="vertical"tools:context=".MainActivity"tools:ignore="HardcodedText,InOrMmUsage"><cn.akitaka.test.TestOverClickandroid:id="@+id/testLay"android:layout_width="200mm"android:layout_height="200mm"android:background="@color/crane_swl_color_3"android:clipChildren="false"android:clickable="true"android:clipToPadding="false">
<!--特別留意,因為是自定義的RelativeLayout,Touch時間默認只有個down,需要設置可點擊才能回調所有的事件--><Buttonandroid:id="@+id/idBtnTest"android:layout_width="wrap_content"android:layout_height="wrap_content"android:layout_marginStart="300mm"android:text="Excel"android:textSize="26mm" /></cn.akitaka.test.TestOverClick>
</LinearLayout>
/*** @author akitaka 2023/11/22 960576866@qq.com* @describe TestOverClick*/
public class TestOverClick extends RelativeLayout {public TestOverClick(Context context) {super(context);}public TestOverClick(Context context, AttributeSet attrs) {super(context, attrs);}public TestOverClick(Context context, AttributeSet attrs, int defStyleAttr) {super(context, attrs, defStyleAttr);}public TestOverClick(Context context, AttributeSet attrs, int defStyleAttr, int defStyleRes) {super(context, attrs, defStyleAttr, defStyleRes);}private void initClickRect() {View rootParent = ((View) getParent());// 獲取父視圖rootParent.post(() -> {// 將當前代碼放在消息隊列中異步執行Rect rect = new Rect();// 創建一個矩形對象// 獲取當前視圖的點擊區域  如果太早執行本函數,會獲取rect失敗,因為此時UI界面尚未開始繪制,無法獲得正確的坐標getHitRect(rect);rect.left -= 0;rect.top -= 0;//布局中控件是距離左300像素 控件本身是200 他倆的中間間距為100 加上按鈕的本身寬度rect.right += AutoSizeUtils.mm2px(getContext(), 100) + btn.getWidth();rect.bottom += 0;rootParent.setTouchDelegate(new TouchDelegate(rect, this));  // 設置根視圖的觸摸委托為當前視圖});}private Button btn;//外部的按鈕對象設置public void setBtn(Button btn) {this.btn = btn;initClickRect();}@Overridepublic boolean onTouchEvent(MotionEvent event) {Log.e("TAG", "事件類型: " + event.getAction());int x = (int) event.getX();int y = (int) event.getY();
//        if () {  TODO  重點注意
//            //這個if判斷是你點擊的x、y坐標是否在按鈕的范圍內,不在的話直接進行return不處理即可
//            //具體的區間判斷范圍,就需要自己的項目具體調整了。
//            return true;
//        }switch (event.getAction()) {case MotionEvent.ACTION_DOWN:Log.e("TAG", "按下事件: " + btn);btn.setBackgroundResource(R.color.purple_200);break;case MotionEvent.ACTION_UP:btn.performClick();Log.e("TAG", "抬起事件: " + btn);HandlerUtils.INSTANCE.postRunnable(() -> {btn.setBackgroundResource(R.color.purple_700);}, 30);//30毫秒延遲break;default:break;}return super.onTouchEvent(event);}
}
public class MainActivity extends FragmentActivity {@Overrideprotected void onCreate(Bundle savedInstanceState) {super.onCreate(savedInstanceState);setContentView(R.layout.activity_main);TestOverClick testLay = findViewById(R.id.testLay);Button idBtnTest = findViewById(R.id.idBtnTest);idBtnTest.setOnClickListener(v -> Log.e("TAG", "點擊了內容: "));testLay.setBtn(idBtnTest);}
}
上面的注釋簡直是保姆級的了。
- 自定義 TestOverClick 嵌套了個子 Button 控件,設置
android:clickable="true"可點擊,設置屬性android:clipChildren="false"和android:clipToPadding="false"實現超出區域可見。 - 自定義 TestOverClick 有個方法 initClickRect 是用來設置點擊響應區域的,咱們向右側進行了擴大,紅色為默認響應區域,經過計算:布局中控件是距離左300像素 控件本身是200 他倆的中間間距為100 加上按鈕的本身寬度。右側增加了綠框范圍的響應區域。
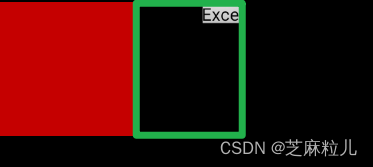
- 接著我們在 onTouchEvent 函數中做兩個處理:處理一是判斷下點擊的區間,通過計算允許在按鈕范圍內處理,否則的話直接消耗事件,這樣就假裝模擬出了只響應按鈕了。處理二是在事件中抬起的時候回調下按鈕的模擬點擊事件,就會進入業務邏輯。注意我們真正點擊的其實是父控件,只不過模擬點擊了按鈕。
- 默認模擬點擊是沒有點擊效果的,所以我們在 onTouchEvent 中 down 和 up 的時候自己更改下按鈕背景狀態即可完美實現點擊UI變化。
- activity 中直接使用即可,我們內部需要用到按鈕,記得要傳遞進去按鈕對象。
題外
一個Parent只能設置一個View的TouchDelegate,設置多個時只有最后設置的生效。
如果想恢復 View 的觸摸范圍:
/*** 還原View的觸摸和點擊響應范圍,最小不小于View自身范圍*/
public static void restoreViewTouchDelegate(final View view) {((View) view.getParent()).post(new Runnable() {@Overridepublic void run() {Rect bounds = new Rect();bounds.setEmpty();TouchDelegate touchDelegate = new TouchDelegate(bounds, view);if (View.class.isInstance(view.getParent())) {((View) view.getParent()).setTouchDelegate(touchDelegate);}}});
}
還沒懂?下方卡片聯系我,手把手教你。
👉其他
📢作者:小空和小芝中的小空
📢轉載說明-務必注明來源:https://zhima.blog.csdn.net/
📢這位道友請留步??,我觀你氣度不凡,談吐間隱隱有王者霸氣💚,日后定有一番大作為📝!!!旁邊有點贊👍收藏🌟今日傳你,點了吧,未來你成功??,我分文不取,若不成功??,也好回來找我。
溫馨提示:點擊下方卡片獲取更多意想不到的資源。


)


)
)


