Apache Dubbo經常作為一個RPC框架來使用,這篇文章主要介紹使用Dubbo配合注冊中心來發布和調用服務。
Apache Dubbo和Spring Boot、JDK的版本對應關系。
| Dubbo 分支 | 最新版本 | JDK | Spring Boot | 組件版本 | 詳細說明 |
|---|---|---|---|---|---|
| 3.3.x (當前文檔) | 3.3.0 | 8, 17, 21 | 2.x、3.x | 詳情 | - 版本變更記錄 - 生產可用(推薦,長期維護)! 最新Triple協議升級,內置Metrics、Tracing、GraalVM支持等 |
| 3.2.x | 3.2.10 | 8, 17 | 2.x、3.x | 詳情 | - 版本變更記錄 - 生產可用(長期維護)! |
| 3.1.x | 3.1.11 | 8, 17 | 2.x、3.x | 詳情 | - 版本變更記錄 - 僅修復安全漏洞! |
| 3.0.x | 3.0.15 | 8 | 2.x | 詳情 | - 版本變更記錄 - 停止維護! |
| 2.7.x | 2.7.23 | 8 | 2.x | 詳情 | - 了解如何升級到Dubbo3 - 停止維護! |
博主使用的Spring Boot版本是2.3.4.RELEASE、jdk版本是1.8.0_461,所以采用dubbo的2.7.23版本(因為3.0.x版本不兼容)。
<dependencyManagement><dependencies><dependency><groupId>org.apache.dubbo</groupId><artifactId>dubbo-bom</artifactId><version>2.7.23</version><type>pom</type><scope>import</scope></dependency></dependencies>
</dependencyManagement>
一、創建服務接口
文章只是為了簡單介紹一下使用Dubbo來發布和調用服務(RPC接口),所以把所有接口都存放在一個dubbo-api的項目上,服務提供者和服務消費者只需要依賴這個項目即可。
1、創建項目
在Intellij IDEA中創建一個Maven項目,項目名為dubbo-api
2、添加依賴
添加lombok的依賴和Maven的jar包插件。
<?xml version="1.0" encoding="UTF-8"?>
<project xmlns="http://maven.apache.org/POM/4.0.0" xmlns:xsi="http://www.w3.org/2001/XMLSchema-instance"xsi:schemaLocation="http://maven.apache.org/POM/4.0.0 https://maven.apache.org/xsd/maven-4.0.0.xsd"><modelVersion>4.0.0</modelVersion><version>20250906</version><groupId>cn.edu.sgu.www</groupId><artifactId>dubbo-api</artifactId><properties><java.version>1.8</java.version></properties><dependencies><dependency><groupId>org.projectlombok</groupId><artifactId>lombok</artifactId><version>1.18.22</version><optional>true</optional></dependency></dependencies><build><plugins><plugin><groupId>org.apache.maven.plugins</groupId><artifactId>maven-jar-plugin</artifactId><version>3.2.0</version></plugin></plugins></build>
</project>
3、創建接口
在項目的src/main/java包下創建多級包cn.edu.sgu.www.dubbo.provider
- 在provider子包下創建entity子包
- 在provider子包下創建service子包
User.java
在entity包下創建一個類User.java。在User類上使用lombok的@Data注解,實現序列化接口,指定序列化版本號。
package cn.edu.sgu.www.dubbo.provider.entity;import lombok.Data;import java.io.Serializable;/*** @author 沐雨橙風ιε* @version 1.0*/
@Data
public class User implements Serializable {private static final long serialVersionUID = 18L;private String id;/*** 姓名*/private String name;/*** 身高*/private Integer height;/*** 體重*/private Integer weight;
}
UserService.java
在service包下創建user子包,在user包下創建UserService接口,定義兩個方法。
package cn.edu.sgu.www.dubbo.provider.service.user;import cn.edu.sgu.www.dubbo.provider.entity.User;import java.util.List;/*** @author 沐雨橙風ιε* @version 1.0*/
public interface UserService {void save(User user);List<String> selectAll();
}
HelloService.java
在service包下創建hello子包,在hello包下創建HelloService接口,定義一個greet()方法。
package cn.edu.sgu.www.dubbo.provider.service.hello;/*** @author 沐雨橙風ιε* @version 1.0*/
public interface HelloService {void greet();
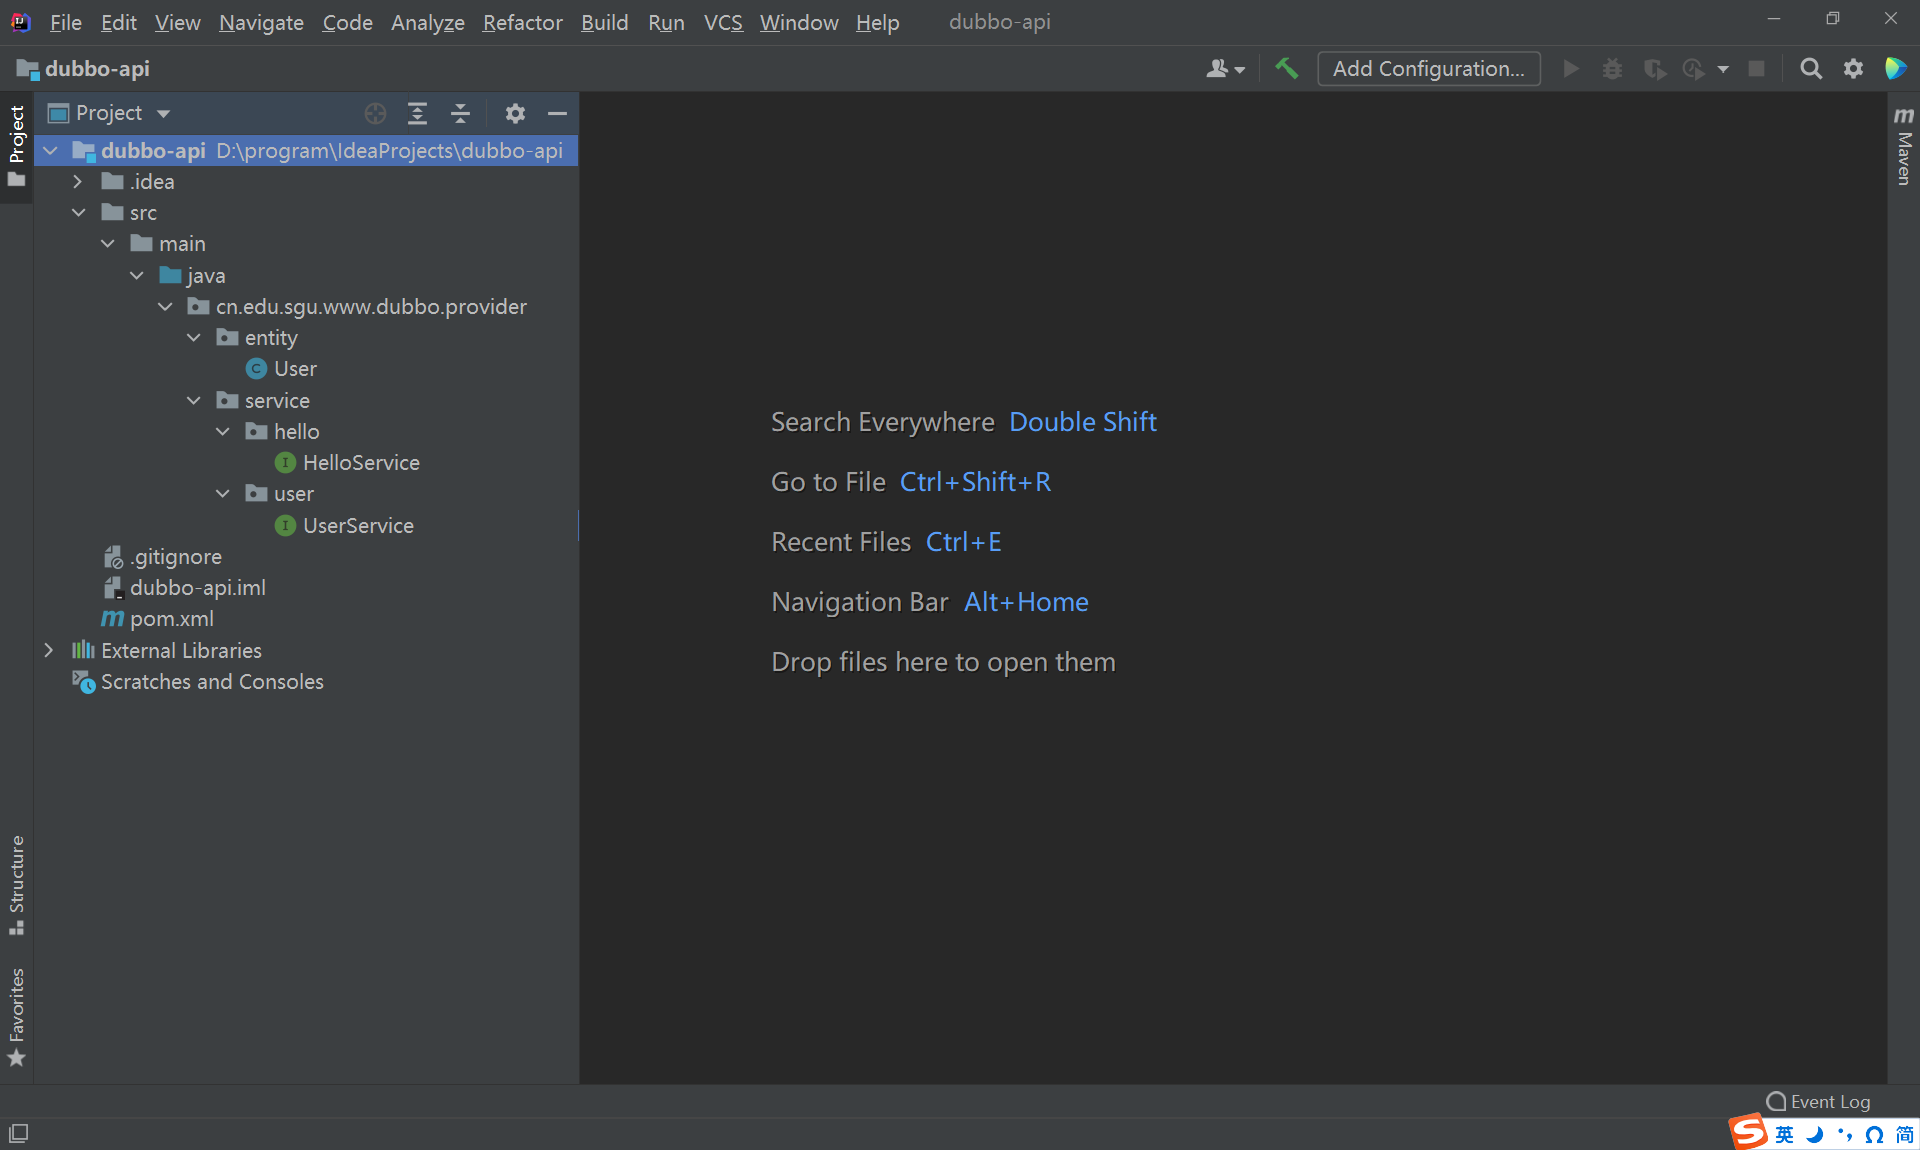
}4、項目結構預覽
完成上面三個步驟之后,項目的目錄結構如下。
5、安裝項目到本地倉庫
在當前項目目錄下執行Maven命令mvn install或直接通過Maven插件安裝本項目到本地倉庫。
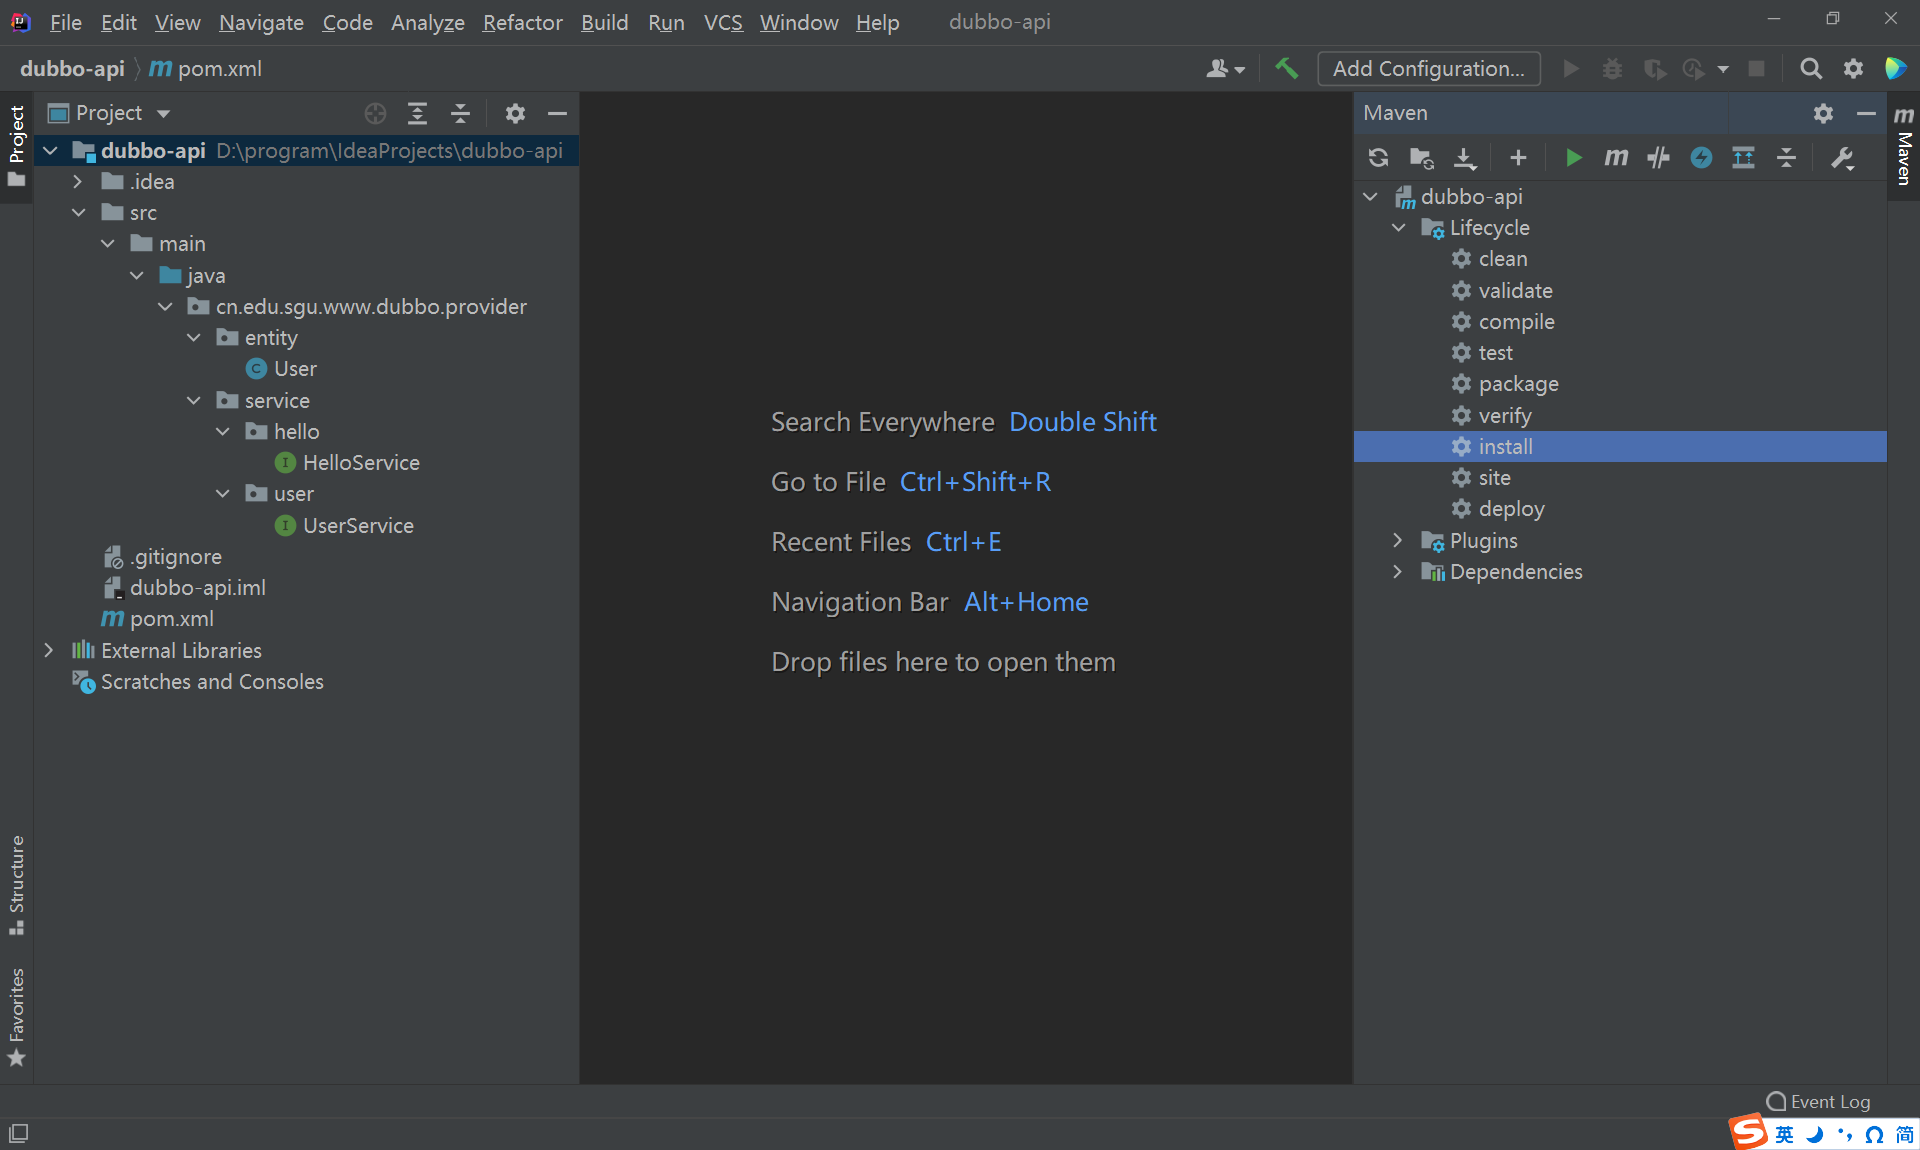
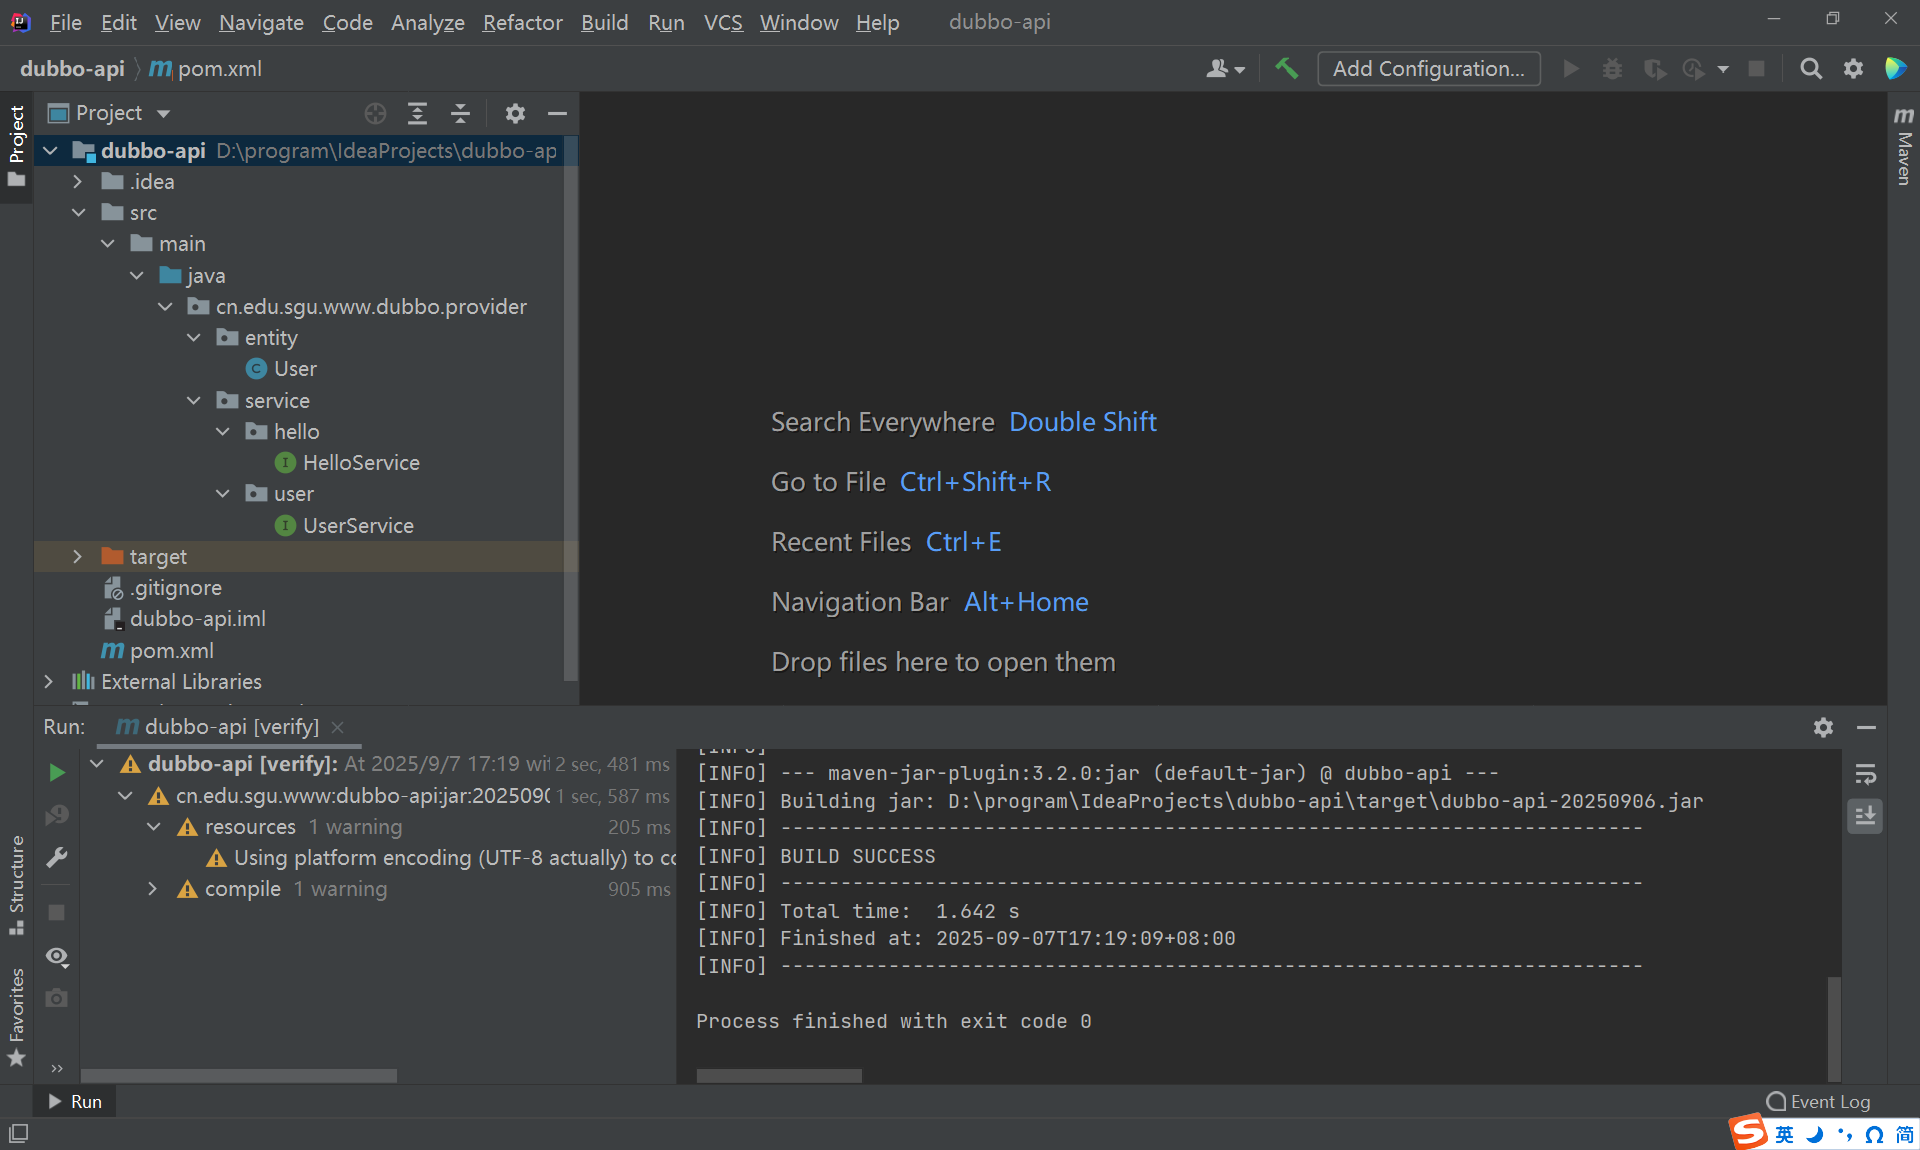
成功安裝到Maven本地倉庫:
二、創建服務提供者
1、創建項目
在Intellij IDEA中創建一個Spring Boot項目,項目名為dubbo-provider
2、添加依賴
添加Apache Dubbo的Spring Boot啟動器依賴,這個啟動器包含了所有使用Dubbo需要的依賴。
因為還需要通過注冊中心暴露服務信息,所以額外引入Dubbo整合nacos的依賴。
<?xml version="1.0" encoding="UTF-8"?>
<project xmlns="http://maven.apache.org/POM/4.0.0" xmlns:xsi="http://www.w3.org/2001/XMLSchema-instance"xsi:schemaLocation="http://maven.apache.org/POM/4.0.0 https://maven.apache.org/xsd/maven-4.0.0.xsd"><modelVersion>4.0.0</modelVersion><parent><groupId>org.springframework.boot</groupId><artifactId>spring-boot-starter-parent</artifactId><version>2.3.4.RELEASE</version></parent><version>20250907</version><artifactId>dubbo-provider</artifactId><description>Apache Dubbo服務提供者項目</description><properties><java.version>1.8</java.version><dubbo.version>2.7.23</dubbo.version><dubbo-registry.version>3.2.10</dubbo-registry.version></properties><dependencyManagement><dependencies><dependency><groupId>org.apache.dubbo</groupId><artifactId>dubbo-bom</artifactId><version>${dubbo.version}</version><type>pom</type><scope>import</scope></dependency></dependencies></dependencyManagement><dependencies><dependency><groupId>org.springframework.boot</groupId><artifactId>spring-boot-starter-web</artifactId></dependency><dependency><version>20250906</version><groupId>cn.edu.sgu.www</groupId><artifactId>dubbo-api</artifactId></dependency><dependency><groupId>org.apache.dubbo</groupId><artifactId>dubbo-spring-boot-starter</artifactId></dependency><dependency><groupId>org.apache.dubbo</groupId><artifactId>dubbo-nacos-spring-boot-starter</artifactId><version>${dubbo-registry.version}</version></dependency></dependencies><build><plugins><plugin><groupId>org.springframework.boot</groupId><artifactId>spring-boot-maven-plugin</artifactId><version>2.3.4.RELEASE</version></plugin></plugins></build>
</project>
3、實現接口
在項目src/main/java包下創建cn.edu.sgu.www.dubbo.provider子包,在provider子包下創建service子包。
UserServiceImpl.java
在service包下創建user子包。
在user包下創建UserServiceImpl,實現UserService接口,重寫兩個方法。
package cn.edu.sgu.www.dubbo.provider.service.user;import cn.edu.sgu.www.dubbo.provider.entity.User;import java.util.ArrayList;
import java.util.List;/*** @author 沐雨橙風ιε* @version 1.0*/
public class UserServiceImpl implements UserService {@Overridepublic void save(User user) {System.out.println("save: " + user);}@Overridepublic List<String> selectAll() {List<String> list = new ArrayList<>();list.add("沐雨橙風");list.add("一葉之秋");list.add("蘇沐秋");return list;}}
HelloServiceImpl.java
在service包下創建hello子包。
在user包下創建HelloServiceImpl,實現HelloService接口,重寫兩個方法。
package cn.edu.sgu.www.dubbo.provider.service.hello;/*** @author 沐雨橙風ιε* @version 1.0*/
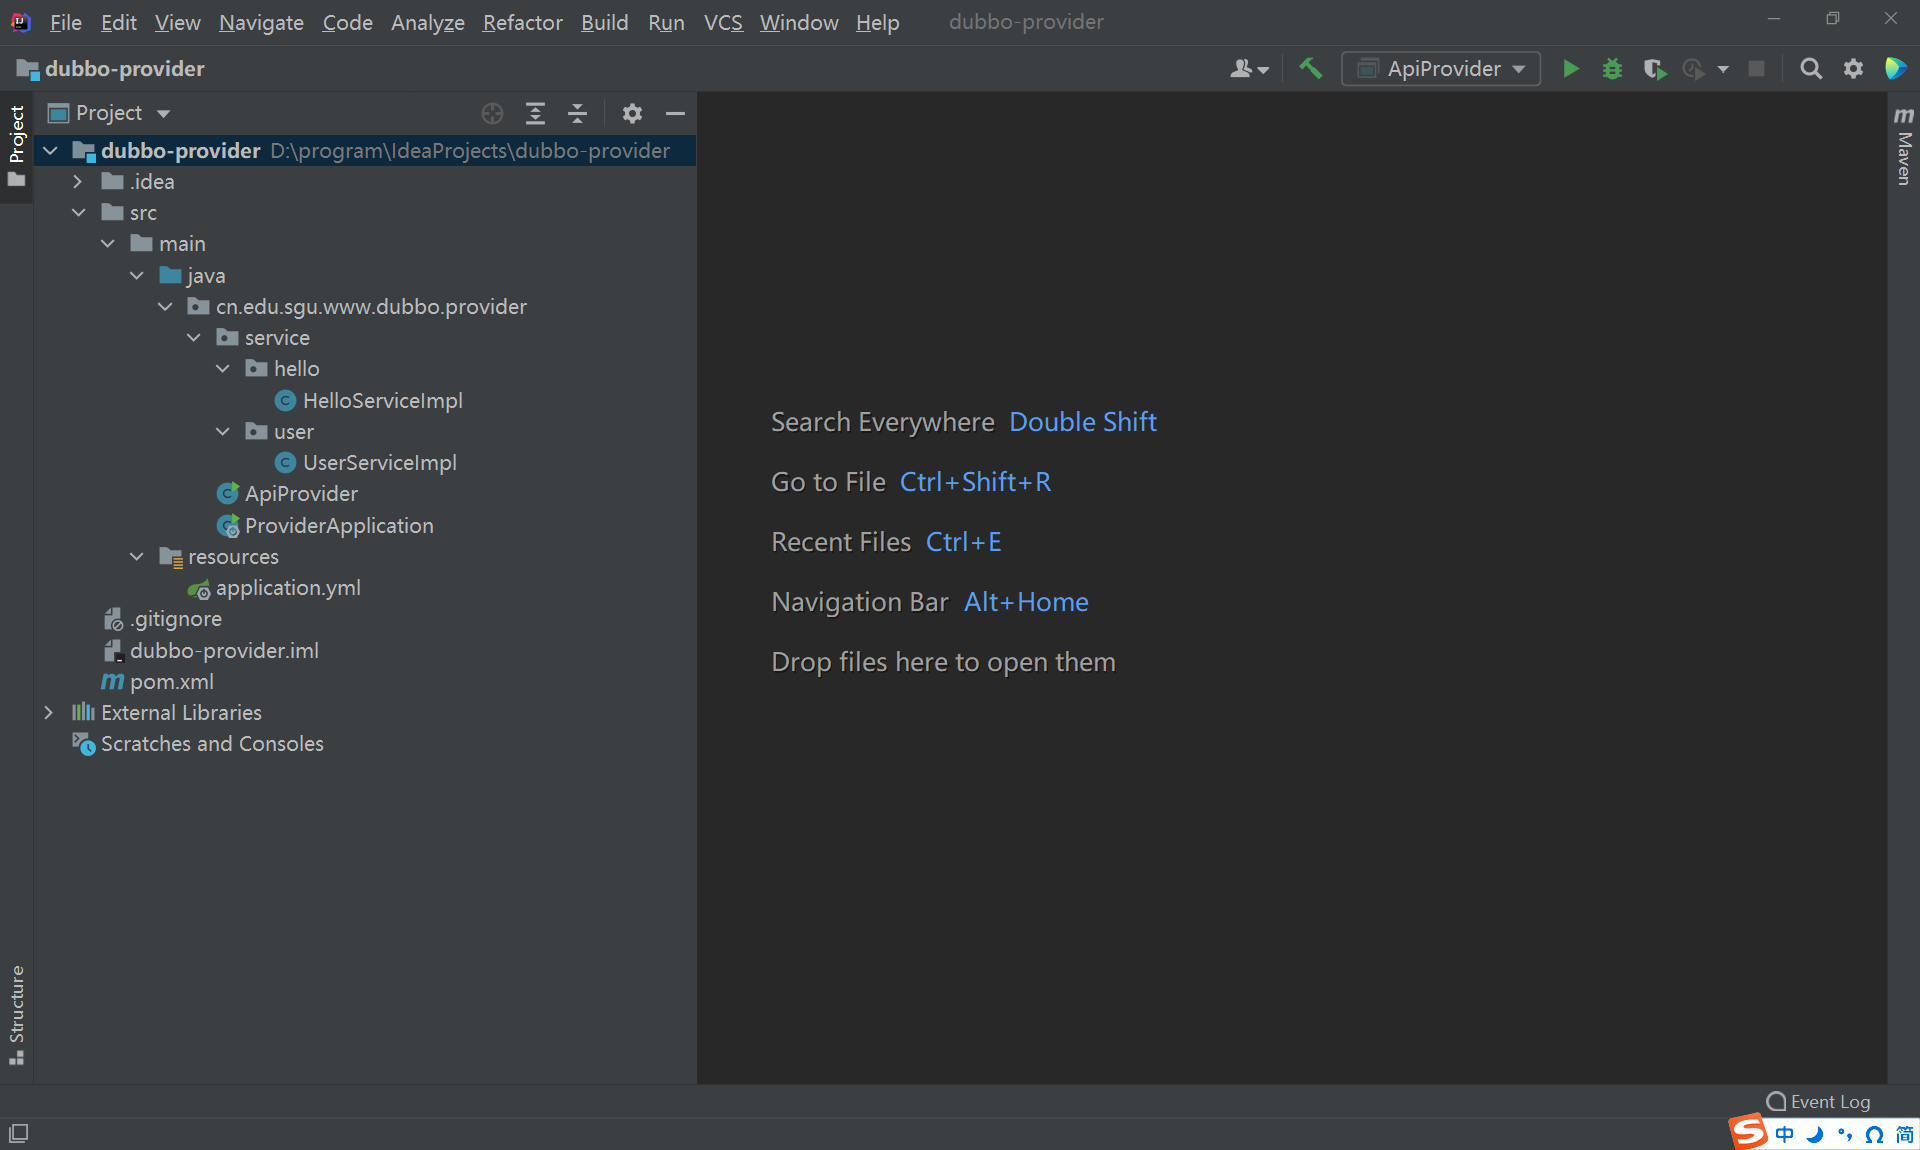
public class HelloServiceImpl implements HelloService {@Overridepublic void greet() {System.out.println("Hello,沐雨橙風ιε");}}完成以上步驟的項目目錄結構如下:
- 啟動類類名刪除了Dubbo前綴
- 配置類后綴由.properties修改為了.yml
4、發布服務
使用API發布服務
使用Dubbo原生API發布服務:在provider包下創建ApiProvider.java
package cn.edu.sgu.www.dubbo.provider;import cn.edu.sgu.www.dubbo.provider.service.hello.HelloService;
import cn.edu.sgu.www.dubbo.provider.service.hello.HelloServiceImpl;
import cn.edu.sgu.www.dubbo.provider.service.user.UserService;
import cn.edu.sgu.www.dubbo.provider.service.user.UserServiceImpl;
import org.apache.dubbo.config.ApplicationConfig;
import org.apache.dubbo.config.ProtocolConfig;
import org.apache.dubbo.config.RegistryConfig;
import org.apache.dubbo.config.ServiceConfig;import java.io.IOException;/*** @author 沐雨橙風ιε* @version 1.0*/
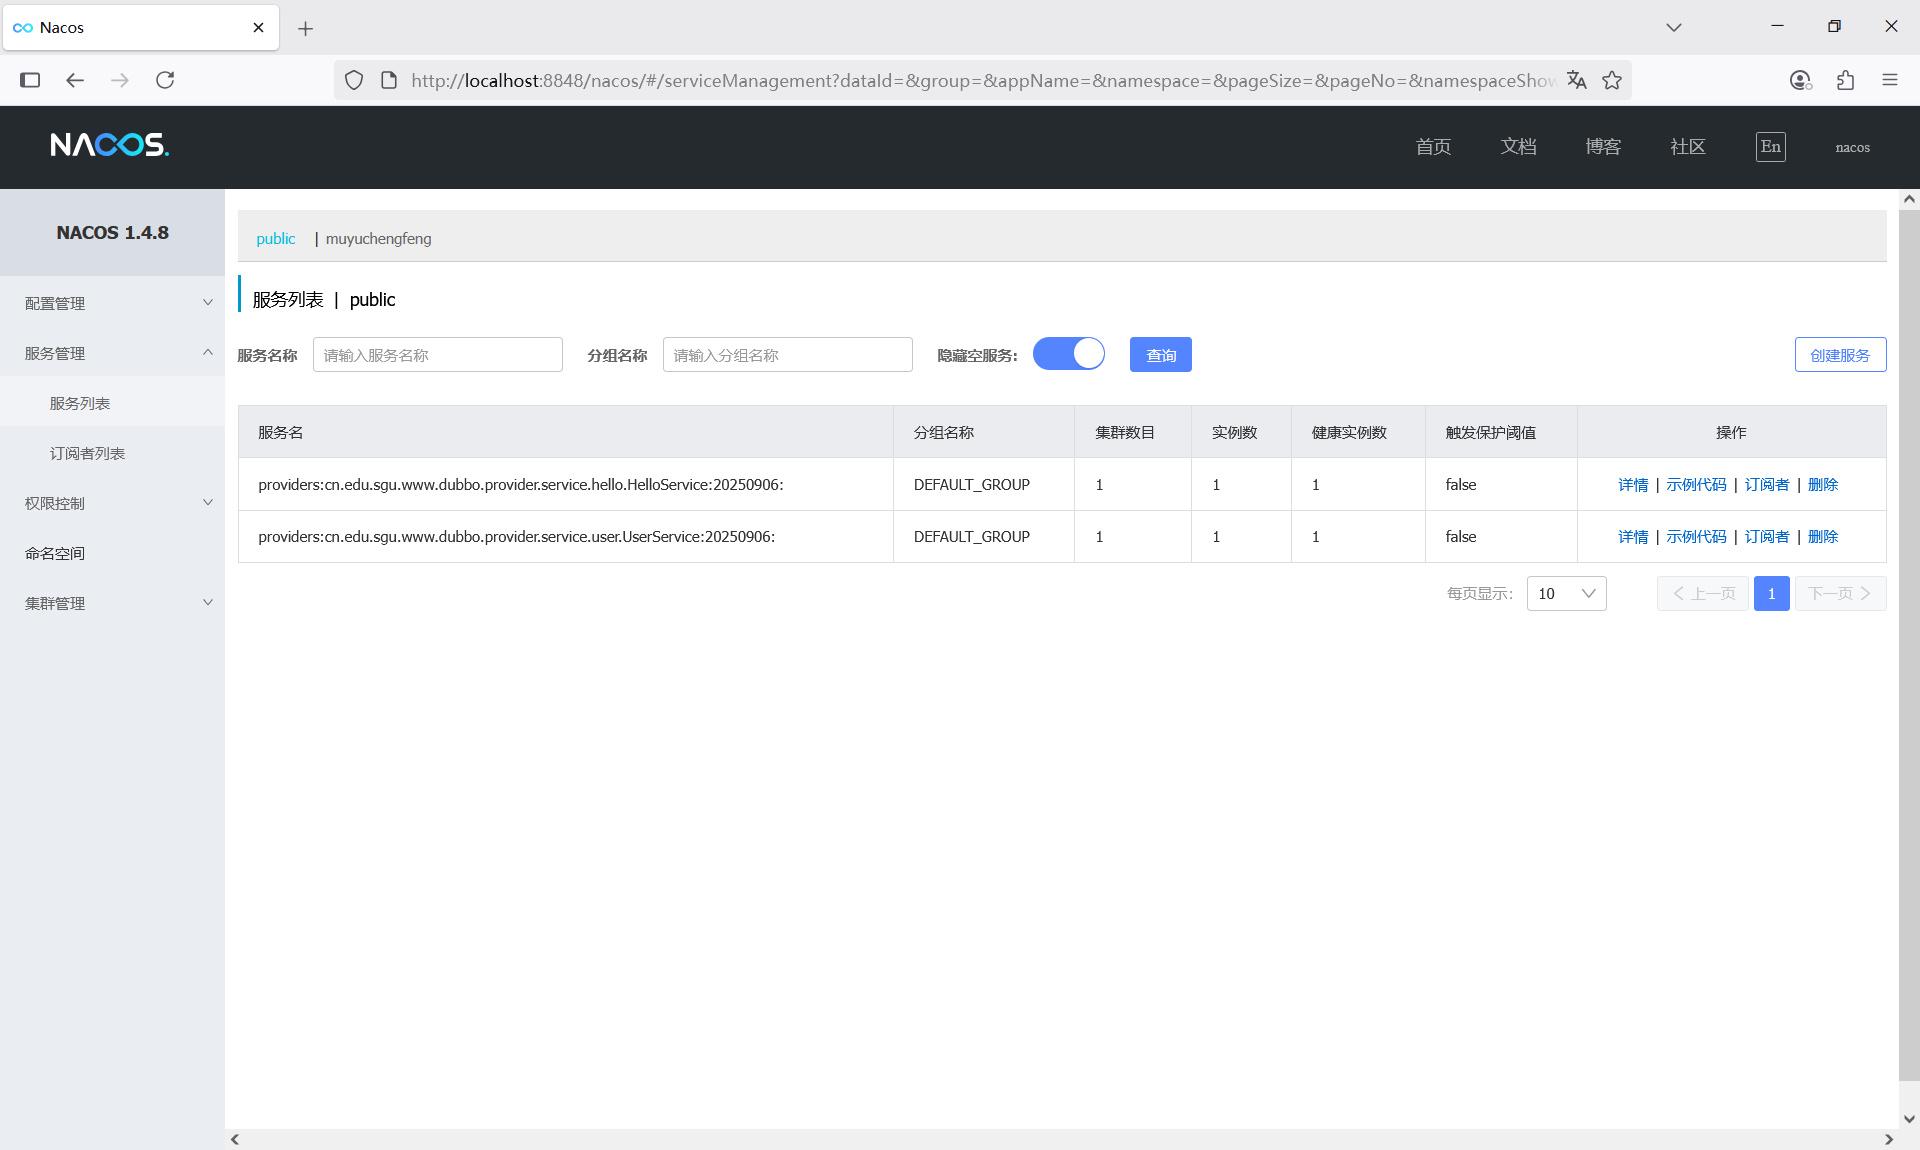
public class ApiProvider {public static void main(String[] args) throws IOException {// 當前應用配置ApplicationConfig application = new ApplicationConfig();application.setName("dubbo-provider");// 連接注冊中心配置RegistryConfig registry = new RegistryConfig();registry.setAddress("nacos://localhost:8848");// 服務提供者協議配置ProtocolConfig protocol = new ProtocolConfig();protocol.setName("dubbo");protocol.setPort(20880);protocol.setThreads(200);// 服務提供者暴露服務配置ServiceConfig<HelloService> helloServiceServiceConfig = new ServiceConfig<>();helloServiceServiceConfig.setApplication(application);helloServiceServiceConfig.setRegistry(registry); // 多個注冊中心可以用setRegistries()helloServiceServiceConfig.setProtocol(protocol); // 多個協議可以用setProtocols()helloServiceServiceConfig.setInterface(HelloService.class);helloServiceServiceConfig.setRef(new HelloServiceImpl());helloServiceServiceConfig.setVersion("20250906");// 暴露及注冊服務helloServiceServiceConfig.export();ServiceConfig<UserService> userServiceServiceConfig = new ServiceConfig<>();userServiceServiceConfig.setApplication(application);userServiceServiceConfig.setRegistry(registry); // 多個注冊中心可以用setRegistries()userServiceServiceConfig.setProtocol(protocol); // 多個協議可以用setProtocols()userServiceServiceConfig.setInterface(UserService.class);userServiceServiceConfig.setRef(new UserServiceImpl());userServiceServiceConfig.setVersion("20250906");// 暴露及注冊服務userServiceServiceConfig.export();System.out.println("dubbo-provider is running.");System.in.read();}}啟動nacos服務器、運行ApiProvider,訪問nacos的控制臺。
可以看到在默認命名空間中多了兩個配置文件。

同時,Dubbo往nacos中注冊了兩個接口級服務。
使用Spring發布服務
基于XML文件
Dubbo支持通過xml配置文件的方式,結合Spring框架來發布服務。
dubbo-provider.xml
在classpath下創建一個xml配置文件,文件名為dubbo-provider.xml
<?xml version="1.0" encoding="UTF-8"?>
<beans xmlns="http://www.springframework.org/schema/beans"xmlns:xsi="http://www.w3.org/2001/XMLSchema-instance"xmlns:dubbo="http://dubbo.apache.org/schema/dubbo"xsi:schemaLocation="http://www.springframework.org/schema/beanshttp://www.springframework.org/schema/beans/spring-beans-4.3.xsdhttp://dubbo.apache.org/schema/dubbohttp://dubbo.apache.org/schema/dubbo/dubbo.xsd"><!-- 提供方應用信息,用于計算依賴關系 --><dubbo:application name="dubbo-provider" /><!-- 用dubbo協議在20880端口暴露服務 --><dubbo:protocol name="dubbo" port="20880" /><!-- 使用nacos注冊中心暴露服務地址 --><dubbo:registry address="nacos://localhost:8848" /><!-- 聲明需要暴露的服務接口 --><dubbo:service interface="cn.edu.sgu.www.dubbo.provider.service.user.UserService" ref="userService" /><dubbo:service interface="cn.edu.sgu.www.dubbo.provider.service.hello.HelloService" ref="helloService" /><!-- 和本地bean一樣實現服務 --><bean id="userService" class="cn.edu.sgu.www.dubbo.provider.service.user.UserServiceImpl" /><bean id="helloService" class="cn.edu.sgu.www.dubbo.provider.service.hello.HelloServiceImpl" />
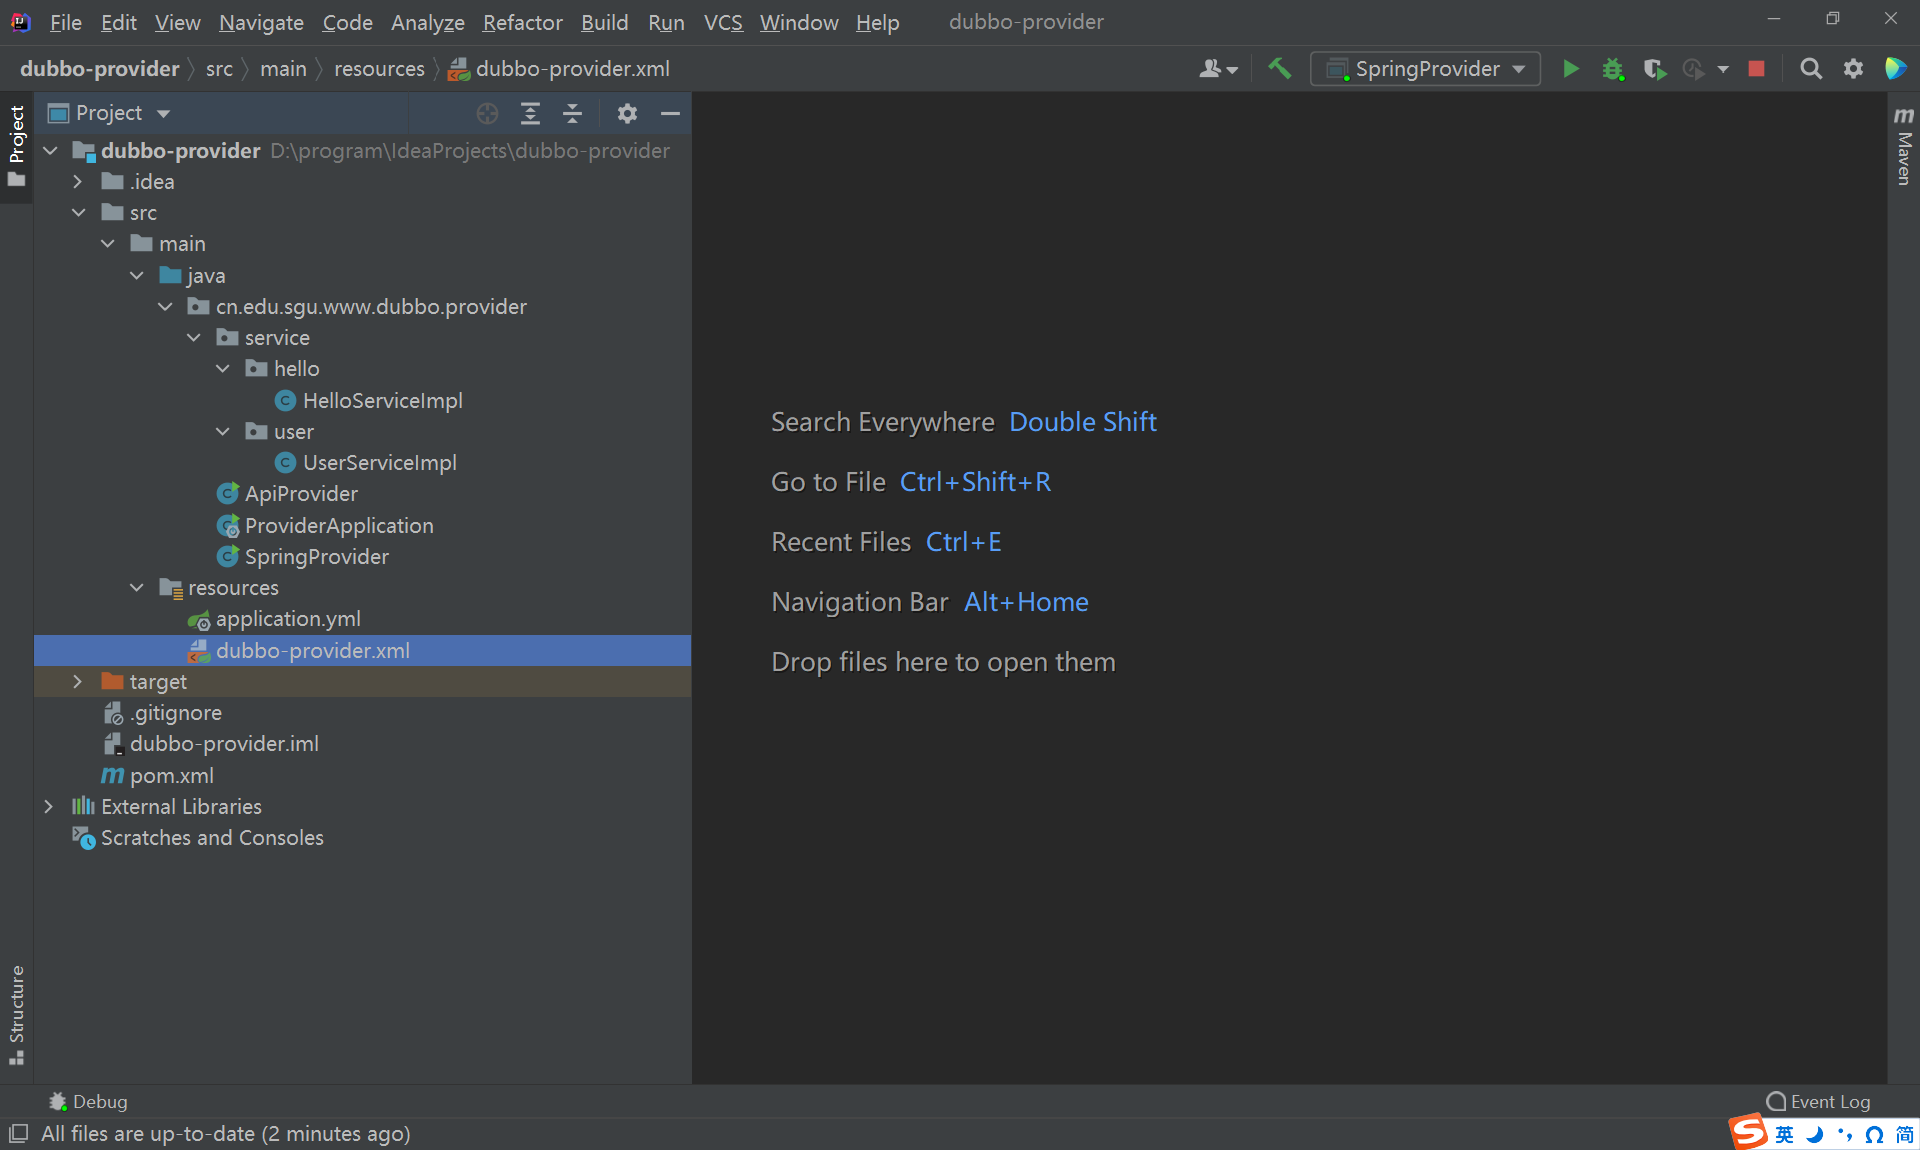
</beans>SpringProvider.java
在provider包下創建SpringProvider類,通過xml配置文件創建并啟動Spring容器。
package cn.edu.sgu.www.dubbo.provider;import org.springframework.context.support.ClassPathXmlApplicationContext;import java.io.IOException;/*** @author 沐雨橙風ιε* @version 1.0*/
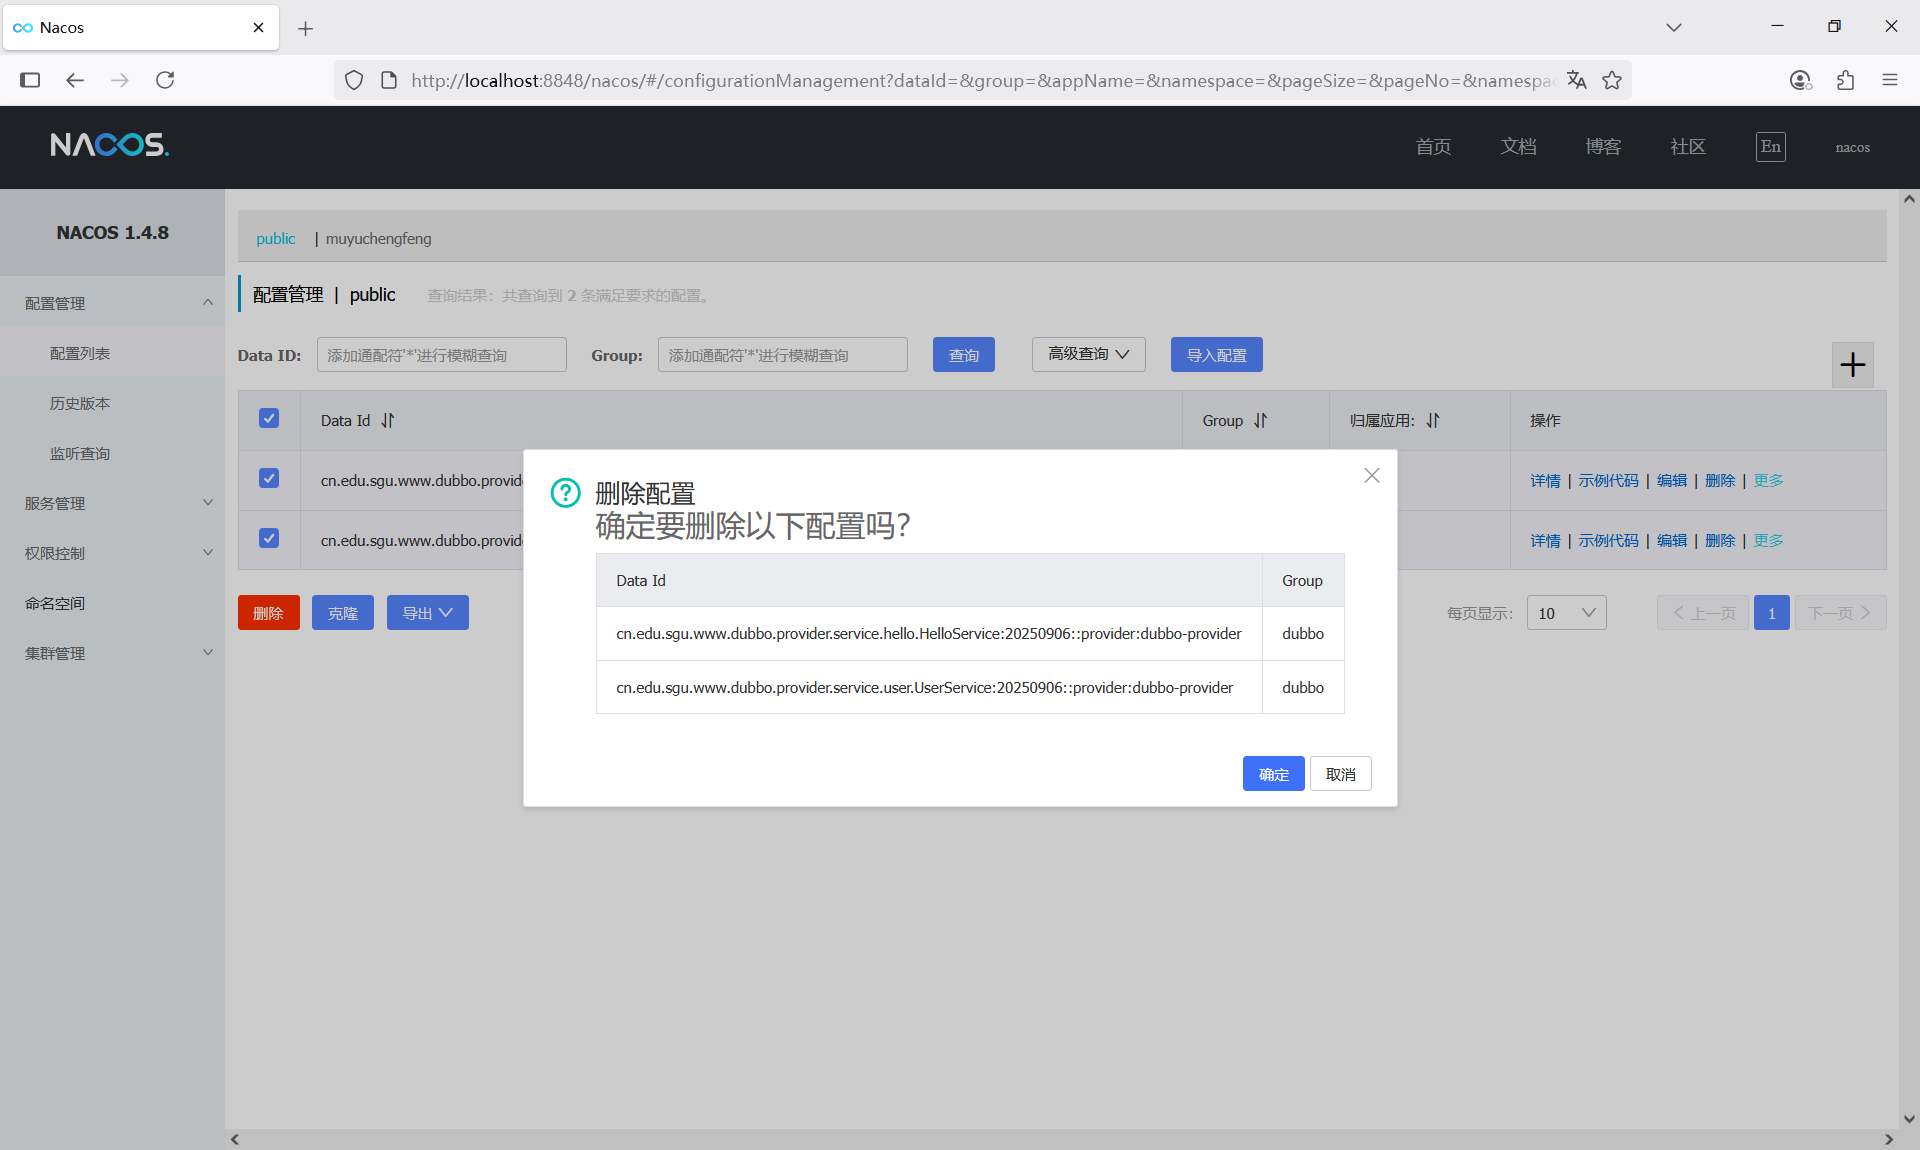
public class SpringProvider {public static void main(String[] args) throws IOException {ClassPathXmlApplicationContext applicationContext = new ClassPathXmlApplicationContext("dubbo-provider.xml");applicationContext.start();System.out.println("dubbo-provider is running.");System.in.read();}}停止之前運行的ApiProvider,并刪除其創建的nacos配置文件。
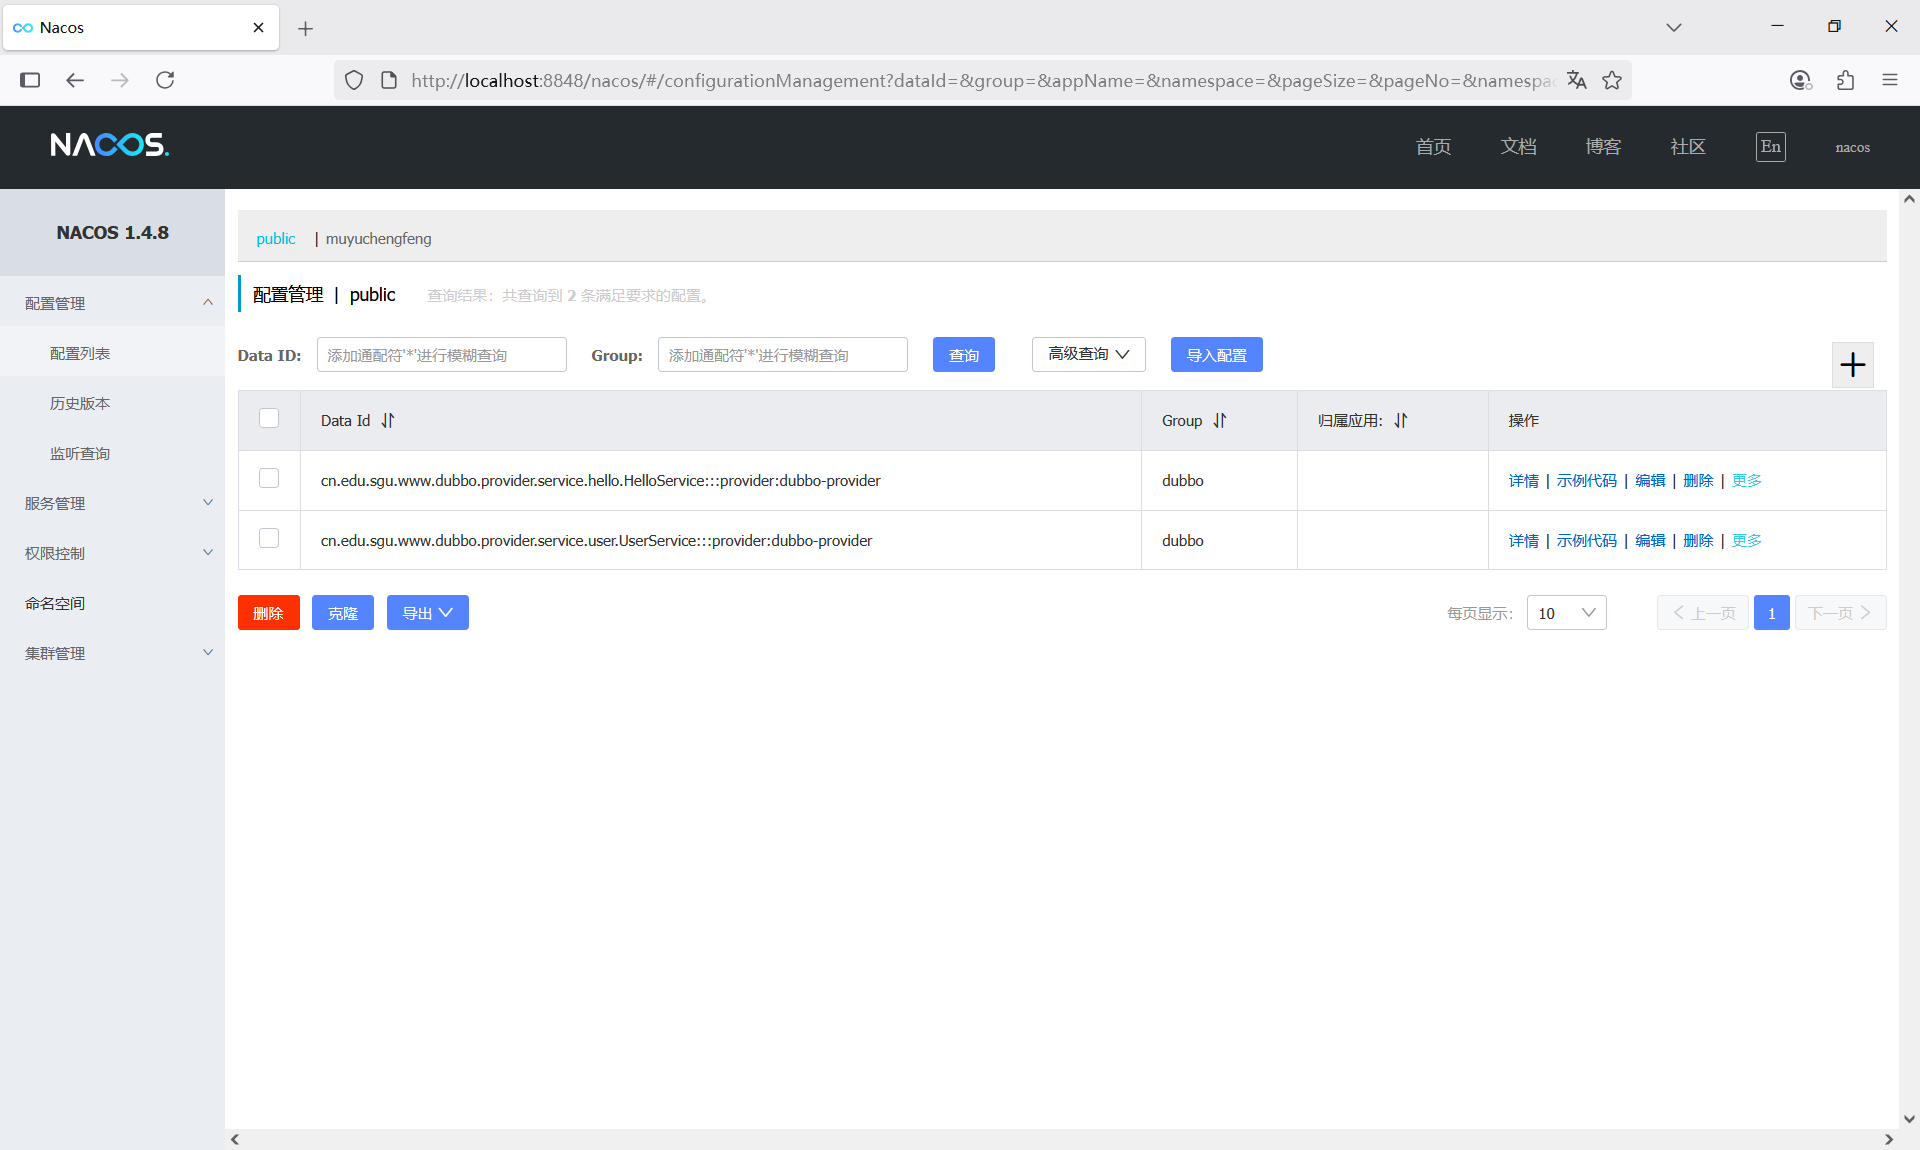
啟動SpringProvider,發現又創建了這兩個配置文件
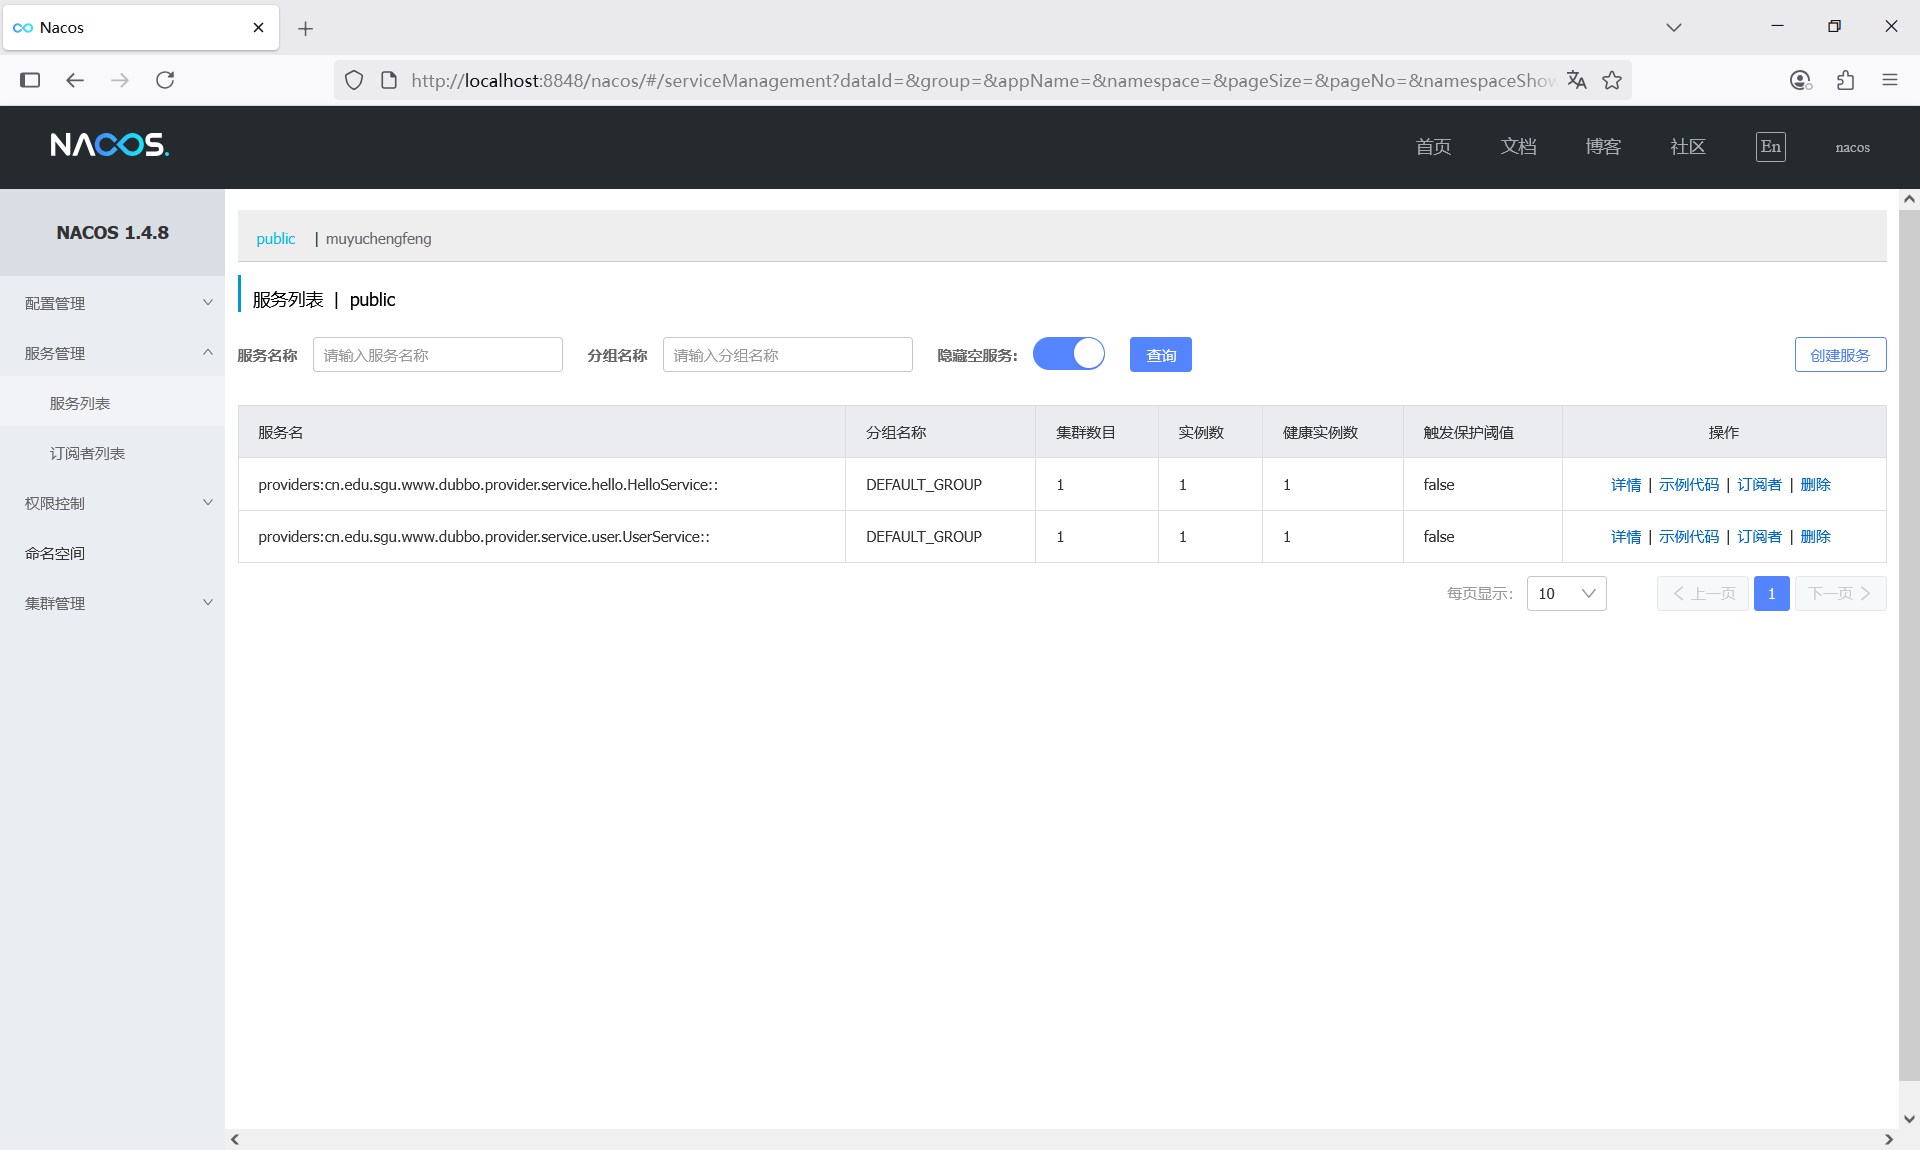
并且這兩個服務也注冊到了nacos
完成以上步驟的項目目錄結構如下:
基于注解
除了基于xml配置文件的方式以外,Spring還支持使用注解的方式發布(暴露)服務。
dubbo-provider.properties
在classpath下創建一個properties配置文件,文件名為dubbo-provider.properties
dubbo.application.name=dubbo-provider
dubbo.registry.address=nacos://localhost:8848
dubbo.protocol.name=dubbo
dubbo.protocol.port=20880
ProviderConfig.java
在HelloServiceImpl和UserServiceImpl兩個類上使用@DubboService注解,將這兩個類定義為Dubbo服務。
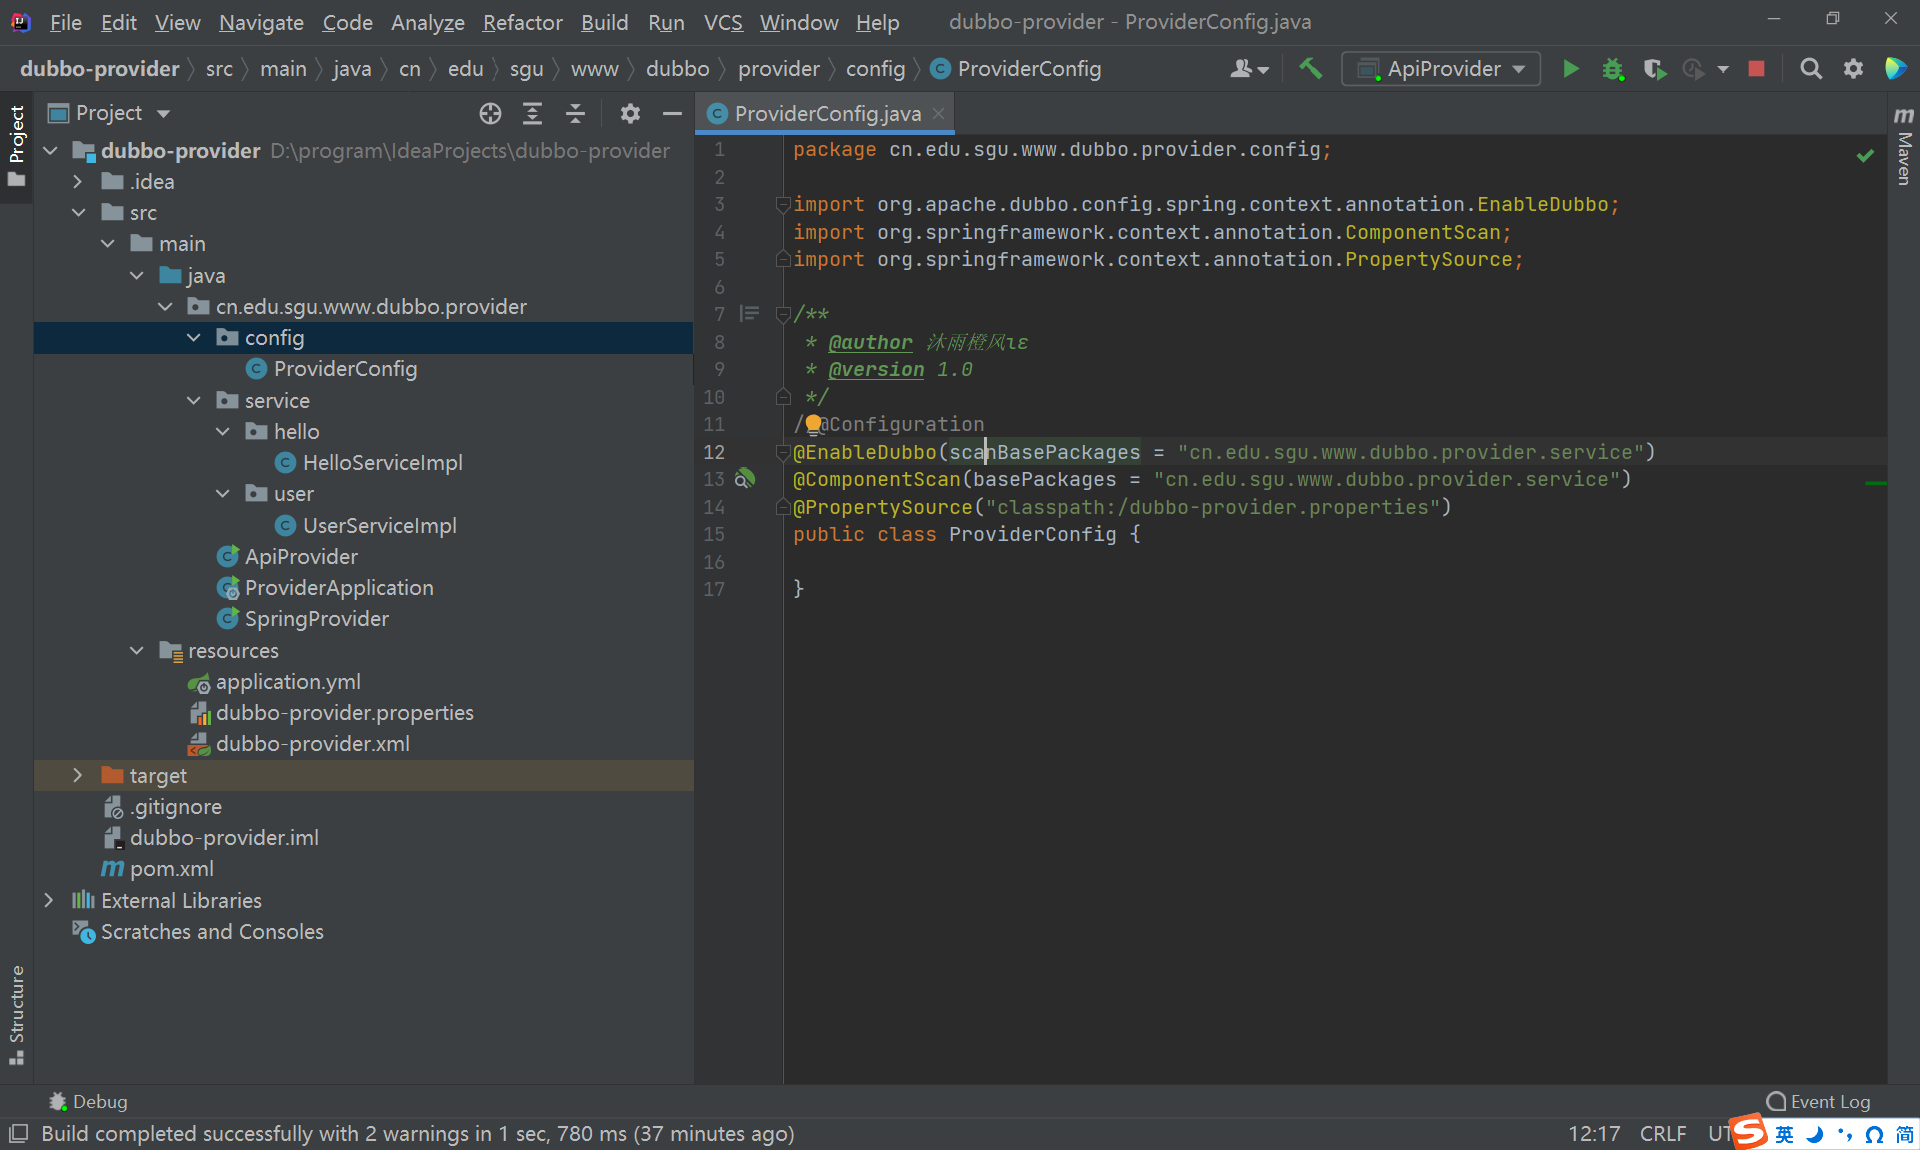
在provider包下創建config子包,在config包下創建一個配置類ProviderConfig。
- 在配置類上使用@EnableDubbo注解,指定掃描service包下的Dubbo服務。
- 在配置類上使用@PropertySource注解,加載classpath下的配置文件dubbo-provider.properties。
package cn.edu.sgu.www.dubbo.provider.config;import org.apache.dubbo.config.spring.context.annotation.EnableDubbo;
import org.springframework.context.annotation.ComponentScan;
import org.springframework.context.annotation.Configuration;
import org.springframework.context.annotation.PropertySource;/*** @author 沐雨橙風ιε* @version 1.0*/
@Configuration
@EnableDubbo(scanBasePackages = "cn.edu.sgu.www.dubbo.provider.service")
@ComponentScan(basePackages = "cn.edu.sgu.www.dubbo.provider.service")
@PropertySource("classpath:/dubbo-provider.properties")
public class ProviderConfig {}
SpringProvider.java
通過配置文件創建并啟動Spring容器。
package cn.edu.sgu.www.dubbo.provider;import cn.edu.sgu.www.dubbo.provider.config.ProviderConfig;
import org.springframework.context.annotation.AnnotationConfigApplicationContext;import java.io.IOException;/*** @author 沐雨橙風ιε* @version 1.0*/
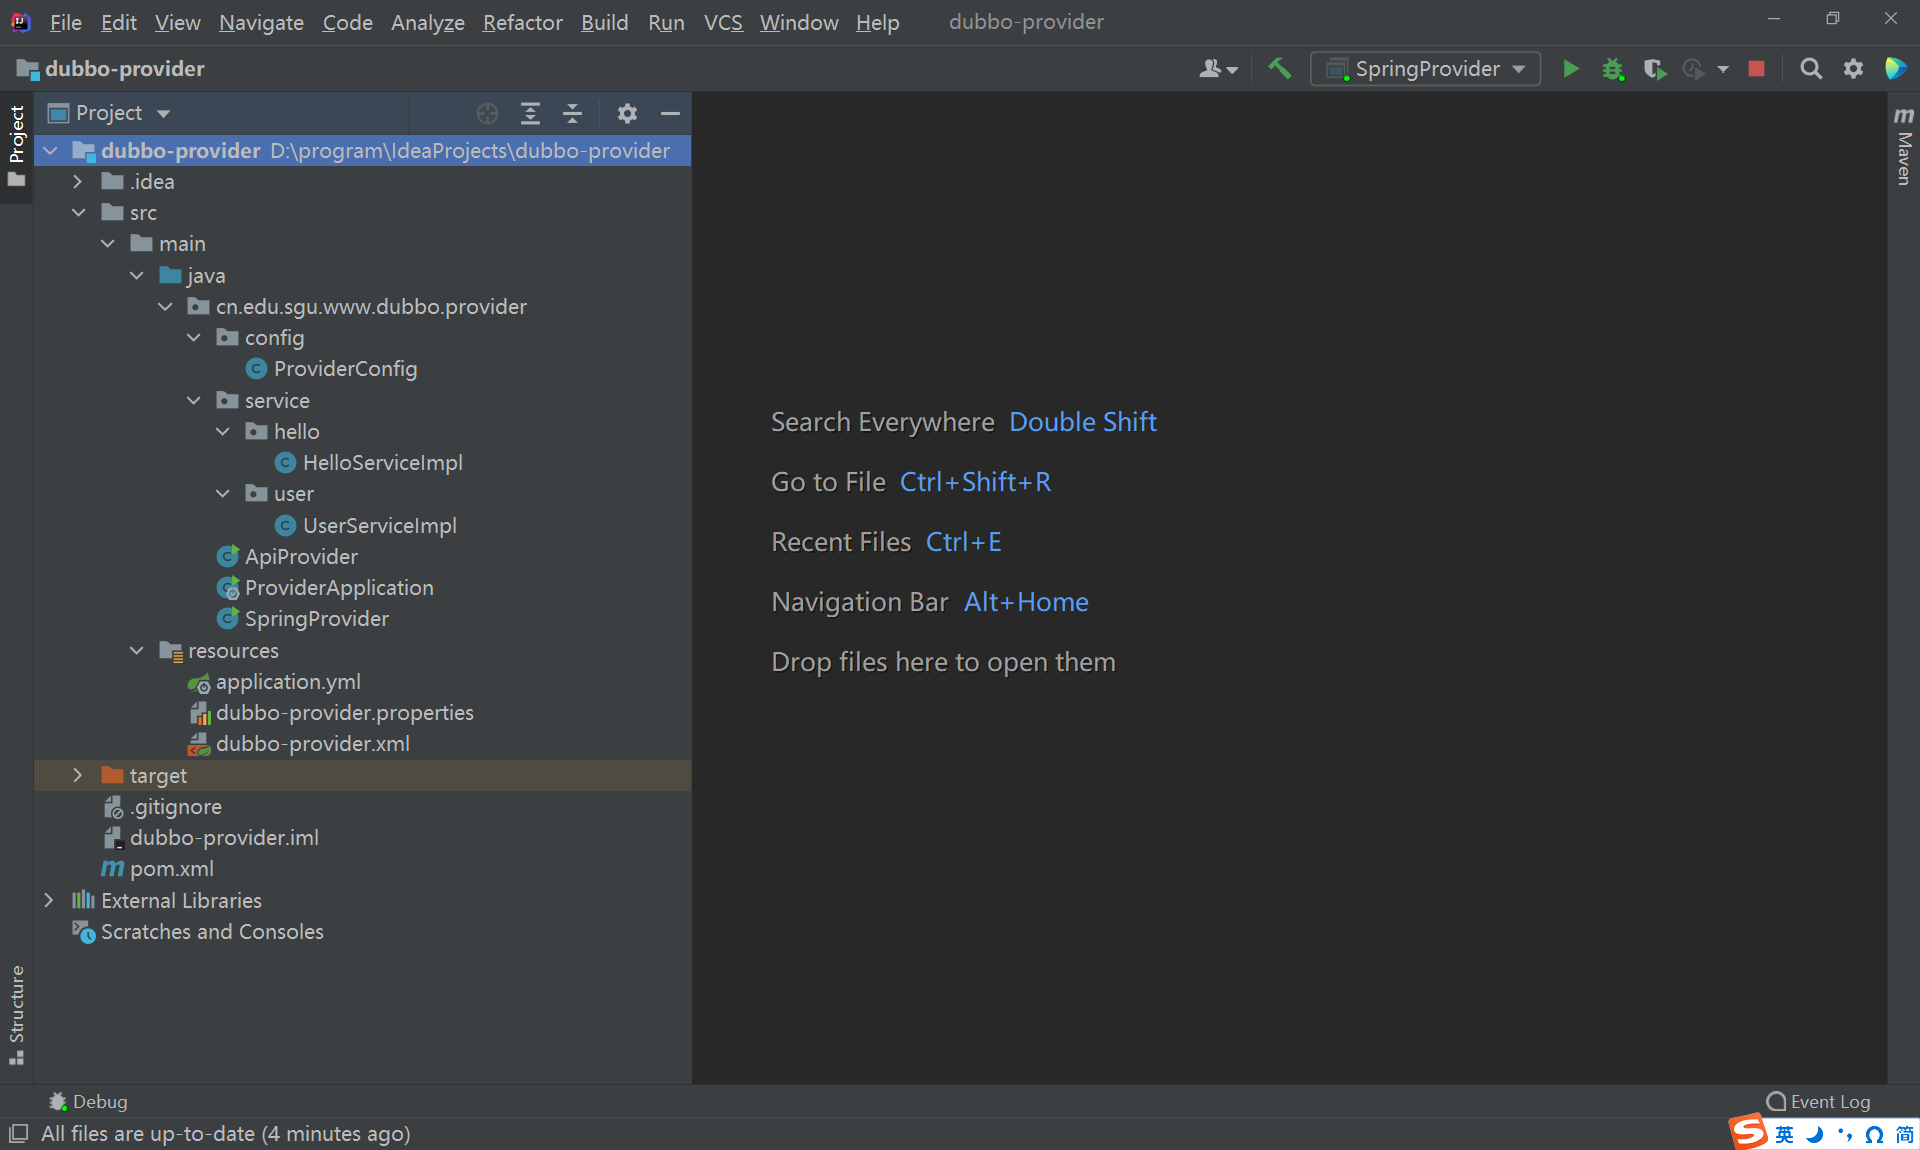
public class SpringProvider {public static void main(String[] args) throws IOException {AnnotationConfigApplicationContext applicationContext = new AnnotationConfigApplicationContext(ProviderConfig.class);applicationContext.start();System.out.println("dubbo-provider is running.");System.in.read();}}停止運行中的SpringProvider,并刪除其創建的nacos配置文件。
再次運行SpringProvider,發現配置文件被重新創建,并且服務也注冊到了nacos。
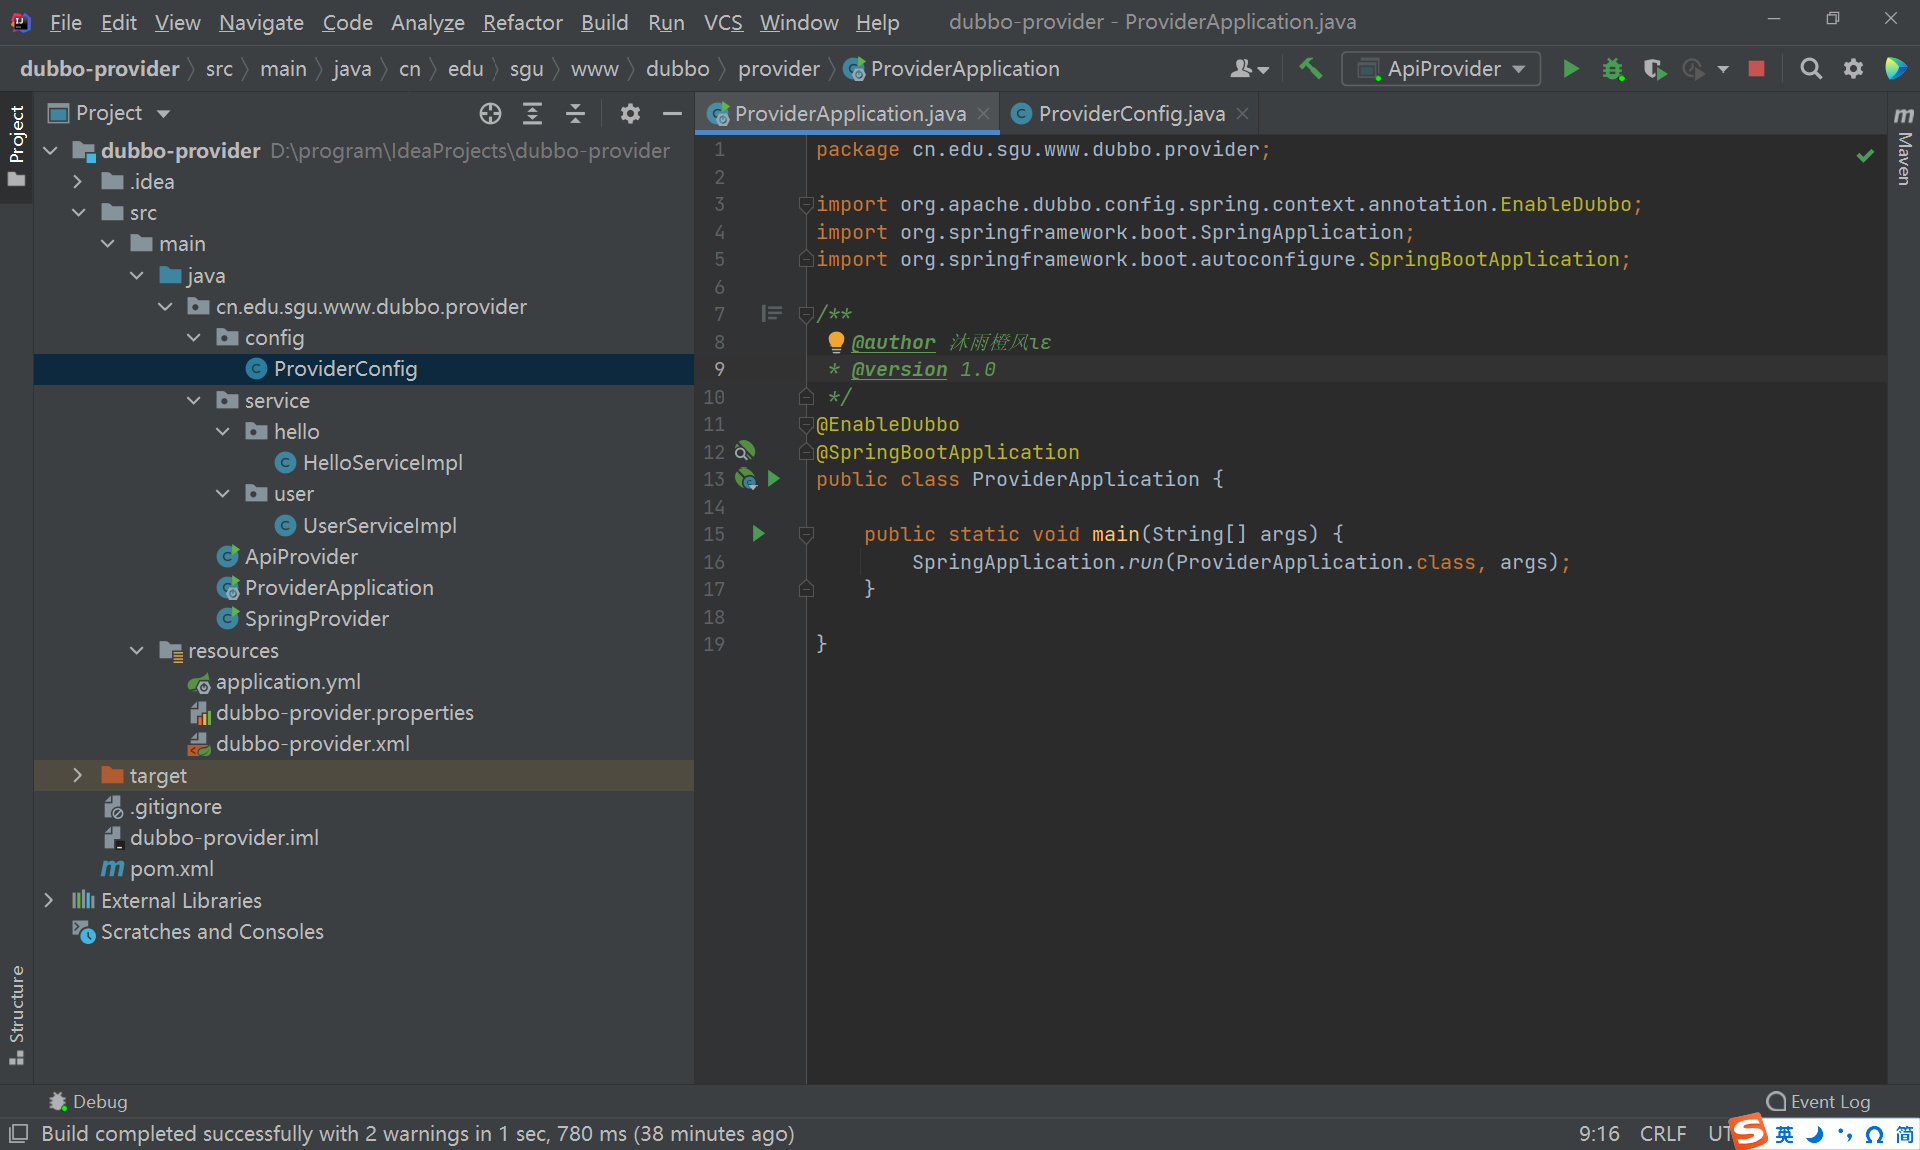
完成以上步驟的項目目錄結構如下:
三、創建服務消費者
1、創建項目
在Intellij IDEA中創建一個Spring Boot項目,項目名為dubbo-consumer
2、添加依賴
<?xml version="1.0" encoding="UTF-8"?>
<project xmlns="http://maven.apache.org/POM/4.0.0" xmlns:xsi="http://www.w3.org/2001/XMLSchema-instance"xsi:schemaLocation="http://maven.apache.org/POM/4.0.0 https://maven.apache.org/xsd/maven-4.0.0.xsd"><modelVersion>4.0.0</modelVersion><parent><groupId>org.springframework.boot</groupId><artifactId>spring-boot-starter-parent</artifactId><version>2.3.4.RELEASE</version></parent><version>20250907</version><artifactId>dubbo-consumer</artifactId><description>Apache Dubbo服務消費者項目</description><properties><java.version>1.8</java.version><dubbo.version>2.7.23</dubbo.version><dubbo-registry.version>3.2.10</dubbo-registry.version></properties><dependencyManagement><dependencies><dependency><groupId>org.apache.dubbo</groupId><artifactId>dubbo-bom</artifactId><version>${dubbo.version}</version><type>pom</type><scope>import</scope></dependency></dependencies></dependencyManagement><dependencies><dependency><groupId>org.springframework.boot</groupId><artifactId>spring-boot-starter-web</artifactId></dependency><dependency><version>20250906</version><groupId>cn.edu.sgu.www</groupId><artifactId>dubbo-api</artifactId></dependency><dependency><groupId>org.apache.dubbo</groupId><artifactId>dubbo-spring-boot-starter</artifactId></dependency><dependency><groupId>org.apache.dubbo</groupId><artifactId>dubbo-nacos-spring-boot-starter</artifactId><version>${dubbo-registry.version}</version></dependency>
<!--        <dependency>-->
<!--            <groupId>org.apache.dubbo</groupId>-->
<!--            <artifactId>dubbo-zookeeper-spring-boot-starter</artifactId>-->
<!--            <version>${dubbo-registry.version}</version>-->
<!--        </dependency>--></dependencies><build><plugins><plugin><groupId>org.springframework.boot</groupId><artifactId>spring-boot-maven-plugin</artifactId><version>2.3.4.RELEASE</version></plugin></plugins></build>
</project>
3、調用服務
使用API調用服務
使用Dubbo原生API調用服務:在consumer包下創建ApiConsumer.java
package cn.edu.sgu.www.dubbo.consumer;import cn.edu.sgu.www.dubbo.provider.service.hello.HelloService;
import cn.edu.sgu.www.dubbo.provider.service.user.UserService;
import org.apache.dubbo.config.ApplicationConfig;
import org.apache.dubbo.config.ReferenceConfig;
import org.apache.dubbo.config.RegistryConfig;import java.util.List;/*** @author 沐雨橙風ιε* @version 1.0*/
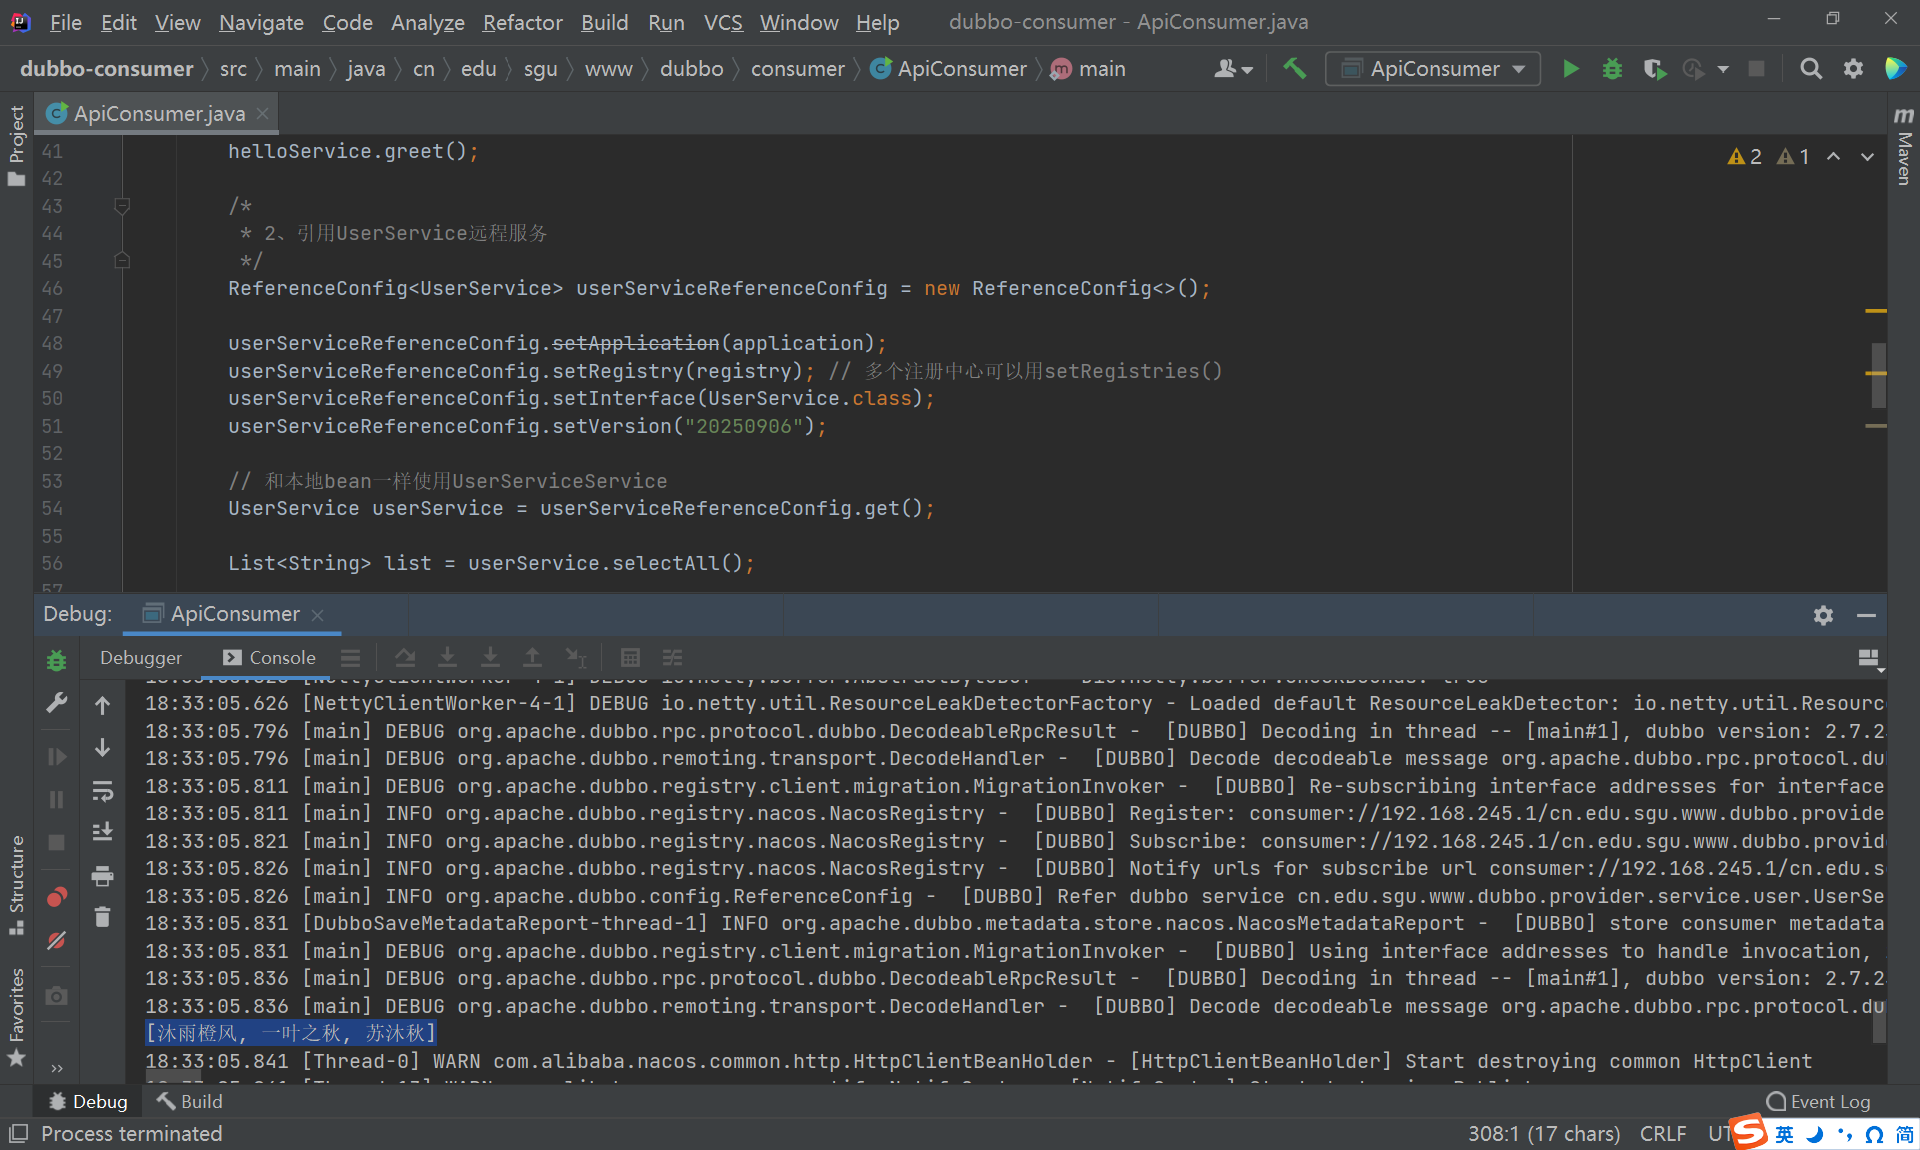
public class ApiConsumer {public static void main(String[] args) {// 當前應用配置ApplicationConfig application = new ApplicationConfig();application.setName("dubbo-consumer");// 連接注冊中心配置RegistryConfig registry = new RegistryConfig();registry.setAddress("nacos://localhost:8848");/** 1、引用HelloService遠程服務*/ReferenceConfig<HelloService> helloServiceReferenceConfig = new ReferenceConfig<>();helloServiceReferenceConfig.setApplication(application);helloServiceReferenceConfig.setRegistry(registry); // 多個注冊中心可以用setRegistries()helloServiceReferenceConfig.setInterface(HelloService.class);helloServiceReferenceConfig.setVersion("20250906");// 和本地bean一樣使用HelloServiceHelloService helloService = helloServiceReferenceConfig.get();helloService.greet();/** 2、引用UserService遠程服務*/ReferenceConfig<UserService> userServiceReferenceConfig = new ReferenceConfig<>();userServiceReferenceConfig.setApplication(application);userServiceReferenceConfig.setRegistry(registry); // 多個注冊中心可以用setRegistries()userServiceReferenceConfig.setInterface(UserService.class);userServiceReferenceConfig.setVersion("20250906");// 和本地bean一樣使用UserServiceServiceUserService userService = userServiceReferenceConfig.get();List<String> list = userService.selectAll();System.out.println(list);}}啟動服務提供者的ApiProvider,然后啟動當前項目的ApiConsumer
可以看到控制臺打印出來了調用UserService接口的selectAll()方法返回的結果。
使用Spring調用服務
基于XML文件
dubbo-consumer.xml
在classpath下創建一個xml配置文件,文件名為dubbo-consumer.xml
<?xml version="1.0" encoding="UTF-8"?>
<beans xmlns="http://www.springframework.org/schema/beans"xmlns:xsi="http://www.w3.org/2001/XMLSchema-instance"xmlns:dubbo="http://dubbo.apache.org/schema/dubbo"xsi:schemaLocation="http://www.springframework.org/schema/beanshttp://www.springframework.org/schema/beans/spring-beans-4.3.xsdhttp://dubbo.apache.org/schema/dubbohttp://dubbo.apache.org/schema/dubbo/dubbo.xsd"><!-- 消費方應用名,用于計算依賴關系,不是匹配條件,不要與提供方一樣 --><dubbo:application name="dubbo-consumer"  /><!-- 使用nacos注冊中心暴露發現服務地址 --><dubbo:registry address="nacos://localhost:8848" /><!-- 生成遠程服務代理,可以和本地bean一樣使用demoService --><dubbo:reference id="userService" interface="cn.edu.sgu.www.dubbo.provider.service.user.UserService" /><dubbo:reference id="helloService" interface="cn.edu.sgu.www.dubbo.provider.service.hello.HelloService" />
</beans>
SpringConsumer.java
在sonsumer包下創建SpringConsumer類,通過xml配置文件創建并啟動Spring容器。
通過Spring容器獲取Dubbo引用的Dubbo服務的Bean對象,調用Bean對象的方法。
package cn.edu.sgu.www.dubbo.consumer;import cn.edu.sgu.www.dubbo.provider.service.hello.HelloService;
import cn.edu.sgu.www.dubbo.provider.service.user.UserService;
import org.springframework.context.support.ClassPathXmlApplicationContext;import java.util.List;/*** @author 沐雨橙風ιε* @version 1.0*/
public class SpringConsumer {public static void main(String[] args) {ClassPathXmlApplicationContext applicationContext = new ClassPathXmlApplicationContext("dubbo-consumer.xml");applicationContext.start();// HelloServiceHelloService helloService = applicationContext.getBean(HelloService.class);helloService.greet();// UserServiceUserService userService = applicationContext.getBean(UserService.class);List<String> list = userService.selectAll();System.out.println(list);}}
基于注解
dubbo-consumer.properties
在classpath下創建一個properties配置文件,文件名為dubbo-provider.properties
dubbo.application.name=dubbo-consumer
dubbo.registry.address=nacos://localhost:8848
HelloController.java
在consumer包下創建controller包,在controller包下創建HelloController類。
通過@DubboReference注解引入Dubbo暴露的接口級服務HelloService
package cn.edu.sgu.www.dubbo.consumer.controller;import cn.edu.sgu.www.dubbo.provider.service.hello.HelloService;
import org.apache.dubbo.config.annotation.DubboReference;
import org.springframework.web.bind.annotation.GetMapping;
import org.springframework.web.bind.annotation.RequestMapping;
import org.springframework.web.bind.annotation.RestController;/*** @author 沐雨橙風ιε* @version 1.0*/
@RestController
@RequestMapping(path = "/hello", produces = "application/json;charset=utf-8")
public class HelloController {@DubboReferenceprivate HelloService helloService;@GetMapping("/greet")public void greet() {helloService.greet();}}
UserController.java
在controller包下創建UserController類。
通過@DubboReference注解引入Dubbo暴露的接口級服務UserService
package cn.edu.sgu.www.dubbo.consumer.controller;import cn.edu.sgu.www.dubbo.provider.service.user.UserService;
import org.apache.dubbo.config.annotation.DubboReference;
import org.springframework.web.bind.annotation.GetMapping;
import org.springframework.web.bind.annotation.RequestMapping;
import org.springframework.web.bind.annotation.RestController;import java.util.List;/*** @author 沐雨橙風ιε* @version 1.0*/
@RestController
@RequestMapping(path = "/user", produces = "application/json;charset=utf-8")
public class UserController {@DubboReferenceprivate UserService userService;@GetMapping("/selectAll")public List<String> selectAll() {return userService.selectAll();}}
ConsumerConfig.java
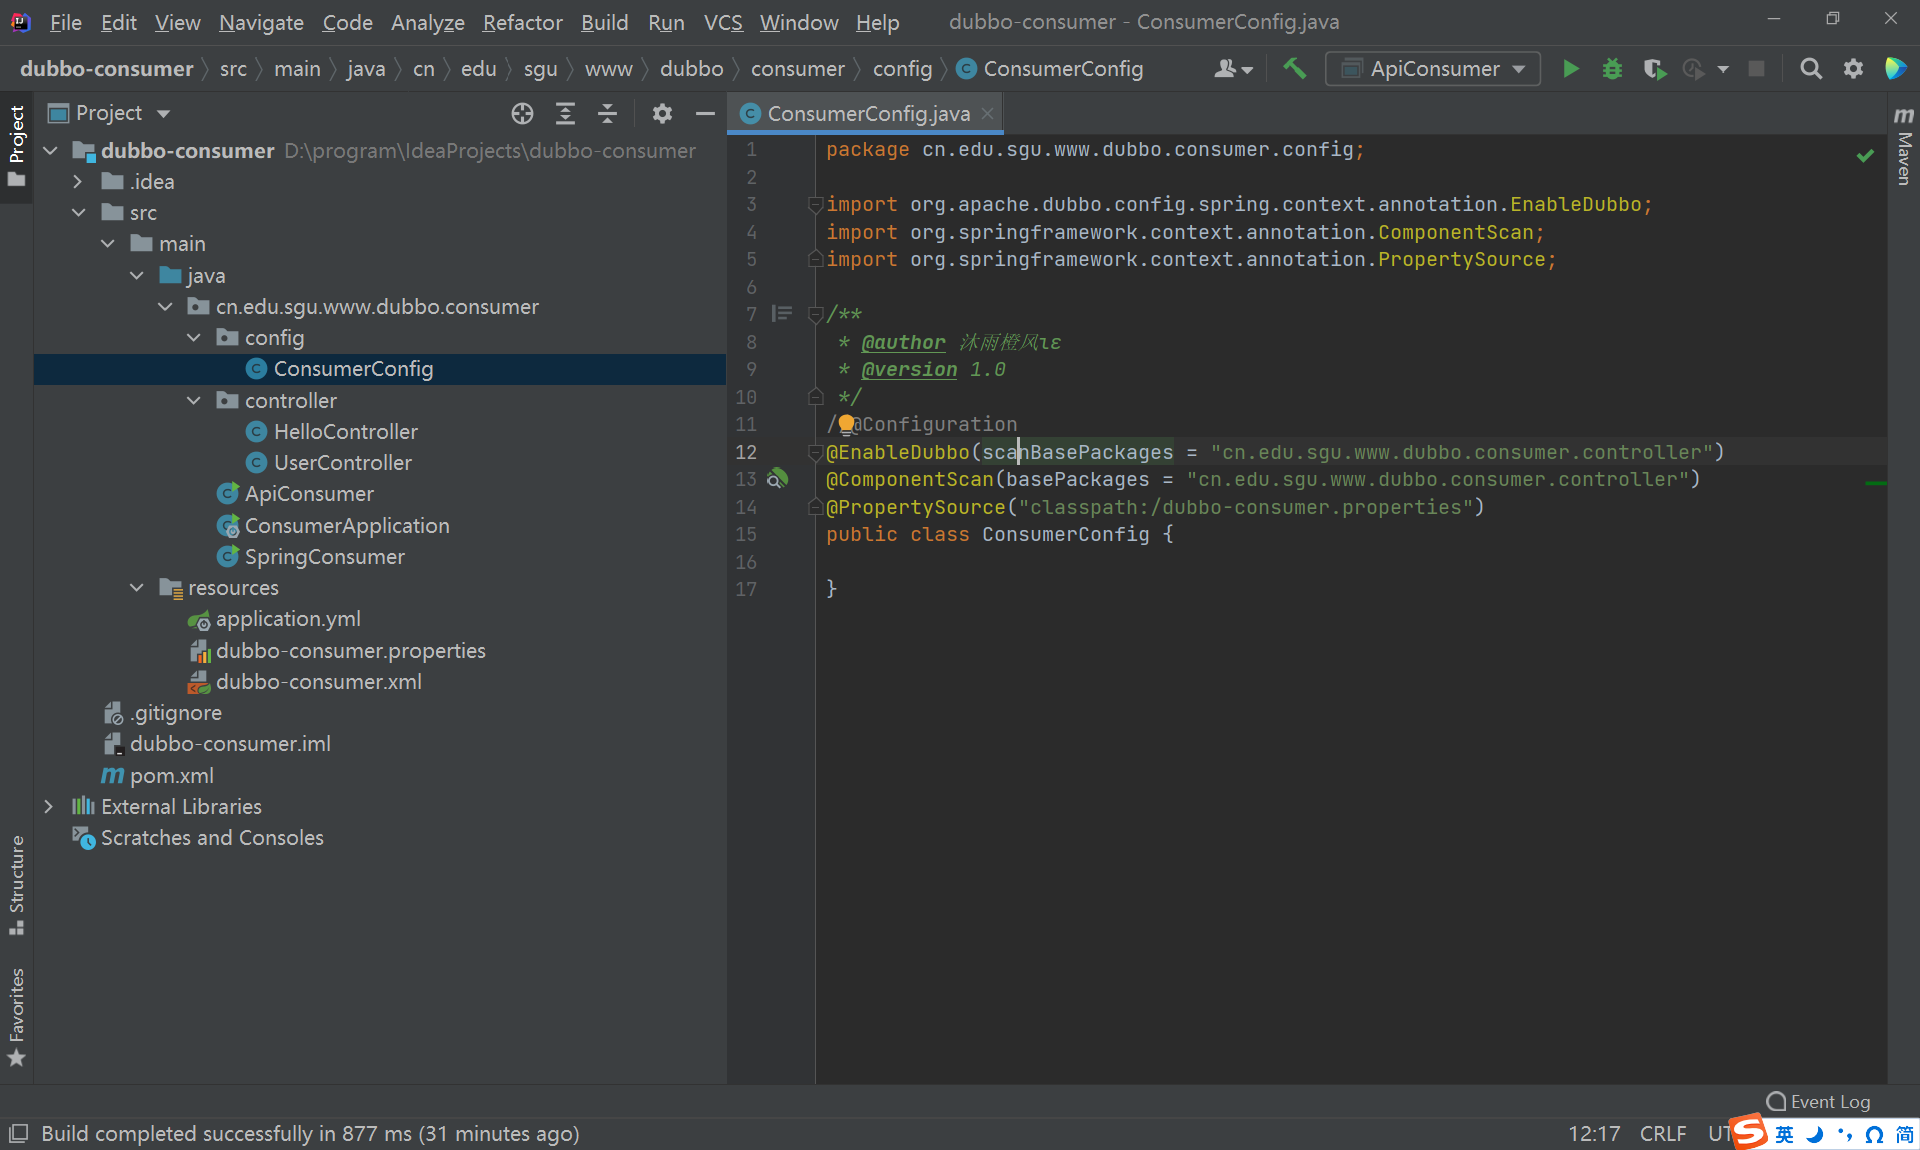
在consumer包下創建config子包,在config包下創建一個配置類ConsumerConfig。
- 在配置類上使用@EnableDubbo注解,指定掃描service包下引用Dubbo服務的類。
- 在配置類上使用@PropertySource注解,加載classpath下的配置文件dubbo-consumer.properties。
package cn.edu.sgu.www.dubbo.consumer.config;import org.apache.dubbo.config.spring.context.annotation.EnableDubbo;
import org.springframework.context.annotation.ComponentScan;
import org.springframework.context.annotation.Configuration;
import org.springframework.context.annotation.PropertySource;/*** @author 沐雨橙風ιε* @version 1.0*/
@Configuration
@EnableDubbo(scanBasePackages = "cn.edu.sgu.www.dubbo.consumer.controller")
@ComponentScan(basePackages = "cn.edu.sgu.www.dubbo.consumer.controller")
@PropertySource("classpath:/dubbo-consumer.properties")
public class ConsumerConfig {}
SpringConsumer.java
通過配置文件創建并啟動Spring容器,通過容器獲取引用Dubbo服務的控制器Bean對象。
package cn.edu.sgu.www.dubbo.consumer;import cn.edu.sgu.www.dubbo.consumer.config.ConsumerConfig;
import cn.edu.sgu.www.dubbo.consumer.controller.HelloController;
import cn.edu.sgu.www.dubbo.consumer.controller.UserController;
import org.springframework.context.annotation.AnnotationConfigApplicationContext;import java.util.List;/*** @author 沐雨橙風ιε* @version 1.0*/
public class SpringConsumer {public static void main(String[] args) {AnnotationConfigApplicationContext applicationContext = new AnnotationConfigApplicationContext(ConsumerConfig.class);applicationContext.start();HelloController helloController = applicationContext.getBean(HelloController.class);helloController.greet();UserController userController = applicationContext.getBean(UserController.class);List<String> list = userController.selectAll();System.out.println(list);}}
四、Dubbo生產級應用
Java應用的開發幾乎離不開Spring Boot,結合Spring Boot使用Dubbo框架簡單許多。
只需要在啟動類上使用@EnableDubbo注解即可,前面用到的配置類已經不需要了。
dubbo-provider
注釋掉ProviderConfig配置類的@Configuration注解,Spring Boot會自動處理@DubboService注解標注的類,將其暴露為Dubbo服務。
在啟動類ProviderApplication上使用@EnableDubbo注解(因為項目沒有其他配置類了)
application.yml
在配置文件中配置dubbo
dubbo:scan:base-packages: cn.edu.sgu.www.dubbo.provider.serviceapplication:name: dubbo-providerlogger: slf4jqos-port: 22221qos-enable: trueprotocol:name: dubboport: 20880registry:address: nacos://localhost:8848 # 使用Nnacos注冊中心parameters:group: dubboserver:port: 8090spring:application:name: dubbo-providerdubbo-consumer
注釋掉ConsumerConfig配置類的@Configuration注解。
在啟動類ConsumerApplication上使用@EnableDubbo注解

application.yml
在配置文件中配置dubbo
dubbo:application:name: dubbo-consumerlogger: slf4jqos-port: 22222qos-enable: trueprotocol:name: triport: 50051registry:address: nacos://localhost:8848?group=dubboserver:port: 8091最后,依次啟動服務提供者dubbo-provider、服務消費者dubbo-consumer,訪問兩個控制器的接口。
好了,文章就分享到這里了,看完不要忘了點贊+收藏哦~
文章代碼已經上傳到Gitee,可按需獲取:
dubbo-api![]() https://gitee.com/muyu-chengfeng/dubbo-api.gitApache Dubbo服務提供者項目
https://gitee.com/muyu-chengfeng/dubbo-api.gitApache Dubbo服務提供者項目![]() https://gitee.com/muyu-chengfeng/dubbo-provider.gitApache Dubbo服務消費者項目
https://gitee.com/muyu-chengfeng/dubbo-provider.gitApache Dubbo服務消費者項目![]() https://gitee.com/muyu-chengfeng/dubbo-consumer.git
https://gitee.com/muyu-chengfeng/dubbo-consumer.git


:代價函數的意義)


變換記錄)
三極管)