????????該教程詳細闡述了在Windows Server 2022上基于Python3.10.6與jieba庫實現并部署中文分詞模型接口的完整流程,涵蓋技術棧(Python3.10.6、jieba、Flask、Waitress、Nginx、NSSM等)與環境準備(Python安裝、虛擬環境配置、依賴包安裝及服務器額外配置),深入解析jieba庫的分詞原理與功能,設計并實現了基礎分詞、詞性標注、自定義詞典、批量分詞及服務狀態等接口(含參數、返回格式與錯誤處理),提供直接部署(通過Waitress運行Flask應用、Nginx反向代理、NSSM注冊系統服務)與Docker容器化部署兩種方案,還包含接口測試方法、常見問題解決(如權限配置、循環導入、中文顯示編碼等)及服務監控維護要點,最終實現可穩定對外提供服務的中文分詞接口。
一、項目概述與環境準備
(一)項目背景與意義
????????在人工智能與自然語言處理技術飛速發展的當下,中文信息處理在各類應用中的地位愈發凸顯。中文分詞作為中文信息處理的基礎環節,其準確性與效率直接影響后續的詞性標注、命名實體識別、情感分析等高級任務的效果。
????????在實際應用中,眾多企業和開發者對穩定、高效、易于集成的中文分詞服務存在迫切需求。然而,自行開發分詞系統不僅需要深厚的自然語言處理知識,還需大量的語料訓練和優化工作,這對于中小型企業或個人開發者而言門檻過高。
????????jieba庫作為目前最流行的Python中文分詞工具之一,具備分詞速度快、準確率高、易于使用等特點,非常適合作為中文分詞服務的基礎。本項目旨在基于Python3.10.6和jieba庫,構建一個可在Windows Server 2022上獨立部署的中文分詞模型接口,為外部提供穩定、高效的分詞服務。
(二)技術棧介紹
1.Python3.10.6
????????作為項目的開發語言,Python具有簡潔易學、生態豐富的特點,非常適合快速開發此類服務。選擇3.10.6版本是因為該版本穩定性好,同時支持一些較新的語言特性,能夠更好地滿足項目需求。
2.jieba庫
????????一款優秀的中文分詞工具,支持三種分詞模式:精確模式、全模式和搜索引擎模式。支持自定義詞典,能夠滿足特定領域的分詞需求。具有較高的分詞準確率和處理速度,適合在生產環境中使用。
3.Flask框架
????????輕量級的Python Web框架,適合構建API服務。具有靈活、易用的特點,學習成本低,開發效率高。可以方便地與其他庫和工具集成。
4.Waitress
????????Python WSGI HTTP服務器,用于在Windows生產環境中運行Flask應用。支持多線程模式,能夠有效提高服務的并發處理能力。
5.Nginx
????????高性能的HTTP和反向代理服務器。作為前端代理,負責接收客戶端請求并轉發給Waitress處理。可以提供負載均衡、靜態資源服務、SSL終端等功能。
6.Docker(可選)
????????容器化技術,用于實現應用的快速部署和環境一致性。可以將應用及其依賴打包成一個容器,方便在不同環境中遷移和運行。
7.NSSM(Non-sucking Service Manager)
????????Windows平臺下的服務管理工具,用于將Python應用注冊為系統服務,實現開機自啟動和進程監控。
(三)環境準備
1.操作系統選擇
????????本項目選擇Windows Server 2022作為部署服務器的操作系統。Windows Server 2022具有強大的穩定性、安全性和兼容性,適合作為企業級應用的運行平臺,能夠為中文分詞服務提供可靠的運行環境。
2.Python3.10.6安裝
(1)下載Python安裝包
????????訪問Python官方網站(https://www.python.org/downloads/release/python-3106/),下載 Windows x86-64 executable installer(64 位版本)。
(2)運行安裝程序
????????雙擊下載的安裝包,勾選“Add Python 3.10 to PATH”選項,然后點擊“Install Now”進行默認安裝。若需要自定義安裝路徑,可點擊“Customize installation”,在彈出的界面中設置安裝目錄,建議安裝在非系統盤(如D:\Python310)。
(3)驗證安裝
????????安裝完成后,打開命令提示符(CMD)或PowerShell,輸入以下命令:
python --version
若輸出“Python 3.10.6”,則表示安裝成功。
2.虛擬環境配置
為避免項目依賴與系統環境沖突,建議使用虛擬環境。
(1)打開命令提示符或PowerShell,進入要創建項目的目錄,例如:
cd D:\projects
(2)創建項目目錄
mkdir chinese-segmentation-api(windows可以直接手動創建)
cd chinese-segmentation-api
(3)創建虛擬環境
python -m venv csa-venv
(4)激活虛擬環境
在命令提示符中:
csa-venv\Scripts\activate.bat
在PowerShell中(需以管理員身份運行):
.\csa-venv\Scripts\Activate.ps1
激活后,命令行提示符前會顯示“(csa-venv)”,表示當前處于虛擬環境中。
3.依賴包安裝
在虛擬環境中安裝項目所需的依賴包(部分,提示缺什么庫,再安裝即可):
pip install --upgrade pip
pip install jieba==0.42.1
pip install Flask==2.2.3
pip install waitress==2.1.2
pip install flask-restful==0.3.9
pip install python-dotenv==1.0.0
pip install pytest==7.3.1 # 用于單元測試
pip install psutil==5.9.5 # 用于系統資源監控
安裝完成后,使用以下命令生成依賴列表文件:
pip freeze > requirements.txt
該文件記錄了項目的依賴信息,方便后續在其他環境中部署。最終文件內容如下:
aniso8601==10.0.1
blinker==1.9.0
certifi==2025.8.3
charset-normalizer==3.4.3
click==8.2.1
colorama==0.4.6
Deprecated==1.2.18
dotenv==0.9.9
Flask==3.1.1
Flask-Limiter==3.12
Flask-RESTful==0.3.10
idna==3.10
itsdangerous==2.2.0
jieba==0.42.1
Jinja2==3.1.6
limits==5.5.0
markdown-it-py==4.0.0
MarkupSafe==3.0.2
mdurl==0.1.2
ordered-set==4.1.0
packaging==25.0
psutil==7.0.0
Pygments==2.19.2
python-dotenv==1.1.1
pytz==2025.2
requests==2.32.4
rich==13.9.4
six==1.17.0
typing_extensions==4.14.1
urllib3==2.5.0
waitress==3.0.2
Werkzeug==3.1.3
wrapt==1.17.3
4.開發工具選擇
(1)代碼編輯器
????????Visual Studio Code:微軟推出的輕量級代碼編輯器,支持Python語法高亮、自動補全、調試等功能,插件豐富,跨平臺支持好。
????????PyCharm:JetBrains推出的Python集成開發環境,功能強大,適合大型Python項目開發,但相對較重量級。
(2)版本控制工具
????????Git:分布式版本控制系統,用于管理項目代碼的版本,支持分支管理、代碼合并等功能。在Windows上可安裝 Git for Windows(https://git-scm.com/download/win)。
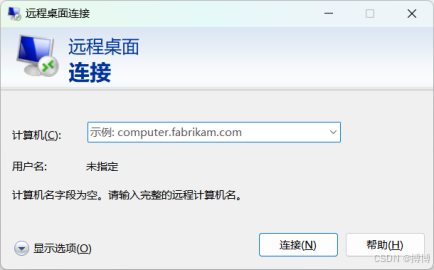
(3)遠程連接工具
????????Remote Desktop Connection:Windows系統自帶的遠程桌面連接工具,用于連接遠程Windows Server 2022服務器。Win+R,輸入mstsc即可進入。
PuTTY:支持SSH協議的遠程連接工具,可用于連接服務器進行命令行操作。
(4)接口測試工具
Postman:功能強大的API測試工具,支持發送各種HTTP請求,查看響應結果。
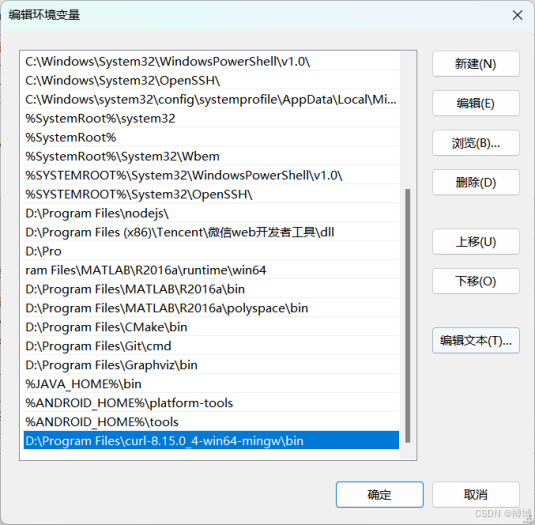
curl:命令行工具,用于發送HTTP請求,適合在服務器上進行簡單的接口測試。Windows版本可從https://curl.se/windows/下載。
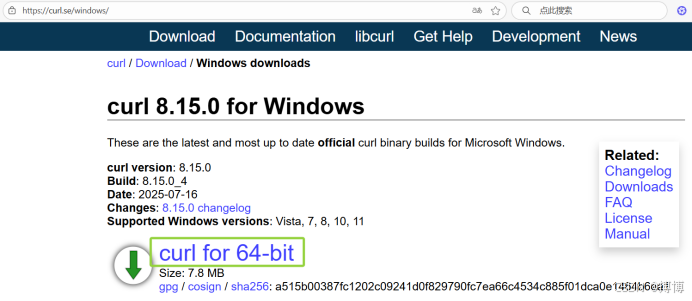
下載后,解壓,將bin目錄的路徑添加到系統環境變量中。
(四)Windows Server 2022額外配置
1.防火墻設置
打開“Windows Defender防火墻”,點擊“高級設置”,在“入站規則”中新建規則,允許端口(如5000、80、443)的連接,確保外部能訪問分詞服務。
2.安裝Nginx
(1)下載Nginx
訪問Nginx官方網站(http://nginx.org/en/download.html),下載穩定版本的Windows版本(如nginx-1.24.0.zip)。
(2)解壓安裝
將下載的壓縮包解壓到指定目錄(如D:\nginx-1.24.0)。
(3)驗證安裝
打開命令提示符,進入Nginx安裝目錄,輸入:
nginx.exe
在瀏覽器中訪問http://localhost,若出現Nginx歡迎頁面,則表示安裝成功。
3.安裝NSSM
(1)下載NSSM
訪問NSSM官方網站(https://nssm.cc/download),下載適合Windows的版本(如nssm-2.24.zip)。
(2)解壓配置
將壓縮包解壓到指定目錄(如D:\nssm-2.24),并將該目錄添加到系統環境變量PATH中,方便在命令行中使用。
二、jieba庫深入理解
(一)jieba庫簡介
jieba(結巴)是由中國開發者fxsjy開發的一款優秀的中文分詞工具,目前在GitHub上擁有超過37k的星標,是Python社區中最受歡迎的中文分詞庫之一。
jieba庫的主要特點包括:
1.支持三種分詞模式
(1)精確模式:試圖將句子最精確地切開,適合文本分析。
(2)全模式:把句子中所有可以成詞的詞語都掃描出來,速度非常快,但不能解決歧義。
(3)搜索引擎模式:在精確模式的基礎上,對長詞再次切分,提高召回率,適合用于搜索引擎分詞。
2.支持繁體分詞。
3.支持自定義詞典,可以根據特定領域的需求添加專業詞匯。
4.支持并行分詞,能夠利用多核 CPU 提高分詞速度,但在 Windows 系統上可能存在一些兼容性問題。
5.提供了詞性標注功能,可以對分詞結果進行詞性標注。
6.輕量級,安裝簡單,使用方便,對新手友好。
(二)jieba的分詞原理
jieba庫采用的是基于前綴詞典的分詞方法,結合了統計語言模型。其核心原理如下。
詳情內容,可看我CSDN文章:https://lzm07.blog.csdn.net/article/details/150405266
1.前綴詞典
jieba內置了一個大規模的中文詞典,記錄了大量的詞語及其詞頻。在分詞過程中,jieba 會從句子的第一個字符開始,查找所有可能的前綴詞語,形成一個有向無環圖(DAG)。
2.動態規劃
利用動態規劃算法查找DAG中從起點到終點的最短路徑(即最大概率路徑),從而得到最優的分詞結果。
3.統計語言模型
對于詞典中沒有的詞語(未登錄詞),jieba采用基于漢字成詞能力的HMM(隱馬爾可夫模型)進行切分。通過對大量語料的訓練,得到漢字之間的轉移概率,從而實現對未登錄詞的識別和切分。
這種結合了規則和統計的方法,使得jieba在保持較高分詞速度的同時,也具有較好的分詞準確率。
(三)jieba的主要功能與API
1. 基本分詞功能
(1)jieba.cut方法
jieba.cut是jieba庫最核心的分詞函數,其語法如下:
jieba.cut(sentence, cut_all=False, HMM=True)
參數說明:
1)sentence:需要分詞的字符串。
2)cut_all:是否使用全模式,默認為False(精確模式)。
3)HMM:是否使用HMM模型識別未登錄詞,默認為True。
返回值:一個可迭代的生成器,可以通過for循環獲取分詞結果,也可以使用list()函數轉換為列表。
示例:
import jieba
text = "我來到北京清華大學"
# 精確模式
seg_list = jieba.cut(text)
print("精確模式:" + "/ ".join(seg_list)) ?# 我/ 來到/ 北京/ 清華大學
# 全模式
seg_list = jieba.cut(text, cut_all=True)
print("全模式:" + "/ ".join(seg_list)) ?# 我/ 來到/ 北京/ 清華/ 清華大學/ 華大/ 大學
# 不使用HMM模型
seg_list = jieba.cut(text, HMM=False)
print("不使用HMM:" + "/ ".join(seg_list)) ?# 我/ 來到/ 北京/ 清華大學
(2)jieba.cut_for_search方法
jieba.cut_for_search用于搜索引擎模式分詞,其語法如下:
jieba.cut_for_search(sentence, HMM=True)
參數說明與jieba.cut類似,但沒有cut_all參數,因為搜索引擎模式是在精確模式的基礎上進行的。
示例:
import jieba
text = "小明碩士畢業于中國科學院計算所,后在日本京都大學深造"
seg_list = jieba.cut_for_search(text)
print("搜索引擎模式:" + "/ ".join(seg_list))
# 輸出:小明/ 碩士/ 畢業/ 于/ 中國/ 科學/ 學院/ 科學院/ 中國科學院/ 計算/ 計算所/ ,/ 后/ 在/ 日本/ 京都/ 大學/ 京都大學/ 深造
2. 自定義詞典
jieba支持用戶添加自定義詞典,以提高特定領域的分詞準確率。自定義詞典的格式為:
詞語 詞頻 詞性
其中,詞頻和詞性為可選參數,默認詞頻為 1,詞性可以省略。
(1)jieba.load_userdict方法
jieba.load_userdict用于加載自定義詞典,其語法如下:
jieba.load_userdict(filename)
參數filename為自定義詞典的路徑。
示例:
假設我們有一個自定義詞典user_dict.txt,內容如下:
云計算 5
人工智能 3
機器學習 n
加載并使用自定義詞典:
import jieba
jieba.load_userdict("user_dict.txt")
text = "云計算和人工智能是當前熱門的技術,機器學習是人工智能的一個重要分支"
seg_list = jieba.cut(text)
print("/ ".join(seg_list))
# 輸出:云計算/ 和/ 人工智能/ 是/ 當前/ 熱門/ 的/ 技術/ ,/ 機器學習/ 是/ 人工智能/ 的/ 一個/ 重要/ 分支
(2)動態添加/刪除詞語
除了加載自定義詞典外,jieba還提供了動態添加和刪除詞語的方法:
1)jieba.add_word(word, freq=None, tag=None):添加詞語到詞典中。
2)jieba.del_word(word):從詞典中刪除詞語。
3)jieba.suggest_freq(segment, tune=True):調整詞語的詞頻,使得詞語能夠被正確分出來。
示例:
import jieba
text = "李小福是創新辦主任也是云計算方面的專家"
# 未添加自定義詞語時的分詞結果
seg_list = jieba.cut(text)
print("默認:" + "/ ".join(seg_list)) ?# 李/ 小福/ 是/ 創新/ 辦/ 主任/ 也/ 是/ 云/ 計算/ 方面/ 的/ 專家
# 添加自定義詞語
jieba.add_word("李小福")
jieba.add_word("創新辦")
jieba.add_word("云計算")
seg_list = jieba.cut(text)
print("添加后:" + "/ ".join(seg_list)) ?# 李小福/ 是/ 創新辦/ 主任/ 也/ 是/ 云計算/ 方面/ 的/ 專家
# 調整詞頻
text = "臺中"
seg_list = jieba.cut(text)
print("調整前:" + "/ ".join(seg_list)) ?# 臺/ 中
jieba.suggest_freq(("臺", "中"), tune=True)
seg_list = jieba.cut(text)
print("調整后:" + "/ ".join(seg_list)) ?# 臺/ 中(這里可能需要更多上下文才能生效)
3. 詞性標注
jieba提供了詞性標注功能,可以使用jieba.posseg模塊進行詞性標注。
jieba.posseg.cut方法的語法如下:
jieba.posseg.cut(sentence, cut_all=False, HMM=True)
返回值:一個可迭代的生成器,每個元素是一個pair對象,包含詞語和詞性。
常見的詞性標簽說明:
n:名詞
v:動詞
a:形容詞
d:副詞
r:代詞
m:數詞
q:量詞
p:介詞
c:連詞
u:助詞
x:標點符號
示例:
import jieba.posseg as pseg
words = pseg.cut("我愛自然語言處理")
for word, flag in words:
????print(f"{word}/{flag}", end=" ")
# 輸出:我/r 愛/v 自然/a 語言/n 處理/v
4. 并行分詞
為了提高分詞速度,jieba支持并行分詞。使用并行分詞需要先調用jieba.enable_parallel方法開啟并行模式。
import jieba
import time
# 開啟并行分詞,參數為并行進程數,默認使用全部CPU核心
jieba.enable_parallel(4)
text = "這是一段很長的文本..." * 1000 ?# 構造一段長文本
start_time = time.time()
result = jieba.cut(text)
end_time = time.time()
print(f"并行分詞時間:{end_time - start_time:.4f}秒")
# 關閉并行分詞
jieba.disable_parallel()
start_time = time.time()
result = jieba.cut(text)
end_time = time.time()
print(f"普通分詞時間:{end_time - start_time:.4f}秒")
注意:并行分詞在Windows系統上可能存在一些問題,建議在Linux或macOS系統上使用。
(四)jieba的性能優化
在實際應用中,分詞性能是一個重要的考量因素。以下是一些優化jieba分詞性能的方法:
(1)使用并行分詞:如前所述,開啟并行分詞可以利用多核CPU提高分詞速度,對于處理大量文本時效果顯著,但在Windows系統上需注意兼容性問題。
(2)減少詞典加載次數:jieba的詞典加載是一個相對耗時的操作,在應用初始化時加載一次詞典,而不是每次分詞都加載,可以提高性能。
(3)使用自定義詞典過濾低頻詞:對于一些特定領域的應用,可以通過自定義詞典添加高頻專業詞匯,同時過濾掉一些低頻的、不常用的詞匯,減少分詞時的計算量。
(4)預加載模型:在應用啟動時預先加載jieba的模型和詞典,避免在處理第一個請求時進行加載,減少首屏延遲。
(5)合理設置HMM參數:對于一些對未登錄詞識別要求不高的場景,可以關閉HMM模型(HMM=False),以提高分詞速度。
(6)批量處理文本:一次性處理多條文本比逐條處理效率更高,因為可以減少一些初始化操作的開銷。
(7)考慮使用C擴展版本:jieba有一個C語言擴展版本jieba_fast,分詞速度比純Python版本快很多,可以考慮使用。安裝方法:pip install jieba_fast。
三、中文分詞接口設計
(一)接口需求分析
在設計中文分詞接口之前,我們需要明確接口的需求,包括功能需求和非功能需求。
1.功能需求
(1)基本分詞功能:支持對輸入的中文文本進行分詞,并返回分詞結果。
(2)多模式分詞:支持精確模式、全模式和搜索引擎模式三種分詞模式,用戶可以根據需要選擇。
(3)詞性標注:支持對分詞結果進行詞性標注,返回每個詞語及其對應的詞性。
(4)自定義詞典:支持用戶臨時添加自定義詞語,以提高特定場景下的分詞準確率。
(5)批量處理:支持對多條文本進行批量分詞,提高處理效率。
(6)結果過濾:支持過濾掉分詞結果中的標點符號、停用詞等無關信息。
2.非功能需求
(1)性能:分詞接口應具有較高的響應速度,對于普通長度的文本(如1000字以內),響應時間應控制在100ms以內。
(2)穩定性:接口應能夠穩定運行,平均無故障時間(MTBF)應不低于72小時。
(3)可擴展性:接口設計應具有良好的可擴展性,便于后續添加新的功能,如關鍵詞提取、實體識別等。
(4)安全性:接口應提供基本的安全機制,如 API 密鑰認證,防止未授權訪問。
(5)易用性:接口應具有清晰的文檔和簡單的調用方式,方便用戶集成。
(6)可監控性:接口應提供基本的監控指標,如請求量、響應時間、錯誤率等,便于運維人員監控服務狀態。
(二)接口功能設計
根據需求分析,我們設計以下幾個主要接口:
(1)基礎分詞接口:提供基本的分詞功能,支持三種分詞模式。
(2)詞性標注接口:在分詞的基礎上,返回每個詞語的詞性。
(3)自定義詞典接口:支持添加、刪除自定義詞語,以及加載自定義詞典文件。
(4)批量分詞接口:支持對多條文本進行批量分詞處理。
(5)服務狀態接口:返回服務的基本信息和狀態,如版本號、當前負載等。
(三)接口參數設計
1.基礎分詞接口
請求URL:/api/segment
請求方法:POST
請求參數:
(1)text(必填):待分詞的中文文本,字符串類型。
(2)mode(可選):分詞模式,字符串類型,取值為 "accurate"(精確模式,默認)、"full"(全模式)、"search"(搜索引擎模式)。
(3)use_hmm(可選):是否使用 HMM 模型,布爾類型,默認為 true。
(4)filter_stopwords(可選):是否過濾停用詞,布爾類型,默認為 false。
(5)filter_punctuation(可選):是否過濾標點符號,布爾類型,默認為 false。
2.詞性標注接口
請求URL:/api/pos_tag
請求方法:POST
請求參數:
(1)text(必填):待處理的中文文本,字符串類型。
(2)mode(可選):分詞模式,字符串類型,取值同上,默認為 "accurate"。
(3)use_hmm(可選):是否使用 HMM 模型,布爾類型,默認為 true。
(4)filter_stopwords(可選):是否過濾停用詞,布爾類型,默認為 false。
(5)filter_punctuation(可選):是否過濾標點符號,布爾類型,默認為 false。
3.自定義詞典接口
請求URL:/api/custom_dict
請求方法:POST
請求參數:
(1)action(必填):操作類型,字符串類型,取值為 "add"(添加詞語)、"delete"(刪除詞語)、"load"(加載詞典文件)。
(2)words(可選):當 action 為 "add" 或 "delete" 時,為要添加或刪除的詞語列表,數組類型。每個元素可以是字符串(僅詞語)或對象(包含 word、freq、tag 字段)。
(3)file_url(可選):當 action 為 "load" 時,為自定義詞典文件的 URL,字符串類型。
4.批量分詞接口
請求URL:/api/batch_segment
請求方法:POST
請求參數:
(1)texts(必填):待分詞的中文文本列表,數組類型。
(2)mode(可選):分詞模式,字符串類型,取值同上,默認為 "accurate"。
(3)use_hmm(可選):是否使用 HMM 模型,布爾類型,默認為 true。
(4)filter_stopwords(可選):是否過濾停用詞,布爾類型,默認為 false。
(5)filter_punctuation(可選):是否過濾標點符號,布爾類型,默認為 false。
5.服務狀態接口
請求URL:/api/status
請求方法:GET
請求參數:無
(四)接口返回格式設計
所有接口均返回JSON格式的數據,包含以下公共字段:
(1)code:狀態碼,整數類型。0 表示成功,非 0 表示錯誤。
(2)message:狀態描述,字符串類型。成功時為 "success",錯誤時為具體的錯誤信息。
(3)data:返回的數據,具體類型根據接口而定。成功時返回實際數據,錯誤時可能為 null。
1.基礎分詞接口返回格式
json格式內容:
{"code": 0,"message": "success","data": {"text": "我來到北京清華大學","segments": ["我", "來到", "北京", "清華大學"],"mode": "accurate","use_hmm": true,"timestamp": 1680000000}
}2.詞性標注接口返回格式
json格式內容:
{"code": 0,"message": "success","data": {"text": "我愛自然語言處理","tags": [{"word": "我", "tag": "r"},{"word": "愛", "tag": "v"},{"word": "自然", "tag": "a"},{"word": "語言", "tag": "n"},{"word": "處理", "tag": "v"}],"mode": "accurate","use_hmm": true,"timestamp": 1680000000}
}3.自定義詞典接口返回格式
json格式內容:
{"code": 0,"message": "success","data": {"action": "add","success_count": 2,"failed_words": [],"timestamp": 1680000000}
}4.批量分詞接口返回格式
json格式內容:
{"code": 0,"message": "success","data": {"total": 2,"results": [{"text": "我來到北京清華大學","segments": ["我", "來到", "北京", "清華大學"]},{"text": "我愛自然語言處理","segments": ["我", "愛", "自然", "語言", "處理"]}],"mode": "accurate","use_hmm": true,"timestamp": 1680000000}
}5.服務狀態接口返回格式
json格式內容:
{"code": 0,"message": "success","data": {"version": "1.0.0","status": "running","start_time": 1680000000,"current_time": 1680000100,"request_count": 100,"average_response_time": 50,"cpu_usage": 20.5,"memory_usage": 30.2}
}
(五)錯誤處理機制設計
為了提高接口的健壯性,需要設計完善的錯誤處理機制。
1.錯誤碼設計
定義以下常見的錯誤碼:
0:成功
1001:參數錯誤(如缺少必填參數、參數格式錯誤等)
1002:權限錯誤(如API密鑰無效、未授權訪問等)
1003:資源不存在(如請求的詞典文件不存在等)
1004:請求頻率限制(如單位時間內請求次數超過限制)
2001:服務器內部錯誤(如代碼異常、服務崩潰等)
2002:服務暫時不可用(如服務正在重啟、維護等)
2.錯誤處理流程
(1)參數驗證:在接口處理之前,先對請求參數進行驗證,如發現參數錯誤,返回 1001 錯誤碼和具體的錯誤信息。
(2)權限驗證:對于需要授權的接口,驗證請求中的 API 密鑰,如密鑰無效或未提供,返回 1002 錯誤碼。
(3)請求頻率控制:檢查當前請求是否超過頻率限制,如超過,返回 1004 錯誤碼。
(4)業務邏輯處理:在處理業務邏輯時,如發生異常,捕獲異常并返回 2001 錯誤碼,同時記錄詳細的錯誤日志。
(5)服務狀態檢查:如服務處于維護狀態,返回 2002 錯誤碼。
3.錯誤日志記錄
為了便于排查問題,需要記錄詳細的錯誤日志,包括:
(1)錯誤發生的時間
(2)錯誤碼和錯誤信息
(3)請求的URL、方法、參數
(4)客戶端IP地址
(5)堆棧跟蹤信息(對于服務器內部錯誤)
錯誤日志可以寫入文件,也可以發送到專門的日志收集系統(如ELK、Graylog等)。在Windows Server 2022上,可將日志存儲在指定的目錄(如D:\chinese-segmentation-api\logs)。
四、接口實現代碼詳解
(一)項目結構設計
為了使項目結構清晰,便于維護和擴展,我們采用以下項目結構:
D:\chinese-segmentation-api\
├── app/
│ ??├── __init__.py ??????????????# 應用初始化
│ ??├── config.py ????????????????# 配置文件
│ ??├── api/ ?????????????????????# API接口模塊
│ ??│ ??├── __init__.py
│ ??│ ??├── segment.py ???????????# 分詞相關接口
│ ??│ ??├── pos_tag.py ???????????# 詞性標注接口
│ ??│ ??├── custom_dict.py ???????# 自定義詞典接口
│ ??│ ??├── batch.py ?????????????# 批量處理接口
│ ??│ ??└── status.py ????????????# 服務狀態接口
│ ??├── core/ ????????????????????# 核心功能模塊
│ ??│ ??├── __init__.py
│ ??│ ??├── segmenter.py ?????????# 分詞器實現
│ ??│ ??├── pos_tagger.py ????????# 詞性標注器實現
│ ??│ ??├── custom_dict_manager.py # 自定義詞典管理器
│ ??│ ??└── stopwords.py ?????????# 停用詞處理
│ ??├── utils/ ???????????????????# 工具類模塊
│ ??│ ??├── __init__.py
│ ??│ ??├── logger.py ????????????# 日志工具
│ ??│ ??├── auth.py ??????????????# 認證工具
│ ??│ ??├── rate_limit.py ????????# 頻率限制工具
│ ??│ ??└── metrics.py ???????????# metrics收集工具
│ ??└── data/ ????????????????????# 數據目錄
│ ??????├── stopwords.txt ????????# 停用詞表
│ ??????└── custom_dicts/ ????????# 自定義詞典目錄
├── tests/ ???????????????????????# 測試模塊
│ ??├── __init__.py
│ ??├── test_segment.py
│ ??├── test_pos_tag.py
│ ??└── test_custom_dict.py
├── .env ?????????????????????????# 環境變量配置
├── .gitignore ???????????????????# Git忽略文件
├── requirements.txt ?????????????# 依賴包列表
├── run.py ???????????????????????# 應用啟動入口
├── start_server.bat ?????????????# 啟動服務的批處理文件
└── README.md ????????????????????# 項目說明文檔
(二)核心分詞功能實現
1.配置文件(app/config.py)
python代碼如下:
import os
from dotenv import load_dotenv# 加載環境變量
load_dotenv()class Config:"""基礎配置類"""# 應用配置APP_NAME = os.getenv("APP_NAME", "Chinese Segmentation API")VERSION = os.getenv("VERSION", "1.0.0")DEBUG = os.getenv("DEBUG", "False").lower() == "true"# 服務器配置HOST = os.getenv("HOST", "0.0.0.0")PORT = int(os.getenv("PORT", 5000))WORKERS = int(os.getenv("WORKERS", 4))  # Waitress的工作線程數# 認證配置API_KEY = os.getenv("API_KEY", "")REQUIRE_AUTH = os.getenv("REQUIRE_AUTH", "True").lower() == "true"# 頻率限制配置RATE_LIMIT = os.getenv("RATE_LIMIT", "100/minute")# 數據文件路徑(適應Windows路徑)BASE_DIR = os.path.abspath(os.path.dirname(os.path.dirname(__file__)))DATA_DIR = os.path.join(BASE_DIR, "data")STOPWORDS_PATH = os.path.join(DATA_DIR, "stopwords.txt")CUSTOM_DICTS_DIR = os.path.join(DATA_DIR, "custom_dicts")# 日志配置LOG_DIR = os.path.join(BASE_DIR, "logs")LOG_LEVEL = os.getenv("LOG_LEVEL", "INFO")@classmethoddef init_directories(cls):"""初始化必要的目錄"""for dir_path in [cls.DATA_DIR, cls.CUSTOM_DICTS_DIR, cls.LOG_DIR]:if not os.path.exists(dir_path):os.makedirs(dir_path, exist_ok=True)class DevelopmentConfig(Config):"""開發環境配置"""DEBUG = TrueLOG_LEVEL = "DEBUG"class ProductionConfig(Config):"""生產環境配置"""DEBUG = FalseLOG_LEVEL = "INFO"# 根據環境變量選擇配置
config = {"development": DevelopmentConfig,"production": ProductionConfig,"default": DevelopmentConfig
}def get_config():"""獲取配置實例"""env = os.getenv("ENVIRONMENT", "default")return config[env]2.應用初始化(app/__init__.py)
python代碼如下:
from flask import Flask
from flask_restful import Api
from .config import get_config, Config
from .api.segment import SegmentResource
from .api.pos_tag import PosTagResource
from .api.custom_dict import CustomDictResource
from .api.batch import BatchSegmentResource
from .api.status import StatusResource
from .utils.logger import setup_logger
from .utils.auth import AuthMiddleware
from .utils.rate_limit import setup_rate_limit
from .core.segmenter import init_segmenter# 初始化配置
config = get_config()
Config.init_directories()# 初始化日志
logger = setup_logger(config)# 初始化分詞器
init_segmenter(config)def create_app():"""創建并配置Flask應用"""app = Flask(config.APP_NAME)app.config.from_object(config)# 設置日志app.logger = logger# 添加認證中間件if config.REQUIRE_AUTH and config.API_KEY:app.wsgi_app = AuthMiddleware(app.wsgi_app, config.API_KEY)# 初始化APIapi = Api(app)# 設置頻率限制setup_rate_limit(app, config.RATE_LIMIT)# 注冊API資源api.add_resource(SegmentResource, '/api/segment')api.add_resource(PosTagResource, '/api/pos_tag')api.add_resource(CustomDictResource, '/api/custom_dict')api.add_resource(BatchSegmentResource, '/api/batch_segment')api.add_resource(StatusResource, '/api/status')app.logger.info(f"Application {config.APP_NAME} v{config.VERSION} initialized")return app3.分詞器實現(app/core/segmenter.py)
python代碼如下:
import jieba
import jieba.posseg as pseg
import os
import platform
from datetime import datetime
from ..config import get_config
from .stopwords import StopwordsFilter# 全局變量
segmenter_initialized = False
stopwords_filter = None
start_time = datetime.now()def init_segmenter(config):"""初始化分詞器"""global segmenter_initialized, stopwords_filterif segmenter_initialized:returntry:# 延遲導入loggerfrom app import logger# 加載停用詞stopwords_filter = StopwordsFilter(config.STOPWORDS_PATH)# 加載默認的自定義詞典custom_dict_files = [f for f in os.listdir(config.CUSTOM_DICTS_DIR) if f.endswith('.txt') and os.path.isfile(os.path.join(config.CUSTOM_DICTS_DIR, f))]for dict_file in custom_dict_files:dict_path = os.path.join(config.CUSTOM_DICTS_DIR, dict_file)jieba.load_userdict(dict_path)logger.info(f"Loaded custom dictionary: {dict_path}")# 啟用并行分詞(Windows系統下不啟用)try:if platform.system() != "Windows":jieba.enable_parallel()logger.info("Enabled parallel segmentation")else:logger.info("Parallel segmentation is not enabled on Windows system")except Exception as e:logger.warning(f"Failed to enable parallel segmentation: {str(e)}")segmenter_initialized = Truelogger.info("Segmenter initialized successfully")except Exception as e:# 延遲導入loggerfrom app import loggerlogger.error(f"Failed to initialize segmenter: {str(e)}", exc_info=True)raisedef get_segment_mode(mode):"""獲取分詞模式對應的函數"""# 延遲導入loggerfrom app import loggerif mode == "full":return jieba.cut, {"cut_all": True}elif mode == "search":return jieba.cut_for_search, {}else: # 默認精確模式return jieba.cut, {"cut_all": False}def segment_text(text, mode="accurate", use_hmm=True, filter_stopwords=False, filter_punctuation=False):"""對文本進行分詞參數:text: 待分詞的文本mode: 分詞模式,"accurate"(精確)、"full"(全模式)、"search"(搜索引擎)use_hmm: 是否使用HMM模型filter_stopwords: 是否過濾停用詞filter_punctuation: 是否過濾標點符號返回:分詞結果列表"""# 延遲導入loggerfrom app import loggerif not segmenter_initialized:raise Exception("Segmenter not initialized")if not text or not isinstance(text, str):return []try:cut_func, kwargs = get_segment_mode(mode)segments = cut_func(text, HMM=use_hmm, **kwargs)# 轉換為列表result = list(segments)# 過濾處理if filter_stopwords or filter_punctuation:result = stopwords_filter.filter(result,filter_stopwords=filter_stopwords,filter_punctuation=filter_punctuation)return resultexcept Exception as e:logger.error(f"Error in segment_text: {str(e)}", exc_info=True)raisedef pos_tag_text(text, mode="accurate", use_hmm=True, filter_stopwords=False, filter_punctuation=False):"""對文本進行詞性標注參數:text: 待處理的文本mode: 分詞模式use_hmm: 是否使用HMM模型filter_stopwords: 是否過濾停用詞filter_punctuation: 是否過濾標點符號返回:詞性標注結果列表,每個元素為{"word": 詞語, "tag": 詞性}"""# 延遲導入loggerfrom app import loggerif not segmenter_initialized:raise Exception("Segmenter not initialized")if not text or not isinstance(text, str):return []try:# 分詞并標注詞性words = pseg.cut(text, HMM=use_hmm)result = [{"word": word, "tag": flag} for word, flag in words]# 過濾處理if filter_stopwords or filter_punctuation:filtered = []for item in result:if stopwords_filter.should_keep(item["word"],filter_stopwords=filter_stopwords,filter_punctuation=filter_punctuation):filtered.append(item)result = filteredreturn resultexcept Exception as e:logger.error(f"Error in pos_tag_text: {str(e)}", exc_info=True)raisedef add_custom_words(words):"""添加自定義詞語參數:words: 詞語列表,每個元素可以是字符串或包含"word"、"freq"、"tag"的字典返回:成功添加的詞語數量和失敗的詞語列表"""# 延遲導入loggerfrom app import loggerif not segmenter_initialized:raise Exception("Segmenter not initialized")success_count = 0failed_words = []if not words or not isinstance(words, list):return success_count, failed_wordsfor word_info in words:try:if isinstance(word_info, str):jieba.add_word(word_info)elif isinstance(word_info, dict):word = word_info.get("word")if not word:failed_words.append(word_info)continuefreq = word_info.get("freq")tag = word_info.get("tag")jieba.add_word(word, freq=freq, tag=tag)else:failed_words.append(word_info)continuesuccess_count += 1logger.info(f"Added custom word: {word_info}")except Exception as e:logger.warning(f"Failed to add custom word {word_info}: {str(e)}")failed_words.append(word_info)return success_count, failed_wordsdef delete_custom_words(words):"""刪除自定義詞語參數:words: 詞語列表返回:成功刪除的詞語數量和失敗的詞語列表"""# 延遲導入loggerfrom app import loggerif not segmenter_initialized:raise Exception("Segmenter not initialized")success_count = 0failed_words = []if not words or not isinstance(words, list):return success_count, failed_wordsfor word in words:try:if not isinstance(word, str):failed_words.append(word)continuejieba.del_word(word)success_count += 1logger.info(f"Deleted custom word: {word}")except Exception as e:logger.warning(f"Failed to delete custom word {word}: {str(e)}")failed_words.append(word)return success_count, failed_wordsdef load_custom_dict(file_path):"""加載自定義詞典文件參數:file_path: 詞典文件路徑返回:是否加載成功"""# 延遲導入loggerfrom app import loggerif not segmenter_initialized:raise Exception("Segmenter not initialized")try:if not os.path.exists(file_path) or not os.path.isfile(file_path):logger.error(f"Custom dictionary file not found: {file_path}")return Falsejieba.load_userdict(file_path)logger.info(f"Loaded custom dictionary file: {file_path}")return Trueexcept Exception as e:logger.error(f"Failed to load custom dictionary {file_path}: {str(e)}", exc_info=True)return False4.停用詞處理(app/core/stopwords.py)
python代碼如下:
import os
import reclass StopwordsFilter:"""停用詞過濾器"""def __init__(self, stopwords_path):"""初始化停用詞過濾器"""self.stopwords = set()self.punctuation_pattern = re.compile(r'[^\w\s]')self.load_stopwords(stopwords_path)def load_stopwords(self, file_path):"""加載停用詞表"""# 延遲導入loggerfrom app import loggertry:if os.path.exists(file_path) and os.path.isfile(file_path):with open(file_path, 'r', encoding='utf-8') as f:for line in f:word = line.strip()if word:self.stopwords.add(word)logger.info(f"Loaded {len(self.stopwords)} stopwords from {file_path}")else:logger.warning(f"Stopwords file not found: {file_path}, using empty stopwords list")except Exception as e:logger.error(f"Failed to load stopwords: {str(e)}", exc_info=True)def is_stopword(self, word):"""判斷是否為停用詞"""# 延遲導入loggerfrom app import loggerreturn word in self.stopwordsdef is_punctuation(self, word):"""判斷是否為標點符號"""# 延遲導入loggerfrom app import loggerreturn len(word) == 1 and self.punctuation_pattern.match(word) is not Nonedef should_keep(self, word, filter_stopwords=True, filter_punctuation=True):"""判斷是否應該保留該詞語"""# 延遲導入loggerfrom app import loggerif filter_stopwords and self.is_stopword(word):return Falseif filter_punctuation and self.is_punctuation(word):return Falsereturn Truedef filter(self, words, filter_stopwords=True, filter_punctuation=True):"""過濾詞語列表"""# 延遲導入loggerfrom app import loggerreturn [word for word in words if self.should_keep(word, filter_stopwords, filter_punctuation)]
(三)接口服務實現
1.基礎分詞接口(app/api/segment.py)
python代碼如下:
from flask_restful import Resource, reqparse
from ..core.segmenter import segment_text
from ..utils.metrics import increment_request_count, record_response_time
import timeimport json
from flask import make_response # json返回中文class SegmentResource(Resource):"""分詞接口資源"""def __init__(self):"""初始化請求解析器"""self.parser = reqparse.RequestParser()self.parser.add_argument('text', type=str, required=True, help='Text to segment is required')self.parser.add_argument('mode', type=str, choices=['accurate', 'full', 'search'], default='accurate')self.parser.add_argument('use_hmm', type=bool, default=True)self.parser.add_argument('filter_stopwords', type=bool, default=False)self.parser.add_argument('filter_punctuation', type=bool, default=False)@record_response_time()@increment_request_count()def post(self):"""處理POST請求"""# 延遲導入loggerfrom app import loggerstart_time = time.time()try:# 解析請求參數args = self.parser.parse_args()text = args['text']mode = args['mode']use_hmm = args['use_hmm']filter_stopwords = args['filter_stopwords']filter_punctuation = args['filter_punctuation']logger.info(f"Segment request received: mode={mode}, text_length={len(text)}")# 執行分詞segments = segment_text(text,mode=mode,use_hmm=use_hmm,filter_stopwords=filter_stopwords,filter_punctuation=filter_punctuation)# 構造響應數據response = {'code': 0,'message': 'success','data': {'text': text,'segments': segments,'mode': mode,'use_hmm': use_hmm,'timestamp': int(time.time())}}# 手動序列化JSON,強制不轉義中文json_str = json.dumps(response, ensure_ascii=False)response = make_response(json_str)response.headers['Content-Type'] = 'application/json'logger.debug(f"Segment request processed in {time.time() - start_time:.4f}s")return responseexcept Exception as e:logger.error(f"Error processing segment request: {str(e)}", exc_info=True)return {'code': 2001,'message': f"Internal server error: {str(e)}",'data': None}, 5002.詞性標注接口(app/api/pos_tag.py)
python代碼如下:
from flask_restful import Resource, reqparse
from ..core.segmenter import pos_tag_text
from ..utils.metrics import increment_request_count, record_response_time
import timeimport json
from flask import make_response # json返回中文class PosTagResource(Resource):"""詞性標注接口資源"""def __init__(self):"""初始化請求解析器"""self.parser = reqparse.RequestParser()self.parser.add_argument('text', type=str, required=True, help='Text to pos tag is required')self.parser.add_argument('mode', type=str, choices=['accurate', 'full', 'search'], default='accurate')self.parser.add_argument('use_hmm', type=bool, default=True)self.parser.add_argument('filter_stopwords', type=bool, default=False)self.parser.add_argument('filter_punctuation', type=bool, default=False)@record_response_time()@increment_request_count()def post(self):"""處理POST請求"""# 延遲導入loggerfrom app import loggerstart_time = time.time()try:# 解析請求參數args = self.parser.parse_args()text = args['text']mode = args['mode']use_hmm = args['use_hmm']filter_stopwords = args['filter_stopwords']filter_punctuation = args['filter_punctuation']logger.info(f"POS tag request received: mode={mode}, text_length={len(text)}")# 執行詞性標注tags = pos_tag_text(text,mode=mode,use_hmm=use_hmm,filter_stopwords=filter_stopwords,filter_punctuation=filter_punctuation)# 構造響應response = {'code': 0,'message': 'success','data': {'text': text,'tags': tags,'mode': mode,'use_hmm': use_hmm,'timestamp': int(time.time())}}# 手動序列化JSON,強制不轉義中文json_str = json.dumps(response, ensure_ascii=False)response = make_response(json_str)response.headers['Content-Type'] = 'application/json'logger.debug(f"POS tag request processed in {time.time() - start_time:.4f}s")return responseexcept Exception as e:logger.error(f"Error processing pos tag request: {str(e)}", exc_info=True)return {'code': 2001,'message': f"Internal server error: {str(e)}",'data': None}, 5003.自定義詞典接口(app/api/custom_dict.py)
python代碼如下:
from flask_restful import Resource, reqparse
from ..core.segmenter import add_custom_words, delete_custom_words, load_custom_dict
from ..config import get_config
from ..utils.metrics import increment_request_count, record_response_time
import time
import os
import tempfile
import requestsimport json
from flask import make_response # json返回中文class CustomDictResource(Resource):"""自定義詞典接口資源"""def __init__(self):"""初始化請求解析器"""self.parser = reqparse.RequestParser()self.parser.add_argument('action', type=str, required=True, choices=['add', 'delete', 'load'],help='Action must be one of: add, delete, load')self.parser.add_argument('words', type=list, default=[])self.parser.add_argument('file_url', type=str, default='')self.config = get_config()@record_response_time()@increment_request_count()def post(self):"""處理POST請求"""# 延遲導入loggerfrom app import loggerstart_time = time.time()try:# 解析請求參數args = self.parser.parse_args()action = args['action']words = args['words']file_url = args['file_url']logger.info(f"Custom dict request received: action={action}")data = {}if action == 'add':# 添加自定義詞語success_count, failed_words = add_custom_words(words)data = {'action': action,'success_count': success_count,'failed_words': failed_words}elif action == 'delete':# 刪除自定義詞語success_count, failed_words = delete_custom_words(words)data = {'action': action,'success_count': success_count,'failed_words': failed_words}elif action == 'load':# 加載自定義詞典文件if not file_url:return {'code': 1001,'message': 'file_url is required for load action','data': None}, 400# 下載詞典文件try:response = requests.get(file_url, timeout=30)response.raise_for_status()# 保存到臨時文件(Windows系統的臨時文件路徑處理)with tempfile.NamedTemporaryFile(mode='w', encoding='utf-8', delete=False, suffix='.txt') as f:f.write(response.text)temp_file_path = f.name# 加載詞典success = load_custom_dict(temp_file_path)# 刪除臨時文件os.unlink(temp_file_path)data = {'action': action,'success': success,'file_url': file_url}except Exception as e:logger.error(f"Failed to download or load custom dict file: {str(e)}", exc_info=True)return {'code': 1003,'message': f"Failed to load custom dictionary: {str(e)}",'data': None}, 400# 構造響應response = {'code': 0,'message': 'success','data': {**data,'timestamp': int(time.time())}}# 手動序列化JSON,強制不轉義中文json_str = json.dumps(response, ensure_ascii=False)response = make_response(json_str)response.headers['Content-Type'] = 'application/json'logger.debug(f"Custom dict request processed in {time.time() - start_time:.4f}s")return responseexcept Exception as e:logger.error(f"Error processing custom dict request: {str(e)}", exc_info=True)return {'code': 2001,'message': f"Internal server error: {str(e)}",'data': None}, 5004.批量分詞接口(app/api/batch.py)
python代碼如下:
from flask_restful import Resource, reqparse
from ..core.segmenter import segment_text
from ..utils.metrics import increment_request_count, record_response_time
import time
from concurrent.futures import ThreadPoolExecutorimport json
from flask import make_response # json返回中文class BatchSegmentResource(Resource):"""批量分詞接口資源"""def __init__(self):"""初始化請求解析器"""self.parser = reqparse.RequestParser()self.parser.add_argument('texts', type=list, required=True, help='List of texts to segment is required')self.parser.add_argument('mode', type=str, choices=['accurate', 'full', 'search'], default='accurate')self.parser.add_argument('use_hmm', type=bool, default=True)self.parser.add_argument('filter_stopwords', type=bool, default=False)self.parser.add_argument('filter_punctuation', type=bool, default=False)self.executor = ThreadPoolExecutor(max_workers=4) # 線程池大小def process_single_text(self, text, mode, use_hmm, filter_stopwords, filter_punctuation):"""處理單條文本"""# 延遲導入loggerfrom app import loggertry:segments = segment_text(text,mode=mode,use_hmm=use_hmm,filter_stopwords=filter_stopwords,filter_punctuation=filter_punctuation)return {'text': text,'segments': segments,'error': None}except Exception as e:logger.warning(f"Error processing text '{text[:50]}...': {str(e)}")return {'text': text,'segments': [],'error': str(e)}@record_response_time()@increment_request_count()def post(self):"""處理POST請求"""# 延遲導入loggerfrom app import loggerstart_time = time.time()try:# 解析請求參數args = self.parser.parse_args()texts = args['texts']mode = args['mode']use_hmm = args['use_hmm']filter_stopwords = args['filter_stopwords']filter_punctuation = args['filter_punctuation']# 驗證texts參數if not isinstance(texts, list) or len(texts) == 0:return {'code': 1001,'message': 'texts must be a non-empty list','data': None}, 400logger.info(f"Batch segment request received: count={len(texts)}, mode={mode}")# 批量處理文本futures = []for text in texts:if not isinstance(text, str):# 跳過非字符串類型的元素continuefuture = self.executor.submit(self.process_single_text,text, mode, use_hmm, filter_stopwords, filter_punctuation)futures.append(future)# 獲取結果results = [future.result() for future in futures]# 構造響應response = {'code': 0,'message': 'success','data': {'total': len(results),'results': results,'mode': mode,'use_hmm': use_hmm,'timestamp': int(time.time())}}# 手動序列化JSON,強制不轉義中文json_str = json.dumps(response, ensure_ascii=False)response = make_response(json_str)response.headers['Content-Type'] = 'application/json'logger.debug(f"Batch segment request processed in {time.time() - start_time:.4f}s")return responseexcept Exception as e:logger.error(f"Error processing batch segment request: {str(e)}", exc_info=True)return {'code': 2001,'message': f"Internal server error: {str(e)}",'data': None}, 5005.服務狀態接口(app/api/status.py)
python代碼如下:
from flask_restful import Resource
from ..config import get_config
from ..core.segmenter import start_time, segmenter_initialized
from ..utils.metrics import get_request_metrics
import time
import psutilimport json
from flask import make_response  # json返回中文class StatusResource(Resource):"""服務狀態接口資源"""def __init__(self):"""初始化配置"""self.config = get_config()def get(self):"""處理GET請求"""# 延遲導入loggerfrom app import loggertry:# 獲取系統資源使用情況cpu_usage = psutil.cpu_percent(interval=0.1)memory = psutil.virtual_memory()memory_usage = memory.percent# 獲取請求指標request_count, avg_response_time = get_request_metrics()# 構造響應response = {'code': 0,'message': 'success','data': {'version': self.config.VERSION,'status': 'running' if segmenter_initialized else 'initializing','start_time': int(start_time.timestamp()),'current_time': int(time.time()),'request_count': request_count,'average_response_time': round(avg_response_time, 2) if avg_response_time else 0,'cpu_usage': cpu_usage,'memory_usage': memory_usage,'debug_mode': self.config.DEBUG}}# 手動序列化JSON,強制不轉義中文json_str = json.dumps(response, ensure_ascii=False)response = make_response(json_str)response.headers['Content-Type'] = 'application/json'return responseexcept Exception as e:logger.error(f"Error processing status request: {str(e)}", exc_info=True)return {'code': 2001,'message': f"Internal server error: {str(e)}",'data': None}, 500
(四)工具類實現
1.日志工具(app/utils/logger.py)
python代碼如下:
import logging
import os
from logging.handlers import RotatingFileHandlerdef setup_logger(config):"""設置日志配置"""# 創建日志器logger = logging.getLogger(config.APP_NAME)logger.setLevel(config.LOG_LEVEL)# 避免重復添加處理器if logger.handlers:return logger# 日志格式formatter = logging.Formatter('%(asctime)s - %(name)s - %(levelname)s - %(message)s')# 控制臺處理器console_handler = logging.StreamHandler()console_handler.setFormatter(formatter)logger.addHandler(console_handler)# 文件處理器(輪轉日志)log_file = os.path.join(config.LOG_DIR, f"{config.APP_NAME}.log")file_handler = RotatingFileHandler(log_file,maxBytes=1024 * 1024 * 10, # 10MBbackupCount=10,encoding='utf-8')file_handler.setFormatter(formatter)logger.addHandler(file_handler)return logger # 關鍵:必須返回logger實例2.認證工具(app/utils/auth.py)
python代碼如下:
from flask import request, jsonify
import sysclass AuthMiddleware:"""認證中間件"""def __init__(self, app, api_key):self.app = appself.api_key = api_keydef __call__(self, environ, start_response):"""處理請求認證"""# 從環境變量中獲取請求路徑path = environ.get('PATH_INFO', '')# 不需要認證的路徑public_paths = ['/api/status']if path in public_paths:return self.app(environ, start_response)# 獲取Authorization頭auth_header = environ.get('HTTP_AUTHORIZATION', '')if not auth_header:logger = self.get_logger()logger.warning(f"Unauthorized request to {path}: No Authorization header")response = self.create_error_response(1002, 'Unauthorized: API key is required')return response(environ, start_response)# 解析Authorization頭try:auth_type, auth_value = auth_header.split(' ', 1)if auth_type.lower() != 'api-key':raise ValueError("Invalid auth type")# 驗證API密鑰if auth_value != self.api_key:raise ValueError("Invalid API key")# 認證通過,繼續處理請求return self.app(environ, start_response)except (ValueError, Exception) as e:logger = self.get_logger()logger.warning(f"Unauthorized request to {path}: {str(e)}")response = self.create_error_response(1002, f'Unauthorized: {str(e)}')return response(environ, start_response)def get_logger(self):"""獲取日志器"""from flask import current_appreturn current_app.loggerdef create_error_response(self, code, message):"""創建錯誤響應"""response = jsonify({'code': code,'message': message,'data': None})response.status_code = 401return response3.頻率限制工具(app/utils/rate_limit.py)
python代碼如下:
from flask_limiter import Limiter
from flask_limiter.util import get_remote_addressdef setup_rate_limit(app, rate_limit):"""設置頻率限制"""if rate_limit:limiter = Limiter(app=app,key_func=get_remote_address,default_limits=[rate_limit],storage_uri="memory://")app.logger.info(f"Rate limit set to: {rate_limit}")return limiterreturn None4.指標收集工具(app/utils/metrics.py)
python代碼如下:
import time
from threading import Lock# 全局指標
request_count = 0
response_times = []
metrics_lock = Lock()def increment_request_count():"""增加請求計數的裝飾器"""def decorator(func):def wrapper(*args, **kwargs):global request_countwith metrics_lock:request_count += 1return func(*args, **kwargs)return wrapperreturn decoratordef record_response_time():"""記錄響應時間的裝飾器"""def decorator(func):def wrapper(*args, **kwargs):start_time = time.time()result = func(*args, **kwargs)end_time = time.time()response_time = (end_time - start_time) * 1000  # 轉換為毫秒with metrics_lock:response_times.append(response_time)# 只保留最近1000個響應時間,防止內存溢出if len(response_times) > 1000:response_times.pop(0)return resultreturn wrapperreturn decoratordef get_request_metrics():"""獲取請求指標"""with metrics_lock:count = request_countif response_times:avg_time = sum(response_times) / len(response_times)else:avg_time = 0return count, avg_time
(五)應用啟動入口(run.py)
python代碼如下:
from app import create_app
from app.config import get_config
from waitress import servedef main():"""應用主函數"""app = create_app()config = get_config()if config.DEBUG:# 開發環境:使用Flask內置服務器app.run(host=config.HOST,port=config.PORT,debug=config.DEBUG)else:# 生產環境:使用Waitress作為WSGI服務器app.logger.info(f"Starting production server with Waitress: {config.HOST}:{config.PORT}, workers={config.WORKERS}")serve(app, host=config.HOST, port=config.PORT, threads=config.WORKERS)if __name__ == '__main__':main()
(六)啟動批處理文件(start_server.bat)
batch代碼如下:
@echo off
cd /d D:\chinese-segmentation-api
call csa-venv\Scripts\activate.bat
set ENVIRONMENT=production
set API_KEY=your_secure_api_key_here
python run.py
pause
如果要實現開機之后自動啟動系統,可以通過生成該文件的快捷方式,并將快捷方式放入到系統的啟動目錄C:\Users\Administrator\AppData\Roaming\Microsoft\Windows\Start Menu\Programs\Startup(AppData可能是隱藏的目錄,要先設置可見)。
將該批處理文件添加到Windows啟動目錄的具體操作:
(1)按下Win + R,輸入shell:startup打開啟動文件夾。
(2)將start_server.bat的快捷方式復制到該文件夾中。
具體查看我的CSDN文章:Windows server服務器上部署python項目(超詳細教程)-CSDN博客?
五、服務器部署方案
(一)服務器環境準備
1.服務器硬件要求
部署中文分詞API服務的服務器硬件要求如下:
(1)CPU:至少2核,推薦4核及以上,以支持多進程并發處理。
(2)內存:至少2GB,推薦4GB及以上,以應對較大的文本處理需求。
(3)硬盤:至少10GB可用空間,用于安裝系統、應用程序和存儲日志文件。
(4)網絡:穩定的網絡連接,帶寬根據預期的并發請求量而定。
2.操作系統配置
Windows Server 2022 安裝完成后,進行以下基本配置:
(1)啟用遠程桌面:在“系統屬性”->“遠程設置”中,允許遠程連接到該計算機。
(2)關閉不必要的服務:在“服務”管理界面中,禁用不需要的系統服務,提高系統性能和安全性。
(3)安裝必要的系統更新:通過“設置”->“更新和安全”安裝最新的系統補丁。
3.必要軟件安裝
(1)安裝Python3.10.6:如前文“環境準備”部分所述。
(2)安裝Git:從Git官網下載Windows版本并安裝,用于版本控制。
(3)安裝Nginx:如前文“環境準備”部分所述。
(4)安裝NSSM:如前文“環境準備”部分所述。
(5)安裝依賴包:在項目虛擬環境中安裝所需的依賴包,如前文所述。
(二)部署方式選擇
本項目在Windows Server 2022上支持兩種部署方式:直接部署和Docker容器化部署。
1.直接部署
更詳細的部署說明,可以看我的CSDN文章:Windows server服務器上部署python項目(超詳細教程)-CSDN博客?,Windows server服務器上部署python項目域名訪問(超詳細教程)-CSDN博客?。
直接部署是將應用程序直接安裝在服務器操作系統上,通過Waitress作為WSGI服務器運行,Nginx作為反向代理。
優點:部署簡單,不需要額外的容器化知識。性能開銷小,適合資源有限的服務器。
缺點:環境依賴管理復雜,可能與服務器上的其他應用產生沖突。部署和升級過程相對繁瑣。
2.Docker容器化部署
Docker容器化部署是將應用程序及其依賴打包到Docker容器中,通過容器運行應用。
優點:環境隔離,避免與其他應用產生沖突。部署和升級簡單,只需更新容器鏡像。便于在不同環境之間遷移。
缺點:需要一定的Docker知識。相比直接部署有一定的性能開銷。
(三)直接部署步驟
1.項目部署
(1)將項目代碼上傳至服務器
通過遠程桌面連接或FTP工具,將本地開發完成的項目文件夾(chinese-segmentation-api)上傳至Windows Server 2022服務器的指定目錄(如D:\services\chinese-segmentation-api)。
(2)配置虛擬環境
在服務器上打開PowerShell,進入項目目錄,執行以下命令激活虛擬環境并安裝依賴:
cd D:\services\chinese-segmentation-api
.\csa-venv\Scripts\Activate.ps1
pip install -r requirements.txt
(3)配置環境變量
?項目配置文件“app/config.py”優先讀取環境變量,創建或修改項目根目錄下的.env文件,配置生產環境參數(ini):
ENVIRONMENT=production
APP_NAME=Chinese Segmentation API
VERSION=1.0.0
HOST=0.0.0.0
PORT=5000??# 自定義端口(1024-65535之間未被占用的端口)
WORKERS=4
API_KEY=your_secure_api_key_here ?# 替換為實際的API密鑰
REQUIRE_AUTH=True
RATE_LIMIT=100/minute
LOG_LEVEL=INFO
保存文件后重啟服務:關閉當前運行的服務(在啟動服務的窗口按Ctrl+C);重新激活虛擬環境并啟動服務:
csa-venv\Scripts\activate
python run.py
(4)測試服務啟動
在虛擬環境中執行啟動命令,驗證服務是否正常運行:
python run.py
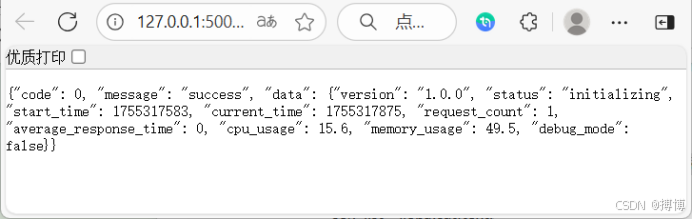
啟動后的效果如下:

之后,就可以打開瀏覽器訪問http://localhost:5000/api/status,若返回服務狀態JSON數據,則表示服務啟動成功,按Ctrl+C停止服務。
如果是改了端口,在阿里云上,還要查看ECS安全組是否開放新端口,添加新端口的操作步驟如下:
(1)登錄阿里云控制臺 → 進入你的ECS實例詳情頁 → 左側菜單找到「安全組」并點擊進入。
(2)選擇實例綁定的安全組 → 點擊「配置規則」→ 「入站規則」→ 「手動添加」。
(3)填寫規則:
A.優先級:1(或其他數值,越小越優先)
B.規則方向:入站
C.協議類型:TCP
D.端口范圍:5001/5001
E.授權對象:0.0.0.0/0(允許所有公網IP訪問,生產環境可限制為你的本地 IP)
F.描述:自定義(如“允許訪問Flask應用5001端口”)
G.點擊「確定」保存規則。
具體可看Windows server服務器上部署python項目(超詳細教程)-CSDN博客?
2.配置Nginx反向代理
(1)修改Nginx配置文件
打開Nginx安裝目錄下的conf\nginx.conf文件(如D:\nginx-1.24.0\conf\nginx.conf),在http塊中添加以下配置:
server {listen 80;server_name your_domain.com; ?# 替換為實際域名或服務器IPlocation / {proxy_pass http://127.0.0.1:5000;proxy_set_header Host $host;proxy_set_header X-Real-IP $remote_addr;proxy_set_header X-Forwarded-For $proxy_add_x_forwarded_for;proxy_set_header X-Forwarded-Proto $scheme;}
}
(2)啟動Nginx服務
在PowerShell中進入Nginx目錄,執行以下命令啟動Nginx:
cd D:\nginx-1.24.0
.\nginx.exe
通過http://服務器IP/api/status訪問服務,驗證反向代理是否生效。
3.使用NSSM注冊系統服務
(1)打開NSSM服務安裝界面
在PowerShell中執行以下命令啟動NSSM配置界面:
nssm install ChineseSegmentationAPI
(2)配置服務參數
Path:選擇Python可執行文件路徑(如D:\services\chinese-segmentation-api\csa-venv\Scripts\python.exe)
Arguments:輸入run.py
Working Directory:選擇項目根目錄(如D:\services\chinese-segmentation-api)
Service name:保持默認ChineseSegmentationAPI或自定義
(3)配置服務啟動方式
切換到NSSM界面的“Log on”選項卡,選擇“Local System account”;在“Startup type” 中選擇“Automatic”,點擊“Install service”完成注冊。
(4)啟動服務
在PowerShell中執行以下命令啟動服務:
nssm start ChineseSegmentationAPI
通過http://服務器IP/api/status驗證服務是否正常運行,若失敗可通過NSSM日志(D:\services\chinese-segmentation-api\logs)排查問題。
(四)Docker容器化部署步驟
1.安裝Docker Desktop
(1)下載并安裝Docker Desktop for Windows(需啟用Hyper-V),重啟服務器后啟動Docker。
(2)在Docker設置中啟用“Container Registry”和“Windows containers”(若使用Windows 容器)或“Linux containers”(推薦)。
2.創建Dockerfile
在項目根目錄下創建Dockerfile,內容如下:
# 基于Python3.10.6鏡像
FROM python:3.10.6-slim
# 設置工作目錄
WORKDIR /app
# 復制依賴文件
COPY requirements.txt .
# 安裝依賴
RUN pip install --no-cache-dir -r requirements.txt
# 復制項目文件
COPY . .
# 創建數據和日志目錄
RUN mkdir -p /app/data/custom_dicts /app/logs
# 暴露端口
EXPOSE 5000
# 啟動命令
CMD ["python", "run.py"]3.創建docker-compose.yml(可選)
yaml代碼如下:
version: '3'
services:chinese-segmentation-api:build: .ports:- "5000:5000"environment:- ENVIRONMENT=production- API_KEY=your_secure_api_key_here- REQUIRE_AUTH=Truevolumes:- ./data:/app/data- ./logs:/app/logsrestart: always4.構建并運行容器
(1)在項目目錄下打開PowerShell,執行以下命令構建鏡像:
docker build -t chinese-segmentation-api:1.0.0 .
(2)運行容器:
docker run -d -p 5000:5000 --name csa-service -e "API_KEY=your_secure_api_key_here" chinese-segmentation-api:1.0.0
或使用docker-compose:
docker-compose up -d
配置Nginx反向代理(同直接部署步驟2)
通過http://服務器IP/api/status驗證容器化服務是否正常運行。
(五)服務監控與維護
1.日志管理
(1)項目日志默認存儲在logs目錄下,通過以下命令查看實時日志:
Get-Content -Path D:\services\chinese-segmentation-api\logs\Chinese Segmentation API.log -Tail 100 -Wait
(2)配置日志輪轉:Nginx和應用日志均已配置輪轉機制(應用日志最大10MB /文件,保留10個備份)。
2.服務狀態監控
(1)通過/api/status接口實時查看服務狀態,包括CPU使用率、內存占用、請求計數等指標。
(2)使用Windows“性能監視器”添加計數器(如“Process”->“% Processor Time”)監控服務資源占用。
3.自動重啟與故障恢復
(1)直接部署:NSSM配置中已默認啟用“自動重啟”,服務崩潰后將自動恢復。
(2)Docker部署:通過restart: always配置確保容器退出后自動重啟。
4.版本更新
(1)直接部署:替換項目文件后,執行nssm restart ChineseSegmentationAPI重啟服務。
(2)Docker 部署:重新構建鏡像并替換容器:
docker-compose down
docker-compose up -d --build
六、接口使用示例與文檔
(一)接口調用工具
推薦使用Postman或curl進行接口測試,以下為curl示例。
(二)基礎分詞接口(/api/segment)
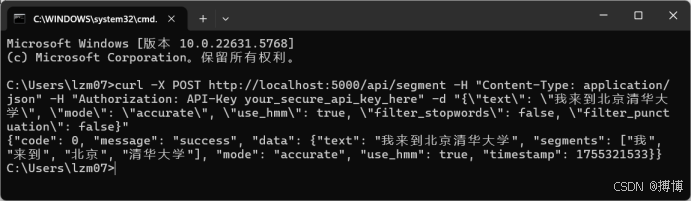
以下Curl命令轉換成單行再在CMD中執行:
curl -X POST http://localhost:5000/api/segment \-H "Content-Type: application/json" \-H "Authorization: API-Key your_secure_api_key_here" \-d "{"text": "我來到北京清華大學","mode": "accurate","use_hmm": true,"filter_stopwords": false,"filter_punctuation": false}"轉義+單行效果:
curl -X POST http://localhost:5000/api/segment -H "Content-Type: application/json" -H "Authorization: API-Key your_secure_api_key_here" -d "{\"text\": \"我來到北京清華大學\", \"mode\": \"accurate\", \"use_hmm\": true, \"filter_stopwords\": false, \"filter_punctuation\": false}"
如果是部署在服務器,則將本地地址localhost:5000改成你服務器地址your_domain.com。
返回示例(json):
{"code": 0,"message": "success","data": {"text": "我來到北京清華大學","segments": ["我", "來到", "北京", "清華大學"],"mode": "accurate","use_hmm": true,"timestamp": 1718000000}
}
效果如下:
(三)詞性標注接口(/api/pos_tag)
以下Curl命令轉換成單行再在CMD中執行:
curl -X POST http://localhost:5000/api/pos_tag \-H "Content-Type: application/json" \-H "Authorization: API-Key your_secure_api_key_here" \-d "{"text": "我愛自然語言處理","mode": "accurate"}"返回示例(json):
{"code": 0,"message": "success","data": {"text": "我愛自然語言處理","tags": [{"word": "我", "tag": "r"},{"word": "愛", "tag": "v"},{"word": "自然", "tag": "a"},{"word": "語言", "tag": "n"},{"word": "處理", "tag": "v"}],"mode": "accurate","use_hmm": true,"timestamp": 1718000100}
}
(四)自定義詞典接口(/api/custom_dict)
以下Curl命令轉換成單行再在CMD中執行:
curl -X POST http://localhost:5000/api/custom_dict \-H "Content-Type: application/json" \-H "Authorization: API-Key your_secure_api_key_here" \-d "{"action": "add","words": ["李小福", {"word": "創新辦", "freq": 5}]}"返回示例(json):
{"code": 0,"message": "success","data": {"action": "add","success_count": 2,"failed_words": [],"timestamp": 1718000200}
}
(五)批量分詞接口(/api/batch_segment)
以下Curl命令轉換成單行再在CMD中執行:
curl -X POST http://localhost:5000/api/batch_segment \-H "Content-Type: application/json" \-H "Authorization: API-Key your_secure_api_key_here" \-d "{"texts": ["我來到北京清華大學", "我愛自然語言處理"],"mode": "accurate"}"返回示例(json):
{"code": 0,"message": "success","data": {"total": 2,"results": [{"text": "我來到北京清華大學","segments": ["我", "來到", "北京", "清華大學"]},{"text": "我愛自然語言處理","segments": ["我", "愛", "自然", "語言", "處理"]}],"mode": "accurate","use_hmm": true,"timestamp": 1718000300}
}
(六)服務狀態接口(/api/status)
以下Curl命令在CMD中執行:
curl -X GET http://localhost:5000/api/status
返回示例(json):
{"code": 0,"message": "success","data": {"version": "1.0.0","status": "running","start_time": 1718000000,"current_time": 1718000400,"request_count": 50,"average_response_time": 45.2,"cpu_usage": 15.3,"memory_usage": 25.8,"debug_mode": false}
}
七、常見問題與解決方案
(一)部署相關問題
1.服務啟動后無法訪問
檢查服務器防火墻是否開放80/5000端口(powershell):
New-NetFirewallRule -DisplayName "Allow Chinese Segmentation API" -Direction Inbound -LocalPort 80,5000 -Protocol TCP -Action Allow
驗證Nginx和應用服務是否正常運行(powershell):
nssm status ChineseSegmentationAPI
.\nginx.exe -t ?# 檢查Nginx配置
2.虛擬環境激活失敗
若PowerShell提示“無法加載腳本”,執行以下命令修改執行策略:
Set-ExecutionPolicy RemoteSigned -Scope CurrentUser
3.Docker容器啟動失敗
查看容器日志排查問題:
docker logs csa-service
(二)功能相關問題
1.分詞結果不符合預期
嘗試添加自定義詞典:通過/api/custom_dict接口添加專業詞匯。
調整分詞模式:使用“full”模式獲取更多可能的分詞結果。
2.接口響應緩慢
檢查服務器資源:通過/api/status接口查看CPU和內存占用,若資源不足需升級服務器配置。
優化請求:減少單次請求的文本長度,或使用批量接口降低請求頻率。
3.權限驗證失敗
檢查API密鑰是否正確:確保請求頭中的Authorization: API-Key值與.env文件中的API_KEY一致。
關閉權限驗證(僅測試環境):在.env中設置REQUIRE_AUTH=False,重啟服務后生效。
八、總結與擴展
本教程詳細介紹了基于Python3.10.6和jieba庫的中文分詞模型接口在Windows Server 2022上的實現與部署過程,涵蓋環境準備、jieba庫原理、接口設計、代碼實現、服務器部署及接口使用等內容。通過直接部署或Docker容器化部署,可快速搭建穩定、高效的中文分詞服務,滿足企業或開發者的中文信息處理需求。
未來可擴展的功能包括:
(1)集成關鍵詞提取、實體識別等高級NLP功能;
(2)接入分布式緩存(如Redis)提高響應速度;
(3)開發Web管理界面,可視化配置自定義詞典和監控服務狀態;
(4)支持多語言分詞(如英文、日文),擴展服務適用場景。
通過本教程的指導,讀者可掌握中文分詞服務的全流程開發與部署方法,并根據實際需求進行二次開發和優化。
sql基礎及索引)


)


)


——枚舉類)

