nginx-主配置文件
- 一、主配置文件nginx.conf內容
- 二、修改配置的文件后的操作
- 三、配置虛擬主機的域名
- 1. 修改nignx.conf配置文件
- 2. 新建域名對應的網頁根目錄
- 3. 重載nginx配置
- 4. 驗證
一、主配置文件nginx.conf內容
[root@web1 conf]# cat nginx.conf#user  nobody;  # nginx woker進程啟動的時候會使用那個用戶去啟動,默認nobody
worker_processes  2;   # 指定2個woker進程,一般情況下與cpu核心的個數一致
# auto 表示 自動匹配cpu核心數量#error_log  logs/error.log;   #錯誤日志存放的路徑
#error_log  logs/error.log  notice;  # 記錄警告及以上級別錯誤
#error_log  logs/error.log  info;#pid        logs/nginx.pid;   #master進程的pid號#事件塊
events {worker_connections  2048;  #定義一個worker進程可以同時并發連接多少個請求     總的請求數=woker進程數*2048use epoll;	# #定義nginx在進行大并發處理的時候采用epoll模型
}# Nginx 支持的 I/O 多路復用模型比較:select、poll 和 epoll
I/O 多路復用解決的大并發連接的時候,nginx如何去處理的問題http {include       mime.types;  # 申明nginx支持的媒體類型,可以傳輸識別哪些類型的文件default_type  application/octet-stream;  # 默認的發送的數據類型server_tokens off;  # 隱藏nginx的版本號#log_format  main  '$remote_addr - $remote_user [$time_local] "$request" '#                  '$status $body_bytes_sent "$http_referer" '#                  '"$http_user_agent" "$http_x_forwarded_for"';log_format  main  是日志記錄格式的名字$remote_addr 是客戶機http請求報文里的ip包里的源ip地址$remote_user  遠程用戶$time_local 訪問的時間$request  http請求報文里的url$status 狀態碼$body_bytes_sent   http響應報文回復的數據大小$http_referer      本次訪問是從哪里引流過來的 --》跳轉$http_user_agent   客戶端的用戶代理瀏覽器$http_x_forwarded_for 記錄從那個負載均衡器轉發的#access_log  logs/access.log  main;  #訪問日志  main是格式的名字sendfile        on;	# # 啟用零拷貝傳輸#tcp_nopush     on;#keepalive_timeout  0;keepalive_timeout  65;  #長連接 65秒gzip  on;   # 開啟壓縮功能,響應報文的body部分進行壓縮#一個server對應nginx進程提供的網站服務,一個server對應一個網站  --》虛擬主機 對應一個網站server {listen       80;  # 監聽的端口#server_name  localhost;server_name  www.sc.com;   # 網站的域名,默認localhost#charset koi8-r;#access_log  logs/host.access.log  main;   #訪問日志#定義路由--》根路徑location / {root   html;   # 網頁根目錄 在html文件夾   html在nginx安裝的路徑下index  index.html index.htm;    # 定義網站的首頁}#error_page  404              /404.html; 	# 出現404狀態碼,返回/404.html頁面(需在網頁根目錄下)# redirect server error pages to the static page /50x.html#error_page   500 502 503 504  /50x.html; 設置50x錯誤指向的頁面location = /50x.html {root   html;}# proxy the PHP scripts to Apache listening on 127.0.0.1:80##location ~ \.php$ {#    proxy_pass   http://127.0.0.1;#}# pass the PHP scripts to FastCGI server listening on 127.0.0.1:9000##location ~ \.php$ {#    root           html;#    fastcgi_pass   127.0.0.1:9000;#    fastcgi_index  index.php;#    fastcgi_param  SCRIPT_FILENAME  /scripts$fastcgi_script_name;#    include        fastcgi_params;#}# deny access to .htaccess files, if Apache's document root# concurs with nginx's one##location ~ /\.ht {#    deny  all;#}}# another virtual host using mix of IP-, name-, and port-based configuration##server {#    listen       8000;#    listen       somename:8080;#    server_name  somename  alias  another.alias;#    location / {#        root   html;#        index  index.html index.htm;#    }#}# HTTPS server##server {#    listen       443 ssl;#    server_name  localhost;#    ssl_certificate      cert.pem;#    ssl_certificate_key  cert.key;#    ssl_session_cache    shared:SSL:1m;#    ssl_session_timeout  5m;#    ssl_ciphers  HIGH:!aNULL:!MD5;#    ssl_prefer_server_ciphers  on;#    location / {#        root   html;#        index  index.html index.htm;#    }#}}
二、修改配置的文件后的操作
檢測nginx.conf配置文件是否正確
[root@web-2 conf]#
nginx -t
nginx: the configuration file /usr/local/nginx1/conf/nginx.conf syntax is ok
nginx: configuration file /usr/local/nginx1/conf/nginx.conf test is successful
重載配置
[root@web-2 conf]#
nginx -s reload
nginx: [emerg] unknown directive “sanchuang” in /usr/local/nginx1/conf/nginx.conf:4
三、配置虛擬主機的域名
1. 修改nignx.conf配置文件
server {listen       80;server_name  www.feng.com;access_log  logs/feng.com.access.log  main;
error_log  logs/feng.com.error.log;location / {root   html/feng.com;index  index.html index.htm;}error_page  404              /404.html;
增加兩個域名則需再寫一個server塊
2. 新建域名對應的網頁根目錄
[root@web-2 conf]# cd /usr/local/nginx1/html/
[root@web-2 html]# mkdir feng.com
[root@web-2 html]# cd feng.com/
[root@web-2 feng.com]# vim index.html # 創建一個首頁文件
[root@web-2 feng.com]# cat index.html
welcome to feng.com
3. 重載nginx配置
[root@web-2 feng.com]#
nginx -t
nginx: the configuration file /usr/local/nginx1/conf/nginx.conf syntax is ok
nginx: configuration file /usr/local/nginx1/conf/nginx.conf test is successful
[root@web-2 feng.com]#nginx -s reload
4. 驗證
去訪問www.feng.com域名對應的網站
另一臺linux系統里測試訪問
修改linux系統里的/etc/hosts文件,添加www.feng.com對應的ip地址
[root@nginx-1 fd]# vim /etc/hosts
192.168.100.157 www.feng.com
測試在hosts文件里添加的域名是否可以解析到對應的ip地址
[root@nginx-1 fd]# ping www.feng.com
PING www.feng.com (192.168.100.157) 56(84) 比特的數據。
64 比特,來自 www.feng.com (192.168.100.157): icmp_seq=1 ttl=64 時間=0.576 毫秒
64 比特,來自 www.feng.com (192.168.100.157): icmp_seq=2 ttl=64 時間=0.219 毫秒
^C
— www.feng.com ping 統計 —
已發送 2 個包, 已接收 2 個包, 0% packet loss, time 1039ms
rtt min/avg/max/mdev = 0.219/0.397/0.576/0.178 ms
linux訪問www.feng.com
[root@nginx-1 fd]# curl www.feng.com
welcome to feng.com
windows系統里測試訪問
修改C:\Windows\System32\drivers\etc\hosts文件
使用記事本打開此文件,添加下面的域名解析記錄
192.168.100.157 www.feng.com
打開cmd程序,進行測試
C:\Users\Administrator>ping www.feng.com 測試
?
正在 Ping www.feng.com [192.168.100.157] 具有 32 字節的數據:
來自 192.168.100.157 的回復: 字節=32 時間<1ms TTL=64
來自 192.168.100.157 的回復: 字節=32 時間<1ms TTL=64
來自 192.168.100.157 的回復: 字節=32 時間=1ms TTL=64
來自 192.168.100.157 的回復: 字節=32 時間<1ms TTL=64
?
192.168.100.157 的 Ping 統計信息:
數據包: 已發送 = 4,已接收 = 4,丟失 = 0 (0% 丟失),
往返行程的估計時間(以毫秒為單位):
最短 = 0ms,最長 = 1ms,平均 = 0ms
用瀏覽器訪問域名,可查看內容
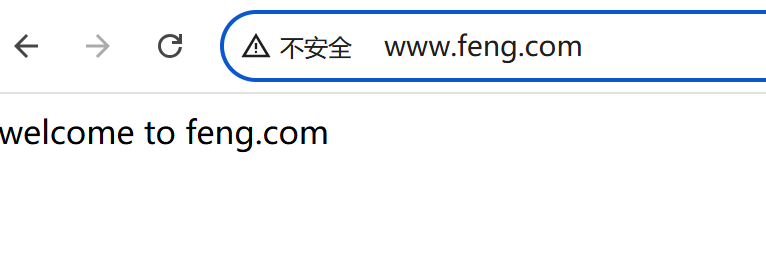
用了基于域名的虛擬主機,應該使用域名去訪問,如果使用ip訪問的話,默認會訪問第1個虛擬主機(網站)


學習記錄)


)

:路由合并_環境配置_常用文件目錄)
![?TRAE SOLO + Holopix AI | 輕松實現 “虛假廣告“-轉[特殊字符]割草小游戲](http://pic.xiahunao.cn/?TRAE SOLO + Holopix AI | 輕松實現 “虛假廣告“-轉[特殊字符]割草小游戲)