目錄
1 邊界復制(BORDER_REPLICATE)
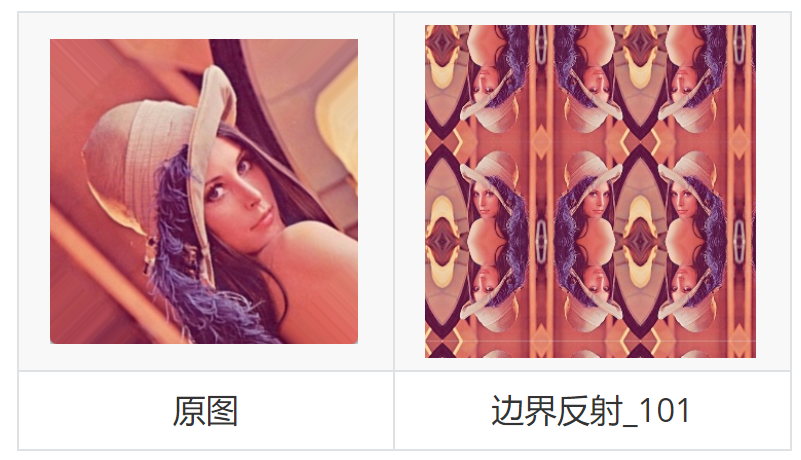
2 邊界反射(BOEDER_REFLECT)
3 邊界反射101(BORDER_REFLECT101)
4 邊界常數(BORDER_CONSTANT)
5 邊界包裹(BORDER_WRAP)
為什么需要填充邊緣呢?我們以下圖為例。
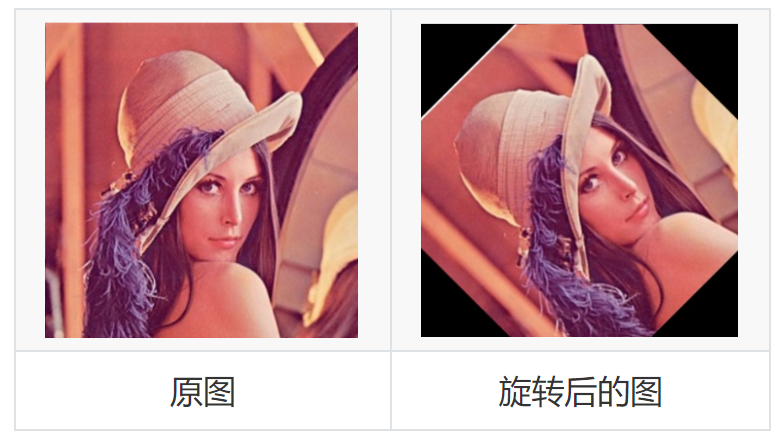
可以看到,左圖在逆時針旋轉45度之后原圖的四個頂點在右圖中已經看不到了,同時,右圖的四個頂點區域其實是什么都沒有的,因此我們需要對空出來的區域進行一個填充。右圖就是對空出來的區域進行了像素值為(0,0,0)的填充,也就是黑色像素值的填充。除此之外,后續的一些圖像處理方式也會用到邊緣填充,這里介紹五個常用的邊緣填充方法。
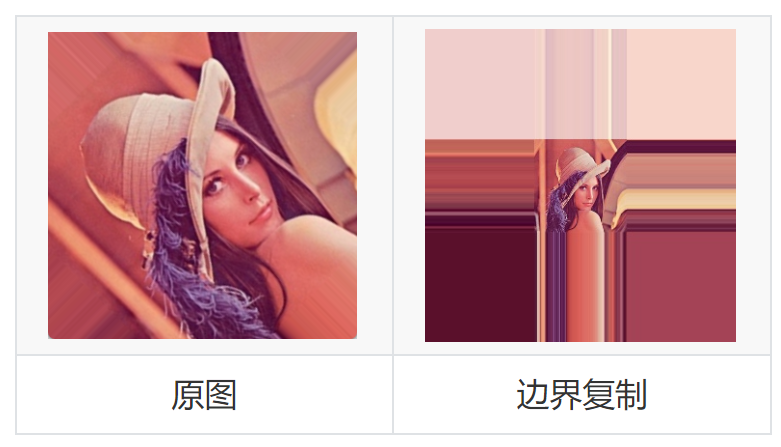
1 邊界復制(BORDER_REPLICATE)
邊界復制會將邊界處的像素值進行復制,然后作為邊界填充的像素值,如下圖所示,可以看到四周的像素值都一樣。
new_img=cv.warpAffine(img,M,(w,h),cv.INTER_LANCZOS4,borderMode=cv.BORDER_REPLICATE)
案例:
import cv2 as cv
face = cv.imread("./images/face.png")
# 定義旋轉中心
h,w = face.shape[:2]
center = (w//2,h//2)
# 獲取旋轉矩陣
M = cv.getRotationMatrix2D(center,45,0.5)
# 使用仿射變換矩陣進行旋轉
img1 = cv.warpAffine(face,M,(w,h),flags=cv.INTER_LANCZOS4)
# 邊界復制
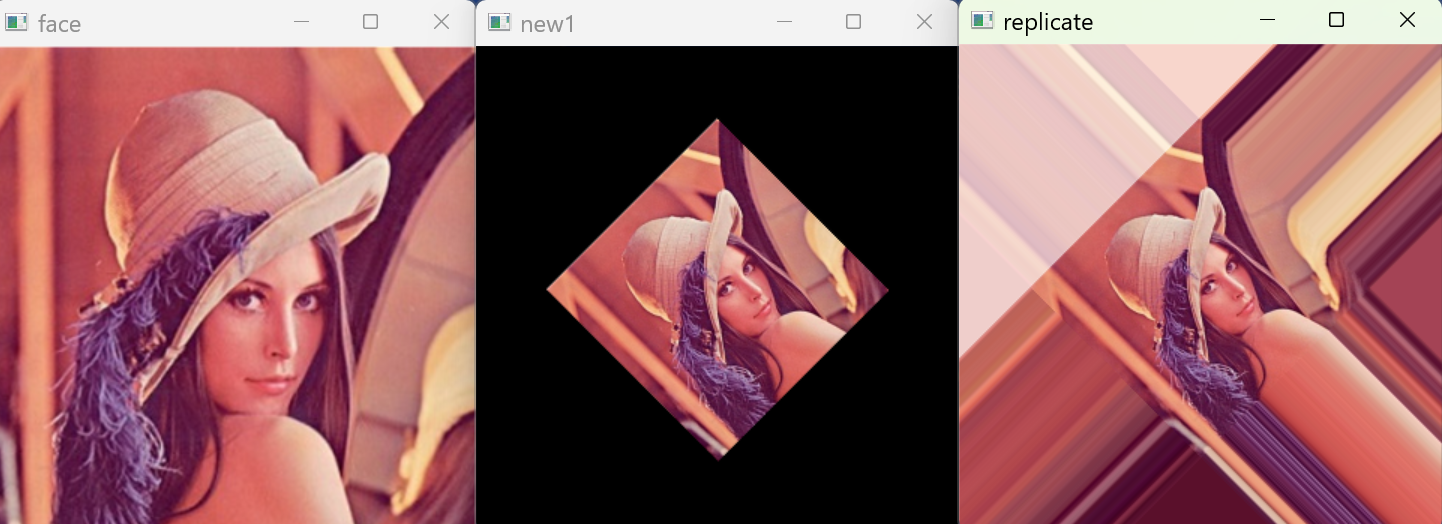
replicate = cv.warpAffine(face,M,(w,h),flags=cv.INTER_LANCZOS4,borderMode=cv.BORDER_REPLICATE)
cv.imshow("face",face)
cv.imshow("new1",img1)
cv.imshow("replicate",replicate)
cv.waitKey(0)
cv.destroyAllWindows()輸出:
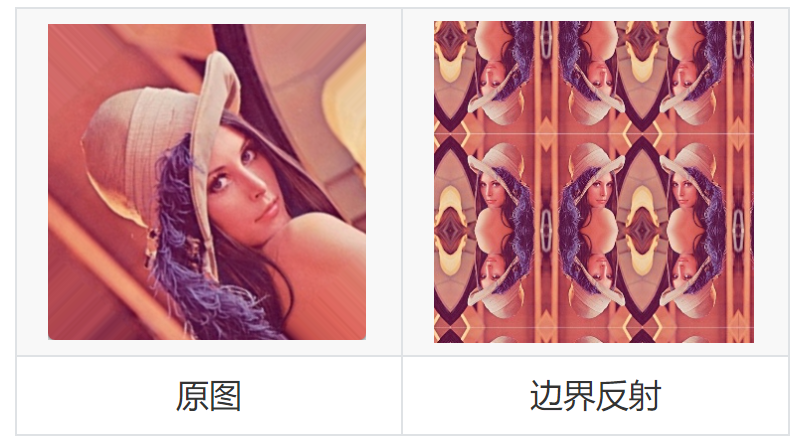
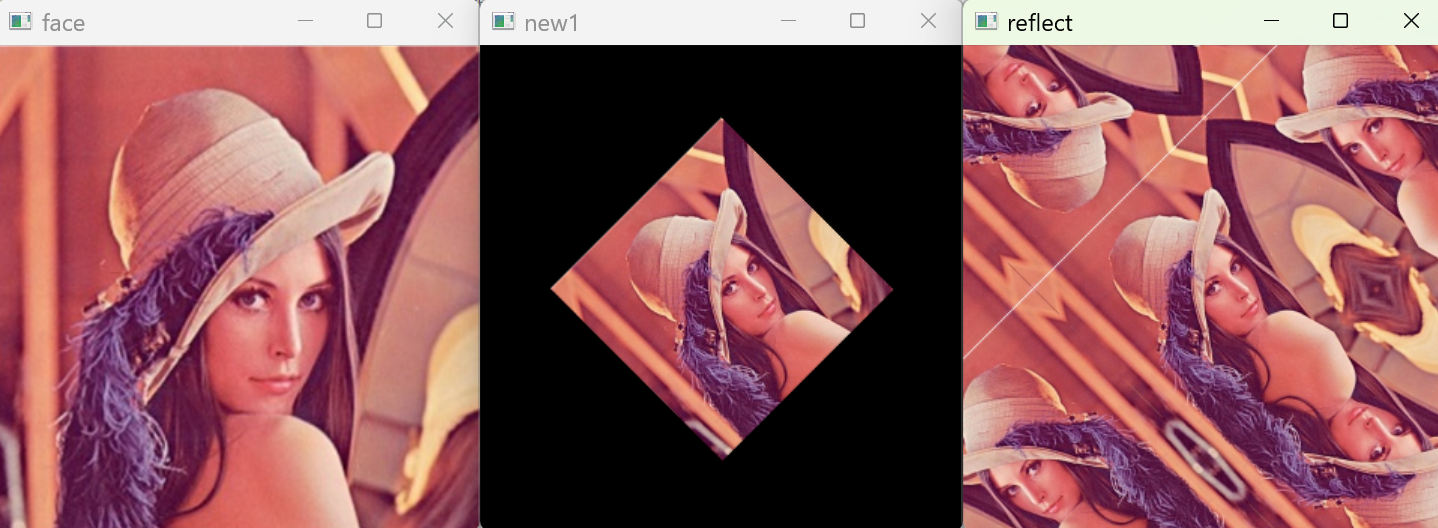
2 邊界反射(BOEDER_REFLECT)
根據原圖的邊緣進行反射。
new_img=cv.warpAffine(img,M,(w,h),cv.INTER_LANCZOS4,borderMode=cv.BORDER_REFLECT)
案例:
import cv2 as cv
face = cv.imread("./images/face.png")
# 定義旋轉中心
h,w = face.shape[:2]
center = (w//2,h//2)
# 獲取旋轉矩陣
M = cv.getRotationMatrix2D(center,45,0.5)
# 使用仿射變換矩陣進行旋轉
img1 = cv.warpAffine(face,M,(w,h),flags=cv.INTER_LANCZOS4)
# 邊界反射
reflect = cv.warpAffine(face,M,(w,h),flags=cv.INTER_LANCZOS4,borderMode=cv.BORDER_REFLECT)
cv.imshow("face",face)
cv.imshow("new1",img1)
cv.imshow("reflect",reflect)
cv.waitKey(0)
cv.destroyAllWindows()
輸出:
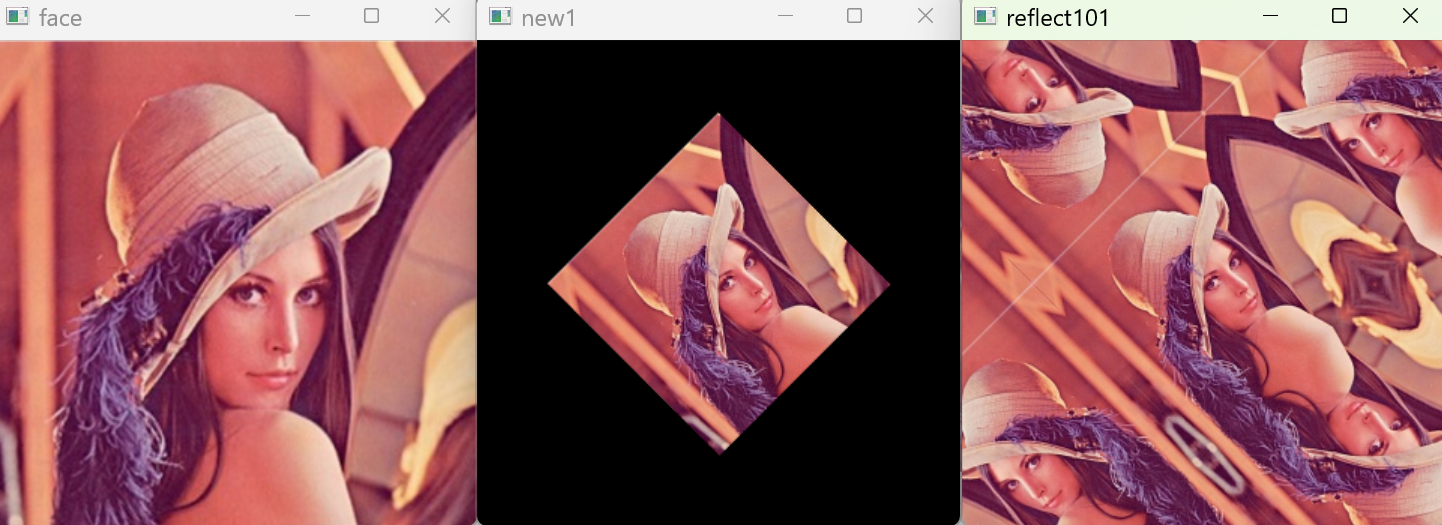
3 邊界反射101(BORDER_REFLECT101)
與邊界反射不同的是,不再反射邊緣的像素點。
new_img=cv.warpAffine(img,M,(w,h),cv.INTER_LANCZOS4,borderMode=cv.BORDER_REFLECT_101)
案例:
import cv2 as cv
face = cv.imread("./images/face.png")
# 定義旋轉中心
h,w = face.shape[:2]
center = (w//2,h//2)
# 獲取旋轉矩陣
M = cv.getRotationMatrix2D(center,45,0.5)
# 使用仿射變換矩陣進行旋轉
img1 = cv.warpAffine(face,M,(w,h),flags=cv.INTER_LANCZOS4)
# 邊界反射101
reflect101 = cv.warpAffine(face,M,(w,h),flags=cv.INTER_LANCZOS4,borderMode=cv.BORDER_REFLECT_101)
cv.imshow("face",face)
cv.imshow("new1",img1)
cv.imshow("reflect101",reflect101)
cv.waitKey(0)
cv.destroyAllWindows()
輸出:
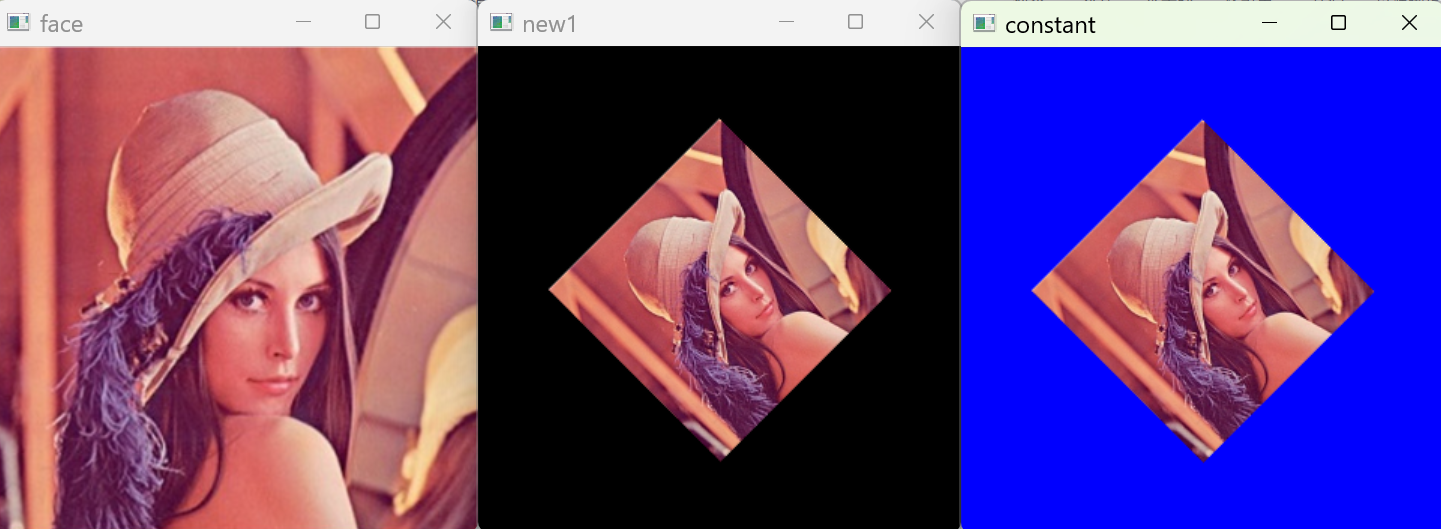
4 邊界常數(BORDER_CONSTANT)
指定常數值作為邊緣填充的像素值。
new_img=cv.warpAffine(img,M,(w,h),cv.INTER_LANCZOS4,borderMode=cv.BORDER_CONSTANT,borderValue=(0,0,255))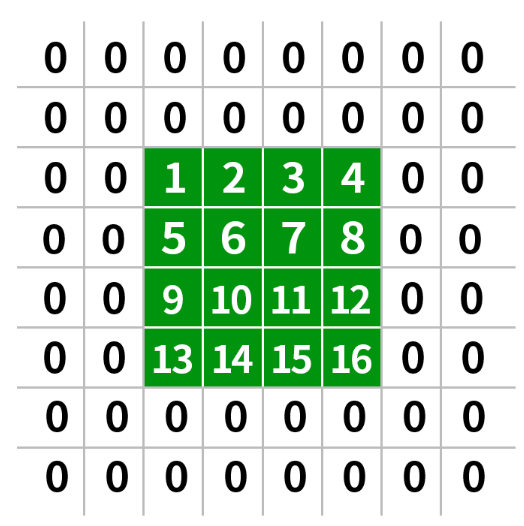

案例:
import cv2 as cv
face = cv.imread("./images/face.png")
# 定義旋轉中心
h,w = face.shape[:2]
center = (w//2,h//2)
# 獲取旋轉矩陣
M = cv.getRotationMatrix2D(center,45,0.5)
# 使用仿射變換矩陣進行旋轉
img1 = cv.warpAffine(face,M,(w,h),flags=cv.INTER_LANCZOS4)
# 邊界常數
constant = cv.warpAffine(face,M,(w,h),flags=cv.INTER_LANCZOS4,borderMode=cv.BORDER_CONSTANT,borderValue=(255,0,0))
cv.imshow("face",face)
cv.imshow("new1",img1)
cv.imshow("constant",constant)
cv.waitKey(0)
cv.destroyAllWindows()
輸出:
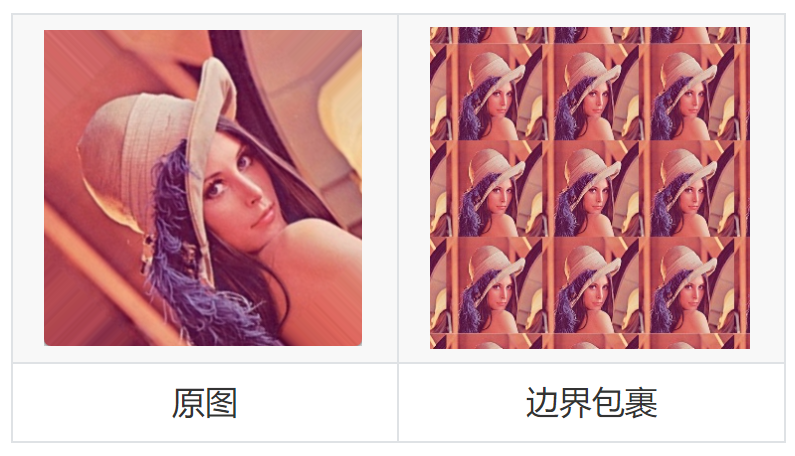
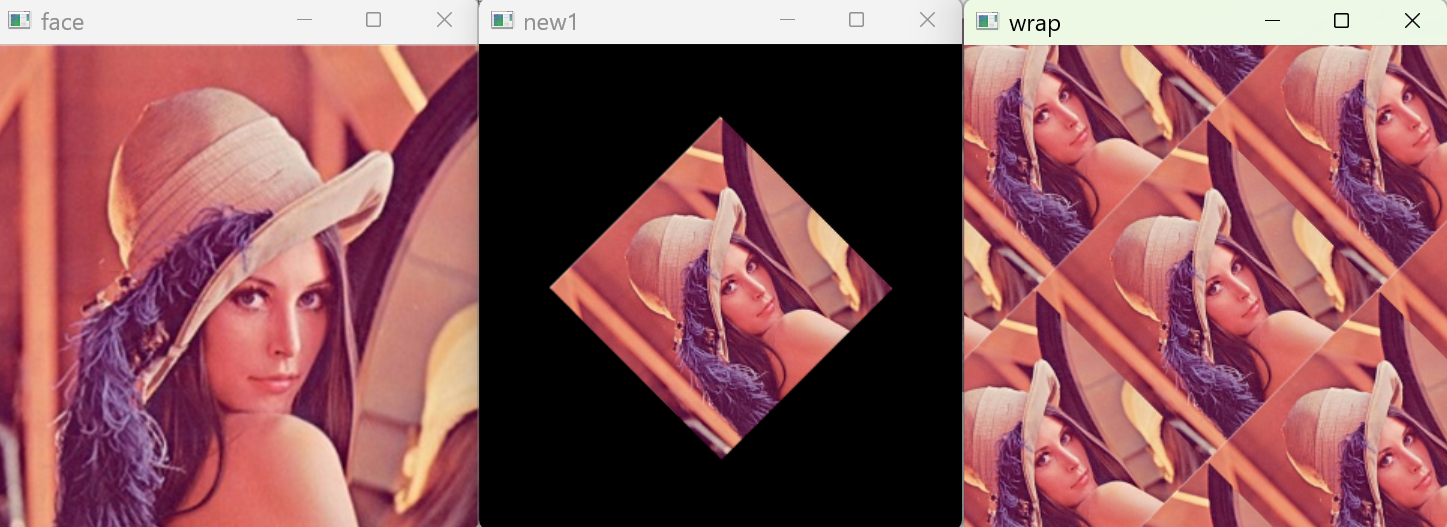
5 邊界包裹(BORDER_WRAP)
復制圖像進行滑動填充
new_img=cv.warpAffine(img,M,(w,h),cv.INTER_LANCZOS4,borderMode=cv.BORDER_WRAP)
案例:
import cv2 as cv
face = cv.imread("./images/face.png")
# 定義旋轉中心
h,w = face.shape[:2]
center = (w//2,h//2)
# 獲取旋轉矩陣
M = cv.getRotationMatrix2D(center,45,0.5)
# 使用仿射變換矩陣進行旋轉
img1 = cv.warpAffine(face,M,(w,h),flags=cv.INTER_LANCZOS4)
# 邊界包裹
wrap = cv.warpAffine(face,M,(w,h),flags=cv.INTER_LANCZOS4,borderMode=cv.BORDER_WRAP)
cv.imshow("face",face)
cv.imshow("new1",img1)
cv.imshow("wrap",wrap)
cv.waitKey(0)
cv.destroyAllWindows()
輸出:
)


)


![[機緣參悟-235]:通過AI人工升級網絡的工作方式和特征理解人的思維方式](http://pic.xiahunao.cn/[機緣參悟-235]:通過AI人工升級網絡的工作方式和特征理解人的思維方式)
—— 重寫虛方法】)


(2))

)