目錄
一、實驗準備
1.下載安裝
2.下載java
2.同步主機系統時間
二、部署
1.部署elasticsearch
修改?/etc/elasticsearch/elasticsearch.yml?配置文件
修改?/etc/hosts/?文件
啟動elasticsearch
查看是否啟動進程netstat -antptu | grep java
2.部署logstash
進入/etc/logstash/condf.d vim文件pipline.conf
寫入
測試logstash是否正常
3.部署kibana
三、訪問
一、實驗準備
1.下載安裝
分別下載安裝Elasticsearch、Logstash、Kibana
2.下載java
yum install -y java
2.同步主機系統時間
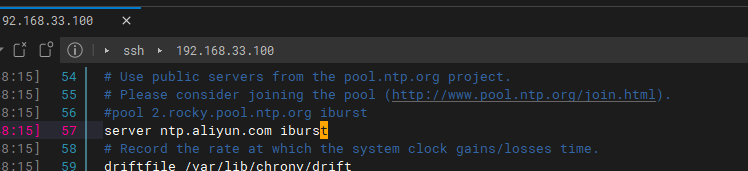
- 在?/etc/chrony.conf?文件中添加?server ntp.aliyun.com iburst
![]()
- 設置為上海時區?
????????????????[root@web1 ~]#?timedatectl set-timezone Asia/Shanghai

- 重啟時間同步服務
????????????????[root@web1 ~]#?systemctl restart chronyd.service?
![]()
二、部署
1.部署elasticsearch
-
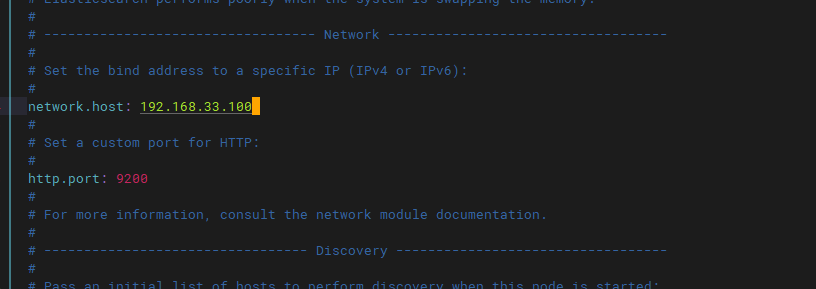
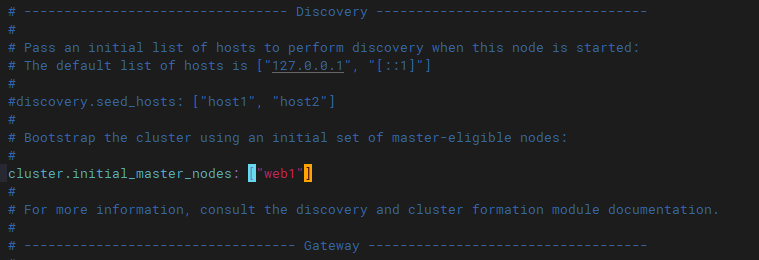
修改?/etc/elasticsearch/elasticsearch.yml?配置文件

- 開啟集群名稱與節點主機名(主機名改為本機名稱)
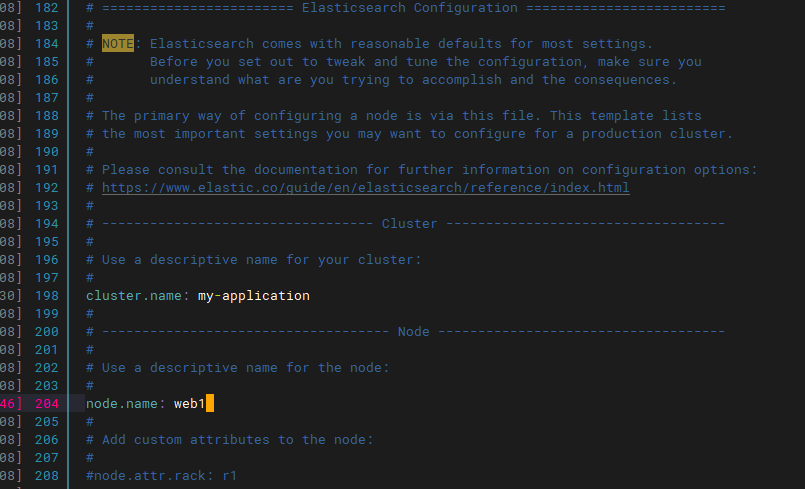
- 開啟監聽ip地址與監聽端口號
- 開啟主節點
-
修改?/etc/hosts/?文件
????????????????[root@web1 ~]#?vim/etc/hosts

????????????????添加ip及主機名

-
啟動elasticsearch
????????[root@web1 ~]#?systemctl start elasticsearch.service

-
查看是否啟動進程netstat -antptu | grep java

2.部署logstash
-
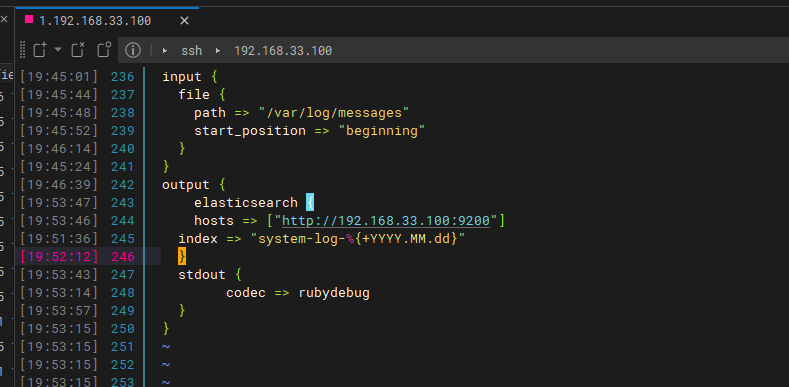
進入/etc/logstash/condf.d vim文件pipline.conf
![]()
-
寫入
input {
? file {
? ? path => "/var/log/messages"
? ? start_position => "beginning"
? }
}
output {
? ? elasticsearch {
? ? hosts => ["http://192.168.33.100:9200"]
? index => "system-log-%{+YYYY.MM.dd}"
? }
? stdout {
? ? ? ? codec => rubydebug
? }
}
-
測試logstash是否正常
? ? ? ? ? ? ? ? 先將?/usr/share/logstash/bin/logstash/ 文件鏈接到系統的?/usr/local/bin/?目錄下
????????????????????[root@web1 ~]#???ln -s `pwd`/logstash /usr/local/bin/
![]()
????????????????啟動并加載logstash查看是否正常
???????????????????????[root@web1 ~]#??logstash -e 'input{ stdin{} }output { stdout{} }'
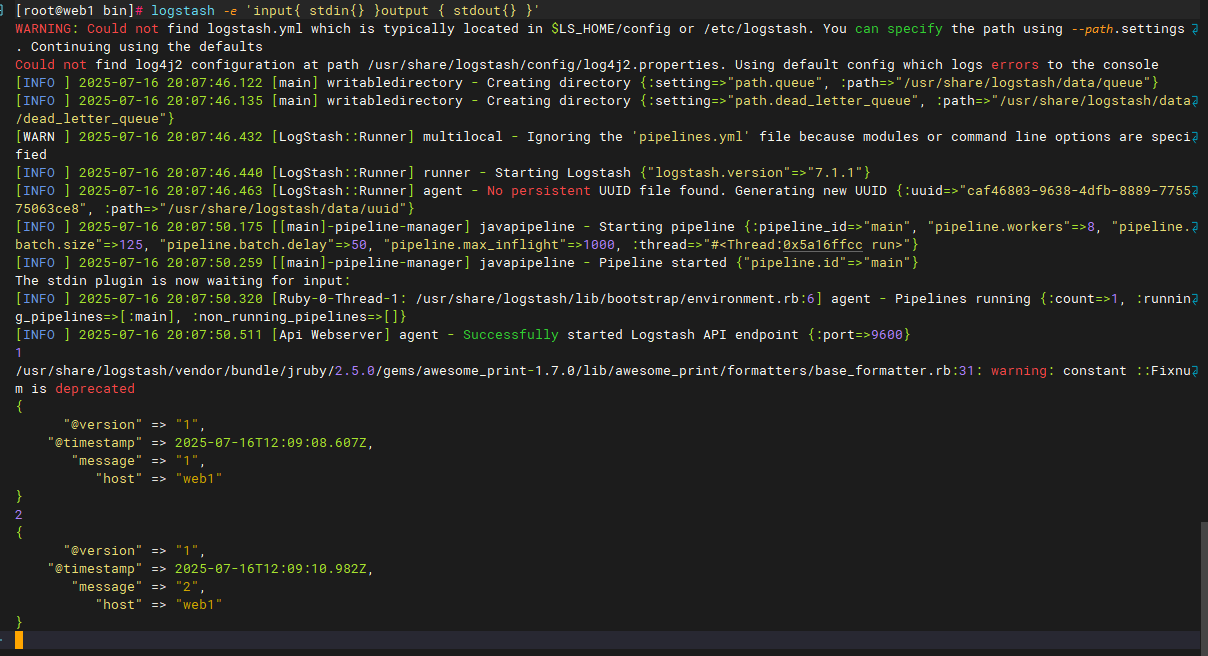
? ? ? ? ? ? ? ? 查看rubydebug解碼是否正常
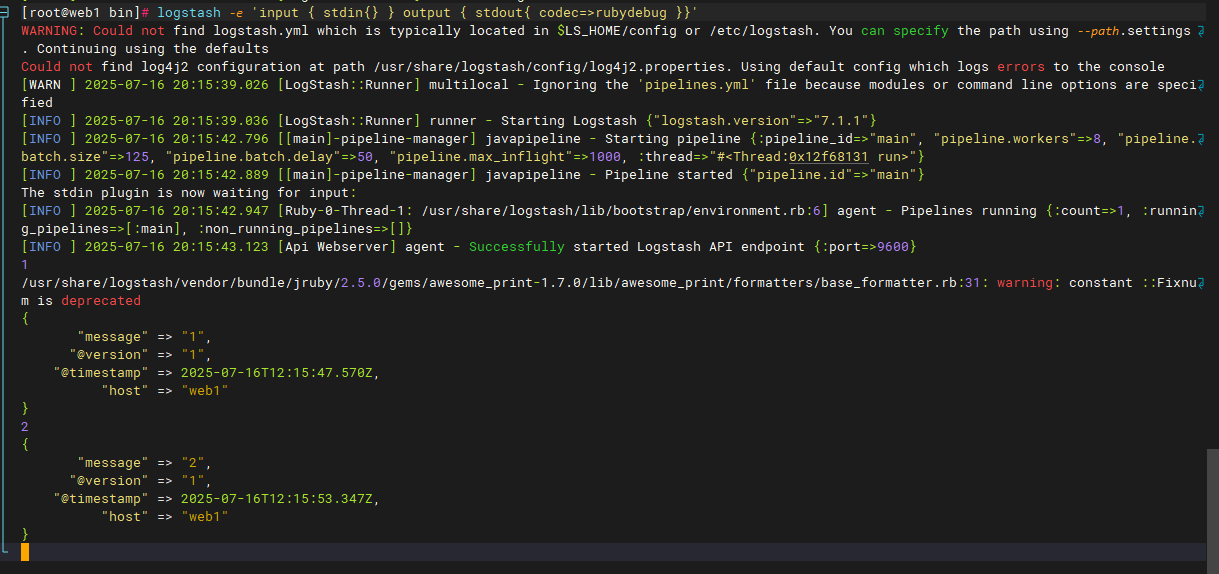
??????????????[root@web1 ~]#???logstash -e 'input { stdin{} } output { stdout{ codec=>rubydebug }}'
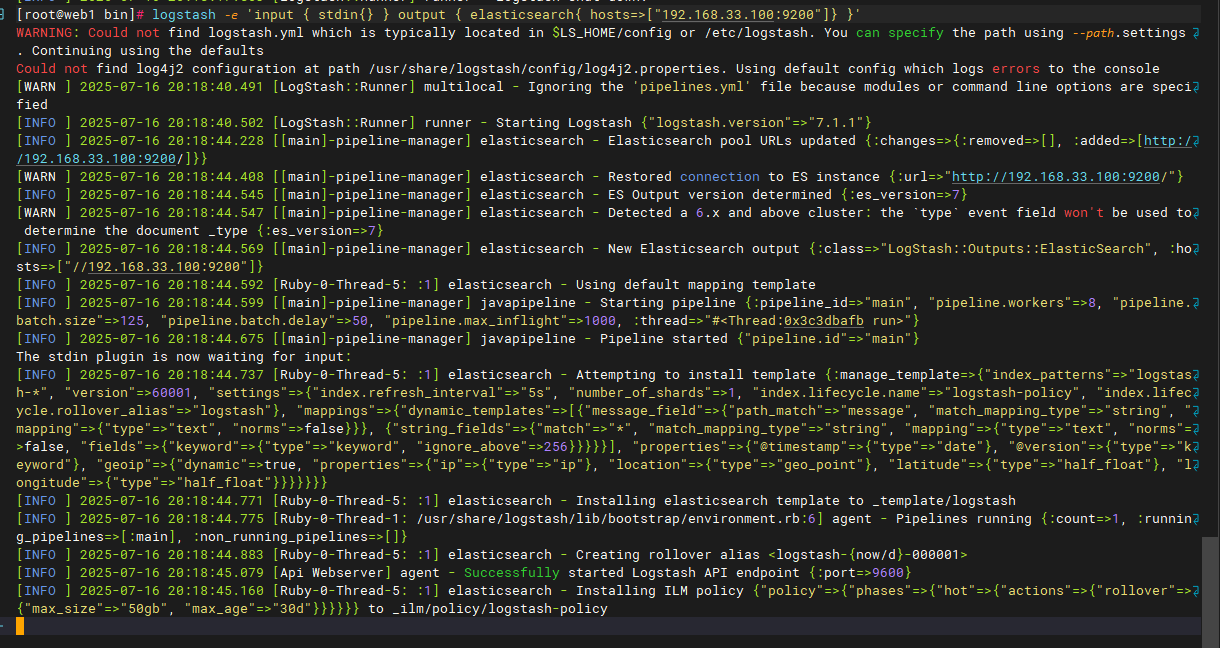
????????????????查看輸出到elasticsearch是否正常
[root@web1 ~]#?logstash -e 'input { stdin{} } output { elasticsearch{ hosts=>["192.168.33.100:9200"]} }'
3.部署kibana
- 修改/etc/kibana/kibana.yml
? ? ? ? ? ? ? ? 開啟主機監聽
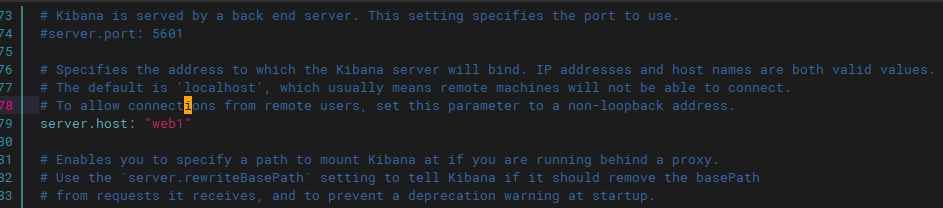
? ? ? ? ? ? ? ? 定義?kibana?名稱與?elasticsearch 傳輸地址
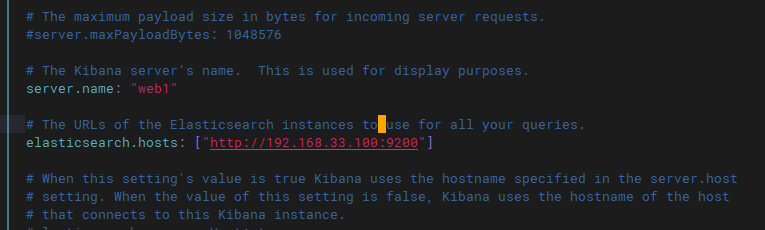
? ? ? ? ? ? ? ? 開啟kibana日志
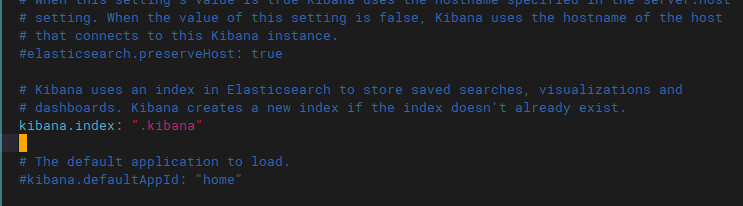
? ? ? ? ? ? ? ? 設置kibana語言? ?
? ?
??
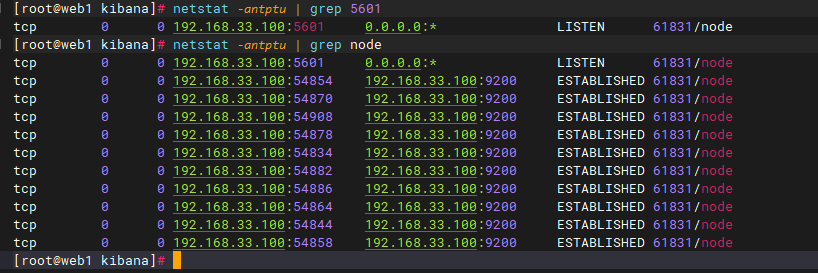
????????? ?? ???啟動kibana
![]()
? ? ? ? ? ? ? ? 查看監聽
???????????????????????[root@web1 ~]#??netstat -antptu | grep 5601
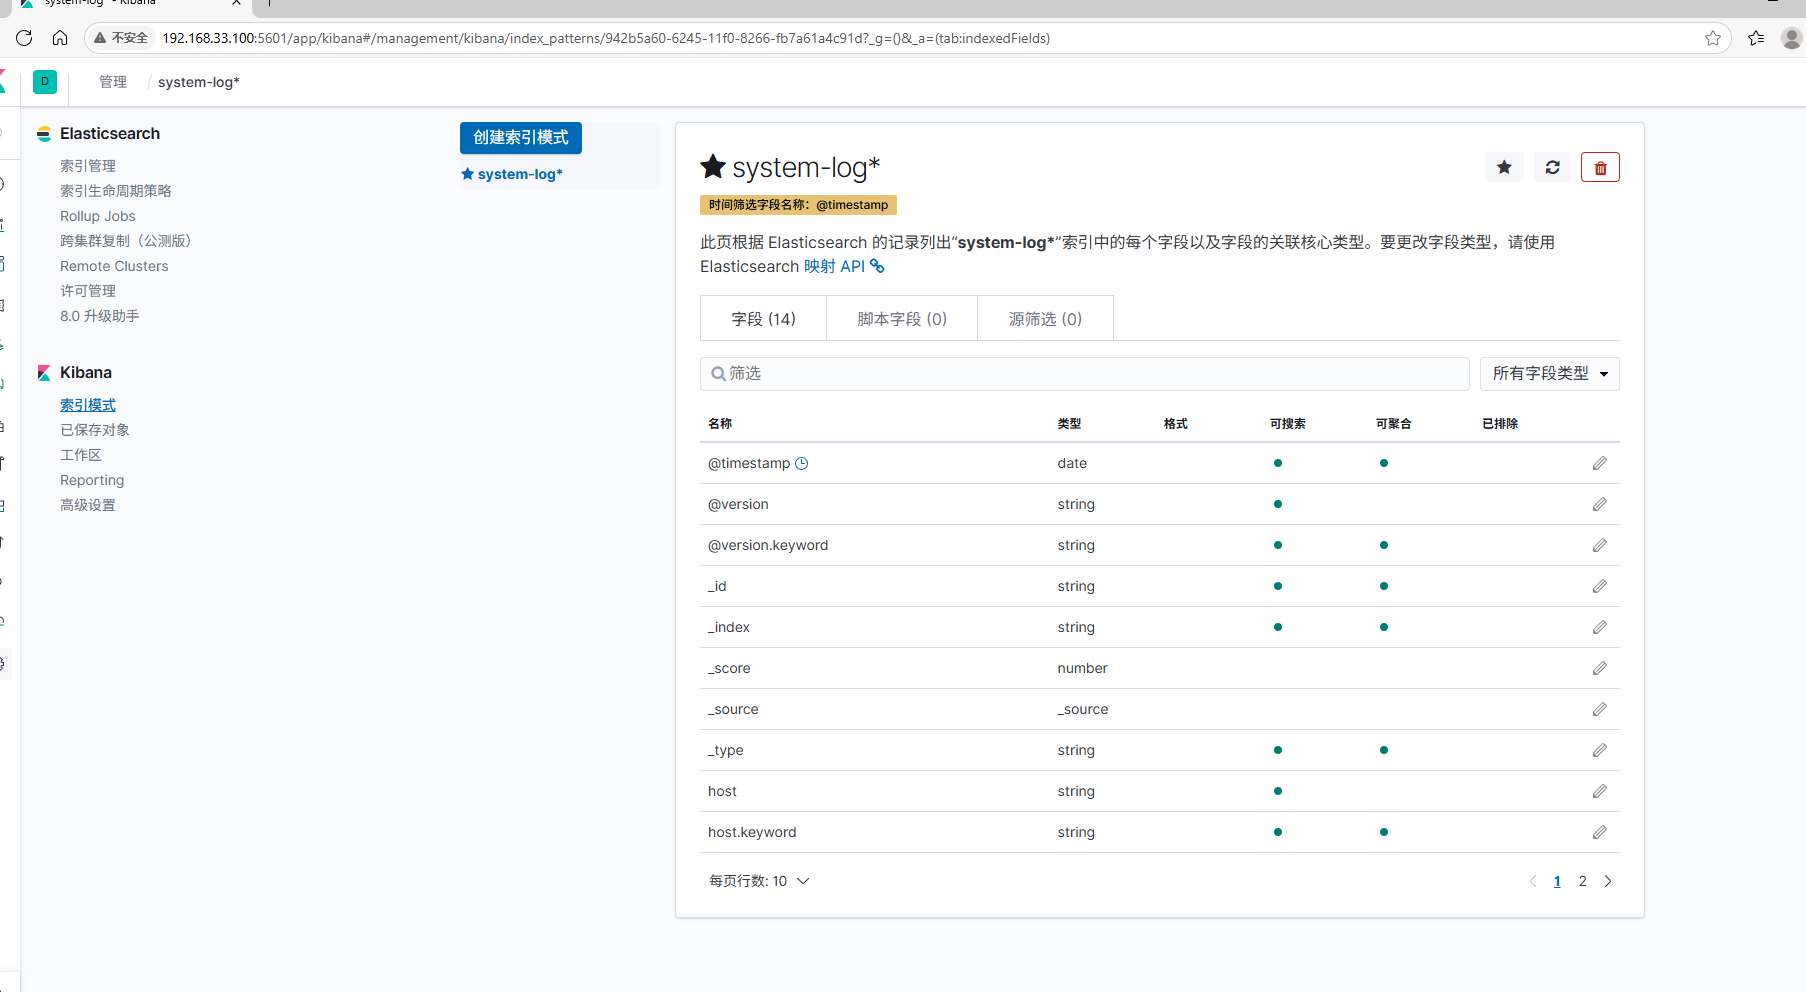
三、訪問
1.網頁訪問本機ip

2.創建索引模式


)
類和類的方法(基礎教程介紹)(Python基礎教程))


![[AI風堇]基于ChatGPT3.5+科大訊飛錄音轉文字API+GPT-SOVITS的模擬情感實時語音對話項目](http://pic.xiahunao.cn/[AI風堇]基于ChatGPT3.5+科大訊飛錄音轉文字API+GPT-SOVITS的模擬情感實時語音對話項目)


)


