溫馨提示:這個黑馬的視頻在b占可以找到,里面有完整的教學過程

然后這個項目有完整的代碼,我已經上傳了,如果審核成功大家就可以看了,但是需要審核多久我也不是很確定
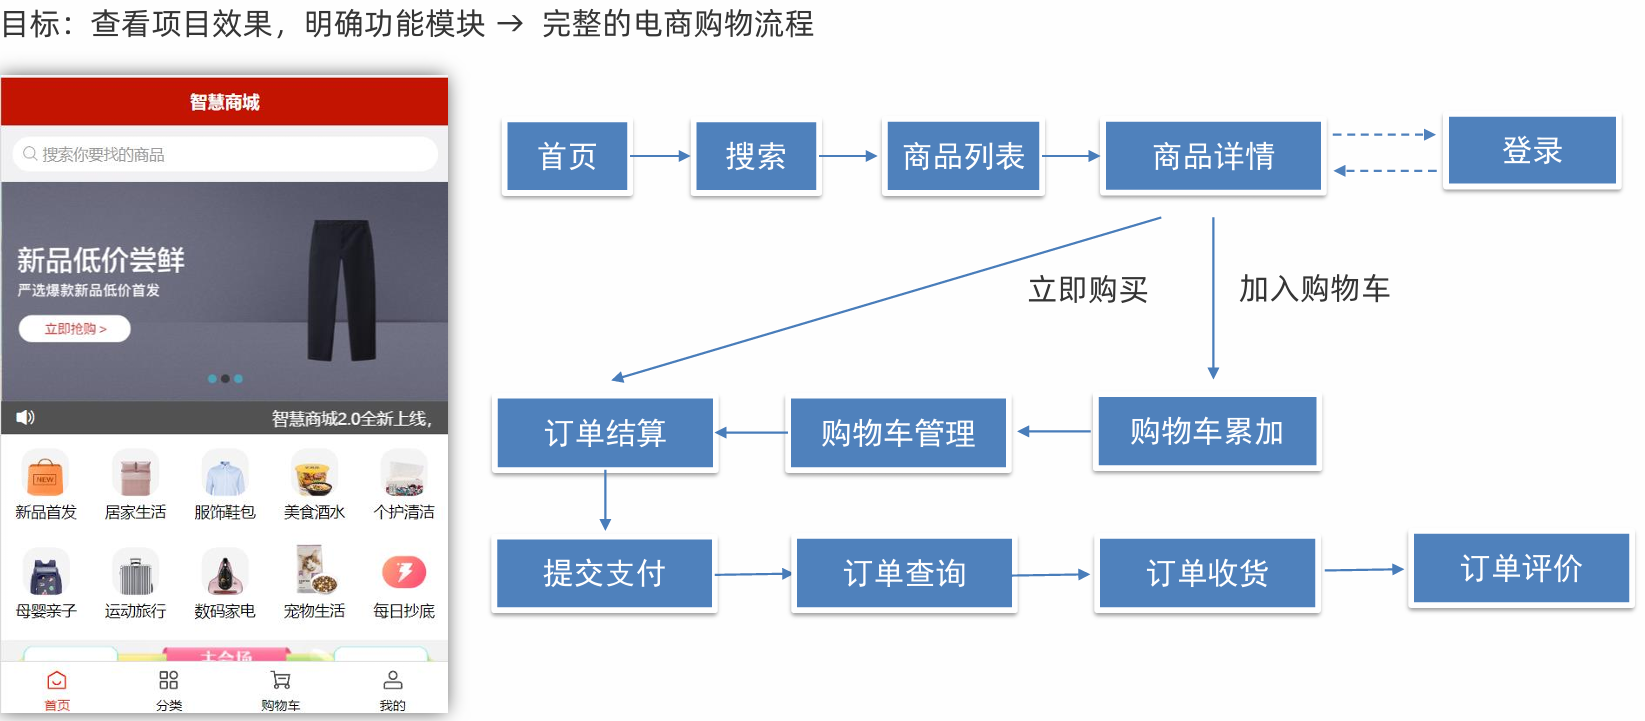
1.項目演示
2. 項目收獲

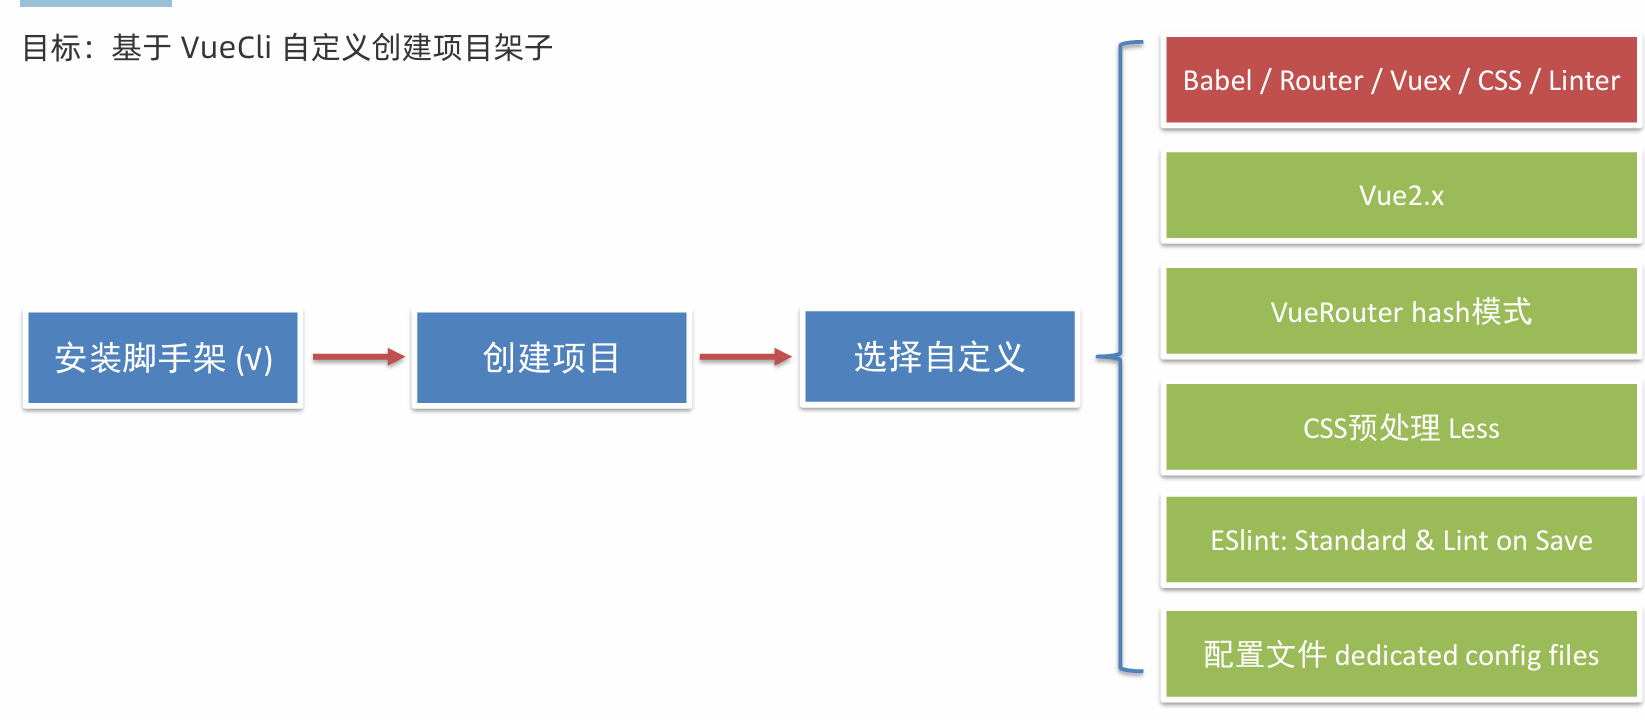
3. 創建項目
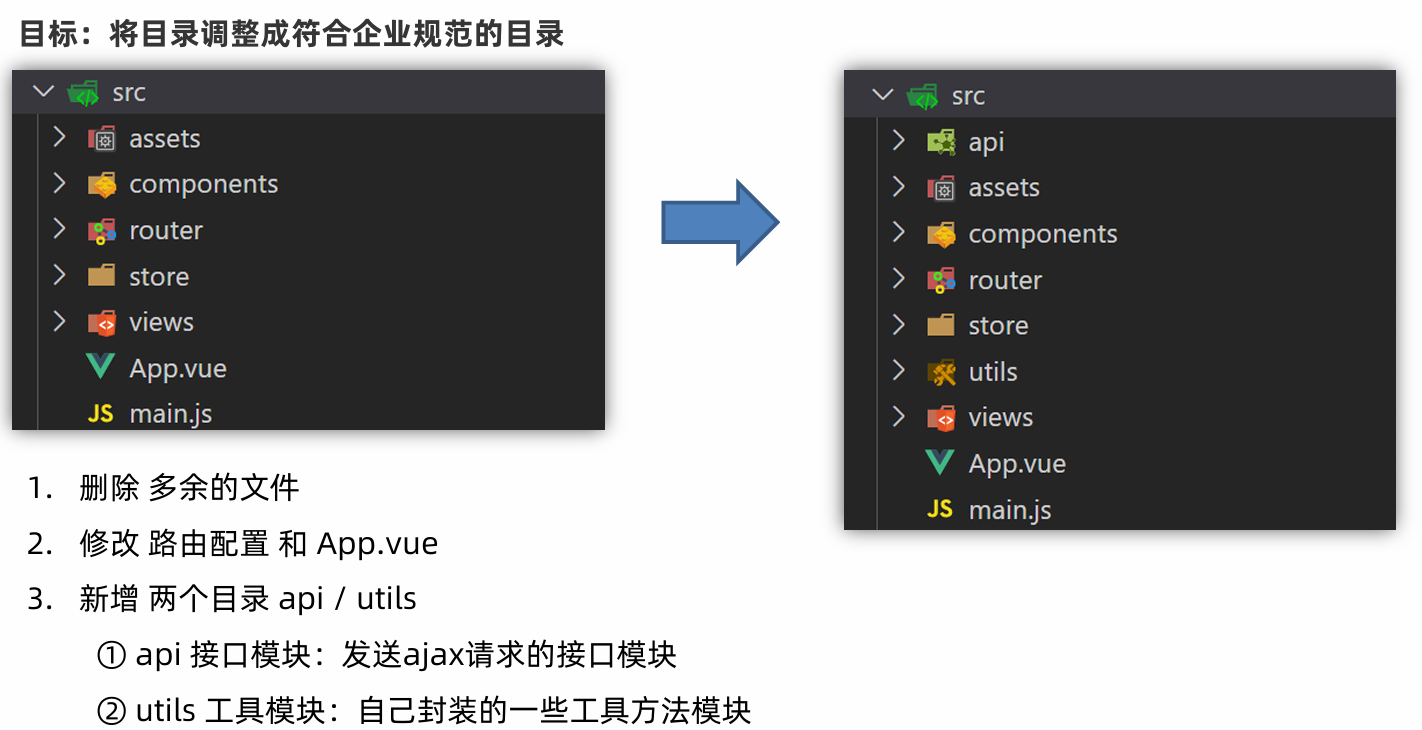
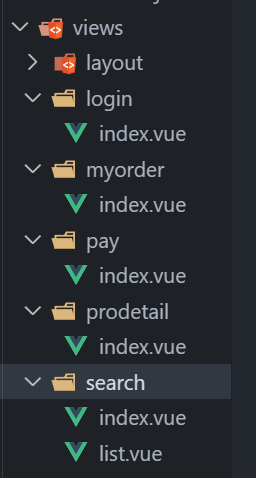
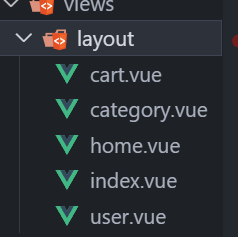
4. 調整初始化目錄
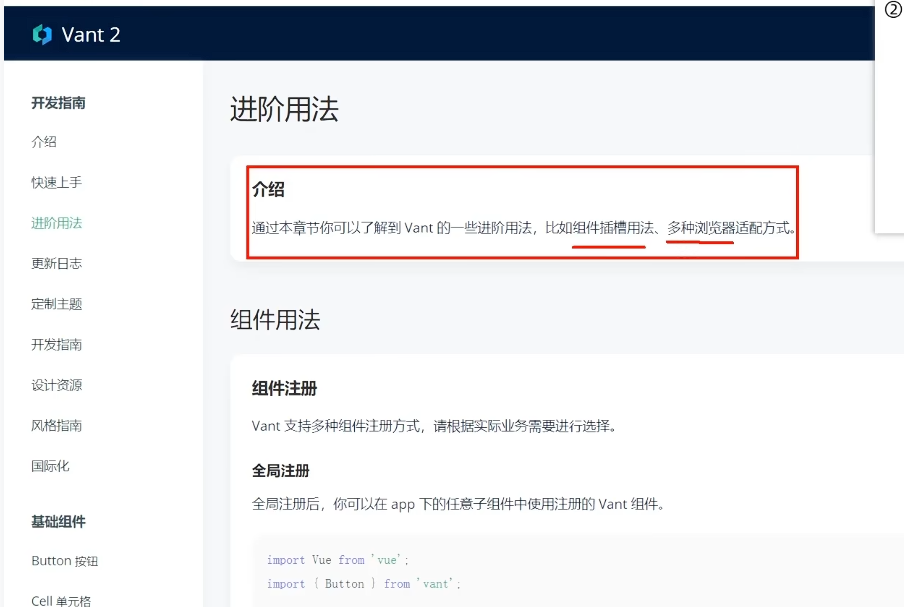
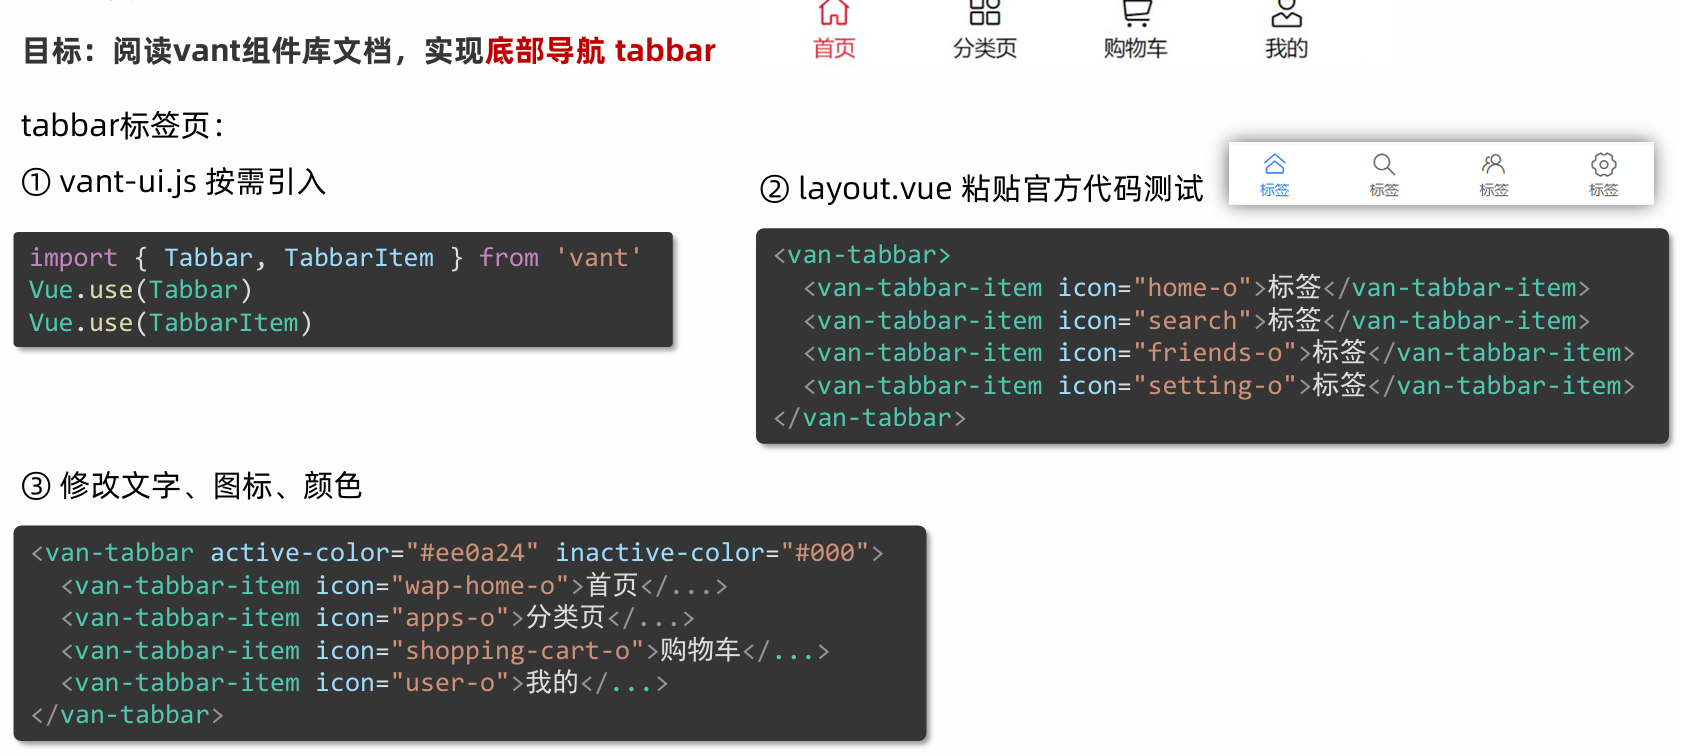
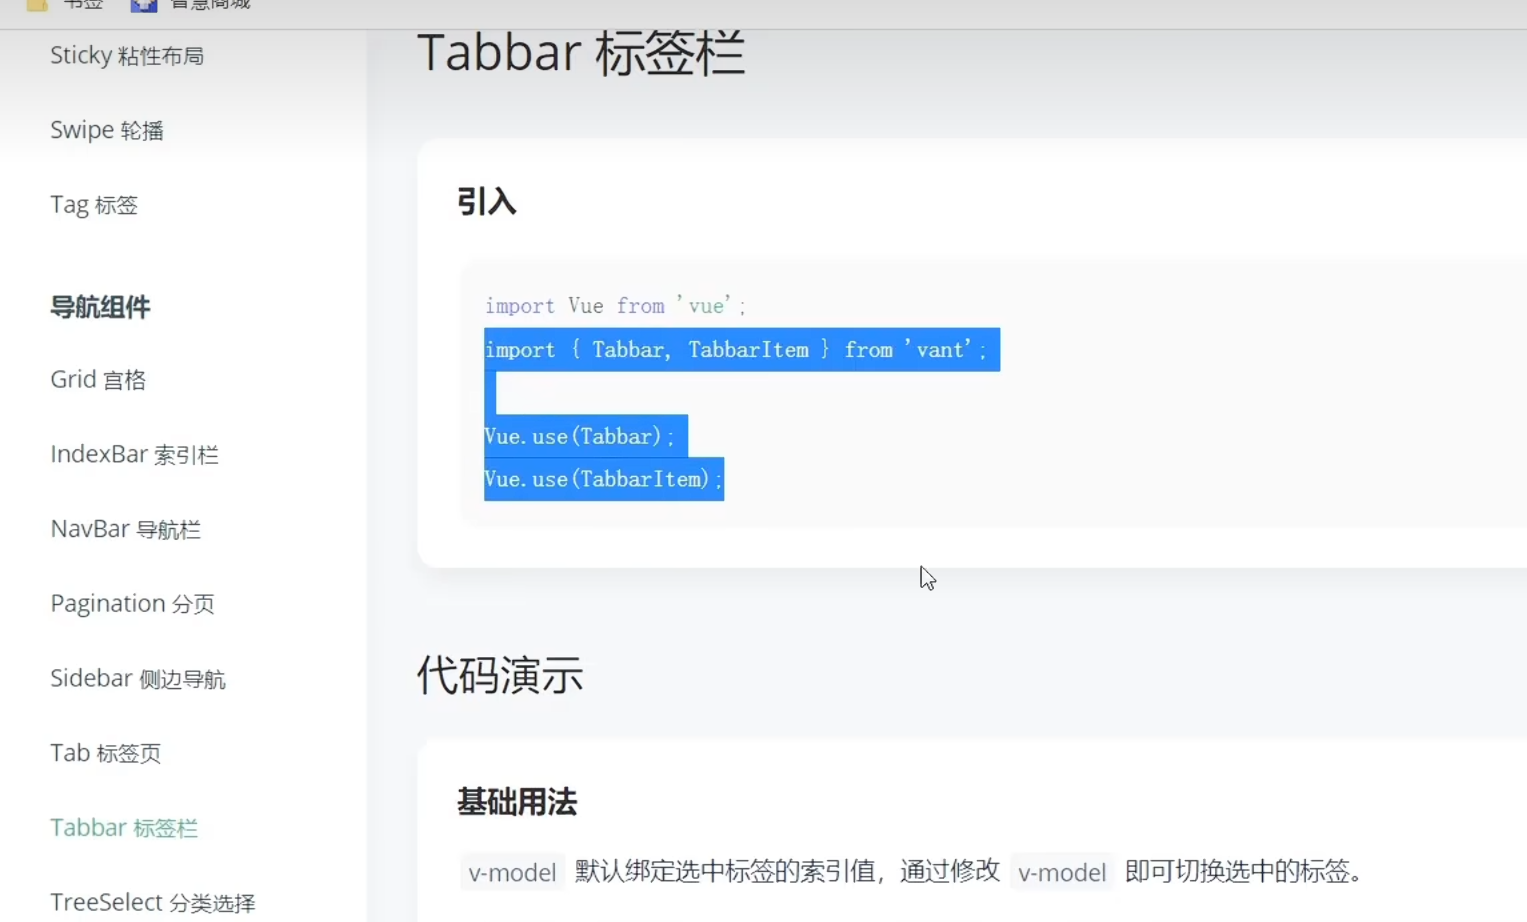
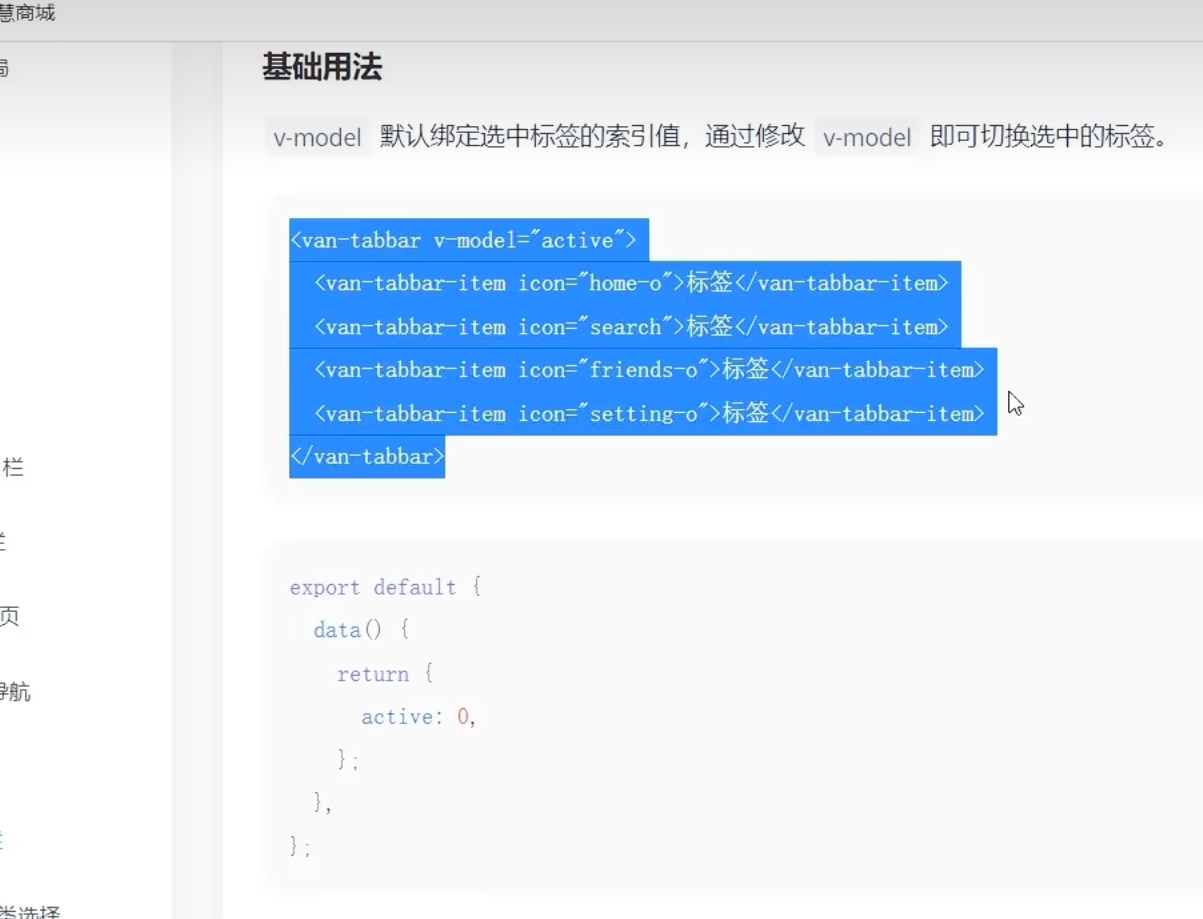
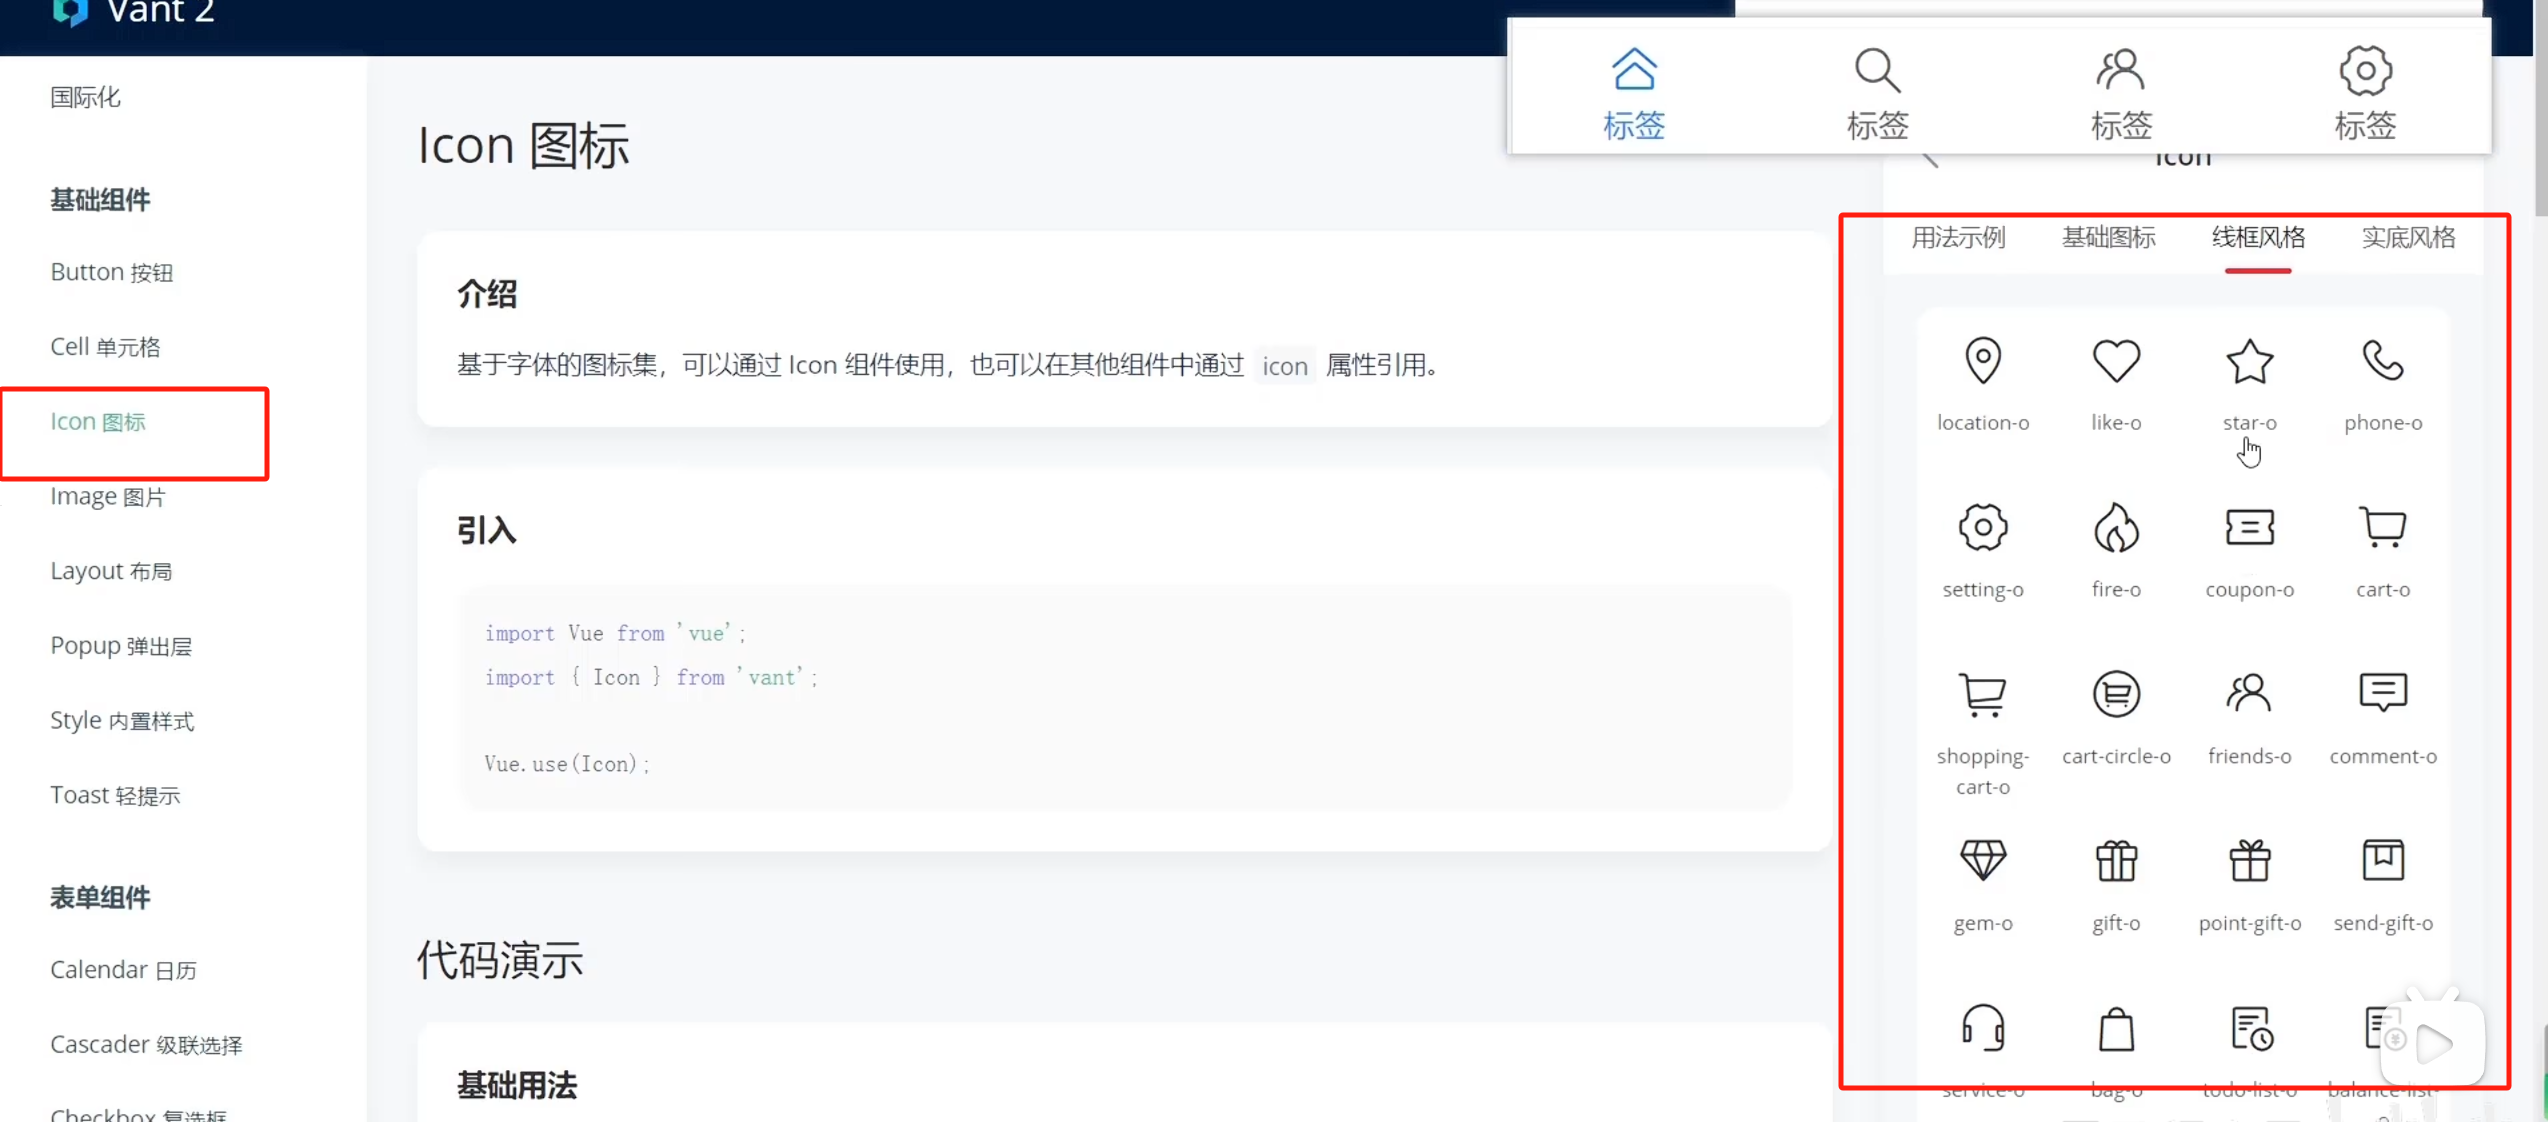
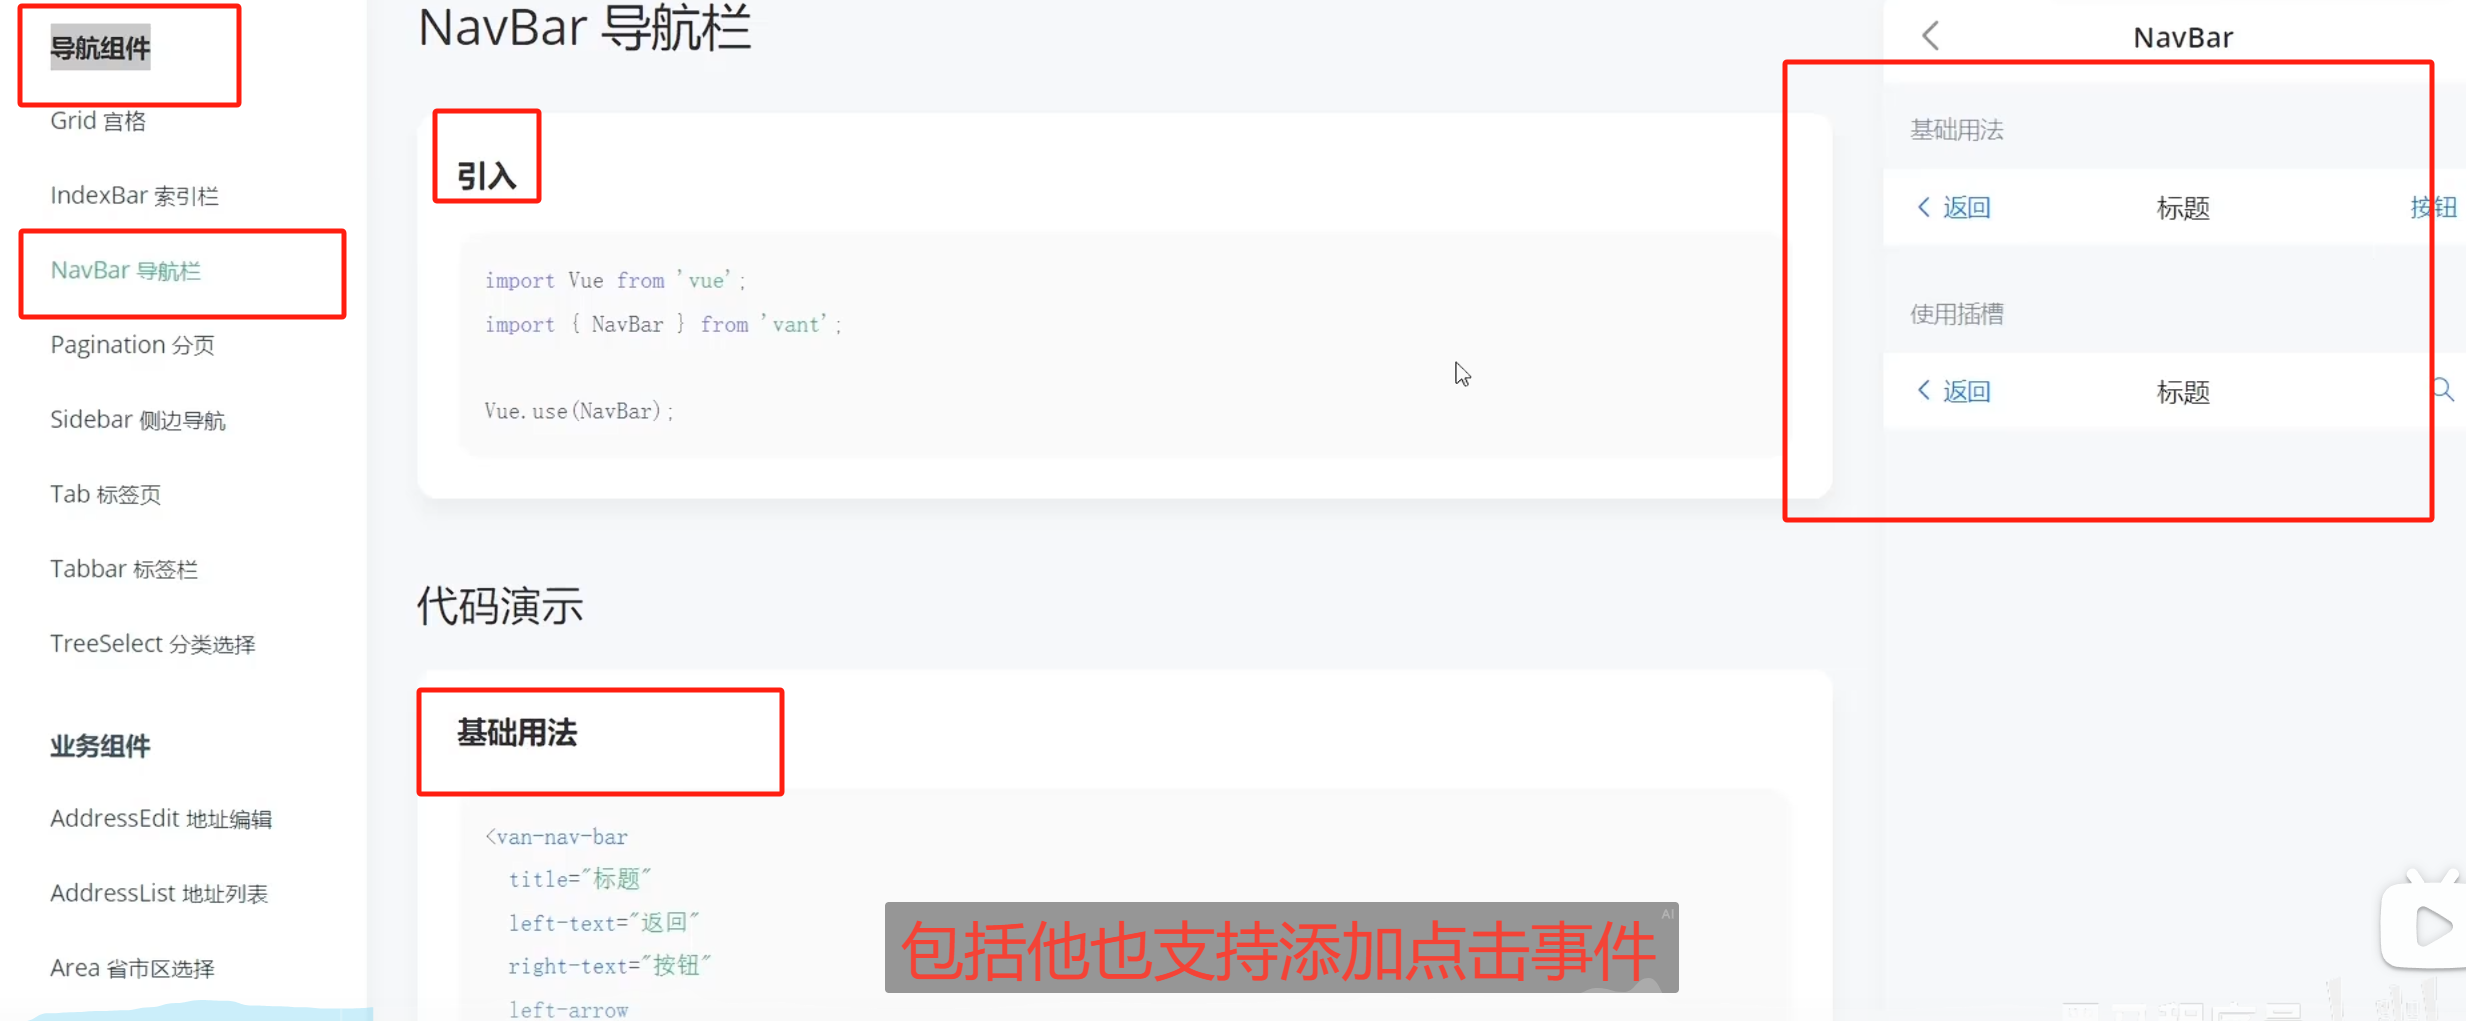
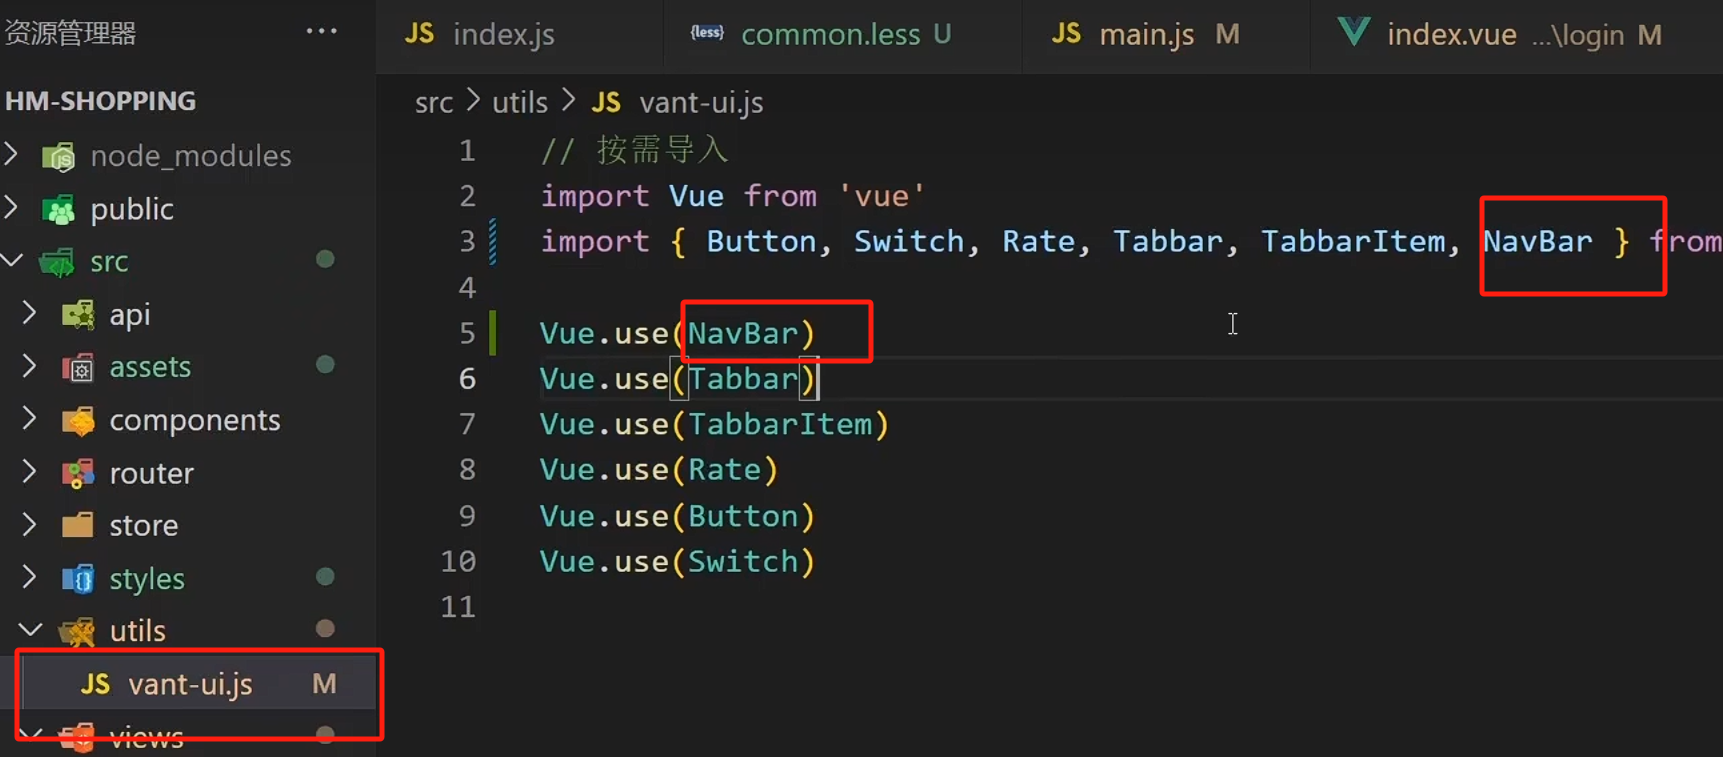
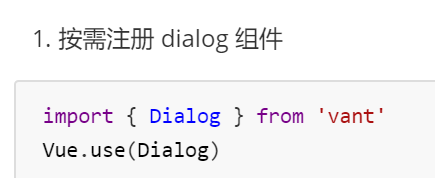
5. vant 組件庫

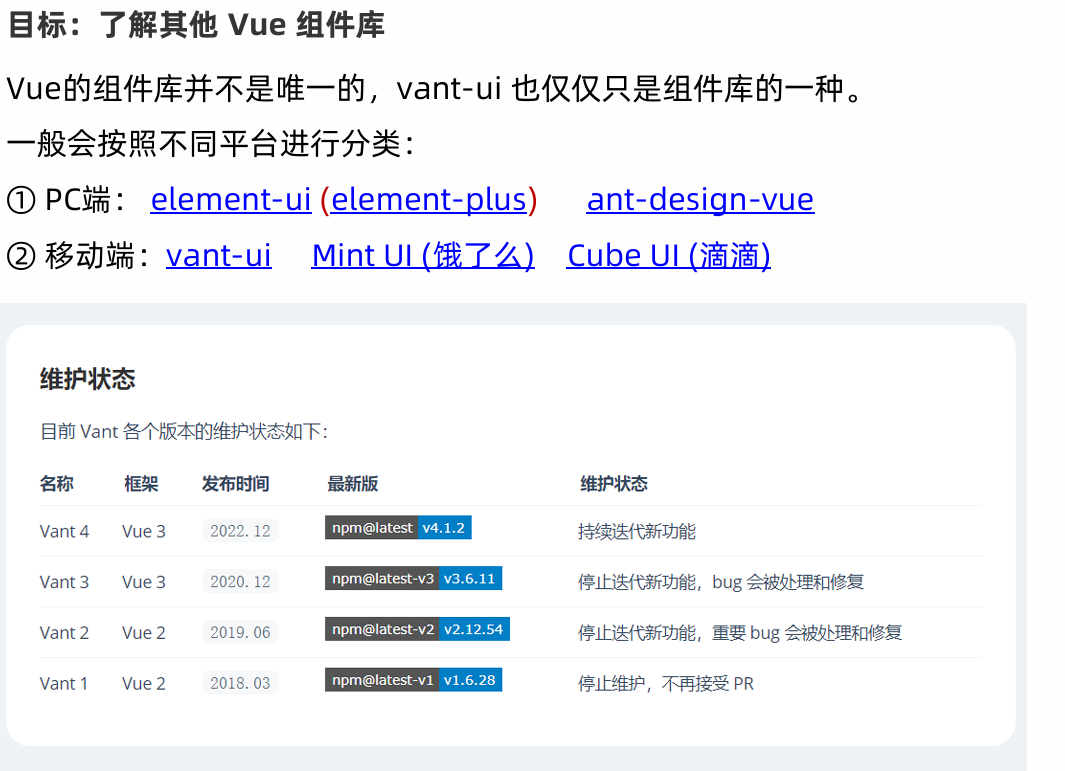
6. 其他 Vue 組件庫
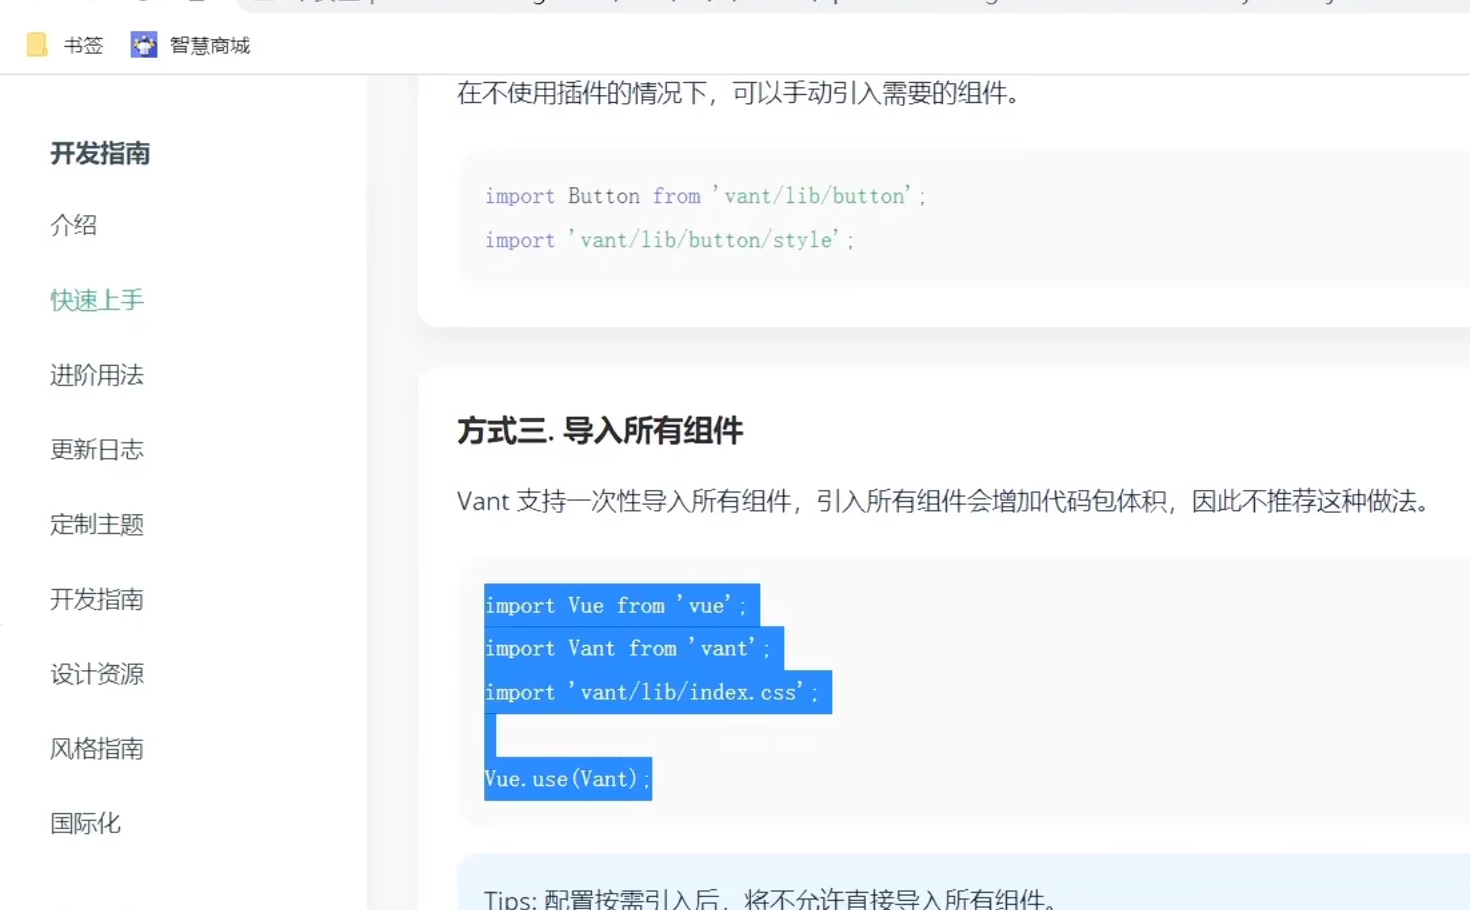
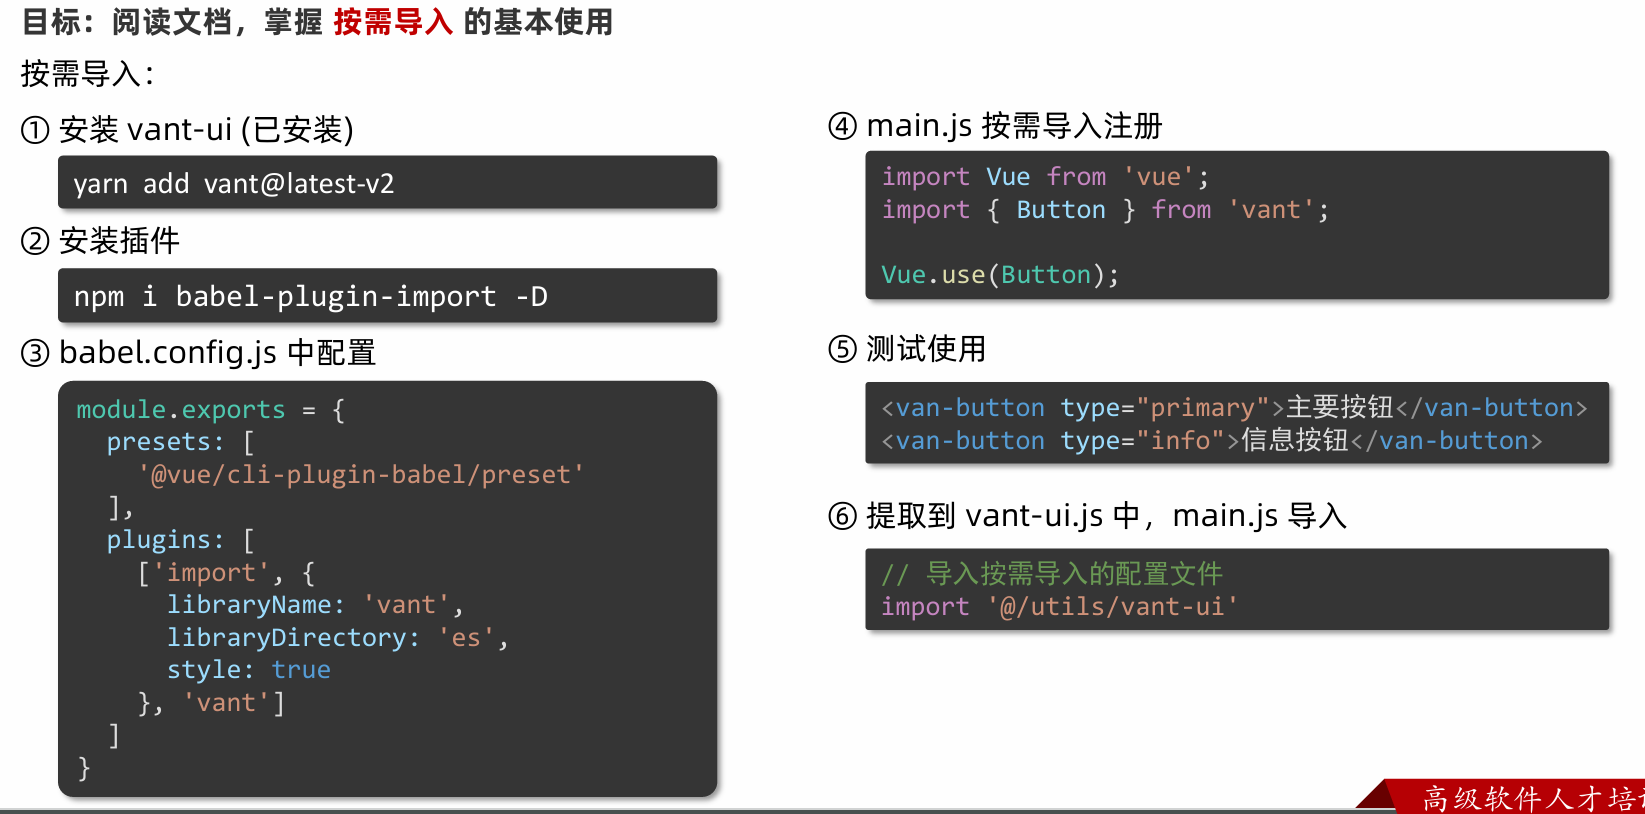
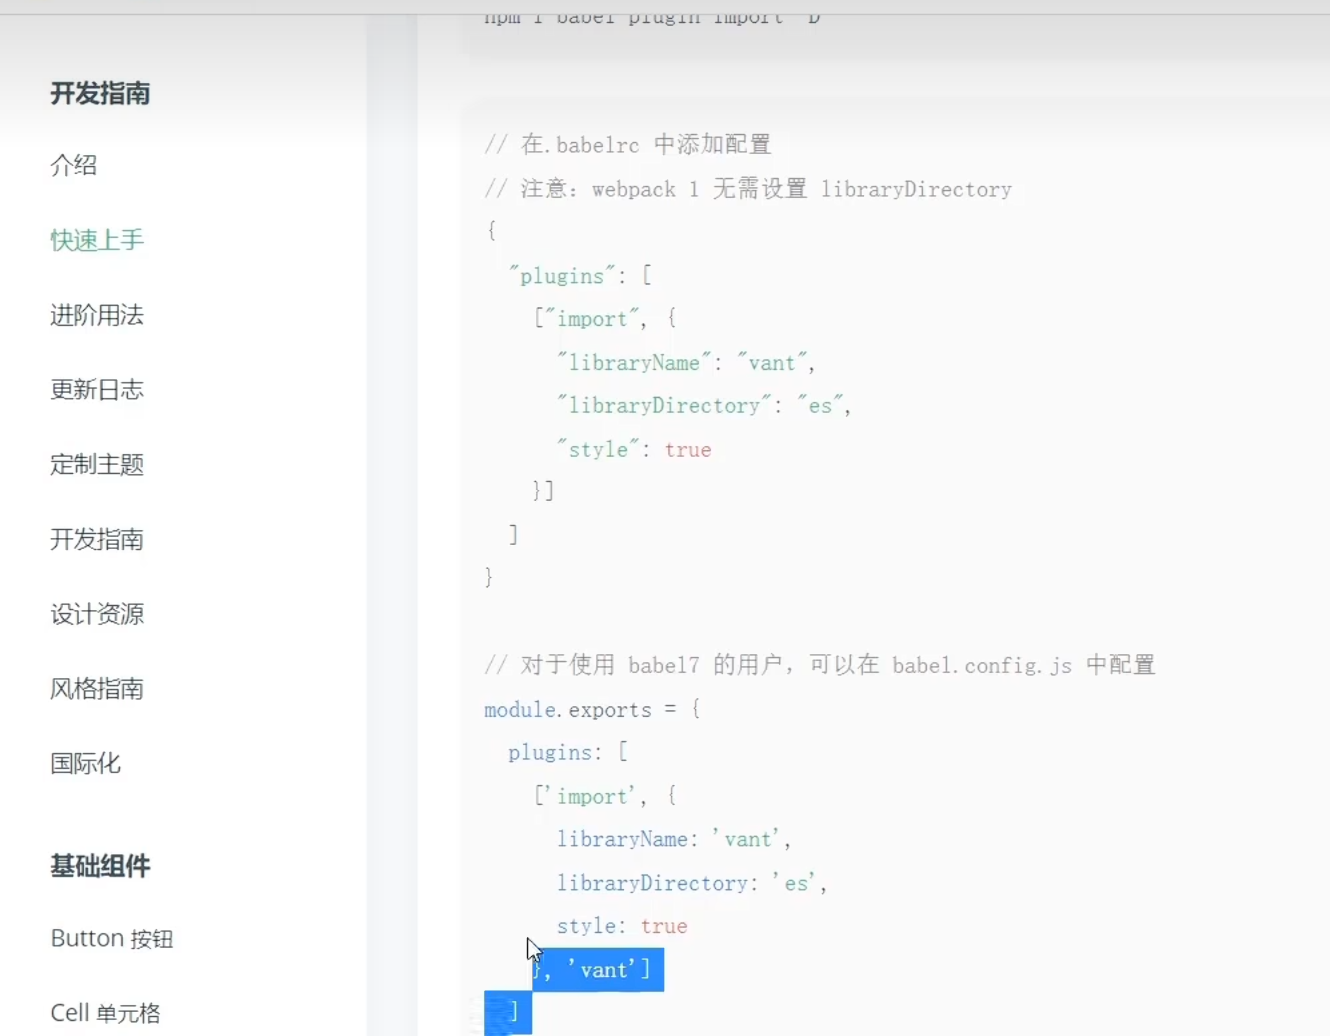
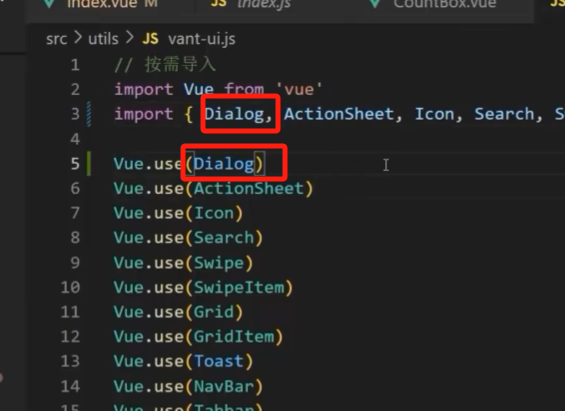
7. vant 全部導入 和 按需導入
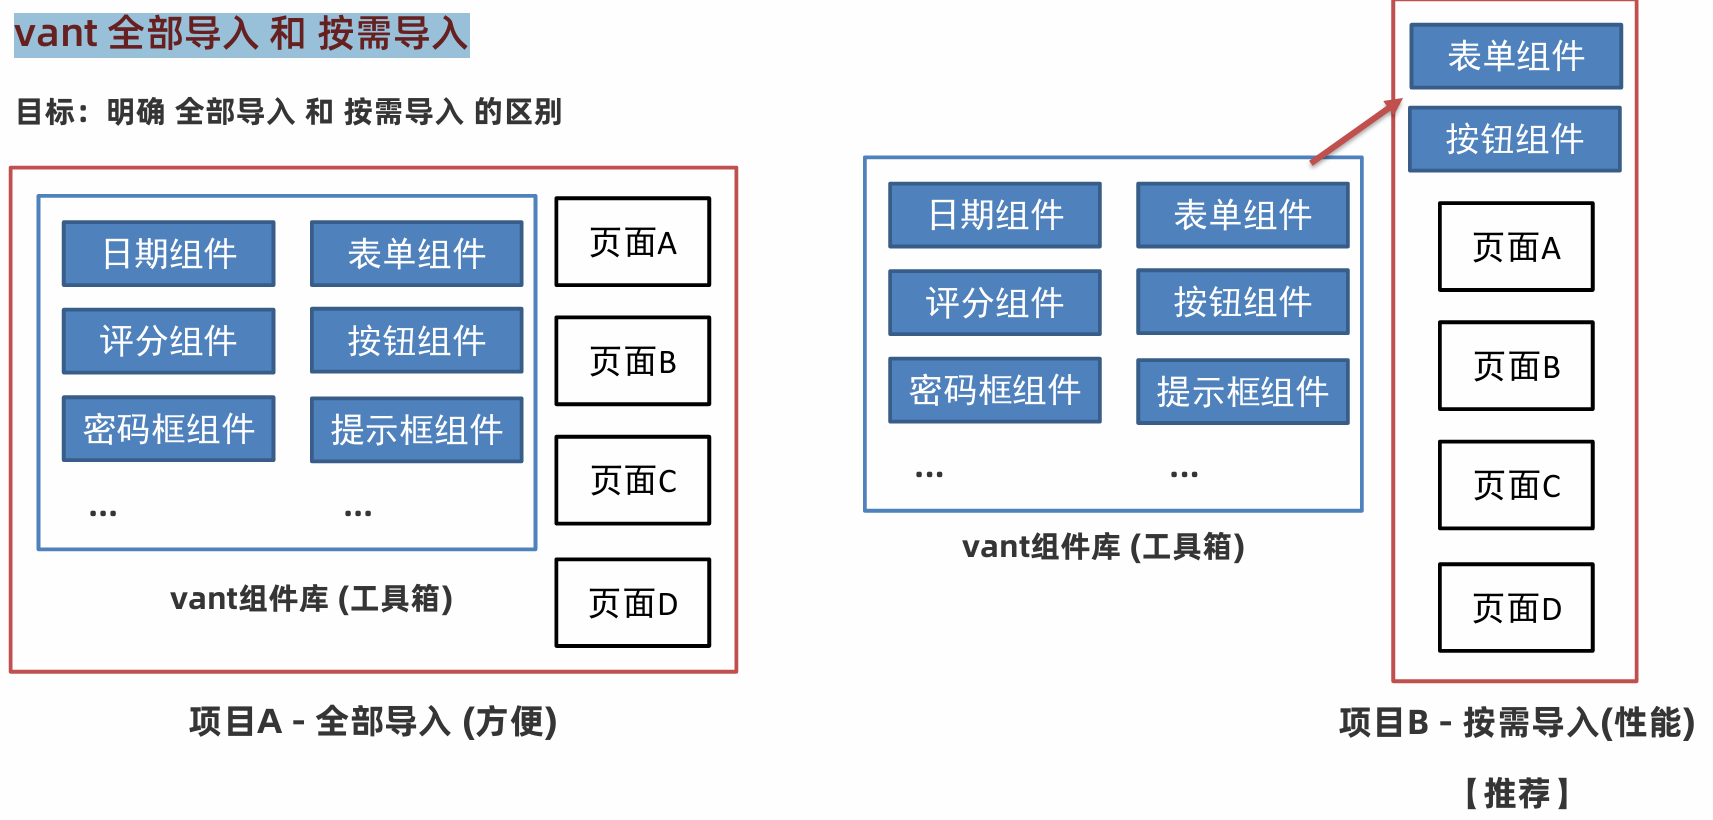
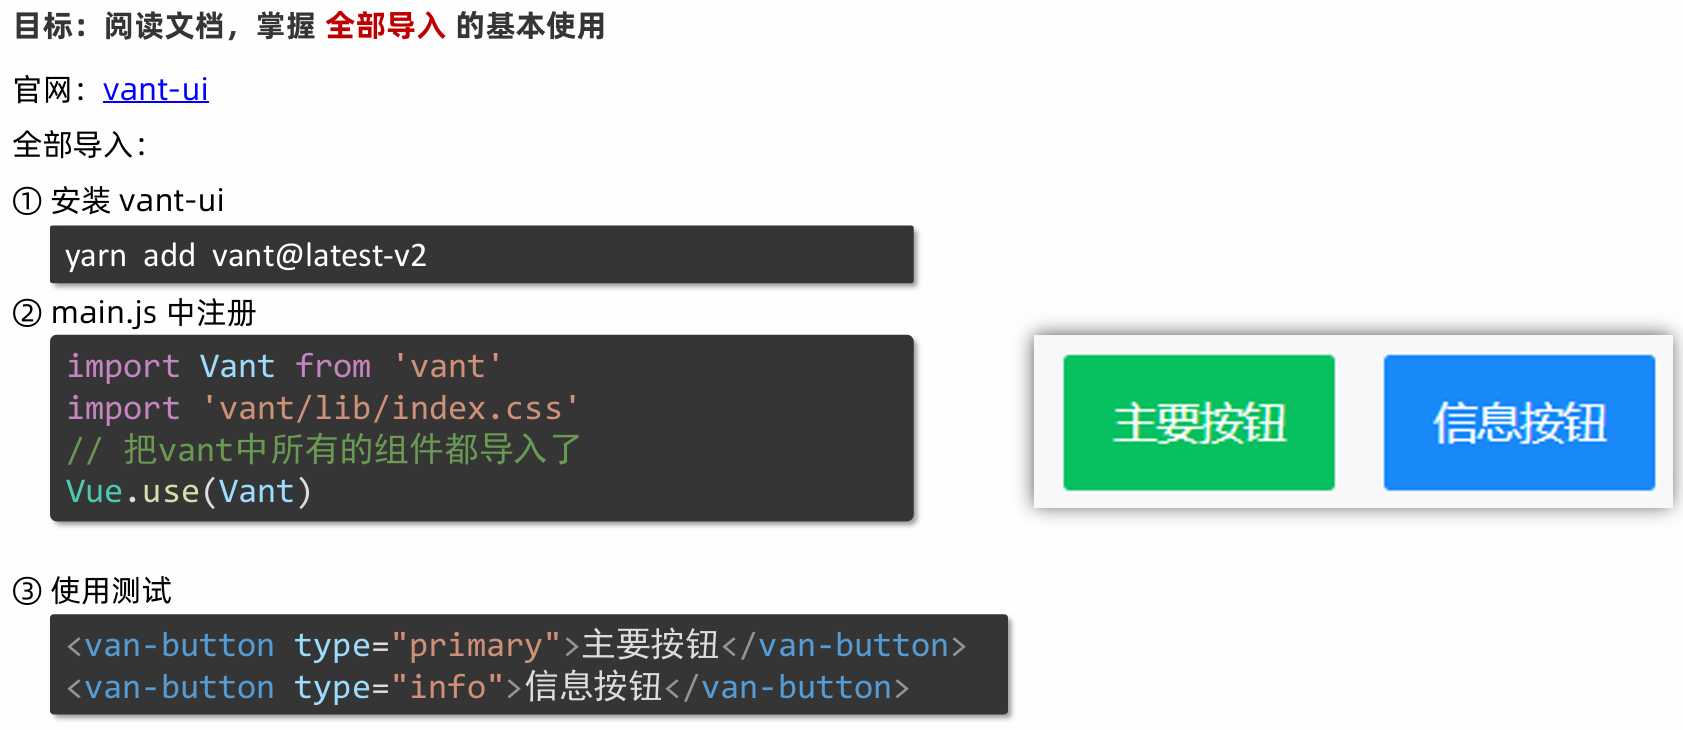
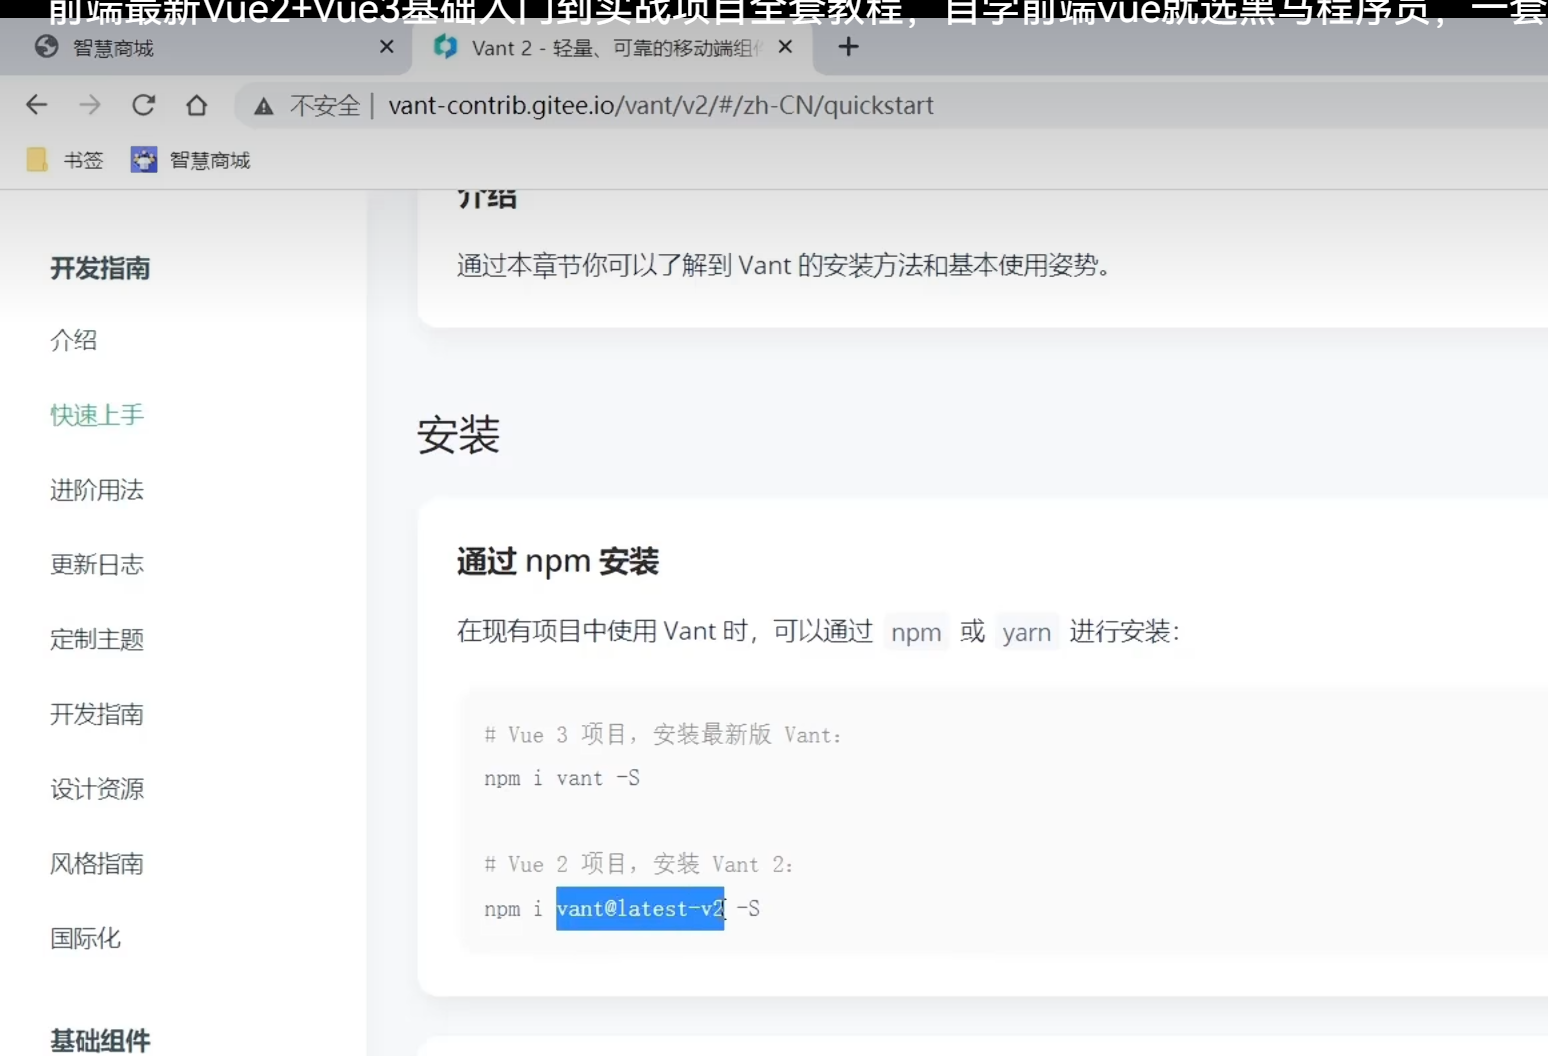
全部導入:
按需導入:
8. 項目中的 vw 適配
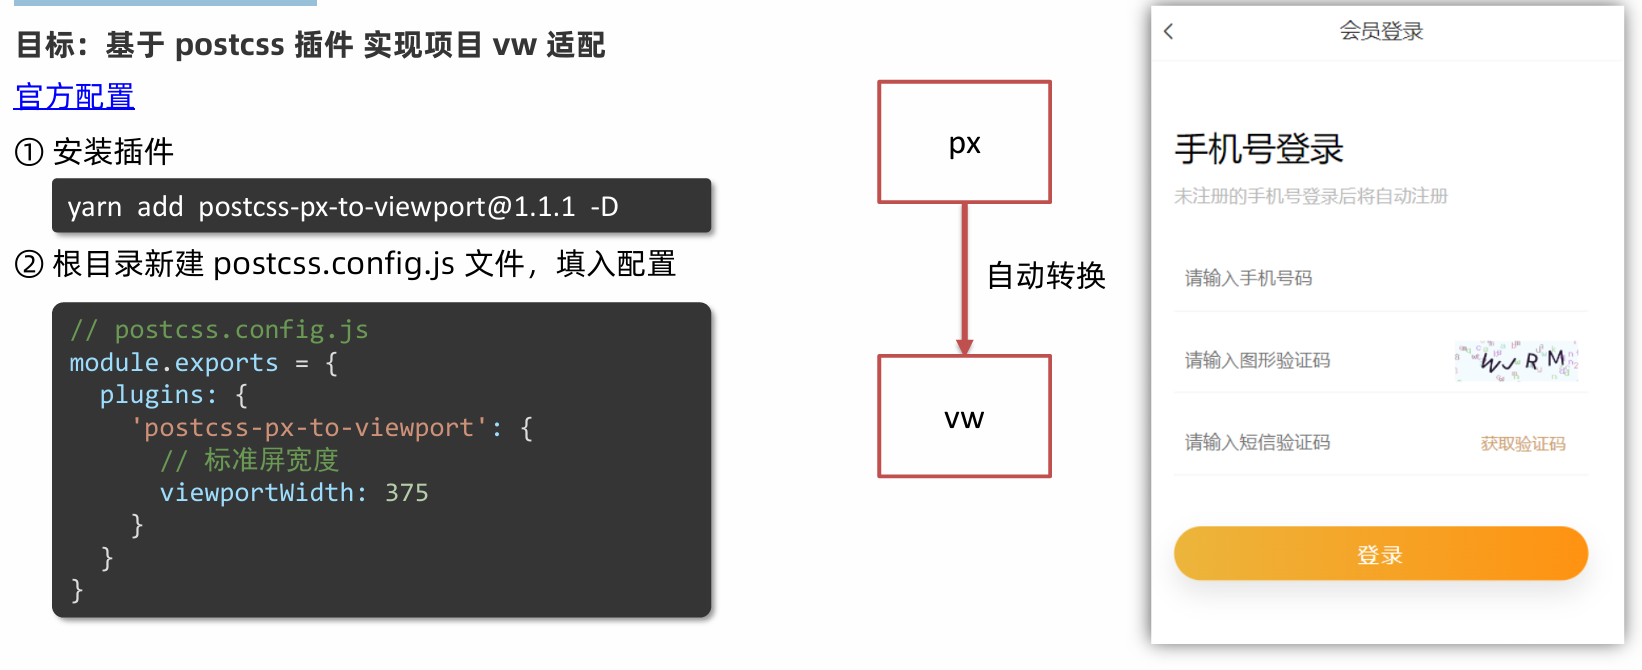
記得執行yarn serve
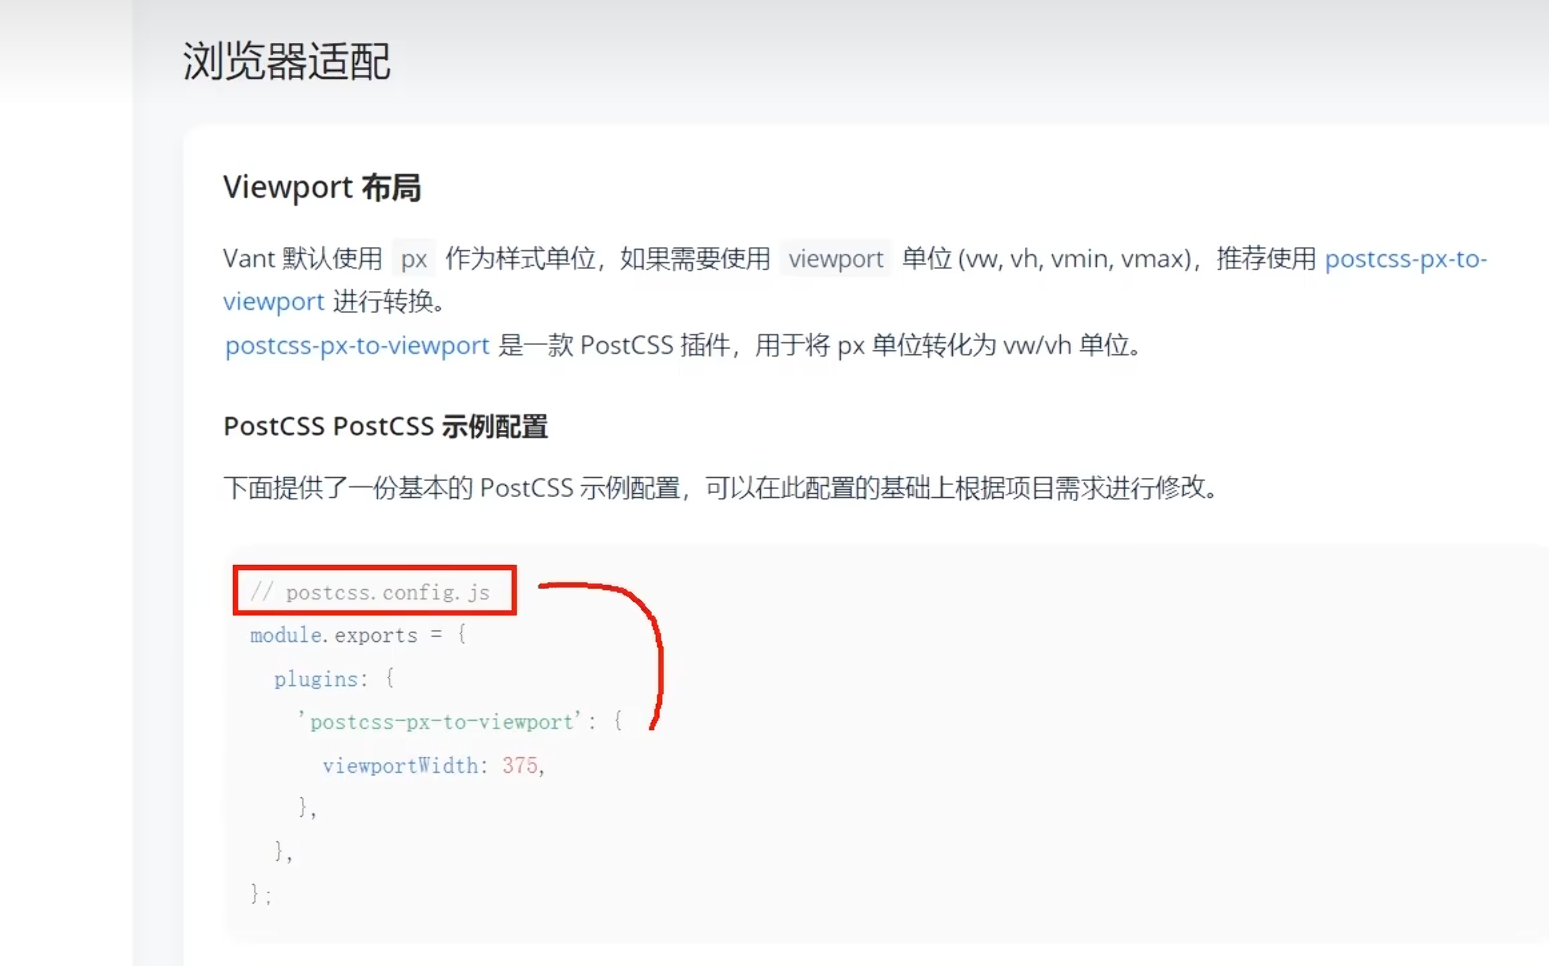
module.exports = {plugins: {'postcss-px-to-viewport': {// vw適配的標準屏的寬度 iphoneX// 設計圖 750,調成1倍 => 適配375標準屏幕// 設計圖 640,調成1倍 => 適配320標準屏幕viewportWidth: 375}}
}
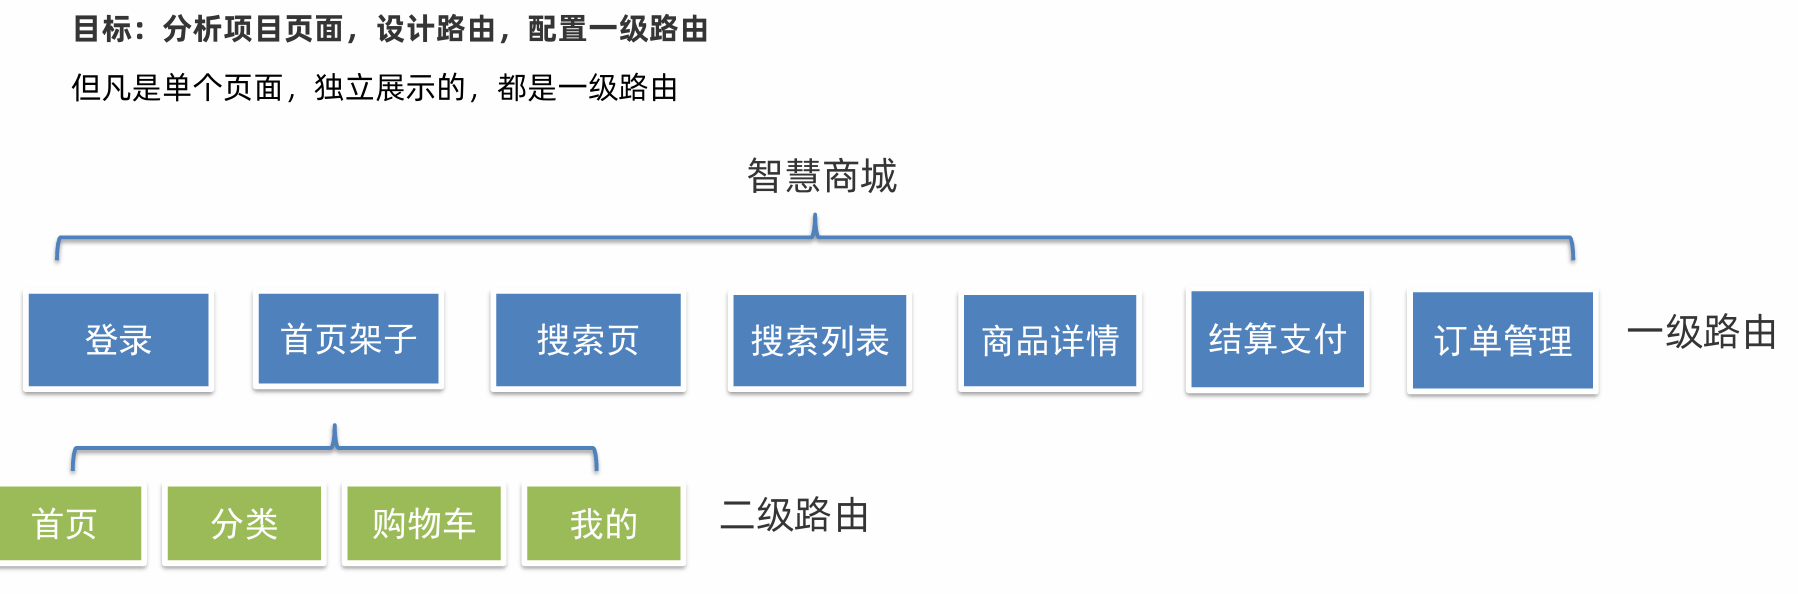
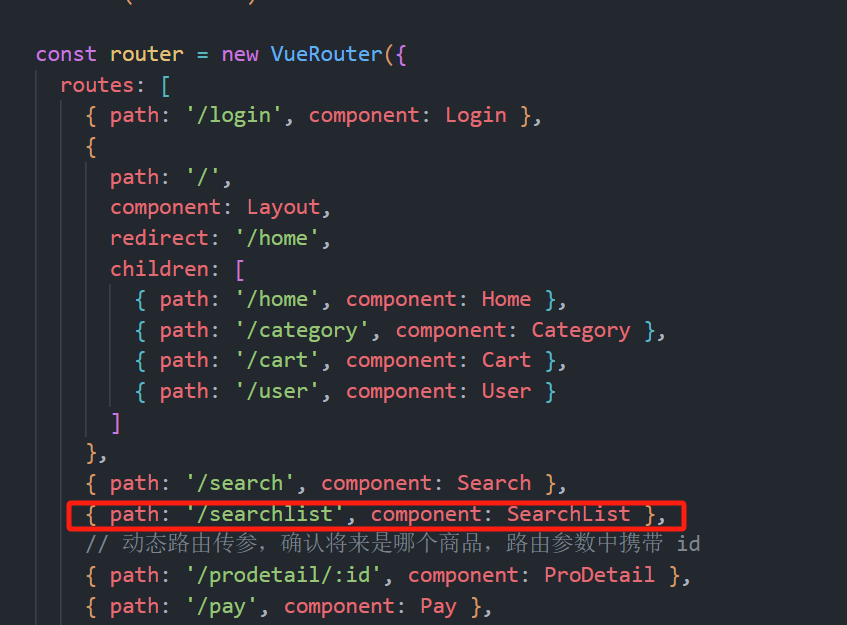
9. 路由設計配置
一:
import Vue from 'vue'
import VueRouter from 'vue-router'
import Login from '@/views/login'
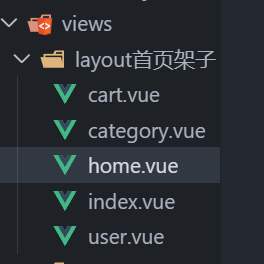
import Layout from '@/views/layout'
import Search from '@/views/search'
import SearchList from '@/views/search/list'
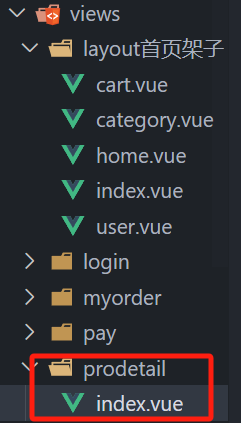
import ProDetail from '@/views/prodetail'
import Pay from '@/views/pay'
import MyOrder from '@/views/myorder'import Home from '@/views/layout/home'
import Category from '@/views/layout/category'
import Cart from '@/views/layout/cart'
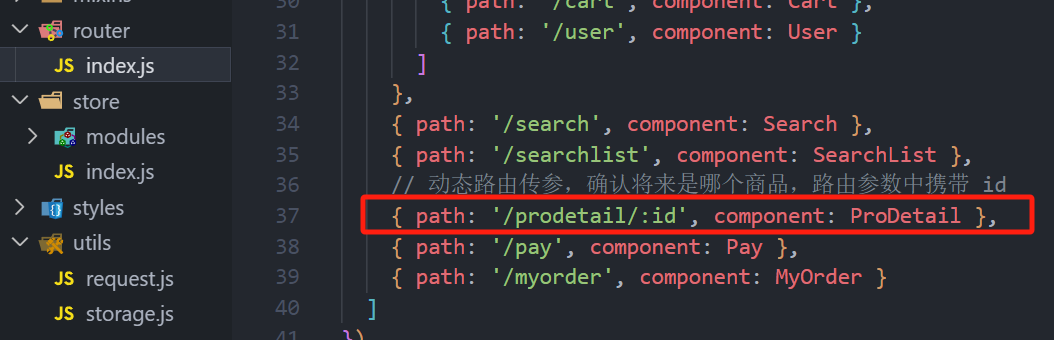
import User from '@/views/layout/user'import store from '@/store'Vue.use(VueRouter)const router = new VueRouter({routes: [{ path: '/login', component: Login },{path: '/',component: Layout,redirect: '/home',children: [{ path: '/home', component: Home },{ path: '/category', component: Category },{ path: '/cart', component: Cart },{ path: '/user', component: User }]},{ path: '/search', component: Search },{ path: '/searchlist', component: SearchList },// 動態路由傳參,確認將來是哪個商品,路由參數中攜帶 id{ path: '/prodetail/:id', component: ProDetail },{ path: '/pay', component: Pay },{ path: '/myorder', component: MyOrder }]
})// 所有的路由在真正被訪問到之前(解析渲染對應組件頁面前),都會先經過全局前置守衛
// 只有全局前置守衛放行了,才會到達對應的頁面// 全局前置導航守衛
// to: 到哪里去,到哪去的完整路由信息對象 (路徑,參數)
// from: 從哪里來,從哪來的完整路由信息對象 (路徑,參數)
// next(): 是否放行
// (1) next() 直接放行,放行到to要去的路徑
// (2) next(路徑) 進行攔截,攔截到next里面配置的路徑// 定義一個數組,專門用戶存放所有需要權限訪問的頁面
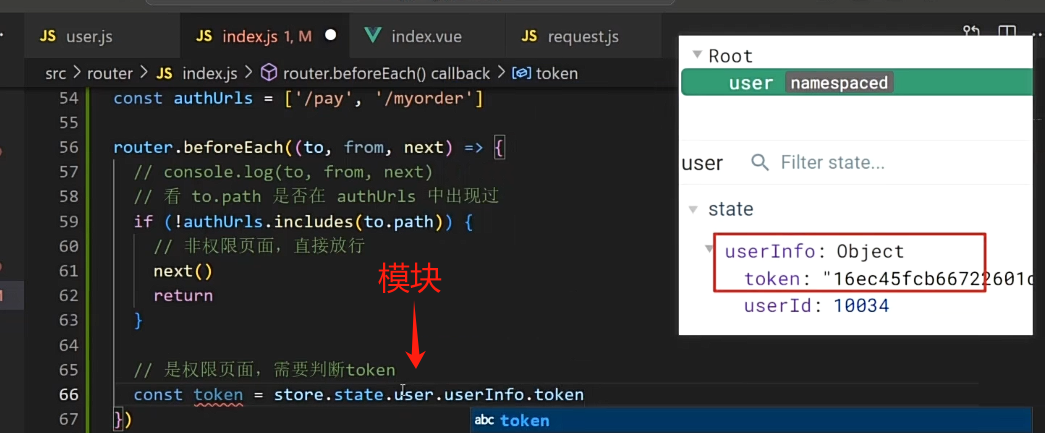
const authUrls = ['/pay', '/myorder']router.beforeEach((to, from, next) => {// console.log(to, from, next)// 看 to.path 是否在 authUrls 中出現過if (!authUrls.includes(to.path)) {// 非權限頁面,直接放行next()return}// 是權限頁面,需要判斷tokenconst token = store.getters.tokenif (token) {next()} else {next('/login')}
})export default router
二:
引入:
引用:

三
import Vue from 'vue'
import VueRouter from 'vue-router'
import Login from '@/views/login'
import Layout from '@/views/layout'
import Search from '@/views/search'
import SearchList from '@/views/search/list'
import ProDetail from '@/views/prodetail'
import Pay from '@/views/pay'
import MyOrder from '@/views/myorder'import Home from '@/views/layout/home'
import Category from '@/views/layout/category'
import Cart from '@/views/layout/cart'
import User from '@/views/layout/user'import store from '@/store'Vue.use(VueRouter)const router = new VueRouter({routes: [{ path: '/login', component: Login },{path: '/',component: Layout,//重定向redirect: '/home',children: [{ path: '/home', component: Home },{ path: '/category', component: Category },{ path: '/cart', component: Cart },{ path: '/user', component: User }]},{ path: '/search', component: Search },{ path: '/searchlist', component: SearchList },// 動態路由傳參,確認將來是哪個商品,路由參數中攜帶 id{ path: '/prodetail/:id', component: ProDetail },{ path: '/pay', component: Pay },{ path: '/myorder', component: MyOrder }]
})// 所有的路由在真正被訪問到之前(解析渲染對應組件頁面前),都會先經過全局前置守衛
// 只有全局前置守衛放行了,才會到達對應的頁面// 全局前置導航守衛
// to:   到哪里去,到哪去的完整路由信息對象 (路徑,參數)
// from: 從哪里來,從哪來的完整路由信息對象 (路徑,參數)
// next(): 是否放行
// (1) next()     直接放行,放行到to要去的路徑
// (2) next(路徑)  進行攔截,攔截到next里面配置的路徑// 定義一個數組,專門用戶存放所有需要權限訪問的頁面
const authUrls = ['/pay', '/myorder']router.beforeEach((to, from, next) => {// console.log(to, from, next)// 看 to.path 是否在 authUrls 中出現過if (!authUrls.includes(to.path)) {// 非權限頁面,直接放行next()return}// 是權限頁面,需要判斷tokenconst token = store.getters.tokenif (token) {next()} else {next('/login')}
})export default router
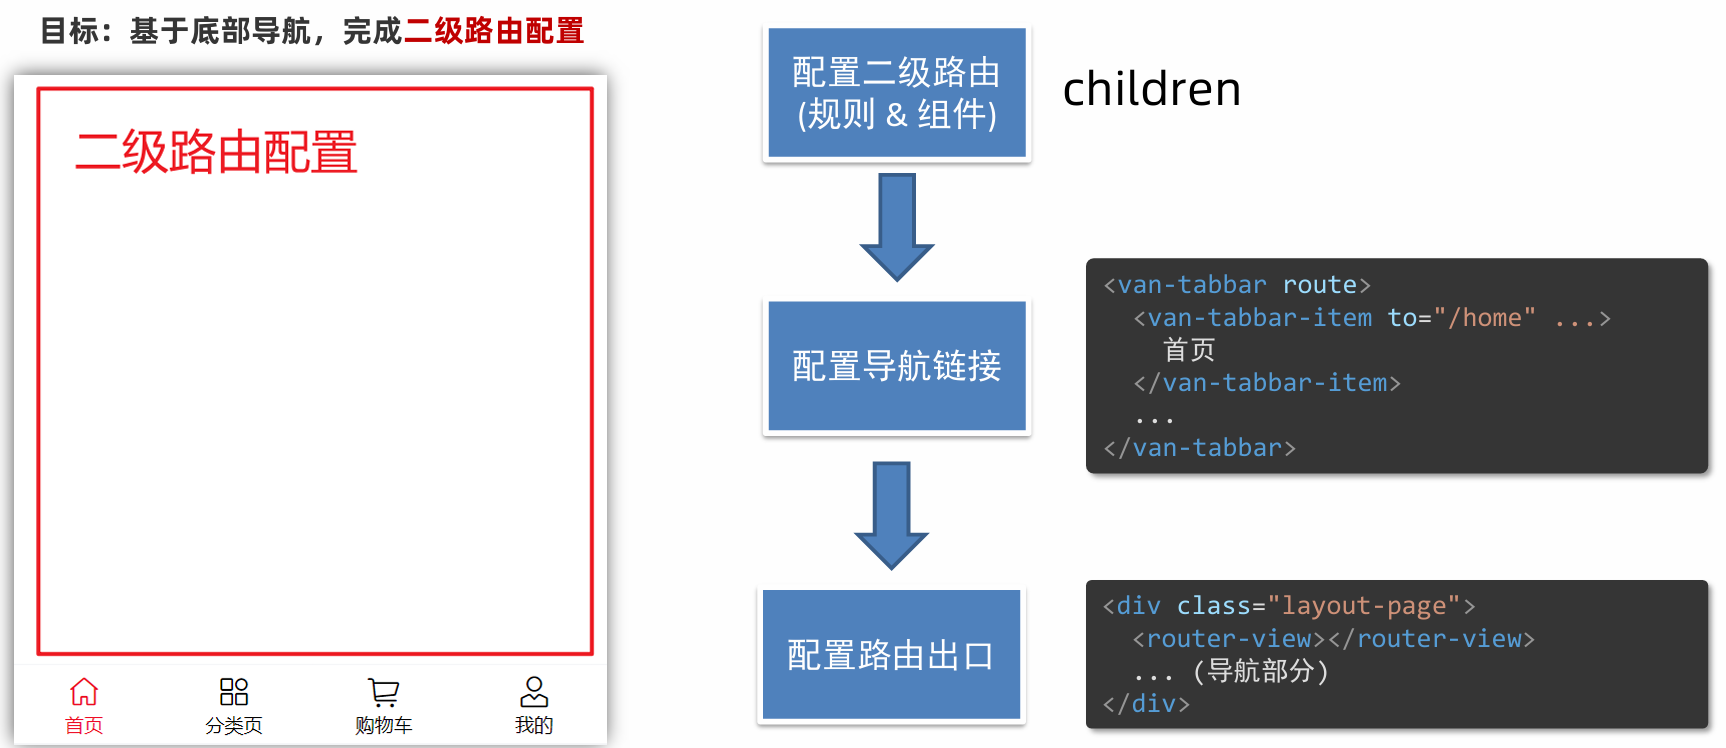
<template><div><!-- 二級路由出口:二級組件展示的位置 --><router-view></router-view><van-tabbar route active-color="#ee0a24" inactive-color="#000"><van-tabbar-item to="/home" icon="wap-home-o">首頁</van-tabbar-item><van-tabbar-item to="/category" icon="apps-o">分類頁</van-tabbar-item><van-tabbar-item to="/cart" icon="shopping-cart-o">購物車</van-tabbar-item><van-tabbar-item to="/user" icon="user-o">我的</van-tabbar-item></van-tabbar></div>
</template><script>
export default {name: 'LayoutIndex'
}
</script><style></style>
10. 登錄頁靜態布局
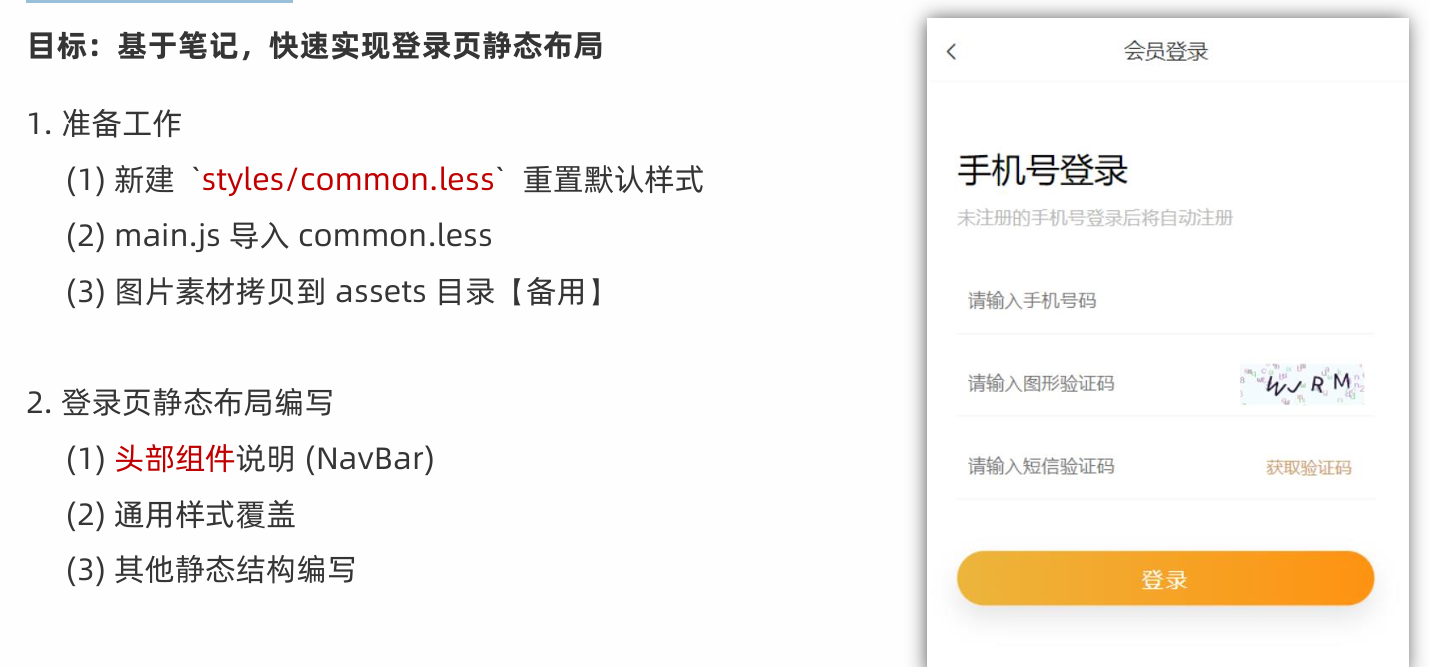
10.1準備工作
// 重置默認樣式
* {margin: 0;padding: 0;box-sizing: border-box;
}// 文字溢出省略號
.text-ellipsis-2 {overflow: hidden;-webkit-line-clamp: 2;text-overflow: ellipsis;display: -webkit-box;-webkit-box-orient: vertical;
}
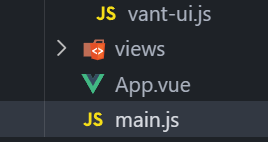
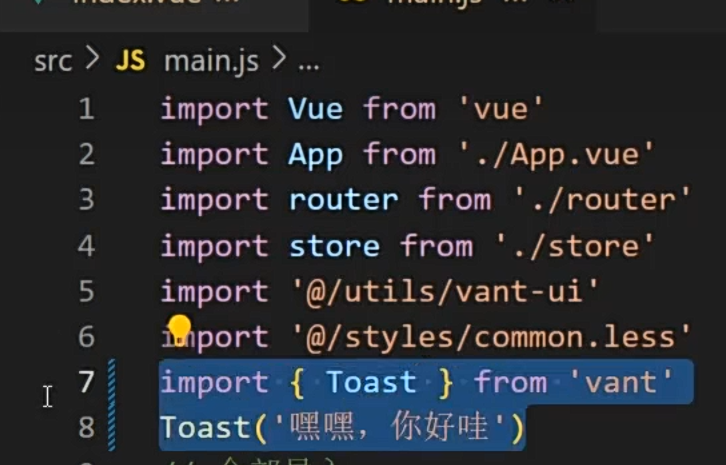
import Vue from 'vue'
import App from './App.vue'
import router from './router'
import store from './store'
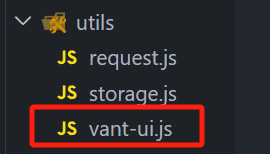
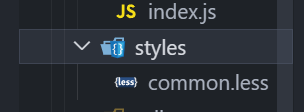
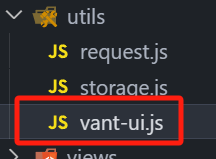
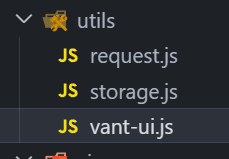
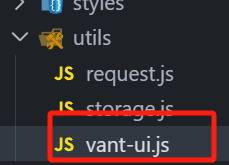
import '@/utils/vant-ui'
import '@/styles/common.less'// import { Toast } from 'vant'
// Toast('嘿嘿,你好哇')
// 全部導入
// import Vant from 'vant'
// import 'vant/lib/index.css'
// // 插件安裝初始化:內部會將所有的vant所有組件進行導入注冊
// Vue.use(Vant)Vue.config.productionTip = falsenew Vue({router,store,render: h => h(App)
}).$mount('#app')
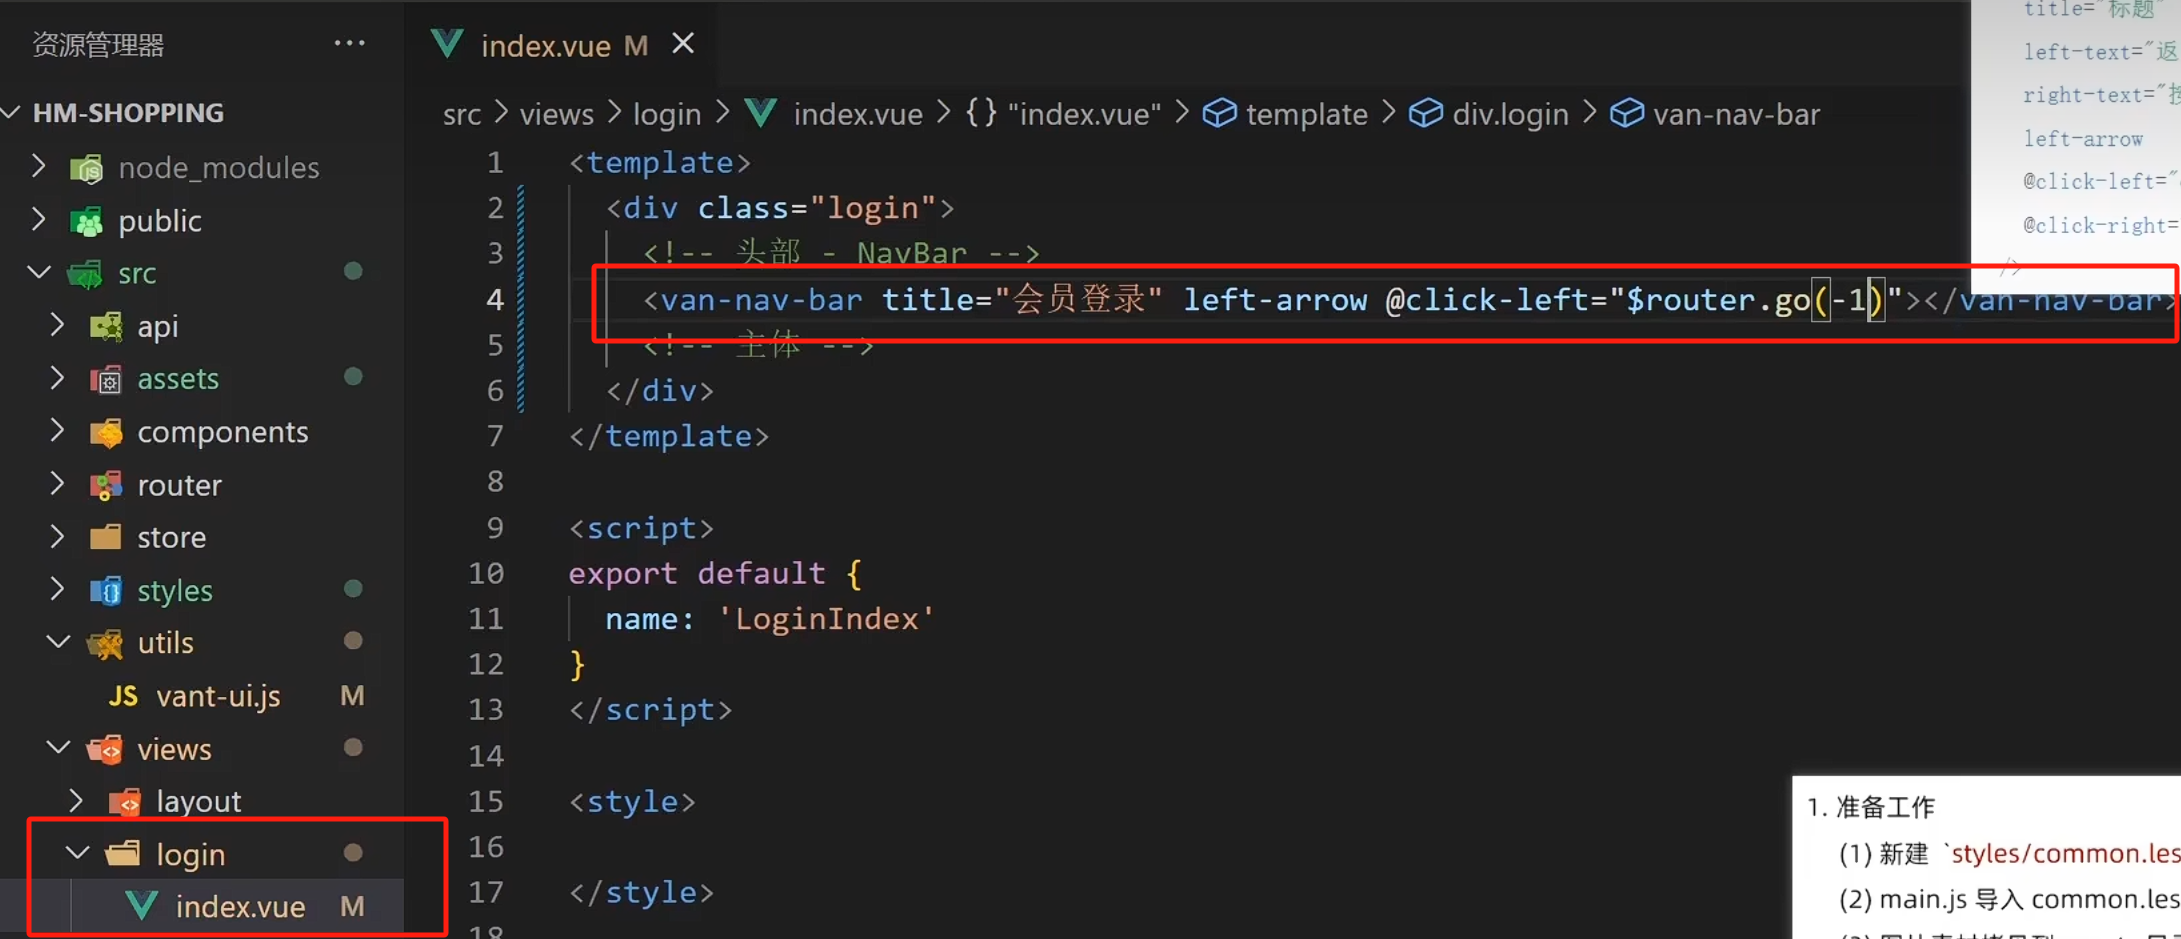
10.2靜態布局編寫
10.21頭部組件
10.22通用樣式的覆蓋
把箭頭變成灰黑色

// 重置默認樣式
* {margin: 0;padding: 0;box-sizing: border-box;
}// 文字溢出省略號
.text-ellipsis-2 {overflow: hidden;-webkit-line-clamp: 2;text-overflow: ellipsis;display: -webkit-box;-webkit-box-orient: vertical;
}// 添加導航的通用樣式
.van-nav-bar {.van-nav-bar__arrow {color: #333;}
}
10.23其他靜態結構的編寫

<template><div class="login"><van-nav-bar title="會員登錄" left-arrow @click-left="$router.go(-1)" /><div class="container"><div class="title"><h3>手機號登錄</h3><p>未注冊的手機號登錄后將自動注冊</p></div><div class="form"><div class="form-item"><input v-model="mobile" class="inp" maxlength="11" placeholder="請輸入手機號碼" type="text"></div><div class="form-item"><input v-model="picCode" class="inp" maxlength="5" placeholder="請輸入圖形驗證碼" type="text"><img v-if="picUrl" :src="picUrl" @click="getPicCode" alt=""></div><div class="form-item"><input v-model="msgCode" class="inp" placeholder="請輸入短信驗證碼" type="text"><button @click="getCode">{{ second === totalSecond ? '獲取驗證碼' : second + '秒后重新發送'}}</button></div></div><div @click="login" class="login-btn">登錄</div></div></div>
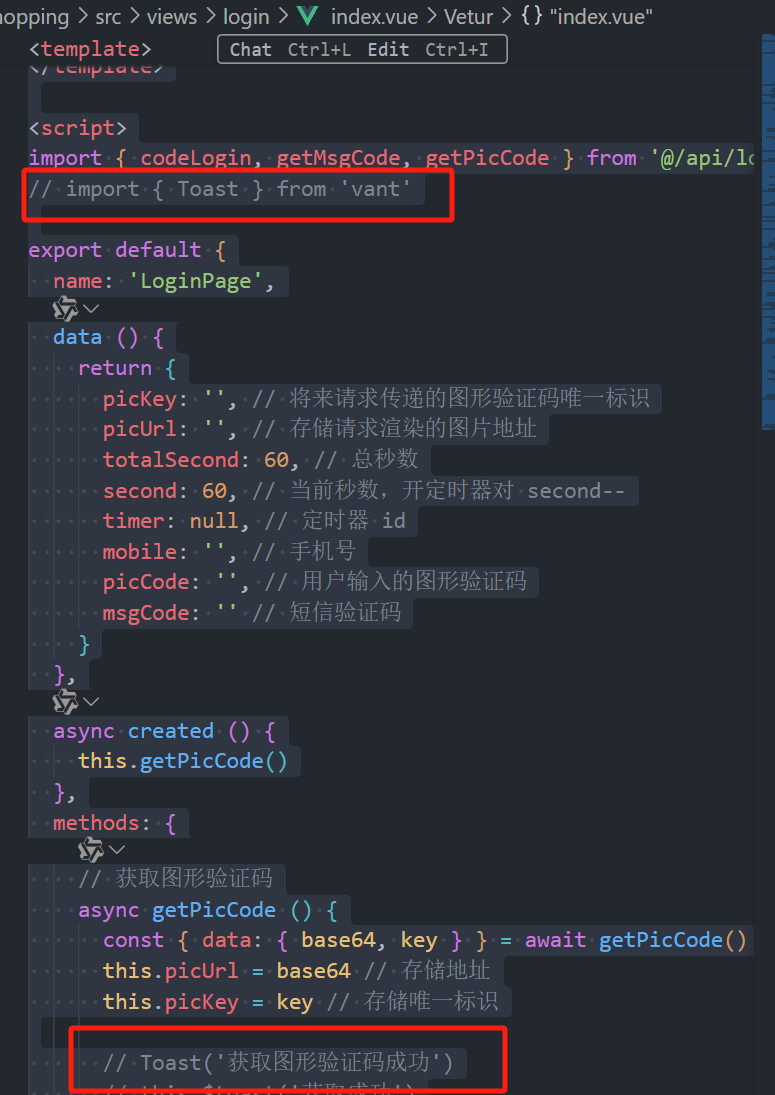
</template><script>
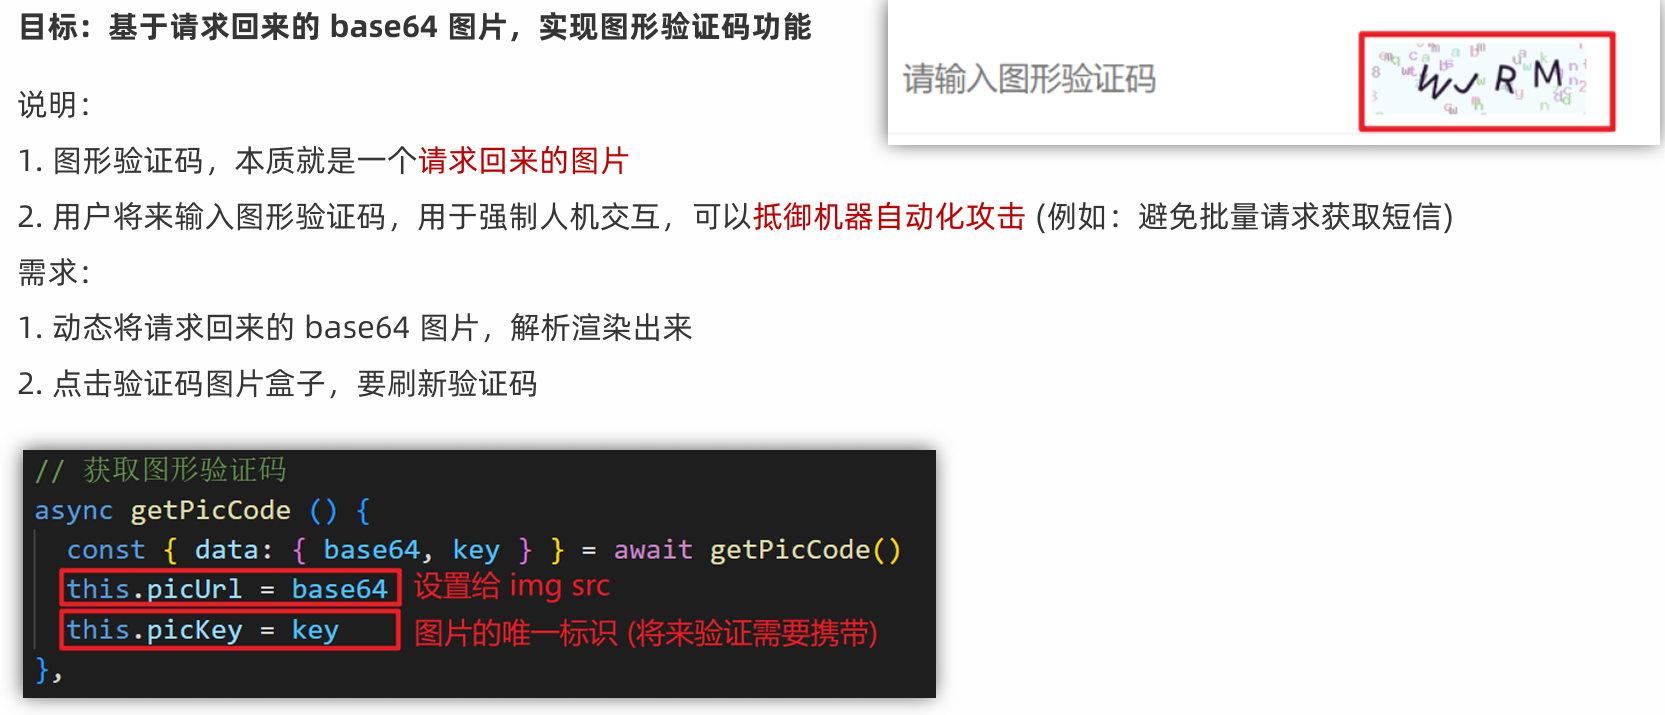
import { codeLogin, getMsgCode, getPicCode } from '@/api/login'
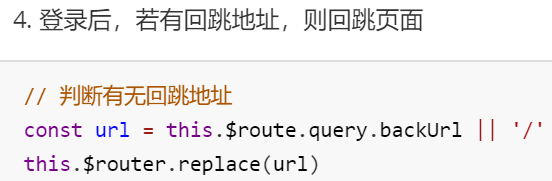
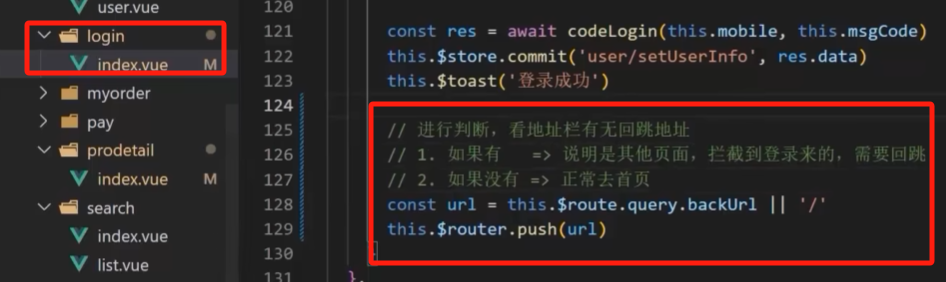
// import { Toast } from 'vant'export default {name: 'LoginPage',data () {return {picKey: '', // 將來請求傳遞的圖形驗證碼唯一標識picUrl: '', // 存儲請求渲染的圖片地址totalSecond: 60, // 總秒數second: 60, // 當前秒數,開定時器對 second--timer: null, // 定時器 idmobile: '', // 手機號picCode: '', // 用戶輸入的圖形驗證碼msgCode: '' // 短信驗證碼}},async created () {this.getPicCode()},methods: {// 獲取圖形驗證碼async getPicCode () {const { data: { base64, key } } = await getPicCode()this.picUrl = base64 // 存儲地址this.picKey = key // 存儲唯一標識// Toast('獲取圖形驗證碼成功')// this.$toast('獲取成功')// this.$toast.success('成功文案')},// 校驗 手機號 和 圖形驗證碼 是否合法// 通過校驗,返回true// 不通過校驗,返回falsevalidFn () {if (!/^1[3-9]\d{9}$/.test(this.mobile)) {this.$toast('請輸入正確的手機號')return false}if (!/^\w{4}$/.test(this.picCode)) {this.$toast('請輸入正確的圖形驗證碼')return false}return true},// 獲取短信驗證碼async getCode () {if (!this.validFn()) {// 如果沒通過校驗,沒必要往下走了return}// 當前目前沒有定時器開著,且 totalSecond 和 second 一致 (秒數歸位) 才可以倒計時if (!this.timer && this.second === this.totalSecond) {// 發送請求// 預期:希望如果響應的status非200,最好拋出一個promise錯誤,await只會等待成功的promiseawait getMsgCode(this.picCode, this.picKey, this.mobile)this.$toast('短信發送成功,注意查收')// 開啟倒計時this.timer = setInterval(() => {this.second--if (this.second <= 0) {clearInterval(this.timer)this.timer = null // 重置定時器 idthis.second = this.totalSecond // 歸位}}, 1000)}},// 登錄async login () {if (!this.validFn()) {return}if (!/^\d{6}$/.test(this.msgCode)) {this.$toast('請輸入正確的手機驗證碼')return}console.log('發送登錄請求')const res = await codeLogin(this.mobile, this.msgCode)this.$store.commit('user/setUserInfo', res.data)this.$toast('登錄成功')// 進行判斷,看地址欄有無回跳地址// 1. 如果有 => 說明是其他頁面,攔截到登錄來的,需要回跳// 2. 如果沒有 => 正常去首頁const url = this.$route.query.backUrl || '/'this.$router.replace(url)}},// 離開頁面清除定時器destroyed () {clearInterval(this.timer)}
}
</script><style lang="less" scoped>
.container {padding: 49px 29px;.title {margin-bottom: 20px;h3 {font-size: 26px;font-weight: normal;}p {line-height: 40px;font-size: 14px;color: #b8b8b8;}}.form-item {border-bottom: 1px solid #f3f1f2;padding: 8px;margin-bottom: 14px;display: flex;align-items: center;.inp {display: block;border: none;outline: none;height: 32px;font-size: 14px;flex: 1;}img {width: 94px;height: 31px;}button {height: 31px;border: none;font-size: 13px;color: #cea26a;background-color: transparent;padding-right: 9px;}}.login-btn {width: 100%;height: 42px;margin-top: 39px;background: linear-gradient(90deg,#ecb53c,#ff9211);color: #fff;border-radius: 39px;box-shadow: 0 10px 20px 0 rgba(0,0,0,.1);letter-spacing: 2px;display: flex;justify-content: center;align-items: center;}
}
</style>
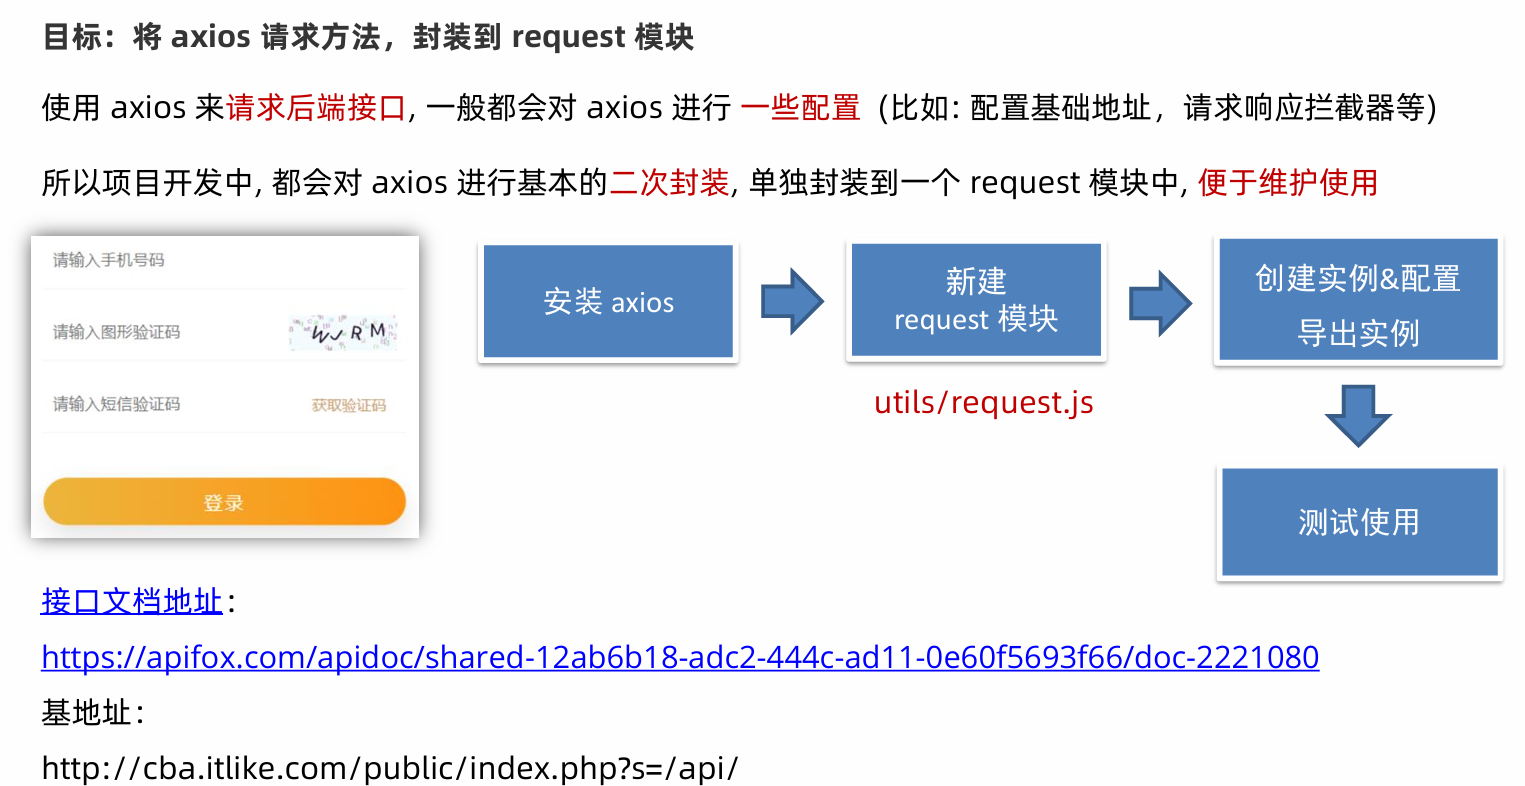
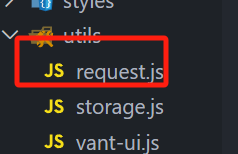
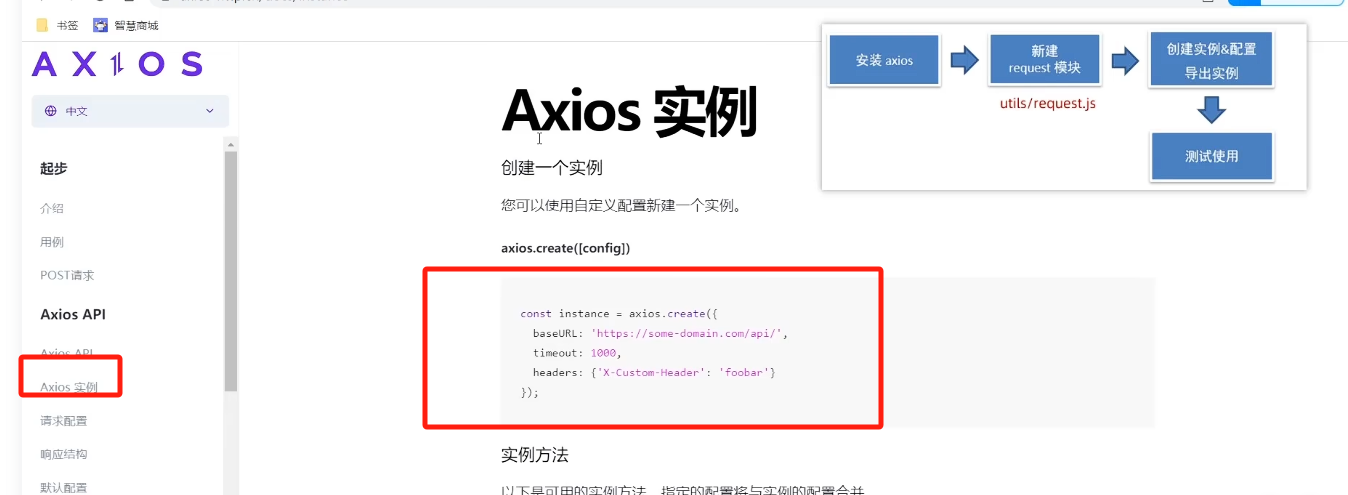
11. request模塊 - axios 封裝
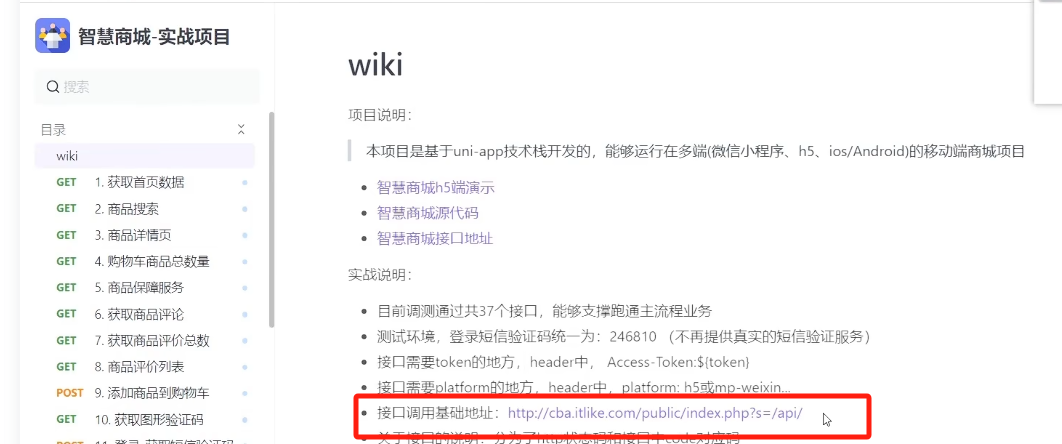
wiki - 智慧商城-實戰項目
import store from '@/store'
import axios from 'axios'
import { Toast } from 'vant'// 創建 axios 實例,將來對創建出來的實例,進行自定義配置
// 好處:不會污染原始的 axios 實例
const instance = axios.create({baseURL: 'http://cba.itlike.com/public/index.php?s=/api/',timeout: 5000
})// 自定義配置 - 請求/響應 攔截器
// 添加請求攔截器
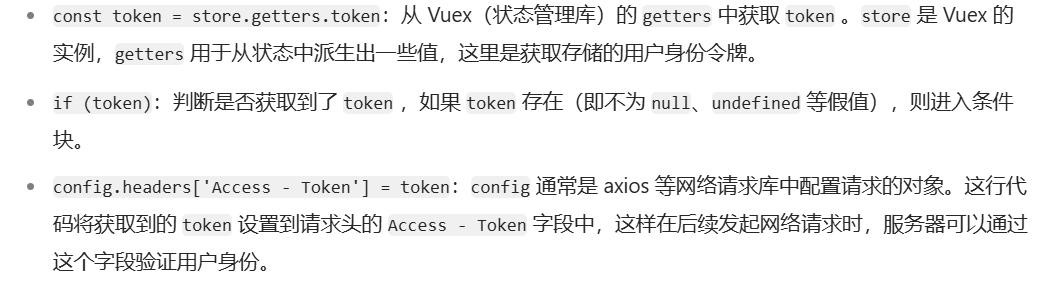
instance.interceptors.request.use(function (config) {// 在發送請求之前做些什么// 開啟loading,禁止背景點擊 (節流處理,防止多次無效觸發)Toast.loading({message: '加載中...',forbidClick: true, // 禁止背景點擊loadingType: 'spinner', // 配置loading圖標duration: 0 // 不會自動消失})// 只要有token,就在請求時攜帶,便于請求需要授權的接口const token = store.getters.tokenif (token) {config.headers['Access-Token'] = tokenconfig.headers.platform = 'H5'}return config
}, function (error) {// 對請求錯誤做些什么return Promise.reject(error)
})// 添加響應攔截器
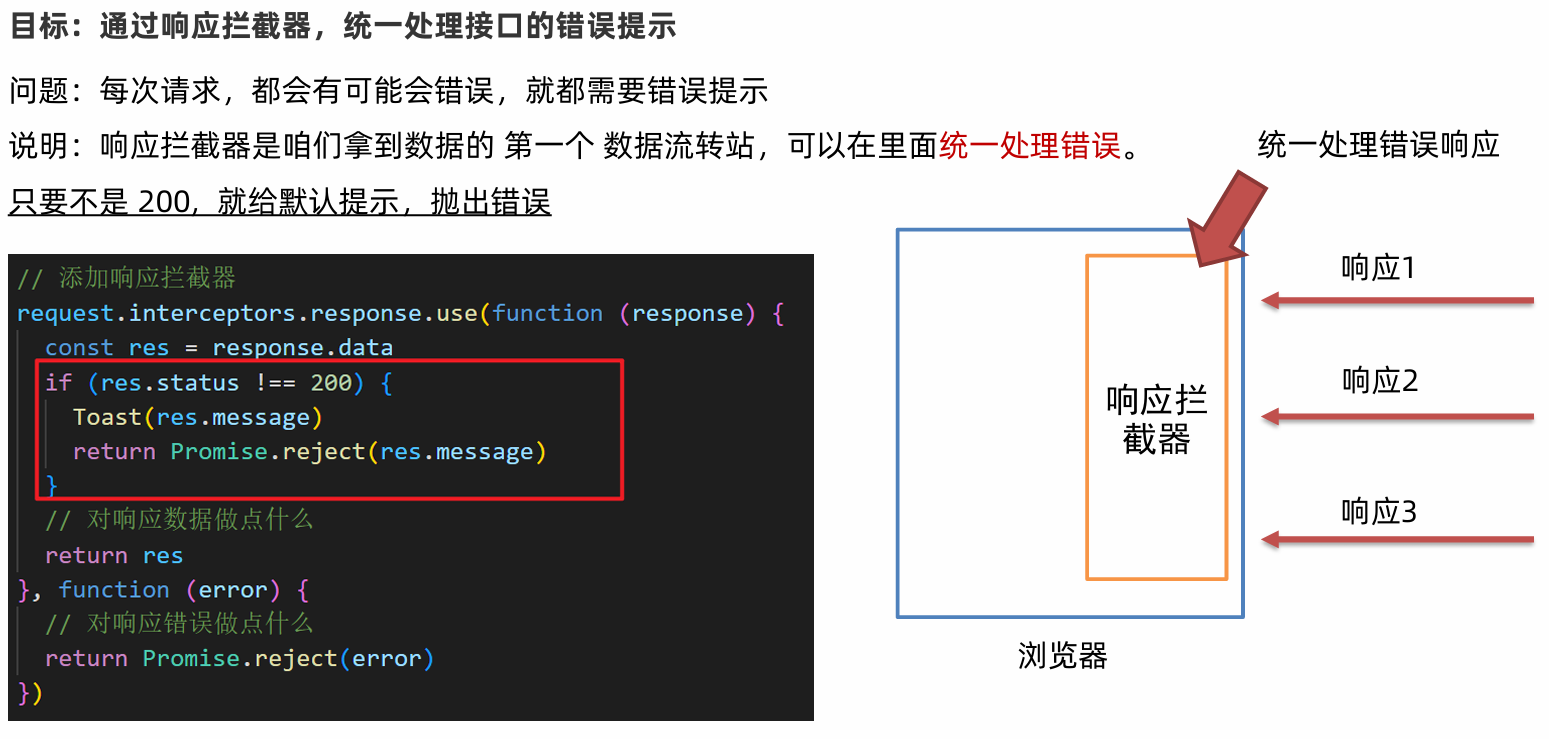
instance.interceptors.response.use(function (response) {// 2xx 范圍內的狀態碼都會觸發該函數。// 對響應數據做點什么 (默認axios會多包裝一層data,需要響應攔截器中處理一下)const res = response.dataif (res.status !== 200) {// 給錯誤提示, Toast 默認是單例模式,后面的 Toast調用了,會將前一個 Toast 效果覆蓋// 同時只能存在一個 ToastToast(res.message)// 拋出一個錯誤的promisereturn Promise.reject(res.message)} else {// 正確情況,直接走業務核心邏輯,清除loading效果Toast.clear()}return res
}, function (error) {// 超出 2xx 范圍的狀態碼都會觸發該函數。// 對響應錯誤做點什么return Promise.reject(error)
})// 導出配置好的實例
export default instance

12. 圖形驗證碼功能完成
<template><div class="login"><van-nav-bar title="會員登錄" left-arrow @click-left="$router.go(-1)" /><div class="container"><div class="title"><h3>手機號登錄</h3><p>未注冊的手機號登錄后將自動注冊</p></div><div class="form"><div class="form-item"><input v-model="mobile" class="inp" maxlength="11" placeholder="請輸入手機號碼" type="text"></div><div class="form-item">//用戶提交了也可以收集數據<input v-model="picCode" class="inp" maxlength="5" placeholder="請輸入圖形驗證碼" type="text"><img v-if="picUrl" :src="picUrl" @click="getPicCode" alt="">//點擊圖片,然后可以刷新</div><div class="form-item"><input v-model="msgCode" class="inp" placeholder="請輸入短信驗證碼" type="text"><button @click="getCode">{{ second === totalSecond ? '獲取驗證碼' : second + '秒后重新發送'}}</button></div></div><div @click="login" class="login-btn">登錄</div></div></div>
</template><script>
import { codeLogin, getMsgCode, getPicCode } from '@/api/login'
// import { Toast } from 'vant'export default {name: 'LoginPage',data () {return {picKey: '', // 將來請求傳遞的圖形驗證碼唯一標識picUrl: '', // 存儲請求渲染的圖片地址totalSecond: 60, // 總秒數second: 60, // 當前秒數,開定時器對 second--timer: null, // 定時器 idmobile: '', // 手機號picCode: '', // 用戶輸入的圖形驗證碼msgCode: '' // 短信驗證碼}},async created () {this.getPicCode()},methods: {// 獲取圖形驗證碼async getPicCode () {const { data: { base64, key } } = await getPicCode()this.picUrl = base64 // 存儲地址this.picKey = key // 存儲唯一標識// Toast('獲取圖形驗證碼成功')// this.$toast('獲取成功')// this.$toast.success('成功文案')},// 校驗 手機號 和 圖形驗證碼 是否合法// 通過校驗,返回true// 不通過校驗,返回falsevalidFn () {if (!/^1[3-9]\d{9}$/.test(this.mobile)) {this.$toast('請輸入正確的手機號')return false}if (!/^\w{4}$/.test(this.picCode)) {this.$toast('請輸入正確的圖形驗證碼')return false}return true},// 獲取短信驗證碼async getCode () {if (!this.validFn()) {// 如果沒通過校驗,沒必要往下走了return}// 當前目前沒有定時器開著,且 totalSecond 和 second 一致 (秒數歸位) 才可以倒計時if (!this.timer && this.second === this.totalSecond) {// 發送請求// 預期:希望如果響應的status非200,最好拋出一個promise錯誤,await只會等待成功的promiseawait getMsgCode(this.picCode, this.picKey, this.mobile)this.$toast('短信發送成功,注意查收')// 開啟倒計時this.timer = setInterval(() => {this.second--if (this.second <= 0) {clearInterval(this.timer)this.timer = null // 重置定時器 idthis.second = this.totalSecond // 歸位}}, 1000)}},// 登錄async login () {if (!this.validFn()) {return}if (!/^\d{6}$/.test(this.msgCode)) {this.$toast('請輸入正確的手機驗證碼')return}console.log('發送登錄請求')const res = await codeLogin(this.mobile, this.msgCode)this.$store.commit('user/setUserInfo', res.data)this.$toast('登錄成功')// 進行判斷,看地址欄有無回跳地址// 1. 如果有   => 說明是其他頁面,攔截到登錄來的,需要回跳// 2. 如果沒有 => 正常去首頁const url = this.$route.query.backUrl || '/'this.$router.replace(url)}},// 離開頁面清除定時器destroyed () {clearInterval(this.timer)}
}
</script><style lang="less" scoped>
.container {padding: 49px 29px;.title {margin-bottom: 20px;h3 {font-size: 26px;font-weight: normal;}p {line-height: 40px;font-size: 14px;color: #b8b8b8;}}.form-item {border-bottom: 1px solid #f3f1f2;padding: 8px;margin-bottom: 14px;display: flex;align-items: center;.inp {display: block;border: none;outline: none;height: 32px;font-size: 14px;flex: 1;}img {width: 94px;height: 31px;}button {height: 31px;border: none;font-size: 13px;color: #cea26a;background-color: transparent;padding-right: 9px;}}.login-btn {width: 100%;height: 42px;margin-top: 39px;background: linear-gradient(90deg,#ecb53c,#ff9211);color: #fff;border-radius: 39px;box-shadow: 0 10px 20px 0 rgba(0,0,0,.1);letter-spacing: 2px;display: flex;justify-content: center;align-items: center;}
}
</style>
13. api 接口模塊 -封裝圖片驗證碼接口

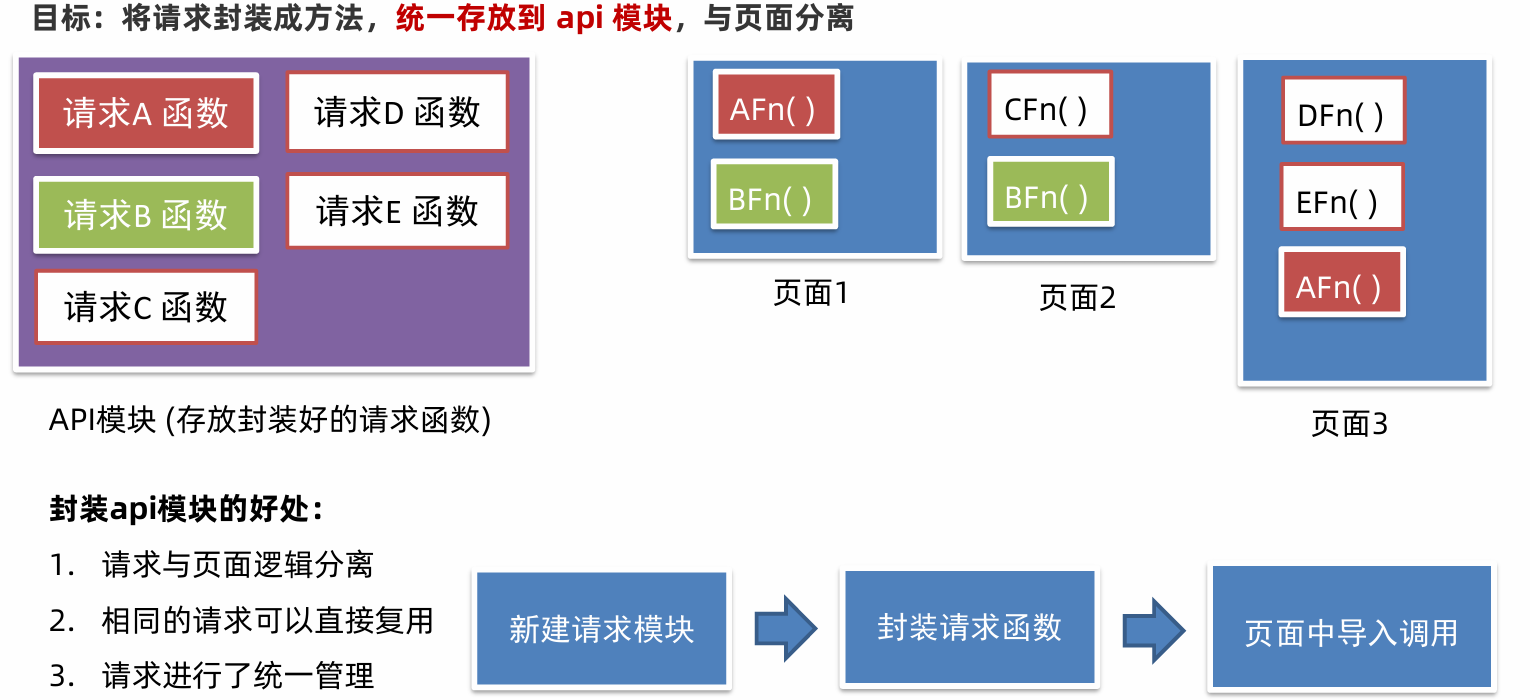
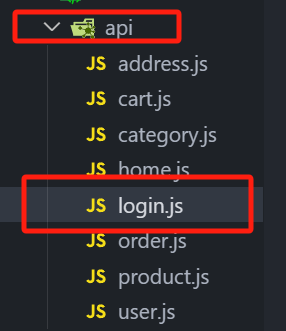
這里發請求:
// 此處用于存放所有登錄相關的接口請求
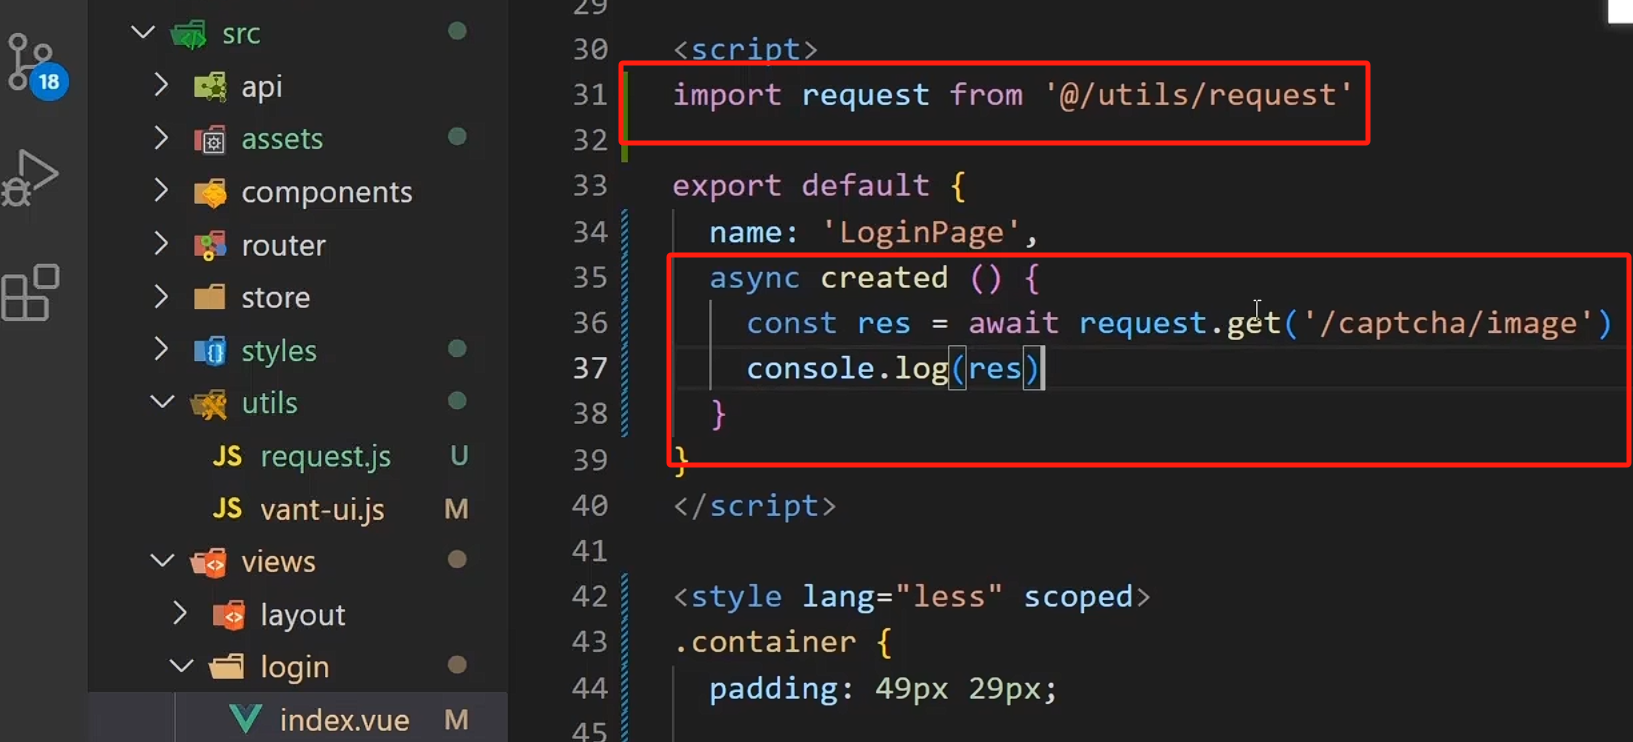
import request from '@/utils/request'// 1. 獲取圖形驗證碼
export const getPicCode = () => {return request.get('/captcha/image')
}// 2. 獲取短信驗證碼
export const getMsgCode = (captchaCode, captchaKey, mobile) => {return request.post('/captcha/sendSmsCaptcha', {form: {captchaCode,captchaKey,mobile}})
}// 3. 登錄接口
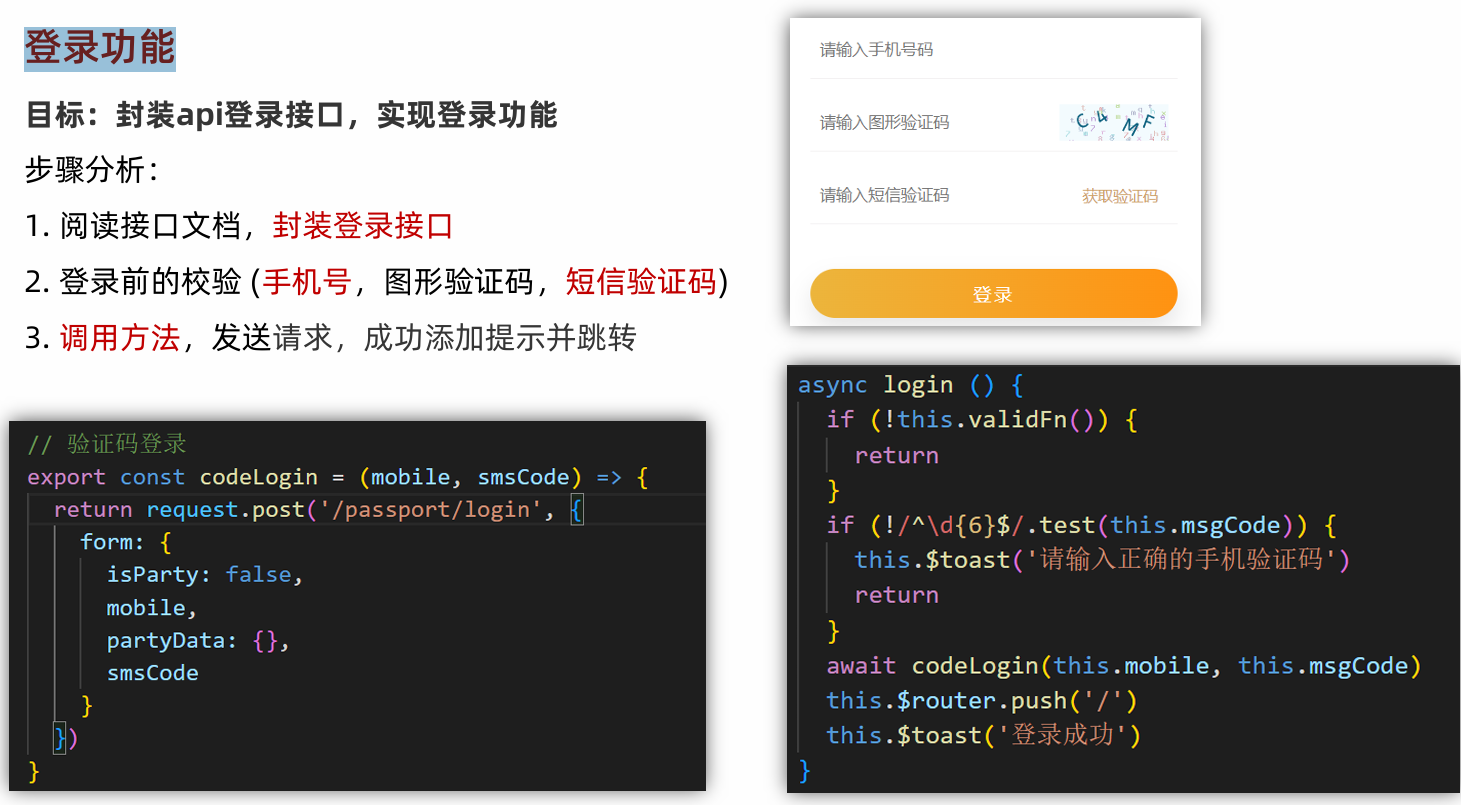
export const codeLogin = (mobile, smsCode) => {return request.post('/passport/login', {form: {isParty: false,partyData: {},mobile,smsCode}})
}
按需導出

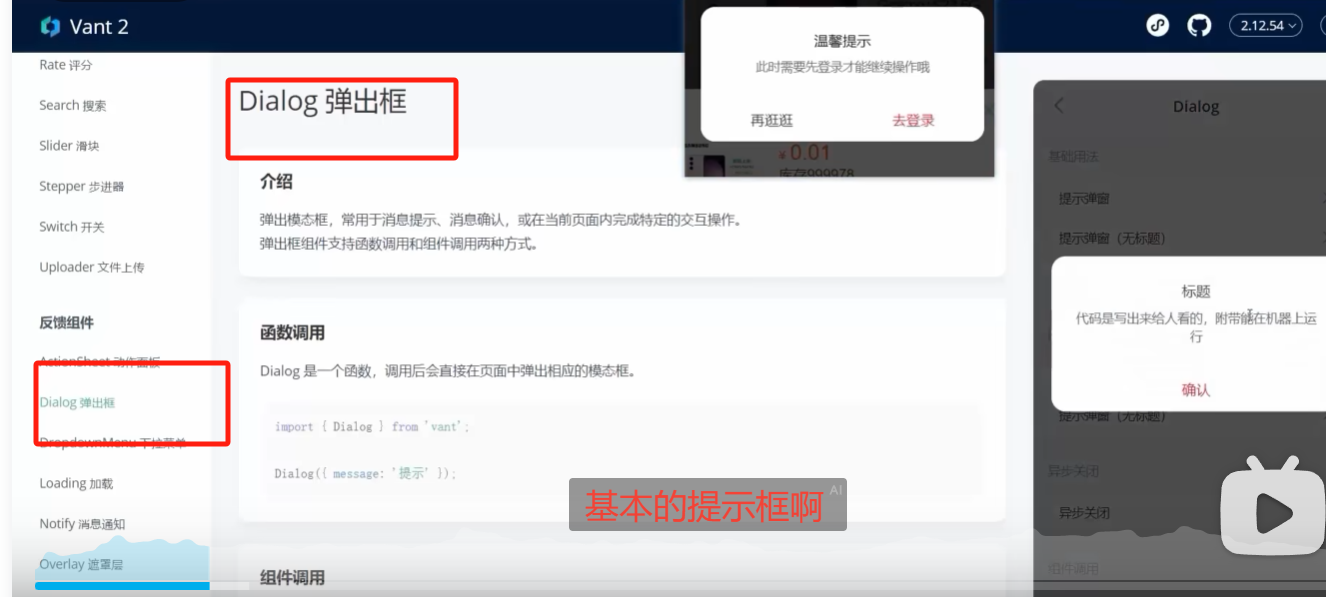
函數調用
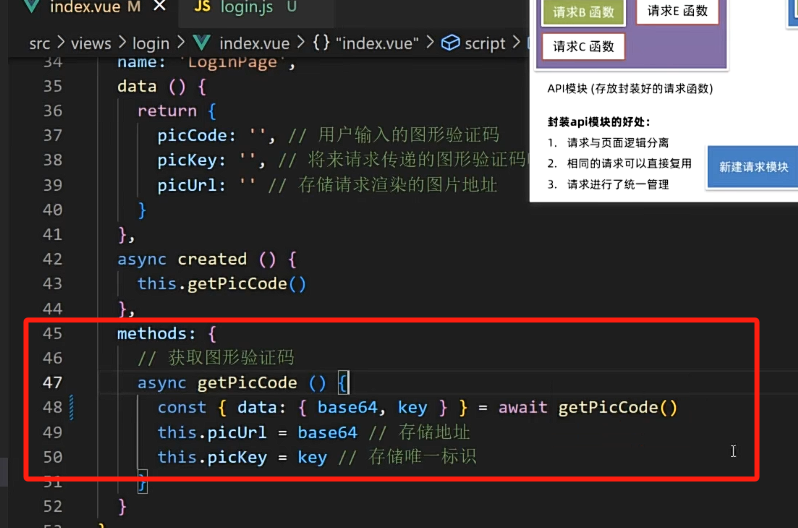
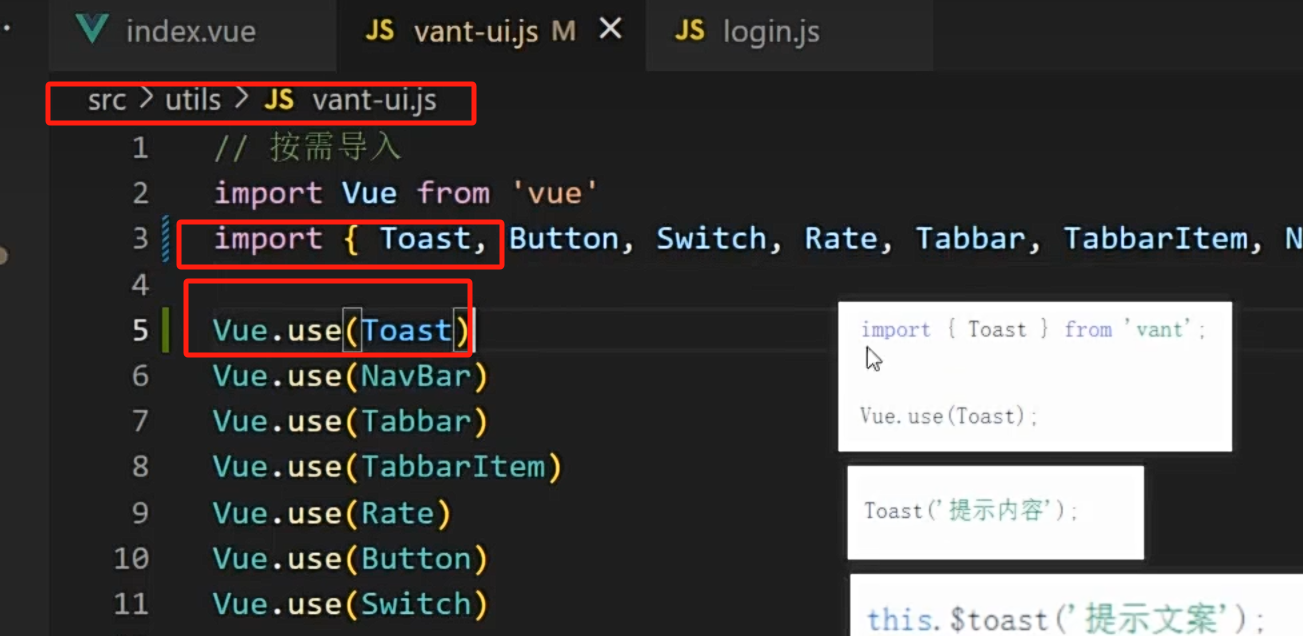
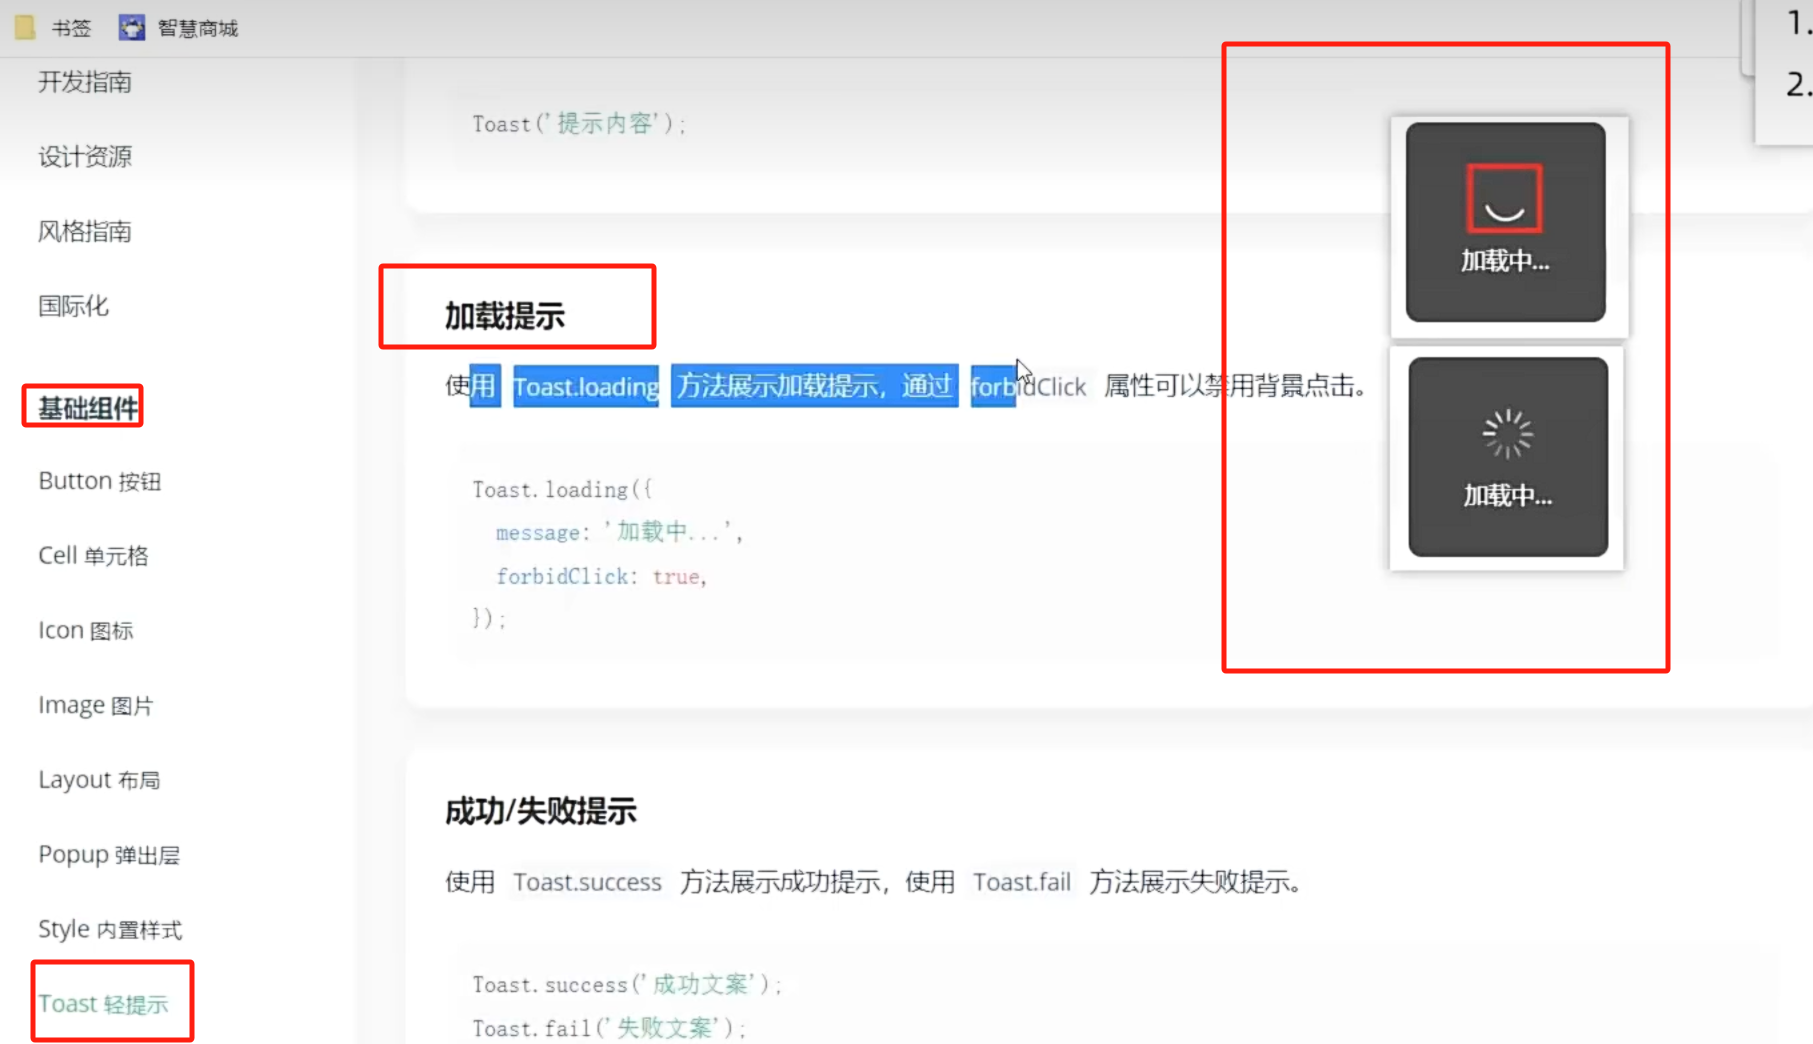
14. Toast 輕提示
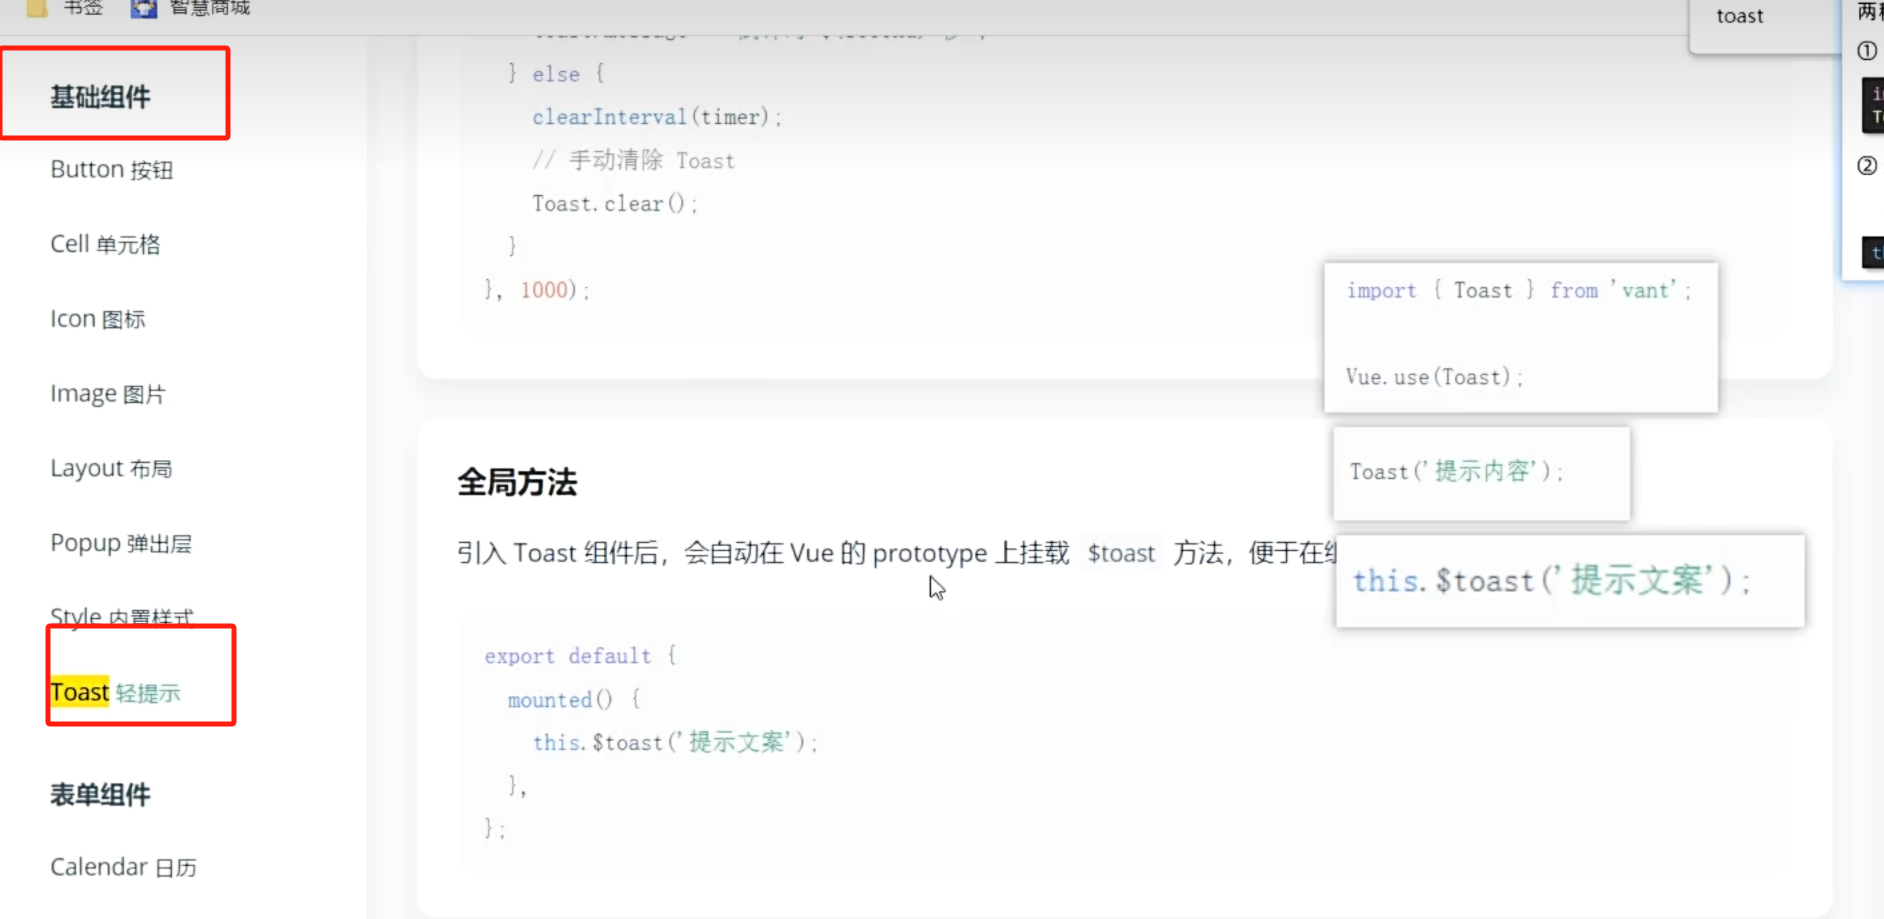
使用方式1:導入調用
組件內可以調用
非組件內也可以調用
使用方式2:this直接調用

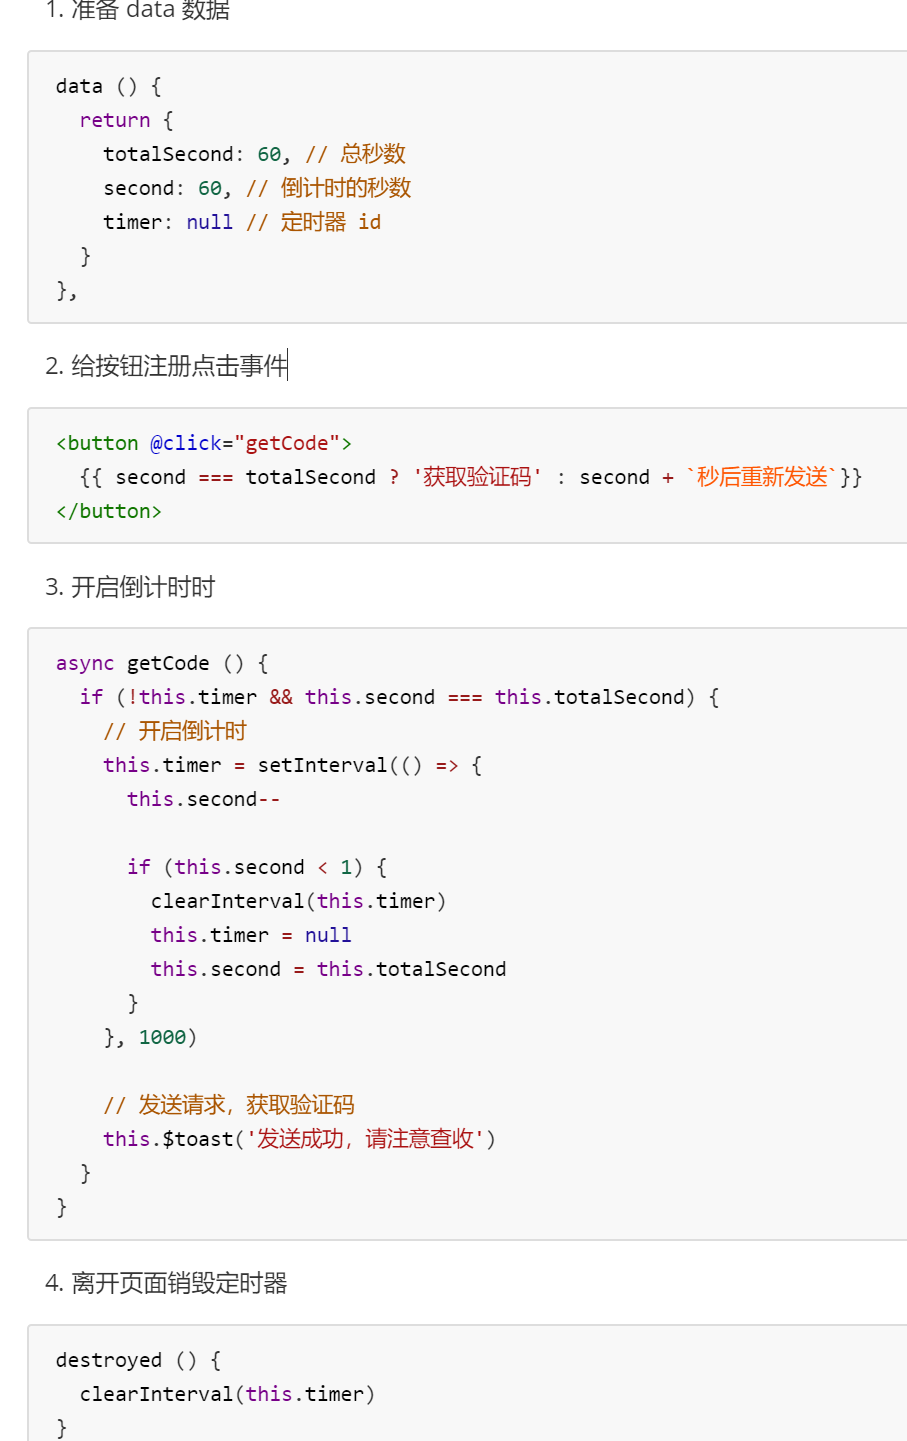
15. 短信驗證倒計時
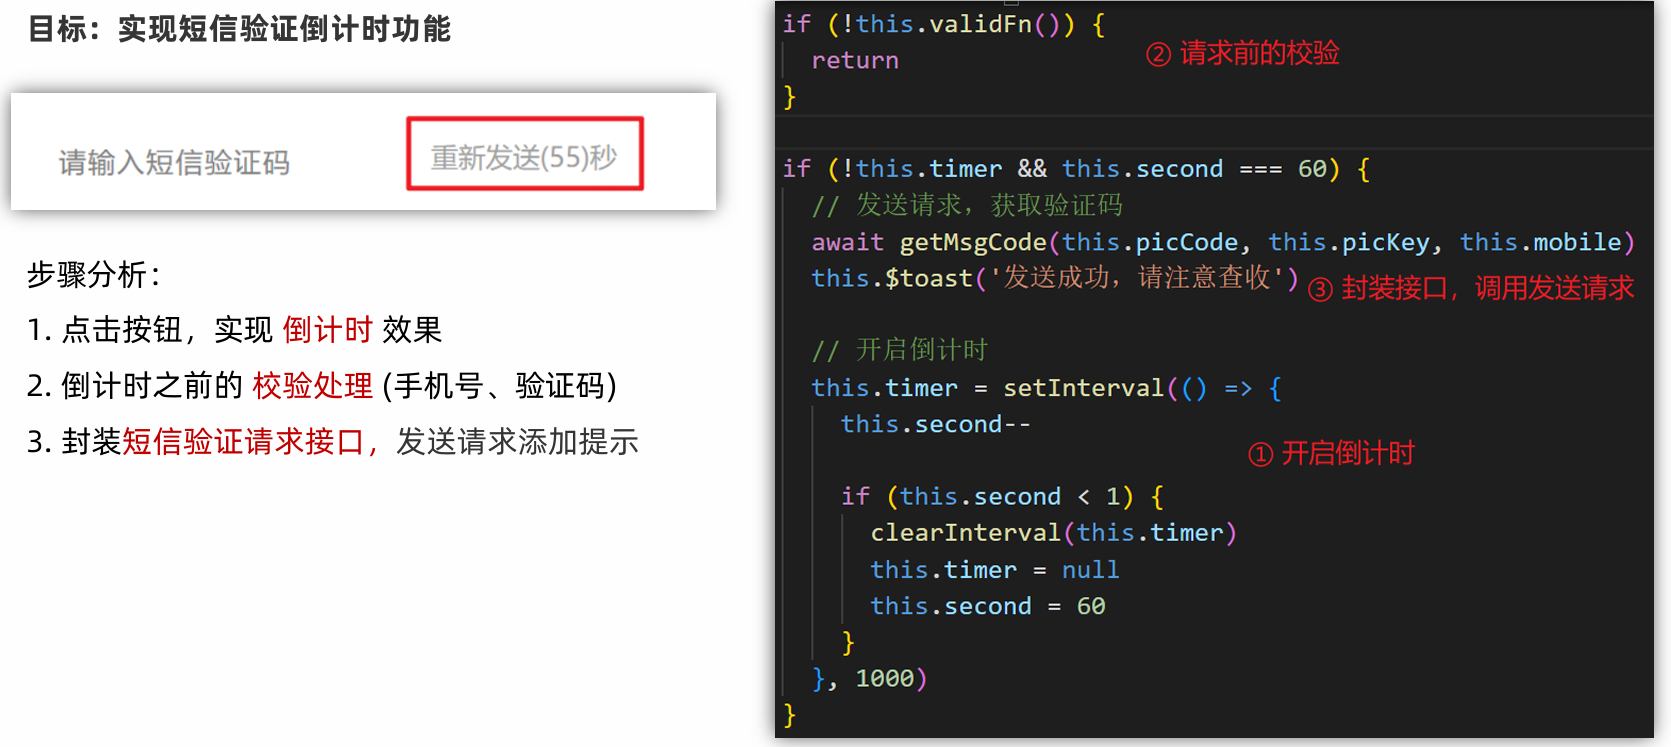
15.1點擊按鈕,實現倒計時效果
index.vue
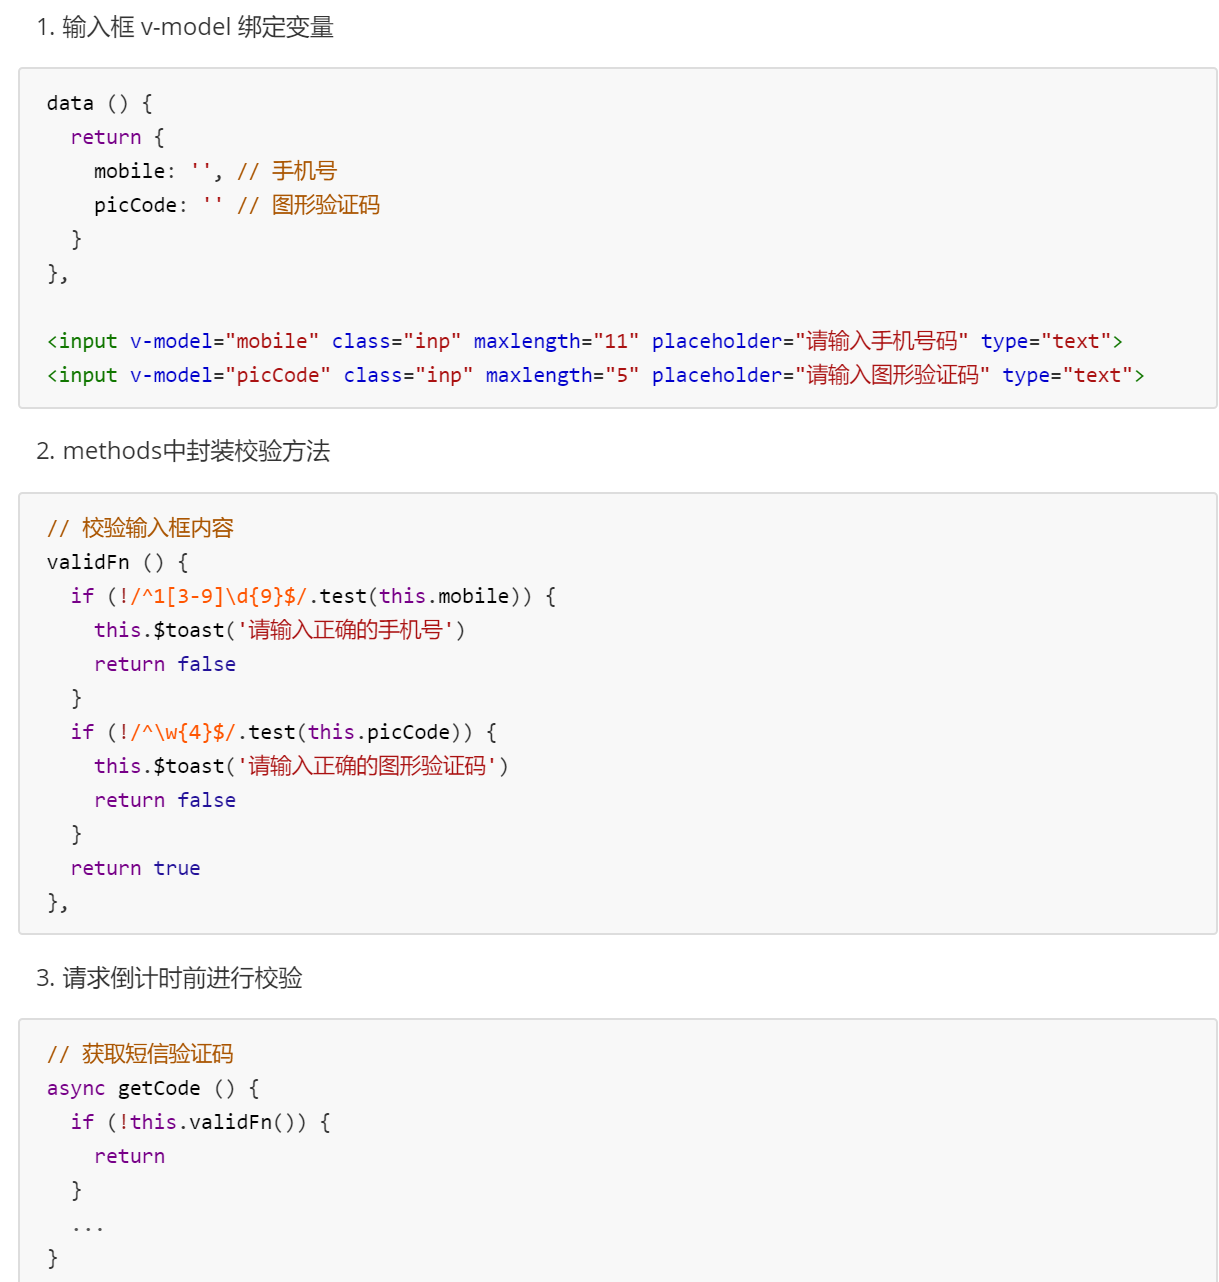
15.2驗證碼請求校驗處理
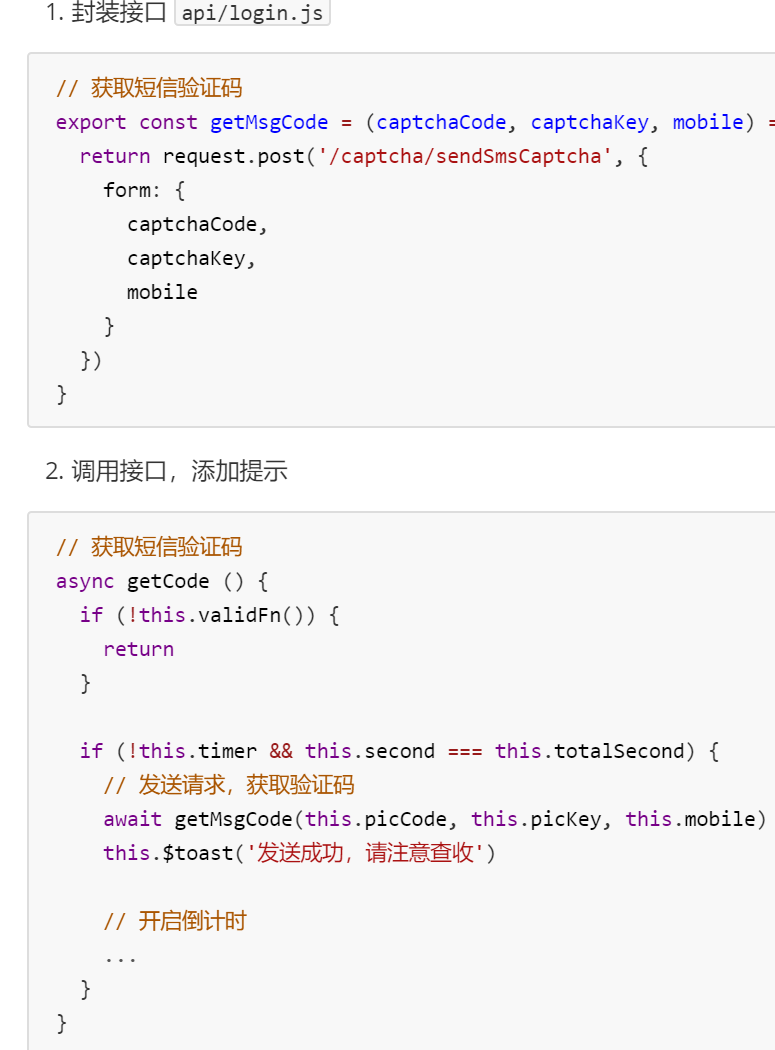
15.3封裝接口,請求獲取驗證碼
16. 登錄功能

17. 響應攔截器統一處理錯誤提示
utils/request.js


18. 登錄權證信息存儲
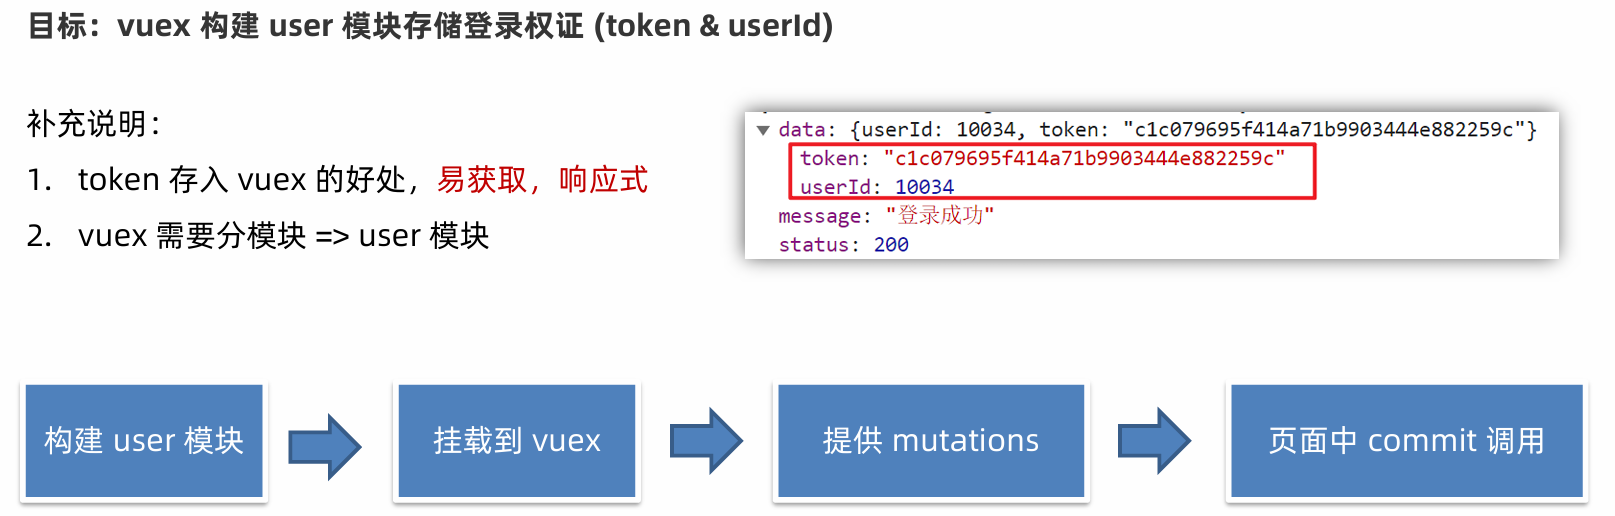
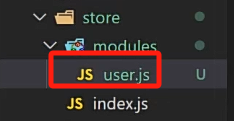
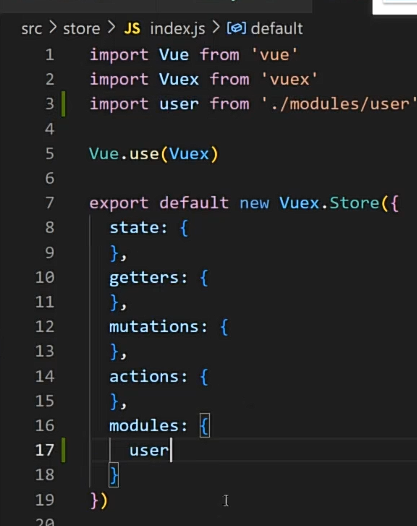
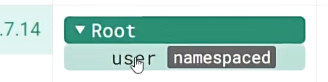
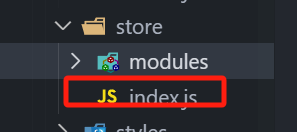
1.新建 vuex user 模塊 store/modules/user.js
export default {namespaced: true,state () {return {userInfo: {token: '',userId: ''},}},mutations: {},actions: {}
}
2.掛載到 vuex 上
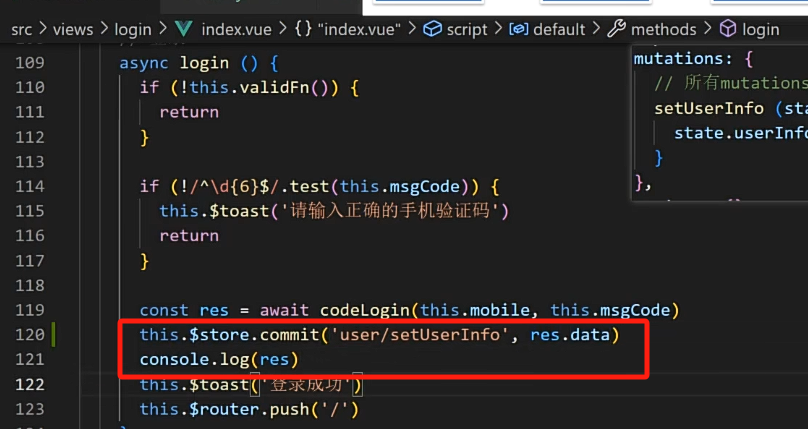
3.提供mutation
export default {namespaced: true,state () {return {userInfo: {token: '',userId: ''},}},mutations: {setUserInfo (state, obj) {state.userInfo = obj},
},actions: {}
}
4.頁面中 commit 調用

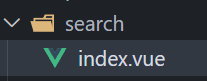
19. storage存儲模塊 -vuex 持久化處理
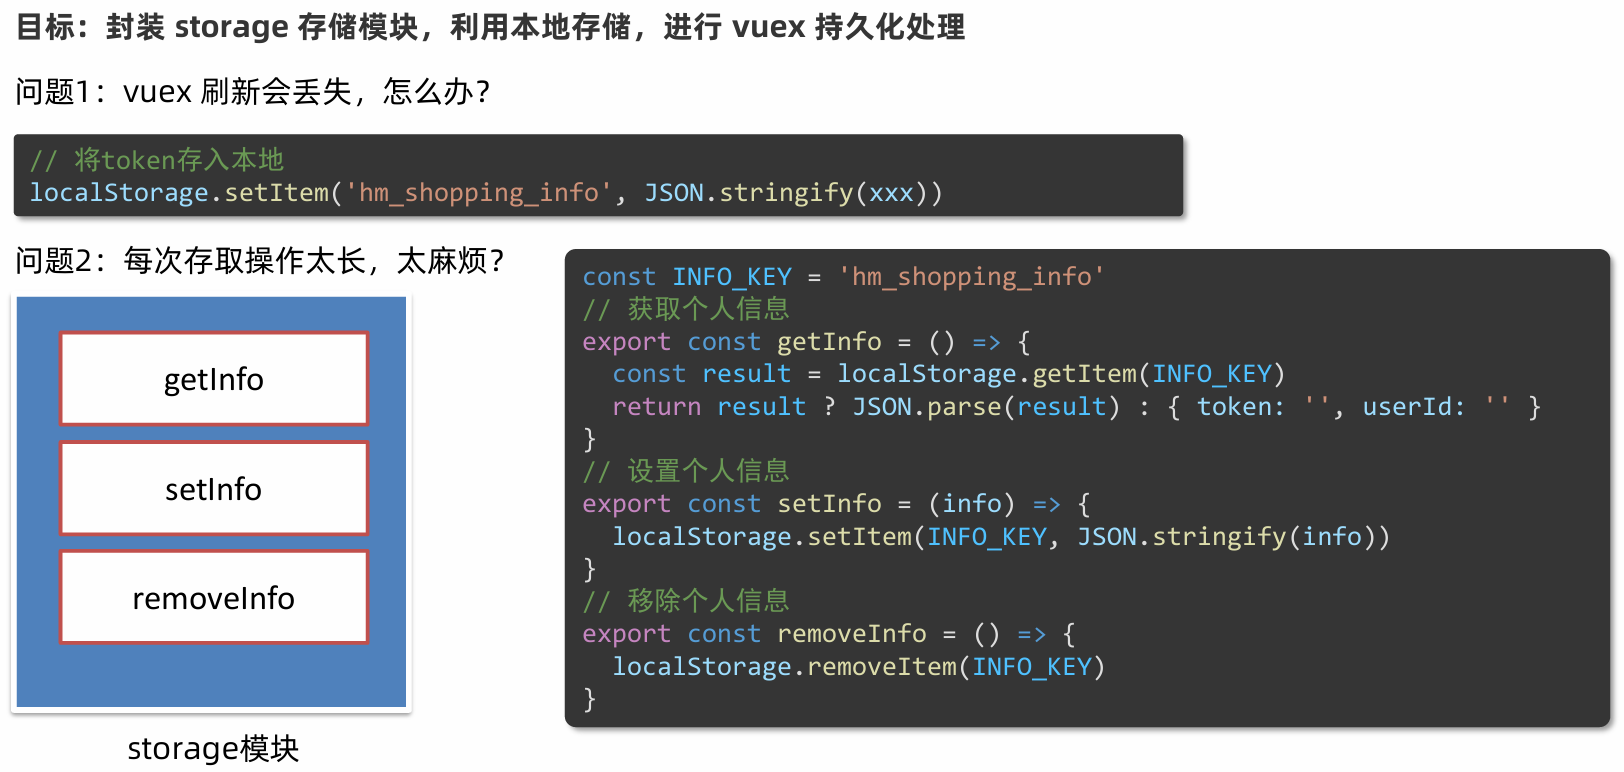
// 約定一個通用的鍵名
const INFO_KEY = 'hm_shopping_info'
const HISTORY_KEY = 'hm_history_list'// 獲取個人信息
export const getInfo = () => {const defaultObj = { token: '', userId: '' }const result = localStorage.getItem(INFO_KEY)//如果沒有結果,就默認給一個默認值return result ? JSON.parse(result) : defaultObj
}// 設置個人信息
export const setInfo = (obj) => {localStorage.setItem(INFO_KEY, JSON.stringify(obj))//obj是一個對象,對象不能往本地存,應該轉化成字符串
}// 移除個人信息
export const removeInfo = () => {localStorage.removeItem(INFO_KEY)
}
import { getInfo, setInfo } from '@/utils/storage'export default {namespaced: true,state () {return {// 個人權證相關userInfo: getInfo()}},mutations: {// 所有mutations的第一個參數,都是statesetUserInfo (state, obj) {state.userInfo = obj//存入vues的同時,傳入一份在本地setInfo(obj)}},actions: {logout (context) {// 個人信息要重置context.commit('setUserInfo', {})// 購物車信息要重置 (跨模塊調用 mutation) cart/setCartListcontext.commit('cart/setCartList', [], { root: true })}},getters: {}
}
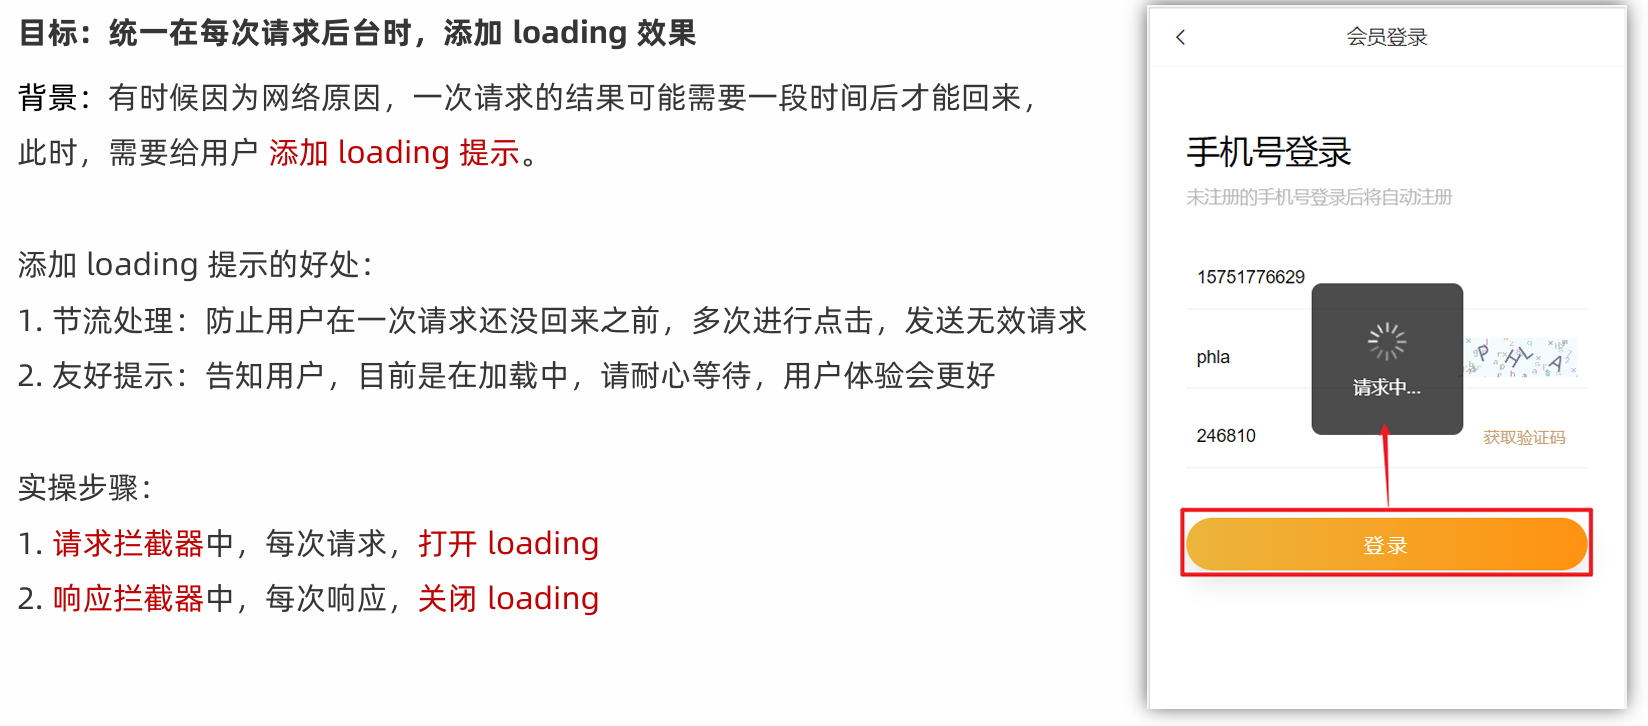
20. 添加請求 loading 效果
import store from '@/store'
import axios from 'axios'
import { Toast } from 'vant'// 創建 axios 實例,將來對創建出來的實例,進行自定義配置
// 好處:不會污染原始的 axios 實例
const instance = axios.create({baseURL: 'http://cba.itlike.com/public/index.php?s=/api/',timeout: 5000
})// 自定義配置 - 請求/響應 攔截器
// 添加請求攔截器
instance.interceptors.request.use(function (config) {// 在發送請求之前做些什么// 開啟loading,禁止背景點擊 (節流處理,防止多次無效觸發)Toast.loading({message: '加載中...',forbidClick: true, // 禁止背景點擊loadingType: 'spinner', // 配置loading圖標duration: 0 // loading圖標不會自動消失})// 只要有token,就在請求時攜帶,便于請求需要授權的接口const token = store.getters.tokenif (token) {config.headers['Access-Token'] = tokenconfig.headers.platform = 'H5'}return config
}, function (error) {// 對請求錯誤做些什么return Promise.reject(error)
})// 添加響應攔截器
instance.interceptors.response.use(function (response) {// 2xx 范圍內的狀態碼都會觸發該函數。// 對響應數據做點什么 (默認axios會多包裝一層data,需要響應攔截器中處理一下)const res = response.dataif (res.status !== 200) {// 給錯誤提示, Toast 默認是單例模式,后面的 Toast調用了,會將前一個 Toast 效果覆蓋// 同時只能存在一個 ToastToast(res.message)// 拋出一個錯誤的promisereturn Promise.reject(res.message)} else {// 正確情況,直接走業務核心邏輯,清除loading效果Toast.clear()}return res
}, function (error) {// 超出 2xx 范圍的狀態碼都會觸發該函數。// 對響應錯誤做點什么return Promise.reject(error)
})// 導出配置好的實例
export default instance
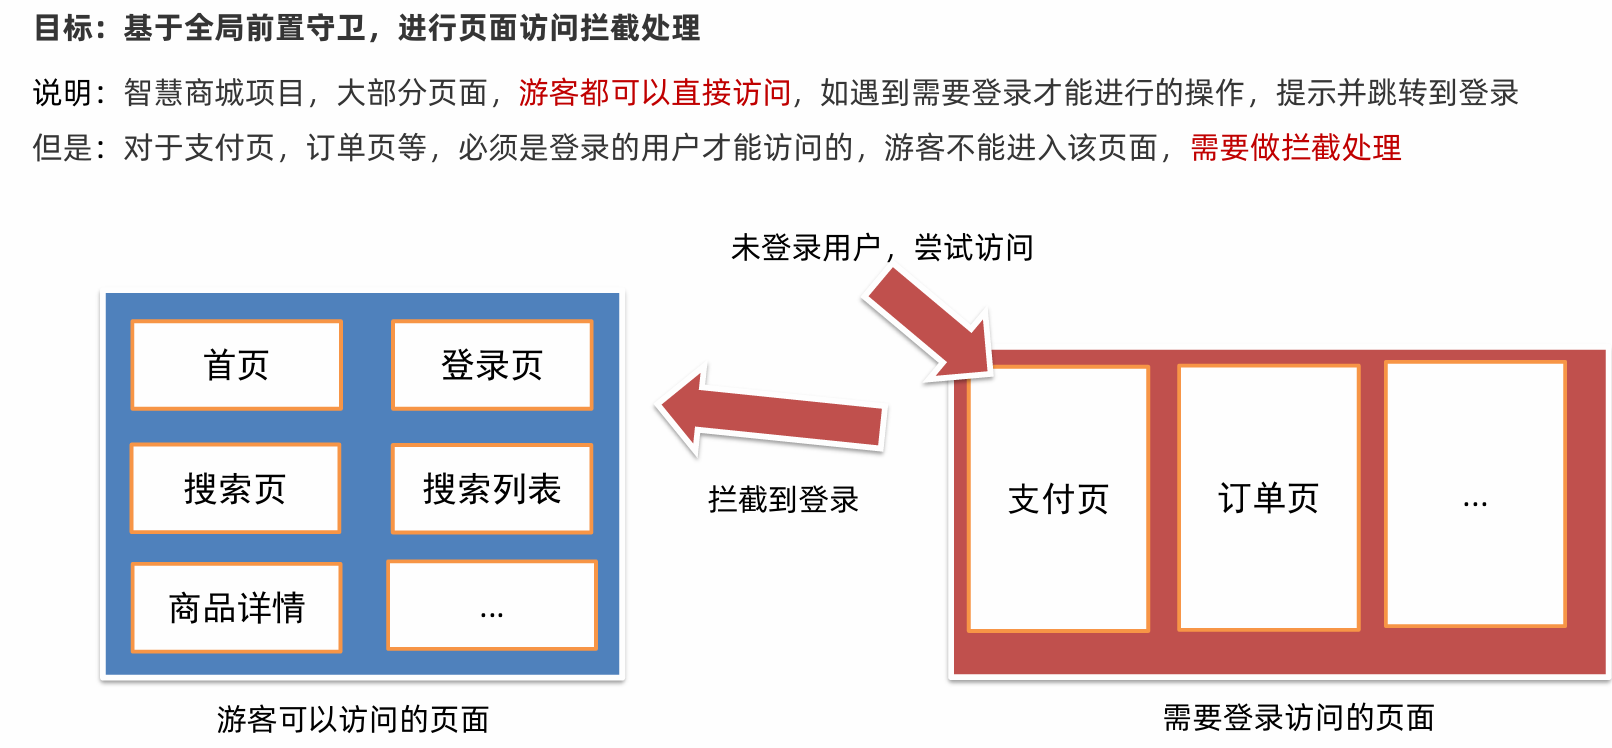
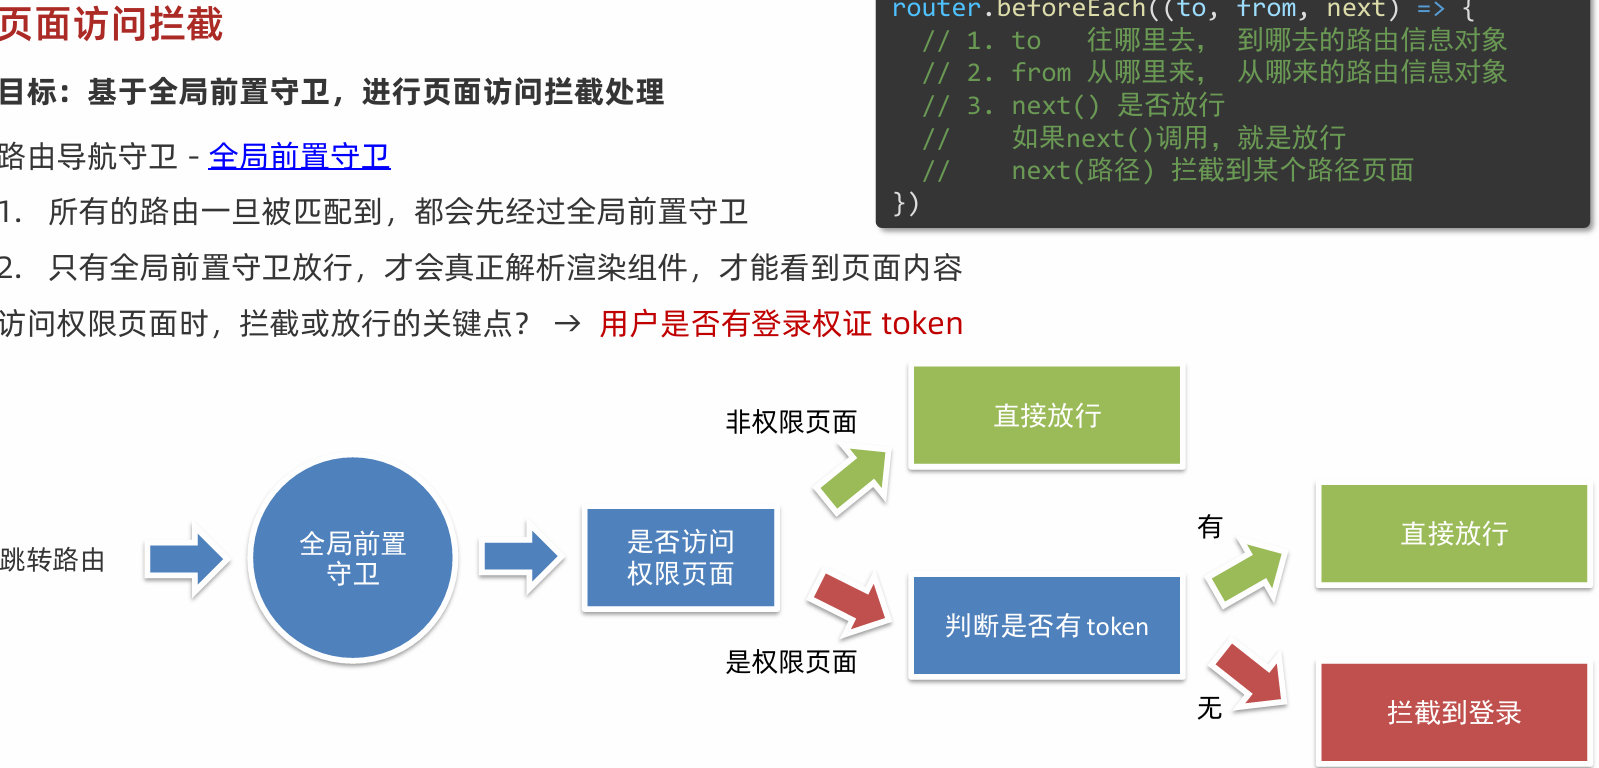
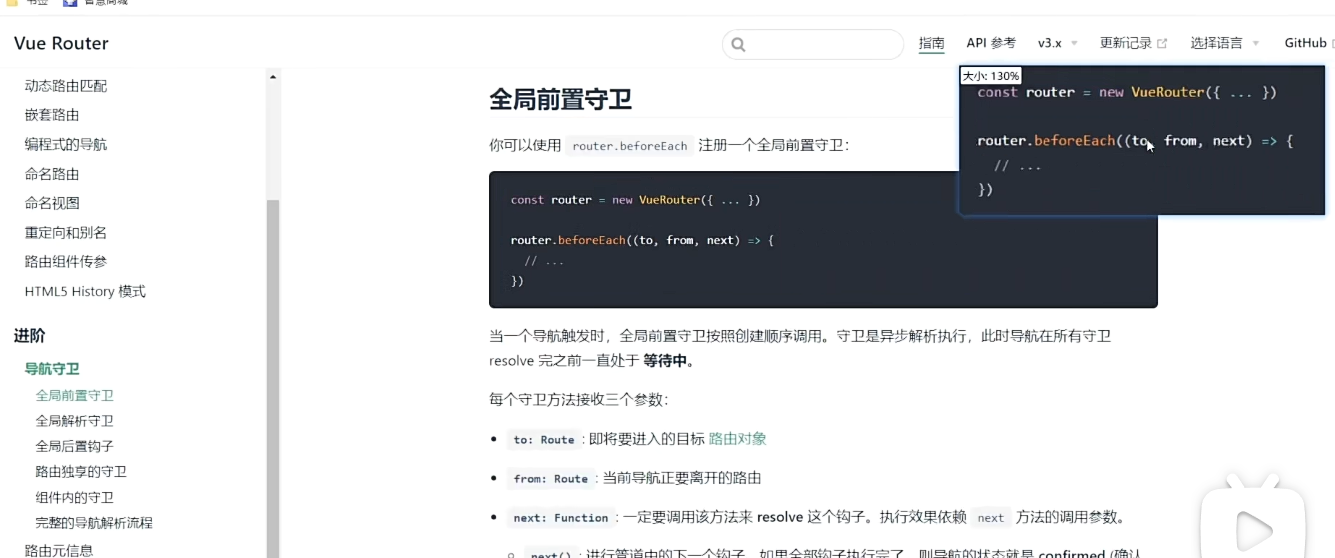
21. 頁面訪問攔截
import Vue from 'vue'
import VueRouter from 'vue-router'
import Login from '@/views/login'
import Layout from '@/views/layout'
import Search from '@/views/search'
import SearchList from '@/views/search/list'
import ProDetail from '@/views/prodetail'
import Pay from '@/views/pay'
import MyOrder from '@/views/myorder'import Home from '@/views/layout/home'
import Category from '@/views/layout/category'
import Cart from '@/views/layout/cart'
import User from '@/views/layout/user'import store from '@/store'Vue.use(VueRouter)const router = new VueRouter({routes: [{ path: '/login', component: Login },{path: '/',component: Layout,redirect: '/home',children: [{ path: '/home', component: Home },{ path: '/category', component: Category },{ path: '/cart', component: Cart },{ path: '/user', component: User }]},{ path: '/search', component: Search },{ path: '/searchlist', component: SearchList },// 動態路由傳參,確認將來是哪個商品,路由參數中攜帶 id{ path: '/prodetail/:id', component: ProDetail },{ path: '/pay', component: Pay },{ path: '/myorder', component: MyOrder }]
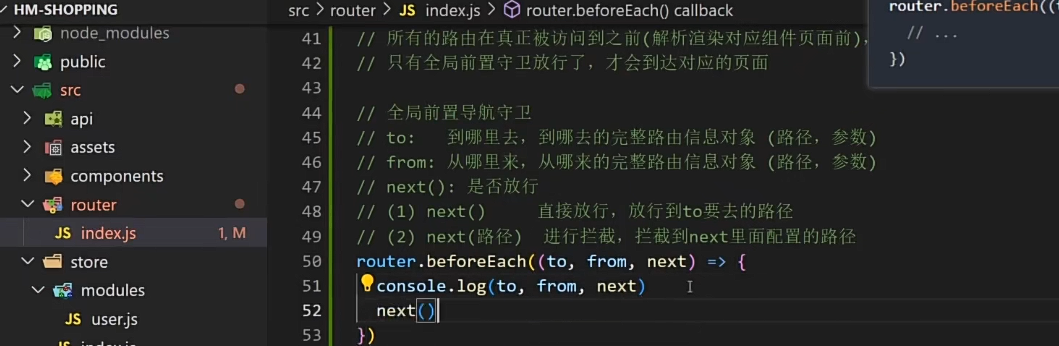
})// 所有的路由在真正被訪問到之前(解析渲染對應組件頁面前),都會先經過全局前置守衛
// 只有全局前置守衛放行了,才會到達對應的頁面// 全局前置導航守衛
// to: 到哪里去,到哪去的完整路由信息對象 (路徑,參數)
// from: 從哪里來,從哪來的完整路由信息對象 (路徑,參數)
// next(): 是否放行
// (1) next() 直接放行,放行到to要去的路徑
// (2) next(路徑) 進行攔截,攔截到next里面配置的路徑// 定義一個數組,專門用戶存放所有需要權限訪問的頁面
const authUrls = ['/pay', '/myorder']router.beforeEach((to, from, next) => {// console.log(to, from, next)// 看 to.path 是否在 authUrls 中出現過if (!authUrls.includes(to.path)) {// 非權限頁面,直接放行next()return}// 是權限頁面,需要判斷tokenconst token = store.getters.tokenif (token) {next()} else {next('/login')}
})export default router

import Vue from 'vue'
import Vuex from 'vuex'
import user from './modules/user'
import cart from './modules/cart'Vue.use(Vuex)export default new Vuex.Store({getters: {token (state) {return state.user.userInfo.token}},modules: {user,cart}
})
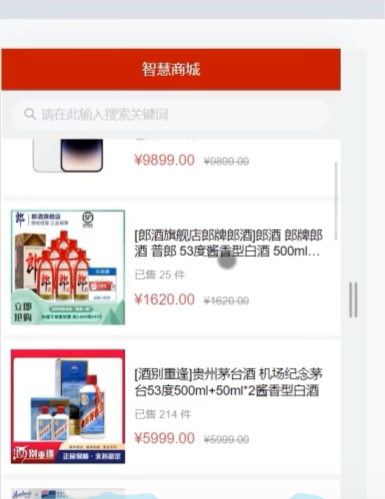
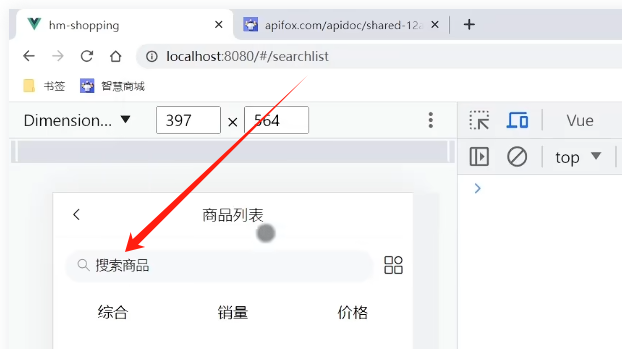
22. 首頁 -靜態結構準備 & 動態渲染

靜態結構:
<template><div class="home"><!-- 導航條 --><van-nav-bar title="智慧商城" fixed /><!-- 搜索框 --><van-searchreadonlyshape="round"background="#f1f1f2"placeholder="請在此輸入搜索關鍵詞"@click="$router.push('/search')"/><!-- 輪播圖 --><van-swipe class="my-swipe" :autoplay="3000" indicator-color="white"><van-swipe-item v-for="item in bannerList" :key="item.imgUrl"><img :src="item.imgUrl" alt=""></van-swipe-item></van-swipe><!-- 導航 --><van-grid column-num="5" icon-size="40"><van-grid-itemv-for="item in navList" :key="item.imgUrl":icon="item.imgUrl"text="新品首發"@click="$router.push('/category')"/></van-grid><!-- 主會場 --><div class="main"><img src="@/assets/main.png" alt=""></div><!-- 猜你喜歡 --><div class="guess"><p class="guess-title">—— 猜你喜歡 ——</p><div class="goods-list"><GoodsItem v-for="item in proList" :key="item.goods_id" :item="item"></GoodsItem></div></div></div>
</template><script>
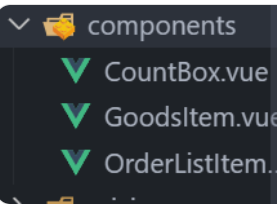
import GoodsItem from '@/components/GoodsItem.vue'
import { getHomeData } from '@/api/home'
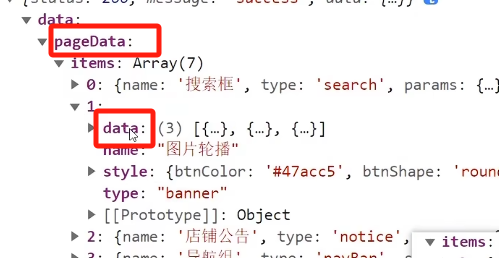
export default {name: 'HomePage',components: {GoodsItem},data () {return {bannerList: [], // 輪播navList: [], // 導航proList: [] // 商品}},async created () {const { data: { pageData } } = await getHomeData()this.bannerList = pageData.items[1].datathis.navList = pageData.items[3].datathis.proList = pageData.items[6].dataconsole.log(this.proList)}
}
</script><style lang="less" scoped>
// 主題 padding
.home {padding-top: 100px;padding-bottom: 50px;
}// 導航條樣式定制
.van-nav-bar {z-index: 999;background-color: #c21401;::v-deep .van-nav-bar__title {color: #fff;}
}// 搜索框樣式定制
.van-search {position: fixed;width: 100%;top: 46px;z-index: 999;
}// 分類導航部分
.my-swipe .van-swipe-item {height: 185px;color: #fff;font-size: 20px;text-align: center;background-color: #39a9ed;
}
.my-swipe .van-swipe-item img {width: 100%;height: 185px;
}// 主會場
.main img {display: block;width: 100%;
}// 猜你喜歡
.guess .guess-title {height: 40px;line-height: 40px;text-align: center;
}// 商品樣式
.goods-list {background-color: #f6f6f6;
}
</style>
![]()
<template><div v-if="item.goods_id" class="goods-item" @click="$router.push(`/prodetail/${item.goods_id}`)"><div class="left"><img :src="item.goods_image" alt="" /></div><div class="right"><p class="tit text-ellipsis-2">{{ item.goods_name }}</p><p class="count">已售 {{ item.goods_sales }} 件</p><p class="price"><span class="new">¥{{ item.goods_price_min }}</span><span class="old">¥{{ item.goods_price_max }}</span></p></div></div>
</template><script>
export default {name: 'GoodsItem',props: {item: {type: Object,default: () => {return {}}}}
}
</script><style lang="less" scoped>
.goods-item {height: 148px;margin-bottom: 6px;padding: 10px;background-color: #fff;display: flex;.left {width: 127px;img {display: block;width: 100%;}}.right {flex: 1;font-size: 14px;line-height: 1.3;padding: 10px;display: flex;flex-direction: column;justify-content: space-evenly;.count {color: #999;font-size: 12px;}.price {color: #999;font-size: 16px;.new {color: #f03c3c;margin-right: 10px;}.old {text-decoration: line-through;font-size: 12px;}}}
}
</style>
import { Search, Swipe, SwipeItem, Grid, GridItem } from 'vant'Vue.use(GridItem)
Vue.use(Search)
Vue.use(Swipe)
Vue.use(SwipeItem)
Vue.use(Grid)
封裝接口
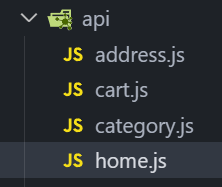
import request from '@/utils/request'// 獲取首頁數據
export const getHomeData = () => {return request.get('/page/detail', {params: {pageId: 0}})
}
頁面調用
<template><div class="home"><!-- 導航條 --><van-nav-bar title="智慧商城" fixed /><!-- 搜索框 --><van-searchreadonlyshape="round"background="#f1f1f2"placeholder="請在此輸入搜索關鍵詞"@click="$router.push('/search')"/><!-- 輪播圖 --><van-swipe class="my-swipe" :autoplay="3000" indicator-color="white"><van-swipe-item v-for="item in bannerList" :key="item.imgUrl"><img :src="item.imgUrl" alt=""></van-swipe-item></van-swipe><!-- 導航 --><van-grid column-num="5" icon-size="40"><van-grid-itemv-for="item in navList" :key="item.imgUrl":icon="item.imgUrl"text="新品首發"@click="$router.push('/category')"/></van-grid><!-- 主會場 --><div class="main"><img src="@/assets/main.png" alt=""></div><!-- 猜你喜歡 --><div class="guess"><p class="guess-title">—— 猜你喜歡 ——</p><div class="goods-list"><GoodsItem v-for="item in proList" :key="item.goods_id" :item="item"></GoodsItem></div></div></div>
</template><script>
import GoodsItem from '@/components/GoodsItem.vue'
import { getHomeData } from '@/api/home'
export default {name: 'HomePage',components: {GoodsItem},data () {return {bannerList: [], // 輪播navList: [], // 導航proList: [] // 商品}},async created () {const { data: { pageData } } = await getHomeData()this.bannerList = pageData.items[1].datathis.navList = pageData.items[3].datathis.proList = pageData.items[6].dataconsole.log(this.proList)}
}
</script><style lang="less" scoped>
// 主題 padding
.home {padding-top: 100px;padding-bottom: 50px;
}// 導航條樣式定制
.van-nav-bar {z-index: 999;background-color: #c21401;::v-deep .van-nav-bar__title {color: #fff;}
}// 搜索框樣式定制
.van-search {position: fixed;width: 100%;top: 46px;z-index: 999;
}// 分類導航部分
.my-swipe .van-swipe-item {height: 185px;color: #fff;font-size: 20px;text-align: center;background-color: #39a9ed;
}
.my-swipe .van-swipe-item img {width: 100%;height: 185px;
}// 主會場
.main img {display: block;width: 100%;
}// 猜你喜歡
.guess .guess-title {height: 40px;line-height: 40px;text-align: center;
}// 商品樣式
.goods-list {background-color: #f6f6f6;
}
</style>
動態渲染

<!-- 輪播圖 -->
<van-swipe class="my-swipe" :autoplay="3000" indicator-color="white"><van-swipe-item v-for="item in bannerList" :key="item.imgUrl"><img :src="item.imgUrl" alt=""></van-swipe-item>
</van-swipe><!-- 導航 -->
<van-grid column-num="5" icon-size="40"><van-grid-itemv-for="item in navList" :key="item.imgUrl":icon="item.imgUrl":text="item.text"@click="$router.push('/category')"/>
</van-grid><!-- 猜你喜歡 -->
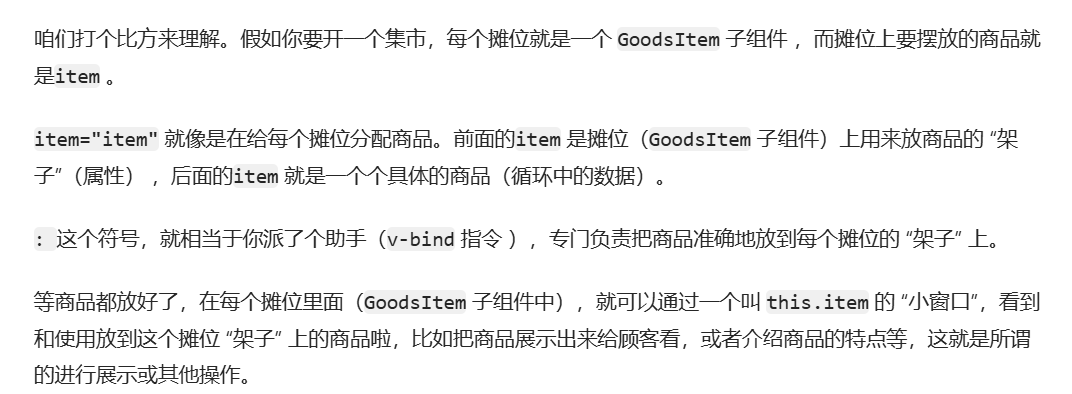
<div class="guess"><p class="guess-title">—— 猜你喜歡 ——</p><div class="goods-list">//:key="item.goods_id"避免重名就可以了//要傳的是整個item對象,完全可以父傳子的方式往下傳進行渲染,一旦傳了就可以通過item來接收<GoodsItem v-for="item in proList" :item="item" :key="item.goods_id"></GoodsItem></div>
</div>用props來接收
<template><div v-if="item.goods_id" class="goods-item" @click="$router.push(`/prodetail/${item.goods_id}`)"><div class="left"><img :src="item.goods_image" alt="" /></div><div class="right"><p class="tit text-ellipsis-2">{{ item.goods_name }}</p><p class="count">已售 {{ item.goods_sales }} 件</p><p class="price"><span class="new">¥{{ item.goods_price_min }}</span><span class="old">¥{{ item.goods_price_max }}</span></p></div></div>
</template><script>
export default {name: 'GoodsItem',props: {item: {type: Object,//是個對象類的,這個default(默認值)就得是個函數,在函數中的返回值就是他的默認值default: () => {return {}}}}
}
</script><style lang="less" scoped>
.goods-item {height: 148px;margin-bottom: 6px;padding: 10px;background-color: #fff;display: flex;.left {width: 127px;img {display: block;width: 100%;}}.right {flex: 1;font-size: 14px;line-height: 1.3;padding: 10px;display: flex;flex-direction: column;justify-content: space-evenly;.count {color: #999;font-size: 12px;}.price {color: #999;font-size: 16px;.new {color: #f03c3c;margin-right: 10px;}.old {text-decoration: line-through;font-size: 12px;}}}
}
</style>
問題1:
![]()

問題2:
加這個item.goods_id}的原因
<div v-if="item.goods_id" class="goods-item" @click="$router.push(`/prodetail/${item.goods_id}`)"
點擊進去跳轉的時候沒有攜帶任何id

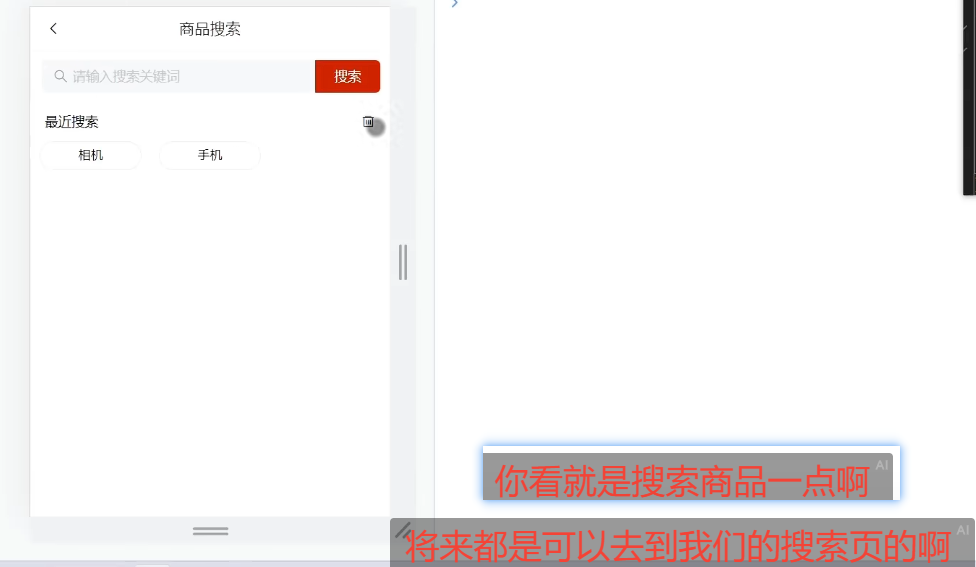
23. 搜索 -歷史記錄管理
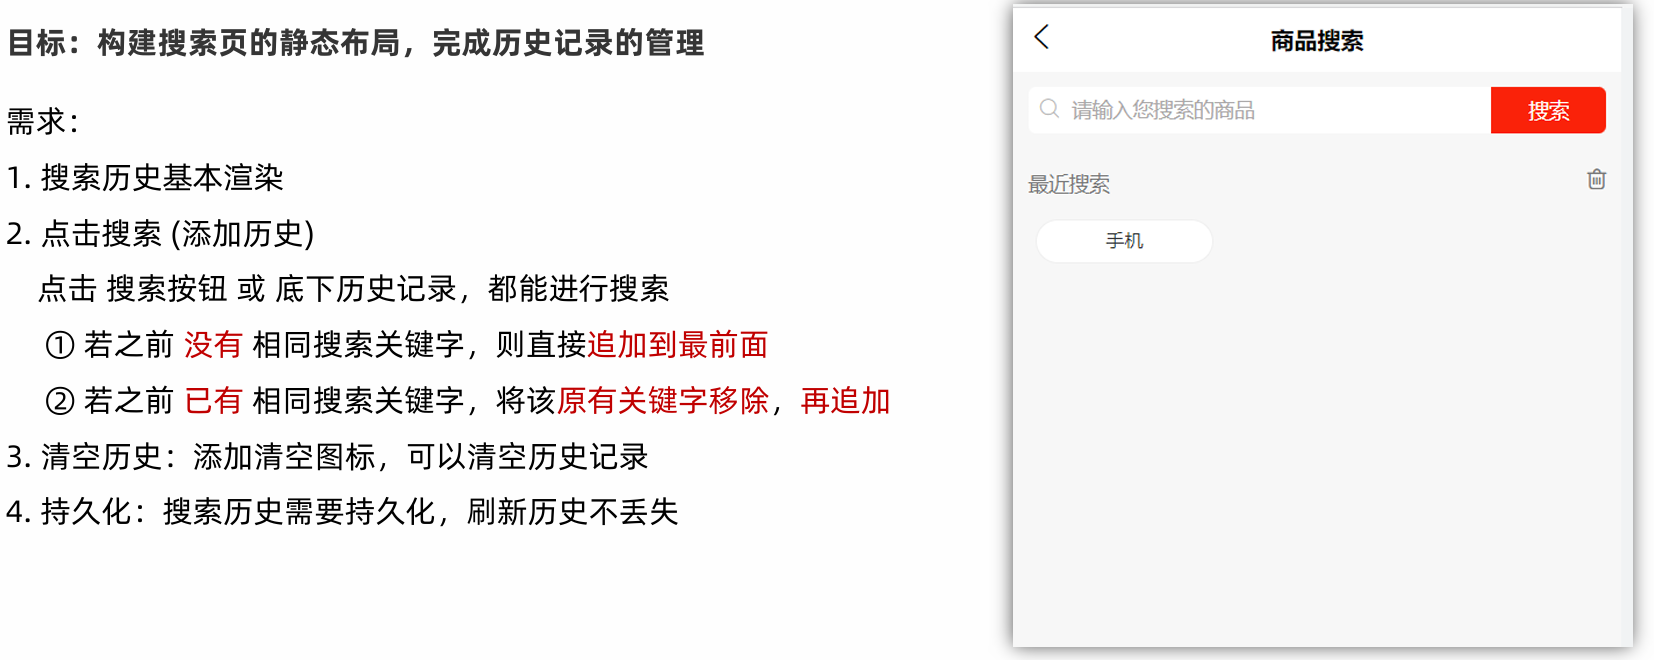
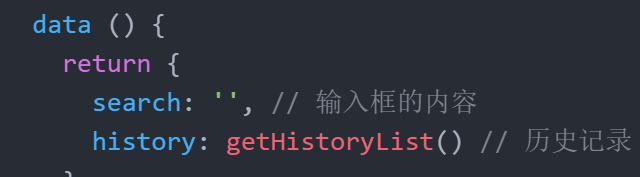
1.搜索歷史基本渲染
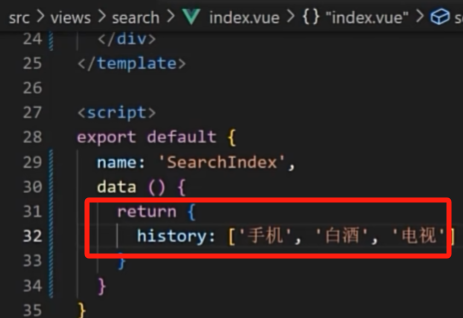
<template><div class="search"><van-nav-bar title="商品搜索" left-arrow @click-left="$router.go(-1)" /><van-search v-model="search" show-action placeholder="請輸入搜索關鍵詞" clearable><template #action><div @click="goSearch(search)">搜索</div></template></van-search><!-- 搜索歷史 --><div class="search-history" v-if="history.length > 0"><div class="title"><span>最近搜索</span><van-icon @click="clear" name="delete-o" size="16" /></div><div class="list"><div v-for="item in history" :key="item" class="list-item" @click="goSearch(item)">{{ item }}</div></div></div></div>
</template><script>
import { getHistoryList, setHistoryList } from '@/utils/storage'
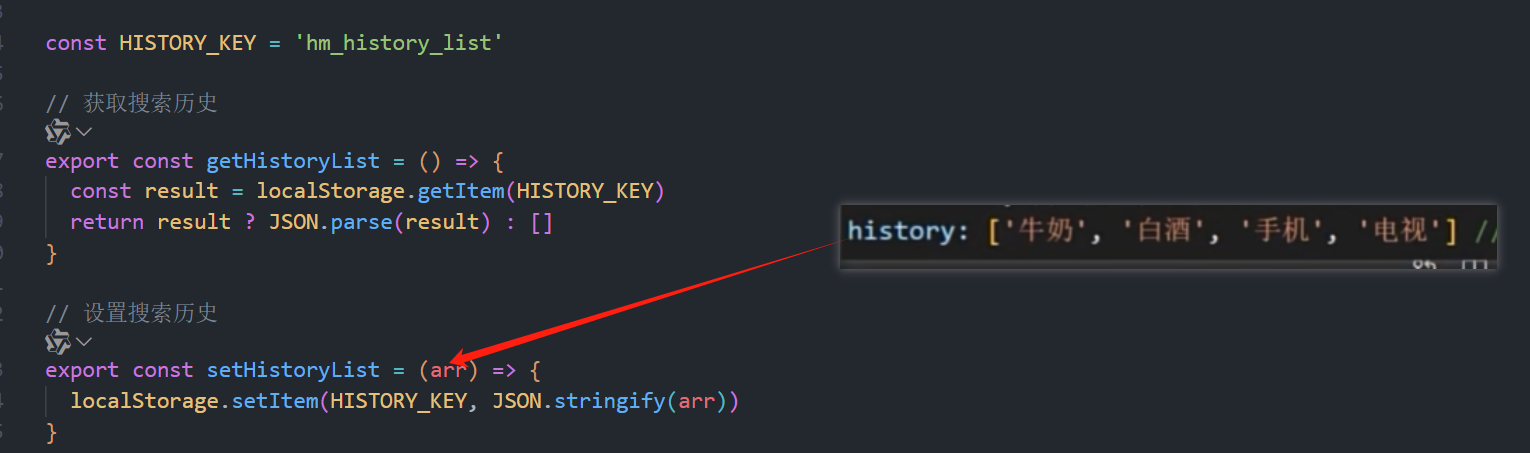
export default {name: 'SearchIndex',data () {return {search: '', // 輸入框的內容history: getHistoryList() // 歷史記錄}},methods: {goSearch (key) {// console.log('進行了搜索,搜索歷史要更新', key)const index = this.history.indexOf(key)if (index !== -1) {// 存在相同的項,將原有關鍵字移除// splice(從哪開始, 刪除幾個, 項1, 項2)this.history.splice(index, 1)}this.history.unshift(key)setHistoryList(this.history)// 跳轉到搜索列表頁this.$router.push(`/searchlist?search=${key}`)},clear () {this.history = []setHistoryList([])}}
}
</script><style lang="less" scoped>
.search {.searchBtn {background-color: #fa2209;color: #fff;}::v-deep .van-search__action {background-color: #c21401;color: #fff;padding: 0 20px;border-radius: 0 5px 5px 0;margin-right: 10px;}::v-deep .van-icon-arrow-left {color: #333;}.title {height: 40px;line-height: 40px;font-size: 14px;display: flex;justify-content: space-between;align-items: center;padding: 0 15px;}.list {display: flex;justify-content: flex-start;flex-wrap: wrap;padding: 0 10px;gap: 5%;}.list-item {width: 30%;text-align: center;padding: 7px;line-height: 15px;border-radius: 50px;background: #fff;font-size: 13px;border: 1px solid #efefef;overflow: hidden;white-space: nowrap;text-overflow: ellipsis;margin-bottom: 10px;}
}
</style>
2.點擊搜索,添加歷史
<template><div class="search"><van-nav-bar title="商品搜索" left-arrow @click-left="$router.go(-1)" /><van-search v-model="search" show-action placeholder="請輸入搜索關鍵詞" clearable><template #action><div @click="goSearch(search)">搜索</div></template></van-search><!-- 搜索歷史 --><div class="search-history" v-if="history.length > 0"><div class="title"><span>最近搜索</span><van-icon @click="clear" name="delete-o" size="16" /></div><div class="list"><div v-for="item in history" :key="item" class="list-item" @click="goSearch(item)">{{ item }}</div></div></div></div>
</template><script>
import { getHistoryList, setHistoryList } from '@/utils/storage'
export default {name: 'SearchIndex',data () {return {search: '', // 輸入框的內容history: getHistoryList() // 歷史記錄}},methods: {goSearch (key) {// console.log('進行了搜索,搜索歷史要更新', key)const index = this.history.indexOf(key)//查找這個key在這個數組中的下標,如查到了便于刪除//indexOf 方法用于查找一個元素在數組中的位置,//如果元素存在,會返回該元素的索引(索引從 0 開始);如果不存在,則返回 -1。if (index !== -1) {// 存在相同的項,將原有關鍵字移除// splice(從哪開始, 刪除幾個, 項1, 項2)this.history.splice(index, 1)}this.history.unshift(key)setHistoryList(this.history)// 跳轉到搜索列表頁this.$router.push(`/searchlist?search=${key}`)},clear () {this.history = []setHistoryList([])}}
}
</script><style lang="less" scoped>
.search {.searchBtn {background-color: #fa2209;color: #fff;}::v-deep .van-search__action {background-color: #c21401;color: #fff;padding: 0 20px;border-radius: 0 5px 5px 0;margin-right: 10px;}::v-deep .van-icon-arrow-left {color: #333;}.title {height: 40px;line-height: 40px;font-size: 14px;display: flex;justify-content: space-between;align-items: center;padding: 0 15px;}.list {display: flex;justify-content: flex-start;flex-wrap: wrap;padding: 0 10px;gap: 5%;}.list-item {width: 30%;text-align: center;padding: 7px;line-height: 15px;border-radius: 50px;background: #fff;font-size: 13px;border: 1px solid #efefef;overflow: hidden;white-space: nowrap;text-overflow: ellipsis;margin-bottom: 10px;}
}
</style>
3.清空歷史
<template><div class="search"><van-nav-bar title="商品搜索" left-arrow @click-left="$router.go(-1)" /><van-search v-model="search" show-action placeholder="請輸入搜索關鍵詞" clearable><template #action><div @click="goSearch(search)">搜索</div></template></van-search><!-- 搜索歷史 --><div class="search-history" v-if="history.length > 0"><div class="title"><span>最近搜索</span><van-icon @click="clear" name="delete-o" size="16" /></div><div class="list"><div v-for="item in history" :key="item" class="list-item" @click="goSearch(item)">{{ item }}</div></div></div></div>
</template><script>
import { getHistoryList, setHistoryList } from '@/utils/storage'
export default {name: 'SearchIndex',data () {return {search: '', // 輸入框的內容history: getHistoryList() // 歷史記錄}},methods: {goSearch (key) {// console.log('進行了搜索,搜索歷史要更新', key)const index = this.history.indexOf(key)//查找這個key在這個數組中的下標,如查到了便于刪除//indexOf 方法用于查找一個元素在數組中的位置,//如果元素存在,會返回該元素的索引(索引從 0 開始);如果不存在,則返回 -1。if (index !== -1) {// 存在相同的項,將原有關鍵字移除// splice(從哪開始, 刪除幾個, 項1, 項2)this.history.splice(index, 1)}this.history.unshift(key)setHistoryList(this.history)// 跳轉到搜索列表頁this.$router.push(`/searchlist?search=${key}`)},clear () {this.history = []setHistoryList([])}}
}
</script><style lang="less" scoped>
.search {.searchBtn {background-color: #fa2209;color: #fff;}::v-deep .van-search__action {background-color: #c21401;color: #fff;padding: 0 20px;border-radius: 0 5px 5px 0;margin-right: 10px;}::v-deep .van-icon-arrow-left {color: #333;}.title {height: 40px;line-height: 40px;font-size: 14px;display: flex;justify-content: space-between;align-items: center;padding: 0 15px;}.list {display: flex;justify-content: flex-start;flex-wrap: wrap;padding: 0 10px;gap: 5%;}.list-item {width: 30%;text-align: center;padding: 7px;line-height: 15px;border-radius: 50px;background: #fff;font-size: 13px;border: 1px solid #efefef;overflow: hidden;white-space: nowrap;text-overflow: ellipsis;margin-bottom: 10px;}
}
</style>
4.持久化
<template><div class="search"><van-nav-bar title="商品搜索" left-arrow @click-left="$router.go(-1)" /><van-search v-model="search" show-action placeholder="請輸入搜索關鍵詞" clearable><template #action><div @click="goSearch(search)">搜索</div></template></van-search><!-- 搜索歷史 --><div class="search-history" v-if="history.length > 0"><div class="title"><span>最近搜索</span><van-icon @click="clear" name="delete-o" size="16" /></div><div class="list"><div v-for="item in history" :key="item" class="list-item" @click="goSearch(item)">{{ item }}</div></div></div></div>
</template><script>
import { getHistoryList, setHistoryList } from '@/utils/storage'
export default {name: 'SearchIndex',data () {return {search: '', // 輸入框的內容//往本地去讀history: getHistoryList() // 歷史記錄}},methods: {goSearch (key) {// console.log('進行了搜索,搜索歷史要更新', key)const index = this.history.indexOf(key)//查找這個key在這個數組中的下標,如查到了便于刪除//indexOf 方法用于查找一個元素在數組中的位置,//如果元素存在,會返回該元素的索引(索引從 0 開始);如果不存在,則返回 -1。if (index !== -1) {// 存在相同的項,將原有關鍵字移除// splice(從哪開始, 刪除幾個, 項1, 項2)this.history.splice(index, 1)}this.history.unshift(key)//往本地去存,持久化到本地setHistoryList(this.history)// 跳轉到搜索列表頁this.$router.push(`/searchlist?search=${key}`)},clear () {this.history = []setHistoryList([])}}
}
</script><style lang="less" scoped>
.search {.searchBtn {background-color: #fa2209;color: #fff;}::v-deep .van-search__action {background-color: #c21401;color: #fff;padding: 0 20px;border-radius: 0 5px 5px 0;margin-right: 10px;}::v-deep .van-icon-arrow-left {color: #333;}.title {height: 40px;line-height: 40px;font-size: 14px;display: flex;justify-content: space-between;align-items: center;padding: 0 15px;}.list {display: flex;justify-content: flex-start;flex-wrap: wrap;padding: 0 10px;gap: 5%;}.list-item {width: 30%;text-align: center;padding: 7px;line-height: 15px;border-radius: 50px;background: #fff;font-size: 13px;border: 1px solid #efefef;overflow: hidden;white-space: nowrap;text-overflow: ellipsis;margin-bottom: 10px;}
}
</style>
5.跳轉


問題1:
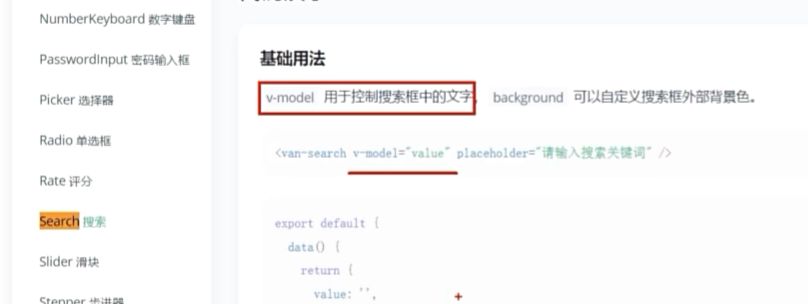
<van-search v-model="search" show-action placeholder="請輸入搜索關鍵詞" clearable>
在這里綁定,是為了實時拿到搜索框的值,通過data能快速拿到搜索框的值
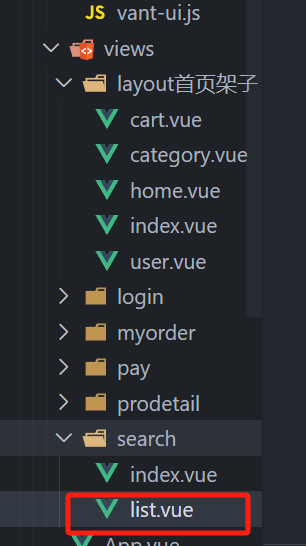
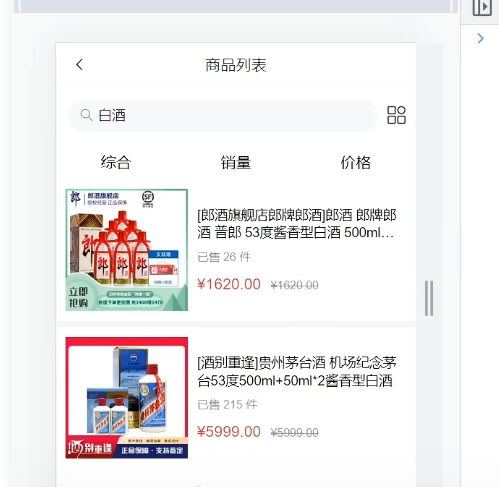
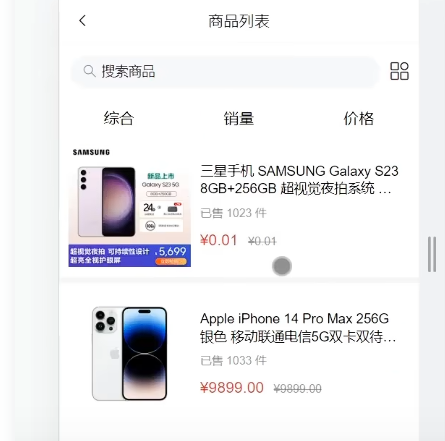
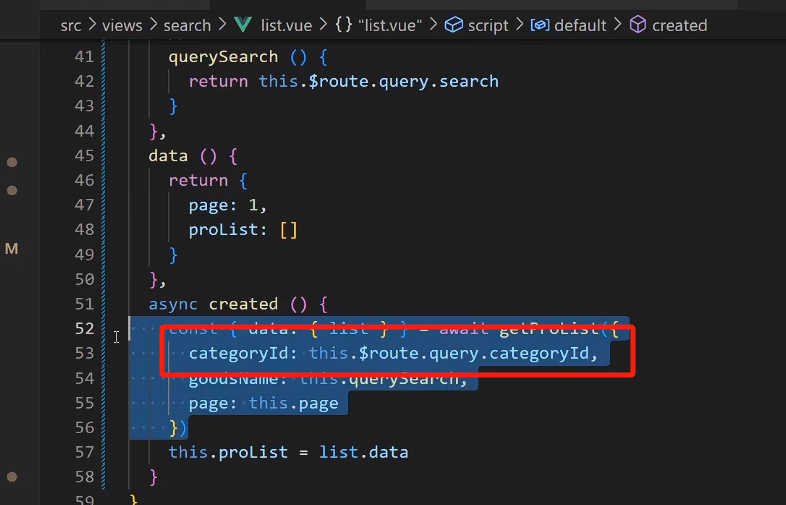
24. 搜索列表 -靜態布局 & 動態渲染
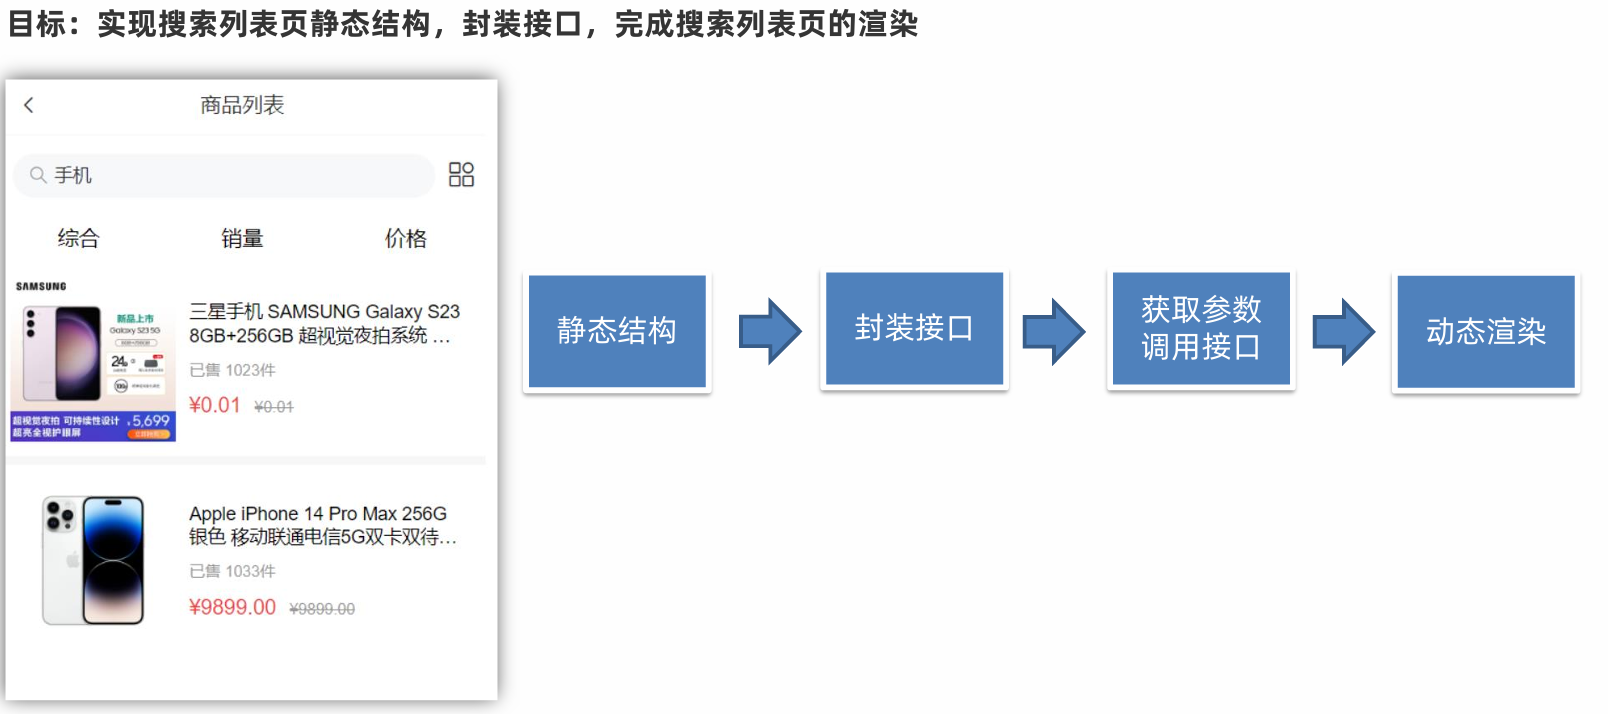
商品搜索頁
代碼
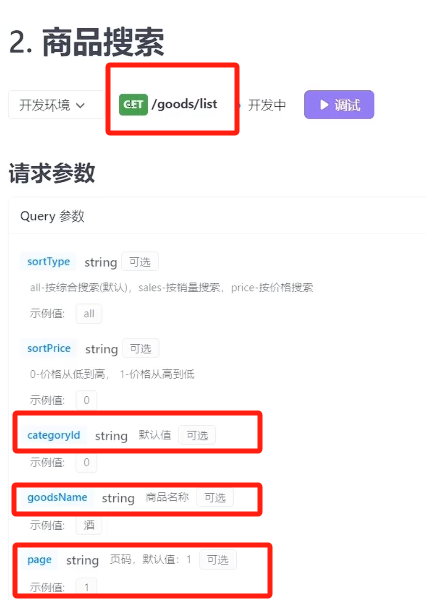

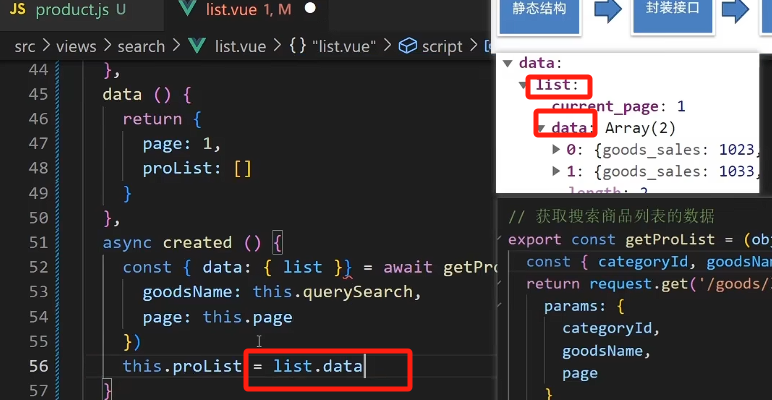
import request from '@/utils/request'// 獲取搜索商品列表的數據
export const getProList = (obj) => {const { categoryId, goodsName, page } = objreturn request.get('/goods/list', {params: {categoryId,goodsName,page}})
}// 獲取商品詳情數據
export const getProDetail = (goodsId) => {return request.get('/goods/detail', {params: {goodsId}})
}// 獲取商品評價
export const getProComments = (goodsId, limit) => {return request.get('/comment/listRows', {params: {goodsId,limit}})
}
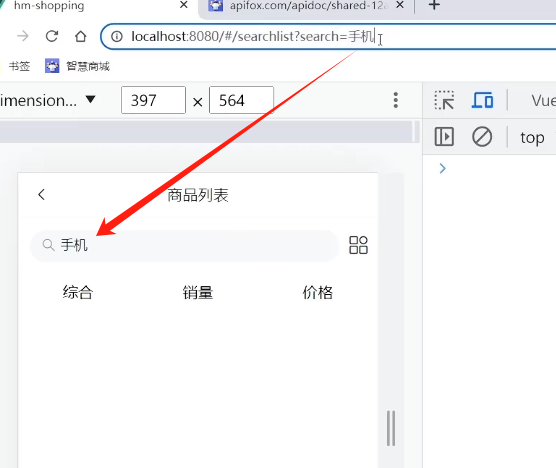
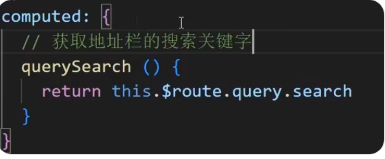
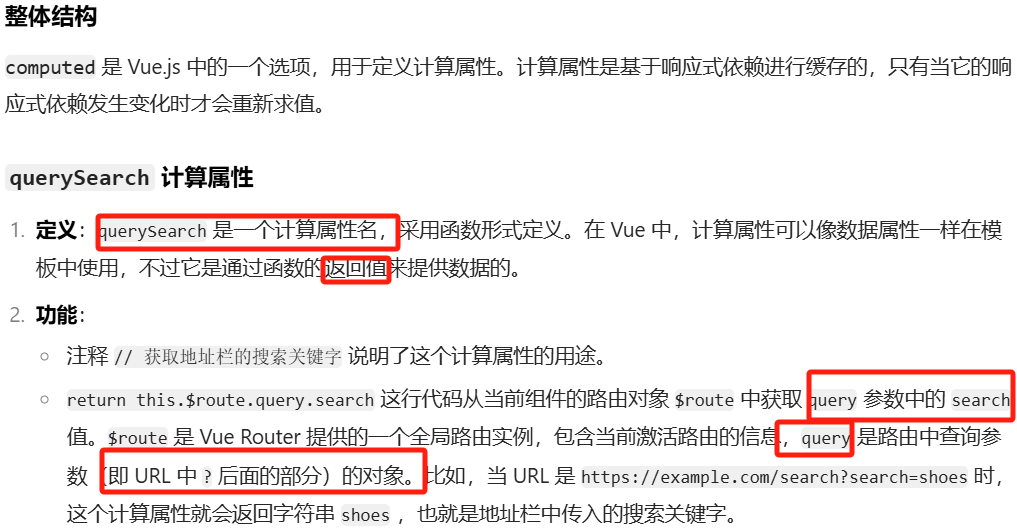
<template><div class="search"><van-nav-bar fixed title="商品列表" left-arrow @click-left="$router.go(-1)" /><van-searchreadonlyshape="round"background="#ffffff":value="querySearch || '搜索商品'"show-action@click="$router.push('/search')"><template #action><van-icon class="tool" name="apps-o" /></template></van-search><!-- 排序選項按鈕 --><div class="sort-btns"><div class="sort-item">綜合</div><div class="sort-item">銷量</div><div class="sort-item">價格 </div></div><div class="goods-list"><GoodsItem v-for="item in proList" :key="item.goods_id" :item="item"></GoodsItem></div></div>
</template><script>
import GoodsItem from '@/components/GoodsItem.vue'
import { getProList } from '@/api/product'
export default {name: 'SearchIndex',components: {GoodsItem},computed: {// 獲取地址欄的搜索關鍵字querySearch () {return this.$route.query.search}},data () {return {page: 1,proList: []}},async created () {const { data: { list } } = await getProList({categoryId: this.$route.query.categoryId,goodsName: this.querySearch,page: this.page})this.proList = list.data}
}
</script><style lang="less" scoped>
.search {padding-top: 46px;::v-deep .van-icon-arrow-left {color: #333;}.tool {font-size: 24px;height: 40px;line-height: 40px;}.sort-btns {display: flex;height: 36px;line-height: 36px;.sort-item {text-align: center;flex: 1;font-size: 16px;}}
}// 商品樣式
.goods-list {background-color: #f6f6f6;
}
</style>
效果:
問題1:
問題2:

分類搜索頁
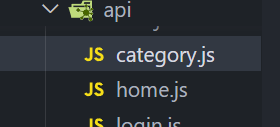
import request from '@/utils/request'// 獲取分類數據
export const getCategoryData = () => {return request.get('/category/list')
}
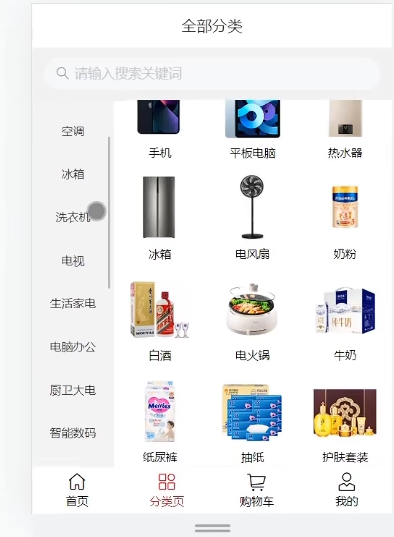
<template><div class="category"><!-- 分類 --><van-nav-bar title="全部分類" fixed /><!-- 搜索框 --><van-searchreadonlyshape="round"background="#f1f1f2"placeholder="請輸入搜索關鍵詞"@click="$router.push('/search')"/><!-- 分類列表 --><div class="list-box"><div class="left"><ul><li v-for="(item, index) in list" :key="item.category_id"><a :class="{ active: index === activeIndex }" @click="activeIndex = index" href="javascript:;">{{ item.name }}</a></li></ul></div><div class="right"><div @click="$router.push(`/searchlist?categoryId=${item.category_id}`)" v-for="item in list[activeIndex]?.children" :key="item.category_id" class="cate-goods"><img :src="item.image?.external_url" alt=""><p>{{ item.name }}</p></div></div></div></div>
</template><script>
import { getCategoryData } from '@/api/category'
export default {name: 'CategoryPage',created () {this.getCategoryList()},data () {return {list: [],activeIndex: 0}},methods: {async getCategoryList () {const { data: { list } } = await getCategoryData()this.list = list}}
}
</script><style lang="less" scoped>
// 主題 padding
.category {padding-top: 100px;padding-bottom: 50px;height: 100vh;.list-box {height: 100%;display: flex;.left {width: 85px;height: 100%;background-color: #f3f3f3;overflow: auto;a {display: block;height: 45px;line-height: 45px;text-align: center;color: #444444;font-size: 12px;&.active {color: #fb442f;background-color: #fff;}}}.right {flex: 1;height: 100%;background-color: #ffffff;display: flex;flex-wrap: wrap;justify-content: flex-start;align-content: flex-start;padding: 10px 0;overflow: auto;.cate-goods {width: 33.3%;margin-bottom: 10px;img {width: 70px;height: 70px;display: block;margin: 5px auto;}p {text-align: center;font-size: 12px;}}}}
}// 導航條樣式定制
.van-nav-bar {z-index: 999;
}// 搜索框樣式定制
.van-search {position: fixed;width: 100%;top: 46px;z-index: 999;
}
</style>

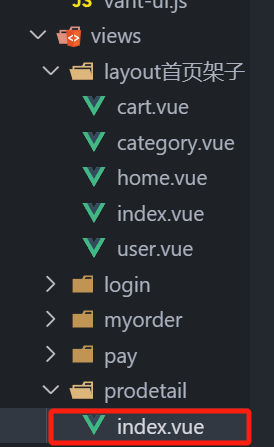
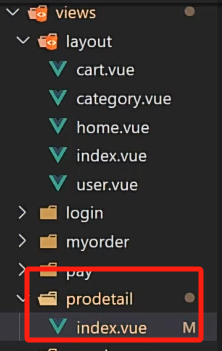
25. 商品詳情-靜態布局 & 渲染
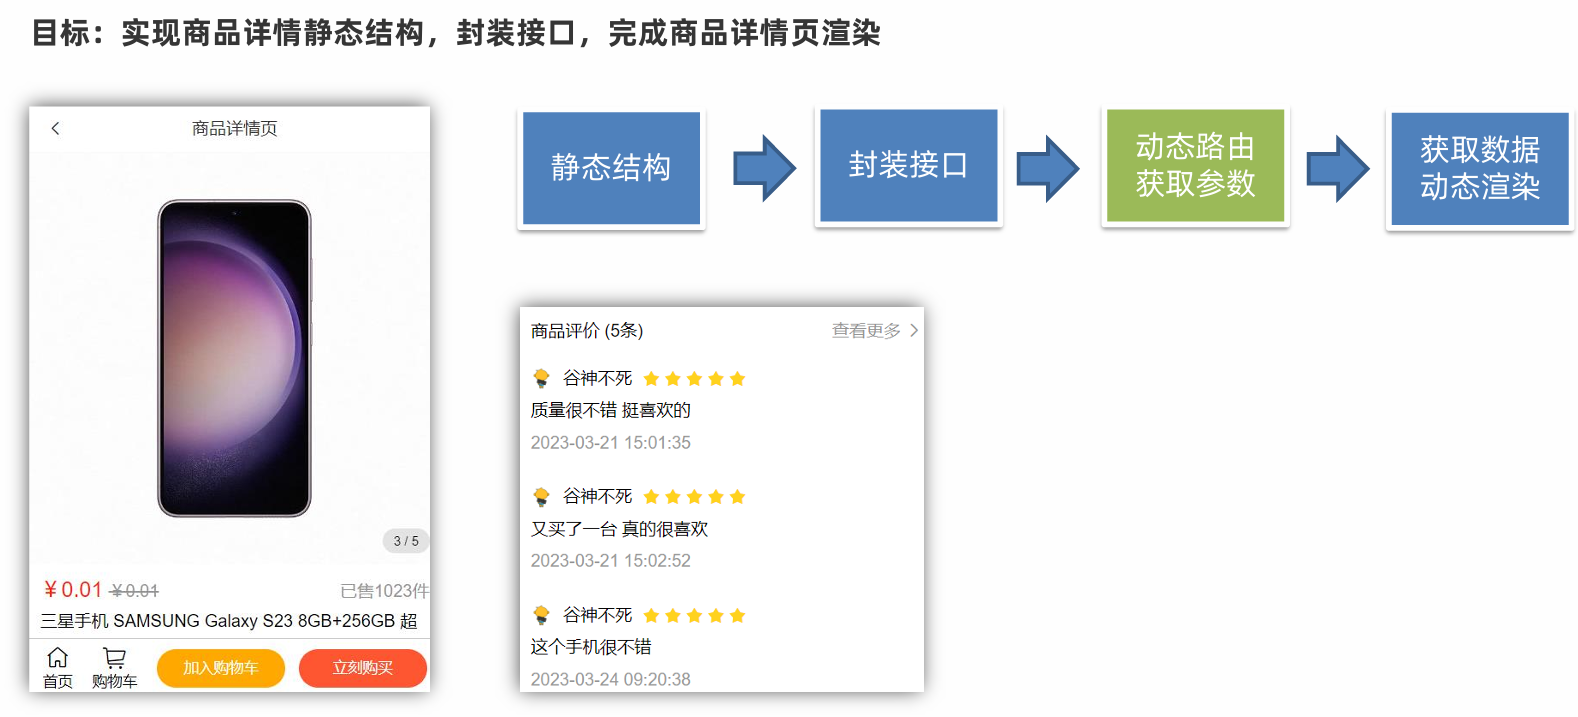
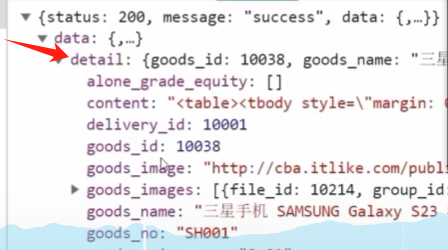
商品詳情頁的渲染:
1.靜態結構
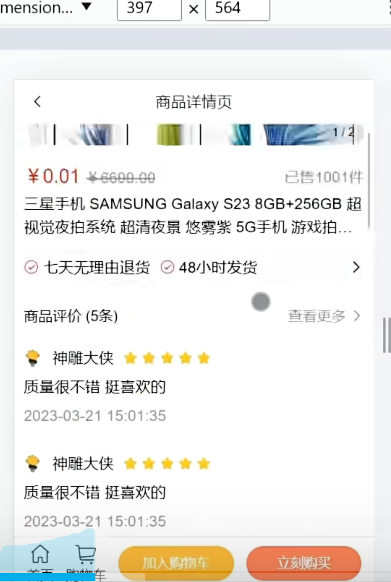
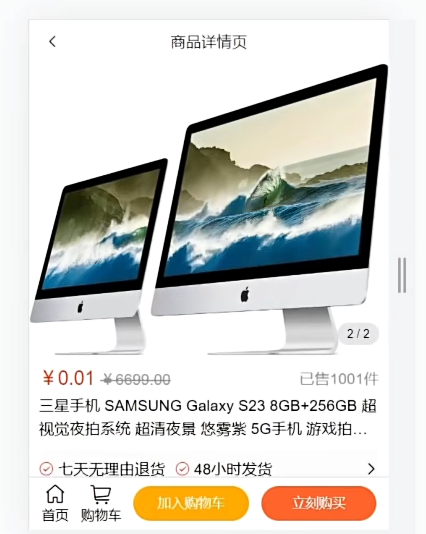
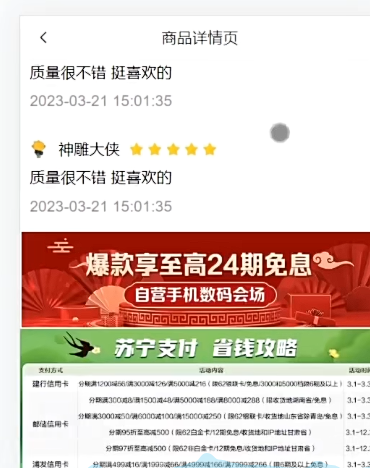
<template><div class="prodetail"><van-nav-bar fixed title="商品詳情頁" left-arrow @click-left="$router.go(-1)" /><van-swipe :autoplay="3000" @change="onChange"><van-swipe-item v-for="(image, index) in images" :key="index"><img :src="image" /></van-swipe-item><template #indicator><div class="custom-indicator">{{ current + 1 }} / {{ images.length }}</div></template></van-swipe><!-- 商品說明 --><div class="info"><div class="title"><div class="price"><span class="now">¥0.01</span><span class="oldprice">¥6699.00</span></div><div class="sellcount">已售1001件</div></div><div class="msg text-ellipsis-2">三星手機 SAMSUNG Galaxy S23 8GB+256GB 超視覺夜拍系統 超清夜景 悠霧紫 5G手機 游戲拍照旗艦機s23</div><div class="service"><div class="left-words"><span><van-icon name="passed" />七天無理由退貨</span><span><van-icon name="passed" />48小時發貨</span></div><div class="right-icon"><van-icon name="arrow" /></div></div></div><!-- 商品評價 --><div class="comment"><div class="comment-title"><div class="left">商品評價 (5條)</div><div class="right">查看更多 <van-icon name="arrow" /> </div></div><div class="comment-list"><div class="comment-item" v-for="item in 3" :key="item"><div class="top"><img src="http://cba.itlike.com/public/uploads/10001/20230321/a0db9adb2e666a65bc8dd133fbed7834.png" alt=""><div class="name">神雕大俠</div><van-rate :size="16" :value="5" color="#ffd21e" void-icon="star" void-color="#eee"/></div><div class="content">質量很不錯 挺喜歡的</div><div class="time">2023-03-21 15:01:35</div></div></div></div><!-- 商品描述 --><div class="desc"><img src="https://uimgproxy.suning.cn/uimg1/sop/commodity/kHgx21fZMWwqirkMhawkAw.jpg" alt=""><img src="https://uimgproxy.suning.cn/uimg1/sop/commodity/0rRMmncfF0kGjuK5cvLolg.jpg" alt=""><img src="https://uimgproxy.suning.cn/uimg1/sop/commodity/2P04A4Jn0HKxbKYSHc17kw.jpg" alt=""><img src="https://uimgproxy.suning.cn/uimg1/sop/commodity/MT4k-mPd0veQXWPPO5yTIw.jpg" alt=""></div><!-- 底部 --><div class="footer"><div class="icon-home"><van-icon name="wap-home-o" /><span>首頁</span></div><div class="icon-cart"><van-icon name="shopping-cart-o" /><span>購物車</span></div><div class="btn-add">加入購物車</div><div class="btn-buy">立刻購買</div></div></div>
</template><script>
export default {name: 'ProDetail',data () {return {images: ['https://img01.yzcdn.cn/vant/apple-1.jpg','https://img01.yzcdn.cn/vant/apple-2.jpg'],current: 0}},methods: {onChange (index) {this.current = index}}
}
</script><style lang="less" scoped>
.prodetail {padding-top: 46px;::v-deep .van-icon-arrow-left {color: #333;}img {display: block;width: 100%;}.custom-indicator {position: absolute;right: 10px;bottom: 10px;padding: 5px 10px;font-size: 12px;background: rgba(0, 0, 0, 0.1);border-radius: 15px;}.desc {width: 100%;overflow: scroll;::v-deep img {display: block;width: 100%!important;}}.info {padding: 10px;}.title {display: flex;justify-content: space-between;.now {color: #fa2209;font-size: 20px;}.oldprice {color: #959595;font-size: 16px;text-decoration: line-through;margin-left: 5px;}.sellcount {color: #959595;font-size: 16px;position: relative;top: 4px;}}.msg {font-size: 16px;line-height: 24px;margin-top: 5px;}.service {display: flex;justify-content: space-between;line-height: 40px;margin-top: 10px;font-size: 16px;background-color: #fafafa;.left-words {span {margin-right: 10px;}.van-icon {margin-right: 4px;color: #fa2209;}}}.comment {padding: 10px;}.comment-title {display: flex;justify-content: space-between;.right {color: #959595;}}.comment-item {font-size: 16px;line-height: 30px;.top {height: 30px;display: flex;align-items: center;margin-top: 20px;img {width: 20px;height: 20px;}.name {margin: 0 10px;}}.time {color: #999;}}.footer {position: fixed;left: 0;bottom: 0;width: 100%;height: 55px;background-color: #fff;border-top: 1px solid #ccc;display: flex;justify-content: space-evenly;align-items: center;.icon-home, .icon-cart {display: flex;flex-direction: column;align-items: center;justify-content: center;font-size: 14px;.van-icon {font-size: 24px;}}.btn-add,.btn-buy {height: 36px;line-height: 36px;width: 120px;border-radius: 18px;background-color: #ffa900;text-align: center;color: #fff;font-size: 14px;}.btn-buy {background-color: #fe5630;}}
}.tips {padding: 10px;
}
</style>
2.封裝接口
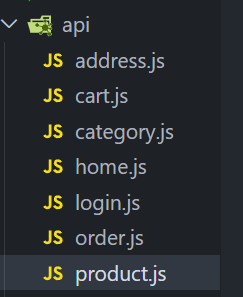
import request from '@/utils/request'// 獲取搜索商品列表的數據
export const getProList = (obj) => {const { categoryId, goodsName, page } = objreturn request.get('/goods/list', {params: {categoryId,goodsName,page}})
}// 獲取商品詳情數據
export const getProDetail = (goodsId) => {return request.get('/goods/detail', {params: {goodsId}})
}// 獲取商品評價
export const getProComments = (goodsId, limit) => {return request.get('/comment/listRows', {params: {goodsId,limit}})
}
3.動態路由傳參
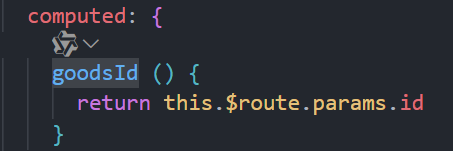
3.1動態路由參數,獲取商品 id
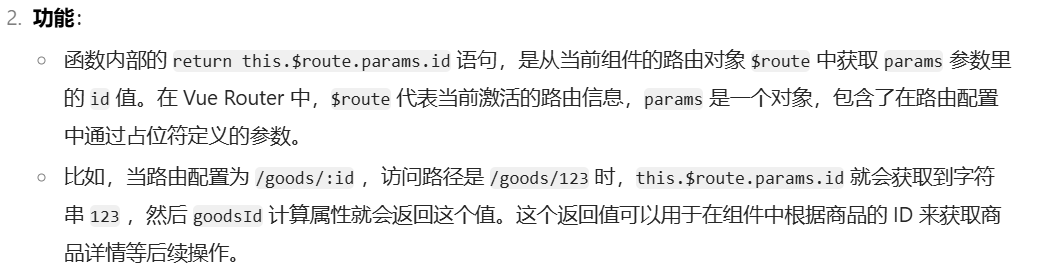
3.2一進入頁面發送請求,獲取商品詳情數據
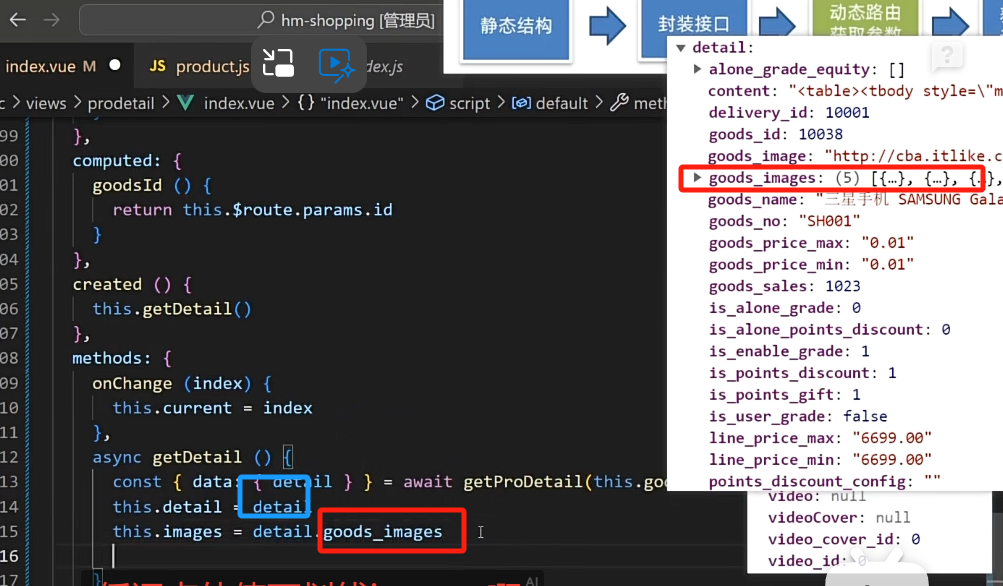
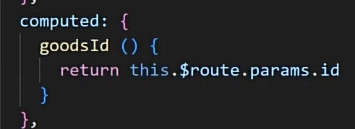
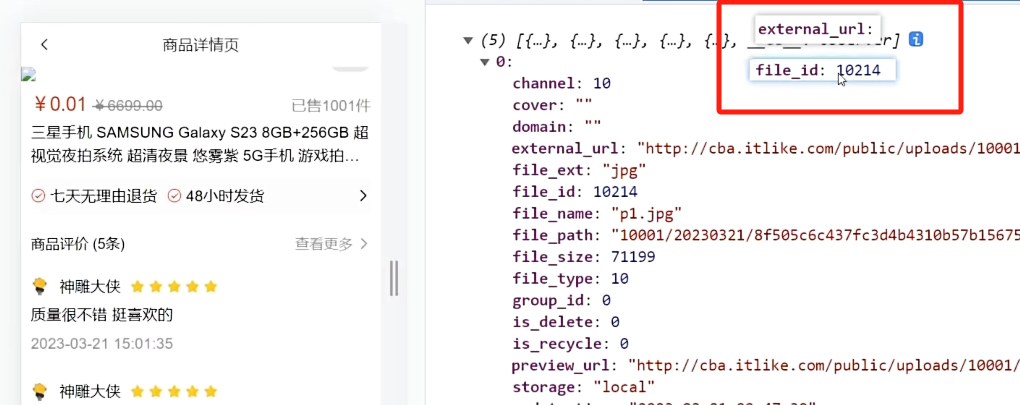
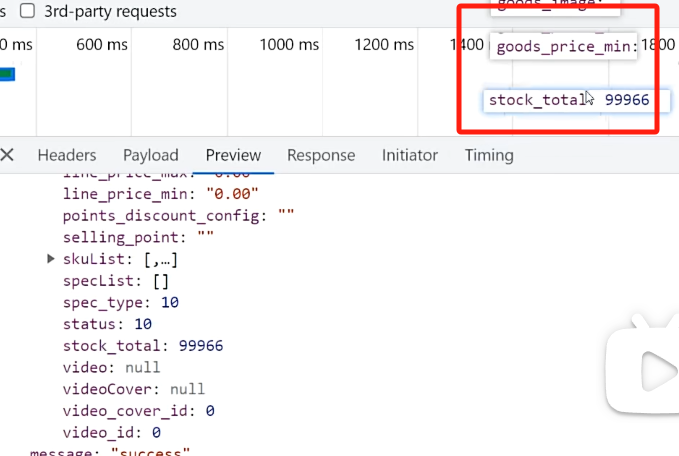
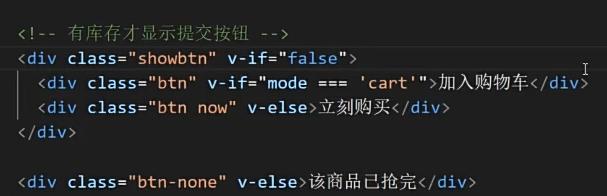
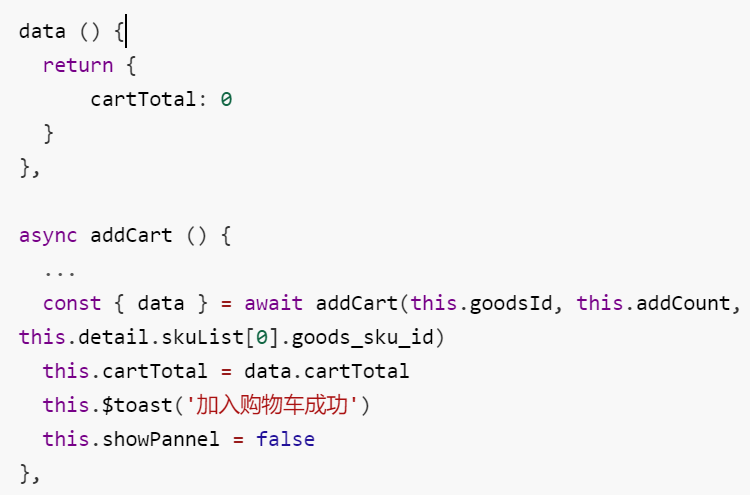
data () {return {images: [],current: 0,detail: {},total: 0, // 評價總數commentList: [], // 評價列表defaultImg,showPannel: false, // 控制彈層的顯示隱藏mode: 'cart', // 標記彈層狀態addCount: 1, // 數字框綁定的數據cartTotal: 0 // 購物車角標}},computed: {goodsId () {return this.$route.params.id}},created () {this.getDetail()this.getComments()},methods: {onChange (index) {this.current = index},async getDetail () {const { data: { detail } } = await getProDetail(this.goodsId)this.detail = detailthis.images = detail.goods_imagesconsole.log(this.images)},3.3動態渲染

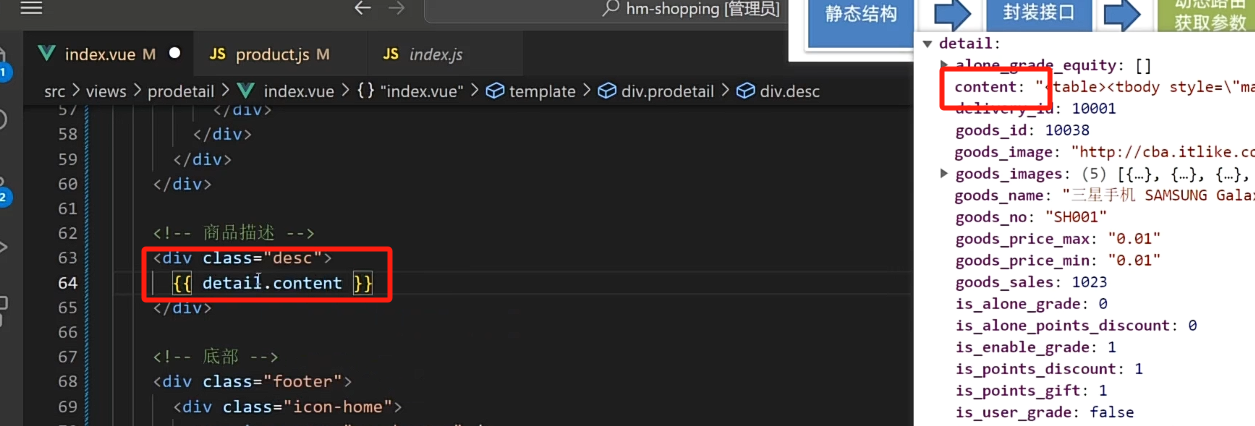
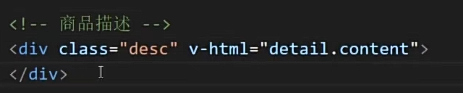
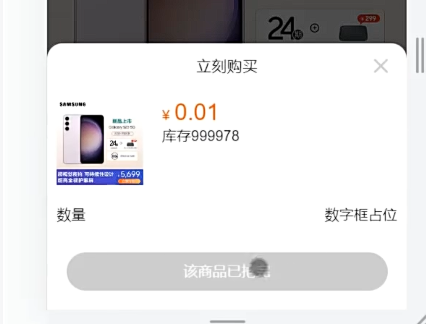
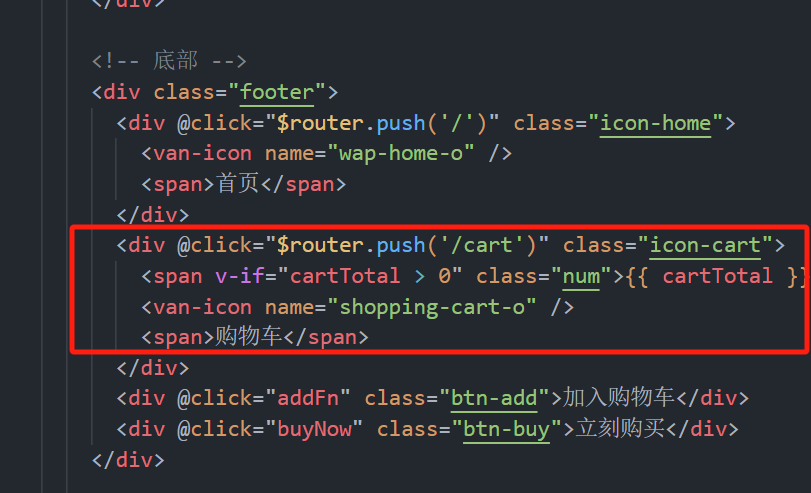
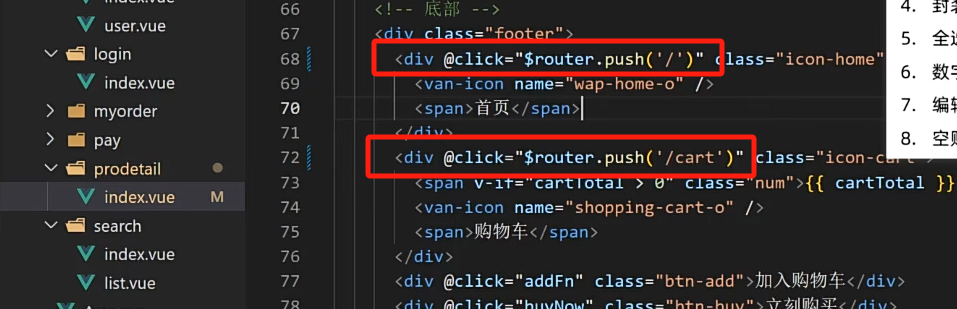
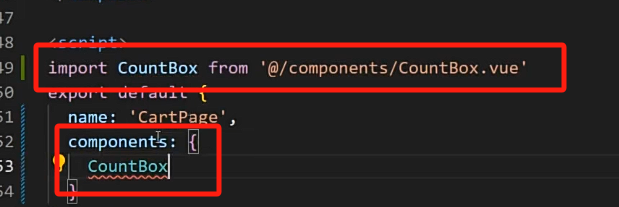
<template><div class="prodetail"><van-nav-bar fixed title="商品詳情頁" left-arrow @click-left="$router.go(-1)" /><van-swipe :autoplay="4000" @change="onChange"><van-swipe-item v-for="(image, index) in images" :key="index"><img :src="image.external_url" /></van-swipe-item><template #indicator><div class="custom-indicator">{{ current + 1 }} / {{ images.length }}</div></template></van-swipe><!-- 商品說明 --><div class="info"><div class="title"><div class="price"><span class="now">¥{{ detail.goods_price_min }}</span><span class="oldprice">¥{{ detail.goods_price_max }}</span></div><div class="sellcount">已售 {{ detail.goods_sales }} 件</div></div><div class="msg text-ellipsis-2">{{ detail.goods_name }}</div><div class="service"><div class="left-words"><span><van-icon name="passed" />七天無理由退貨</span><span><van-icon name="passed" />48小時發貨</span></div><div class="right-icon"><van-icon name="arrow" /></div></div></div><!-- 商品評價 --><div class="comment"><div class="comment-title"><div class="left">商品評價 ({{ total }}條)</div><div class="right">查看更多 <van-icon name="arrow" /> </div></div><div class="comment-list"><div class="comment-item" v-for="item in commentList" :key="item.comment_id"><div class="top"><img :src="item.user.avatar_url || defaultImg" alt=""><div class="name">{{ item.user.nick_name }}</div><van-rate :size="16" :value="item.score / 2" color="#ffd21e" void-icon="star" void-color="#eee"/></div><div class="content">{{ item.content }}</div><div class="time">{{ item.create_time }}</div></div></div></div><!-- 商品描述 --><div class="desc" v-html="detail.content"></div><!-- 底部 --><div class="footer"><div @click="$router.push('/')" class="icon-home"><van-icon name="wap-home-o" /><span>首頁</span></div><div @click="$router.push('/cart')" class="icon-cart"><span v-if="cartTotal > 0" class="num">{{ cartTotal }}</span><van-icon name="shopping-cart-o" /><span>購物車</span></div><div @click="addFn" class="btn-add">加入購物車</div><div @click="buyNow" class="btn-buy">立刻購買</div></div><!-- 加入購物車/立即購買 公用的彈層 --><van-action-sheet v-model="showPannel" :title="mode === 'cart' ? '加入購物車' : '立刻購買'"><div class="product"><div class="product-title"><div class="left"><img :src="detail.goods_image" alt=""></div><div class="right"><div class="price"><span>¥</span><span class="nowprice">{{ detail.goods_price_min }}</span></div><div class="count"><span>庫存</span><span>{{ detail.stock_total }}</span></div></div></div><div class="num-box"><span>數量</span><!-- v-model 本質上 :value 和 @input 的簡寫 --><CountBox v-model="addCount"></CountBox></div><!-- 有庫存才顯示提交按鈕 --><div class="showbtn" v-if="detail.stock_total > 0"><div class="btn" v-if="mode === 'cart'" @click="addCart">加入購物車</div><div class="btn now" v-else @click="goBuyNow">立刻購買</div></div><div class="btn-none" v-else>該商品已搶完</div></div></van-action-sheet></div>
</template><script>
import { getProComments, getProDetail } from '@/api/product'
import defaultImg from '@/assets/default-avatar.png'
import CountBox from '@/components/CountBox.vue'
import { addCart } from '@/api/cart'
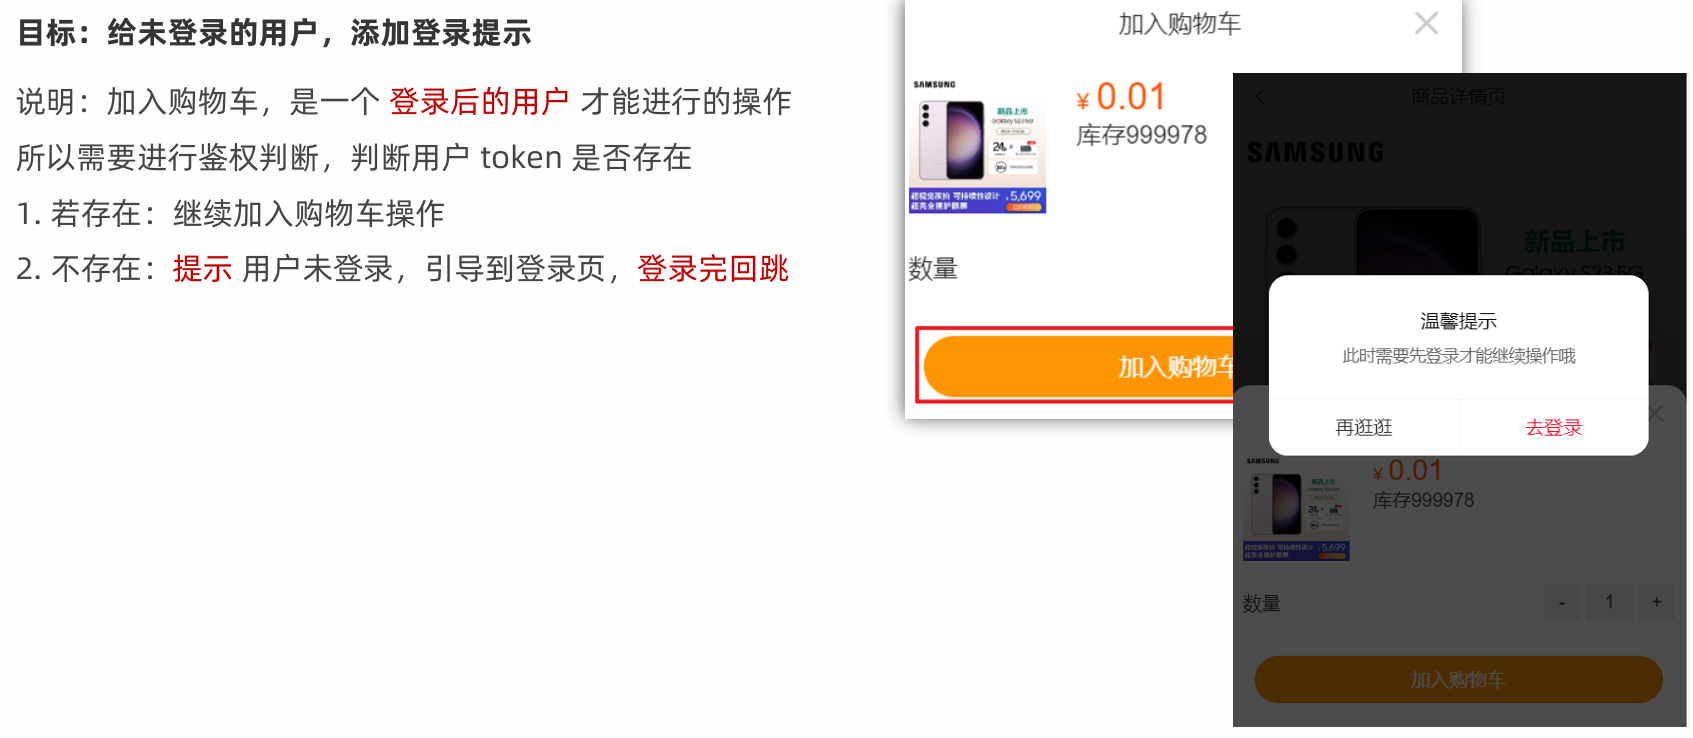
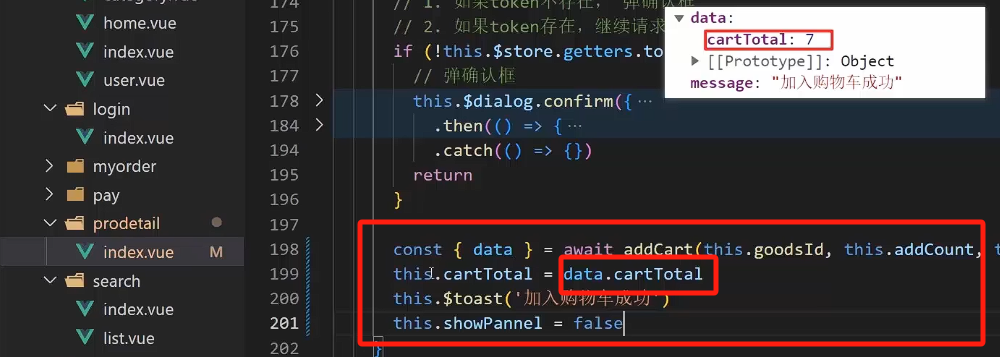
import loginConfirm from '@/mixins/loginConfirm'export default {name: 'ProDetail',mixins: [loginConfirm],components: {CountBox},data () {return {images: [],current: 0,detail: {},total: 0, // 評價總數commentList: [], // 評價列表defaultImg,showPannel: false, // 控制彈層的顯示隱藏mode: 'cart', // 標記彈層狀態addCount: 1, // 數字框綁定的數據cartTotal: 0 // 購物車角標}},computed: {goodsId () {return this.$route.params.id}},created () {this.getDetail()this.getComments()},methods: {onChange (index) {this.current = index},async getDetail () {const { data: { detail } } = await getProDetail(this.goodsId)this.detail = detailthis.images = detail.goods_imagesconsole.log(this.images)},async getComments () {const { data: { list, total } } = await getProComments(this.goodsId, 3)this.commentList = listthis.total = total},addFn () {this.mode = 'cart'this.showPannel = true},buyNow () {this.mode = 'buyNow'this.showPannel = true},async addCart () {if (this.loginConfirm()) {return}const { data } = await addCart(this.goodsId, this.addCount, this.detail.skuList[0].goods_sku_id)this.cartTotal = data.cartTotalthis.$toast('加入購物車成功')this.showPannel = false},goBuyNow () {if (this.loginConfirm()) {return}this.$router.push({path: '/pay',query: {mode: 'buyNow',goodsId: this.goodsId,goodsSkuId: this.detail.skuList[0].goods_sku_id,goodsNum: this.addCount}})}}
}
</script><style lang="less" scoped>
.prodetail {padding-top: 46px;::v-deep .van-icon-arrow-left {color: #333;}img {display: block;width: 100%;}.custom-indicator {position: absolute;right: 10px;bottom: 10px;padding: 5px 10px;font-size: 12px;background: rgba(0, 0, 0, 0.1);border-radius: 15px;}.desc {width: 100%;overflow: scroll;::v-deep img {display: block;width: 100%!important;}}.info {padding: 10px;}.title {display: flex;justify-content: space-between;.now {color: #fa2209;font-size: 20px;}.oldprice {color: #959595;font-size: 16px;text-decoration: line-through;margin-left: 5px;}.sellcount {color: #959595;font-size: 16px;position: relative;top: 4px;}}.msg {font-size: 16px;line-height: 24px;margin-top: 5px;}.service {display: flex;justify-content: space-between;line-height: 40px;margin-top: 10px;font-size: 16px;background-color: #fafafa;.left-words {span {margin-right: 10px;}.van-icon {margin-right: 4px;color: #fa2209;}}}.comment {padding: 10px;}.comment-title {display: flex;justify-content: space-between;.right {color: #959595;}}.comment-item {font-size: 16px;line-height: 30px;.top {height: 30px;display: flex;align-items: center;margin-top: 20px;img {width: 20px;height: 20px;}.name {margin: 0 10px;}}.time {color: #999;}}.footer {position: fixed;left: 0;bottom: 0;width: 100%;height: 55px;background-color: #fff;border-top: 1px solid #ccc;display: flex;justify-content: space-evenly;align-items: center;.icon-home, .icon-cart {display: flex;flex-direction: column;align-items: center;justify-content: center;font-size: 14px;.van-icon {font-size: 24px;}}.btn-add,.btn-buy {height: 36px;line-height: 36px;width: 120px;border-radius: 18px;background-color: #ffa900;text-align: center;color: #fff;font-size: 14px;}.btn-buy {background-color: #fe5630;}}
}.tips {padding: 10px;
}// 彈層的樣式
.product {.product-title {display: flex;.left {img {width: 90px;height: 90px;}margin: 10px;}.right {flex: 1;padding: 10px;.price {font-size: 14px;color: #fe560a;.nowprice {font-size: 24px;margin: 0 5px;}}}}.num-box {display: flex;justify-content: space-between;padding: 10px;align-items: center;}.btn, .btn-none {height: 40px;line-height: 40px;margin: 20px;border-radius: 20px;text-align: center;color: rgb(255, 255, 255);background-color: rgb(255, 148, 2);}.btn.now {background-color: #fe5630;}.btn-none {background-color: #cccccc;}
}.footer .icon-cart {position: relative;padding: 0 6px;.num {z-index: 999;position: absolute;top: -2px;right: 0;min-width: 16px;padding: 0 4px;color: #fff;text-align: center;background-color: #ee0a24;border-radius: 50%;}
}
</style>
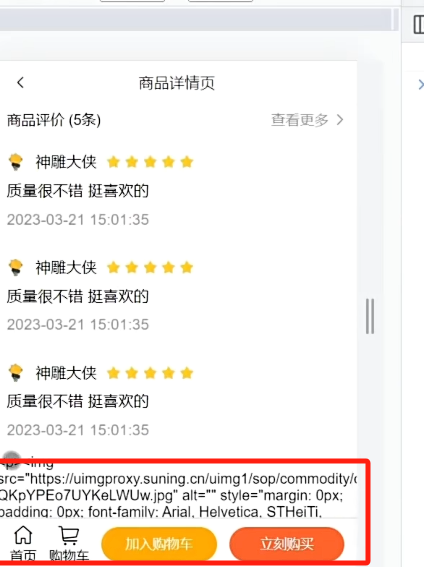
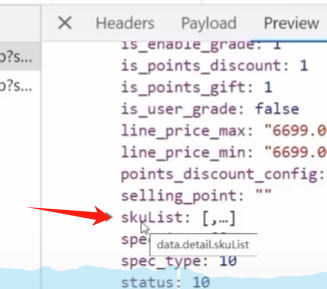
問題1:
直接渲染出現問題
得這樣子
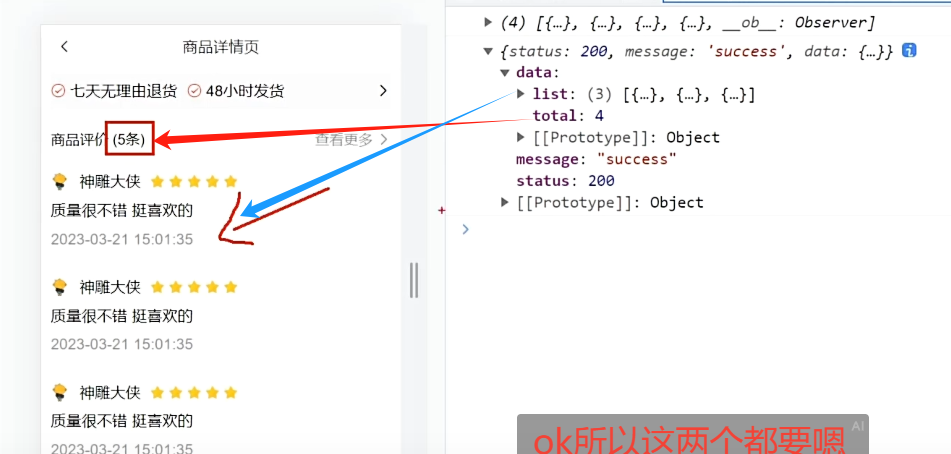
商品評價:
接口:
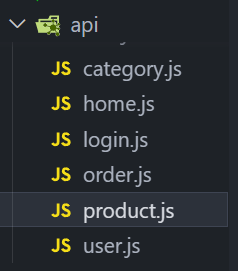
import request from '@/utils/request'// 獲取搜索商品列表的數據
export const getProList = (obj) => {const { categoryId, goodsName, page } = objreturn request.get('/goods/list', {params: {categoryId,goodsName,page}})
}// 獲取商品詳情數據
export const getProDetail = (goodsId) => {return request.get('/goods/detail', {params: {goodsId}})
}// 獲取商品評價
export const getProComments = (goodsId, limit) => {return request.get('/comment/listRows', {params: {goodsId,limit}})
}
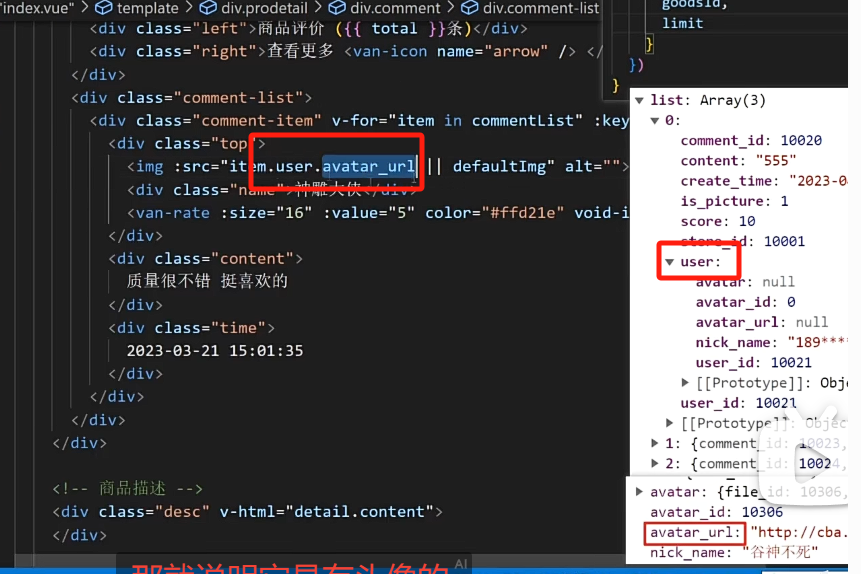
<template><!-- 商品評價 --><div class="comment"><div class="comment-title"><div class="left">商品評價 ({{ total }}條)</div><div class="right">查看更多 <van-icon name="arrow" /> </div></div><div class="comment-list"><div class="comment-item" v-for="item in commentList" :key="item.comment_id"><div class="top"><img :src="item.user.avatar_url || defaultImg" alt=""><div class="name">{{ item.user.nick_name }}</div><van-rate :size="16" :value="item.score / 2" color="#ffd21e" void-icon="star" void-color="#eee"/></div><div class="content">{{ item.content }}</div><div class="time">{{ item.create_time }}</div></div></div></div>
</template><script>
import { getProComments, getProDetail } from '@/api/product'
import defaultImg from '@/assets/default-avatar.png'
import CountBox from '@/components/CountBox.vue'
import { addCart } from '@/api/cart'
import loginConfirm from '@/mixins/loginConfirm'export default {name: 'ProDetail',mixins: [loginConfirm],components: {CountBox},data () {return {images: [],current: 0,detail: {},total: 0, // 評價總數commentList: [], // 評價列表defaultImg,showPannel: false, // 控制彈層的顯示隱藏mode: 'cart', // 標記彈層狀態addCount: 1, // 數字框綁定的數據cartTotal: 0 // 購物車角標}},computed: {goodsId () {return this.$route.params.id}},created () {this.getDetail()this.getComments()},methods: {onChange (index) {this.current = index},async getDetail () {const { data: { detail } } = await getProDetail(this.goodsId)this.detail = detailthis.images = detail.goods_imagesconsole.log(this.images)},async getComments () {const { data: { list, total } } = await getProComments(this.goodsId, 3)this.commentList = listthis.total = total}
}
</script>
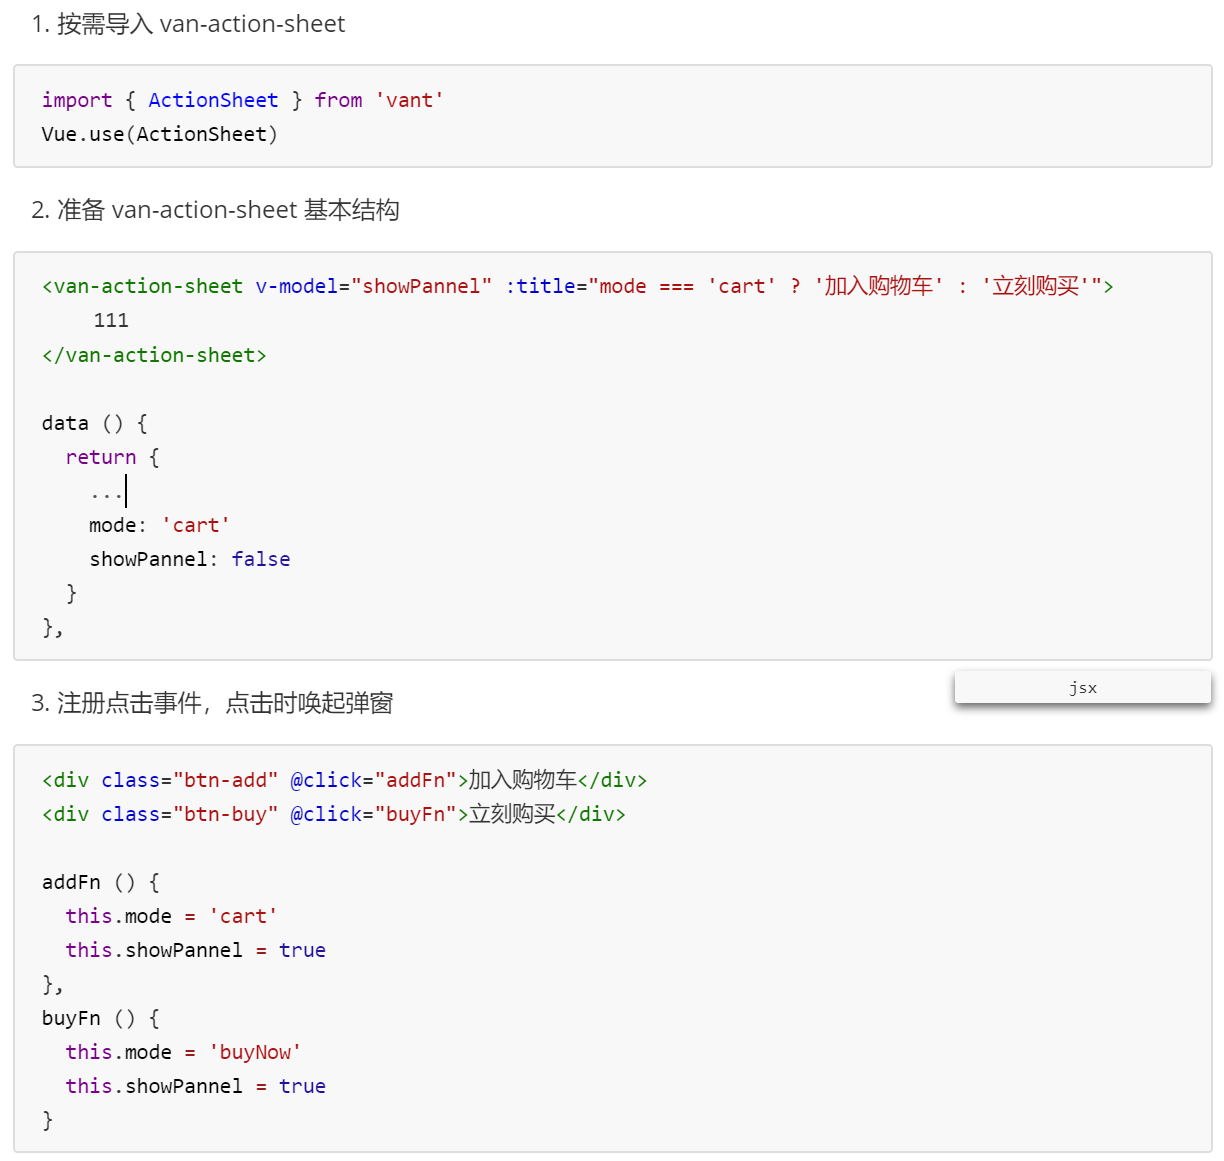
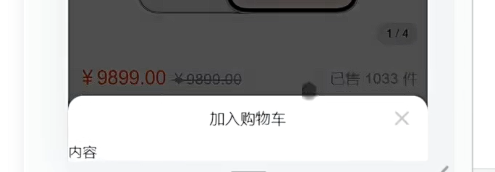
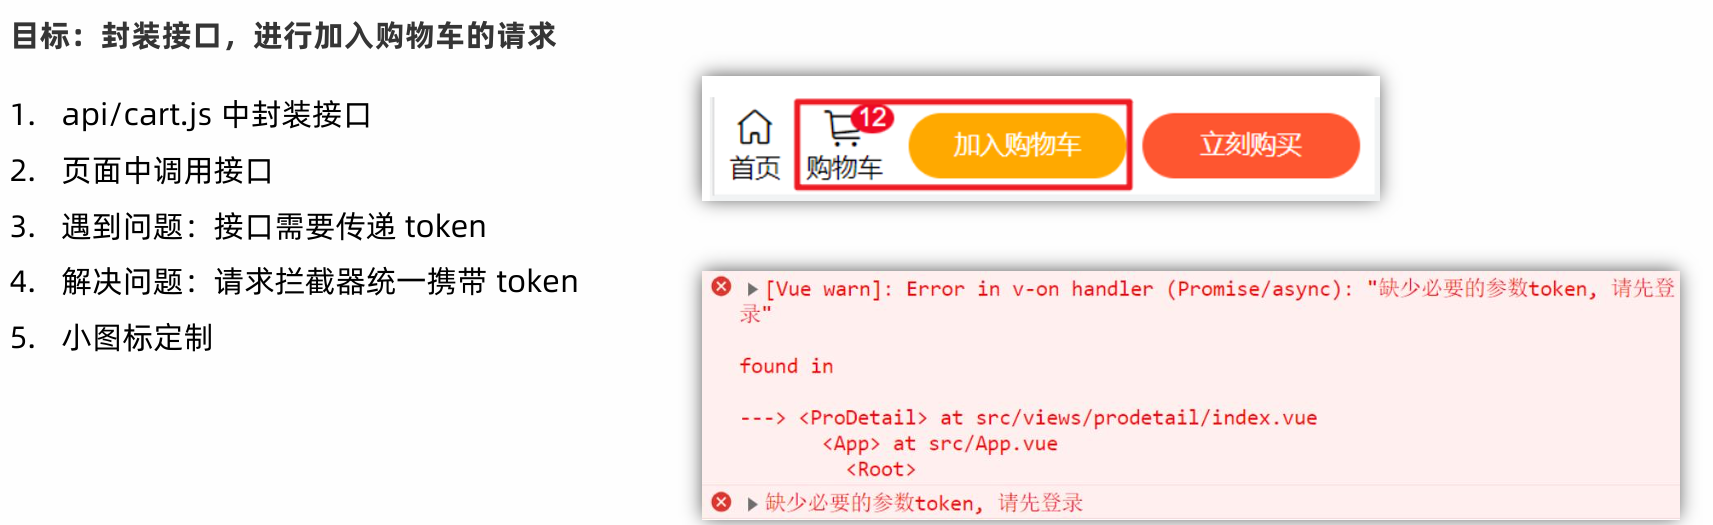
26. 加入購物車 -喚起彈層
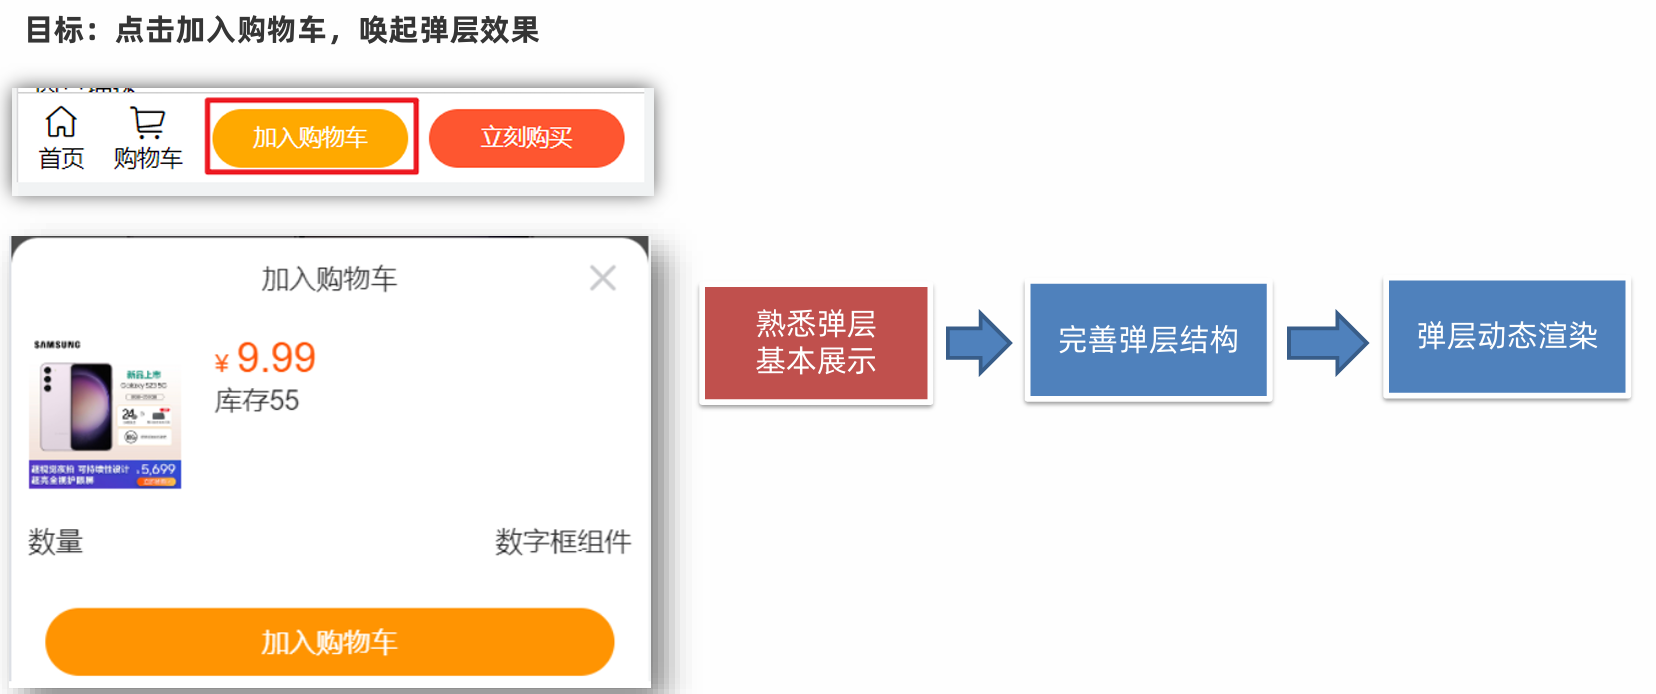
加深理解
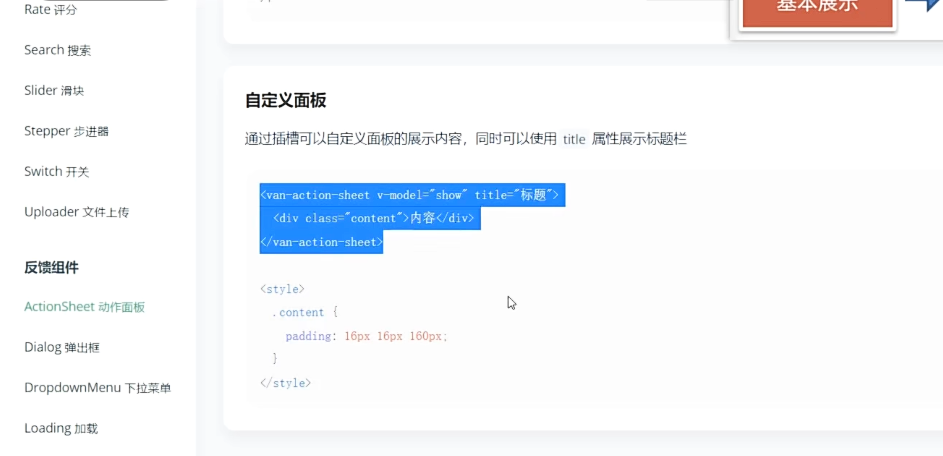
代碼區
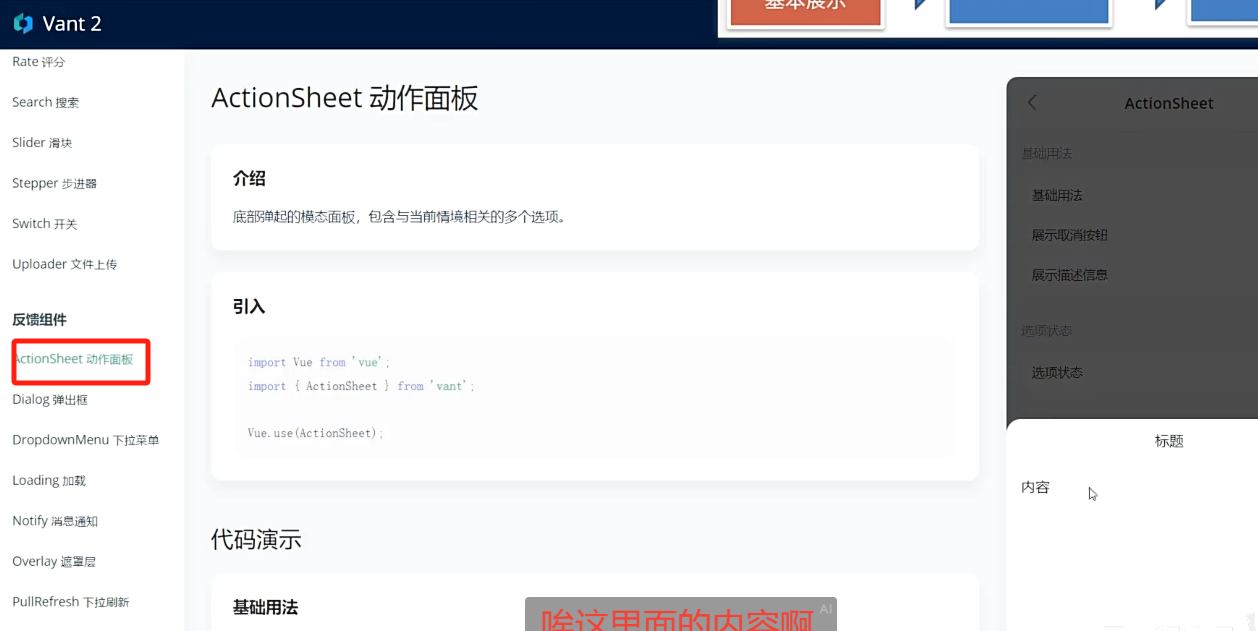
// 按需導入
import Vue from 'vue'
import { ActionSheet } from 'vant'
Vue.use(ActionSheet)
<!-- 加入購物車/立即購買 公用的彈層 --><van-action-sheet v-model="showPannel" :title="mode === 'cart' ? '加入購物車' : '立刻購買'"><div class="product"><div class="product-title"><div class="left"><img :src="detail.goods_image" alt=""></div><div class="right"><div class="price"><span>¥</span><span class="nowprice">{{ detail.goods_price_min }}</span></div><div class="count"><span>庫存</span><span>{{ detail.stock_total }}</span></div></div></div><div class="num-box"><span>數量</span><!-- v-model 本質上 :value 和 @input 的簡寫 --><CountBox v-model="addCount"></CountBox></div><!-- 有庫存才顯示提交按鈕 --><div class="showbtn" v-if="detail.stock_total > 0"><div class="btn" v-if="mode === 'cart'" @click="addCart">加入購物車</div><div class="btn now" v-else @click="goBuyNow">立刻購買</div></div><div class="btn-none" v-else>該商品已搶完</div></div></van-action-sheet></div><script>
import { getProComments, getProDetail } from '@/api/product'
import defaultImg from '@/assets/default-avatar.png'
import CountBox from '@/components/CountBox.vue'
import { addCart } from '@/api/cart'
import loginConfirm from '@/mixins/loginConfirm'export default {name: 'ProDetail',mixins: [loginConfirm],components: {CountBox},data () {return {images: [],current: 0,detail: {},total: 0, // 評價總數commentList: [], // 評價列表defaultImg,showPannel: false, // 控制彈層的顯示隱藏mode: 'cart', // 標記彈層狀態addCount: 1, // 數字框綁定的數據cartTotal: 0 // 購物車角標}},computed: {goodsId () {return this.$route.params.id}},created () {this.getDetail()this.getComments()},methods: {onChange (index) {this.current = index},async getDetail () {const { data: { detail } } = await getProDetail(this.goodsId)this.detail = detailthis.images = detail.goods_imagesconsole.log(this.images)},async getComments () {const { data: { list, total } } = await getProComments(this.goodsId, 3)this.commentList = listthis.total = total},addFn () {this.mode = 'cart'this.showPannel = true},buyNow () {this.mode = 'buyNow'this.showPannel = true},async addCart () {if (this.loginConfirm()) {return}const { data } = await addCart(this.goodsId, this.addCount, this.detail.skuList[0].goods_sku_id)this.cartTotal = data.cartTotalthis.$toast('加入購物車成功')this.showPannel = false},}<style lang="less" scoped>
.prodetail {padding-top: 46px;::v-deep .van-icon-arrow-left {color: #333;}img {display: block;width: 100%;}.custom-indicator {position: absolute;right: 10px;bottom: 10px;padding: 5px 10px;font-size: 12px;background: rgba(0, 0, 0, 0.1);border-radius: 15px;}.desc {width: 100%;overflow: scroll;::v-deep img {display: block;width: 100%!important;}}.info {padding: 10px;}.title {display: flex;justify-content: space-between;.now {color: #fa2209;font-size: 20px;}.oldprice {color: #959595;font-size: 16px;text-decoration: line-through;margin-left: 5px;}.sellcount {color: #959595;font-size: 16px;position: relative;top: 4px;}}.msg {font-size: 16px;line-height: 24px;margin-top: 5px;}.service {display: flex;justify-content: space-between;line-height: 40px;margin-top: 10px;font-size: 16px;background-color: #fafafa;.left-words {span {margin-right: 10px;}.van-icon {margin-right: 4px;color: #fa2209;}}}.comment {padding: 10px;}.comment-title {display: flex;justify-content: space-between;.right {color: #959595;}}.comment-item {font-size: 16px;line-height: 30px;.top {height: 30px;display: flex;align-items: center;margin-top: 20px;img {width: 20px;height: 20px;}.name {margin: 0 10px;}}.time {color: #999;}}.footer {position: fixed;left: 0;bottom: 0;width: 100%;height: 55px;background-color: #fff;border-top: 1px solid #ccc;display: flex;justify-content: space-evenly;align-items: center;.icon-home, .icon-cart {display: flex;flex-direction: column;align-items: center;justify-content: center;font-size: 14px;.van-icon {font-size: 24px;}}.btn-add,.btn-buy {height: 36px;line-height: 36px;width: 120px;border-radius: 18px;background-color: #ffa900;text-align: center;color: #fff;font-size: 14px;}.btn-buy {background-color: #fe5630;}}
}.tips {padding: 10px;
}// 彈層的樣式
.product {.product-title {display: flex;.left {img {width: 90px;height: 90px;}margin: 10px;}.right {flex: 1;padding: 10px;.price {font-size: 14px;color: #fe560a;.nowprice {font-size: 24px;margin: 0 5px;}}}}.num-box {display: flex;justify-content: space-between;padding: 10px;align-items: center;}.btn, .btn-none {height: 40px;line-height: 40px;margin: 20px;border-radius: 20px;text-align: center;color: rgb(255, 255, 255);background-color: rgb(255, 148, 2);}.btn.now {background-color: #fe5630;}.btn-none {background-color: #cccccc;}
}效果圖


加入style之后
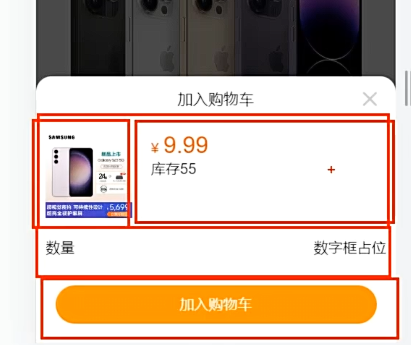
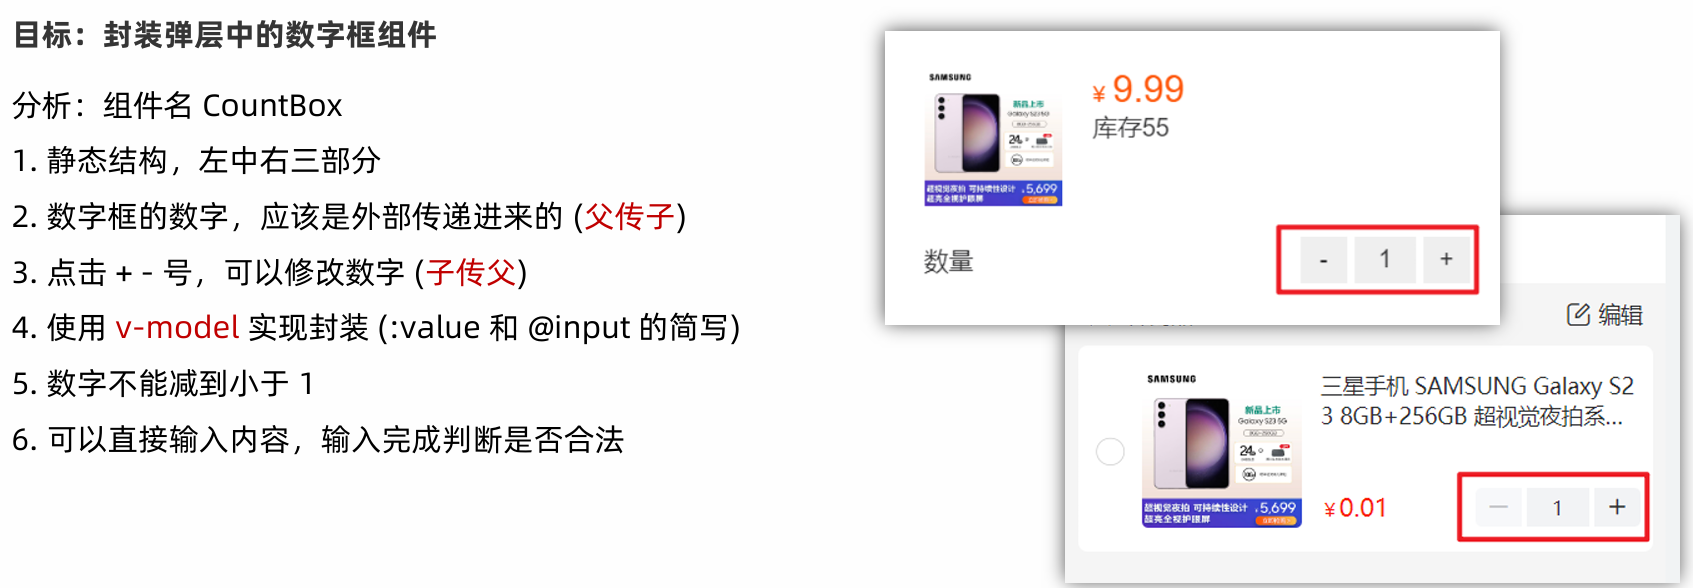
27. 加入購物車 -封裝數字框組件
<!-- 加入購物車/立即購買 公用的彈層 --><van-action-sheet v-model="showPannel" :title="mode === 'cart' ? '加入購物車' : '立刻購買'"><div class="product"><div class="product-title"><div class="left"><img :src="detail.goods_image" alt=""></div><div class="right"><div class="price"><span>¥</span><span class="nowprice">{{ detail.goods_price_min }}</span></div><div class="count"><span>庫存</span><span>{{ detail.stock_total }}</span></div></div></div><div class="num-box"><span>數量</span><!-- v-model 本質上 :value 和 @input 的簡寫 --><CountBox v-model="addCount"></CountBox></div><script>import CountBox from '@/components/CountBox.vue'export default {name: 'ProDetail',mixins: [loginConfirm],components: {CountBox},data () {return {addCount: 1...}},
}</script>
<template><div class="count-box"><button @click="handleSub" class="minus">-</button><input :value="value" @change="handleChange" class="inp" type="text"><button @click="handleAdd" class="add">+</button></div>
</template><script>
export default {props: {value: {type: Number,default: 1}},methods: {handleSub () {if (this.value <= 1) {return}this.$emit('input', this.value - 1)},handleAdd () {this.$emit('input', this.value + 1)},handleChange (e) {// console.log(e.target.value)const num = +e.target.value // 轉數字處理 (1) 數字 (2) NaN// 輸入了不合法的文本 或 輸入了負值,回退成原來的 value 值if (isNaN(num) || num < 1) {e.target.value = this.valuereturn}this.$emit('input', num)}}
}
</script><style lang="less" scoped>
.count-box {width: 110px;display: flex;.add, .minus {width: 30px;height: 30px;outline: none;border: none;background-color: #efefef;}.inp {width: 40px;height: 30px;outline: none;border: none;margin: 0 5px;background-color: #efefef;text-align: center;}
}
</style>
問題1:


28. 加入購物車 -判斷 token 添加登錄提示


push改為replace
加強理解
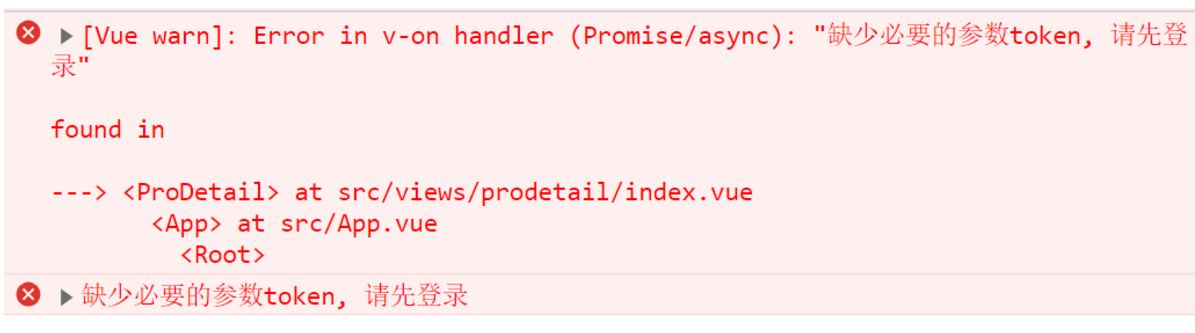
問題1:

問題2:
里面的push換成replace


29. 加入購物車 -封裝接口進行請求
1.封裝接口
import request from '@/utils/request'// 加入購物車
// goodsId    => 商品id     iphone8
// goodsSkuId => 商品規格id  紅色的iphone8  粉色的iphone8
export const addCart = (goodsId, goodsNum, goodsSkuId) => {return request.post('/cart/add', {goodsId,goodsNum,goodsSkuId})
}
2.請求攔截器

3.頁面調用請求
4.圖標
5.樣式

.footer .icon-cart {position: relative;padding: 0 6px;.num {z-index: 999;position: absolute;top: -2px;right: 0;min-width: 16px;padding: 0 4px;color: #fff;text-align: center;background-color: #ee0a24;border-radius: 50%;}問題1:
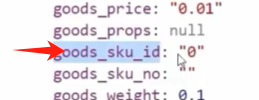
這個skuList.goods_sku_id是商品規格,不過在這個項目中,商品規格默認只有一種

問題2:

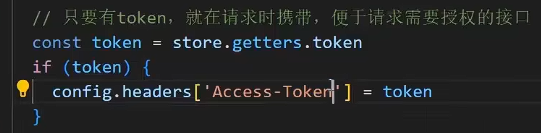
所有的請求在發出之前,都會先經過咱們的請求攔截器,我們可以在請求攔截器當中,統一的攜帶就可以了,找到請求攔截器
30. 購物車模塊
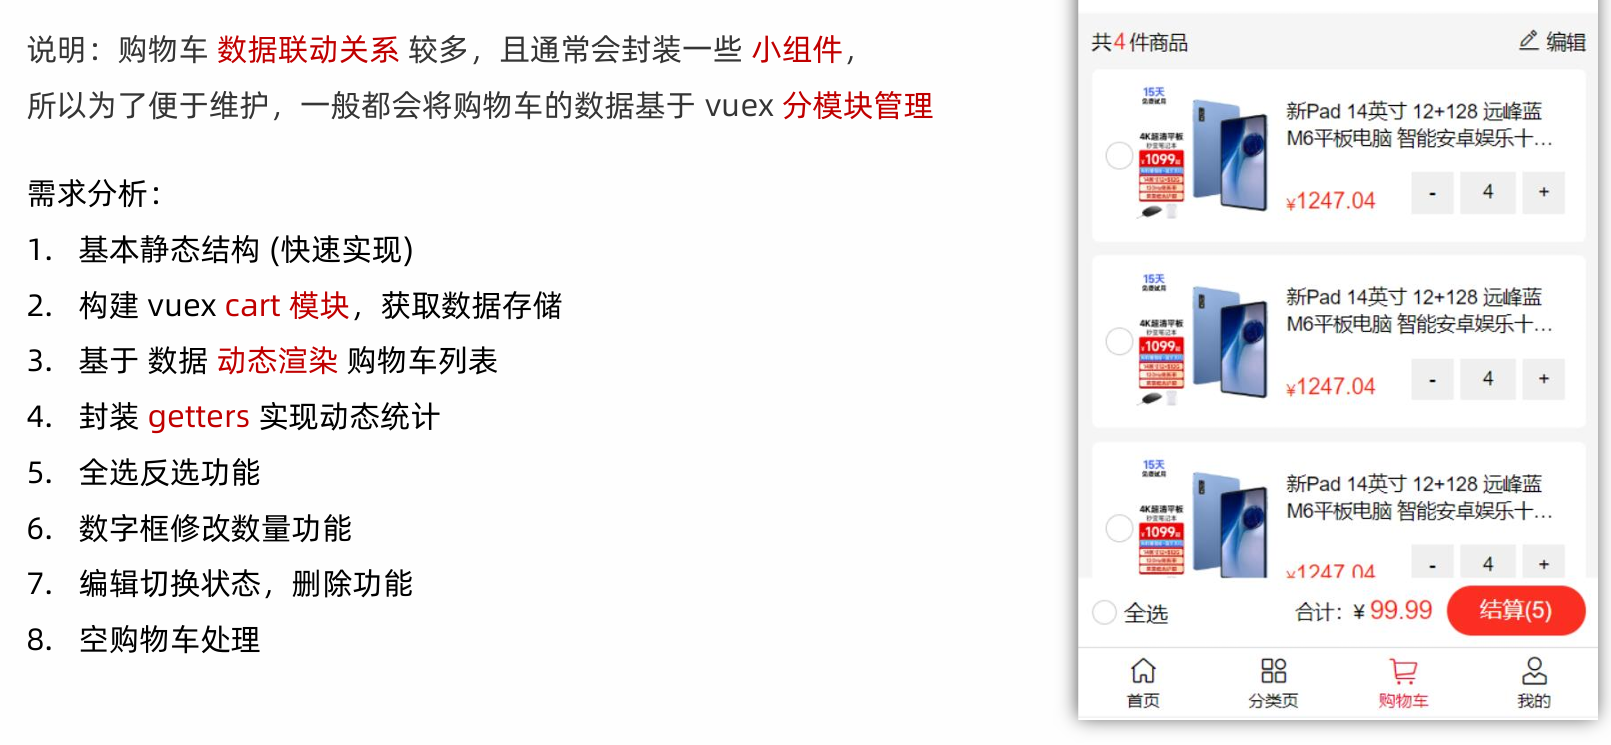
1.基本靜態結構
靜態結構
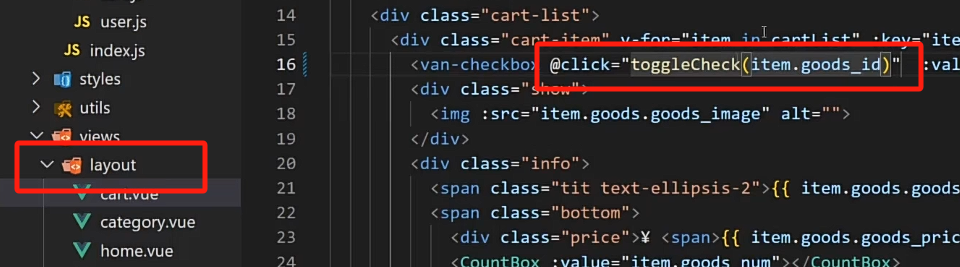
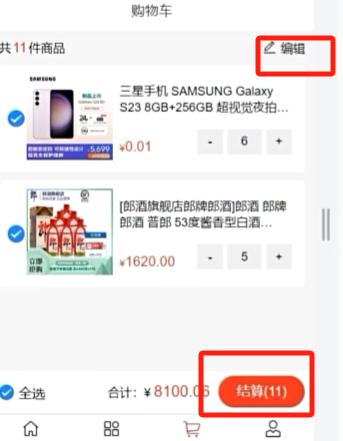
<template><div class="cart"><van-nav-bar title="購物車" fixed /><div v-if="isLogin && cartList.length > 0"><!-- 購物車開頭 --><div class="cart-title"><span class="all">共<i>{{ cartTotal }}</i>件商品</span><span class="edit" @click="isEdit = !isEdit"><van-icon name="edit" />編輯</span></div><!-- 購物車列表 --><div class="cart-list"><div class="cart-item" v-for="item in cartList" :key="item.goods_id"><van-checkbox @click="toggleCheck(item.goods_id)" :value="item.isChecked"></van-checkbox><div class="show"><img :src="item.goods.goods_image" alt=""></div><div class="info"><span class="tit text-ellipsis-2">{{ item.goods.goods_name }}</span><span class="bottom"><div class="price">¥ <span>{{ item.goods.goods_price_min }}</span></div><!-- 既希望保留原本的形參,又需要通過調用函數傳參 => 箭頭函數包裝一層 --><CountBox @input="(value) => changeCount(value, item.goods_id, item.goods_sku_id)" :value="item.goods_num"></CountBox></span></div></div></div><div class="footer-fixed"><div @click="toggleAllCheck" class="all-check"><van-checkbox :value="isAllChecked" icon-size="18"></van-checkbox>全選</div><div class="all-total"><div class="price"><span>合計:</span><span>¥ <i class="totalPrice">{{ selPrice }}</i></span></div><div v-if="!isEdit" class="goPay" :class="{ disabled: selCount === 0 }" @click="goPay">結算({{ selCount }})</div><div v-else @click="handleDel" class="delete" :class="{ disabled: selCount === 0 }" >刪除</div></div></div></div><div class="empty-cart" v-else><img src="@/assets/empty.png" alt=""><div class="tips">您的購物車是空的, 快去逛逛吧</div><div class="btn" @click="$router.push('/')">去逛逛</div></div></div>
</template><script>
import CountBox from '@/components/CountBox.vue'
import { mapGetters, mapState } from 'vuex'
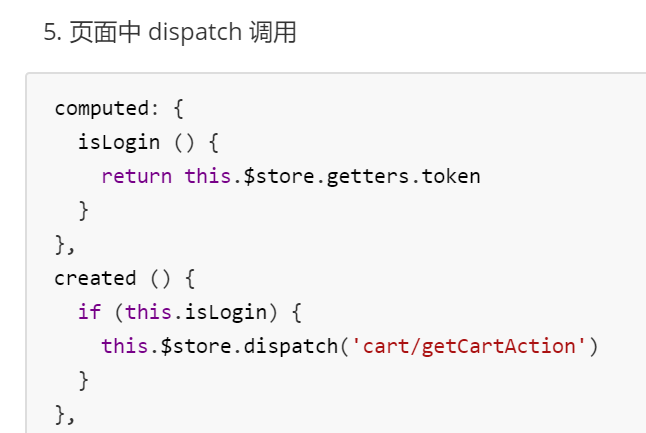
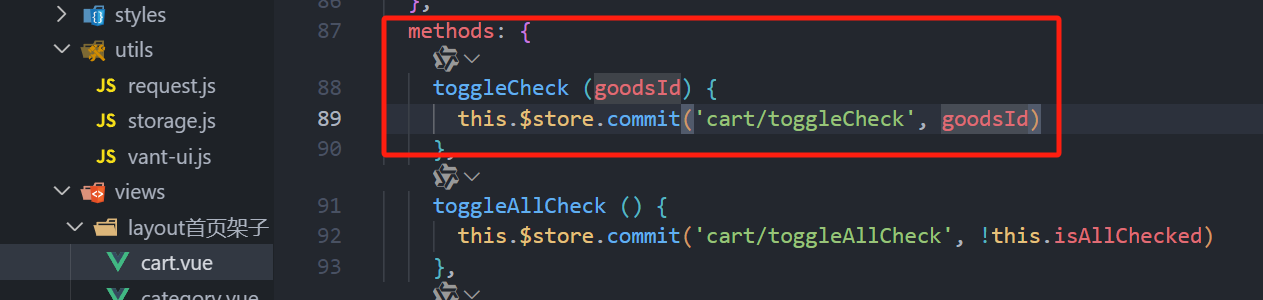
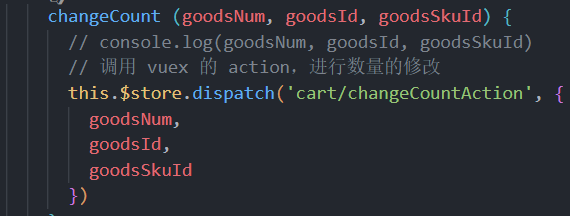
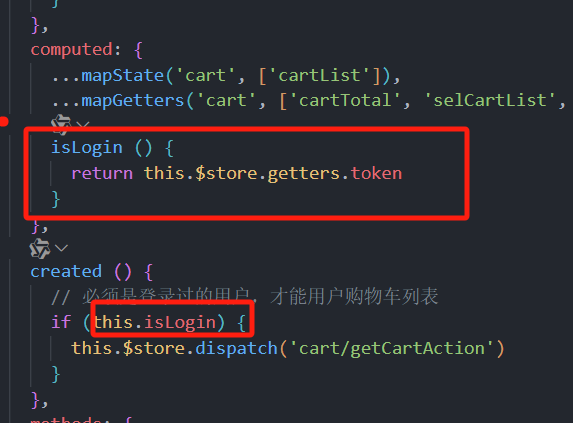
export default {name: 'CartPage',components: {CountBox},data () {return {isEdit: false}},computed: {...mapState('cart', ['cartList']),...mapGetters('cart', ['cartTotal', 'selCartList', 'selCount', 'selPrice', 'isAllChecked']),isLogin () {return this.$store.getters.token}},created () {// 必須是登錄過的用戶,才能用戶購物車列表if (this.isLogin) {this.$store.dispatch('cart/getCartAction')}},methods: {toggleCheck (goodsId) {this.$store.commit('cart/toggleCheck', goodsId)},toggleAllCheck () {this.$store.commit('cart/toggleAllCheck', !this.isAllChecked)},changeCount (goodsNum, goodsId, goodsSkuId) {// console.log(goodsNum, goodsId, goodsSkuId)// 調用 vuex 的 action,進行數量的修改this.$store.dispatch('cart/changeCountAction', {goodsNum,goodsId,goodsSkuId})},async handleDel () {if (this.selCount === 0) returnawait this.$store.dispatch('cart/delSelect')this.isEdit = false},goPay () {// 判斷有沒有選中商品if (this.selCount > 0) {// 有選中的 商品 才進行結算跳轉this.$router.push({path: '/pay',query: {mode: 'cart',cartIds: this.selCartList.map(item => item.id).join(',') // 'cartId,cartId,cartId'}})}}},watch: {isEdit (value) {if (value) {this.$store.commit('cart/toggleAllCheck', false)} else {this.$store.commit('cart/toggleAllCheck', true)}}}
}
</script><style lang="less" scoped>
// 主題 padding
.cart {padding-top: 46px;padding-bottom: 100px;background-color: #f5f5f5;min-height: 100vh;.cart-title {height: 40px;display: flex;justify-content: space-between;align-items: center;padding: 0 10px;font-size: 14px;.all {i {font-style: normal;margin: 0 2px;color: #fa2209;font-size: 16px;}}.edit {.van-icon {font-size: 18px;}}}.cart-item {margin: 0 10px 10px 10px;padding: 10px;display: flex;justify-content: space-between;background-color: #ffffff;border-radius: 5px;.show img {width: 100px;height: 100px;}.info {width: 210px;padding: 10px 5px;font-size: 14px;display: flex;flex-direction: column;justify-content: space-between;.bottom {display: flex;justify-content: space-between;.price {display: flex;align-items: flex-end;color: #fa2209;font-size: 12px;span {font-size: 16px;}}.count-box {display: flex;width: 110px;.add,.minus {width: 30px;height: 30px;outline: none;border: none;}.inp {width: 40px;height: 30px;outline: none;border: none;background-color: #efefef;text-align: center;margin: 0 5px;}}}}}
}.footer-fixed {position: fixed;left: 0;bottom: 50px;height: 50px;width: 100%;border-bottom: 1px solid #ccc;background-color: #fff;display: flex;justify-content: space-between;align-items: center;padding: 0 10px;.all-check {display: flex;align-items: center;.van-checkbox {margin-right: 5px;}}.all-total {display: flex;line-height: 36px;.price {font-size: 14px;margin-right: 10px;.totalPrice {color: #fa2209;font-size: 18px;font-style: normal;}}.goPay, .delete {min-width: 100px;height: 36px;line-height: 36px;text-align: center;background-color: #fa2f21;color: #fff;border-radius: 18px;&.disabled {background-color: #ff9779;}}}}.empty-cart {padding: 80px 30px;img {width: 140px;height: 92px;display: block;margin: 0 auto;}.tips {text-align: center;color: #666;margin: 30px;}.btn {width: 110px;height: 32px;line-height: 32px;text-align: center;background-color: #fa2c20;border-radius: 16px;color: #fff;display: block;margin: 0 auto;}
}
</style>
然后加入跳轉
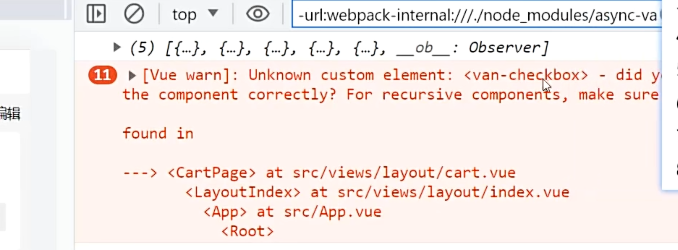
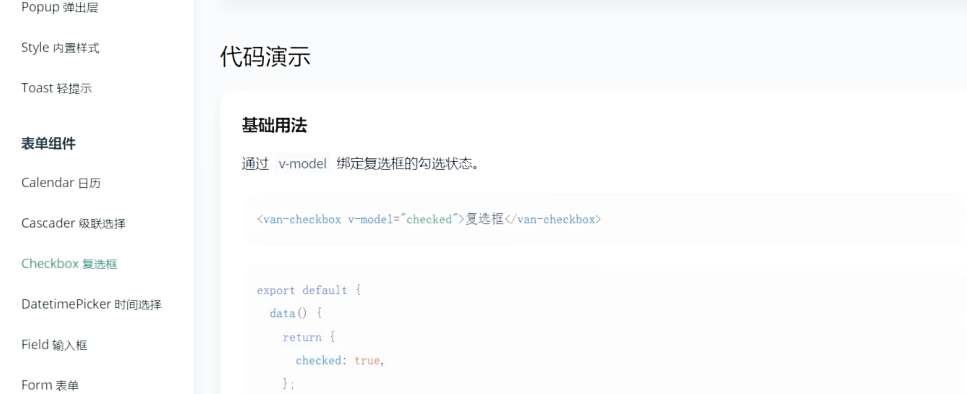
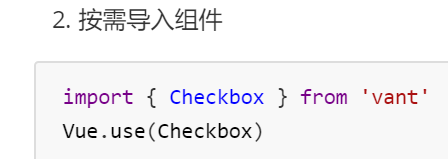
需要用到vant組件庫
小小修改
<template><div class="count-box"><button @click="handleSub" class="minus">-</button><input :value="value" @change="handleChange" class="inp" type="text"><button @click="handleAdd" class="add">+</button></div>
</template><script>
export default {props: {value: {type: Number,default: 1}},methods: {handleSub () {if (this.value <= 1) {return}this.$emit('input', this.value - 1)},handleAdd () {this.$emit('input', this.value + 1)},handleChange (e) {// console.log(e.target.value)const num = +e.target.value // 轉數字處理 (1) 數字 (2) NaN// 輸入了不合法的文本 或 輸入了負值,回退成原來的 value 值if (isNaN(num) || num < 1) {e.target.value = this.valuereturn}this.$emit('input', num)}}
}
</script><style lang="less" scoped>
.count-box {width: 110px;display: flex;.add, .minus {width: 30px;height: 30px;outline: none;border: none;background-color: #efefef;}.inp {width: 40px;height: 30px;outline: none;border: none;margin: 0 5px;background-color: #efefef;text-align: center;}
}
</style>

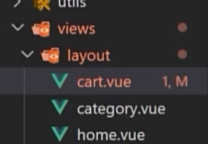
2.構建vuex cart模塊,獲取數據存儲
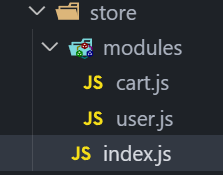
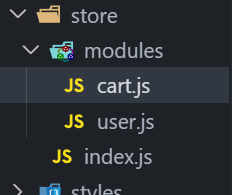
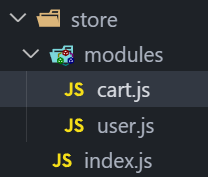
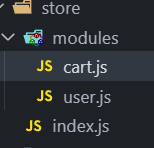
新建 modules/cart.js 模塊
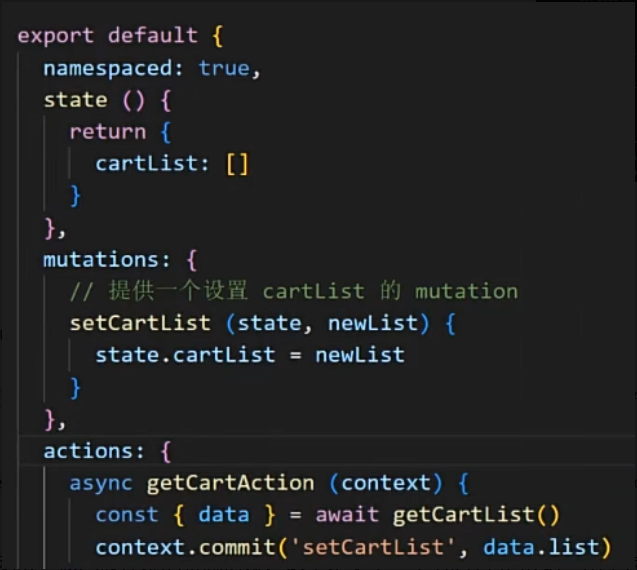
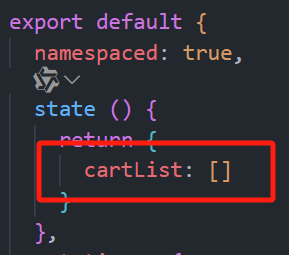
export default {namespaced: true,state () {return {cartList: []}},mutations: {},actions: {},getters: {}
}
掛載到 store 上面
import Vue from 'vue'
import Vuex from 'vuex'
import user from './modules/user'
import cart from './modules/cart'Vue.use(Vuex)export default new Vuex.Store({getters: {token (state) {return state.user.userInfo.token}},modules: {user,cart}
})
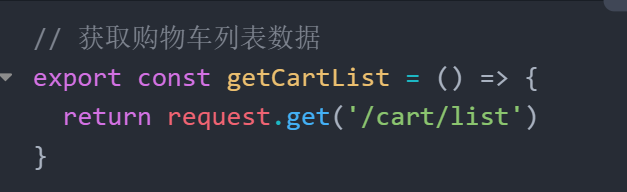
封裝 API 接口 api/cart.js
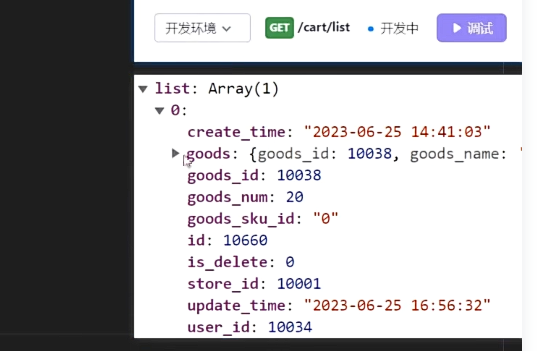
// 獲取購物車列表數據
export const getCartList = () => {return request.get('/cart/list')
}
封裝 action 和 mutation
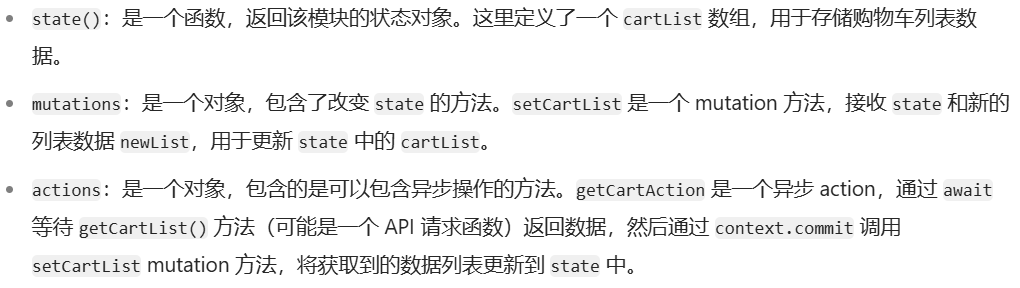
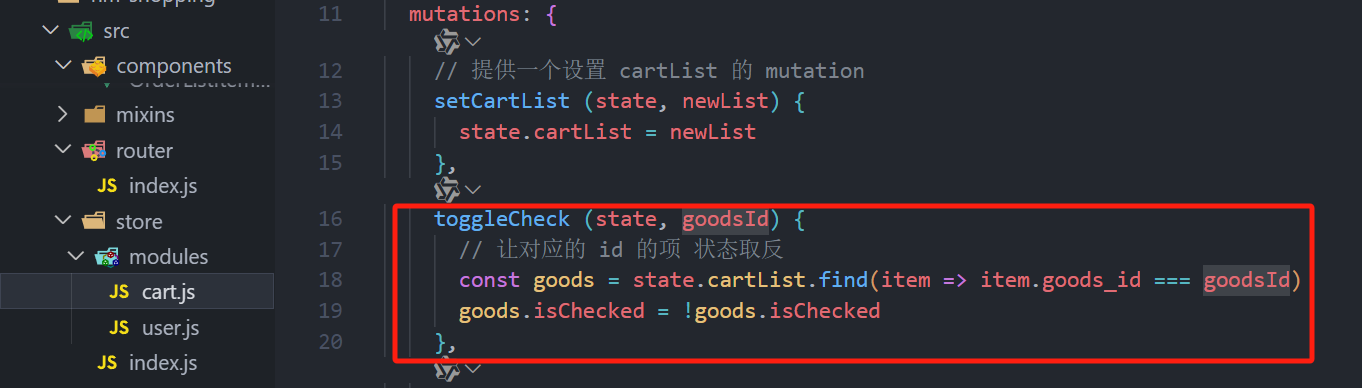
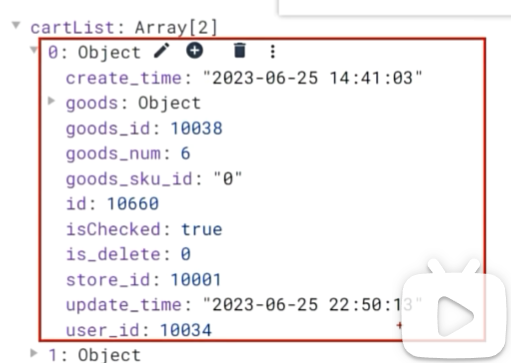
export default {namespaced: true,state () {return {cartList: []}},mutations: {setCartList (state, newList) {state.cartList = newList},
},
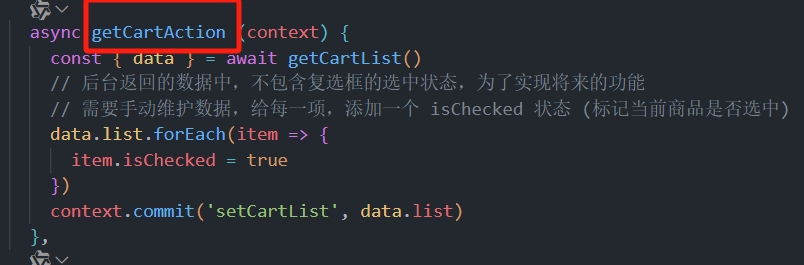
actions: {async getCartAction (context) {const { data } = await getCartList()// 后臺返回的數據中,不包含復選框的選中狀態,為了實現將來的功能// 需要手動維護數據,給每一項,添加一個 isChecked 狀態 (標記當前商品是否選中)data.list.forEach(item => {item.isChecked = true})context.commit('setCartList', data.list)}
},getters: {}
}判斷用戶是否登錄

==
加深理解
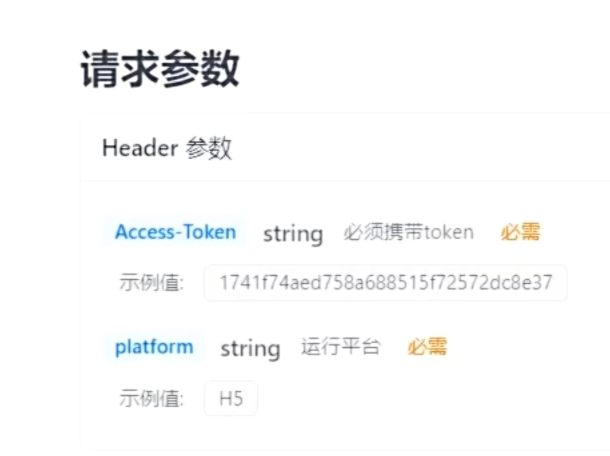
都要在head中傳遞,但是已經在請求攔截器中統一攜帶了這2個參數,所以只用調接口就可以了
問題1:
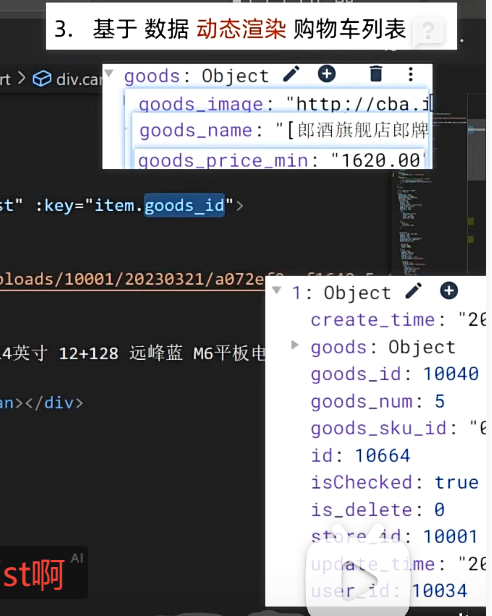
3.基于數據動態渲染購物車列表
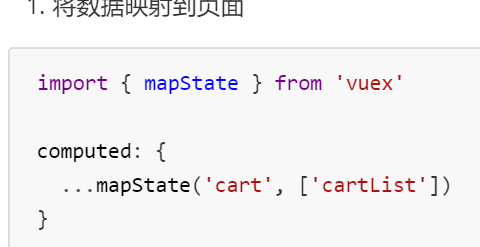
3.1數據映射到頁面
要做動態渲染,然后數據告訴你了在vuex,在頁面當中想要拿到這個state中數據,想在cart.vue拿到數據,提供對應的計算屬性
3.2動態渲染
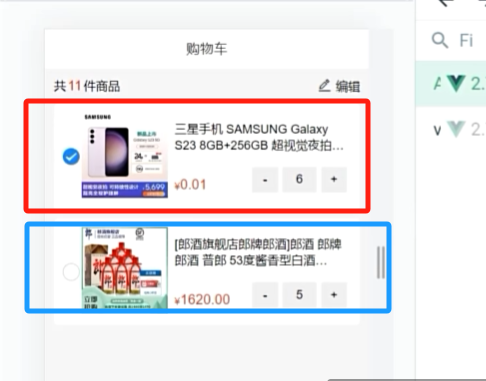
<!-- 購物車列表 -->
<div class="cart-list"><div class="cart-item" v-for="item in cartList" :key="item.goods_id"><van-checkbox icon-size="18" :value="item.isChecked"></van-checkbox><div class="show" @click="$router.push(`/prodetail/${item.goods_id}`)"><img :src="item.goods.goods_image" alt=""></div><div class="info"><span class="tit text-ellipsis-2">{{ item.goods.goods_name }}</span><span class="bottom"><div class="price">¥ <span>{{ item.goods.goods_price_min }}</span></div><CountBox :value="item.goods_num"></CountBox></span></div></div>
</div>
問題1:
![]()
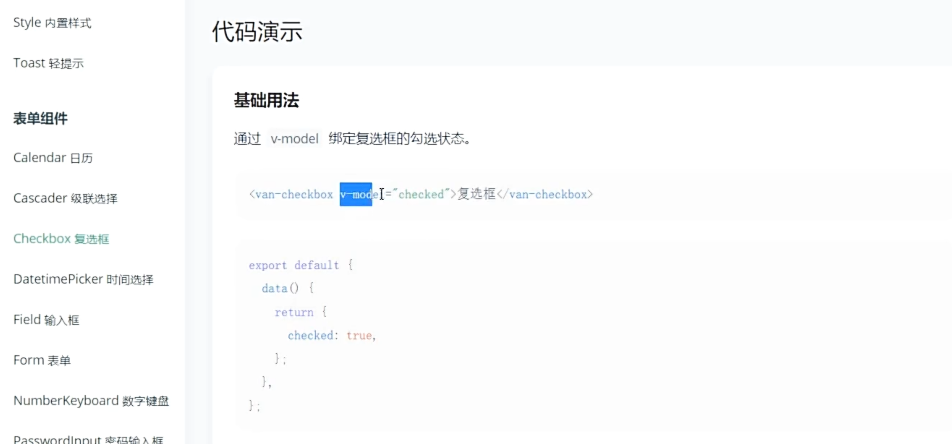
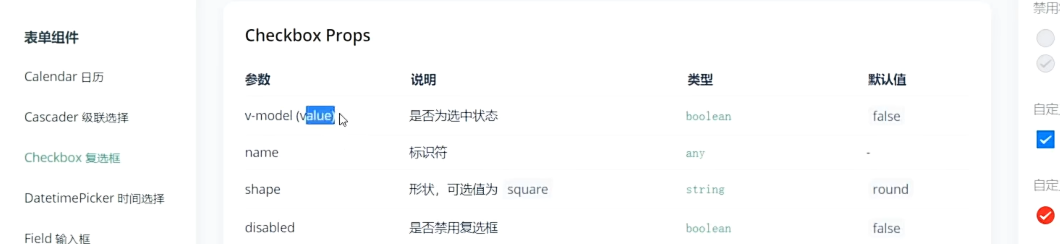
不能是v-model

應該是

因為v-model是直接跟vues里面的數據雙向綁定,但是這里只是單純的渲染,任何一個組件隨便改就亂了
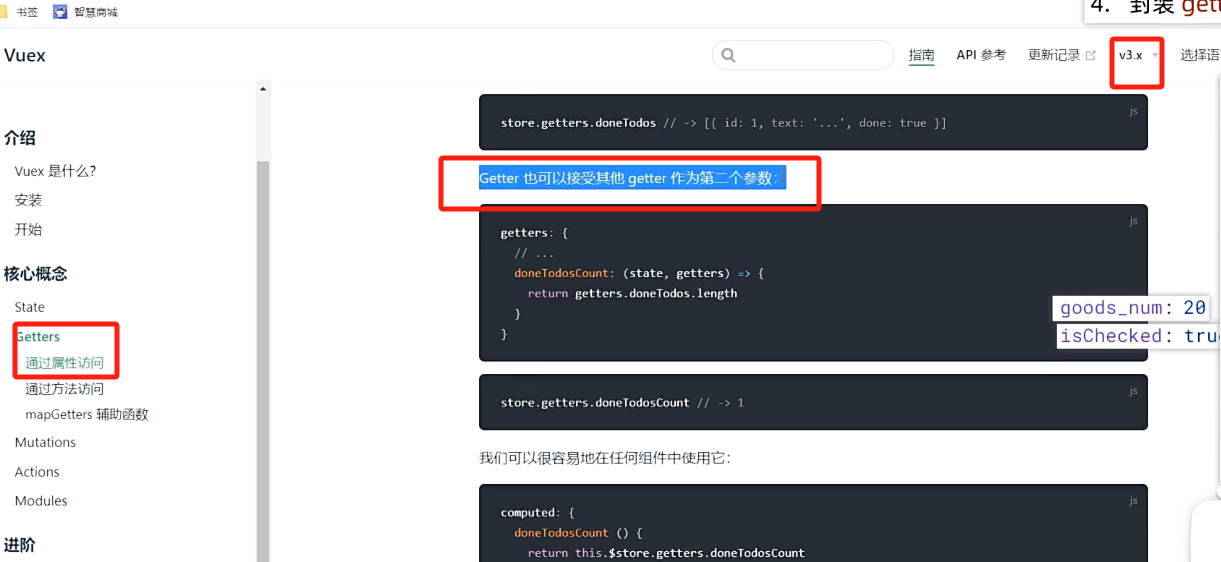
4.封裝getter實現動態設計
4.1封裝 getters:商品總數 / 選中的商品列表 / 選中的商品總數 / 選中的商品總價

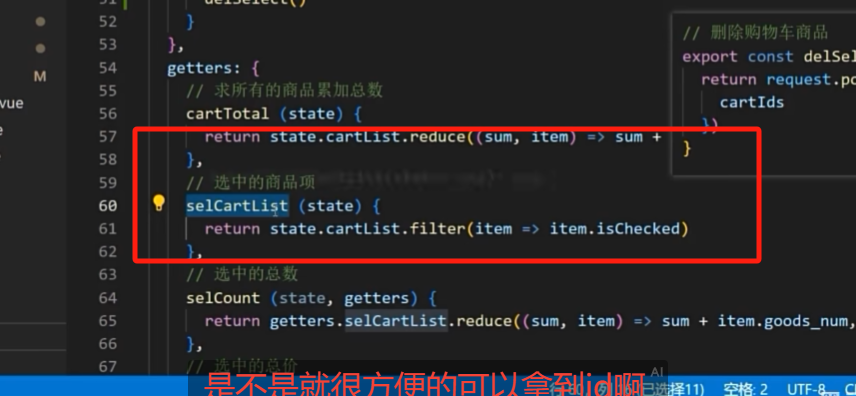
getters: {cartTotal (state) {return state.cartList.reduce((sum, item, index) => sum + item.goods_num, 0)},selCartList (state) {return state.cartList.filter(item => item.isChecked)},selCount (state, getters) {return getters.selCartList.reduce((sum, item, index) => sum + item.goods_num, 0)},selPrice (state, getters) {return getters.selCartList.reduce((sum, item, index) => {return sum + item.goods_num * item.goods.goods_price_min}, 0).toFixed(2)//.toFixed(2)保留2位小數}
}
4.2這些計算屬性想在頁面應用
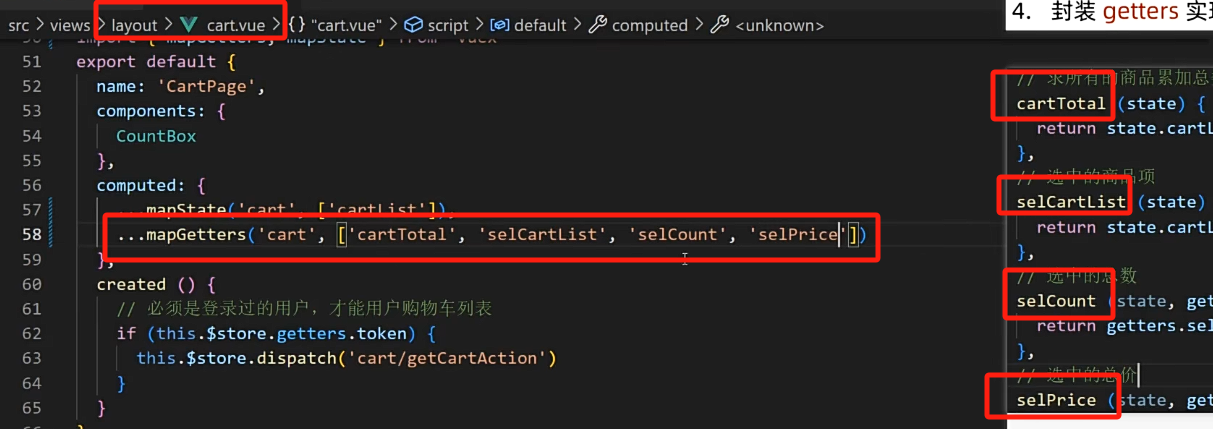
4.3頁面中 mapGetters 映射使用
computed: {...mapGetters('cart', ['cartTotal', 'selCount', 'selPrice']),
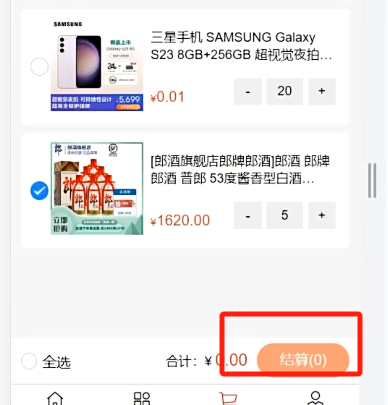
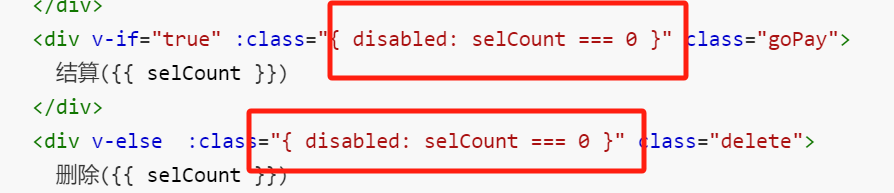
},<!-- 購物車開頭 -->
<div class="cart-title"><span class="all">共<i>{{ cartTotal || 0 }}</i>件商品</span><span class="edit"><van-icon name="edit" />編輯</span>
</div><div class="footer-fixed"><div class="all-check"><van-checkbox icon-size="18"></van-checkbox>全選</div><div class="all-total"><div class="price"><span>合計:</span><span>¥ <i class="totalPrice">{{ selPrice }}</i></span></div><div v-if="true" :class="{ disabled: selCount === 0 }" class="goPay">結算({{ selCount }})</div><div v-else :class="{ disabled: selCount === 0 }" class="delete">刪除({{ selCount }})</div></div>
</div>4.4優化
問題1:
如何在getter屬性中訪問呢getter
5.全選反選功能
5.1可以點擊小選
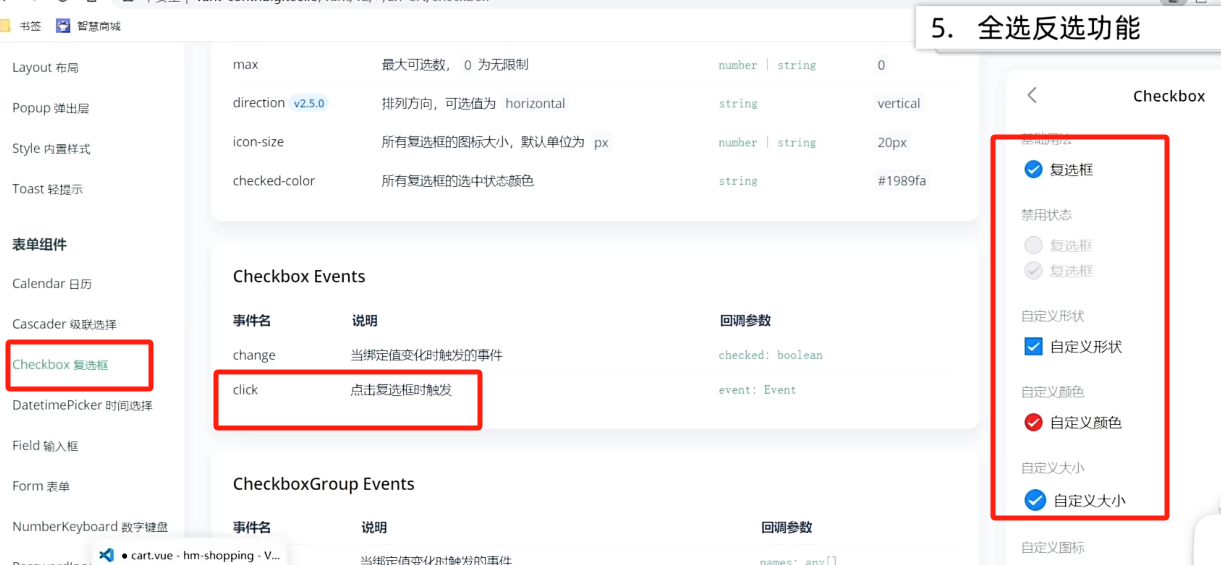

5.2點擊小選可以控制大選+點擊大選可以控制全部小選(青色)
import { changeCount, delSelect, getCartList } from '@/api/cart'
import { Toast } from 'vant'export default {namespaced: true,state () {return {cartList: []}},mutations: {toggleAllCheck (state, flag) {state.cartList.forEach(item => {item.isChecked = flag})},},getters: {// 求所有的商品累加總數cartTotal (state) {return state.cartList.reduce((sum, item) => sum + item.goods_num, 0)},// 選中的商品項selCartList (state) {return state.cartList.filter(item => item.isChecked)},// 選中的總數selCount (state, getters) {return getters.selCartList.reduce((sum, item) => sum + item.goods_num, 0)},// 選中的總價selPrice (state, getters) {return getters.selCartList.reduce((sum, item) => {return sum + item.goods_num * item.goods.goods_price_min}, 0).toFixed(2)},// 是否全選isAllChecked (state) {return state.cartList.every(item => item.isChecked)}}
}
<template><div class="footer-fixed"><div @click="toggleAllCheck" class="all-check"><van-checkbox :value="isAllChecked"  icon-size="18"></van-checkbox>全選</div><div class="all-total"><div class="price"><span>合計:</span><span>¥ <i class="totalPrice">{{ selPrice }}</i></span></div><div v-if="!isEdit" class="goPay" :class="{ disabled: selCount === 0 }"  @click="goPay">結算({{ selCount }})</div><div v-else @click="handleDel" class="delete" :class="{ disabled: selCount === 0 }" >刪除</div></div></div></div><div class="empty-cart" v-else><img src="@/assets/empty.png" alt=""><div class="tips">您的購物車是空的, 快去逛逛吧</div><div class="btn" @click="$router.push('/')">去逛逛</div></div></div>
</template><script>
import CountBox from '@/components/CountBox.vue'
import { mapGetters, mapState } from 'vuex'
export default {name: 'CartPage',components: {CountBox},data () {return {isEdit: false}},computed: {...mapState('cart', ['cartList']),...mapGetters('cart', ['cartTotal',  'selCount', 'selPrice', 'isAllChecked']),isLogin () {return this.$store.getters.token}},created () {// 必須是登錄過的用戶,才能用戶購物車列表if (this.isLogin) {this.$store.dispatch('cart/getCartAction')}},methods: {toggleCheck (goodsId) {this.$store.commit('cart/toggleCheck', goodsId)},toggleAllCheck () {this.$store.commit('cart/toggleAllCheck', !this.isAllChecked)//點擊之后原來的狀態應該取反,然后原來的狀態已經在上面映射了,如45行},changeCount (goodsNum, goodsId, goodsSkuId) {// console.log(goodsNum, goodsId, goodsSkuId)// 調用 vuex 的 action,進行數量的修改this.$store.dispatch('cart/changeCountAction', {goodsNum,goodsId,goodsSkuId})},async handleDel () {if (this.selCount === 0) returnawait this.$store.dispatch('cart/delSelect')this.isEdit = false},goPay () {// 判斷有沒有選中商品if (this.selCount > 0) {// 有選中的 商品 才進行結算跳轉this.$router.push({path: '/pay',query: {mode: 'cart',cartIds: this.selCartList.map(item => item.id).join(',') // 'cartId,cartId,cartId'}})}}},watch: {isEdit (value) {if (value) {this.$store.commit('cart/toggleAllCheck', false)} else {this.$store.commit('cart/toggleAllCheck', true)}}}
}
</script>
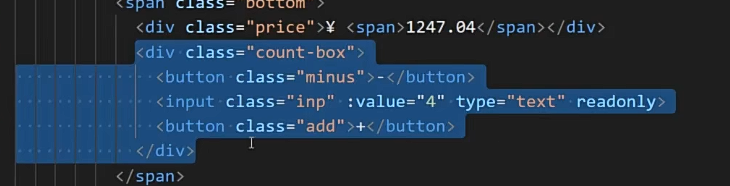
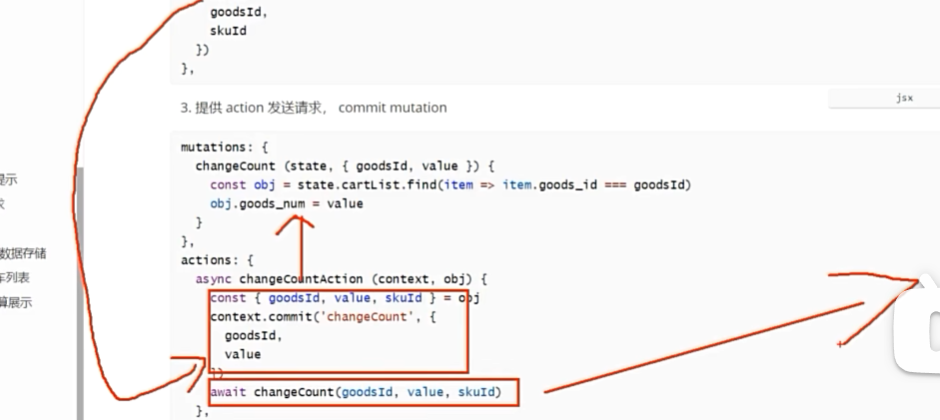
6.數字框修改數量功能
6.1封裝接口

action{
}
調用mutations

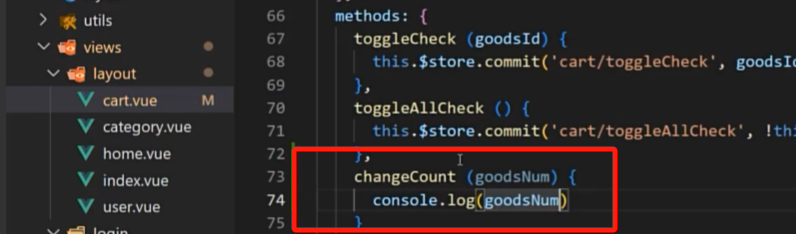
問題1:
問題:
封裝接口之后,要調用的話,就需要這個CountBox.vue事件,
添加input就可以拿到你所傳遞過來的參數,

傳參就可以拿到數據
但是參數不只有goodsnum,還有其他
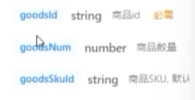
在遍歷的是有的

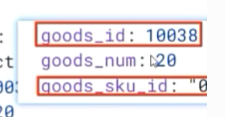
所以只要把item傳進去就有了,但是如果這么寫
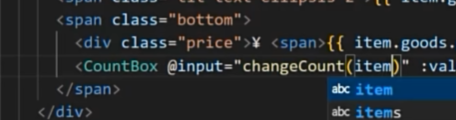
就會丟失原本的input傳遞過來的形參
解決:
既想要保留原本的形參,又需要調用函數傳參,
問題2:

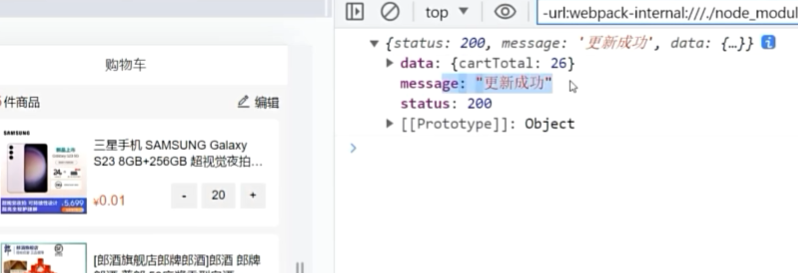
是后臺更新成功了,但是頁面沒更新,
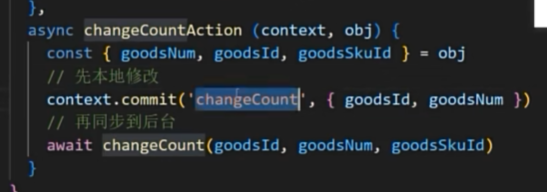
本地先修改,然后更新到后臺
本地修改只需要傳2個本地的購物車就能更新了,不用goods_sku_id

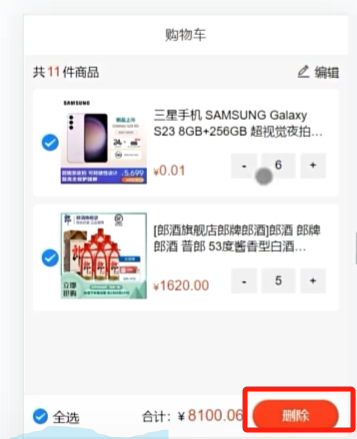
7.編輯切換狀態
<template><div class="cart"><van-nav-bar title="購物車" fixed /><div v-if="isLogin && cartList.length > 0"><!-- 購物車開頭 --><div class="cart-title"><span class="all">共<i>{{ cartTotal }}</i>件商品</span><span class="edit" @click="isEdit = !isEdit"><van-icon name="edit" />編輯</span></div><div class="all-total"><div class="price"><span>合計:</span><span>¥ <i class="totalPrice">{{ selPrice }}</i></span></div><div v-if="!isEdit" class="goPay" :class="{ disabled: selCount === 0 }"  @click="goPay">結算({{ selCount }})</div><div v-else @click="handleDel" class="delete" :class="{ disabled: selCount === 0 }" >刪除</div></div></div></div></template>data () {return {isEdit: false}},
watch: {isEdit (value) {if (value) {this.$store.commit('cart/toggleAllCheck', false)} else {this.$store.commit('cart/toggleAllCheck', true)}}}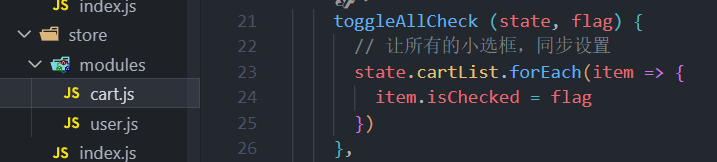
效果
8.刪除功能
8.1問題1:

代表這一條對應的購物車的數據,
后面如果要刪除某一條數據,應該要把這個id組合起來傳給后臺,后臺是數組包含這個id值,接口是string,所以是字符串數組
8.2代碼:
1??查看接口,封裝 API ( 注意:此處 id 為獲取回來的購物車數據的 id )
import request from '@/utils/request'// 加入購物車
// goodsId => 商品id iphone8
// goodsSkuId => 商品規格id 紅色的iphone8 粉色的iphone8
export const addCart = (goodsId, goodsNum, goodsSkuId) => {return request.post('/cart/add', {goodsId,goodsNum,goodsSkuId})
}// 獲取購物車列表
export const getCartList = () => {return request.get('/cart/list')
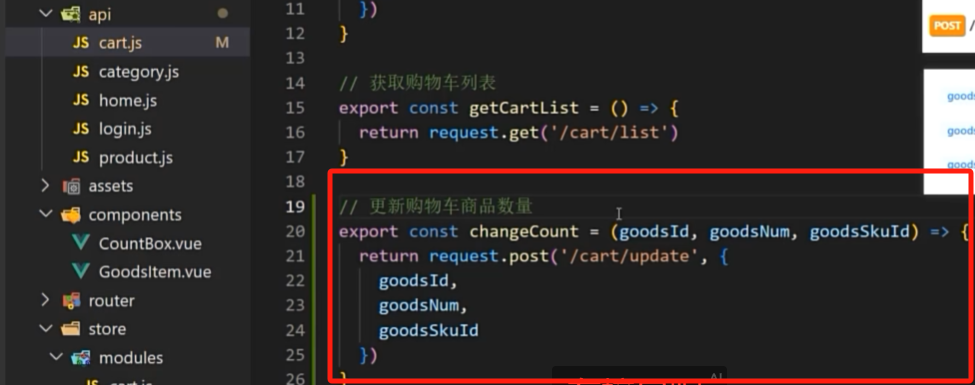
}// 更新購物車商品數量
export const changeCount = (goodsId, goodsNum, goodsSkuId) => {return request.post('/cart/update', {goodsId,goodsNum,goodsSkuId})
}// 刪除購物車商品
export const delSelect = (cartIds) => {return request.post('/cart/clear', {cartIds})
}
2??注冊刪除點擊事件,調用接口
然后重置一下刪除狀態,等刪除完就轉換為結算的按鈕
<div v-else :class="{ disabled: selCount === 0 }" @click="handleDel" class="delete">刪除({{ selCount }})
</div>async handleDel () {if (this.selCount === 0) returnawait this.$store.dispatch('cart/delSelect')//這個刪除選中,其實在本身的actions里是能夠獲取到的this.isEdit = false
},
理解
🎴
if (this.selCount === 0) return

🎴

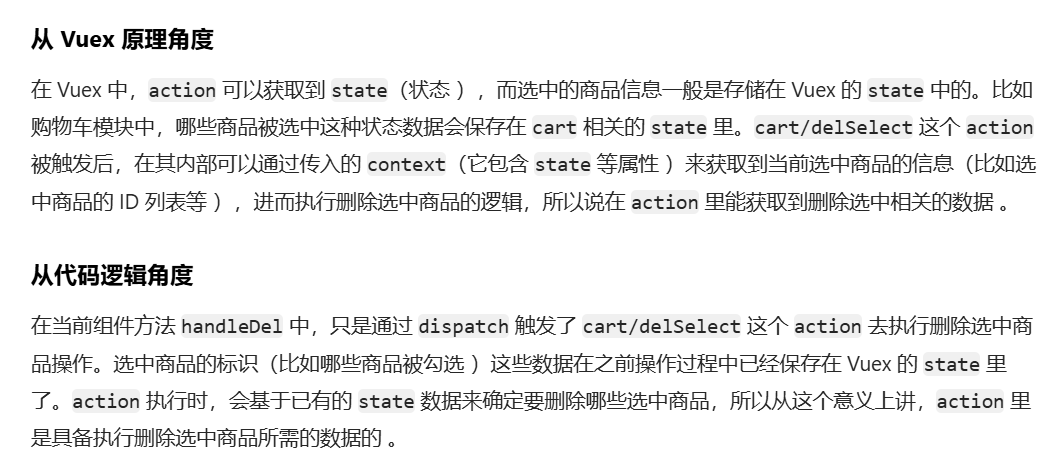
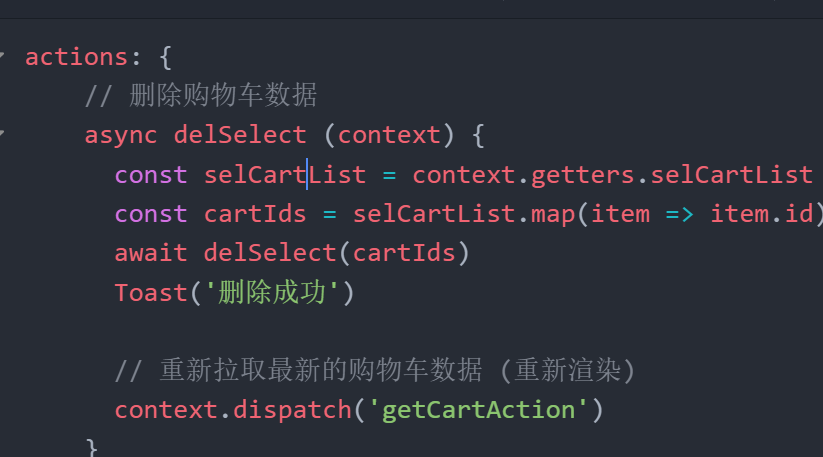
3??提供 actions
actions: {// 刪除購物車數據async delSelect (context) {const selCartList = context.getters.selCartListconst cartIds = selCartList.map(item => item.id)await delSelect(cartIds)Toast('刪除成功')// 重新拉取最新的購物車數據 (重新渲染)context.dispatch('getCartAction')}
},
理解
🪂


🪂
這步的思路,
直接調用我們封裝的方法delSelect,但是需要cartIds,就得先拿到數組,要怎么去拿到我們的購物車數組,有context就有state,有state就能拿到數組,而且通過context還能拿到getters,能拿到getters就能拿到選中商品的項,
然后傳入這個cartIds , delSelect(cartIds),然后靜待他的請求(await)
🪂

拉去的是這一步,action里面調用action
9.空購物車
1.外面包個大盒子,添加 v-if 判斷,然后添加一下購物車的渲染
<div class="cart-box" v-if="isLogin && cartList.length > 0"><!-- 購物車開頭 --><div class="cart-title">...</div><!-- 購物車列表 --><div class="cart-list">...</div><div class="footer-fixed">...</div>
</div><div class="empty-cart" v-else><img src="@/assets/empty.png" alt=""><div class="tips">您的購物車是空的, 快去逛逛吧</div><div class="btn" @click="$router.push('/')">去逛逛</div>
</div>
2.因為一直要判斷,所以小小完善一下
3.樣式
.empty-cart {padding: 80px 30px;img {width: 140px;height: 92px;display: block;margin: 0 auto;}.tips {text-align: center;color: #666;margin: 30px;}.btn {width: 110px;height: 32px;line-height: 32px;text-align: center;background-color: #fa2c20;border-radius: 16px;color: #fff;display: block;margin: 0 auto;}
}
31. 訂單結算臺
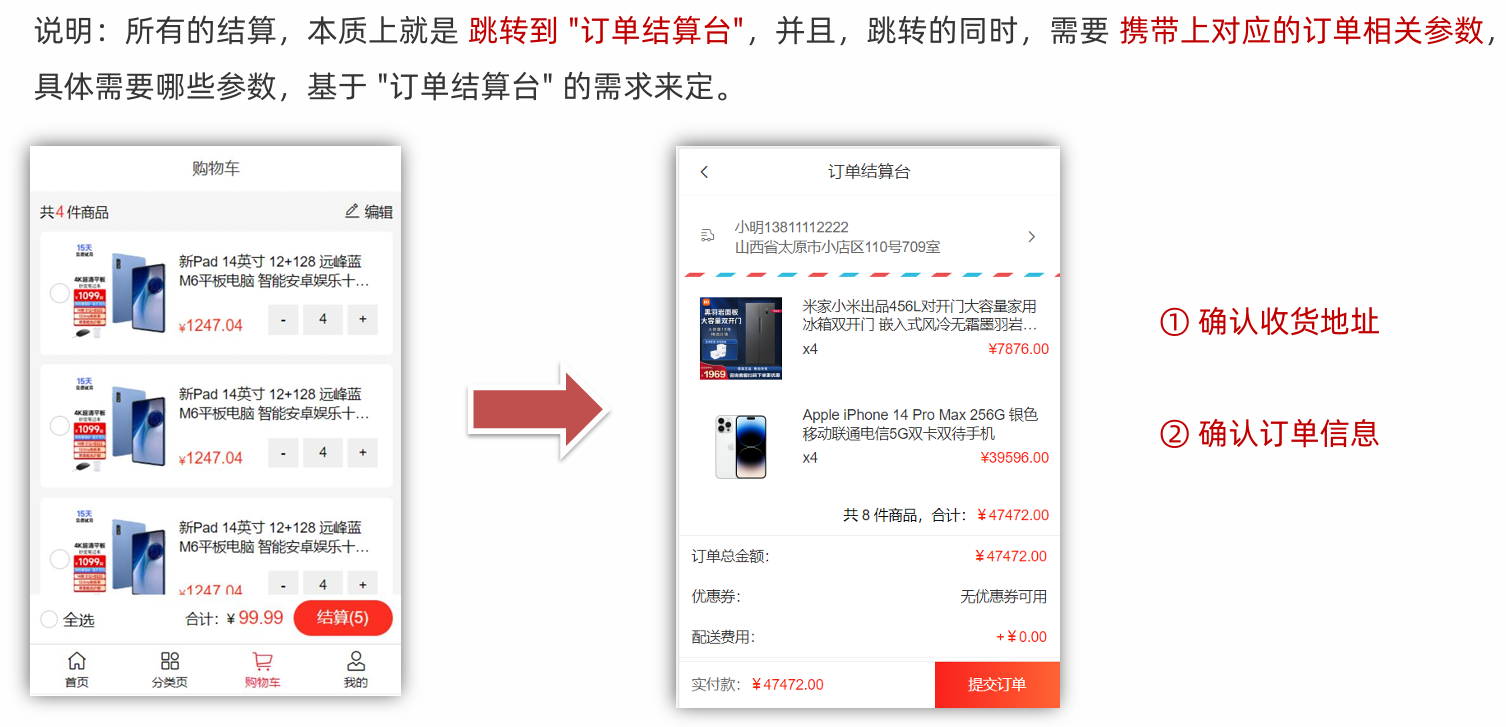
31.1靜態樣式
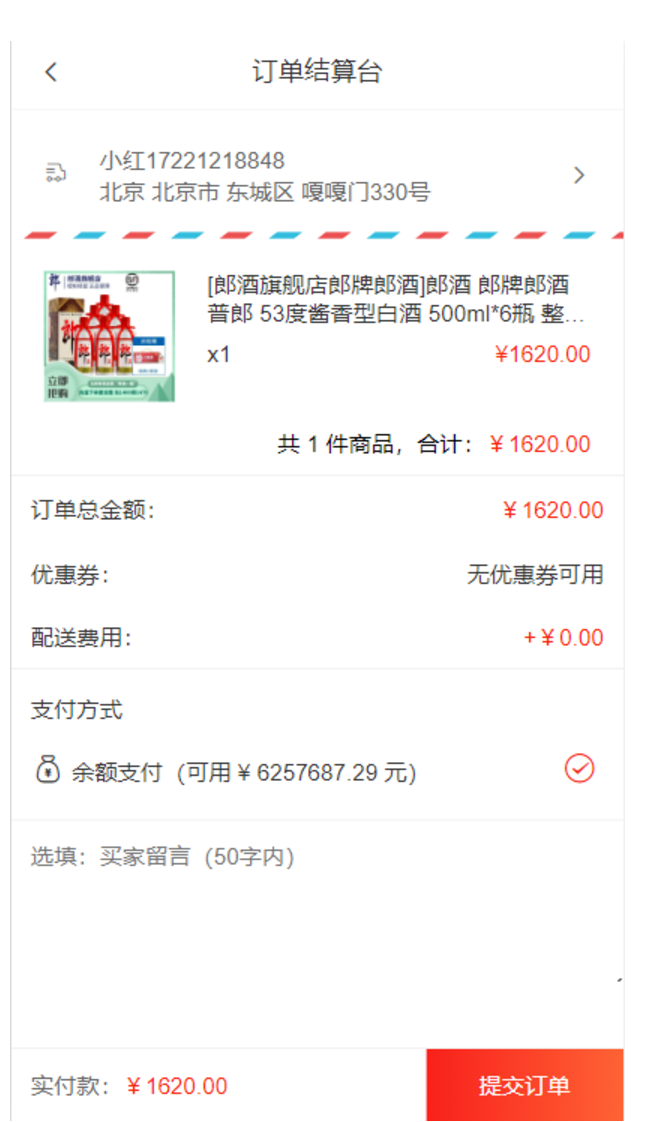
<template><div class="pay"><van-nav-bar fixed title="訂單結算臺" left-arrow @click-left="$router.go(-1)" /><!-- 地址相關 --><div class="address"><div class="left-icon"><van-icon name="logistics" /></div><div class="info" v-if="true"><div class="info-content"><span class="name">小紅</span><span class="mobile">13811112222</span></div><div class="info-address">江蘇省 無錫市 南長街 110號 504</div></div><div class="info" v-else>請選擇配送地址</div><div class="right-icon"><van-icon name="arrow" /></div></div><!-- 訂單明細 --><div class="pay-list"><div class="list"><div class="goods-item"><div class="left"><img src="http://cba.itlike.com/public/uploads/10001/20230321/8f505c6c437fc3d4b4310b57b1567544.jpg" alt="" /></div><div class="right"><p class="tit text-ellipsis-2">三星手機 SAMSUNG Galaxy S23 8GB+256GB 超視覺夜拍系統 超清夜景 悠霧紫 5G手機 游戲拍照旗艦機s23</p><p class="info"><span class="count">x3</span><span class="price">¥9.99</span></p></div></div></div><div class="flow-num-box"><span>共 12 件商品,合計:</span><span class="money">¥1219.00</span></div><div class="pay-detail"><div class="pay-cell"><span>訂單總金額:</span><span class="red">¥1219.00</span></div><div class="pay-cell"><span>優惠券:</span><span>無優惠券可用</span></div><div class="pay-cell"><span>配送費用:</span><span v-if="false">請先選擇配送地址</span><span v-else class="red">+¥0.00</span></div></div><!-- 支付方式 --><div class="pay-way"><span class="tit">支付方式</span><div class="pay-cell"><span><van-icon name="balance-o" />余額支付(可用 ¥ 999919.00 元)</span><!-- <span>請先選擇配送地址</span> --><span class="red"><van-icon name="passed" /></span></div></div><!-- 買家留言 --><div class="buytips"><textarea placeholder="選填:買家留言(50字內)" name="" id="" cols="30" rows="10"></textarea></div></div><!-- 底部提交 --><div class="footer-fixed"><div class="left">實付款:<span>¥999919</span></div><div class="tipsbtn">提交訂單</div></div></div>
</template><script>
export default {name: 'PayIndex',data () {return {}},methods: {}
}
</script><style lang="less" scoped>
.pay {padding-top: 46px;padding-bottom: 46px;::v-deep {.van-nav-bar__arrow {color: #333;}}
}
.address {display: flex;align-items: center;justify-content: flex-start;padding: 20px;font-size: 14px;color: #666;position: relative;background: url(@/assets/border-line.png) bottom repeat-x;background-size: 60px auto;.left-icon {margin-right: 20px;}.right-icon {position: absolute;right: 20px;top: 50%;transform: translateY(-7px);}
}
.goods-item {height: 100px;margin-bottom: 6px;padding: 10px;background-color: #fff;display: flex;.left {width: 100px;img {display: block;width: 80px;margin: 10px auto;}}.right {flex: 1;font-size: 14px;line-height: 1.3;padding: 10px;padding-right: 0px;display: flex;flex-direction: column;justify-content: space-evenly;color: #333;.info {margin-top: 5px;display: flex;justify-content: space-between;.price {color: #fa2209;}}}
}.flow-num-box {display: flex;justify-content: flex-end;padding: 10px 10px;font-size: 14px;border-bottom: 1px solid #efefef;.money {color: #fa2209;}
}.pay-cell {font-size: 14px;padding: 10px 12px;color: #333;display: flex;justify-content: space-between;.red {color: #fa2209;}
}
.pay-detail {border-bottom: 1px solid #efefef;
}.pay-way {font-size: 14px;padding: 10px 12px;border-bottom: 1px solid #efefef;color: #333;.tit {line-height: 30px;}.pay-cell {padding: 10px 0;}.van-icon {font-size: 20px;margin-right: 5px;}
}.buytips {display: block;textarea {display: block;width: 100%;border: none;font-size: 14px;padding: 12px;height: 100px;}
}.footer-fixed {position: fixed;background-color: #fff;left: 0;bottom: 0;width: 100%;height: 46px;line-height: 46px;border-top: 1px solid #efefef;font-size: 14px;display: flex;.left {flex: 1;padding-left: 12px;color: #666;span {color:#fa2209;}}.tipsbtn {width: 121px;background: linear-gradient(90deg,#f9211c,#ff6335);color: #fff;text-align: center;line-height: 46px;display: block;font-size: 14px;}
}
</style>
31.2獲取收貨地址列表
1??封裝地址的接口4??
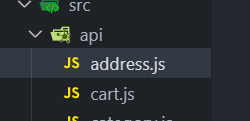
import request from '@/utils/request'// 獲取地址列表
export const getAddressList = () => {return request.get('/address/list')
}
2??調用獲取地址
一進入頁面就發請求,用created
import { getAddressList } from '@/api/address'
data () {return {addressList: []}
},
computed: {selectAddress () {// 這里地址管理不是主線業務,直接獲取默認第一條地址return this.addressList[0] }
},
async created () {this.getAddressList()
},
methods: {async getAddressList () {const { data: { list } } = await getAddressList()this.addressList = list}
}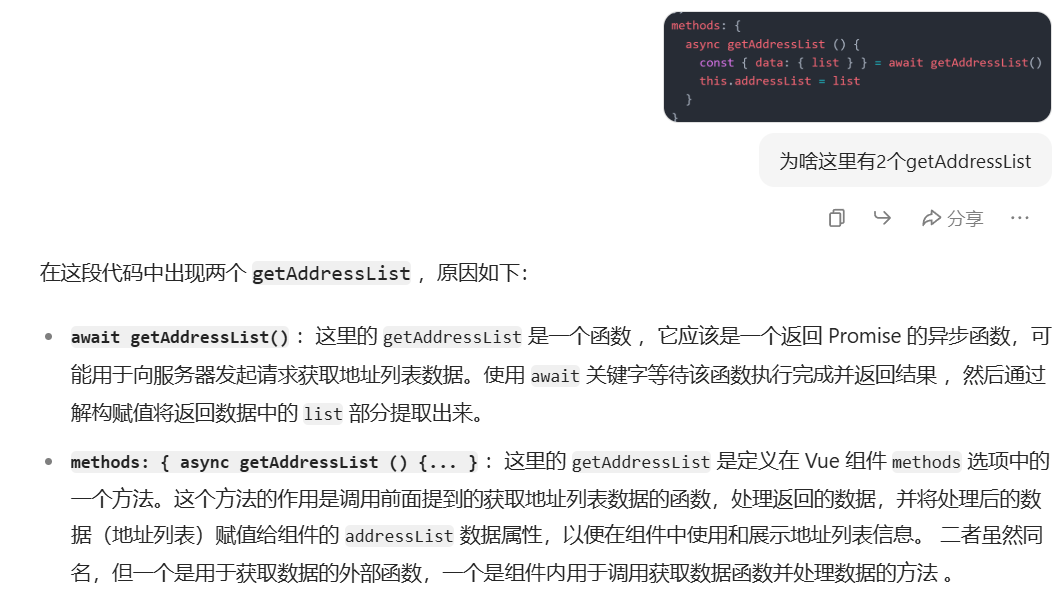
3?? 頁面中 - 進行渲染
代碼
computed: {longAddress () {const region = this.selectAddress.regionreturn region.province + region.city + region.region + this.selectAddress.detail}
},<div class="info" v-if="selectAddress?.address_id"><div class="info-content"><span class="name">{{ selectAddress.name }}</span><span class="mobile">{{ selectAddress.phone }}</span></div><div class="info-address">{{ longAddress }}</div>
</div>
理解:
這里還有一個貼心的判斷
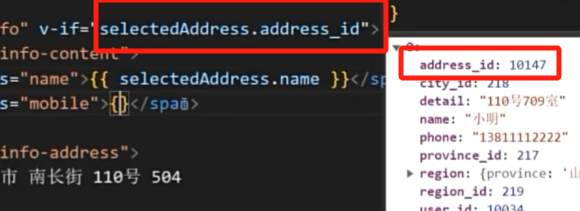
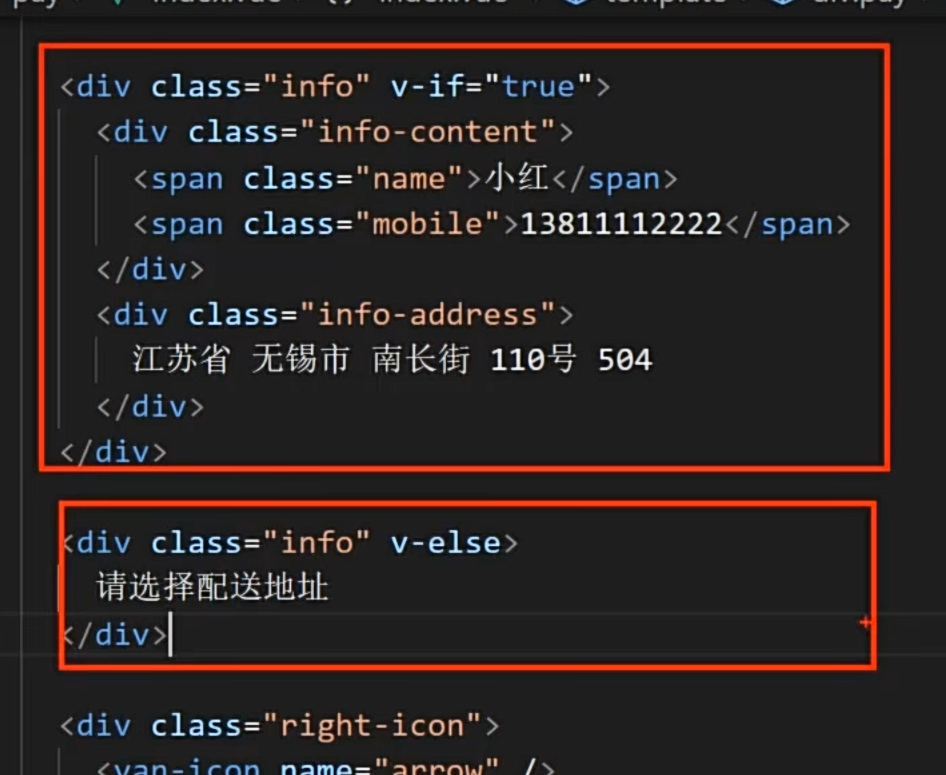
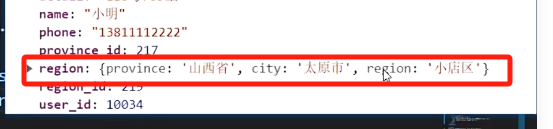

32. 訂單結算臺 -確認訂單信息
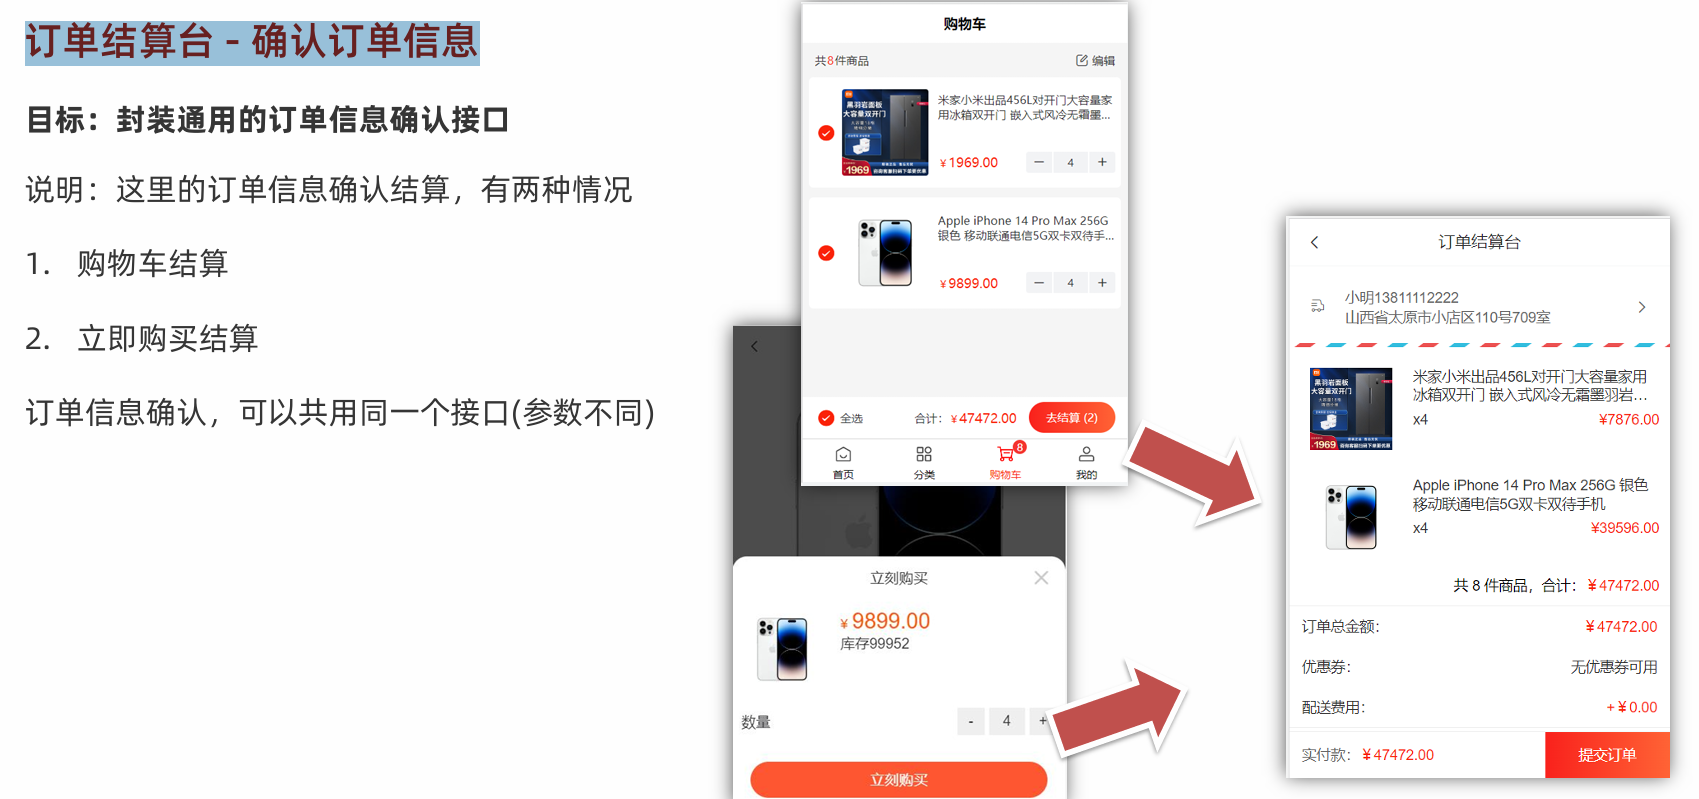
33. 訂單結算臺 -購物車結算
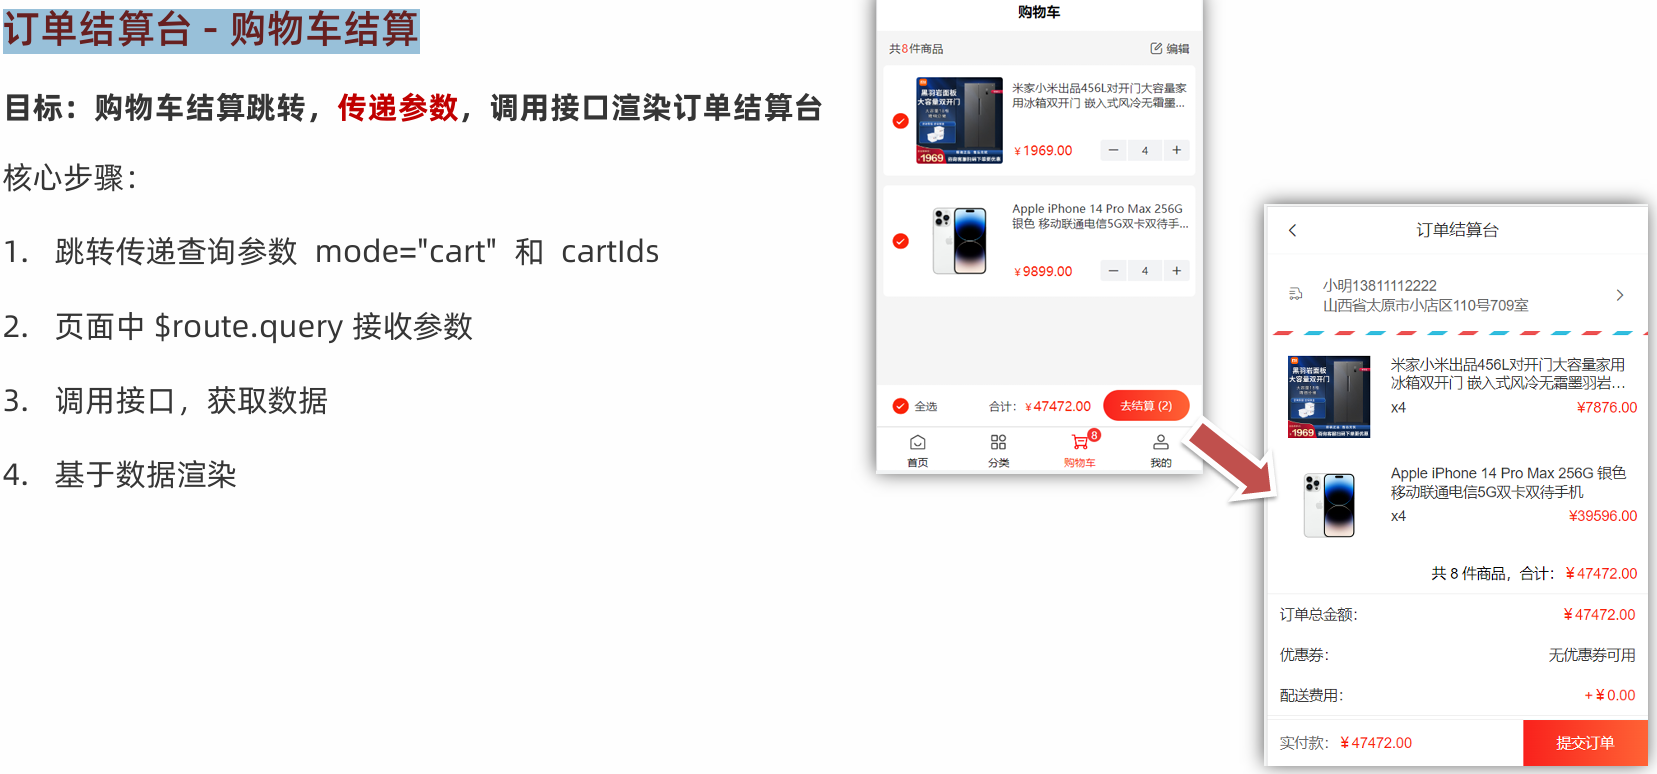
33.1跳轉查詢參數mode='cart'和
封裝接口
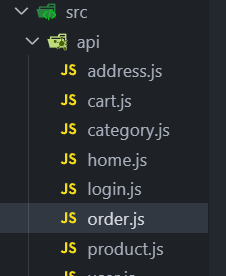
import request from '@/utils/request'// 訂單結算確認
// mode: cart    => obj { cartIds }
// mode: buyNow  => obj { goodsId  goodsNum  goodsSkuId }
export const checkOrder = (mode, obj) => {return request.get('/checkout/order', {params: {mode, // cart buyNowdelivery: 10, // 10 快遞配送 20 門店自提couponId: 0, // 優惠券ID 傳0 不使用優惠券isUsePoints: 0, // 積分 傳0 不使用積分...obj // 將傳遞過來的參數對象 動態展開}})
}
注冊點擊事件
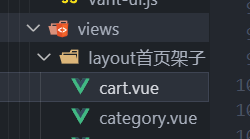
<div class="all-total"><div class="price"><span>合計:</span><span>¥ <i class="totalPrice">{{ selPrice }}</i></span></div><div v-if="!isEdit" class="goPay" :class="{ disabled: selCount === 0 }" @click="goPay">結算({{ selCount }})</div><div v-else @click="handleDel" class="delete" :class="{ disabled: selCount === 0 }" >刪除</div></div></div></div>模式:cart
method:{
goPay () {// 判斷有沒有選中商品if (this.selCount > 0) {// 有選中的 商品 才進行結算跳轉this.$router.push({path: '/pay',query: {mode: 'cart',cartIds: this.selCartList.map(item => item.id).join(',') // 'cartId,cartId,cartId'}})}}
}
33.2頁面中$routr.query接收參數
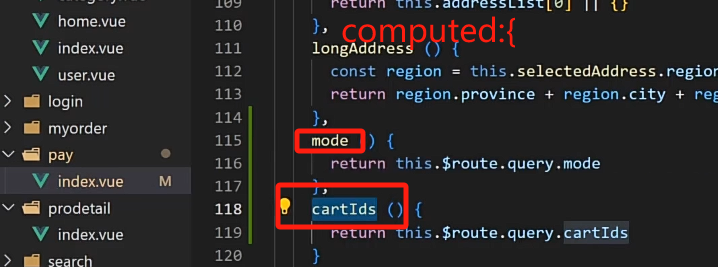
理解
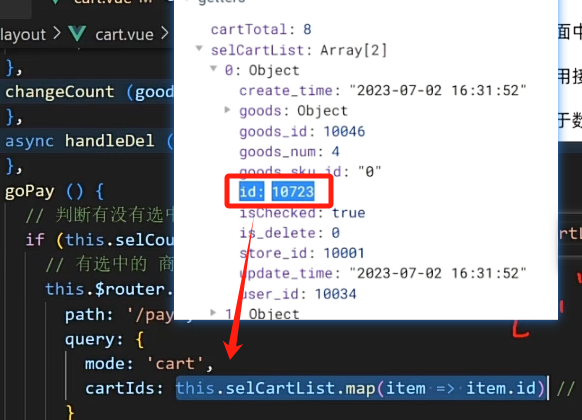
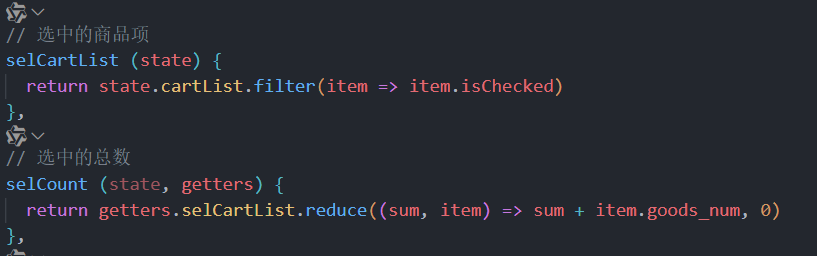
實現效果
成功把2個參數傳遞過來,拿是拿過來了,但是沒有去獲取他,對于地址欄上的參數,直接$.route.query
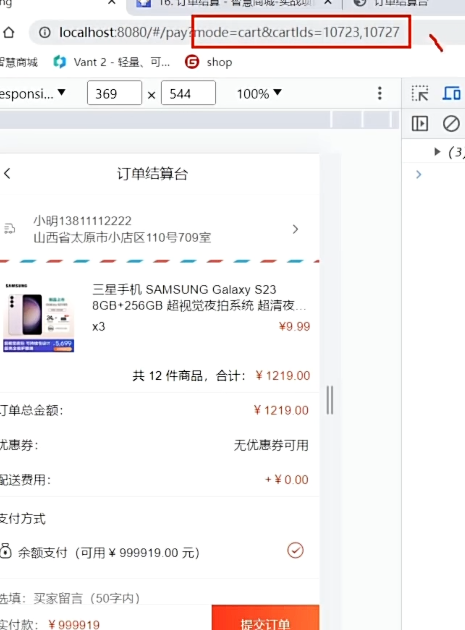
為了訪問,可以在這個pay的頁面去定義2個計算屬性,找起來方便一點
33.3調用接口,獲得數據
<script>
import {checkOrder} from '@/api/order'
export default {data () {return {order: {},personal: {}}
},computed: {mode () {return this.$route.query.mode},cartIds () {return this.$route.query.cartIds}
}}async created () {//一進頁面就發請求,要用createdthis.getOrderList()
},async getOrderList () {if (this.mode === 'cart') {const { data: { order, personal } } = await checkOrder(this.mode, { cartIds: this.cartIds })this.order = orderthis.personal = personal}
}
33.4基于數據進行渲染

<!-- 訂單明細 -->
<div class="pay-list" v-if="order.goodsList"><div class="list"><div class="goods-item" v-for="item in order.goodsList" :key="item.goods_id"><div class="left"><img :src="item.goods_image" alt="" /></div><div class="right"><p class="tit text-ellipsis-2">{{ item.goods_name }}</p><p class="info"><span class="count">x{{ item.total_num }}</span><span class="price">¥{{ item.total_pay_price }}</span></p></div></div></div><div class="flow-num-box"><span>共 {{ order.orderTotalNum }} 件商品,合計:</span><span class="money">¥{{ order.orderTotalPrice }}</span></div><div class="pay-detail"><div class="pay-cell"><span>訂單總金額:</span><span class="red">¥{{ order.orderTotalPrice }}</span></div><div class="pay-cell"><span>優惠券:</span><span>無優惠券可用</span></div><div class="pay-cell"><span>配送費用:</span><span v-if="!selectedAddress">請先選擇配送地址</span><span v-else class="red">+¥0.00</span></div></div><!-- 支付方式 --><div class="pay-way"><span class="tit">支付方式</span><div class="pay-cell"><span><van-icon name="balance-o" />余額支付(可用 ¥ {{ personal.balance }} 元)</span><!-- <span>請先選擇配送地址</span> --><span class="red"><van-icon name="passed" /></span></div></div><!-- 買家留言 --><div class="buytips"><textarea placeholder="選填:買家留言(50字內)" name="" id="" cols="30" rows="10"></textarea></div>
</div><!-- 底部提交 -->
<div class="footer-fixed"><div class="left">實付款:<span>¥{{ order.orderTotalPrice }}</span></div><div class="tipsbtn">提交訂單</div>
</div>
34. 訂單結算臺 -立即購買結算
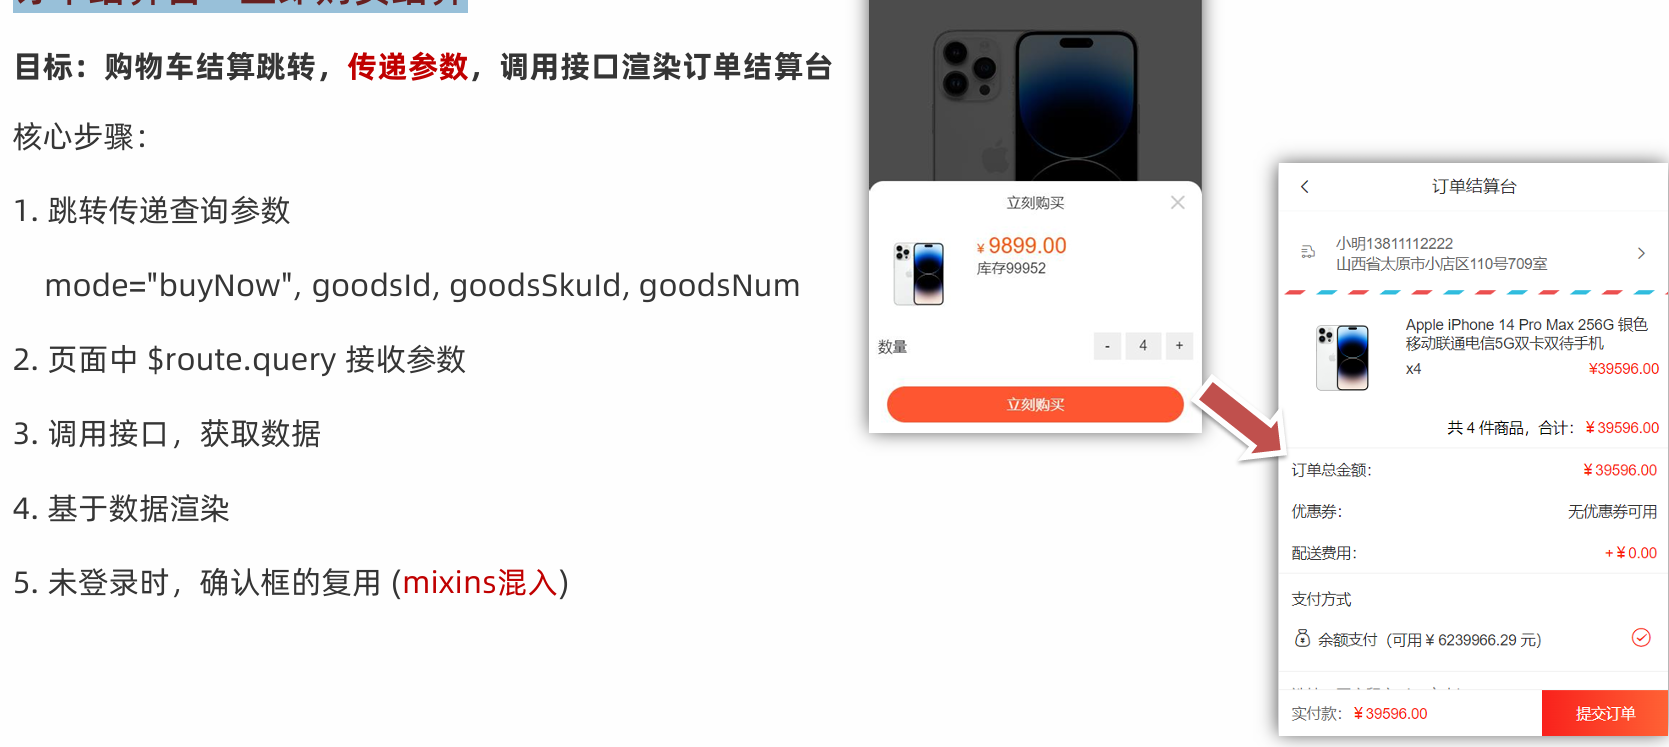
34.1點擊跳轉傳參

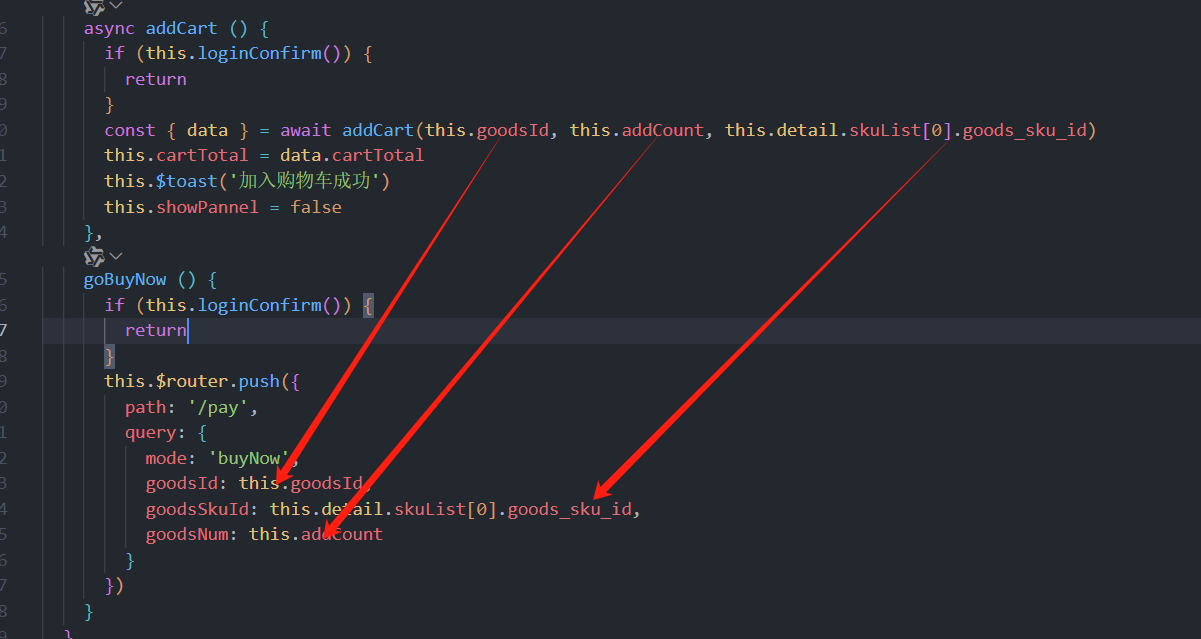
<div class="btn" v-if="mode === 'buyNow'" @click="goBuyNow">立刻購買</div>goBuyNow () {this.$router.push({path: '/pay',query: {mode: 'buyNow',goodsId: this.goodsId,goodsSkuId: this.detail.skuList[0].goods_sku_id,goodsNum: this.addCount}})
}
報錯
代碼沒問題,是進入這個頁面之后,會立刻去做渲染,而上一個渲染,他沒有做判斷就報錯,
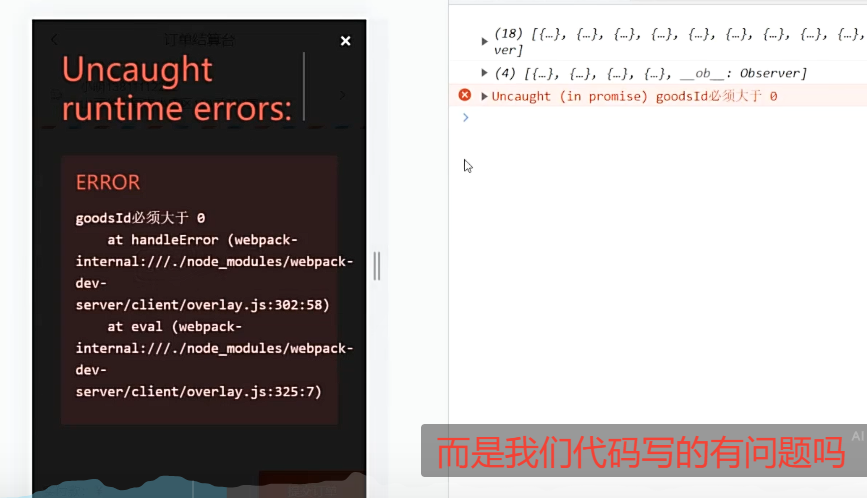
這里是直接去做渲染,基于cartIds去渲染,一旦跳轉過來變成buyNow之后,應該要傳遞 的是goodsId,···,所以需要去準備對應的計算屬性,去獲取傳遞過來的參數,
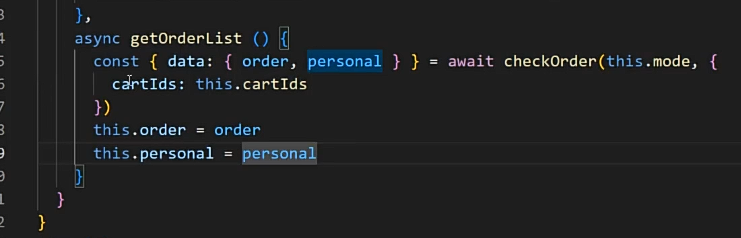

參數傳遞過來了只不過問題是沒有去拿,拿完之后沒有基于他去渲染,所以就是地址欄有,但是請求的時候沒有帶,
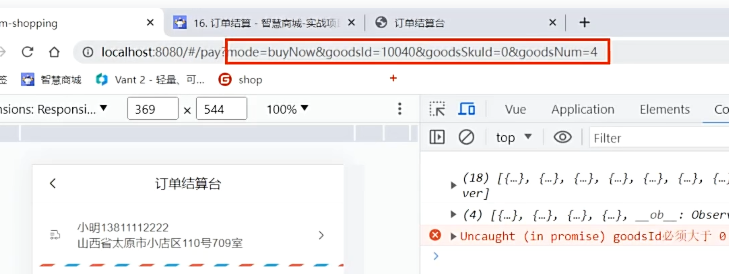
34.2計算屬性處理參數
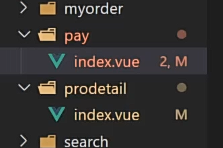
computed: {...goodsId () {return this.$route.query.goodsId},goodsSkuId () {return this.$route.query.goodsSkuId},goodsNum () {return this.$route.query.goodsNum}
}
34.3基于請求時攜帶參數發請求渲染
method {
async getOrderList () {// 購物車結算if (this.mode === 'cart') {const { data: { order, personal } } = await checkOrder(this.mode, {cartIds: this.cartIds})this.order = orderthis.personal = personal}// 立刻購買結算if (this.mode === 'buyNow') {const { data: { order, personal } } = await checkOrder(this.mode, {goodsId: this.goodsId,goodsSkuId: this.goodsSkuId,goodsNum: this.goodsNum})this.order = orderthis.personal = personal}}
}
理解
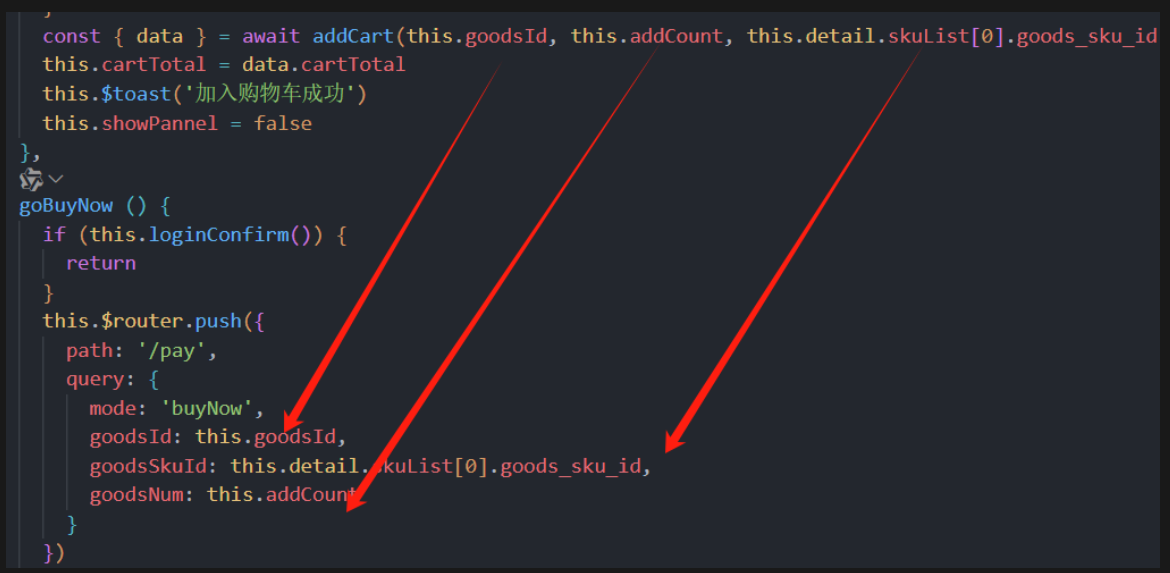

34.4mixins 復用 - 處理登錄確認框的彈出
原因:
這個goBuyNow沒有做任何未登錄的處理
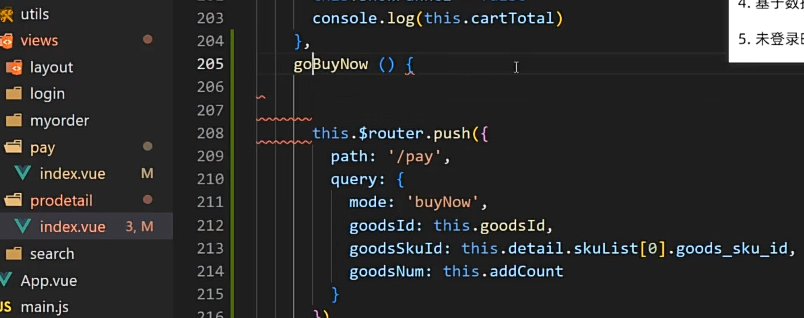
按道理說直接這段復制粘貼就可以了,但是代碼太長,可以封裝一下

直接封裝成一個方法,但是后面其他頁面也可能也會用
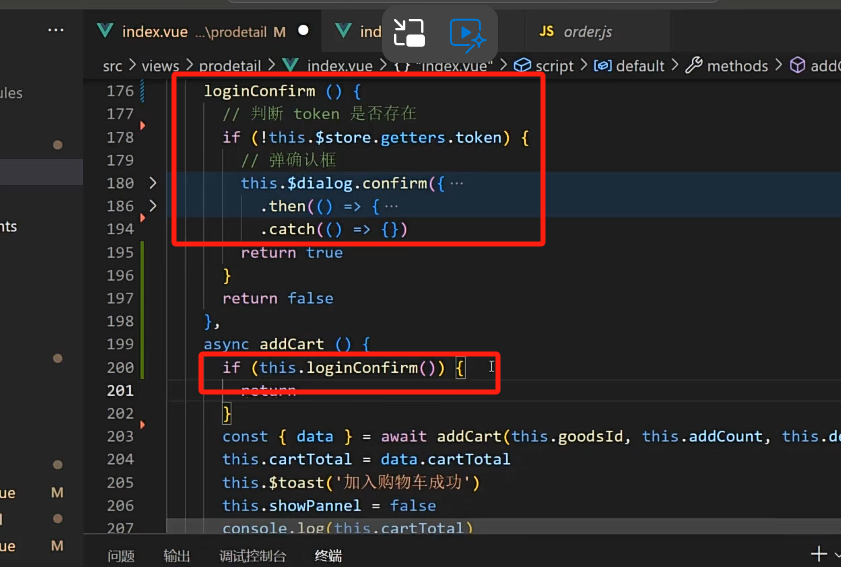
希望把這個方法也封裝到一個專門的公共位置去復用,這個方法又不是一個普通的函數,又訪問store,訪問到組件內的一些東西
如果沖突了以組件內部為主
代碼
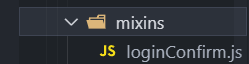
export default {// 此處編寫的就是 Vue組件實例的 配置項,通過一定語法,可以直接混入到組件內部// data methods computed 生命周期函數 ...// 注意點:// 1. 如果此處 和 組件內,提供了同名的 data 或 methods, 則組件內優先級更高// 2. 如果編寫了生命周期函數,則mixins中的生命周期函數 和 頁面的生命周期函數,//    會用數組管理,統一執行created () {// console.log('嘎嘎')},data () {return {title: '標題'}},methods: {sayHi () {// console.log('你好')},// 根據登錄狀態,判斷是否需要顯示登錄確認框// 1. 如果未登錄 => 顯示確認框 返回 true// 2. 如果已登錄 => 啥也不干   返回 falseloginConfirm () {// 判斷 token 是否存在if (!this.$store.getters.token) {// 彈確認框this.$dialog.confirm({title: '溫馨提示',message: '此時需要先登錄才能繼續操作哦',confirmButtonText: '去登陸',cancelButtonText: '再逛逛'}).then(() => {this.$router.replace({path: '/login',query: {backUrl: this.$route.fullPath}})}).catch(() => {})return true}return false}}
}
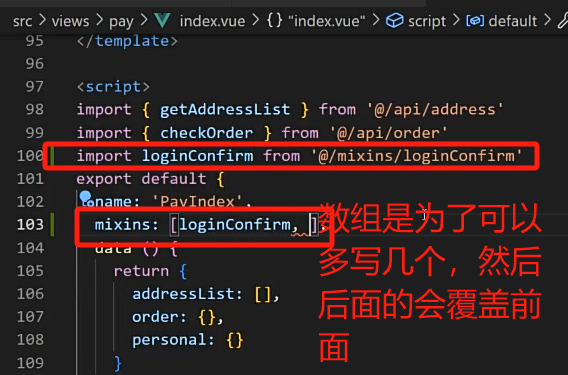
35. 提交訂單并支付
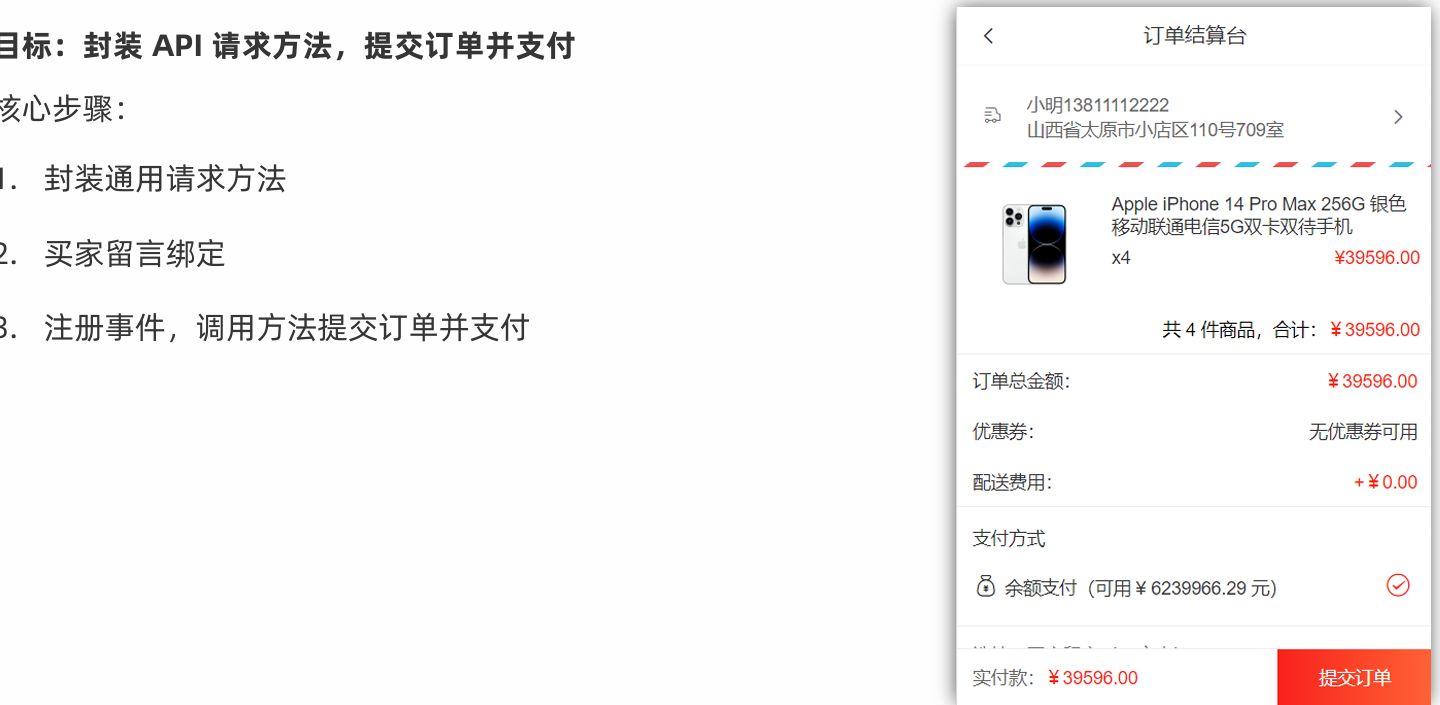
35.1 封裝 API 通用方法(統一余額支付)
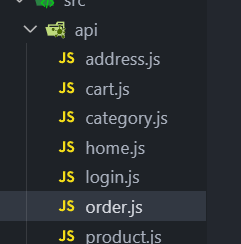
import request from '@/utils/request'
// 提交訂單
// mode: cart    => obj { cartIds, remark }
// mode: buyNow  => obj { goodsId, goodsNum, goodsSkuId, remark }
export const submitOrder = (mode, obj) => {return request.post('/checkout/submit', {mode,delivery: 10, // 10 快遞配送couponId: 0,isUsePoints: 0,payType: 10, // 余額支付...obj})
}// 訂單列表
export const getMyOrderList = (dataType, page) => {return request.get('/order/list', {params: {dataType,page // List}})
}
35.2買家留言綁定
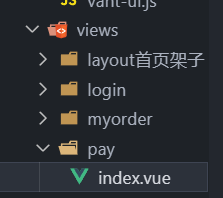
data () {return {remark: ''}
},
<div class="buytips"><textarea v-model="remark" placeholder="選填:買家留言(50字內)" name="" id="" cols="30" rows="10"></textarea>
</div>
35.3注冊點擊事件,提交訂單并支付
<div class="tipsbtn" @click="submitOrder">提交訂單</div>
import {submitOrder} from '@/api/order'method{
// 提交訂單
async submitOrder () {if (this.mode === 'cart') {await submitOrder(this.mode, {remark: this.remark,cartIds: this.cartIds})}if (this.mode === 'buyNow') {await submitOrder(this.mode, {remark: this.remark,goodsId: this.goodsId,goodsSkuId: this.goodsSkuId,goodsNum: this.goodsNum})}this.$toast.success('支付成功')this.$router.replace('/myorder')
}
}
36. 訂單管理 & 個人中心 (快速實現)

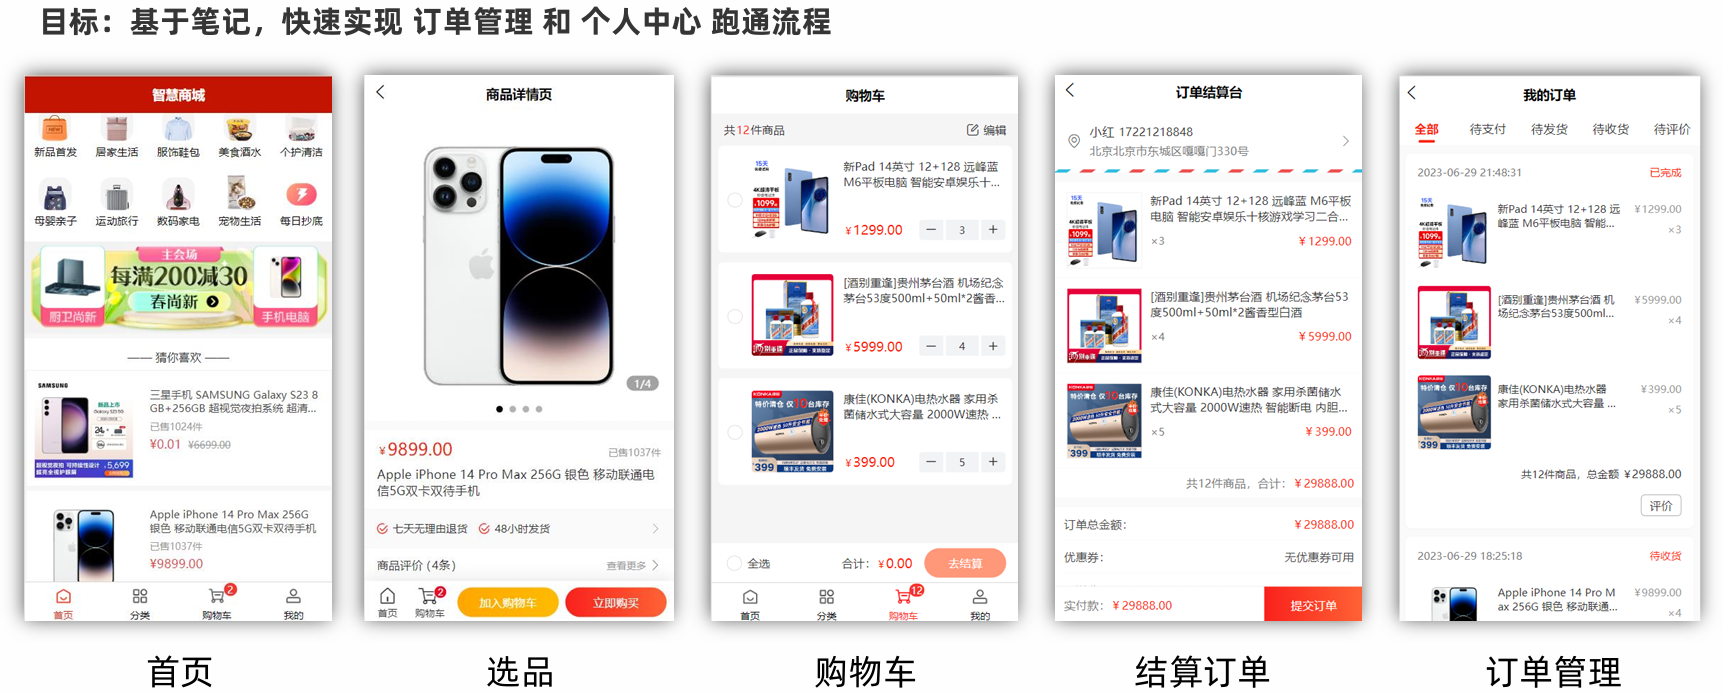
🪂訂單管理
36.1 靜態布局
1?? 基礎靜態結構
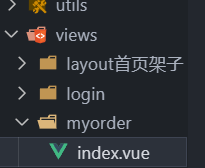
<template><div class="order"><van-nav-bar title="我的訂單" left-arrow @click-left="$router.go(-1)" /><van-tabs v-model="active" sticky><van-tab name="all" title="全部"></van-tab><van-tab name="payment" title="待支付"></van-tab><van-tab name="delivery" title="待發貨"></van-tab><van-tab name="received" title="待收貨"></van-tab><van-tab name="comment" title="待評價"></van-tab></van-tabs><OrderListItem v-for="item in list" :key="item.order_id" :item="item"></OrderListItem></div>
</template><script>
import OrderListItem from '@/components/OrderListItem.vue'
import { getMyOrderList } from '@/api/order'
export default {name: 'OrderPage',components: {OrderListItem},data () {return {active: this.$route.query.dataType || 'all',page: 1,list: []}},methods: {async getOrderList () {const { data: { list } } = await getMyOrderList(this.active, this.page)list.data.forEach((item) => {item.total_num = 0item.goods.forEach(goods => {item.total_num += goods.total_num})})this.list = list.data}},watch: {active: {immediate: true,handler () {this.getOrderList()}}}
}
</script><style lang="less" scoped>
.order {background-color: #fafafa;
}
.van-tabs {position: sticky;top: 0;
}
</style>
2??components/OrderListItem
<template><div class="order-list-item" v-if="item.order_id"><div class="tit"><div class="time">{{ item.create_time }}</div><div class="status"><span>{{ item.state_text }}</span></div></div><div class="list" ><div class="list-item" v-for="(goods, index) in item.goods" :key="index"><div class="goods-img"><img :src="goods.goods_image" alt=""></div><div class="goods-content text-ellipsis-2">{{ goods.goods_name }}</div><div class="goods-trade"><p>¥ {{ goods.total_pay_price }}</p><p>x {{ goods.total_num }}</p></div></div></div><div class="total">共 {{ item.total_num }} 件商品,總金額 ¥{{ item.total_price }}</div><div class="actions"><div v-if="item.order_status === 10"><span v-if="item.pay_status === 10">立刻付款</span><span v-else-if="item.delivery_status === 10">申請取消</span><span v-else-if="item.delivery_status === 20 || item.delivery_status === 30">確認收貨</span></div><div v-if="item.order_status === 30"><span>評價</span></div></div></div>
</template><script>
export default {props: {item: {type: Object,default: () => {return {}}}}
}
</script><style lang="less" scoped>
.order-list-item {margin: 10px auto;width: 94%;padding: 15px;background-color: #ffffff;box-shadow: 0 0.5px 2px 0 rgba(0,0,0,.05);border-radius: 8px;color: #333;font-size: 13px;.tit {height: 24px;line-height: 24px;display: flex;justify-content: space-between;margin-bottom: 20px;.status {color: #fa2209;}}.list-item {display: flex;.goods-img {width: 90px;height: 90px;margin: 0px 10px 10px 0;img {width: 100%;height: 100%;}}.goods-content {flex: 2;line-height: 18px;max-height: 36px;margin-top: 8px;}.goods-trade {flex: 1;line-height: 18px;text-align: right;color: #b39999;margin-top: 8px;}}.total {text-align: right;}.actions {text-align: right;span {display: inline-block;height: 28px;line-height: 28px;color: #383838;border: 0.5px solid #a8a8a8;font-size: 14px;padding: 0 15px;border-radius: 5px;margin: 10px 0;}}
}
</style>
3??導入注冊
import { Tab, Tabs } from 'vant'
Vue.use(Tab)
Vue.use(Tabs)
36.2點擊 tab 切換渲染
1??封裝獲取訂單列表的 API 接口
// 訂單列表
export const getMyOrderList = (dataType, page) => {return request.get('/order/list', {params: {dataType,page}})
}
2??給 tab 綁定 name 屬性
封裝調用接口獲取數據
<template><div class="order"><van-nav-bar title="我的訂單" left-arrow @click-left="$router.go(-1)" /><van-tabs v-model="active" sticky><van-tab name="all" title="全部"></van-tab><van-tab name="payment" title="待支付"></van-tab><van-tab name="delivery" title="待發貨"></van-tab><van-tab name="received" title="待收貨"></van-tab><van-tab name="comment" title="待評價"></van-tab></van-tabs><OrderListItem v-for="item in list" :key="item.order_id" :item="item"></OrderListItem></div>
</template><script>
import OrderListItem from '@/components/OrderListItem.vue'
import { getMyOrderList } from '@/api/order'
export default {name: 'OrderPage',components: {OrderListItem},data () {return {active: this.$route.query.dataType || 'all',page: 1,list: []}},methods: {async getOrderList () {const { data: { list } } = await getMyOrderList(this.active, this.page)list.data.forEach((item) => {item.total_num = 0item.goods.forEach(goods => {item.total_num += goods.total_num})})//上面的話要計算商品的總數,上面我的訂單要展示一下所有訂單的總數//但是默認后臺返回的接口中,沒有給你返回這個總數,所以做了個處理,遍歷//將他們的總數做了一個求和this.list = list.data}},watch: {active: {immediate: true,handler () {this.getOrderList()}}}
}
</script><style lang="less" scoped>
.order {background-color: #fafafa;
}
.van-tabs {position: sticky;top: 0;
}
</style>
3??動態渲染
<template><div class="order-list-item" v-if="item.order_id"><div class="tit"><div class="time">{{ item.create_time }}</div><div class="status"><span>{{ item.state_text }}</span></div></div><div class="list" ><div class="list-item" v-for="(goods, index) in item.goods" :key="index"><div class="goods-img"><img :src="goods.goods_image" alt=""></div><div class="goods-content text-ellipsis-2">{{ goods.goods_name }}</div><div class="goods-trade"><p>¥ {{ goods.total_pay_price }}</p><p>x {{ goods.total_num }}</p></div></div></div><div class="total">共 {{ item.total_num }} 件商品,總金額 ¥{{ item.total_price }}</div><div class="actions"><div v-if="item.order_status === 10"><span v-if="item.pay_status === 10">立刻付款</span><span v-else-if="item.delivery_status === 10">申請取消</span><span v-else-if="item.delivery_status === 20 || item.delivery_status === 30">確認收貨</span></div><div v-if="item.order_status === 30"><span>評價</span></div></div></div>
</template><script>
export default {props: {item: {type: Object,default: () => {return {}}}}
}
</script><style lang="less" scoped>
.order-list-item {margin: 10px auto;width: 94%;padding: 15px;background-color: #ffffff;box-shadow: 0 0.5px 2px 0 rgba(0,0,0,.05);border-radius: 8px;color: #333;font-size: 13px;.tit {height: 24px;line-height: 24px;display: flex;justify-content: space-between;margin-bottom: 20px;.status {color: #fa2209;}}.list-item {display: flex;.goods-img {width: 90px;height: 90px;margin: 0px 10px 10px 0;img {width: 100%;height: 100%;}}.goods-content {flex: 2;line-height: 18px;max-height: 36px;margin-top: 8px;}.goods-trade {flex: 1;line-height: 18px;text-align: right;color: #b39999;margin-top: 8px;}}.total {text-align: right;}.actions {text-align: right;span {display: inline-block;height: 28px;line-height: 28px;color: #383838;border: 0.5px solid #a8a8a8;font-size: 14px;padding: 0 15px;border-radius: 5px;margin: 10px 0;}}
}
</style>
🪂個人中心
1.封裝獲取個人信息 - API接口
import request from '@/utils/request'// 獲取個人信息
export const getUserInfoDetail = () => {return request.get('/user/info')
}
2.調用接口,獲取數據進行渲染
<template><div class="user"><div class="head-page" v-if="isLogin"><div class="head-img"><img src="@/assets/default-avatar.png" alt="" /></div><div class="info"><div class="mobile">{{ detail.mobile }}</div><div class="vip"><van-icon name="diamond-o" />普通會員</div></div></div><div v-else class="head-page" @click="$router.push('/login')"><div class="head-img"><img src="@/assets/default-avatar.png" alt="" /></div><div class="info"><div class="mobile">未登錄</div><div class="words">點擊登錄賬號</div></div></div><div class="my-asset"><div class="asset-left"><div class="asset-left-item"><span>{{ detail.pay_money || 0 }}</span><span>賬戶余額</span></div><div class="asset-left-item"><span>0</span><span>積分</span></div><div class="asset-left-item"><span>0</span><span>優惠券</span></div></div><div class="asset-right"><div class="asset-right-item"><van-icon name="balance-pay" /><span>我的錢包</span></div></div></div><div class="order-navbar"><div class="order-navbar-item" @click="$router.push('/myorder?dataType=all')"><van-icon name="balance-list-o" /><span>全部訂單</span></div><div class="order-navbar-item" @click="$router.push('/myorder?dataType=payment')"><van-icon name="clock-o" /><span>待支付</span></div><div class="order-navbar-item" @click="$router.push('/myorder?dataType=delivery')"><van-icon name="logistics" /><span>待發貨</span></div><div class="order-navbar-item" @click="$router.push('/myorder?dataType=received')"><van-icon name="send-gift-o" /><span>待收貨</span></div></div><div class="service"><div class="title">我的服務</div><div class="content"><div class="content-item"><van-icon name="records" /><span>收貨地址</span></div><div class="content-item"><van-icon name="gift-o" /><span>領券中心</span></div><div class="content-item"><van-icon name="gift-card-o" /><span>優惠券</span></div><div class="content-item"><van-icon name="question-o" /><span>我的幫助</span></div><div class="content-item"><van-icon name="balance-o" /><span>我的積分</span></div><div class="content-item"><van-icon name="refund-o" /><span>退換/售后</span></div></div></div><div class="logout-btn"><button @click="logout">退出登錄</button></div></div>
</template><script>
import { getUserInfoDetail } from '@/api/user.js'
export default {name: 'UserPage',data () {return {detail: {}}},created () {if (this.isLogin) {this.getUserInfoDetail()}},computed: {isLogin () {return this.$store.getters.token}},methods: {async getUserInfoDetail () {const { data: { userInfo } } = await getUserInfoDetail()this.detail = userInfo},logout () {this.$dialog.confirm({title: '溫馨提示',message: '你確認要退出么'}).then(() => {// 退出是一個動作 => 包含了兩步,分別是將 user 和 cart 進行重置this.$store.dispatch('user/logout')}).catch(() => {})}}
}
</script><style lang="less" scoped>
.user {min-height: 100vh;background-color: #f7f7f7;padding-bottom: 50px;
}.head-page {height: 130px;background: url("http://cba.itlike.com/public/mweb/static/background/user-header2.png");background-size: cover;display: flex;align-items: center;.head-img {width: 50px;height: 50px;border-radius: 50%;overflow: hidden;margin: 0 10px;img {width: 100%;height: 100%;object-fit: cover;}}
}
.info {.mobile {margin-bottom: 5px;color: #c59a46;font-size: 18px;font-weight: bold;}.vip {display: inline-block;background-color: #3c3c3c;padding: 3px 5px;border-radius: 5px;color: #e0d3b6;font-size: 14px;.van-icon {font-weight: bold;color: #ffb632;}}
}.my-asset {display: flex;padding: 20px 0;font-size: 14px;background-color: #fff;.asset-left {display: flex;justify-content: space-evenly;flex: 3;.asset-left-item {display: flex;flex-direction: column;justify-content: center;align-items: center;span:first-child {margin-bottom: 5px;color: #ff0000;font-size: 16px;}}}.asset-right {flex: 1;.asset-right-item {display: flex;flex-direction: column;justify-content: center;align-items: center;.van-icon {font-size: 24px;margin-bottom: 5px;}}}
}.order-navbar {display: flex;padding: 15px 0;margin: 10px;font-size: 14px;background-color: #fff;border-radius: 5px;.order-navbar-item {display: flex;flex-direction: column;justify-content: center;align-items: center;width: 25%;.van-icon {font-size: 24px;margin-bottom: 5px;}}
}.service {font-size: 14px;background-color: #fff;border-radius: 5px;margin: 10px;.title {height: 50px;line-height: 50px;padding: 0 15px;font-size: 16px;}.content {display: flex;justify-content: flex-start;flex-wrap: wrap;font-size: 14px;background-color: #fff;border-radius: 5px;.content-item {display: flex;flex-direction: column;justify-content: center;align-items: center;width: 25%;margin-bottom: 20px;.van-icon {font-size: 24px;margin-bottom: 5px;color: #ff3800;}}}
}.logout-btn {button {width: 60%;margin: 10px auto;display: block;font-size: 13px;color: #616161;border-radius: 9px;border: 1px solid #dcdcdc;padding: 7px 0;text-align: center;background-color: #fafafa;}
}
</style>
🪂退出功能
這個退出,是需要操作vuex里面的數據的,操作vuex里面的數據,一定要提交mutation
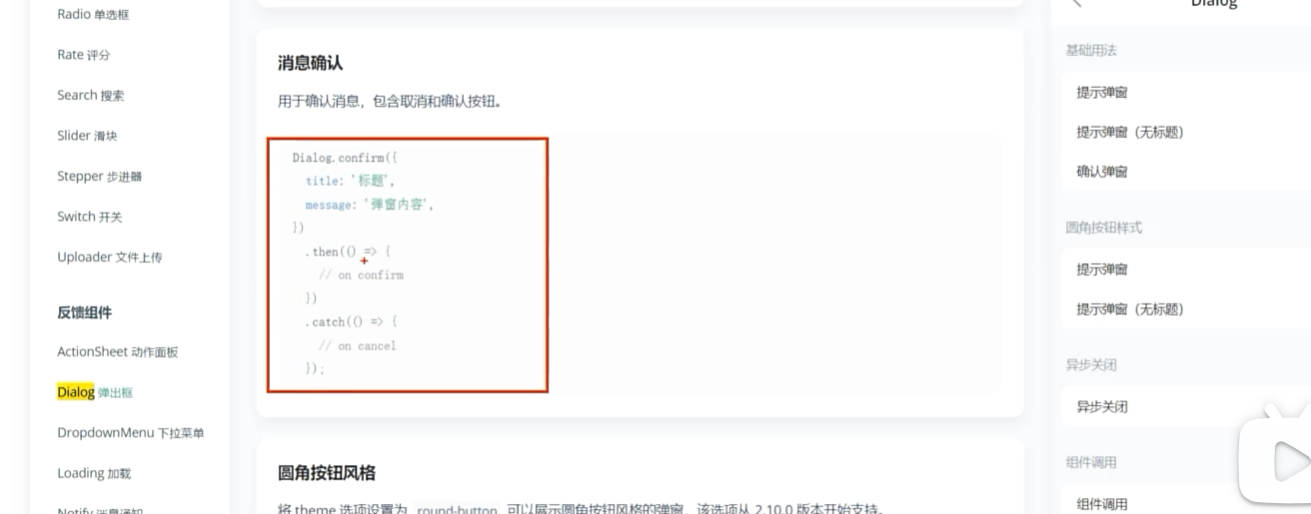
1.注冊點擊事件
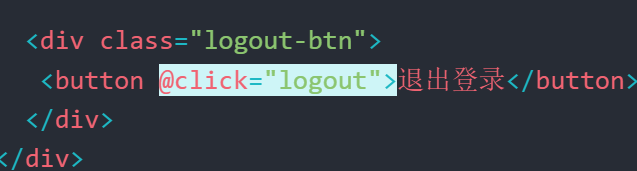
2.提供方法
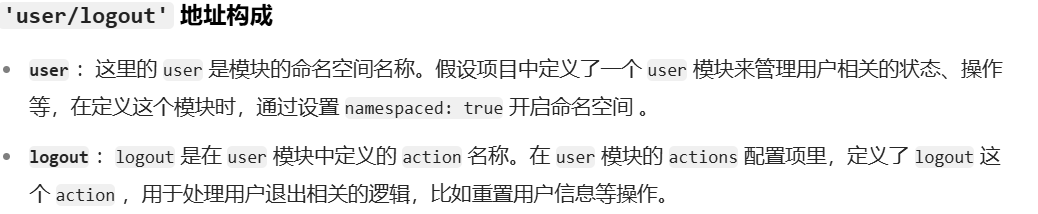
methods: {logout () {this.$dialog.confirm({title: '溫馨提示',message: '你確認要退出么?'}).then(() => {this.$store.dispatch('user/logout')}).catch(() => {})}
}a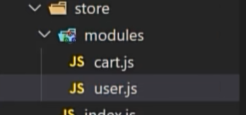
mutations: {// 所有mutations的第一個參數,都是statesetUserInfo (state, obj) {state.userInfo = obj//存入vues的同時,傳入一份在本地setInfo(obj)}},actions: {logout (context) {// 個人信息要重置context.commit('setUserInfo', {})// 購物車信息要重置 (跨模塊調用 mutation)  cart/setCartListcontext.commit('cart/setCartList', [], { root: true })}},getters: {}
}
跨模塊
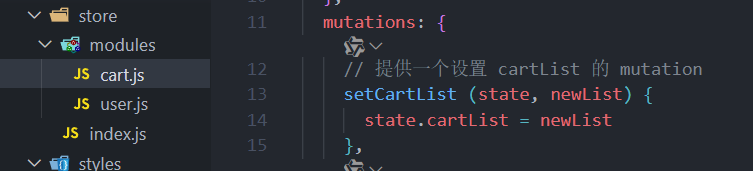
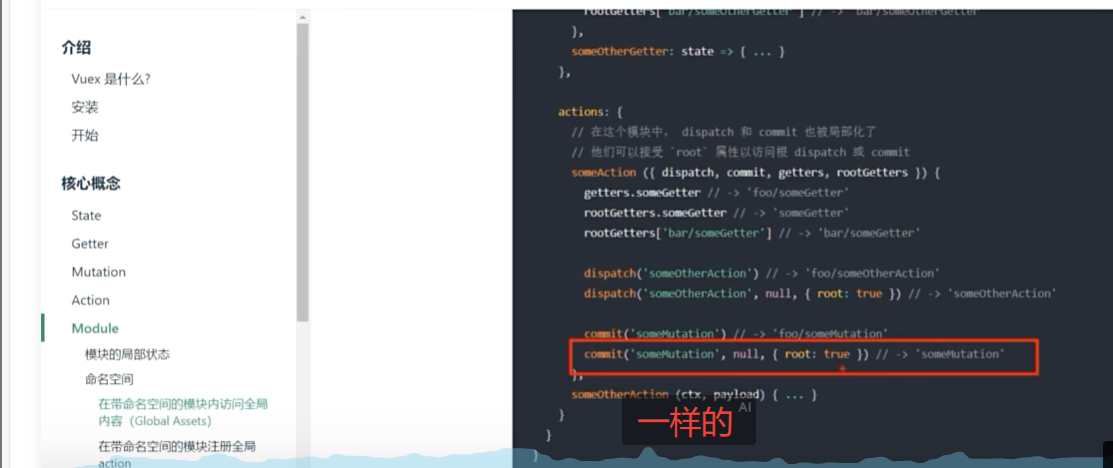
問題1:
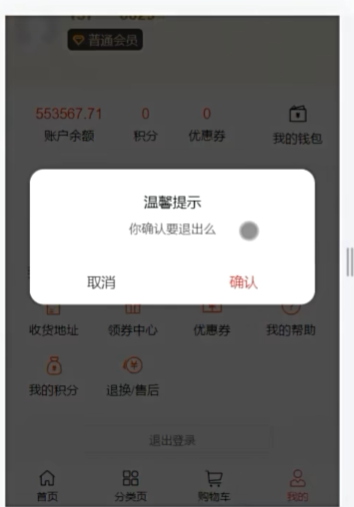
一點退出的提示框,有多個數據要清,尤其vuex里面的多個數據,在vuex現在有2個分模塊的數據
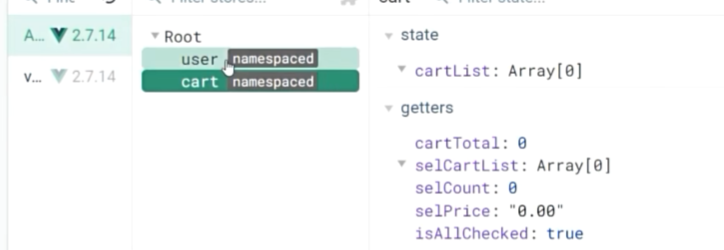
雖然這個cart看起來沒什么數據,但是一旦加入了幾個商品,就會有數據了,無論是cart還是user,都要在退出之后重置數據,但是有多個模塊的數據需要去重置,就需要多mutations,這個退出是一個動作=> 包含了兩步,分別是將 user 和 cart 進行重置,所以就封裝action
37. 打包發布
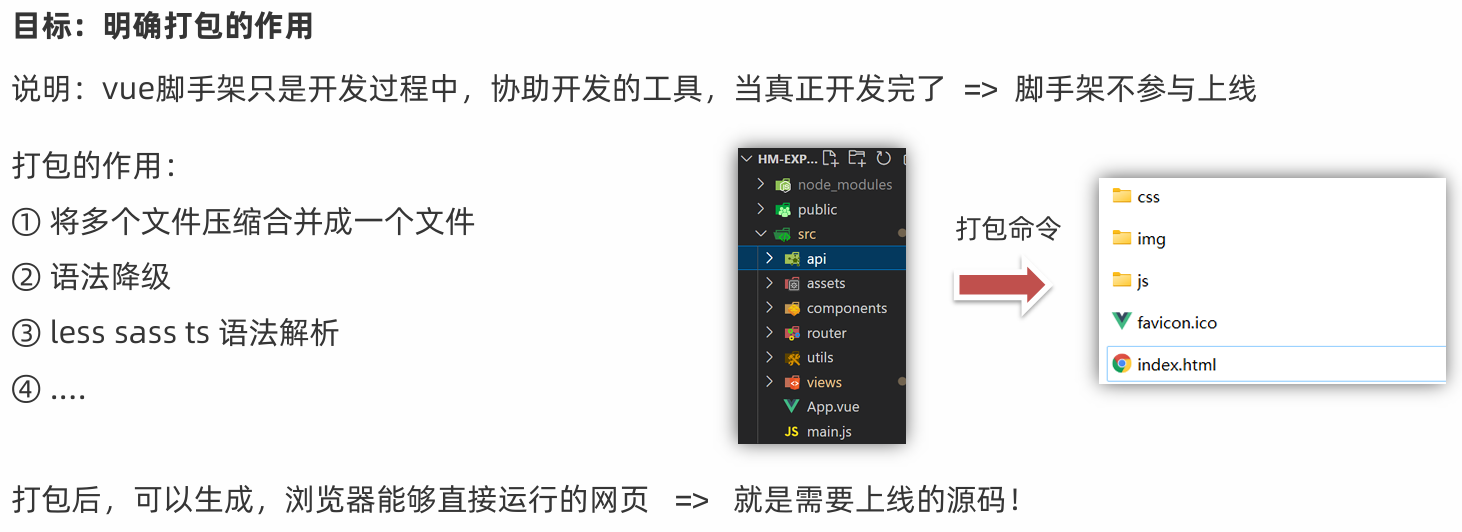

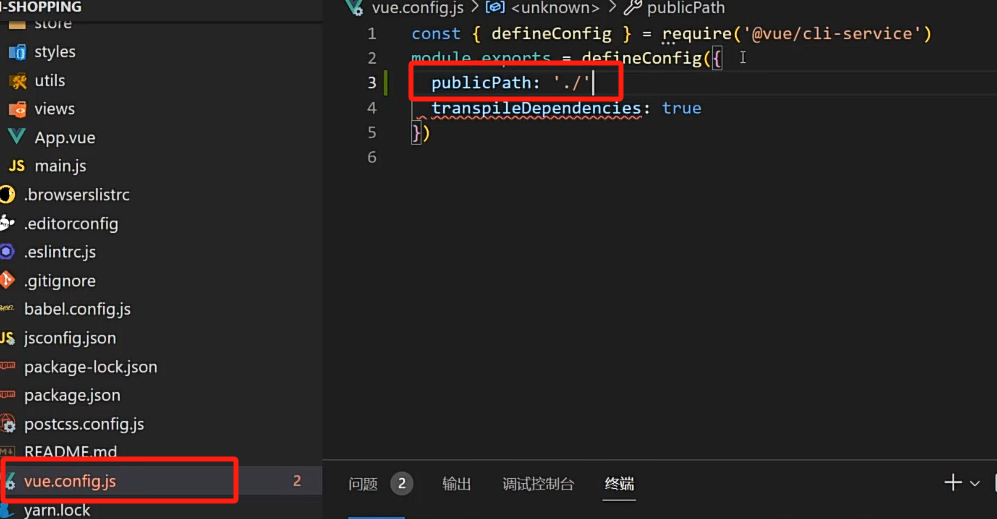
38. 打包優化:路由懶加載
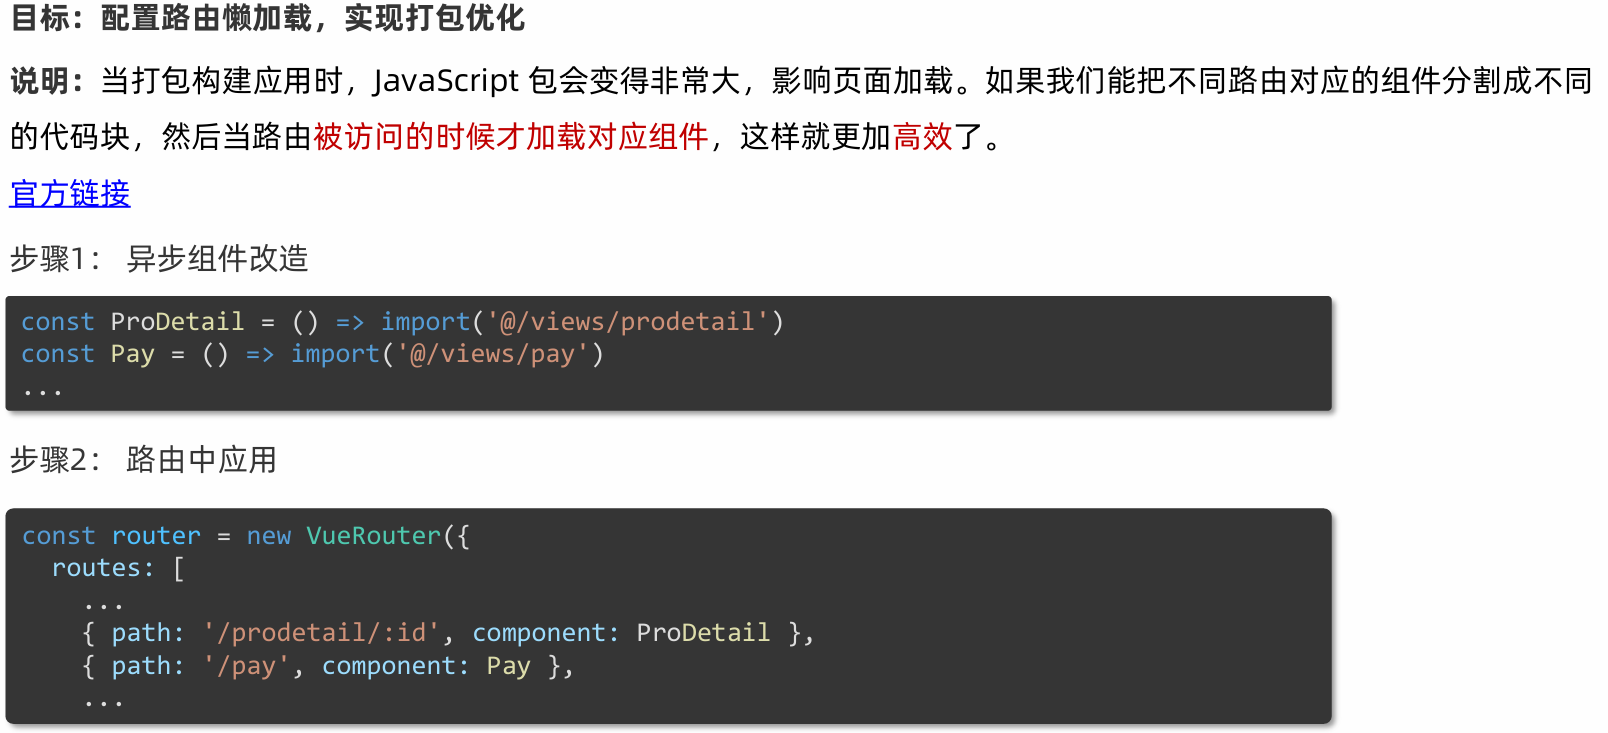
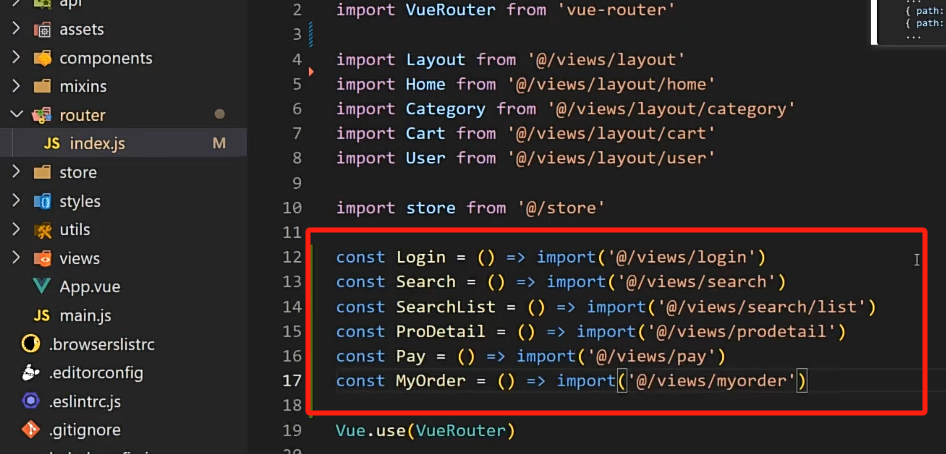
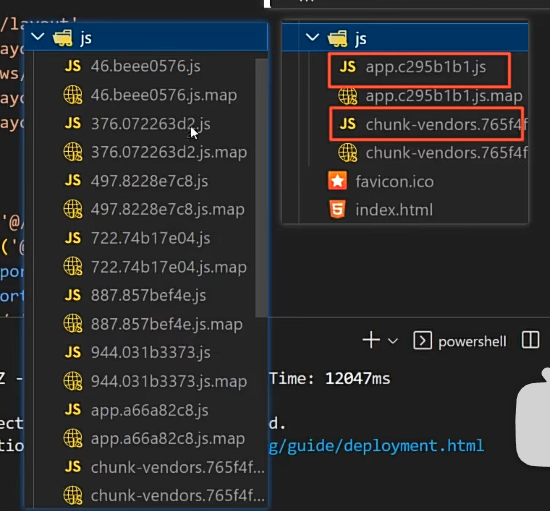


)


