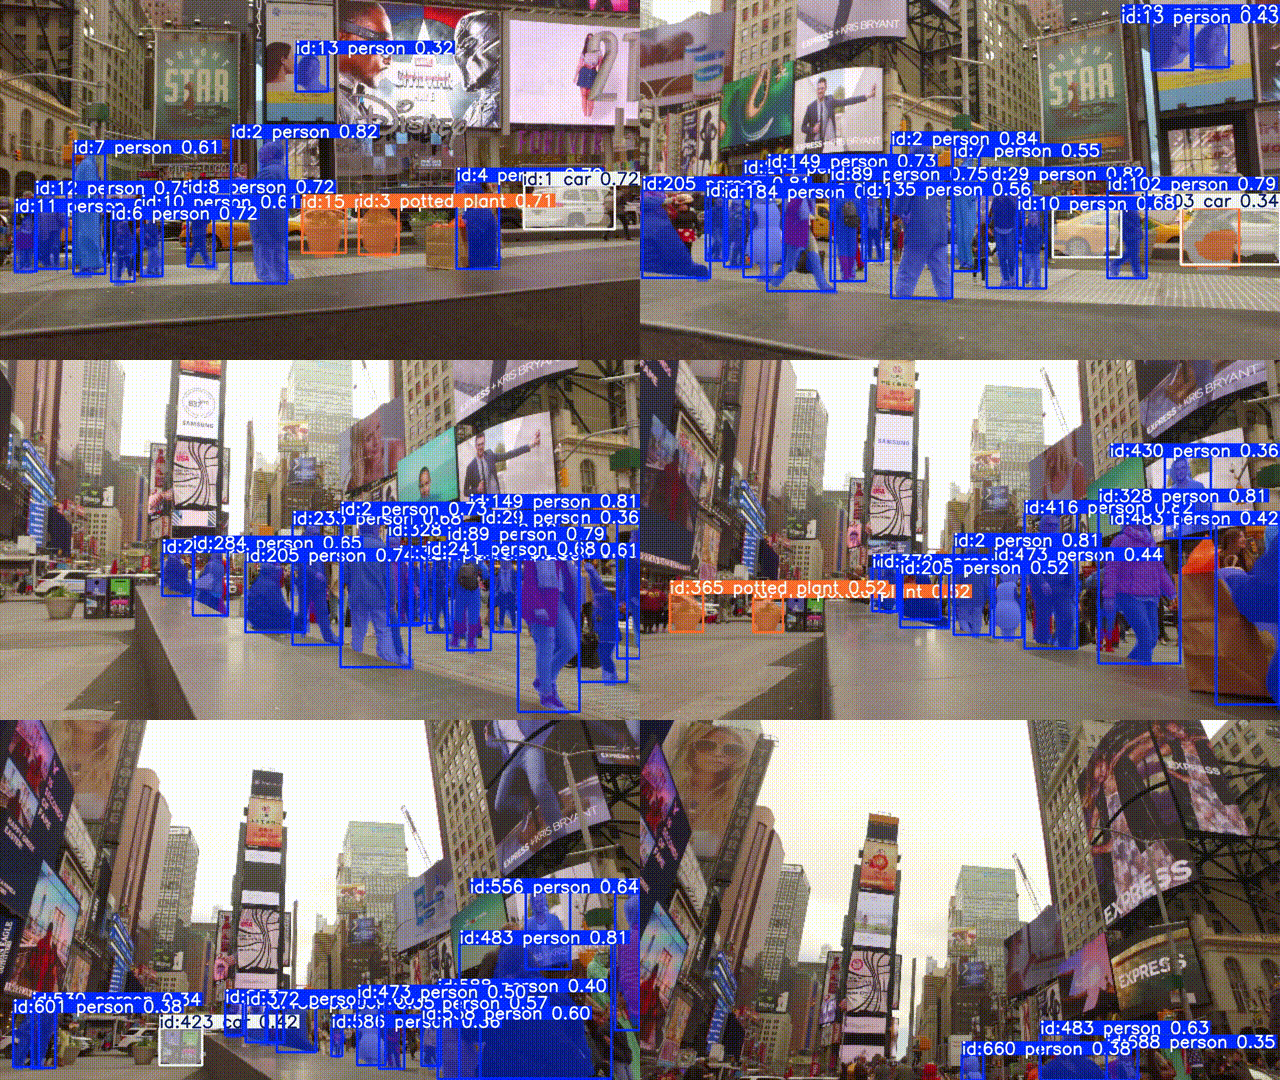
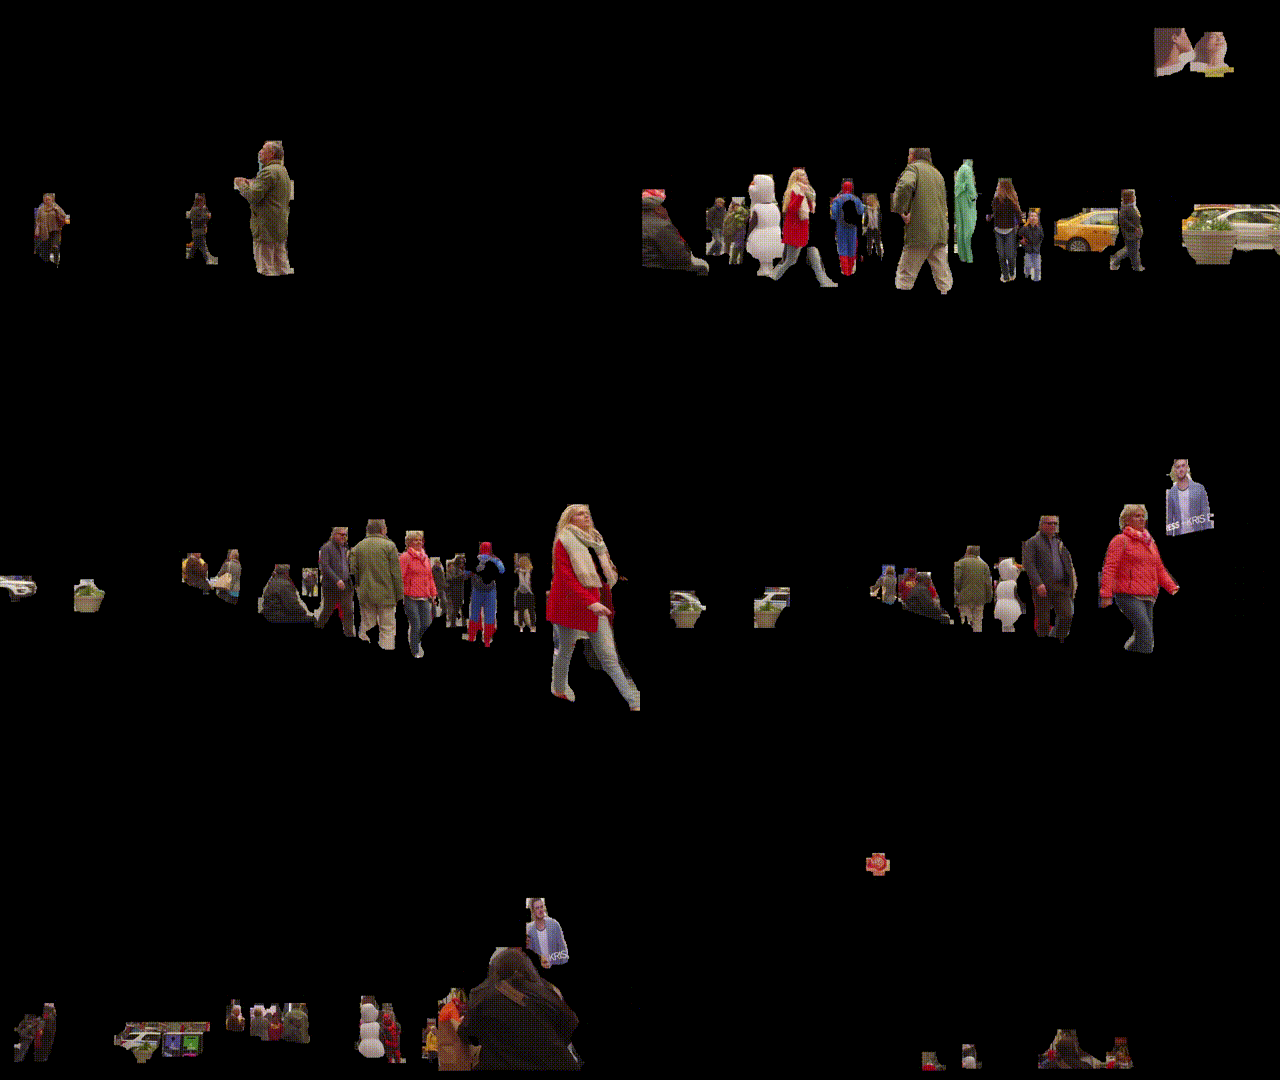
在計算機視覺任務中,特別是在目標檢測和實例分割中,我們常常需要從圖像中提取特定的目標區域。這可以通過使用目標檢測模型(如 YOLOv8)獲得的檢測框(bounding boxes)和掩碼(masks)來實現。掩碼幫助我們從圖像中只保留目標區域,同時去除背景。接下來,我們將通過 OpenCV 來實現這一過程,并給出如何處理掩碼和圖像的具體代碼示例。

1. 問題背景
假設我們使用了一個目標檢測或實例分割模型(如 YOLOv8),它返回了目標的檢測框和掩碼。目標是通過掩碼來提取圖像中的目標區域,而將背景部分隱藏。通常,掩碼是一個二值圖像,其中目標區域為白色,背景為黑色。我們需要使用這些掩碼來處理圖像,使得只有檢測到的目標部分顯示在最終輸出中。
-
僅在原圖上顯示掩碼覆蓋的區域,其余部分設為黑色。
2. 錯誤原因分析
在處理掩碼時,常常會遇到以下幾個問題:
-
掩碼尺寸不匹配:掩碼的尺寸可能與輸入圖像的尺寸不一致。
-
掩碼維度問題:有時掩碼可能包含多余的維度(例如,掩碼是三維的,而我們只需要二維掩碼)。
-
bitwise_and報錯:當圖像和掩碼的尺寸不匹配時,OpenCV 的bitwise_and操作會報錯。
為了避免這些問題,我們需要確保掩碼的尺寸和圖像一致,并且掩碼是單通道的二值圖像。
3. 解決方案
3.1 確保掩碼是單通道且尺寸匹配
我們首先需要確保掩碼是一個單通道圖像,并且它的尺寸與輸入圖像匹配。以下是如何處理掩碼并應用到圖像的代碼:
import numpy as np
import cv2def apply_mask(image, masks):"""Apply masks to the image, keeping only the masked regions.Args:image (np.ndarray): Input image (H, W, 3).masks (List[np.ndarray]): List of binary masks (H, W).Returns:np.ndarray: Masked image."""if not masks:return image# Initialize combined maskcombined_mask = np.zeros(image.shape[:2], dtype=np.uint8)for mask in masks:# Ensure mask is 2D and uint8mask = mask.astype(np.uint8)if mask.ndim > 2:mask = mask.squeeze()  # Remove extra dimensions# Resize mask if neededif mask.shape != combined_mask.shape:mask = cv2.resize(mask, (image.shape[1], image.shape[0]))# Combine masks (logical OR)combined_mask = cv2.bitwise_or(combined_mask, mask)# Apply mask to each channelmasked_image = np.zeros_like(image)for c in range(image.shape[2]):masked_image[:, :, c] = cv2.bitwise_and(image[:, :, c], image[:, :, c], mask=combined_mask)return masked_image
在這段代碼中,我們對每個掩碼進行處理:
-
確保掩碼是二維的。
-
如果掩碼的尺寸與輸入圖像不匹配,則進行縮放。
-
使用
bitwise_or合并多個掩碼。 -
最后,我們通過
bitwise_and將掩碼應用到圖像的每個通道。
3.2 處理 YOLOv8 的 Results 對象
如果使用的是 YOLOv8(Ultralytics 的目標檢測框架),其結果(Results 對象)中的掩碼是一個特殊的 Masks 對象,可能需要先將其轉換為 NumPy 數組進行處理。以下是如何從 YOLOv8 的 Results 中提取掩碼并應用到圖像的示例:
from ultralytics import YOLOmodel = YOLO("yolov8n-seg.pt")  # Segmentation model
results = model.predict("input.jpg")# Extract masks
if results[0].masks is not None:masks = results[0].masks.data.cpu().numpy()  # (N, H, W)masked_image = apply_mask(results[0].orig_img, masks)cv2.imwrite("output.jpg", masked_image)
在這段代碼中,我們:
-
使用
model.predict獲取 YOLOv8 的檢測結果。 -
如果檢測結果中包含掩碼(
results[0].masks),則提取掩碼并轉換為 NumPy 數組。 -
將掩碼應用到原始圖像,并保存結果。
4. 完整代碼示例
以下是完整的代碼示例,結合 YOLOv8 和 OpenCV 進行目標區域提取:
import cv2
import numpy as np
from ultralytics import YOLOdef apply_mask(image, masks):"""Apply masks to the image."""combined_mask = np.zeros(image.shape[:2], dtype=np.uint8)for mask in masks:mask = mask.astype(np.uint8)if mask.ndim > 2:mask = mask.squeeze()if mask.shape != combined_mask.shape:mask = cv2.resize(mask, (image.shape[1], image.shape[0]))combined_mask = cv2.bitwise_or(combined_mask, mask)masked_image = np.zeros_like(image)for c in range(image.shape[2]):masked_image[:, :, c] = cv2.bitwise_and(image[:, :, c], image[:, :, c], mask=combined_mask)return masked_image# Load YOLOv8 segmentation model
model = YOLO("yolov8n-seg.pt")
results = model.predict("input.jpg")# Apply masks
if results[0].masks is not None:masks = results[0].masks.data.cpu().numpy()masked_image = apply_mask(results[0].orig_img, masks)cv2.imwrite("output.jpg", masked_image)
5. 常見問題及解決
Q1: 掩碼尺寸和圖像不一致怎么辦?
如果掩碼尺寸與圖像不一致,最簡單的解決方法是使用 OpenCV 的 cv2.resize 將掩碼調整為圖像的尺寸。
Q2: bitwise_and 報錯 Sizes do not match?
這種錯誤通常發生在掩碼和圖像尺寸不匹配時。確保掩碼的尺寸與圖像一致,并且掩碼是單通道二值圖像。
6. 迅速集成 PiscTrace
如果你在使用 PiscTrace 進行跟蹤任務,可以通過以下方式集成掩碼應用功能:
import numpy as np
import cv2class Test:def obj_exe(self, im0, tracks):"""Generate heatmap based on tracking data and keep only mask regions in the frame.Args:im0 (ndarray): Image (H, W, C)tracks (list): List of tracks obtained from the object tracking process.Returns:ndarray: Image with only mask regions visible (rest is blacked out)"""self.im0 = im0self.result = tracks[0]# Extract result attributesself.orig_img = self.result.orig_imgself.orig_shape = self.result.orig_img.shape[:2]self.boxes = self.result.boxesself.masks = self.result.masks  # This should be the masks objectself.probs = self.result.probsself.keypoints = self.result.keypointsself.obb = self.result.obbself.speed = self.result.speedself.names = self.result.namesself.path = self.result.path# Process to keep only mask regionsif self.masks is not None:# Initialize combined mask with correct dimensionscombined_mask = np.zeros(self.im0.shape[:2], dtype=np.uint8)for mask in self.masks.data:# Convert mask to numpy array if it isn't alreadymask_np = mask.cpu().numpy() if hasattr(mask, 'cpu') else np.array(mask)# Ensure mask is 2D and matches image dimensionsif mask_np.ndim > 2:mask_np = mask_np.squeeze()  # Remove singleton dimensions# Resize mask if needed (assuming masks might be different size)if mask_np.shape != combined_mask.shape:mask_np = cv2.resize(mask_np.astype(np.uint8), (combined_mask.shape[1], combined_mask.shape[0]))# Combine masks (logical OR)combined_mask = cv2.bitwise_or(combined_mask, mask_np.astype(np.uint8))# Ensure we have a 3-channel image for colorif len(self.im0.shape) == 2:self.im0 = cv2.cvtColor(self.im0, cv2.COLOR_GRAY2BGR)# Apply mask to each channel of the imagemasked_img = np.zeros_like(self.im0)for c in range(self.im0.shape[2]):masked_img[:, :, c] = cv2.bitwise_and(self.im0[:, :, c], self.im0[:, :, c], mask=combined_mask)self.im0 = masked_imgreturn self.im0
7. 總結
本文介紹了如何使用 OpenCV 和 YOLOv8 實現目標區域提取和掩碼應用。通過確保掩碼與圖像的尺寸匹配,并應用于每個通道,我們能夠有效地從圖像中提取目標區域。如果你遇到任何問題或有更好的實現方法,歡迎在評論區討論!


App Input事件接收器InputEventReceiver)

)
)


KV緩存(2))
)


![P1009 [NOIP 1998 普及組] 階乘之和](http://pic.xiahunao.cn/P1009 [NOIP 1998 普及組] 階乘之和)
)

