

目錄
- 項目背景
- 技術棧和項目環境
- 正排索引和倒排索引
- 數據去標簽與清洗
- 下載數據源
- 去標簽
- 建立索引
- 構建正排索引
- 構建倒排索引
- 建立搜索引擎
- http_server 服務
- 搜索到的內容有重復
文章末有源碼鏈接。
項目背景
目前我們常用的搜索引擎有Google、百度、360等,這些搜索引擎都是超大型超完善的全網搜索,而本項目Boost搜索引擎只是一個非常簡單的站內搜索。
| 比較維度 | 全網搜索 | 站內搜索 |
|---|---|---|
| 搜索范圍與數據來源 | 覆蓋整個互聯網,數據來源廣泛,需搜索引擎爬蟲抓取收錄網頁 | 限定在特定網站內部,數據僅來源于該網站自身內容 |
| 搜索效率 | 范圍廣、數據量大,檢索復雜,速度相對較慢,結果篩選耗時 | 搜索范圍小,速度更快,可快速定位信息 |
| 可控性 | 用戶和網站管理者無法干涉搜索引擎算法,搜索結果不可控 | 網站管理者可優化搜索功能,根據需求調整搜索算法等,具有可控性 |
| 索引構建 | 需構建龐大復雜的索引系統處理海量數據,技術難度高 | 針對特定網站內容和數據結構優化,索引構建相對簡單且更具針對性 |
為什么選做Boost的搜索引擎呢?
作為C++選手,相信大家都瀏覽過Boost官網,而我們在2023年之前瀏覽Boost官網時是沒有搜索功能的,雖然自從2023年起新增了搜索功能,但這之前給我們的不太好的瀏覽體驗可能還是耿耿于懷,所以本項目選做Boost搜索引擎,算是彌補之前沒有的遺憾吧(雖然肯定沒有現在官網提供的好用🤡)。
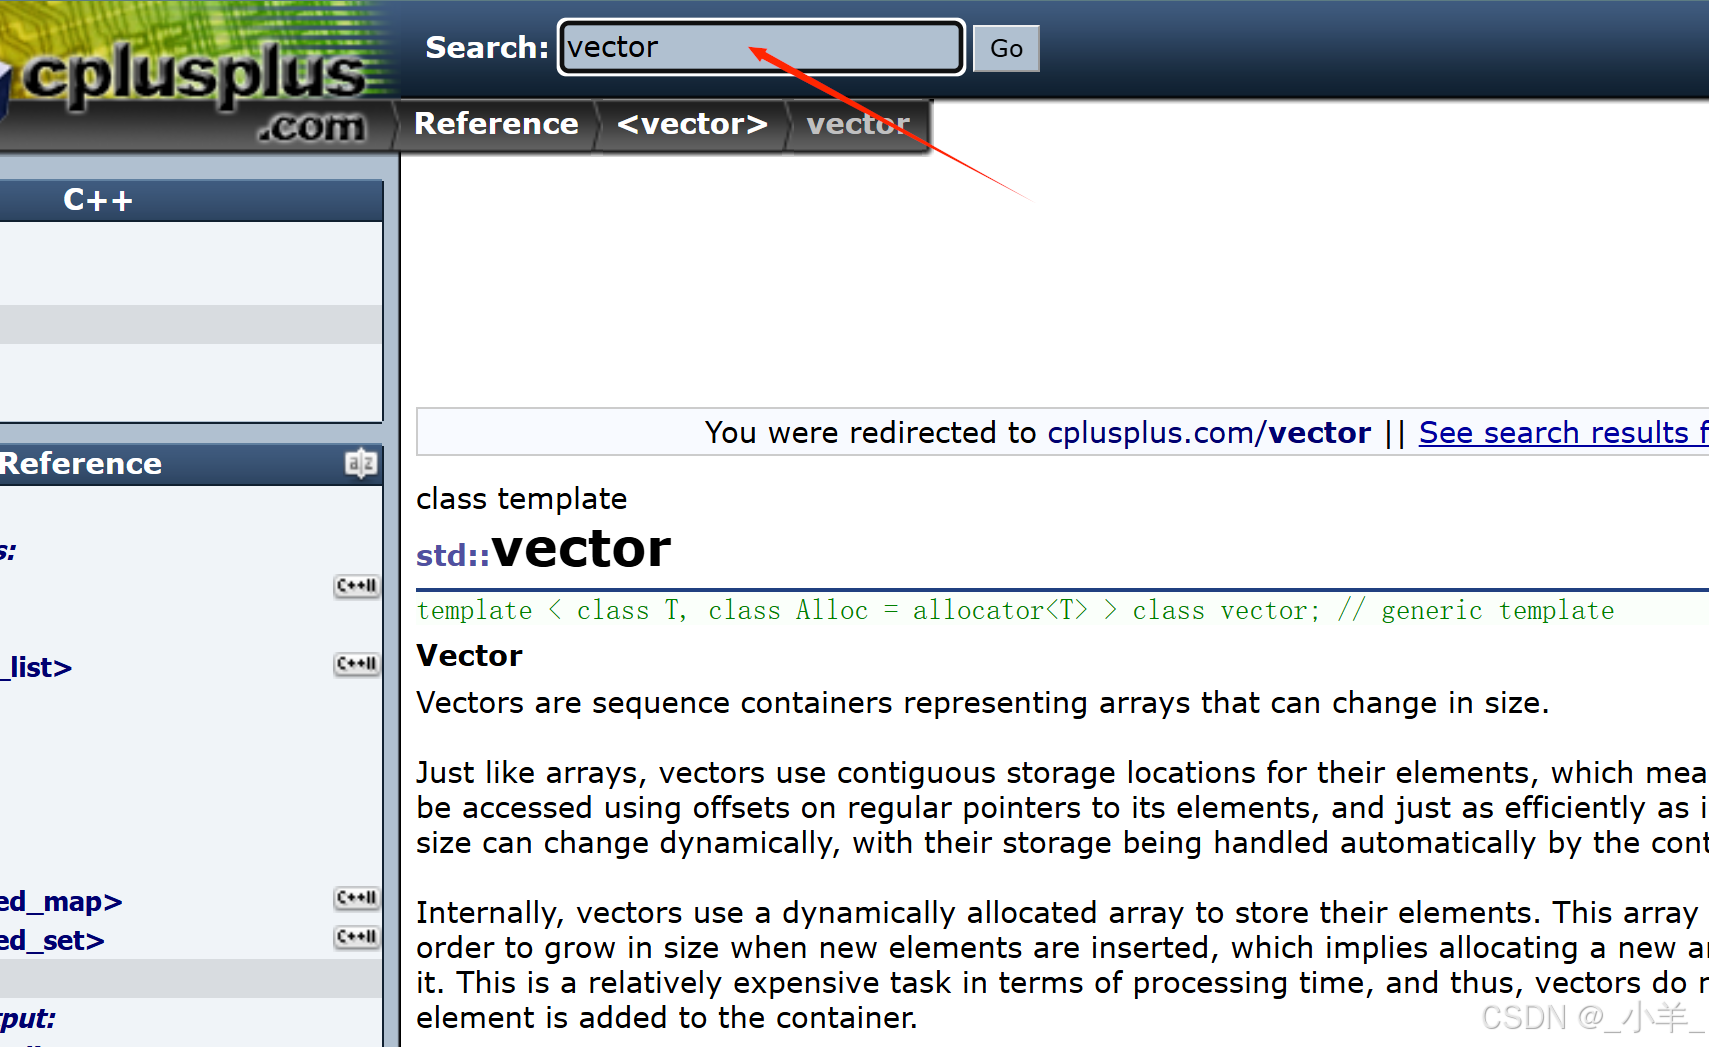
我們最熟悉最常用的站內搜索cplusplus官網,當我們想查看 vector 的官方文檔時可以直接在搜索框中搜索,就能得到我們想要的信息。
雖然我們無法獨立實現向百度這樣大型的搜索引擎,但是通過本項目Boost搜索引擎這個站內搜索小項目,可以做到管中窺豹的效果,大致了解像他們這樣大型的工程整體框架是什么樣的,是怎么運作的。
首先我們來看看百度搜索是以什么樣的方式展示的:
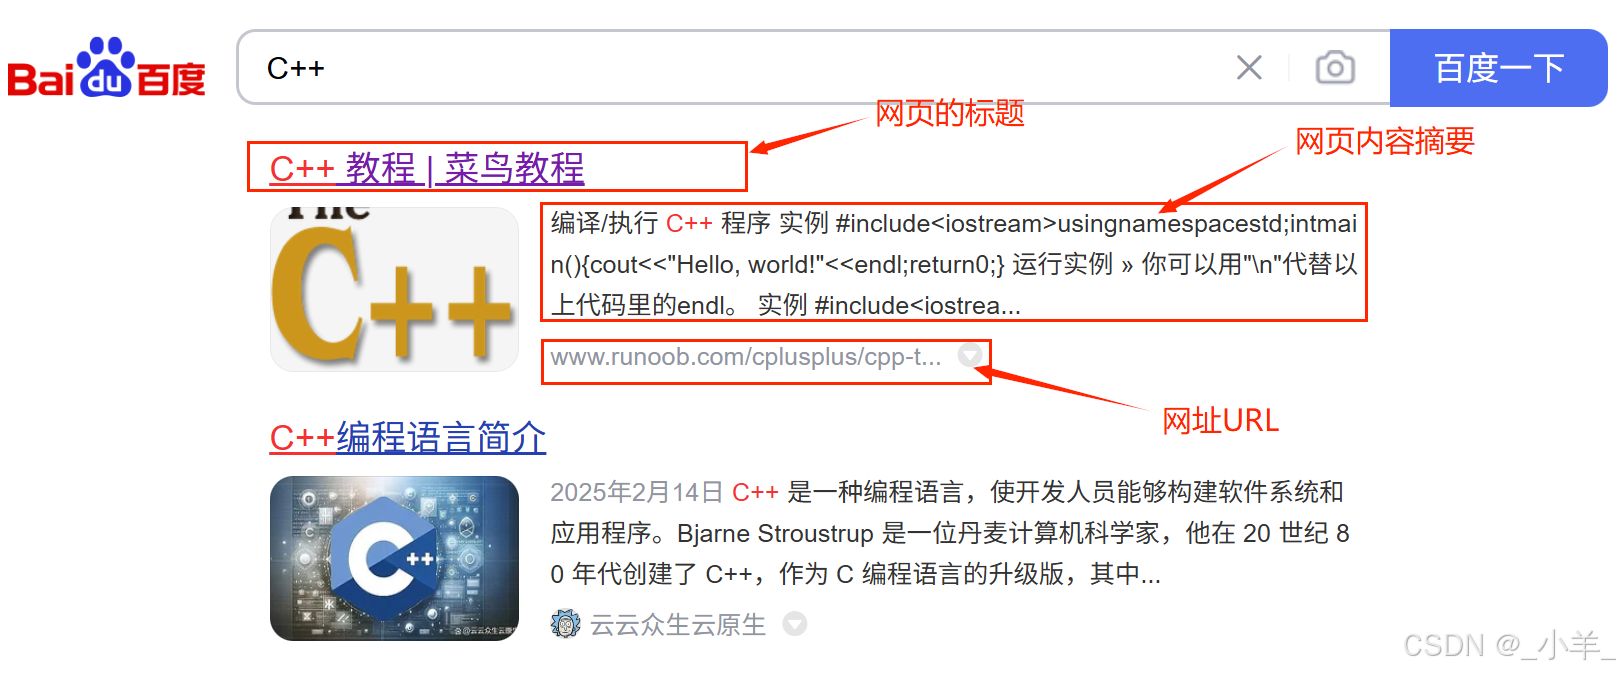
可以看到基本有這三部分內容,(當然還有圖片,為了簡單我們就不展示圖片了😜)那本項目也就模仿這樣的格式展示搜索到的結果。
另外,當我們的搜索語句中有多個搜索關鍵詞的時候,它是不嚴格匹配的,因此我們需要有一個切分搜索關鍵字的過程。這個任務可以借助 cppjieba 這個庫來幫我們完成。


搜索引擎的宏觀原理:
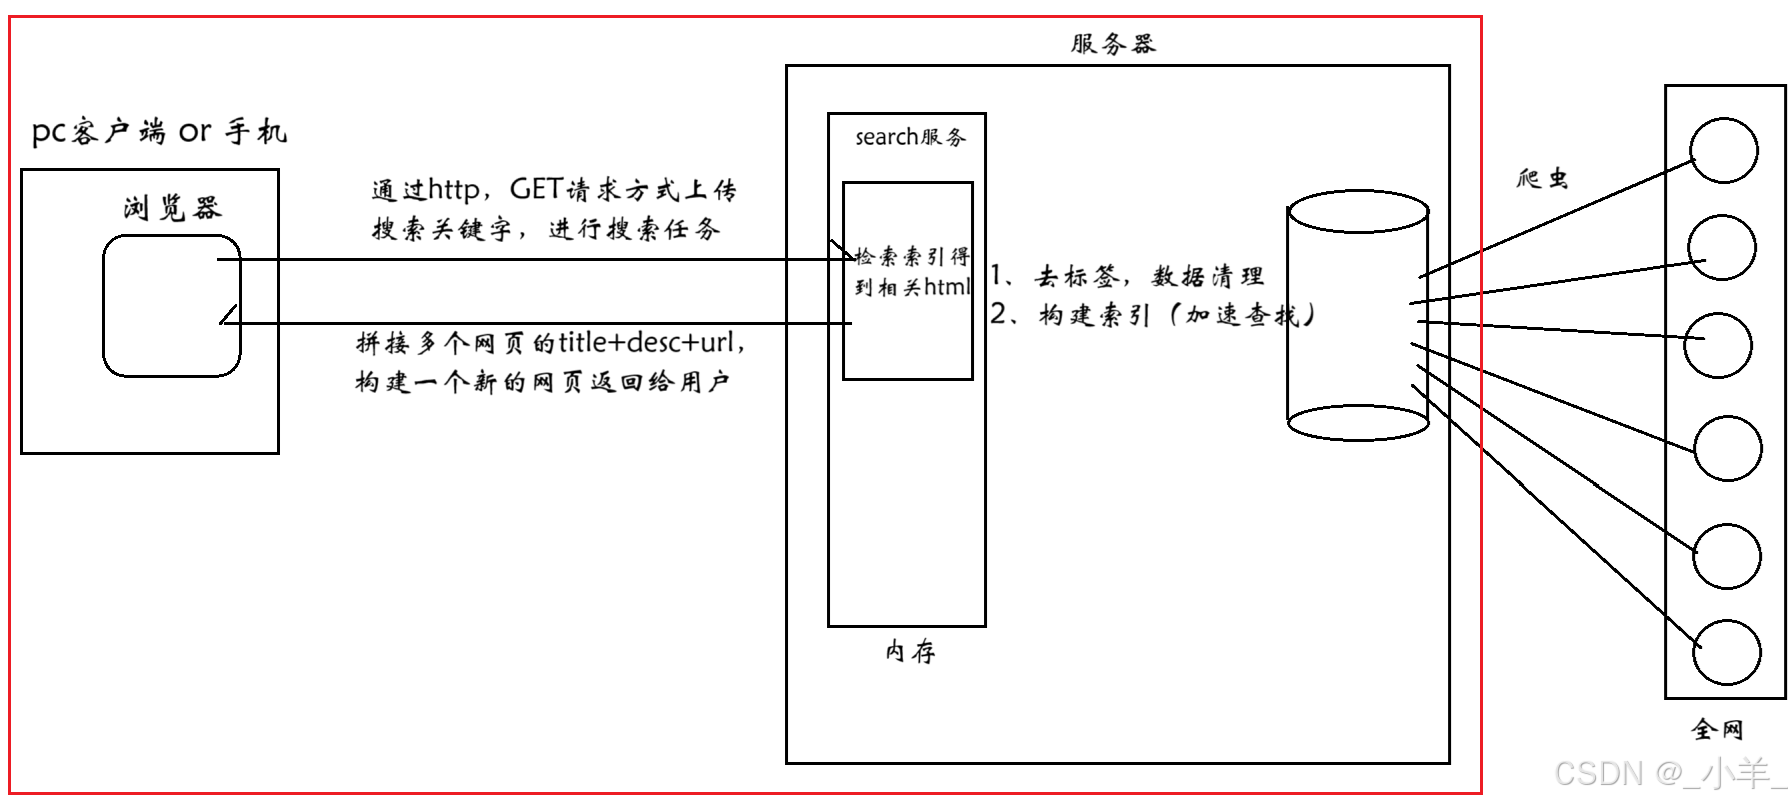
本項目實現的是紅色框框中的內容。
技術棧和項目環境
- 技術棧:C/C++、C++11、STL、Boost庫、JsonCpp、cppjieba、cpp-httplib;
- 項目環境:Ubuntu-22.04、vscode、gcc/g++、makefile。
cppjieba是一個用 C++ 實現的中文分詞庫,它具有高效、準確、易用等特點;cpp-httplib是一個輕量級、跨平臺的 C++ HTTP 庫,它以單頭文件的形式存在,使用起來非常便捷。
正排索引和倒排索引
首先我們通過一個例子來了解下什么是正排和倒排索引:
- 文檔1:小帥是安徽理工大學的三好學生
- 文檔2:小帥是安徽理工大學電信院的學生會主席
正排索引:從文檔ID找到文檔內容(文檔中的關鍵字)。
| 文檔ID | 文檔內容 |
|---|---|
| 1 | 小帥是安徽理工大學的三好學生 |
| 2 | 小帥是安徽理工大學電信院的學生會主席 |
目標文檔進行分詞(方便建立倒排索引和查找):
- 文檔1:小帥、安徽理工大學、三好學生、學生
- 文檔2:小帥、安徽理工大學、電信院、學生、學生會、主席
倒排索引:根據文檔內容分詞,整理不重復的關鍵字,找到對應文檔ID的方案。
| 關鍵字 | 文檔ID |
|---|---|
| 小帥 | 文檔1、文檔2 |
| 安徽理工大學 | 文檔1、文檔2 |
| 三好學生 | 文檔1 |
| 學生 | 文檔1、文檔2 |
| 電信院 | 文檔2 |
| 學生會 | 文檔2 |
| 主席 | 文檔2 |
當用戶輸入學生:倒排索引中查找 -> 提取文檔ID -> 根據正排索引 -> 找到文檔內容 ->
title+desc+url -> 構建響應結果。
文檔1和文檔2中都有學生這個關鍵字,那先顯示誰呢?我們后面在搭建的時候會給每個文檔設置權重。
數據去標簽與清洗
下載數據源
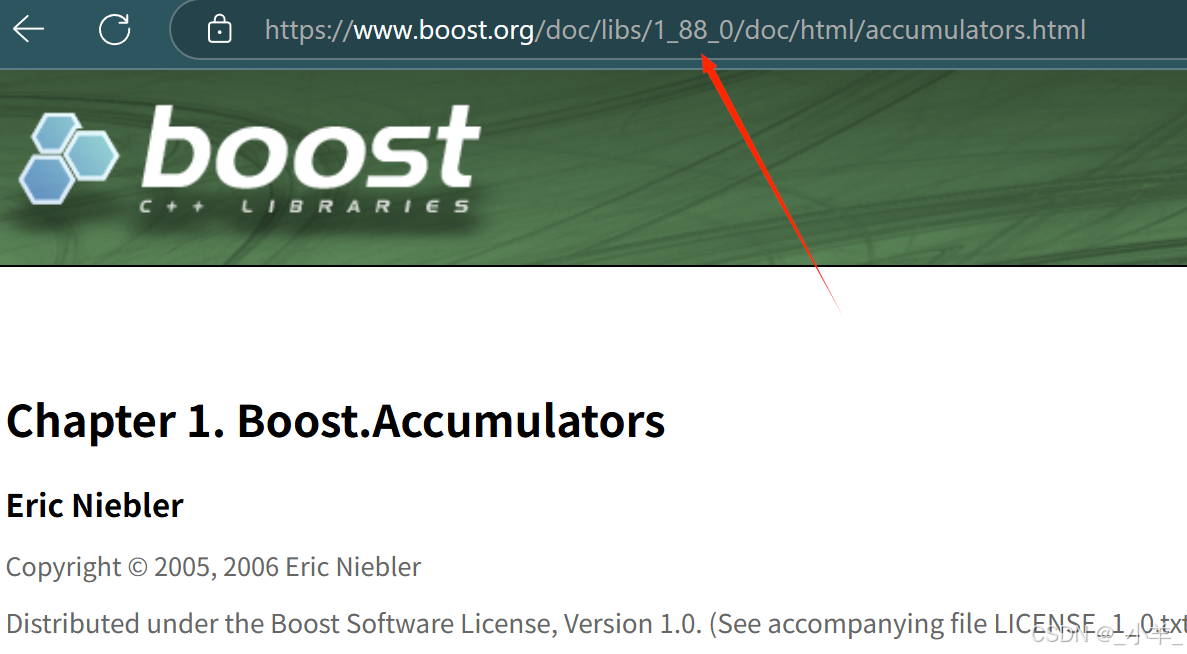
首先從Boost官網下載數據源:
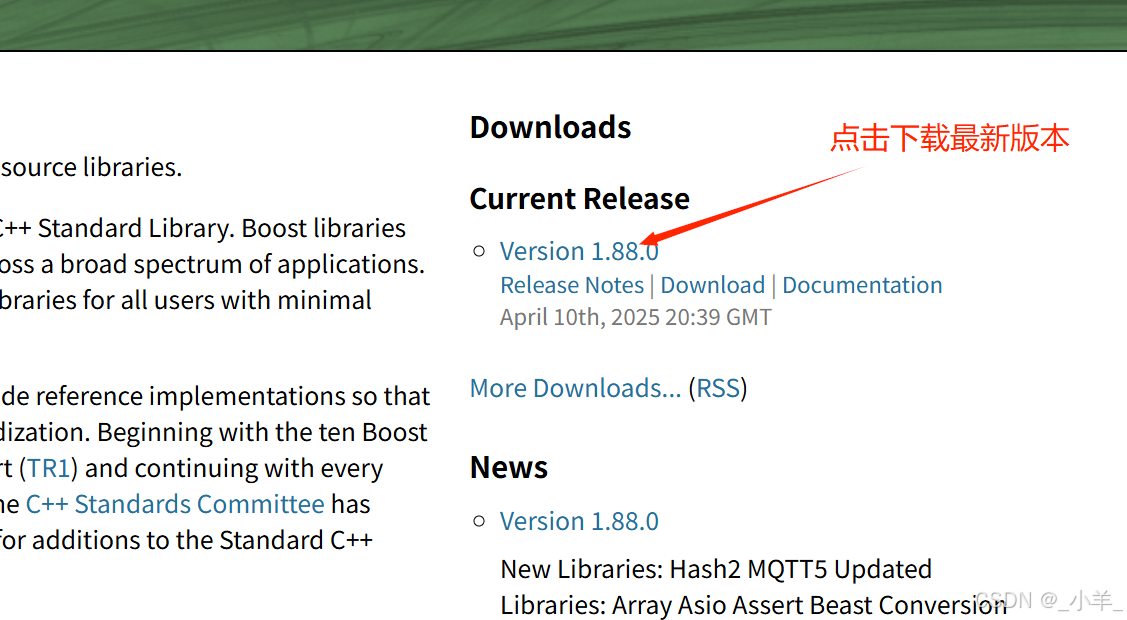
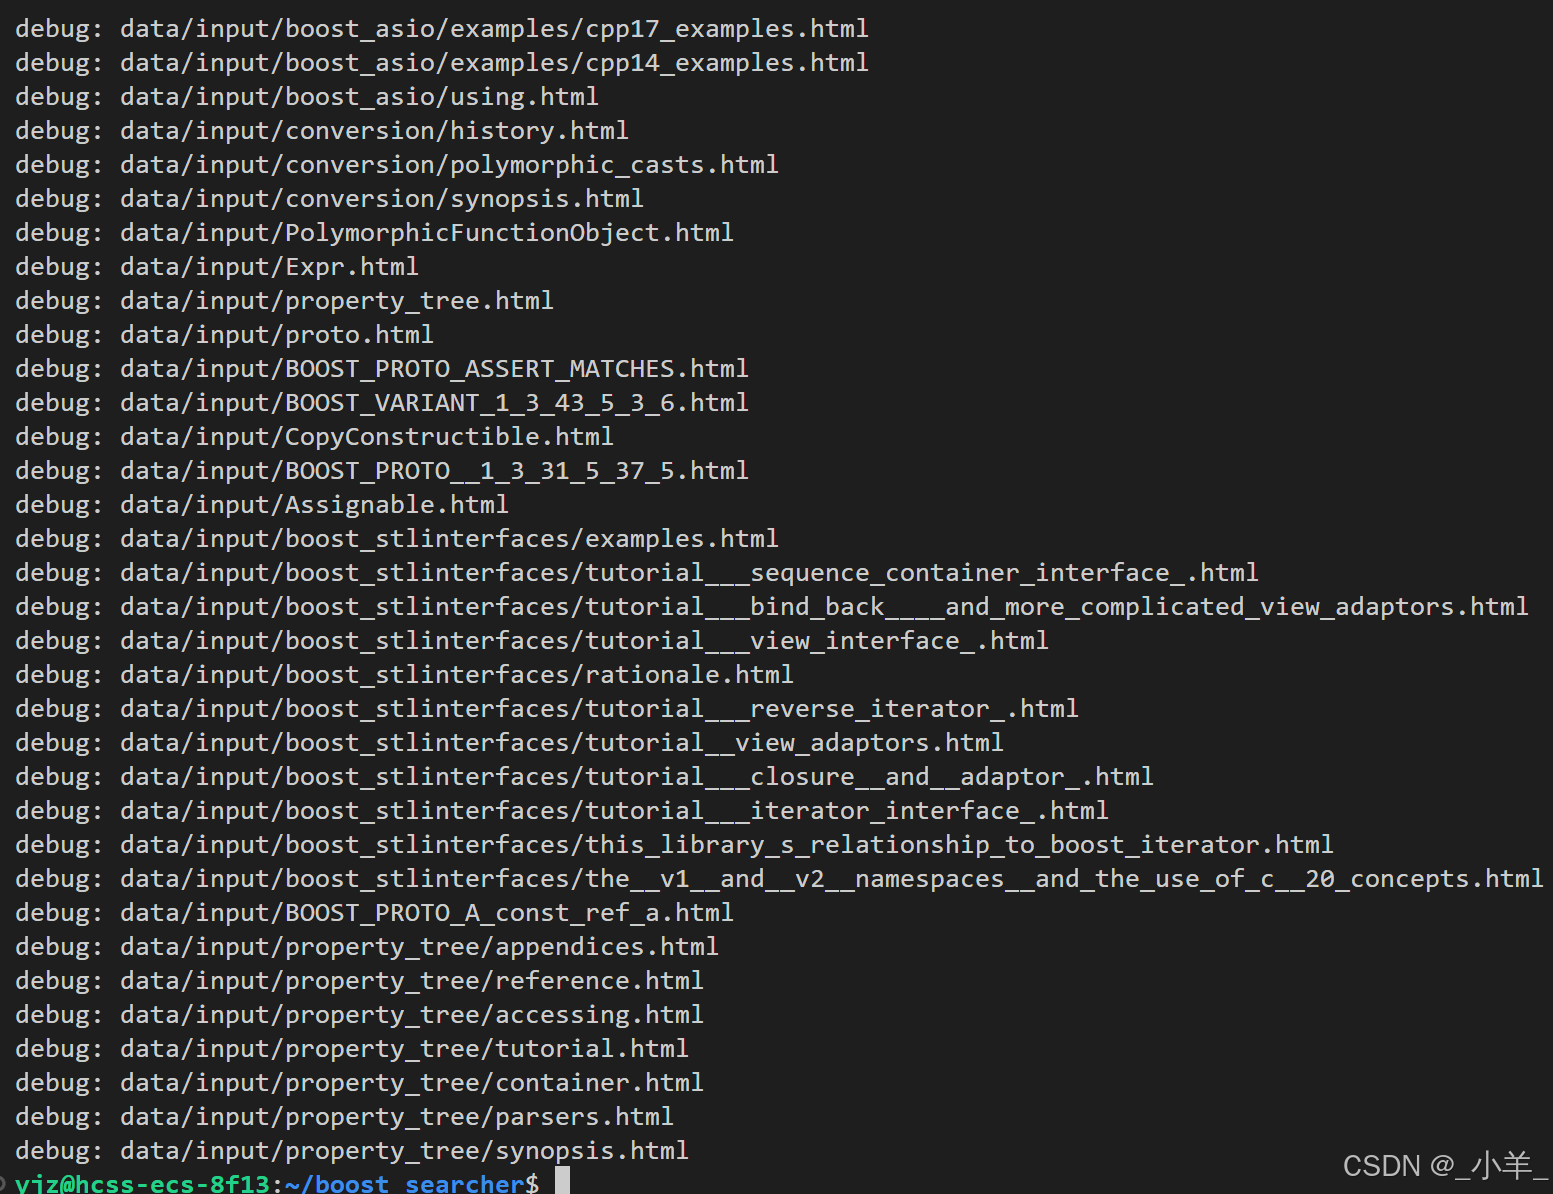
下載好后通過 rz -E 拉取到Ubuntu服務器上,然后 tar xzf 解壓,我們只需要 boost_1_88_0\doc\html 中的內容,將所有內容拷貝到新目錄中,其他的部分就可以刪除掉了,得到下面這些文件:

把每個html文件名和路徑保存起來,方便后續文件讀取:
#include <iostream>
#include <string>
#include <vector>
#include <boost/filesystem.hpp>const std::string src_path = "data/input/";
const std::string output = "data/raw_html/raw.txt";// 文檔格式
typedef struct DocInfo
{std::string title;		std::string content;std::string url;
}DocInfo_t;bool EnumFile(const std::string &src_path, std::vector<std::string> *files_list)
{namespace fs = boost::filesystem;fs::path root_path(src_path);if (fs::exists(root_path) == false) // 判斷路徑是否存在{std::cerr << src_path << " not exists" << std::endl;return false;}fs::recursive_directory_iterator end;for (fs::recursive_directory_iterator it(root_path); it != end; it++){if (fs::is_regular_file(*it) == false) // 判斷是否是普通文件{continue;}if (it->path().extension() != ".html") // 判斷文件路徑名是否符合要求{continue;}std::cout << "debug: " << it->path().string() << std::endl;files_list->push_back(it->path().string());}return true;
}bool ParseHtml(const std::vector<std::string> &files, std::vector<DocInfo_t> *results)
{return true;
}bool SaveHtml(const std::vector<DocInfo_t> &results, const std::string &output)
{return true;
}int main()
{// 1.把每個html文件名和路徑保存起來,方便后續文件讀取std::vector<std::string> files_list;if (EnumFile(src_path, &files_list) == false){std::cerr << "enum file name fail!" << std::endl;return 1;}// 2.按照files_list讀取每個文件的內容,并進行解析std::vector<DocInfo_t> results;if (ParseHtml(files_list, &results) == false){std::cerr << "parse html fail!" << std::endl;return 2;}// 3.把解析完畢的各個文件內容寫入到output中,按照 \3 作為每個文檔的分隔符if (SaveHtml(results, output) == false){std::cerr << "save html fail!" << std::endl;return 3;}return 0;
}
Boost庫不是C++標準庫,因此在編寫makefile時別忘了鏈接指定庫哦:
cc=g++parser : parser.cc$(cc) -o $@ $^ -lboost_system -lboost_filesystem -std=c++11.PHONY:clean
clean:rm -f parser
通過打印調式,我們就能得到下面這些信息:
去標簽
什么是標簽?我們隨便打開一個上面的文件:
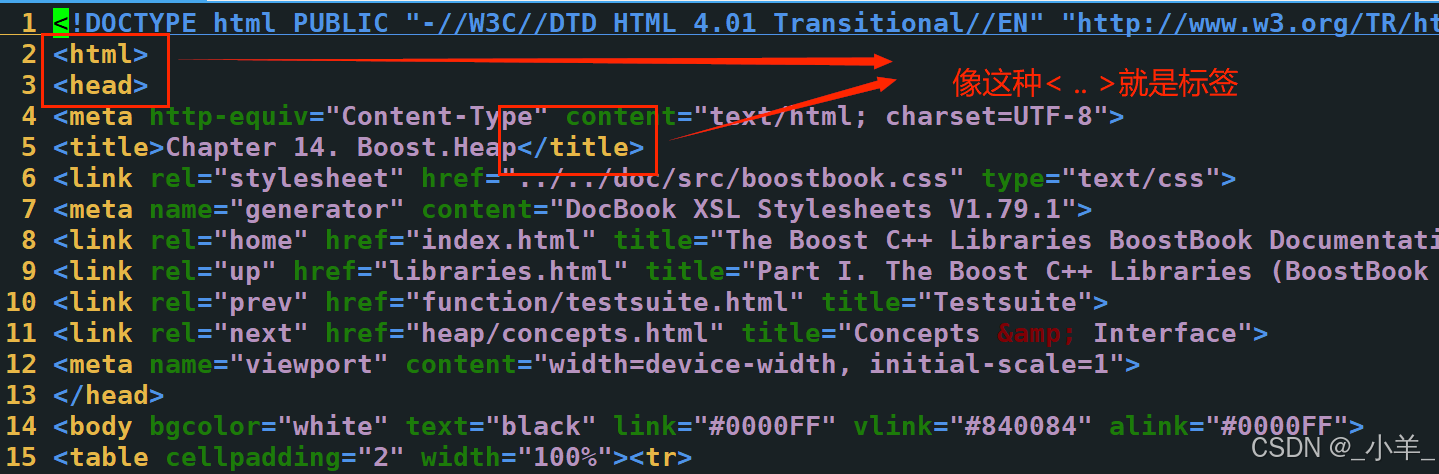
- 標簽對我們搜索是沒有價值的,因此需要去掉這些標簽,剩下的內容就是我們需要的;
- 我們的目標是把每個文檔都去標簽,然后把內容寫入到同一個文件中,每個文檔內容不需要任何換行,文檔和文檔之間用
\3區分,這樣做是為了讀取的時候更方便; - 比如:
title\3content\3url \n title\3content\3url...,用getline(ifstream, line)直接讀取一個文檔的全部內容,然后再根據 \3 獲取各個部分。
按照files_list讀取每個文件的內容,并進行解析:
bool ParseHtml(const std::vector<std::string> &files_list, std::vector<DocInfo_t> *results)
{for (const std::string &file : files_list){std::string result;if (yjz_util::FileUtil::ReadFile(file, &result) == false) continue;DocInfo_t doc;if (ParseTitle(result, &doc.title) == false) continue;if (ParseContent(result, &doc.content) == false) continue;if (ParseUrl(file, &doc.url) == false) continue;results->push_back(std::move(doc));}return true;
}
提取title:
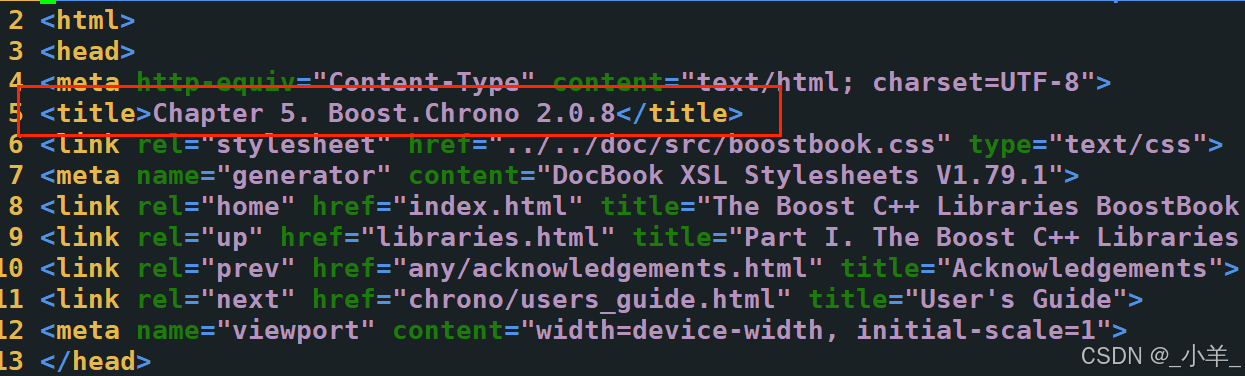
static bool ParseTitle(const std::string &file, std::string *title)
{size_t begin = file.find("<title>");if (begin == std::string::npos) return false;size_t end = file.find("</title>");if (end == std::string::npos) return false;begin += std::string("<title>").size();if (begin > end) return false;*title = file.substr(begin, end - begin);return true;
}
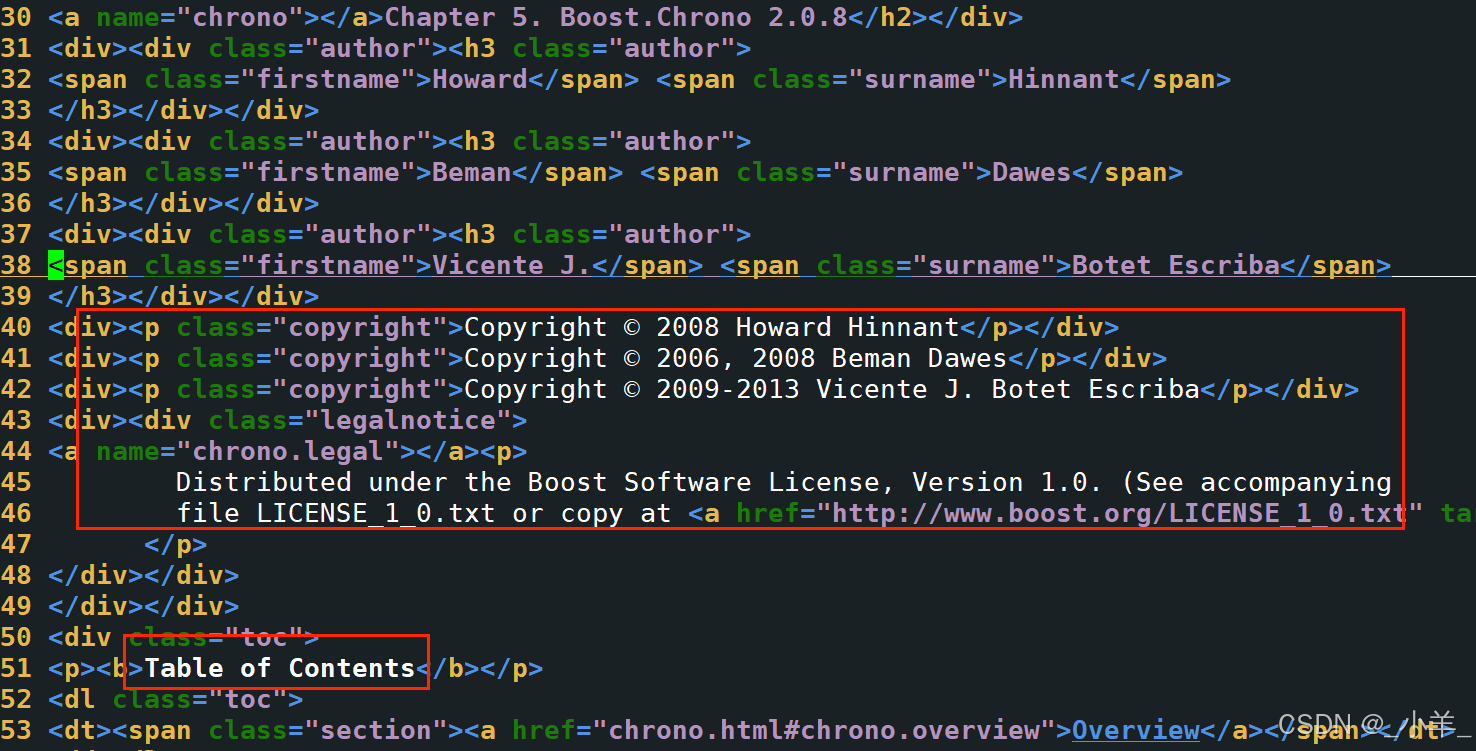
提取content,也就是去標簽,我們只需要像下面這種白色的內容:
static bool ParseContent(const std::string &file, std::string *content)
{// 狀態機enum status{LABLE,CONTENT};enum status s = LABLE; // 開始默認為標簽for (char c : file){switch (s){case LABLE : if (c == '>') s = CONTENT; break; // 如果遇到'>',假設接下來是contentcase CONTENT : if (c == '<') s = LABLE; // 如果假設錯誤,狀態重新轉為lableelse{// 后面我們想用\n作為html解析后文本的分隔符if (c == '\n') c = ' ';content->push_back(c);}break;default : break;}}return true;
}
構建URL:
static bool ParseUrl(const std::string &file_path, std::string *url)
{std::string url_head = "https://www.boost.org/doc/libs/1_88_0/doc/html";std::string url_tail = file_path.substr(src_path.size());*url = url_head + url_tail;return true;
}
將解析的內容寫入到指定的文件中:
bool SaveHtml(const std::vector<DocInfo_t> &results, const std::string &output)
{
#define SEP '\3'// 按二進制方式寫入std::ofstream out(output, std::ios::out | std::ios::binary);if (out.is_open() == false){std::cerr << "open " << output << " fail!" << std::endl;return false;}for (auto &it : results){std::string out_string;out_string = it.title;out_string += SEP;out_string += it.content;out_string += SEP;out_string += it.url;out_string += '\n';out.write(out_string.c_str(), out_string.size());}out.close();return true;
}
建立索引
index.hpp 的基本結構:
namespace yjz_index
{struct DocInfo{std::string title;std::string content;std::string url;uint64_t doc_id;};struct InvertedElem{uint64_t doc_id;     // 文檔IDstd::string word;    // 關鍵字int weight;          // 權重};class Index{private:Index(){}Index(const Index&) = delete;Index& operator=(const Index&) = delete;static Index *_instance;static std::mutex _mutex;public:using InvertedList = std::vector<InvertedElem>;~Index(){}// 獲取單例static Index* GetInstance(){}// 根據文檔ID找到文檔內容DocInfo* GetForwardIndex(uint64_t doc_id){}// 根據關鍵字找到倒排拉鏈InvertedList* GetInvertedList(const std::string &word){}// 根據格式化后的文檔,構建正排、倒排索引bool BuildIndex(const std::string &input){}private:// 構建正排索引DocInfo* BuildForwardIndex(const std::string &line){}// 構建倒排索引bool BuildInvertedIndex(const DocInfo &doc){}private:// 將數組下標作為文檔IDstd::vector<DocInfo> _forward_index;  // 正排索引std::unordered_map<std::string, InvertedList> _inverted_index;};Index* Index::_instance= nullptr;std::mutex Index::_mutex;
}
構建正排索引
將符合特定格式的字符串解析并轉化為結構化的文檔信息對象,進而添加到正排索引數據結構(_forward_index 容器 )中,為后續基于文檔信息的檢索、分析等操作提供基礎。
DocInfo* BuildForwardIndex(const std::string &line)
{// 解析line,字符串切分std::vector<std::string> results;const std::string sep = "\3";yjz_util::StringUtil::Split(line, &results, sep);if (results.size() != 3){return nullptr;}// 將切分好的字符串構建DocInfoDocInfo doc;doc.title = results[0];doc.content = results[1];doc.url = results[2];doc.doc_id = _forward_index.size(); // 先更新文檔ID再插入_forward_index.push_back(std::move(doc));return &_forward_index.back();
}
構建倒排索引
對給定的文檔進行分詞處理,統計每個單詞在標題和內容中的出現次數,計算每個單詞的權重,然后將這些信息添加到倒排索引中。通過這種方式,可以快速查找包含特定單詞的文檔,并根據單詞的權重對文檔進行排序。
// 構建倒排索引
bool BuildInvertedIndex(const DocInfo &doc)
{// doc -> 倒排拉鏈struct word_cnt{int title_cnt;int content_cnt;word_cnt() : title_cnt(0), content_cnt(0) {}}; std::unordered_map<std::string, word_cnt> word_map; // 暫存詞頻std::vector<std::string> title_words;yjz_util::JiebaUtil::CutString(doc.title, &title_words);for (auto &s : title_words){boost::to_lower(s); // 全部轉化為小寫word_map[s].title_cnt++;}std::vector<std::string> content_words;yjz_util::JiebaUtil::CutString(doc.content, &content_words);for (auto &s : content_words){boost::to_lower(s); word_map[s].content_cnt++;}for (auto &word_pair : word_map){InvertedElem item;item.doc_id = doc.doc_id;item.word = word_pair.first;item.weight = 10 * word_pair.second.title_cnt + word_pair.second.content_cnt;InvertedList &inverted_list = _inverted_index[word_pair.first];inverted_list.push_back(std::move(item));}return true;
}
Boost庫切分字符串:
static void CutString(const std::string &line, std::vector<std::string> *result, const std::string &sep)
{boost::split(*result, line, boost::is_any_of(sep), boost::token_compress_on);
}
boost::split函數:這是 Boost 庫中的一個函數,用于將字符串按照指定的分隔符進行分割;*result:通過解引用指針 result,將分割后的子字符串存儲到該向量中;line:待分割的輸入字符串;boost::is_any_of(sep):用于指定分割字符串時使用的分隔符;boost::token_compress_on:這是一個分割標志,設置為 boost::token_compress_on 表示如果連續出現多個分隔符,會將它們視為一個分隔符進行處理,避免產生空的子字符串。
建立搜索引擎
searcher.hpp 基本框架:
namespace yjz_searcher
{class Searcher{public:Searcher(){}~Searcher(){}struct InvertedElemPrint{uint64_t doc_id;int weight;std::vector<std::string> words; // 多個詞對應同一個doc_idInvertedElemPrint() : doc_id(0), weight(0) {}};void InitSearcher(const std::string &input){// 獲取或創建index對象_index = yjz_index::Index::GetInstance();std::cout << "獲取或創建index單例成功!" << std::endl;_index->BuildIndex(input);std::cout << "建立正排和倒排索引成功!" << std::endl;}void Search(const std::string &query, std::string *json_string){// 1.分詞,對query(搜索關鍵字)按要求進行分詞// 2.觸發,根據分好的詞進行索引查找,關鍵字需要忽略大小寫// 3.合并排序,匯總查找結果,按照權重排降序// 4.根據查找出來的結果,構建Json串}// 獲取摘要std::string GetDesc(const std::string &html_content, const std::string &word){}private:yjz_index::Index *_index; };
}
編寫Search函數:
void Search(const std::string &query, std::string *json_string)
{// 1.分詞,對query(搜索關鍵字)按要求進行分詞std::vector<std::string> words;yjz_util::JiebaUtil::CutString(query, &words);// 2.觸發,根據分好的詞進行索引查找,關鍵字需要忽略大小寫yjz_index::Index::InvertedList inverted_list_all;for (auto word : words){boost::to_lower(word);yjz_index::Index::InvertedList *inverted_list = _index->GetInvertedList(word);if (inverted_list == nullptr) continue;inverted_list_all.insert(inverted_list_all.end(), inverted_list->begin(), inverted_list->end());}// 3.合并排序,匯總查找結果,按照權重排降序std::sort(inverted_list_all.begin(), inverted_list_all.end(), [](const yjz_index::InvertedElem& e1, const yjz_index::InvertedElem& e2){return e1.weight > e2.weight;});// 4.根據查找出來的結果,構建Json串Json::Value root;for (auto &it : inverted_list_all){// 根據文檔ID進行正排索引yjz_index::DocInfo *doc = _index->GetForwardIndex(it.doc_id); if (doc == nullptr) continue;Json::Value elem;elem["title"] = doc->title;elem["desc"] = GetDesc(doc->content, it.word);elem["url"] = doc->url;// for Debug// elem["id"] = it.doc_id;// elem["weight"] = it.weight;root.append(elem);}Json::StyledWriter writer;*json_string = writer.write(root);
}
獲取摘要:找到word關鍵字在html_content中首次出現的位置,規定往前找50字節,往后找100字節,截取這部分內容。
因為我們在構建倒排索引和索引查找時將關鍵字統一轉換為了小寫,因此在原始數據中查找時也應該統一按小寫字母查找。
search函數定義在<algorithm>頭文件中,用于在一個序列中查找另一個序列首次出現的位置,并支持自定義查找規則。
std::string GetDesc(const std::string &html_content, const std::string &word)
{const int pre_step = 50;const int next_step = 100;// 找到首次出現auto it = std::search(html_content.begin(), html_content.end(), word.begin(), word.end(), [](char x, char y){return std::tolower(x) == std::tolower(y);});if (it == html_content.end()) return "None1";int pos = std::distance(html_content.begin(), it);int start = 0;int end = html_content.size() - 1;start = std::max(start, pos - pre_step);end = std::min(end, pos + next_step);if (start >= end) return "None2";return html_content.substr(start, end - start);
}
我們想知道現在的搜索結果是不是按照我們預想的按照權重 weight 進行順序呈現的呢?
在 search 函數中構建Json串時,我們把文檔ID和權重加上進行測試:
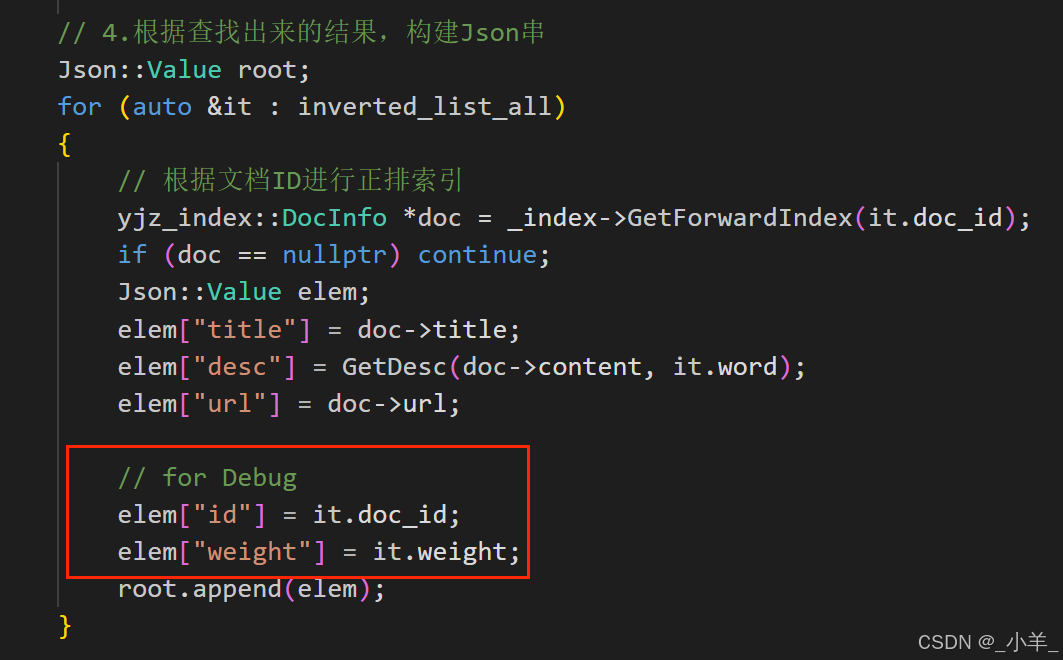
下面是搜索結果:


可以看到是沒有問題的。
http_server 服務
下載 cpp-httplib 庫,然后直接參照給的示例編寫我們想要的服務,非常簡單。
#include "cpp-httplib/httplib.h"
#include "searcher.hpp"const std::string input = "data/raw_html/raw.txt";
const std::string root_path = "./wwwroot";int main()
{yjz_searcher::Searcher search;search.InitSearcher(input);httplib::Server svr;svr.set_base_dir(root_path);svr.Get("/s", [&search](const httplib::Request &req, httplib::Response &rsp){if (req.has_param("word") == false) {rsp.set_content("必須要有搜索關鍵字!", "text/plain: charset=utf-8");return;}std::string word = req.get_param_value("word");std::cout << "用戶在搜索: " << word << std::endl;std::string json_string;search.Search(word, &json_string);rsp.set_content(json_string, "application/json");});svr.listen("0.0.0.0", 8081);return 0;
}
當然我們也可以自己搭建http服務。
到這里后端的工作基本已經完成了,那前端代碼怎么辦呢?我這里就直接讓Deepseek幫我寫了,如下:
<!DOCTYPE html>
<html lang="zh-CN">
<head><meta charset="UTF-8"><meta name="viewport" content="width=device-width, initial-scale=1.0, maximum-scale=1.0, user-scalable=no"><script src="https://code.jquery.com/jquery-3.6.0.min.js"></script><link rel="stylesheet" href="https://cdnjs.cloudflare.com/ajax/libs/font-awesome/6.0.0/css/all.min.css"><title>Boost 智能搜索引擎</title><style>:root {--primary-color: #4e6ef2;--hover-color: #3b5bdb;--background: #f8f9fa;--text-dark: #2d3436;--text-light: #636e72;}* {margin: 0;padding: 0;box-sizing: border-box;font-family: 'Segoe UI', system-ui, sans-serif;}body {background: var(--background);min-height: 100vh;padding: 2rem 1rem;}.container {max-width: 800px;margin: 0 auto;animation: fadeIn 0.5s ease;}.search-box {display: flex;gap: 10px;margin-bottom: 2rem;box-shadow: 0 4px 6px rgba(0, 0, 0, 0.1);border-radius: 30px;background: white;padding: 5px;}.search-input {flex: 1;padding: 1rem 1.5rem;border: none;border-radius: 30px;font-size: 1.1rem;color: var(--text-dark);transition: all 0.3s ease;}.search-input:focus {outline: none;box-shadow: 0 0 0 3px rgba(78, 110, 242, 0.2);}.search-btn {padding: 0 2rem;border: none;border-radius: 30px;background: linear-gradient(135deg, var(--primary-color), var(--hover-color));color: white;font-size: 1rem;font-weight: 600;cursor: pointer;transition: all 0.3s ease;display: flex;align-items: center;gap: 8px;}.search-btn:hover {background: var(--hover-color);transform: translateY(-1px);}.result-item {background: white;border-radius: 12px;padding: 1.5rem;margin-bottom: 1rem;box-shadow: 0 2px 4px rgba(0, 0, 0, 0.05);transition: transform 0.2s ease;}.result-item:hover {transform: translateX(5px);}.result-title {color: var(--primary-color);font-size: 1.2rem;font-weight: 600;margin-bottom: 0.5rem;text-decoration: none;display: flex;align-items: center;gap: 8px;}.result-title:hover {text-decoration: underline;}.result-desc {color: var(--text-dark);line-height: 1.6;margin-bottom: 0.5rem;display: -webkit-box;-webkit-line-clamp: 3;-webkit-box-orient: vertical;overflow: hidden;}.result-url {color: var(--text-light);font-size: 0.9rem;font-family: monospace;}.loading {text-align: center;padding: 2rem;color: var(--text-light);}@keyframes fadeIn {from { opacity: 0; transform: translateY(20px); }to { opacity: 1; transform: translateY(0); }}@media (max-width: 768px) {.search-box {flex-direction: column;border-radius: 15px;}.search-btn {padding: 1rem;justify-content: center;}}</style>
</head>
<body><div class="container"><div class="search-box"><input type="text" class="search-input" placeholder="請輸入搜索關鍵詞..." autofocus><button class="search-btn" onclick="search()"><i class="fas fa-search"></i>搜索</button></div><div class="result-container"></div></div><script>// 增強功能$(document).ready(() => {// 回車鍵搜索$('.search-input').keypress(e => e.which === 13 && search())// 輸入框交互$('.search-input').focus(function() {if (this.value === "請輸入搜索關鍵詞...") this.value = ""}).blur(function() {if (this.value === "") this.value = "請輸入搜索關鍵詞..."})})function search() {const query = $('.search-input').val().trim()if (!query) return// 顯示加載狀態$('.result-container').html(`<div class="loading"><i class="fas fa-spinner fa-spin"></i>正在搜索中...</div>`)$.ajax({url: `/s?word=${encodeURIComponent(query)}`,method: 'GET',success: buildResults,error: () => {$('.result-container').html(`<div class="result-item" style="color: #dc3545;"><i class="fas fa-exclamation-triangle"></i>請求失敗,請稍后重試</div>`)}})}function buildResults(data) {const container = $('.result-container').empty()if (data.length === 0) {container.html(`<div class="result-item"><div style="color: var(--text-light); text-align: center;"><i class="fas fa-search-minus"></i>沒有找到相關結果</div></div>`)return}data.forEach(item => {const elem = $(`<div class="result-item"><a href="${item.url}" class="result-title" target="_blank"><i class="fas fa-link"></i>${item.title}</a><p class="result-desc">${item.desc}</p><div class="result-url">${item.url}</div></div>`)container.append(elem)})}</script>
</body>
</html>
最后結果展示:
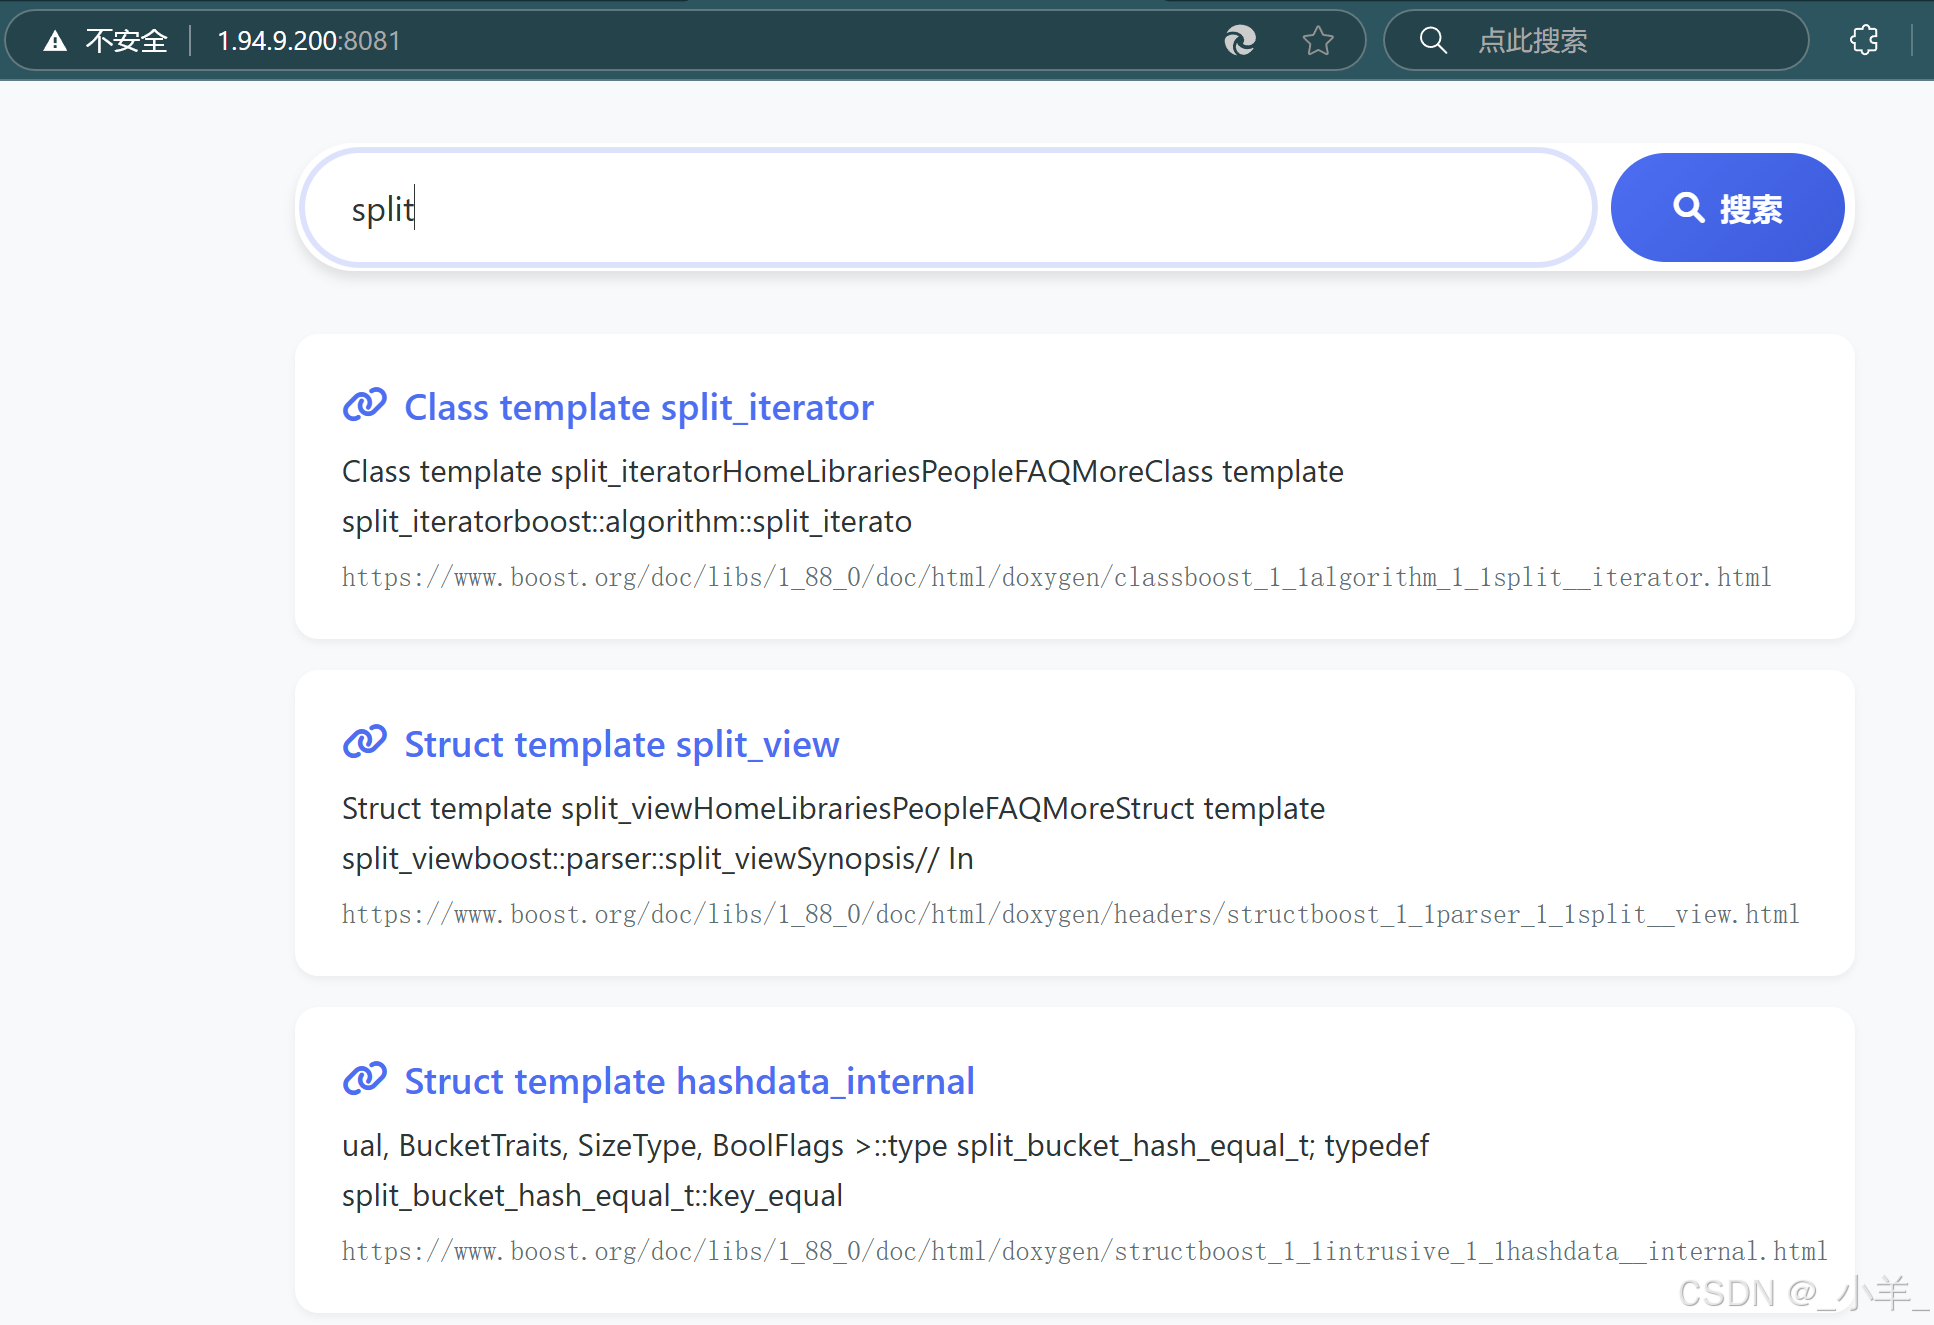
可以看到非常完美,Deepseek寫的頁面還是非常好看的。
但是目前的代碼還有一個不易察覺的問題,當我們輸入搜索內容,通過 cppjieba 分詞得到多個關鍵詞,這些關鍵詞可能都來自同一個文檔,根據目前的代碼每個關鍵詞都會通過索引查找到這個文檔,也就是說這個文檔會給我們呈現多份,而我們希望得到的只是一個文檔就行,因此接下來還需要優化一下去重的問題。
搜索到的內容有重復
下面是一個測試文件:
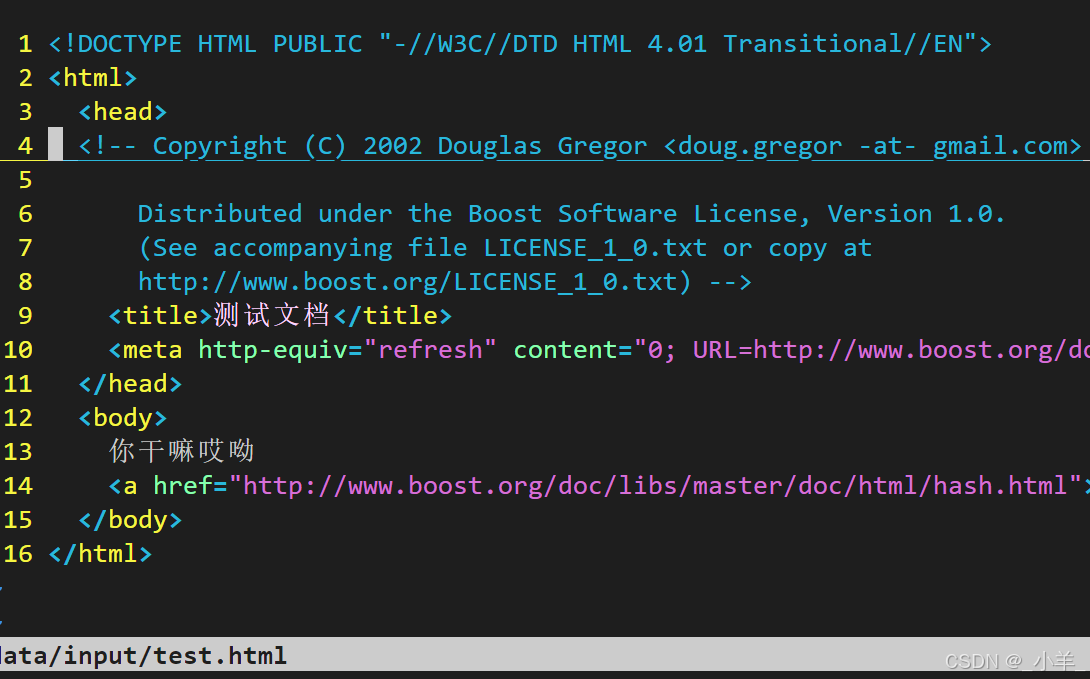
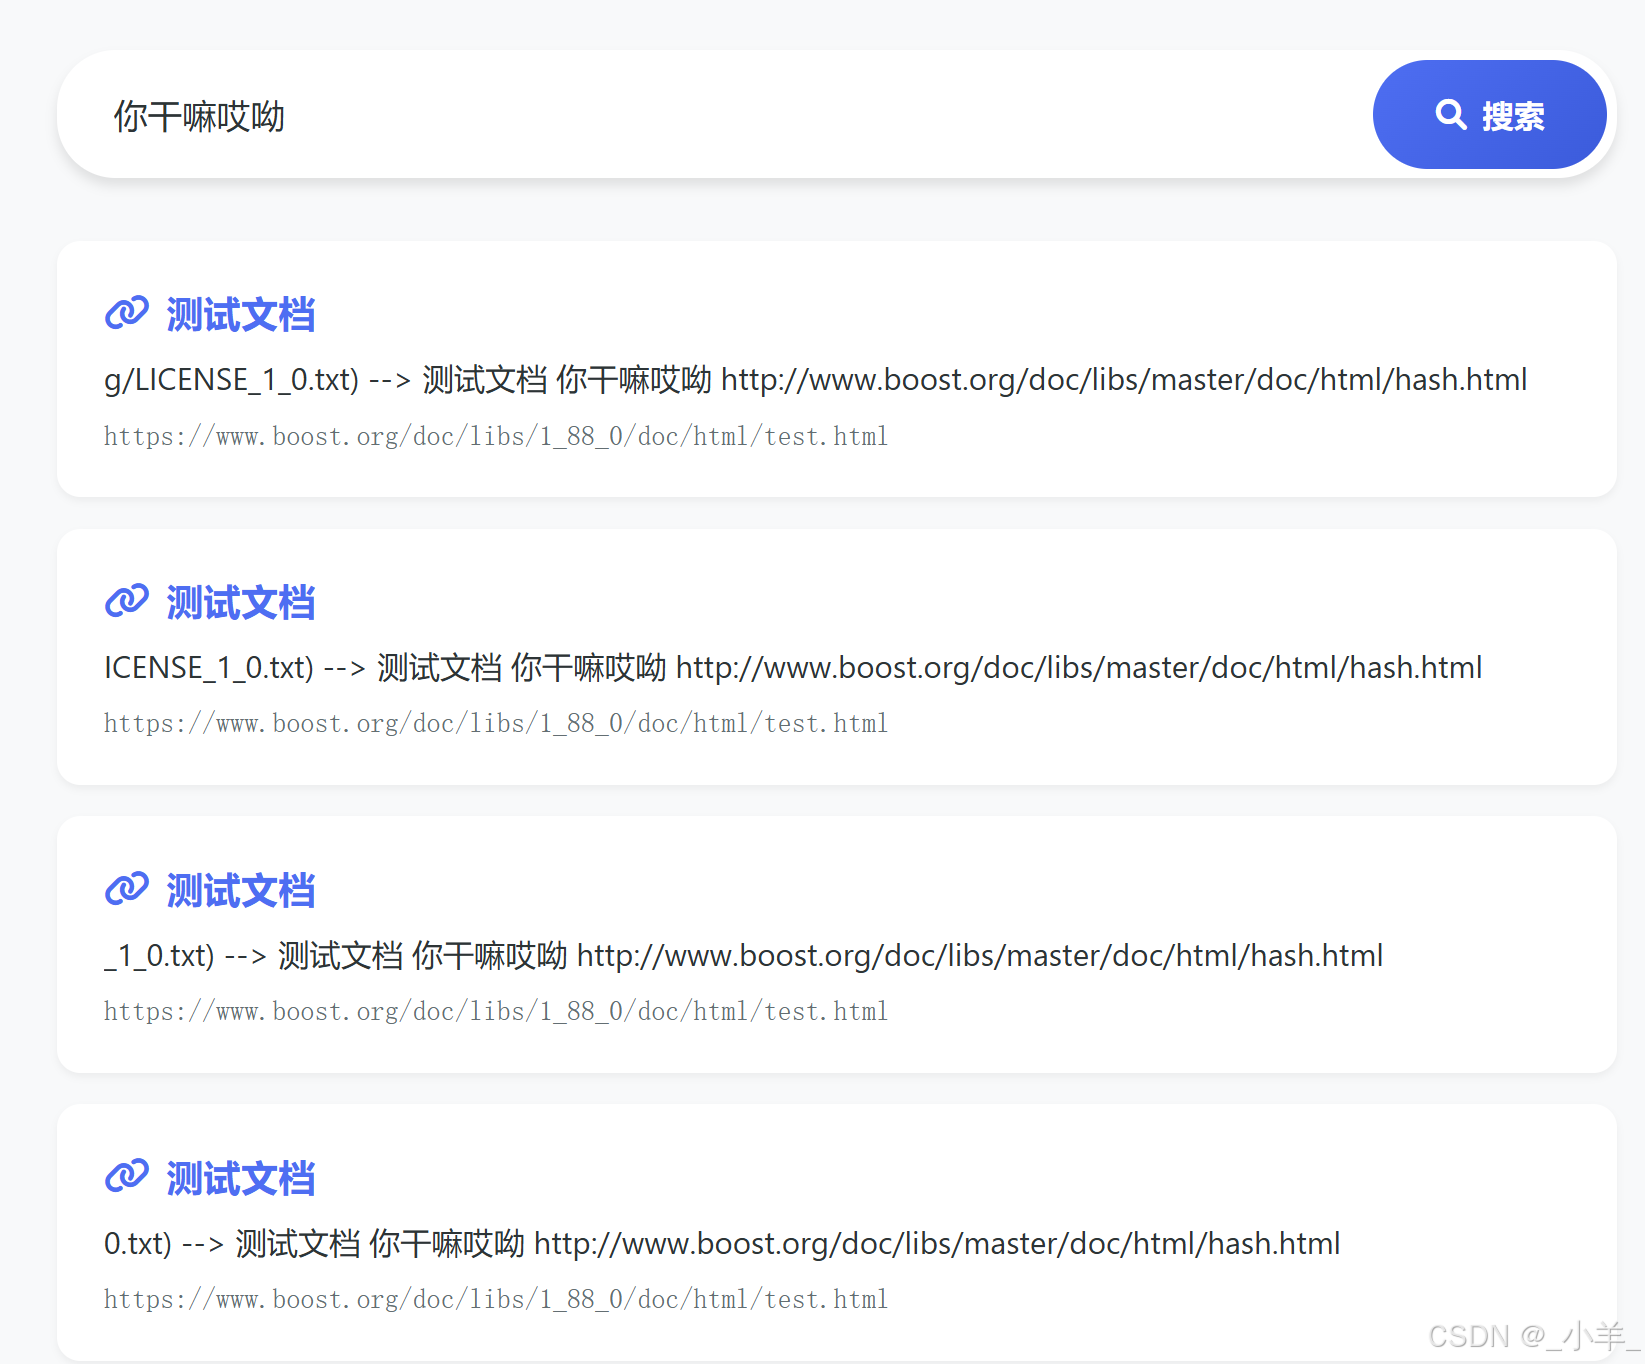
可以看到通過 cppjieba 分詞然后通過每個關鍵詞都索引到了這個文檔,給我們重復呈現了四次。
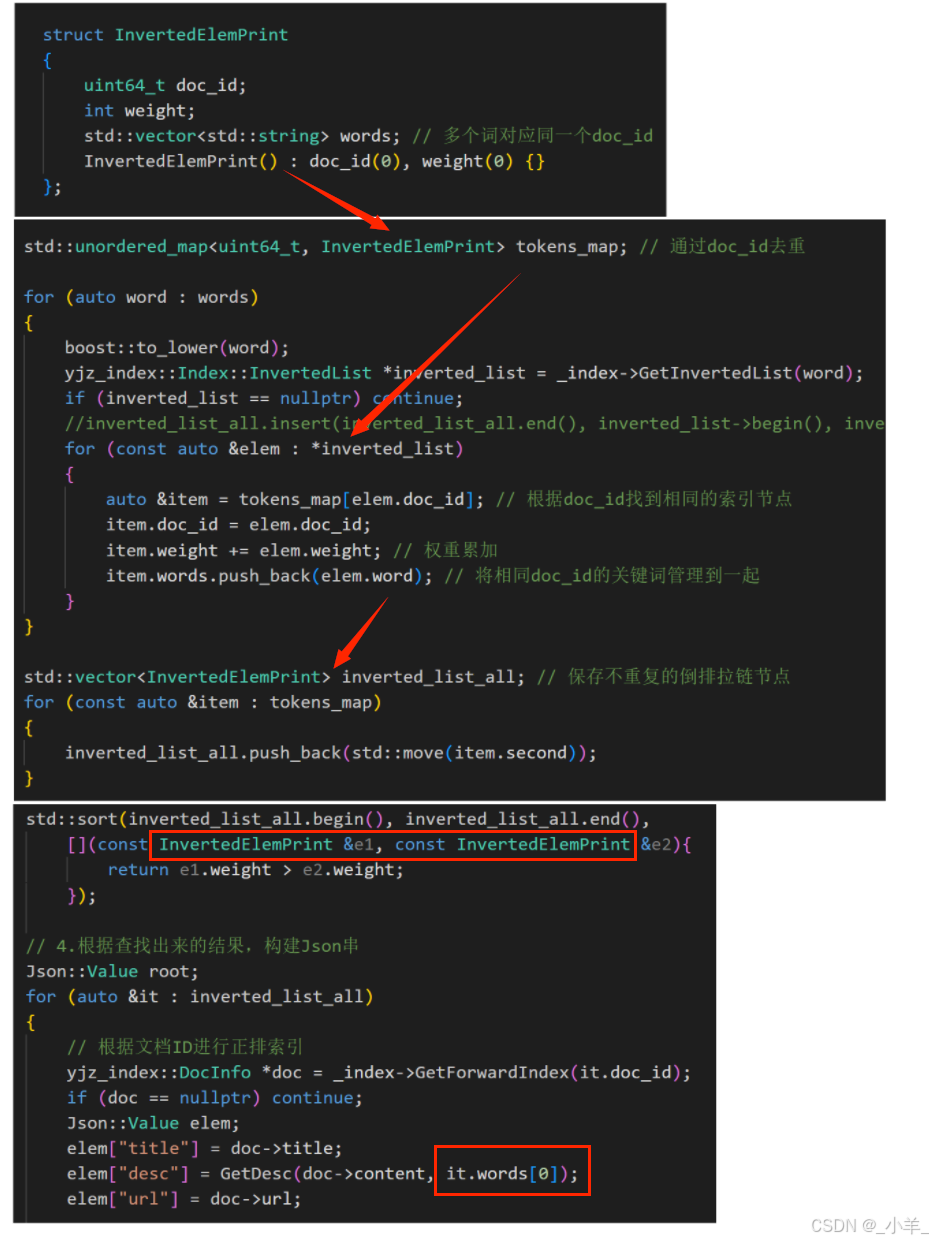
接下來考慮如何去重。我們可以根據一個文檔只有一個 doc_id 的特點,將所有 doc_id 相同的關鍵詞統計到一起,權重累加。
struct InvertedElemPrint
{uint64_t doc_id;int weight;std::vector<std::string> words; // 多個詞對應同一個doc_idInvertedElemPrint() : doc_id(0), weight(0) {}
};
//... void Search(const std::string &query, std::string *json_string)
{// 1.分詞,對query(搜索關鍵字)按要求進行分詞std::vector<std::string> words;yjz_util::JiebaUtil::CutString(query, &words);// 2.觸發,根據分好的詞進行索引查找,關鍵字需要忽略大小寫// yjz_index::Index::InvertedList inverted_list_all;std::unordered_map<uint64_t, InvertedElemPrint> tokens_map; // 通過doc_id去重for (auto word : words){boost::to_lower(word);yjz_index::Index::InvertedList *inverted_list = _index->GetInvertedList(word);if (inverted_list == nullptr) continue;//inverted_list_all.insert(inverted_list_all.end(), inverted_list->begin(), inverted_list->end());for (const auto &elem : *inverted_list){auto &item = tokens_map[elem.doc_id]; // 根據doc_id找到相同的索引節點item.doc_id = elem.doc_id;item.weight += elem.weight; // 權重累加item.words.push_back(elem.word); // 將相同doc_id的關鍵詞管理到一起}}std::vector<InvertedElemPrint> inverted_list_all; // 保存不重復的倒排拉鏈節點for (const auto &item : tokens_map){inverted_list_all.push_back(std::move(item.second));}// 3.合并排序,匯總查找結果,按照權重排降序// std::sort(inverted_list_all.begin(), inverted_list_all.end(), //     [](const yjz_index::InvertedElem& e1, const yjz_index::InvertedElem& e2){//         return e1.weight > e2.weight;//     });std::sort(inverted_list_all.begin(), inverted_list_all.end(), [](const InvertedElemPrint &e1, const InvertedElemPrint &e2){return e1.weight > e2.weight;});// 4.根據查找出來的結果,構建Json串Json::Value root;for (auto &it : inverted_list_all){// 根據文檔ID進行正排索引yjz_index::DocInfo *doc = _index->GetForwardIndex(it.doc_id); if (doc == nullptr) continue;Json::Value elem;elem["title"] = doc->title;elem["desc"] = GetDesc(doc->content, it.words[0]);elem["url"] = doc->url;// for Debug// elem["id"] = it.doc_id;// elem["weight"] = it.weight;root.append(elem);}// Json::StyledWriter writer;Json::FastWriter writer;*json_string = writer.write(root);
}

完成去重結果。
最后我們可以通過下面的指令將服務放到后臺運行,方便我們隨時搜索。
nohup ./http_server &
Boost搜索引擎源碼
本篇文章的分享就到這里了,如果您覺得在本文有所收獲,還請留下您的三連支持哦~


)


)

![56.[前端開發-前端工程化]Day03-webpack構建工具](http://pic.xiahunao.cn/56.[前端開發-前端工程化]Day03-webpack構建工具)


![[machine learning] Transformer - Attention (一)](http://pic.xiahunao.cn/[machine learning] Transformer - Attention (一))


