目錄
一、安裝redis,配置redis.conf
1.安裝gcc
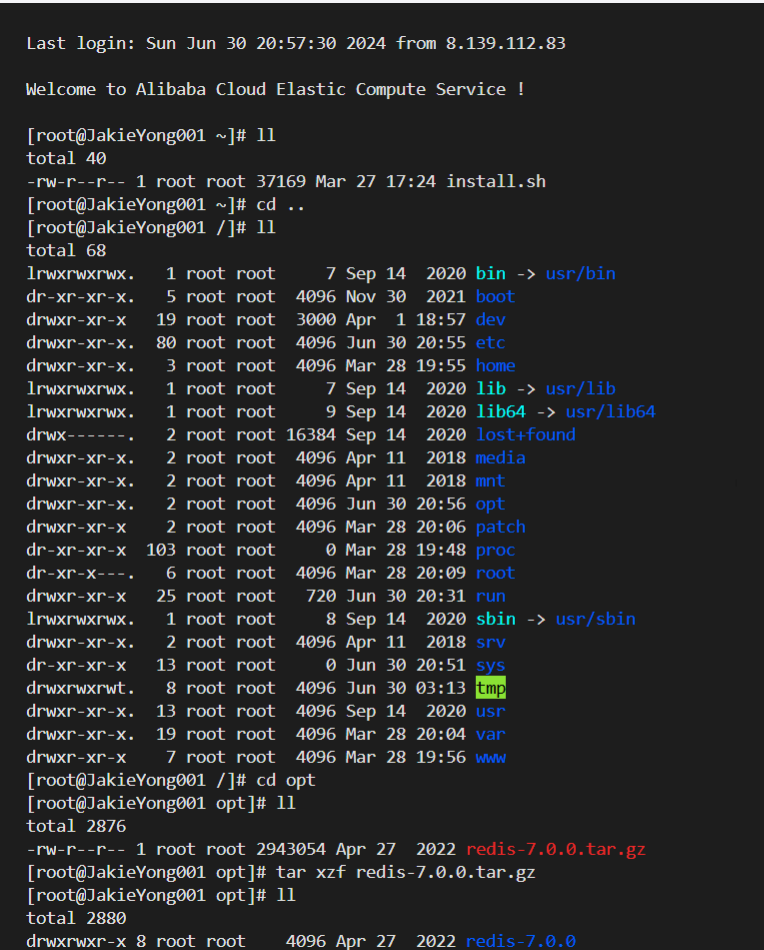
2.將redis的壓縮包放到指定位置解壓 [如下面放在 /opt 目錄下]
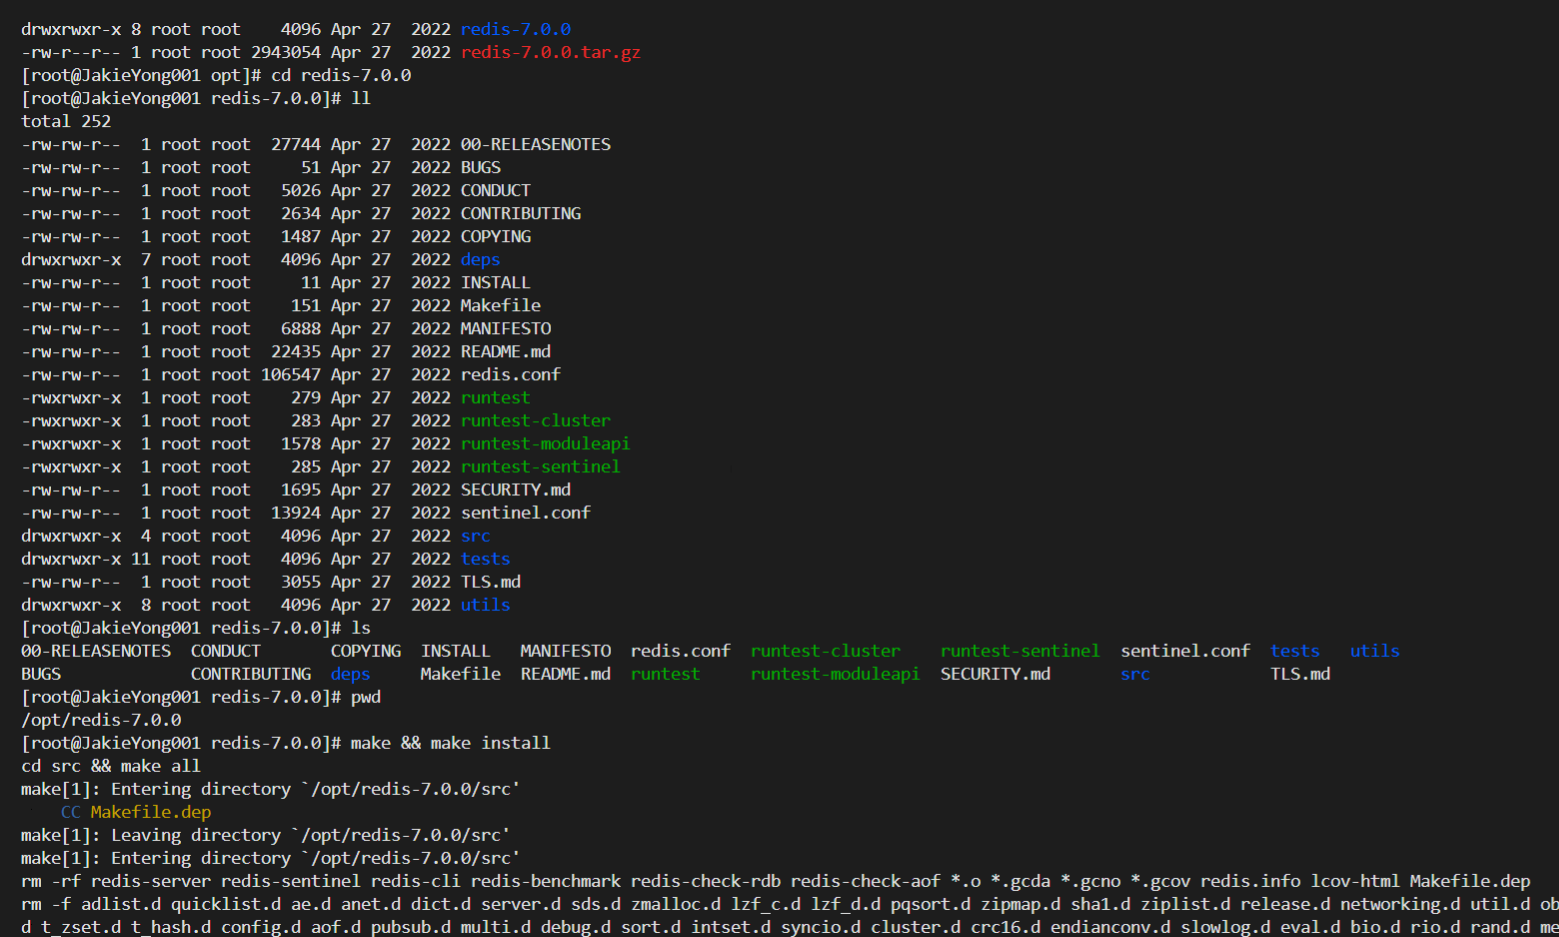
3.編譯安裝
4.配置redis.conf文件
5.開機自啟
二、解決虛擬機本地可以連接redis但是主機不能連接redis
1.虛擬機網絡適配器網絡連接設置為橋接模式
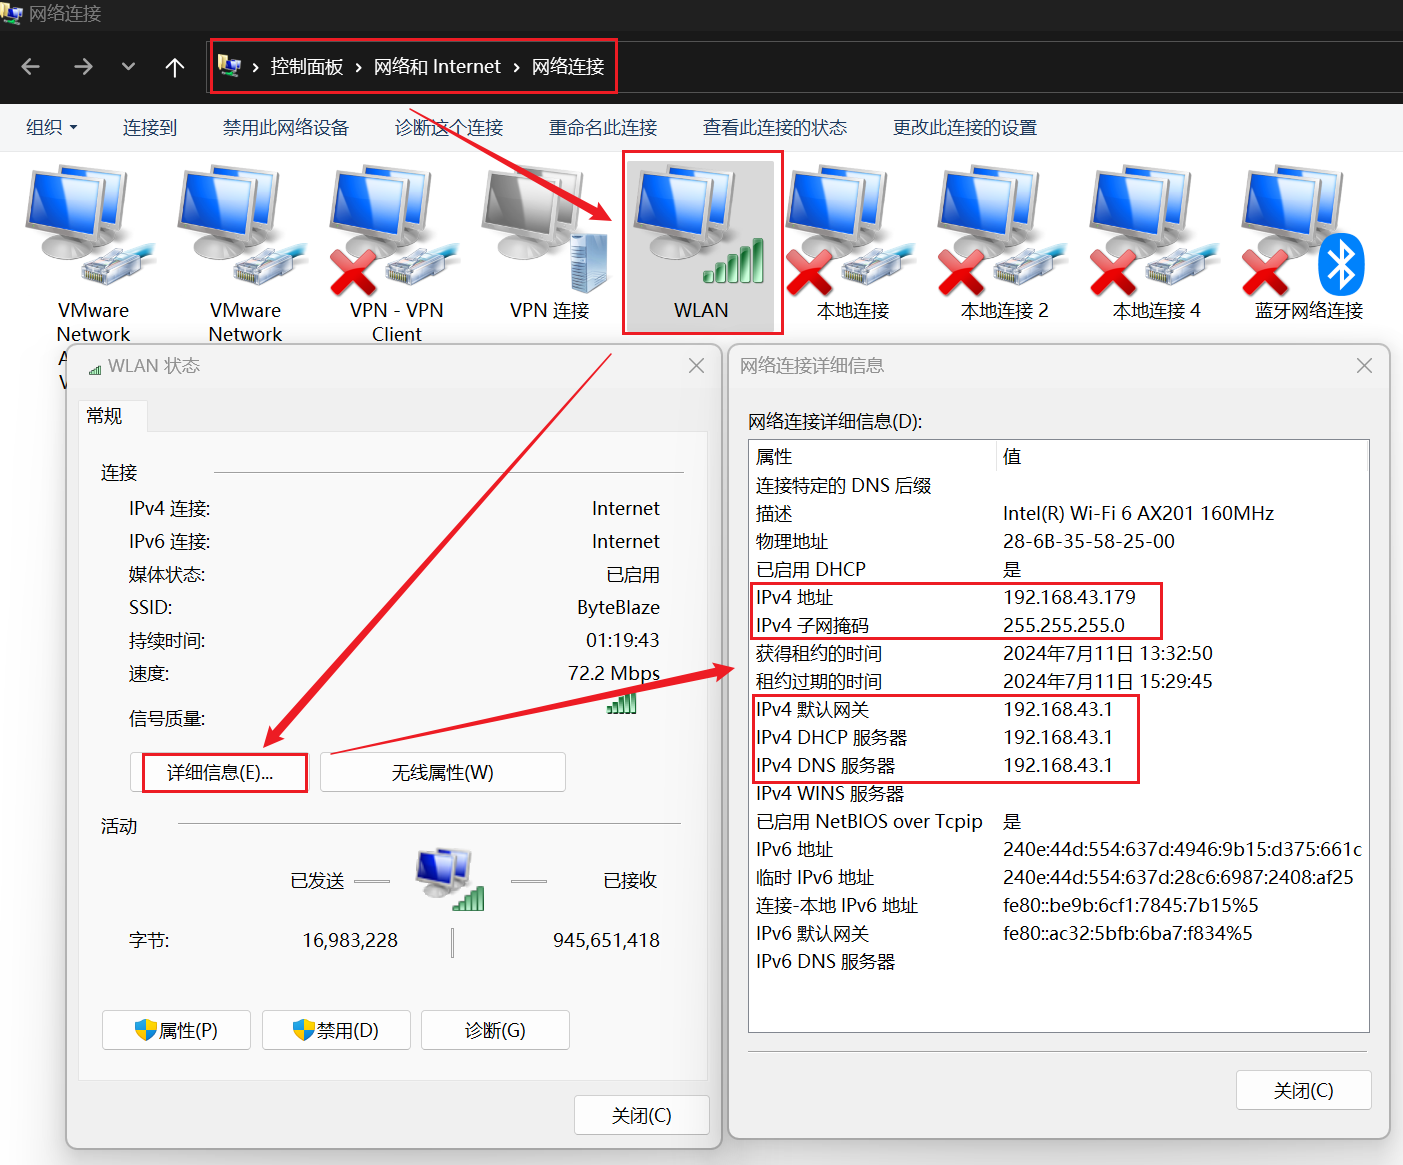
2.控制面板查看主機的網絡連接信息
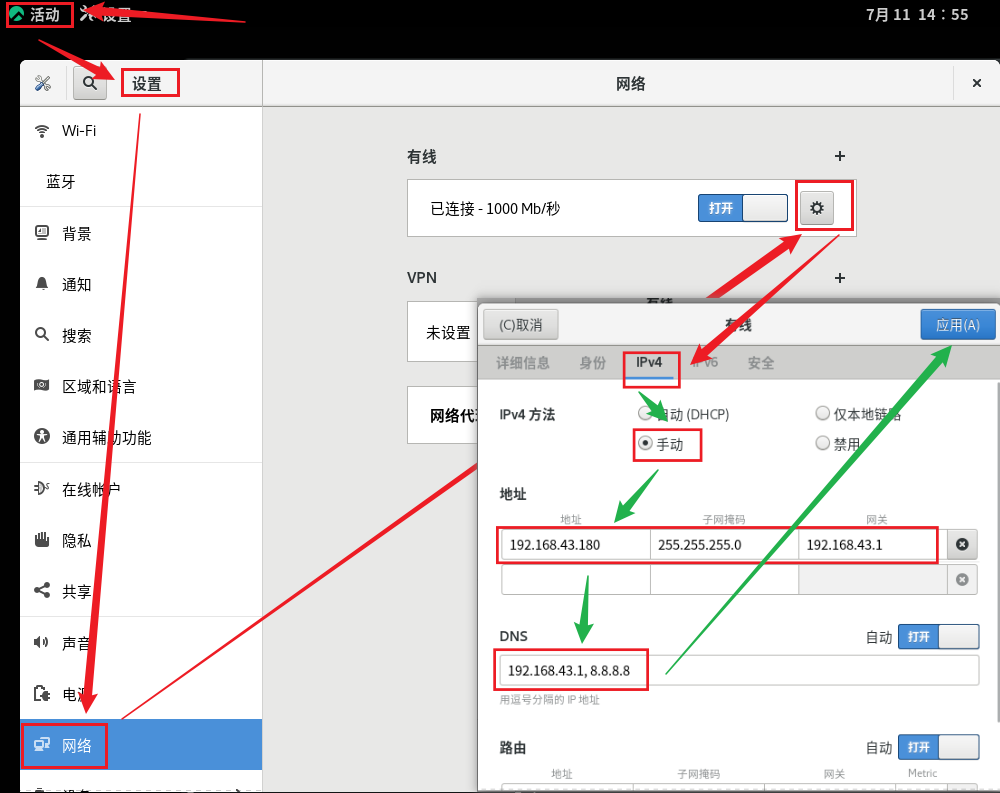
3.手動配置虛擬機網絡連接,輸入與主機同一網絡段地址
三、配置遠程連接
1.設置防火墻端口
2.使用windows圖形化界面
四、IDEA連接redis
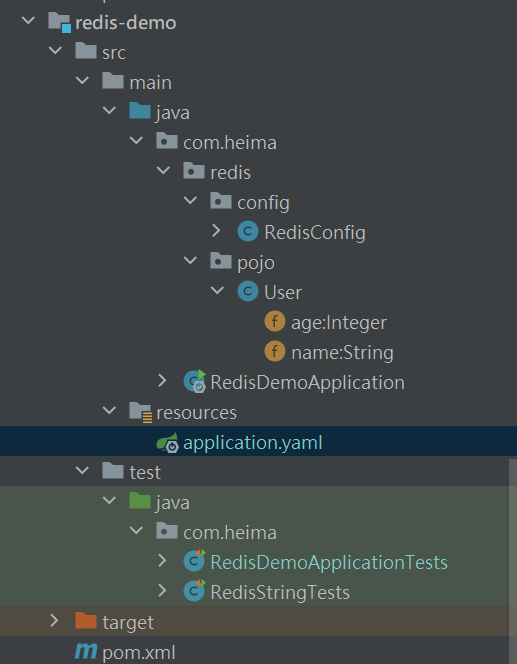
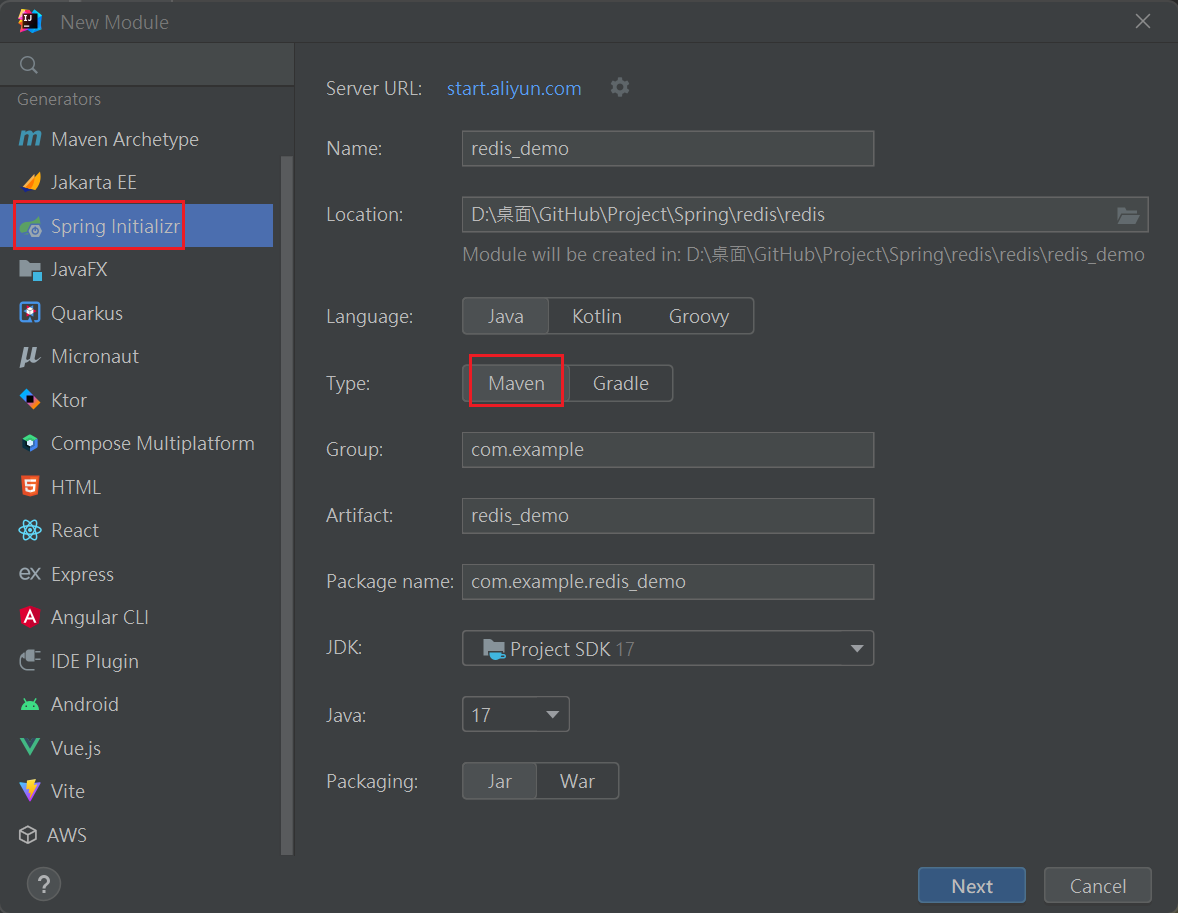
1.新建項目
2.引入redis依賴和連接池依賴
3.配置文件
4.注入redisTemplate
5.編寫測試(所以代碼)
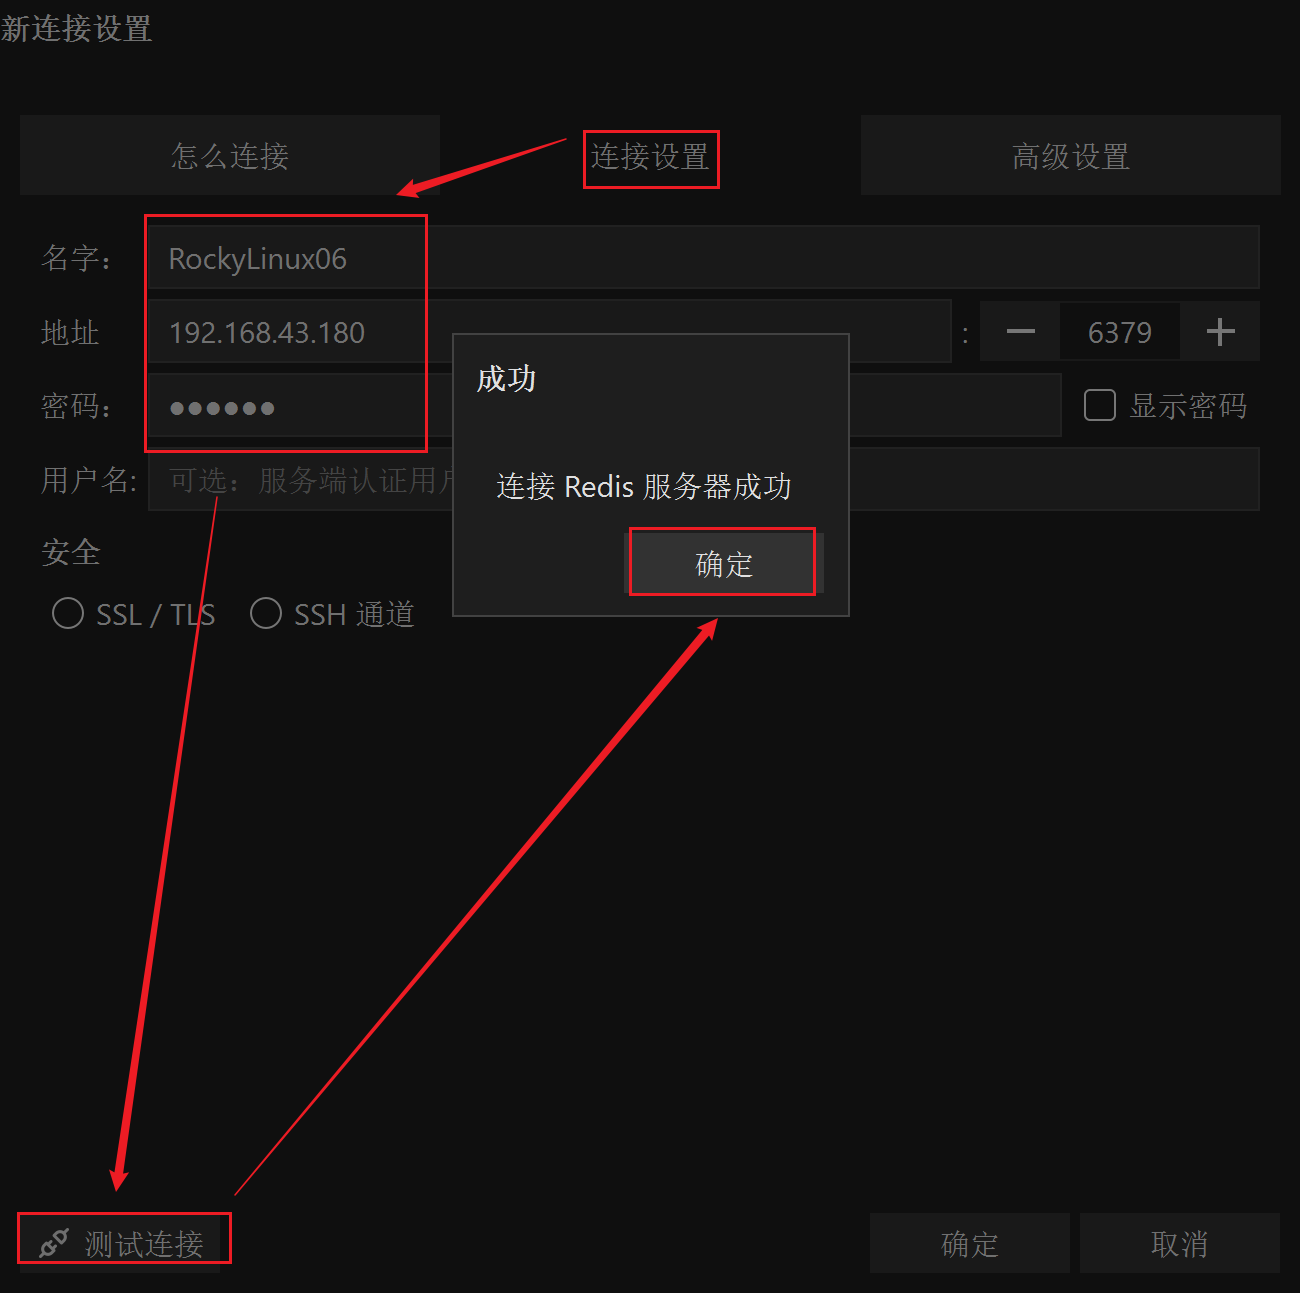
6.查看winsows GUI 界面
一、安裝redis,配置redis.conf
1.安裝gcc
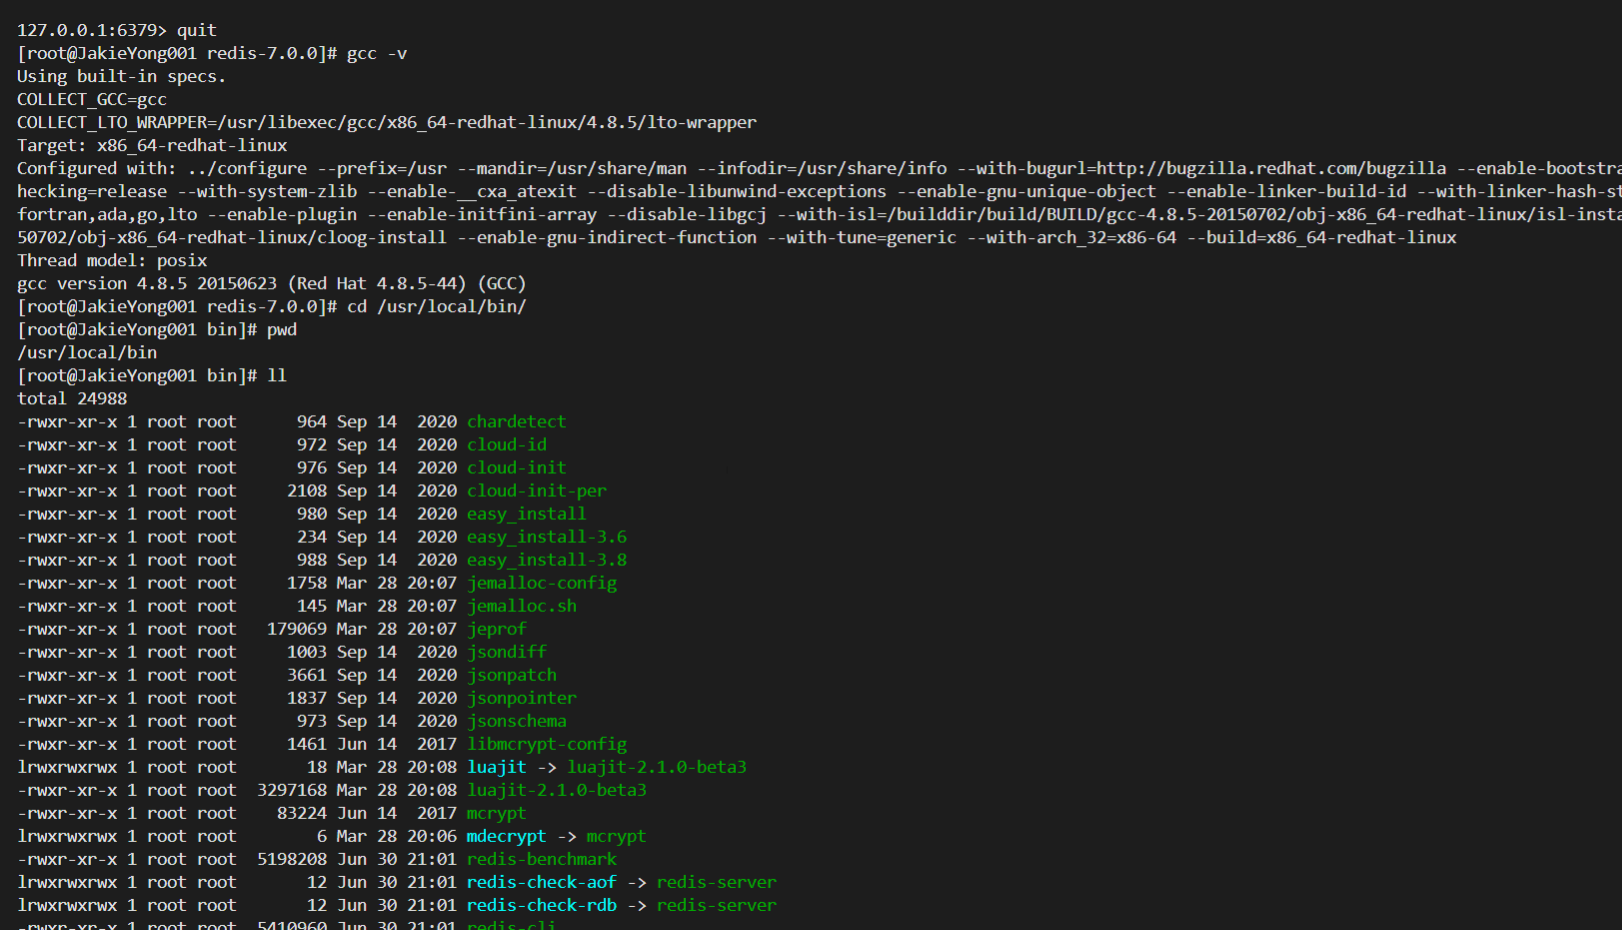
# Redis是基于C語言編寫的,因此首先需要安裝Redis所需要的gcc依賴:
yum install -y gcc tcl
gcc -v # 查看gcc版本
2.將redis的壓縮包放到指定位置解壓 [如下面放在 /opt 目錄下]
# 安裝reids
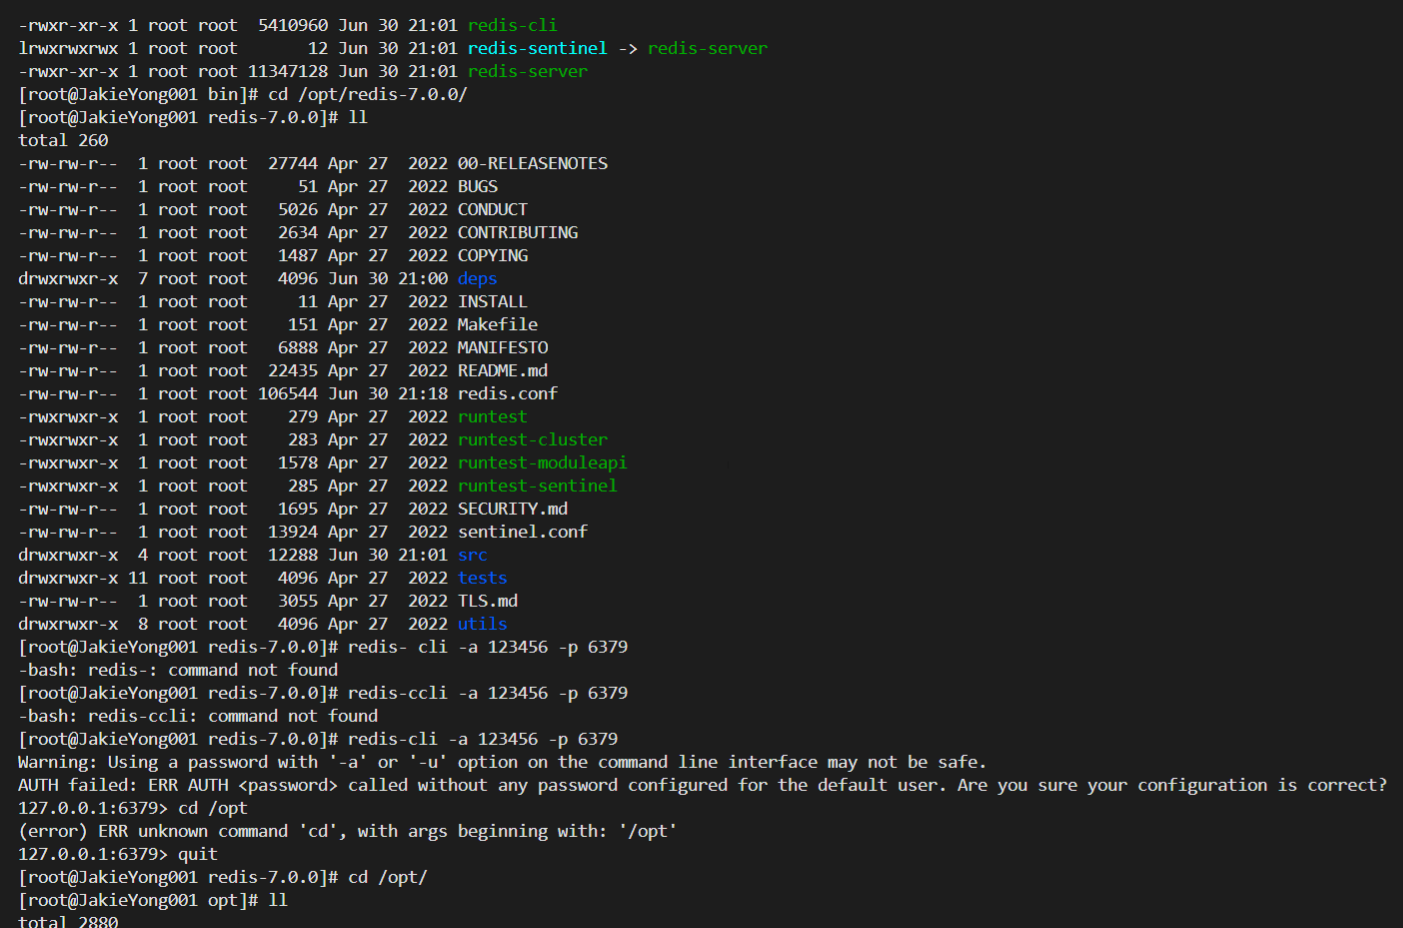
ll # 查看目錄內容
cd /opt # 進入 /opt 目錄,將redis壓縮包放在該目錄下
tar xzf redis-7.0.0.tar.gz # 解壓
cd redis-7.0.0 # 進入redis文件夾
make && make install # 編譯安裝redis# 出現以下語句則安裝成功
# Hint: It's a good idea to run 'make test' ;)
# - redis-cli:是redis提供的命令行客戶端
# - redis-server:是redis的服務端啟動腳本
# - redis-sentinel:是redis的哨兵啟動腳本redis-server # 啟動redis
3.編譯安裝

4.配置redis.conf文件
# 更改配置 redis.conf
pwd # 查看當前所在路勁信息
mkdir /myredis # 創建一個鑫目錄文件夾用來存放副本reids.conf配置文件
cp redis.conf /myredis # 將redis.conf復制到/myredis 文件目錄下
vim redis.conf # 編輯redis.conf配置文件# redis.conf 的配置更改,使用 /bind 回車找到位置
# 允許訪問的地址,默認是127.0.0.1,會導致只能在本地訪問。修改為0.0.0.0則可以在任意IP訪問,生產環境不要設置為0.0.0.0
bind 0.0.0.0
# 守護進程,修改為yes后即可后臺運行
daemonize yes
# 密碼,設置后訪問Redis必須輸入密碼
requirepass 123456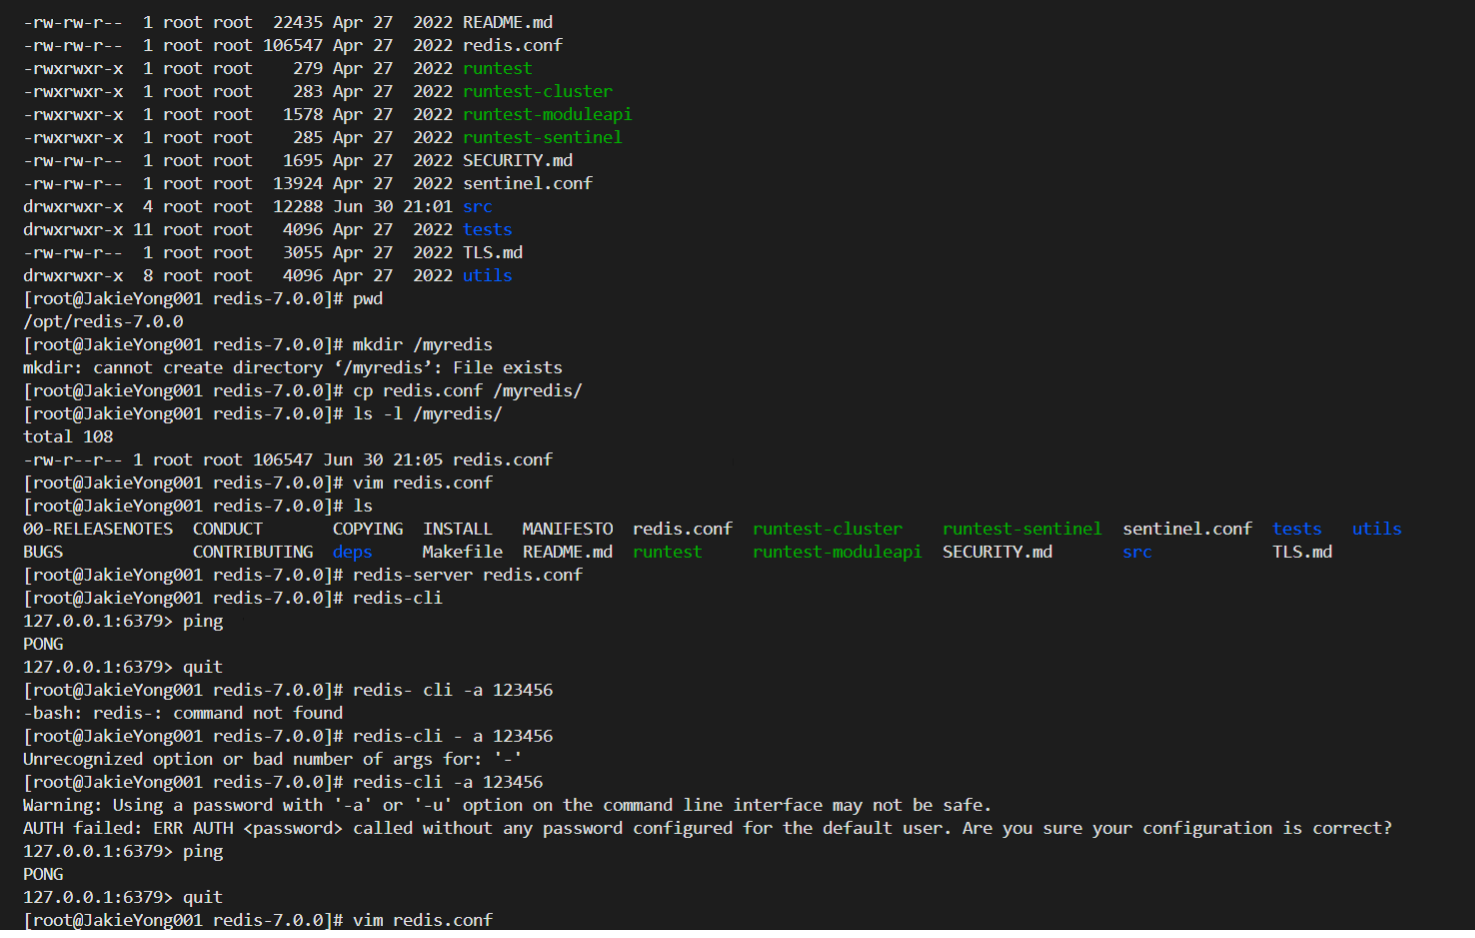
5.開機自啟
# 開機自啟
vi /etc/systemd/system/redis.service
# 內容如下
[Unit]
Description=redis-server
After=network.target[Service]
Type=forking
ExecStart=/usr/local/bin/redis-server /usr/local/src/redis-6.2.6/redis.conf
PrivateTmp=true[Install]
WantedBy=multi-user.target# 然后重載系統服務
systemctl daemon-reload# 啟動
systemctl start redis
# 停止
systemctl stop redis
# 重啟
systemctl restart redis
# 查看狀態
systemctl status redis# 運行命令實現開機自啟
systemctl enable redis
# 其他配置(可選)
# 監聽的端口
port 6379
# 工作目錄,默認是當前目錄,也就是運行redis-server時的命令,日志、持久化等文件會保存在這個目錄
dir .
# 數據庫數量,設置為1,代表只使用1個庫,默認有16個庫,編號0~15
databases 1
# 設置redis能夠使用的最大內存
maxmemory 512mb
# 日志文件,默認為空,不記錄日志,可以指定日志文件名
logfile "redis.log"二、解決虛擬機本地可以連接redis但是主機不能連接redis

(先關閉虛擬機再進行以下配置:)
1.虛擬機網絡適配器網絡連接設置為橋接模式

2.控制面板查看主機的網絡連接信息
3.手動配置虛擬機網絡連接,輸入與主機同一網絡段地址
4.主機與虛擬機網絡地址對應
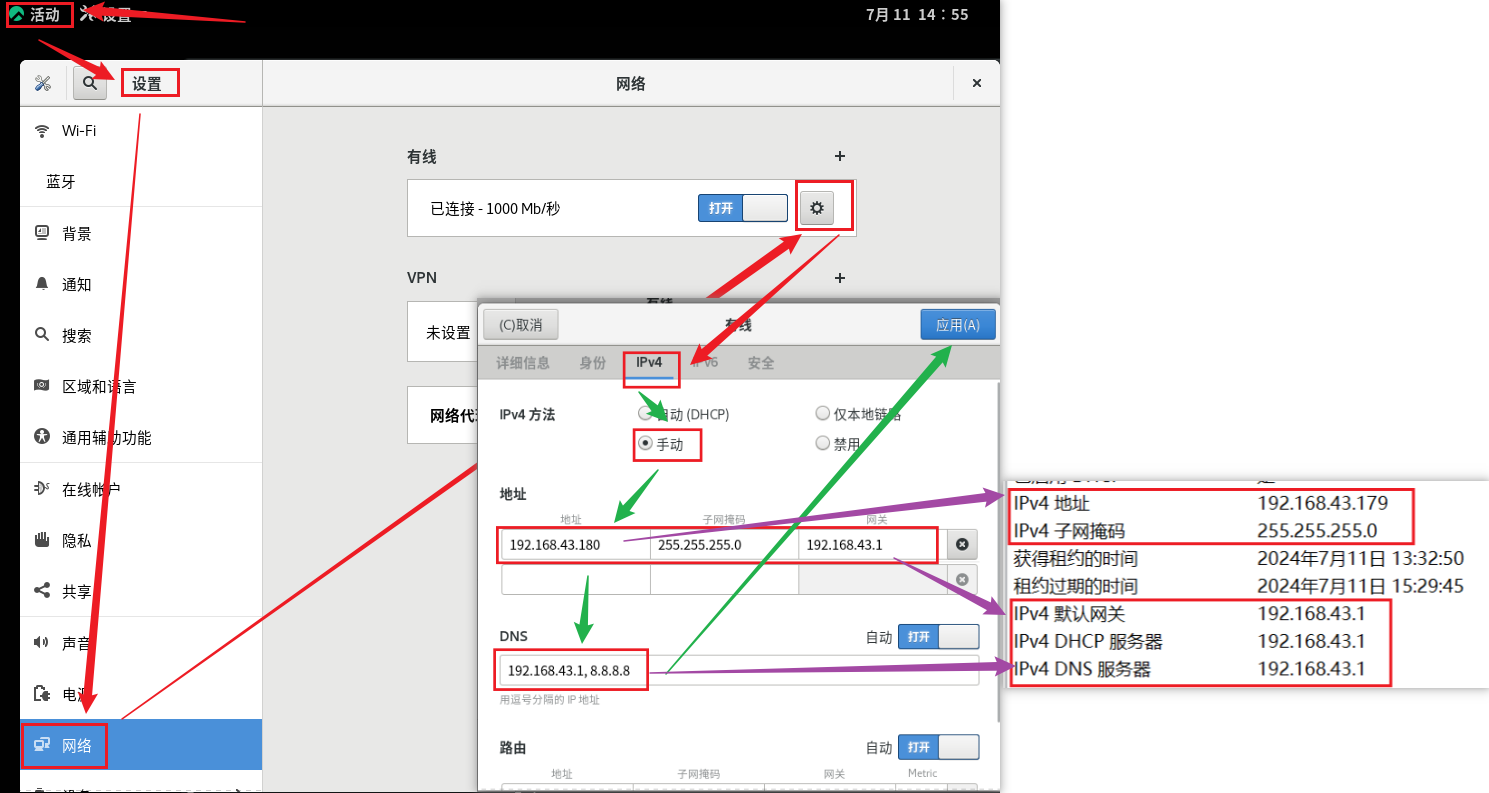
ifconfig # 查看網絡地址 192.168.43.180
redis-cli -h 192.168.43.180 -p 6379 -a 123456 # 使用網絡地址連接服務器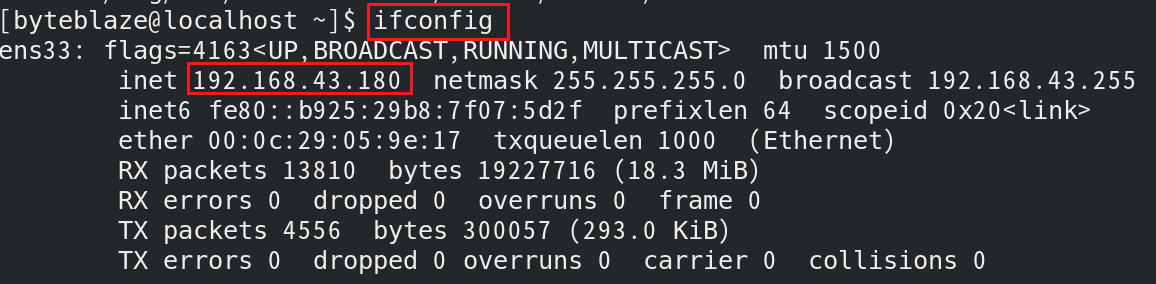

三、配置遠程連接
1.設置防火墻端口
sudo firewall-cmd --add-port=6379/tcp --permanent
sudo firewall-cmd --reload
redis-cli -h c -p 6379 -a 123456ps aux | grep redis2.使用windows圖形化界面

四、IDEA連接redis
1.新建項目

2.引入redis依賴和連接池依賴
<!--redis依賴-->
<dependency><groupId>org.springframework.boot</groupId><artifactId>spring-boot-starter-data-redis</artifactId>
</dependency>
<!--common-pool-->
<dependency><groupId>org.apache.commons</groupId><artifactId>commons-pool2</artifactId>
</dependency>
3.配置文件
spring:redis:host: 192.168.43.180 # 更換成自己的地址port: 6379password: 123456lettuce:pool:max-active: 8max-idle: 8min-idle: 0max-wait: 100ms4.注入redisTemplate
@Autowired
private RedisTemplate<String, Object> redisTemplate;
5.編寫測試(所以代碼)
import com.heima.redis.pojo.User;
import org.junit.jupiter.api.Test;
import org.springframework.beans.factory.annotation.Autowired;
import org.springframework.boot.test.context.SpringBootTest;
import org.springframework.data.redis.core.RedisTemplate;@SpringBootTest
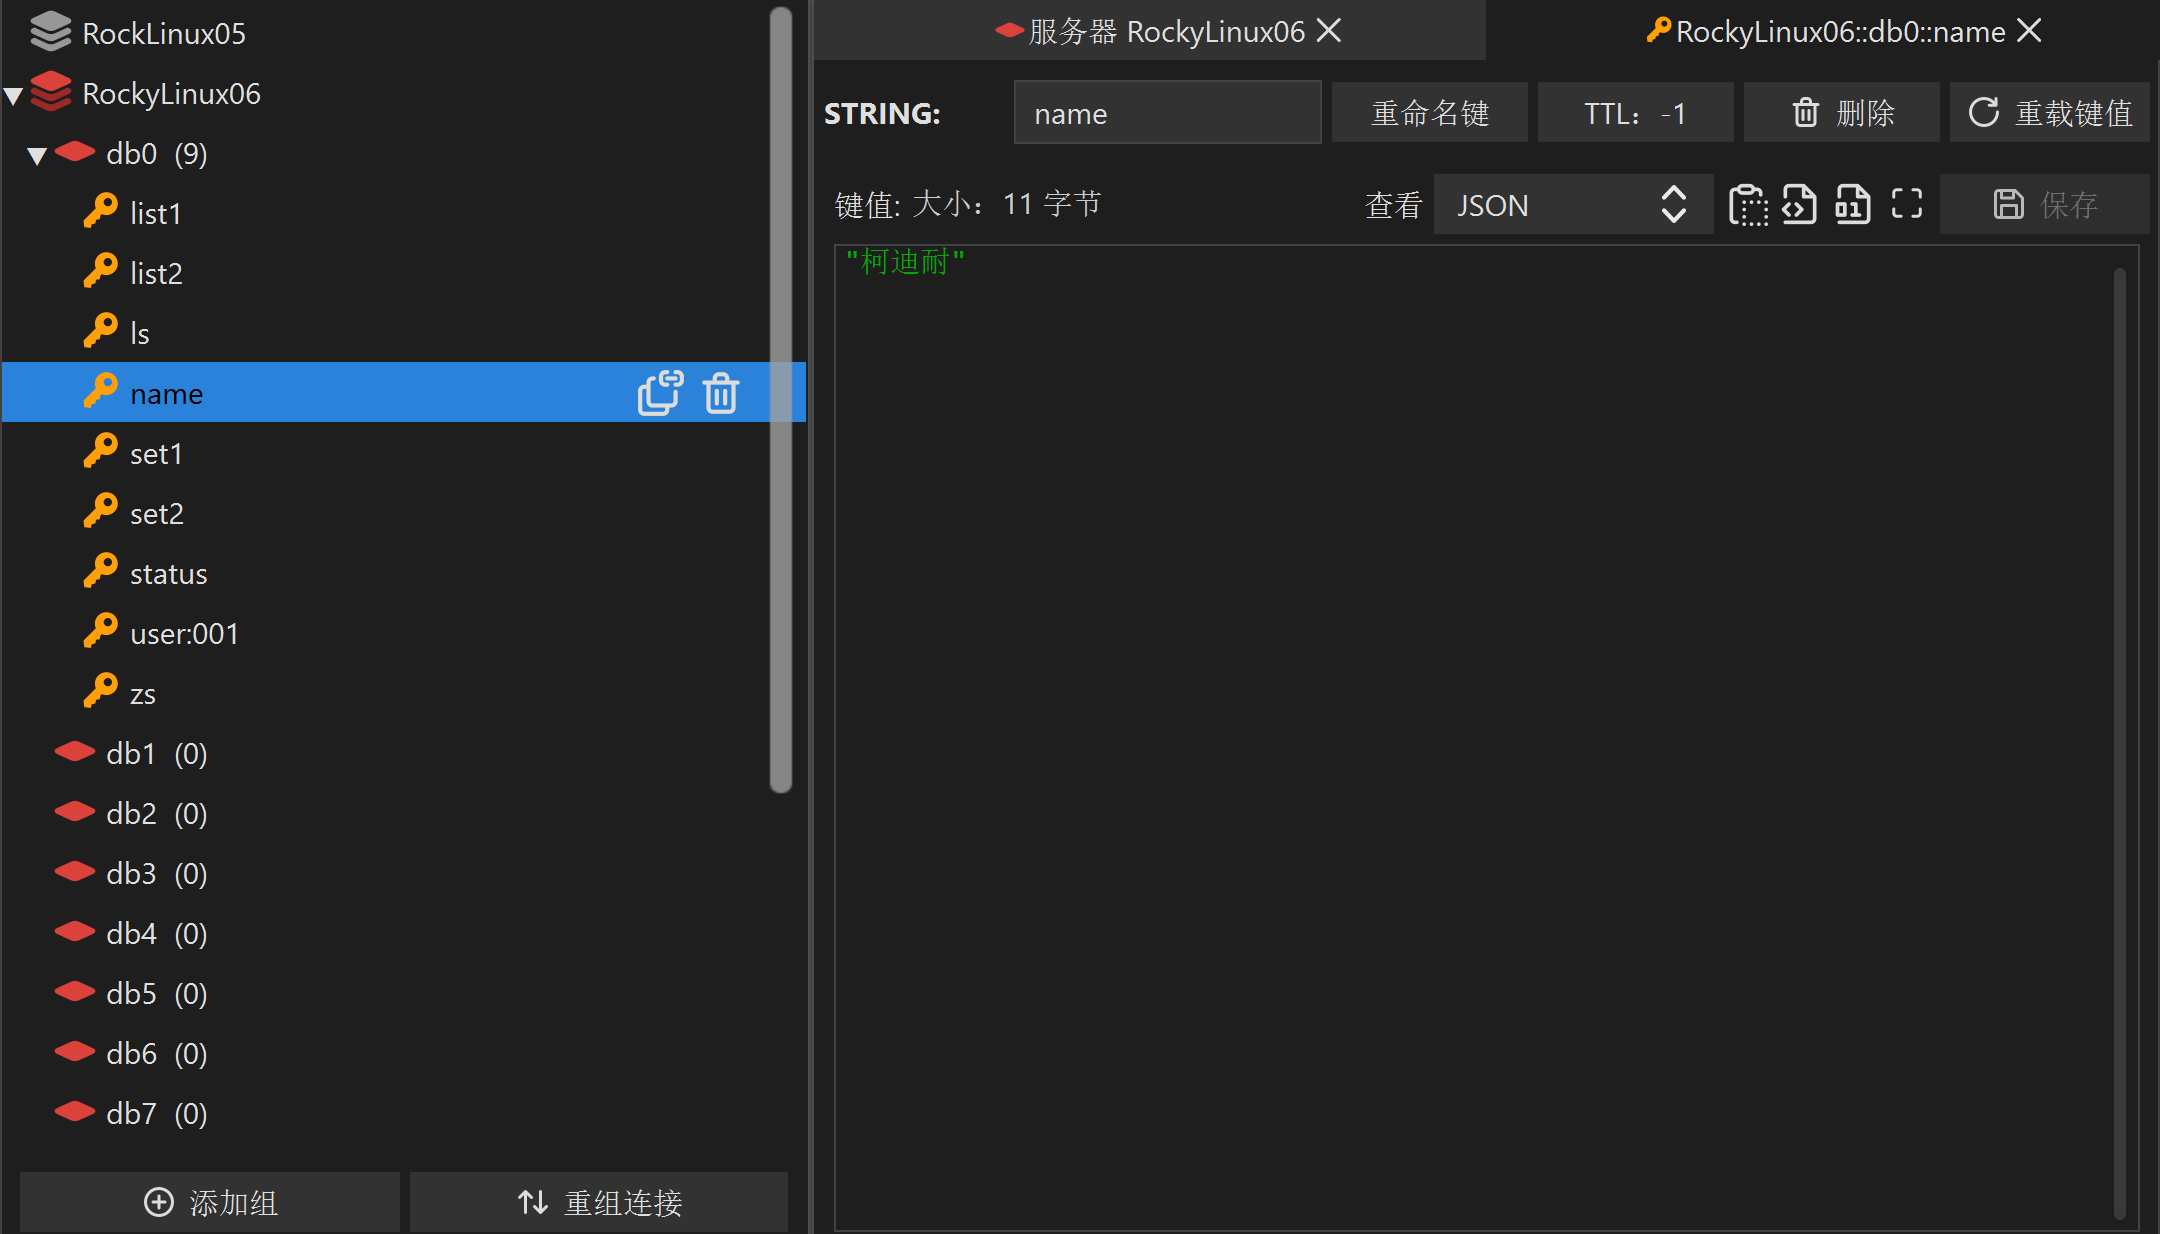
class RedisDemoApplicationTests {@Autowiredprivate RedisTemplate<String,Object> redisTemplate;@Testvoid testString() {// 寫入一條String數據redisTemplate.opsForValue().set("name", "柯迪耐");// 獲取string數據Object name = redisTemplate.opsForValue().get("name");System.out.println("name = " + name);}@Testvoid testSaveUser() {// 寫入數據redisTemplate.opsForValue().set("user:100", new User("虎哥", 21));// 獲取數據User o = (User) redisTemplate.opsForValue().get("user:100");System.out.println("o = " + o);}
}import org.springframework.context.annotation.Bean;
import org.springframework.context.annotation.Configuration;
import org.springframework.data.redis.connection.RedisConnectionFactory;
import org.springframework.data.redis.core.RedisTemplate;
import org.springframework.data.redis.serializer.GenericJackson2JsonRedisSerializer;
import org.springframework.data.redis.serializer.RedisSerializer;@Configuration
public class RedisConfig {@Beanpublic RedisTemplate<String, Object> redisTemplate(RedisConnectionFactory connectionFactory){// 創建RedisTemplate對象RedisTemplate<String, Object> template = new RedisTemplate<>();// 設置連接工廠template.setConnectionFactory(connectionFactory);// 創建JSON序列化工具GenericJackson2JsonRedisSerializer jsonRedisSerializer = new GenericJackson2JsonRedisSerializer();// 設置Key的序列化template.setKeySerializer(RedisSerializer.string());template.setHashKeySerializer(RedisSerializer.string());// 設置Value的序列化template.setValueSerializer(jsonRedisSerializer);template.setHashValueSerializer(jsonRedisSerializer);// 返回return template;}
}import lombok.AllArgsConstructor;
import lombok.Data;
import lombok.NoArgsConstructor;@Data
@NoArgsConstructor
@AllArgsConstructor
public class User {private String name;private Integer age;
}6.查看winsows GUI 界面


)


)


)

