圖像增強方法匯總OpenCV+python實現【第一部分】
- 前言
- 常用的圖像增強方法
- 1. 旋轉(Rotation):
- 2. 平移(Translation):
- 3. 縮放(Scaling):
- 4. 剪切變換(Shear Transform):
- 5. 翻轉(Flipping):
- 6. 亮度調整(Brightness Adjustment):
- 7. 對比度調整(Contrast Adjustment):
- 8. 添加噪聲(Adding Noise):
- 9. 顏色抖動(Color Jittering):
- 10. 隨機擦除(Random Erasing)
前言
圖像增強是指通過各種技術手段改善圖像的視覺效果,使其更適合特定的應用場景。以下是一些常見的圖像增強方法。
注意:本文從廣義的角度講圖像增強方法,這些圖像增強方法不一定都適用于CV中AI模型訓練前的圖像處理
常用的圖像增強方法
在CV模型的訓練過程中,圖像增強(Image Augmentation)是一個非常重要的技術,可以有效地增加訓練數據的多樣性,防止過擬合,并提高模型的泛化能力。以下是一些常用的圖像增強方法,它們在訓練CNN模型時非常有用:
1. 旋轉(Rotation):
- 隨機旋轉圖像一定角度。
# 圖像路徑,替換成你的圖片路徑image_path = '1.jpg'# 載入圖像image = cv2.imread(image_path)# 獲取圖像尺寸(h, w) = image.shape[:2]# 設置旋轉的中心為圖像中心center = (w / 2, h / 2)# 生成一個-90到90之間的隨機旋轉角度angle = np.random.uniform(-90, 90)# 獲取旋轉矩陣,其中1.0表示圖像旋轉后不改變大小rotation_matrix = cv2.getRotationMatrix2D(center, angle, 1.0)# 執行旋轉操作rotated_image = cv2.warpAffine(image, rotation_matrix, (w, h))# 顯示原圖和旋轉后的圖像cv2.imshow('Original Image', image)cv2.imshow('Rotated Image', rotated_image)# 按任意鍵退出cv2.waitKey(0)cv2.destroyAllWindows()旋轉效果如下:

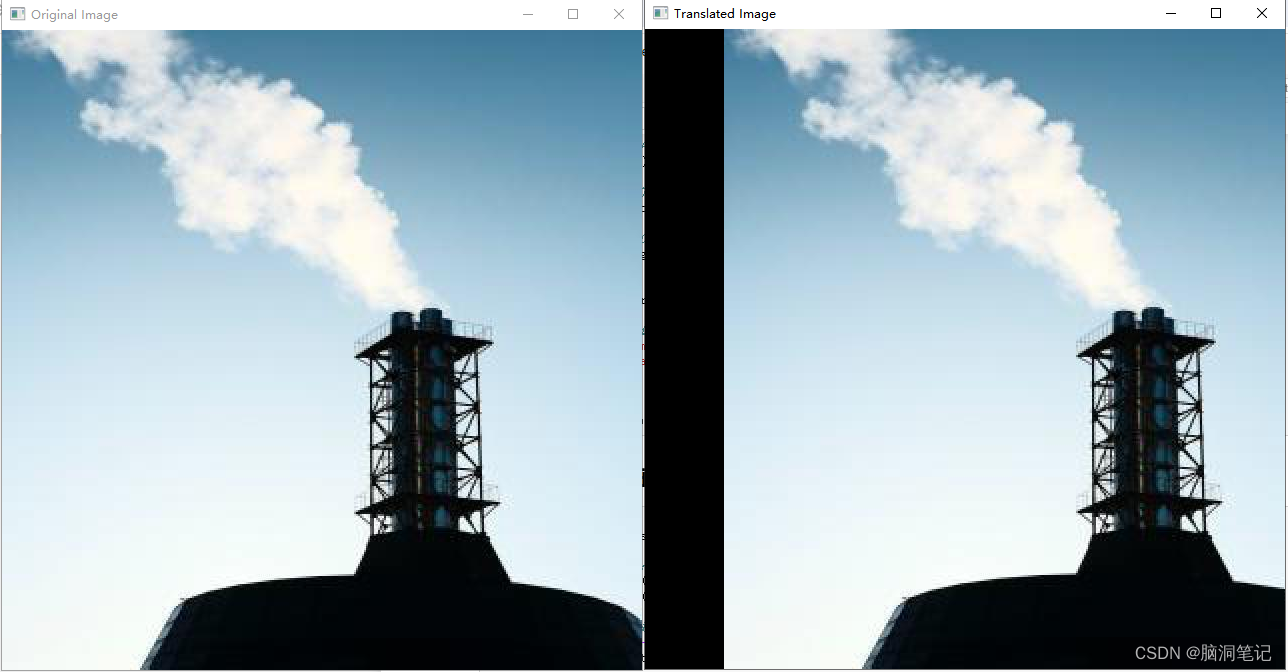
2. 平移(Translation):
- 隨機平移圖像在水平或垂直方向上的位置。
# 獲取圖像的高和寬
height, width = image.shape[:2]# 隨機生成平移量(注意:這里需要確保平移量不會使圖像超出邊界)
tx = np.random.randint(-100, 100)  # 水平方向上的平移量,單位:像素
ty = np.random.randint(-100, 100)  # 垂直方向上的平移量,單位:像素# 確保平移后的圖像不會超出原始圖像的邊界
tx = max(min(tx, width-1), 0)
ty = max(min(ty, height-1), 0)# 創建仿射變換矩陣
translation_matrix = np.float32([[1, 0, tx], [0, 1, ty]])# 應用仿射變換
translated_image = cv2.warpAffine(image, translation_matrix, (width, height))# 顯示或保存平移后的圖像
cv2.imshow('Original Image', image)
cv2.imshow('Translated Image', translated_image)
cv2.waitKey(0)
cv2.destroyAllWindows()
平移效果如下:
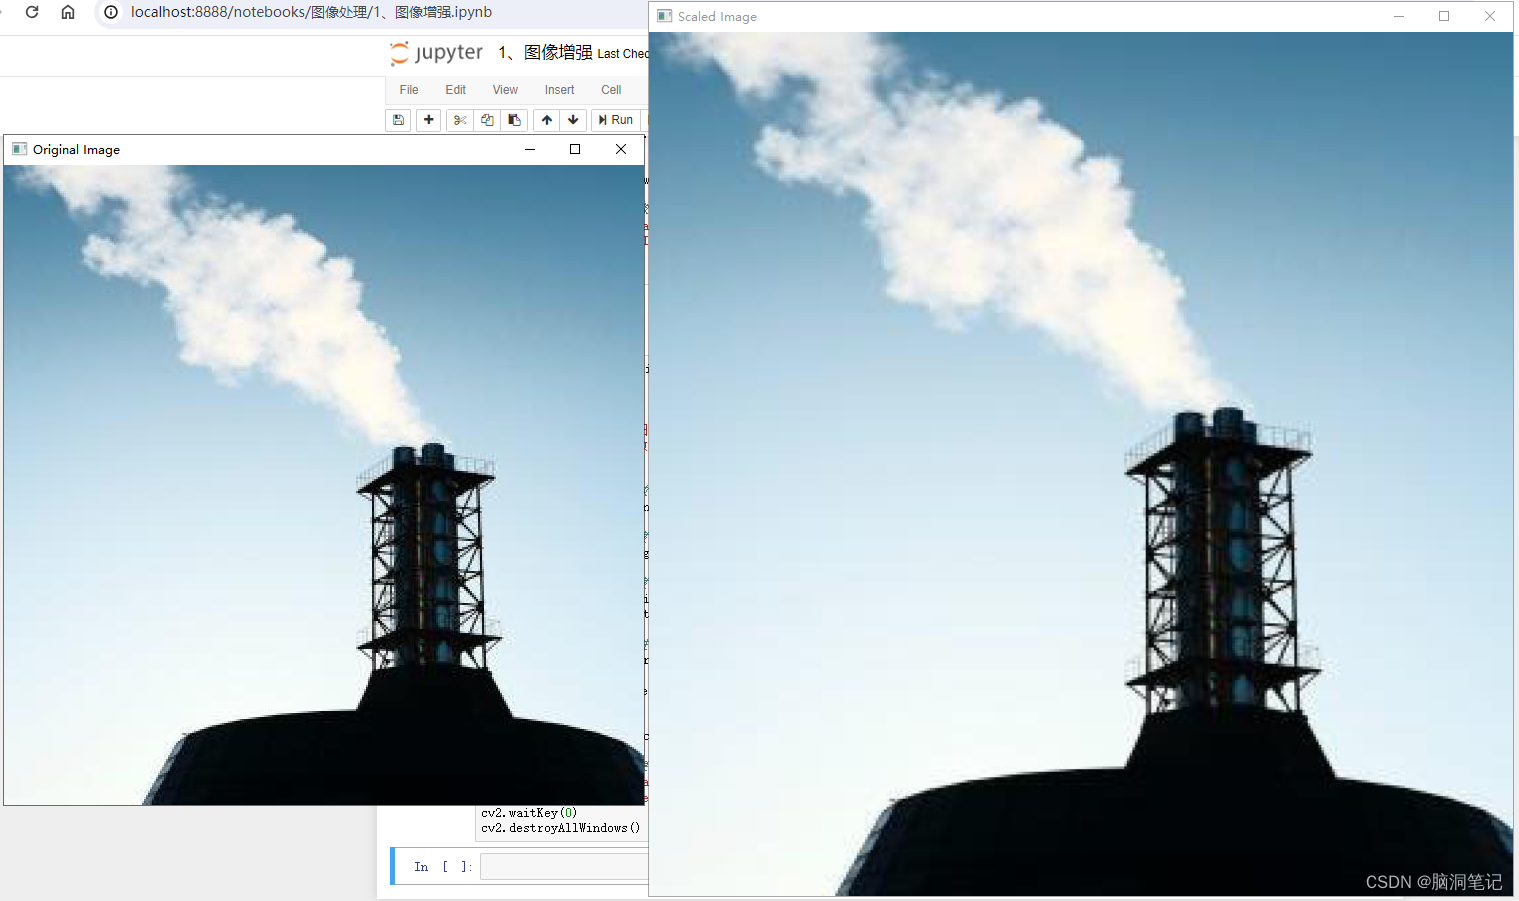
3. 縮放(Scaling):
- 隨機縮放圖像大小。
def random_scale_image(image, scale_range=(0.5, 1.5)):"""
隨機縮放圖像的大小。:param image: 要縮放的圖像,應為numpy數組形式
:param scale_range: 縮放比例的范圍,默認(0.5, 1.5),即縮放后的大小在原始大小的50%到150%之間
:return: 縮放后的圖像
"""# 生成一個隨機的縮放比例scale = np.random.uniform(scale_range[0], scale_range[1])# 獲取原始圖像的高度和寬度height, width = image.shape[:2]# 計算縮放后的新高度和寬度new_height = int(height * scale)new_width = int(width * scale)# 使用cv2.resize()進行縮放scaled_image = cv2.resize(image, (new_width, new_height), interpolation=cv2.INTER_LINEAR)return scaled_image# 隨機縮放圖像
scaled_image = random_scale_image(image)# 顯示縮放后的圖像(如果需要)
cv2.imshow('Original Image', image)
cv2.imshow('Scaled Image', scaled_image)
cv2.waitKey(0)
cv2.destroyAllWindows()
縮放效果:
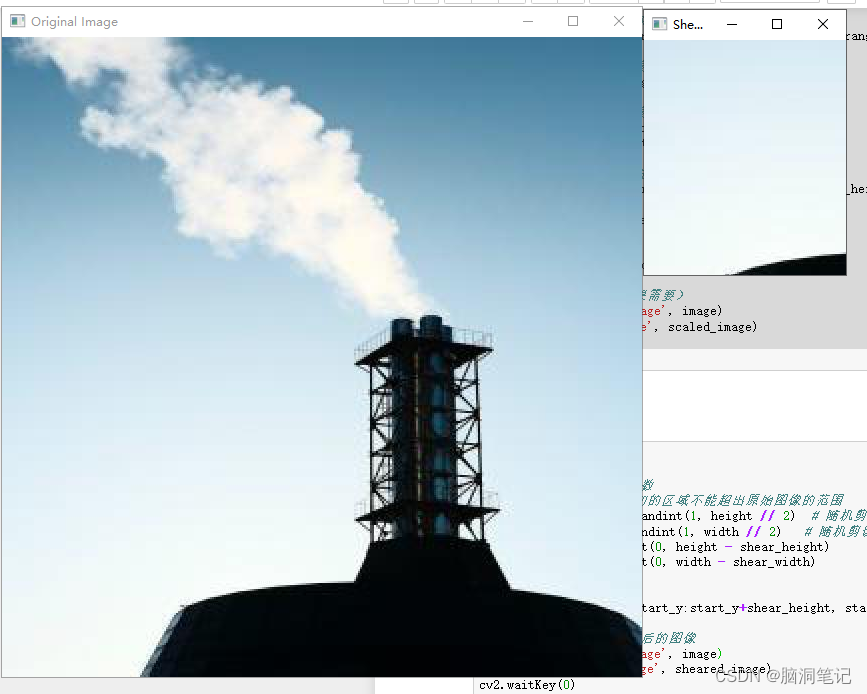
4. 剪切變換(Shear Transform):
- 隨機剪切圖像。
import random# 步驟1:定義隨機剪切參數# 注意:這里我們假設剪切的區域不能超出原始圖像的范圍shear_height = random.randint(1, height // 2) # 隨機剪切高度(這里設定為圖像高度的一半以下)shear_width = random.randint(1, width // 2) # 隨機剪切寬度(這里設定為圖像寬度的一半以下)start_y = random.randint(0, height - shear_height)start_x = random.randint(0, width - shear_width)# 步驟2:剪切圖像sheared_image = image[start_y:start_y+shear_height, start_x:start_x+shear_width]# 步驟3:顯示或保存剪切后的圖像cv2.imshow('Original Image', image)cv2.imshow('Sheared Image', sheared_image)cv2.waitKey(0)cv2.destroyAllWindows()效果
5. 翻轉(Flipping):
- 隨機水平或垂直翻轉圖像。
# 定義一個函數來隨機翻轉圖像def random_flip(image):# 隨機選擇翻轉模式flip_code = random.choice([0, 1]) # 0為垂直翻轉,1為水平翻轉# 使用cv2.flip函數進行翻轉flipped_image = cv2.flip(image, flip_code)return flipped_image# 調用函數并顯示翻轉后的圖像flipped_image = random_flip(image)cv2.imshow('Original Image', image)cv2.imshow('Flipped Image', flipped_image)cv2.waitKey(0)cv2.destroyAllWindows()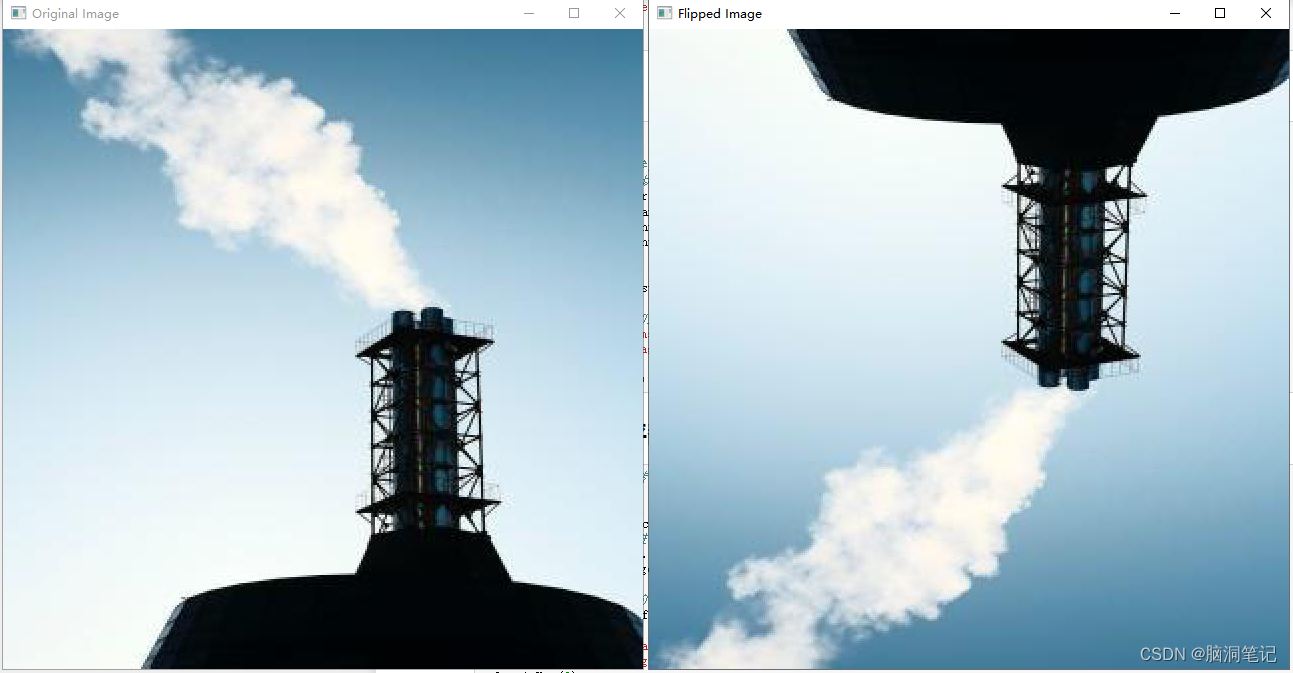
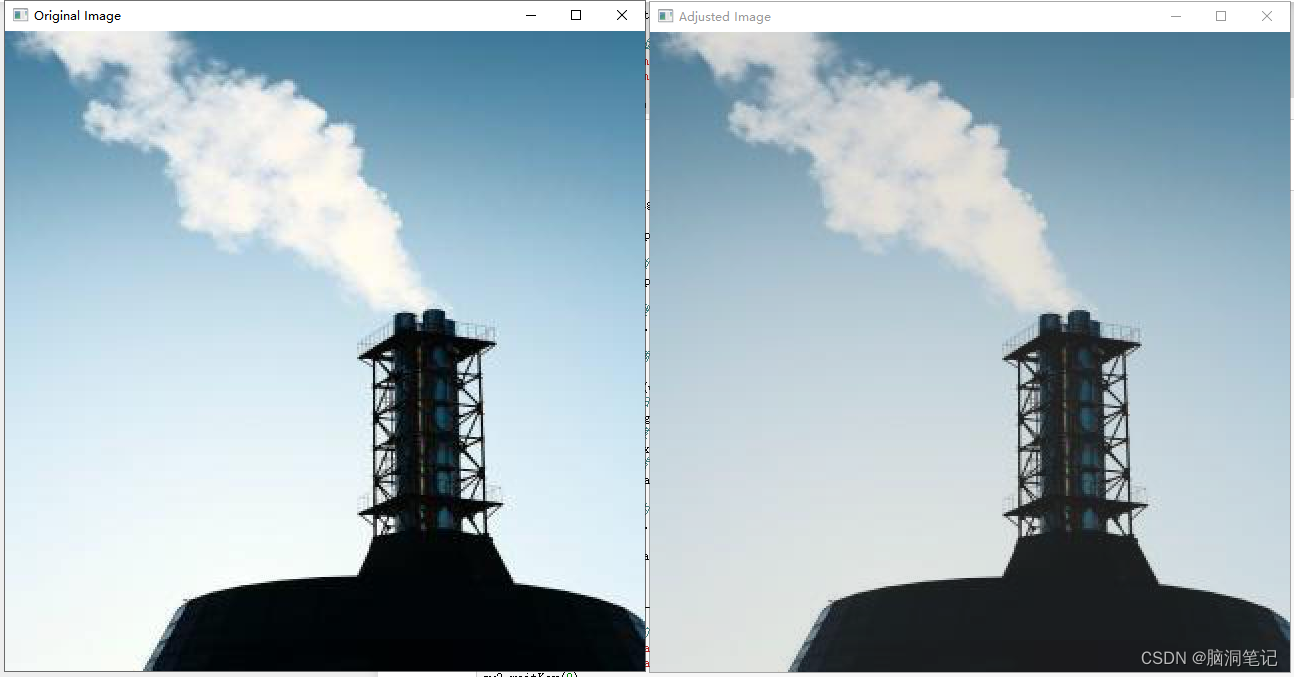
6. 亮度調整(Brightness Adjustment):
- 隨機調整圖像的亮度。
def adjust_brightness_randomly(image, alpha_range=(0.5, 1.5)):# 生成一個隨機亮度調整因子alpha = random.uniform(alpha_range[0], alpha_range[1])# 亮度調整adjusted_image = cv2.convertScaleAbs(image, alpha=alpha, beta=0)return adjusted_image# 隨機調整亮度
adjusted_image = adjust_brightness_randomly(image)# 顯示或保存調整后的圖像
cv2.imshow('Original Image', image)
cv2.imshow('Adjusted Image', adjusted_image)
cv2.waitKey(0)
cv2.destroyAllWindows()
效果
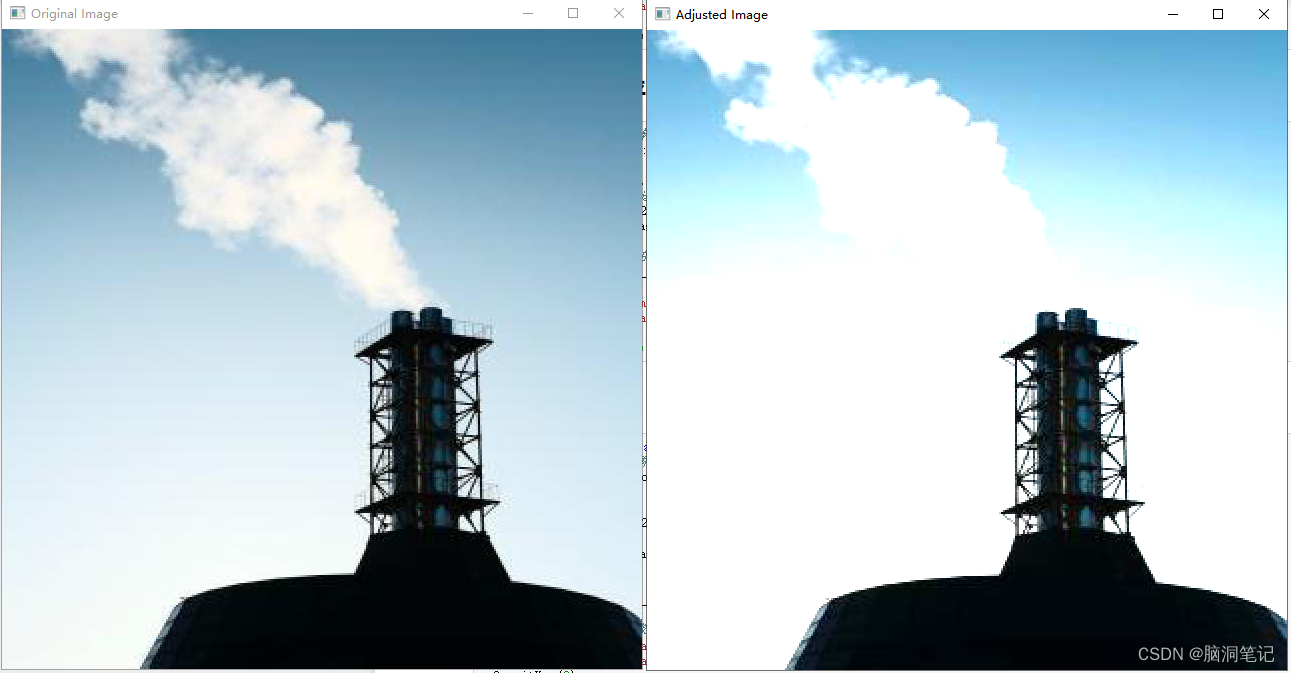
7. 對比度調整(Contrast Adjustment):
- 隨機調整圖像的對比度。
def random_contrast(image, contrast_range=[0.5, 1.5]):# 獲取圖像的維度h, w, _ = image.shape# 隨機選擇對比度系數contrast_factor = np.random.uniform(contrast_range[0], contrast_range[1])# 創建一個空的浮點型圖像來存儲調整后的圖像adjusted_image = np.zeros((h, w, 3), dtype=np.float32)# 對圖像進行對比度調整for i in range(h):for j in range(w):# 將像素值歸一化到0-1之間pixel = image[i, j] / 255.0# 調整對比度adjusted_pixel = np.clip(contrast_factor * (pixel - 0.5) + 0.5, 0, 1)# 將像素值轉換回0-255adjusted_image[i, j] = adjusted_pixel * 255# 將浮點數圖像轉換為無符號整數adjusted_image = np.uint8(adjusted_image)return adjusted_image# 隨機調整圖像的對比度
adjusted_image = random_contrast(image)# 顯示原始圖像和調整后的圖像
cv2.imshow('Original Image', image)
cv2.imshow('Adjusted Image', adjusted_image)
cv2.waitKey(0)
cv2.destroyAllWindows()
效果如下
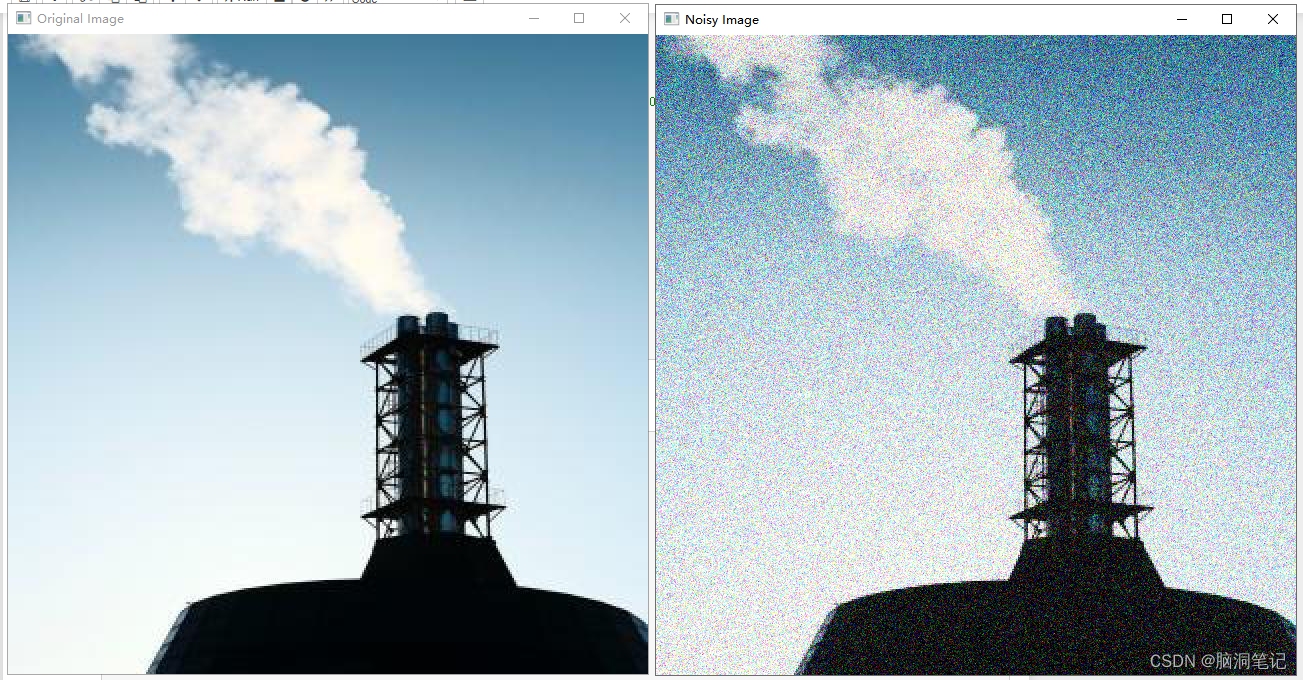
8. 添加噪聲(Adding Noise):
- 隨機向圖像中添加噪聲。
 # 將圖像數據轉換為浮點型以支持噪聲添加
image_N = image.astype(np.float32)# 定義高斯噪聲的均值和標準差
mean = 0
stddev = 50.0  # 可以根據需要調整這個值來控制噪聲的強度# 生成高斯噪聲
noise = np.random.normal(mean, stddev, image_N.shape)# 將噪聲添加到圖像上
noisy_image = np.clip(image_N + noise, 0, 255).astype(np.uint8)# 顯示或保存帶噪聲的圖像
cv2.imshow('Original Image', image)
cv2.imshow('Noisy Image', noisy_image)
cv2.waitKey(0)
cv2.destroyAllWindows()
效果
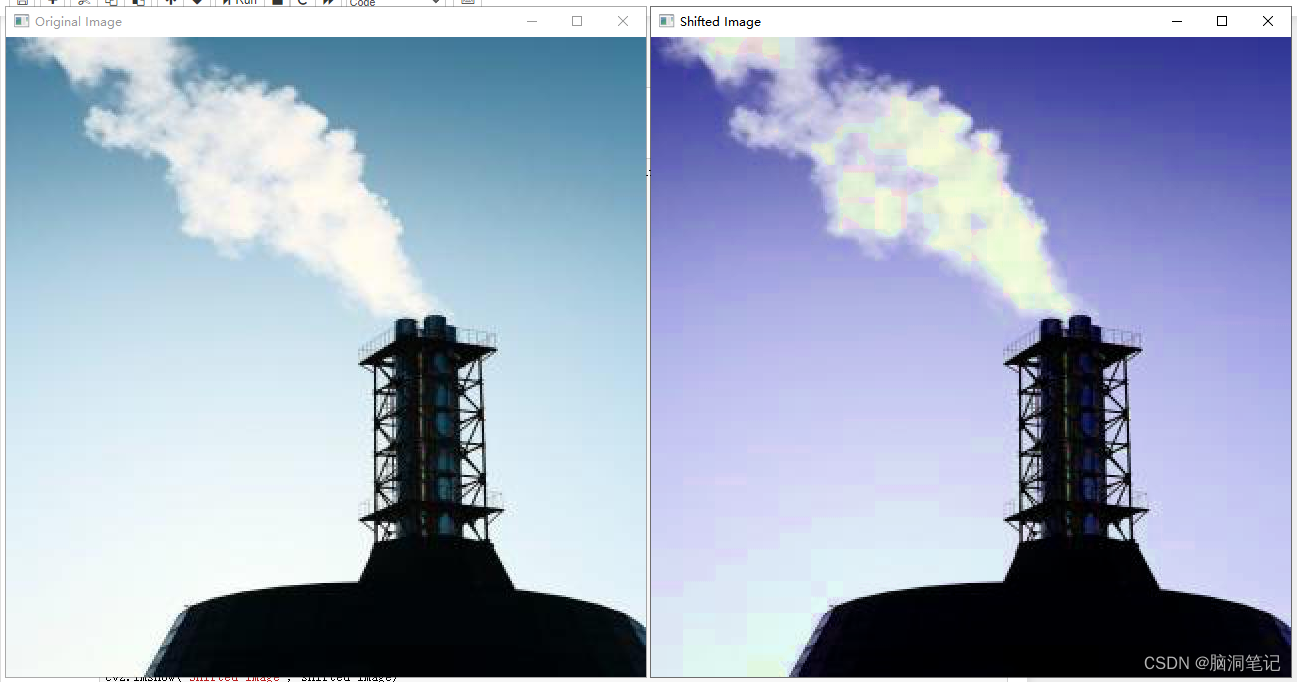
9. 顏色抖動(Color Jittering):
- 隨機改變圖像的顏色屬性,如色調、飽和度和亮度。
 def random_color_shift(image, hue_shift_range=18, sat_shift_range=30, val_shift_range=40):# 將BGR圖像轉換為HSV圖像hsv = cv2.cvtColor(image, cv2.COLOR_BGR2HSV)# 分解HSV圖像的通道h, s, v = cv2.split(hsv)# 隨機改變色調h = cv2.add(h, np.random.randint(-hue_shift_range, hue_shift_range+1))h = np.clip(h, 0, 179)  # 確保色調值在0-179之間# 隨機改變飽和度s = cv2.add(s, np.random.randint(-sat_shift_range, sat_shift_range+1))s = np.clip(s, 0, 255)  # 確保飽和度值在0-255之間# 隨機改變亮度v = cv2.add(v, np.random.randint(-val_shift_range, val_shift_range+1))v = np.clip(v, 0, 255)  # 確保亮度值在0-255之間# 合并HSV通道hsv_shifted = cv2.merge((h, s, v))# 將HSV圖像轉換回BGR圖像image_shifted = cv2.cvtColor(hsv_shifted, cv2.COLOR_HSV2BGR)return image_shifted# 隨機改變顏色屬性
shifted_image = random_color_shift(image)# 顯示或保存圖像
cv2.imshow('Original Image', image)
cv2.imshow('Shifted Image', shifted_image)
cv2.waitKey(0)
cv2.destroyAllWindows()
效果
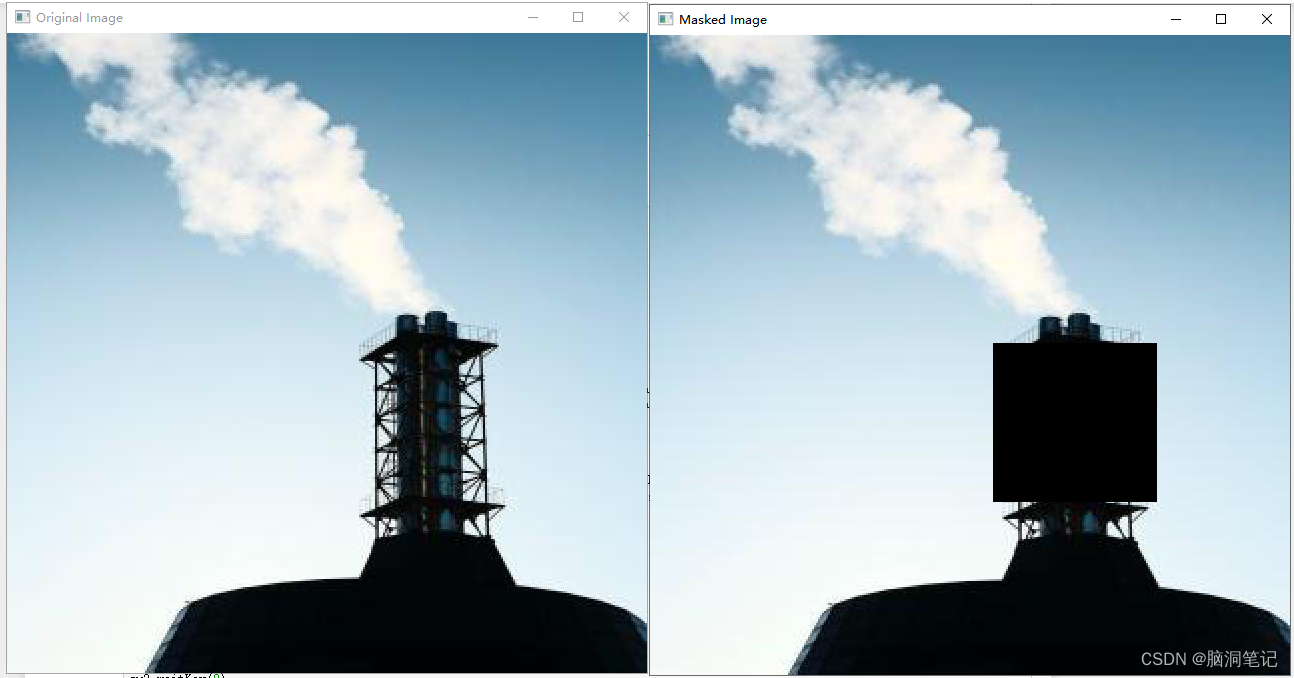
10. 隨機擦除(Random Erasing)
- 隨機遮擋圖像的一部分,以增強模型的魯棒性。
def random_mask_image(image, min_mask_area=0.05, max_mask_area=0.2):image_c = image.copy()height, width = image_c.shape[:2]# 確定要遮擋的面積(基于圖像尺寸的百分比)min_mask_width_height = int(min(width, height) * np.sqrt(min_mask_area))max_mask_width_height = int(min(width, height) * np.sqrt(max_mask_area))# 隨機選擇遮擋區域的左上角坐標和大小start_x = random.randint(0, width - max_mask_width_height)start_y = random.randint(0, height - max_mask_width_height)mask_width = random.randint(min_mask_width_height, max_mask_width_height)mask_height = random.randint(min_mask_width_height, max_mask_width_height)# 在圖像上繪制遮擋矩形image_c[start_y:start_y+mask_height, start_x:start_x+mask_width, :] = 0  # 使用黑色(RGB值為0,0,0)進行遮擋return image_c# 使用示例
masked_image = random_mask_image(image)cv2.imshow('Original Image', image)
cv2.imshow('Masked Image', masked_image)
cv2.waitKey(0)
cv2.destroyAllWindows()
效果


和shape)


![[C++初階]vector的初步理解](http://pic.xiahunao.cn/[C++初階]vector的初步理解)


申報獎勵補貼和條件材料、時間指南)

