文章目錄
- 1. .p12文件
- 1.1 主要特點
- 1.2 常見用途
- 1.3 常見操作
- 1.4 與其他格式的區別
- 1.5 與公鑰的區別和聯系
- 1.6 安全性注意事項
- 2. Nginx 配置
- 2.1 location指令
- 2.2 alias 與 root 指令的區別
- 3 雙向認證配置
- 3.1 創建根證書
- 3.1.1 生成根CA的私鑰
- 3.1.2 生成請求證書
- 3.1.3 生成自簽署CA證書
- 3.2 用根CA為服務器簽發證書
- 3.2.1 生成服務器的私鑰
- 3.2.2 生成證書請求
- 3.2.3 使用CA證書簽署服務器證書
- 3.3 用根CA為客戶端簽發證書
- 3.3.1 生成客戶端私鑰
- 3.3.2 生成證書請求
- 3.3.3 使用CA證書簽署客戶端證書
- 3.3.4 生成p12
- 3.4 Nginx 服務器塊配置
- 3.4.1 增加 HTTPS 服務器配置
- 3.4.2 重啟 Nginx
- 3.5 開啟端口
- 3.6 客戶端證書生成腳本
上文介紹了雙向認證證書的文件類型、工作流程、生成和測試指令。本文以實例介紹 https + 域名 + 雙向證書認證 訪問模式的部署。
構建一個基于 HTTPS + 域名 + 雙向證書認證(mTLS) 的模式是一個非常強大的安全實踐。它通常用于保護高安全性的API、微服務之間的通信、金融系統或內部管理后臺。要實現這個模式,你需要準備以下文件:
| 角色 | 所需文件 | 作用 |
|---|---|---|
| 證書頒發機構 (CA) | ca.key ca.crt (或 .cer) | 1. ca.key:CA的私鑰,高度敏感,用于簽署CSR。2. ca.cer:根證書,必須分發給所有服務器和客戶端,作為信任的錨點。 |
| 服務器 (Server) | server.key server.csr server.crt (或 .cer) | 1. server.key:服務器的私鑰。2. server.csr:服務器的證書簽名請求。3. server.crt:由CA簽署的服務器證書。證書的SAN中必須包含服務的域名(如 DNS:api.example.com)。 |
| 客戶端 (Client) | client.key client.csr client.crt (或 .cer) | 1. client.key:客戶端的私鑰。 2. client.csr:客戶端的證書簽名請求。3. client.crt:由 同一個CA 簽署的客戶端證書。 |
1. .p12文件
.p12文件(也稱為PFX文件)是一種數字證書容器文件,采用PKCS#12標準格式。它就像一個"數字身份證文件包",將多個安全相關的文件打包在一起并用密碼保護。
一個典型的.p12文件包含:
- 🔑 私鑰:加密密鑰
- 📄 用戶證書:公鑰和身份信息
- 🔗 CA證書鏈:頒發機構的證書(建立信任鏈)
- 📝 其他元數據:證書名稱、有效期等信息
1.1 主要特點
- 密碼保護:必須用密碼才能打開和使用
- 平臺通用:Windows、macOS、Linux都支持
- 完整包:包含身份驗證所需的所有文件
- 二進制格式:不是文本文件,不能直接查看內容
1.2 常見用途
🔐 客戶端身份認證
# 使用.p12文件訪問需要認證的網站
curl --cert client.p12:password https://secure.example.com
💻 導入到操作系統
- Windows:雙擊導入到證書管理器
- macOS:鑰匙串訪問
- Linux:用于各種應用的客戶端認證
🌐 瀏覽器客戶端證書
- 用于訪問銀行、政府等需要強認證的網站
🚪 VPN接入認證
- 許多VPN系統使用.p12文件進行客戶端認證
1.3 常見操作
- 查看.p12文件信息:
openssl pkcs12 -info -in zhoubowen.p12
# 會提示輸入密碼,然后顯示文件內容
- 從.p12提取各個組件:
# 提取私鑰
openssl pkcs12 -in zhoubowen.p12 -nocerts -out private.key# 提取證書(包含公鑰)
openssl pkcs12 -in zhoubowen.p12 -clcerts -nokeys -out certificate.crt# 從證書提取公鑰
openssl x509 -in certificate.crt -pubkey -noout > zhoubowen_public.pem# 提取CA證書
openssl pkcs12 -in zhoubowen.p12 -cacerts -nokeys -out ca.crt
- 生成.p12文件:
openssl pkcs12 -export \-inkey private.key \-in certificate.crt \-certfile ca.crt \-out zhoubowen.p12 \-name "pxshen" \-password pass:"@HzRaobR7SPX"
pkcs12:處理PKCS#12格式文件的子命令-export: 表示要創建一個新的PKCS#12文件-inkey:指定私鑰-in:指定數字證書,由CA簽發-certfile:指定CA的根證書-name:為證書設置一個友好名稱,導入證書庫時顯示這個名稱,方便用戶識別和管理多個證書。-password:設置.p12文件的加密密碼,pass:"$password"表示直接提供密碼文本,也可以使用其他方式,如env:、file:等。
1.4 與其他格式的區別
| 格式 | 擴展名 | 內容 |
|---|---|---|
| .p12/.pfx | .p12, .pfx | 私鑰+證書+CA鏈 |
| .pem | .pem, .crt, .key | 私鑰、公鑰 |
| .jks | .jks | Java密鑰庫格式 |
1.5 與公鑰的區別和聯系
- 包含關系:
.p12文件 = 私鑰 + 公鑰證書 + CA證書鏈
公鑰證書 = 公鑰 + 身份信息 + CA簽名
- 從.p12文件中提取公鑰:
# 從.p12文件中提取公鑰
openssl pkcs12 -in user.p12 -clcerts -nokeys -out public_key.pem# 或者從證書中提取公鑰
openssl x509 -in user.crt -pubkey -noout > public_key.pem
.p12文件用于客戶端SSL認證,導入到瀏覽器,用于網站客戶端證書認證。而公鑰用于加密數據、驗證簽名。
1.6 安全性注意事項
- 密碼強度:使用強密碼保護.p12文件
- 安全存儲:像保護銀行卡密碼一樣保護.p12文件
- 定期更換:證書過期后應及時更新
- 謹慎分發:只在必要時分發給授權用戶
2. Nginx 配置
Nginx 是配置 mTLS 非常常見的 Web 服務器。
此處引申一下 nginx.conf 中 HTTP 的配置:
# 全局配置
user root;                            # 以root用戶身份運行工作進程
worker_processes auto;                # 自動設置工作進程數量(通常等于CPU核心數)
error_log /var/log/nginx/error.log;   # 錯誤日志位置
pid /run/nginx.pid;                   # 存儲主進程ID的文件位置# 加載動態模塊
include /usr/share/nginx/modules/*.conf;# 事件模塊
events {worker_connections 1024;    # 每個工作進程最大并發連接數
}# HTTP模塊
http {# 定義日志格式log_format  main  '$remote_addr - $remote_user [$time_local] "$request" ''$status $body_bytes_sent "$http_referer" ''"$http_user_agent" "$http_x_forwarded_for"';# 訪問日志位置和格式access_log  /var/log/nginx/access.log  main;# 性能優化相關設置sendfile            on;    # 使用高效文件傳輸tcp_nopush          on;    # 優化數據包發送tcp_nodelay         on;    # 禁用Nagle算法keepalive_timeout   65;    # 保持連接超時時間types_hash_max_size 4096;  # MIME類型哈希表大小# include             /etc/nginx/mime.types;     # MIME類型定義default_type        application/octet-stream;  # 默認MIME類型# 包含其他配置文件include /etc/nginx/conf.d/*.conf;# HTTP服務器配置server {listen       80;               # 監聽80端口(HTTP)server_name  182.61.130.103;   # 服務器域名或IP地址# 前端靜態資源location /h5/ {alias /mnt/h5/;            # 將/h5/映射到本地目錄/mnt/h5/try_files $uri $uri/ =404; # 嘗試提供請求的文件,否則返回404}# 后臺靜態資源服務location / {root   /mnt/vue-ui/dist;index  index.html index.htm;}# API 轉發location ~ /manager/ {# rewrite ^/manager/(.*) /$1 break;  # 重寫URL,移除/manager/前綴proxy_pass http://127.0.0.1:8081;   # 轉發到本地8081端口# 設置代理頭信息proxy_set_header Host $host;proxy_set_header X-Real-IP $remote_addr;proxy_set_header X-Forwarded-For $proxy_add_x_forwarded_for;proxy_set_header X-Forwarded-Proto $scheme;# 支持WebSocketproxy_http_version 1.1;proxy_set_header Upgrade $http_upgrade;proxy_set_header Connection "upgrade";}# 自定義404錯誤頁面error_page 404 /404.html;location = /404.html {root /usr/share/nginx/html/;  # 404頁面所在目錄internal;                     # 防止直接通過URL訪問}# 阻止訪問非指定路徑的請求,匹配所有不以 /h5/ /manager/ 開頭的URL路徑# location ~ ^(?!/(h5|manager)/) {#     return 404;# }}
}
配置一個 HTTP 服務器配置,靜態資源服務通過 /h5/ 路徑提供前端靜態資源,通過 / 路徑提供后臺管理靜態資源,將所有 /manager/ 開頭的請求轉發到本地的 8081端口應用服務器。
2.1 location指令
Nginx 的 location 指令有多種匹配方式,每種都有不同的優先級和用途。
- 精確匹配 - 最高優先級
location = /exact-path {# 只完全匹配 /exact-path# 不匹配 /exact-path/ 或 /exact-path/other
}示例:
location = /login {# 只匹配 http://example.com/loginproxy_pass http://backend/login;
}
- 優先前綴匹配 - 第二優先級
location ^~ /static/ {# 匹配以 /static/ 開頭的所有路徑# 且跳過正則表達式檢查
}示例:
location ^~ /static/ {# 匹配 /static/, /static/js/, /static/css/app.css 等alias /var/www/static/;
}
- 正則表達式匹配 - 第三優先級
location ~ /user/[0-9]+ {# 匹配 /user/123, /user/456 等
}location ~ /manager/ {# 這個配置會匹配任何包含 "/manager/" 字符串的URL# 匹配 /manager/ /manager/123 /manager/123/456 /user/manager/settings (中間包含 /manager/)# 不會匹配 /manager (缺少結尾的斜杠)
}location ~* \.(jpg|jpeg|png|gif)$ {# 匹配 .jpg, .JPG, .PNG 等圖片文件
}
- 普通前綴匹配 - 最低優先級
location /api/ {# 匹配以 /api/ 開頭的所有路徑
}
- 命名location - 用于內部重定向
location @fallback {# 不會直接匹配客戶端請求# 只能通過 error_page, try_files 等內部指令使用proxy_pass http://backup-server;
}
匹配優先級從高到低:
location = /path(精確匹配)location ^~ /prefix/(優先前綴匹配)location ~ /regex/或location ~* /regex/(按配置順序)location /prefix/(普通前綴匹配)
2.2 alias 與 root 指令的區別
| 特性 | alias | root |
|---|---|---|
| 路徑映射 | 完全替換匹配的路徑部分 | 將匹配的路徑追加到指定目錄后 |
| 語法 | location /path/ { alias /dir/; } | location /path/ { root /dir/; } |
| 路徑處理 | /path/file → /dir/file | /path/file → /dir/path/file |
| 結尾斜杠 | 通常需要以斜杠結尾 | 不需要以斜杠結尾 |
| 適用場景 | 虛擬目錄映射 | 常規目錄服務 |
alias示例:
location /mgr/ {alias /mnt/view/mgr/;# 請求: /mgr/index.html# 實際文件: /mnt/view/mgr/index.html
}
root示例:
location /mgr/ {root /mnt/view/;# 請求: /mgr/index.html# 實際文件: /mnt/view/mgr/index.html
}
3 雙向認證配置
目錄層級:
/mnt/certs/
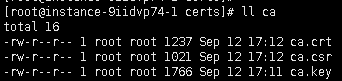
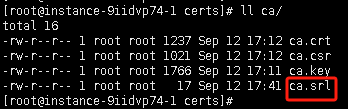
├── ca/
│ ├── ca.key # ca密鑰
│ ├── ca.csr # ca證書請求文件
│ ├── ca.crt # ca根證書
│ └── ca.srl # ca序列號文件
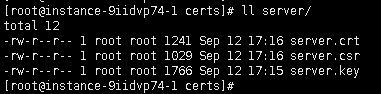
├── server/
│ ├── server.key # 服務器密鑰
│ ├── server.csr # 服務器請求文件
│ └── server.crt # 服務器證書
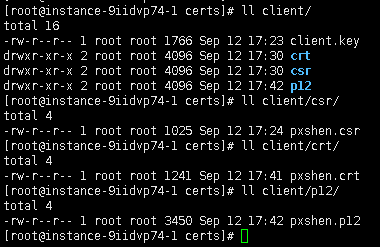
├── client/
│ ├── client.key # 客戶端密鑰
│ ├── csr/
│ │ └── *.csr # 客戶端請求文件
│ ├── crt/
│ │ └── *.crt # 客戶端證書
│ ├── p12/
│ │ └── *.p12 # 客戶端數字證書容器文件
│ └── passwords.txt # 數字證書密碼
└── script└── batchCreateCilent.sh # 客戶端證書生成腳本
注1:密鑰、證書指令含義參見上篇《HTTPS + 域名 + 雙向證書認證(上)》
3.1 創建根證書
3.1.1 生成根CA的私鑰
openssl genrsa -aes256 -out /mnt/certs/ca/ca.key 2048caKey
3.1.2 生成請求證書
openssl req -new -sha256 \-key /mnt/certs/ca/ca.key \-out /mnt/certs/ca/ca.csr \-subj "/C=CN/ST=AnHui/L=HeFei/O=Ums/OU=IT/CN=CA/emailAddress=admin@ums.com"
3.1.3 生成自簽署CA證書
openssl x509 -req -days 36500 -sha256 -extensions v3_ca \-signkey /mnt/certs/ca/ca.key \-in /mnt/certs/ca/ca.csr \-out /mnt/certs/ca/ca.crt
3.2 用根CA為服務器簽發證書
3.2.1 生成服務器的私鑰
openssl genrsa -aes256 -out /mnt/certs/server/server.key 2048serverKey
3.2.2 生成證書請求
openssl req -new -sha256 \-key /mnt/certs/server/server.key \-out /mnt/certs/server/server.csr \-subj "/C=CN/ST=AnHui/L=HeFei/O=Ums/OU=IT/CN=ahgasazj/emailAddress=admin@ums.com"
3.2.3 使用CA證書簽署服務器證書
openssl x509 -req -days 3650 -sha256 -extensions v3_req \-CA /mnt/certs/ca/ca.crt \-CAkey /mnt/certs/ca/ca.key \-CAserial /mnt/certs/ca/ca.srl \-CAcreateserial \-in /mnt/certs/server/server.csr \-out /mnt/certs/server/server.crt
3.3 用根CA為客戶端簽發證書
3.3.1 生成客戶端私鑰
openssl genrsa -aes256 -out /mnt/certs/client/client.key 2048clientKey
3.3.2 生成證書請求
openssl req -new -sha256 \-key /mnt/certs/client/client.key \-out /mnt/certs/client/csr/pxshen.csr \-subj "/C=CN/ST=AnHui/L=HeFei/O=Ums/OU=IT/CN=pxshen/emailAddress=admin@ums.com"
3.3.3 使用CA證書簽署客戶端證書
openssl x509 -req -days 3650 -sha256 -extensions v3_req \-CA /mnt/certs/ca/ca.crt \-CAkey /mnt/certs/ca/ca.key \-CAserial /mnt/certs/ca/ca.srl \-CAcreateserial \-in /mnt/certs/client/csr/pxshen.csr \-out /mnt/certs/client/crt/pxshen.crt
3.3.4 生成p12
openssl pkcs12 -export \-inkey /mnt/certs/client/client.key \-in /mnt/certs/client/crt/pxshen.crt \-certfile /mnt/certs/ca/ca.crt \-out /mnt/certs/client/p12/pxshen.p12 \-name "pxshen" \-password pass:"@HzRaobR7SPX"
3.4 Nginx 服務器塊配置
3.4.1 增加 HTTPS 服務器配置
http {...# HTTP服務器配置server {...}# HTTPS 服務器配置server {listen       2443 ssl;server_name  ahyjhxsh.com;# 服務器證書和私鑰ssl_certificate /mnt/certs/server/server.crt;ssl_certificate_key /mnt/certs/server/server.key;# 啟用雙向認證ssl_client_certificate /mnt/certs/ca/ca.crt; # 告訴Nginx:用這個CA證書去驗證客戶端提供的證書ssl_verify_client on; # 開啟客戶端證書驗證# 后臺靜態資源服務location / {if ($ssl_client_verify != SUCCESS) {return 403;}root   /mnt/vue-ui/dist;index  index.html index.htm;}# API 轉發location ~ /manager/ {# rewrite ^/manager/(.*) /$1 break;  # 重寫URL,移除/manager/前綴proxy_pass http://127.0.0.1:8081;   # 轉發到本地8081端口# 設置代理頭信息proxy_set_header Host $host;proxy_set_header X-Real-IP $remote_addr;proxy_set_header X-Forwarded-For $proxy_add_x_forwarded_for;proxy_set_header X-Forwarded-Proto $scheme;# 支持WebSocketproxy_http_version 1.1;proxy_set_header Upgrade $http_upgrade;proxy_set_header Connection "upgrade";# 如果驗證成功,Nginx會將客戶端證書的信息存儲在變量中# 你可以將這些信息傳遞給后端應用(如用戶名、證書序列號等)proxy_set_header X-SSL-Client-Verify $ssl_client_verify;proxy_set_header X-SSL-Client-S-DN $ssl_client_s_dn;proxy_set_header X-SSL-Client-I-DN $ssl_client_i_dn;proxy_set_header X-SSL-Client-Serial $ssl_client_serial;}}
}
關鍵指令解釋:
ssl_client_certificate:指定信任的CA證書文件,用于驗證客戶端證書。ssl_verify_client on:開啟強制雙向認證。沒有有效客戶端證書的連接將被拒絕。
3.4.2 重啟 Nginx
報錯:
[root@instance-9iidvp74-1 conf]# /usr/local/nginx/sbin/nginx -c /usr/local/nginx/conf/nginx.conf
nginx: [emerg] the "ssl" parameter requires ngx_http_ssl_module in /usr/local/nginx/conf/nginx.conf:85
需要 nginx 開啟 ssl 模塊
# 進入 Nginx 源碼目錄(如果不知道位置,可以重新下載)
/mnt/nginx/nginx-1.20.1/# 使用 nginx -V 輸出的配置參數,并添加 --with-http_ssl_module
./configure --with-http_ssl_module# 編譯
make# 不要 make install,會覆蓋配置!而是替換二進制文件
cp /usr/local/nginx/sbin/nginx /usr/local/nginx/sbin/nginx.bak
cp objs/nginx /usr/local/nginx/sbin/nginx
[root@instance-9iidvp74-1 nginx-1.20.1]# /usr/local/nginx/sbin/nginx -c /usr/local/nginx/conf/nginx.conf
Enter PEM pass phrase:
啟動需要輸入 server.key 密碼
3.5 開啟端口
# 防火墻開啟2443端口
firewall-cmd --zone=public --add-port=2443/tcp --permanent# 刷新
firewall-cmd --reload
3.6 客戶端證書生成腳本
batchCreateCilent.sh:
[root@instance-1ays3hq4 certs]# cat script/batchCreateCilent.sh
#!/bin/bash
usernames=("zhoubowen")# 定義隨機密碼生成函數
generate_password() {local length=${1:-12}  # 默認長度為 12tr -dc 'A-Za-z0-9!@#$^*()_+' < /dev/urandom | head -c "$length"
}# 創建必要的目錄
mkdir -p /mnt/certs/client/{csr,crt,p12}# 循環遍歷用戶名列表
for username in "${usernames[@]}"; doecho "正在為用戶 $username 生成證書..."# 生成 CSR 文件openssl req -new \-key /mnt/certs/client/client.key \-out /mnt/certs/client/csr/${username}.csr \-subj "/C=CN/ST=AnHui/L=Hefei/O=ahyjhxsh/CN=$username"# 檢查 CSR 文件是否生成成功if [ $? -ne 0 ]; thenecho "生成 CSR 文件失敗:$username"continuefi# 使用 CA 簽發證書并生成 CRT 文件openssl x509 -req \-in /mnt/certs/client/csr/${username}.csr \-CA ca/ca.crt \-CAkey ca/ca.key \-CAcreateserial \-out /mnt/certs/client/crt/${username}.crt \-days 365# 檢查 CRT 文件是否生成成功if [ $? -ne 0 ]; thenecho "生成證書失敗:$username"continuefi# 生成隨機密碼password=$(generate_password 12)echo "用戶 $username 的 .p12 文件密碼: $password"# 生成 P12 文件openssl pkcs12 -export \-inkey /mnt/certs/client/client.key \-in /mnt/certs/client/crt/${username}.crt \-certfile ca/ca.crt \-out /mnt/certs/client/p12/${username}.p12 \-name "$username" \-password pass:"$password"# 檢查 P12 文件是否生成成功if [ $? -eq 0 ]; thenecho "用戶 $username 的 .p12 文件已成功生成!"elseecho "生成 .p12 文件失敗:$username"fiecho "$username:$password" >> /mnt/certs/client/passwords.txt
doneecho "所有用戶的證書和 .p12 文件生成完成。"


)


在線預約)


——with語句)

入門:高通量計算與數據管理最佳實踐)
 :Transformer在computer vision領域的應用(一))
)

