在微信小程序開發中,相機功能已成為許多應用的核心組成部分。本文將介紹如何使用UniApp框架實現一個功能豐富的相機組件,支持拍照、錄像、前后攝像頭切換以及雙指縮放等功能。
功能概述
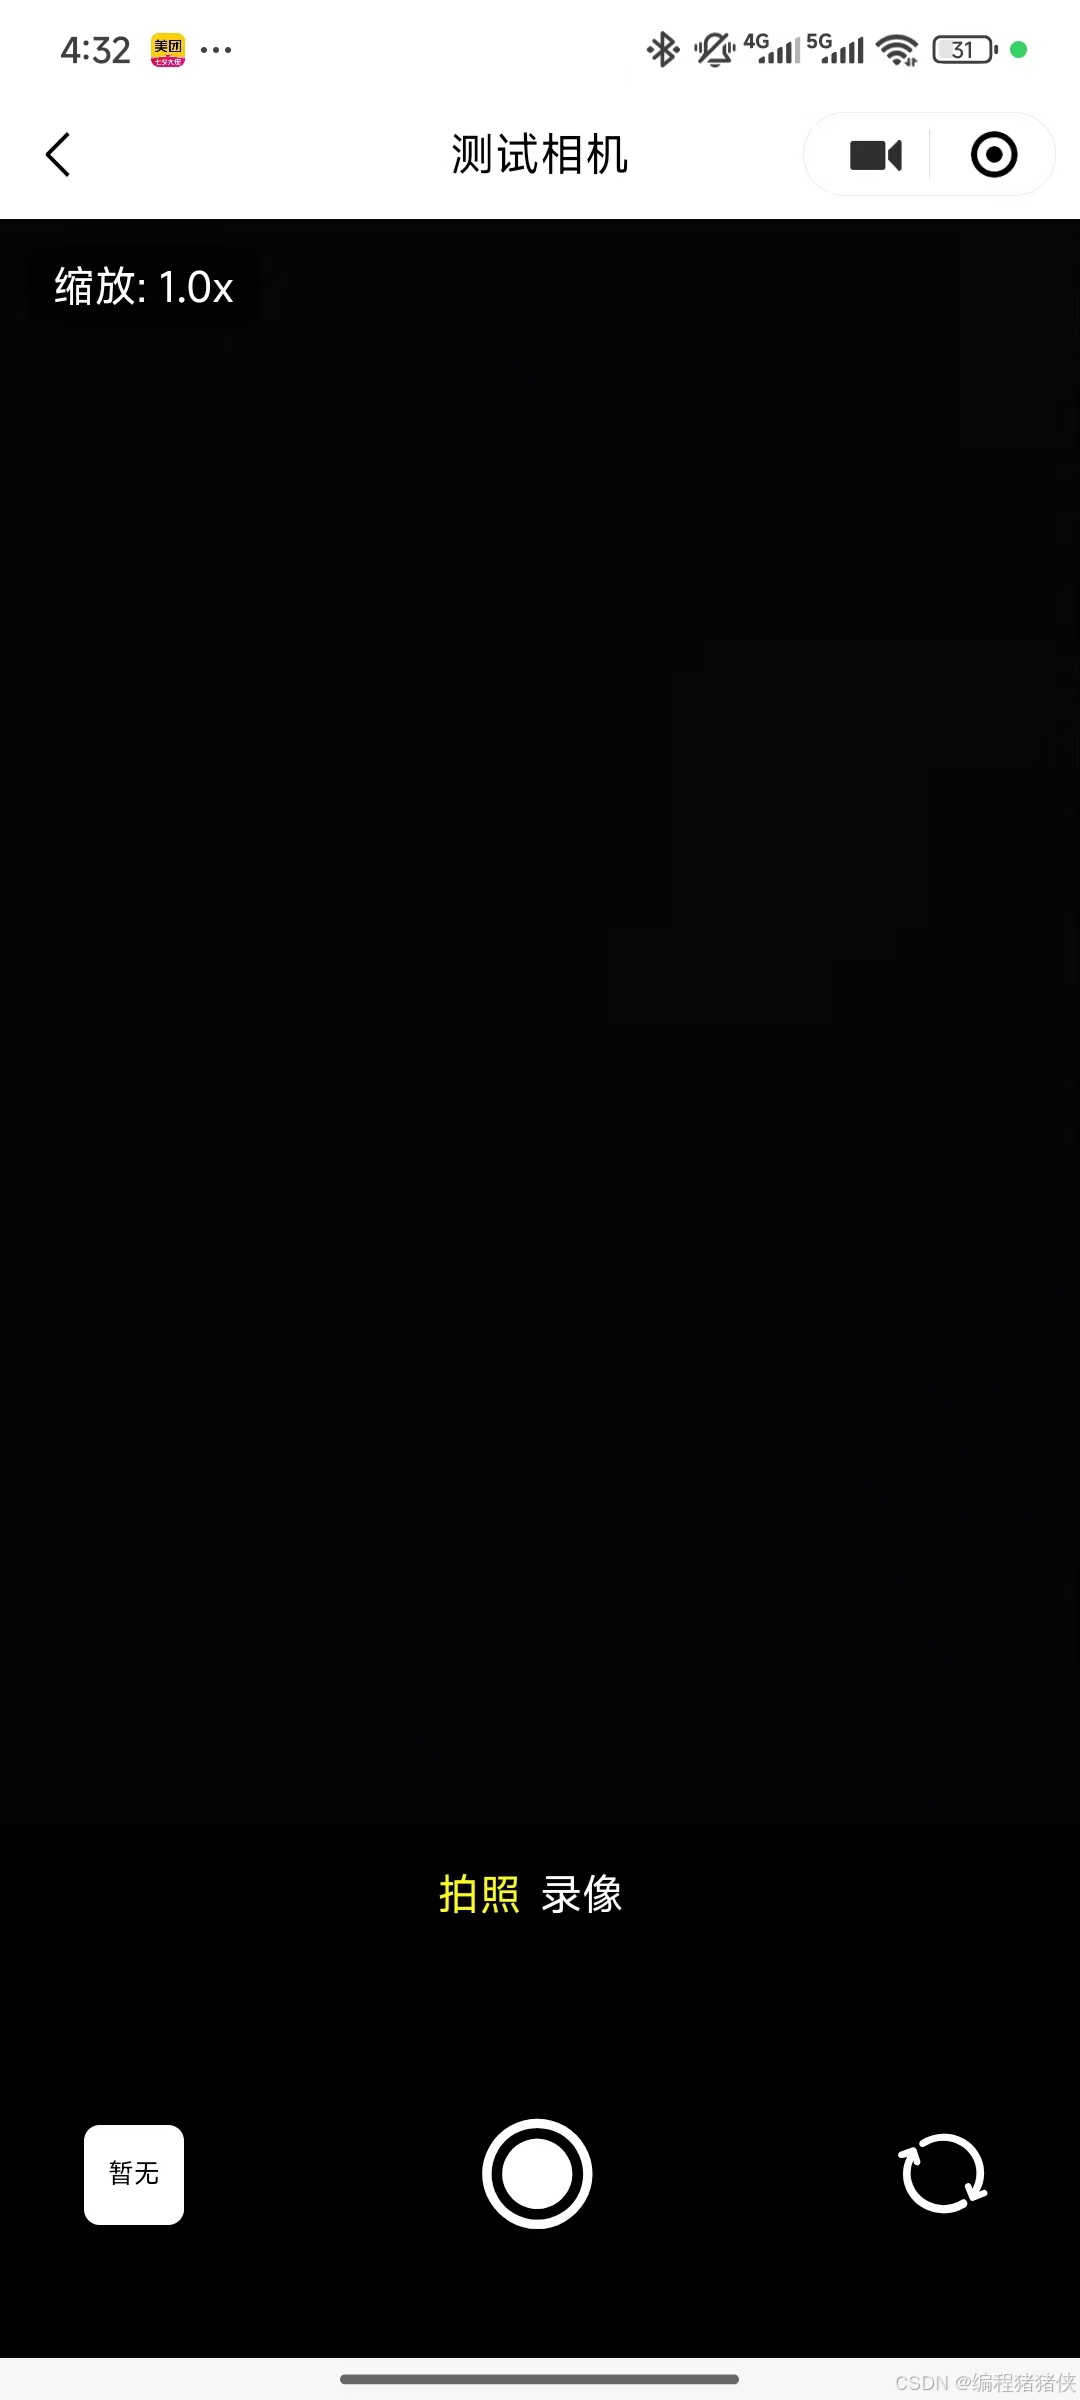
這個相機組件具備以下核心功能:
拍照功能:支持高質量圖片拍攝
錄像功能:支持最長60秒的視頻錄制
前后攝像頭切換:輕松切換前置和后置攝像頭
雙指縮放:通過手勢控制相機變焦
操作模式切換:在拍照和錄像模式間流暢切換
實現細節
相機基礎設置
首先,我們使用UniApp的
camera組件作為基礎雙指縮放實現
雙指縮放是通過監聽觸摸事件并計算兩指之間的距離變化來實現的
模式切換與媒體捕獲
通過滑動切換拍照和錄像模式,并分別實現拍照和錄像功能
用戶界面設計
組件界面采用黑色主題,符合相機應用的常見設計風格
樣式設計
使用SCSS編寫樣式,確保界面美觀且響應式
完整代碼如下
<template><view class="container"><camera:device-position="cameraType"flash="off"@error="handleCameraError"@touchstart="handleZoomStart"@touchmove="handleZoomMove"style="width: 100%; height: 75vh"ref="cameraRef":resolution="'high'"></camera><!-- 縮放級別顯示(可選) --><view class="zoom-indicator">縮放: {{ currentZoom.toFixed(1) }}x</view><view class="btn_group"><viewclass="top"@touchstart="handleTouchStart"@touchmove="handleTouchMove"@touchend="handleTouchEnd"style="height: 100rpx"><view:style="{color: currentIndex === index ? 'yellow' : '#FFFFFF',transform: `translateX(${currentIndex === index ? '20rpx' : '0'})`,}"class="top_item"v-for="(item, index) in typeList":key="index">{{ item?.name }}</view></view><view class="bottom"><image@tap="handlePreviewImage(photoPath, [photoPath])"v-if="photoPath"class="pic":src="photoPath"/><view v-else class="pic">暫無</view><view><uni-icons@click="handleClick":color="isRecord ? '#ff0000' : `#ffffff`"type="circle-filled"size="56"></uni-icons></view><view><uni-icons@click="handleLoop"type="loop"color="#ffffff"size="40"></uni-icons></view></view></view></view>
</template><script setup lang="ts">
import { reactive, ref, onMounted, watch } from "vue";
import { handlePreviewImage } from "@/utils/common";// 相機實例
const cameraRef = ref(null);
// 照片路徑
const photoPath = ref("");
//攝像頭類型
const cameraType = ref<"back" | "front">("back");
//記錄loop切換的類型
const loopFlag = ref(false);
//記錄是否開始錄制
const isRecord = ref(false);// 縮放相關
const initialDistance = ref(0); // 初始雙指距離
const currentZoom = ref(1); // 當前縮放級別(初始1)
const maxZoom = 2.5; // 最大縮放級別
const minZoom = 1; // 最小縮放級別//操作類型
const typeList = reactive([{name: "拍照",type: 1,},{name: "錄像",type: 2,},
]);const currentIndex = ref(0);
const startX = ref(1);
const endX = ref(1);// 雙指縮放邏輯
const handleZoomStart = (e: TouchEvent) => {if (e.touches.length >= 2) {initialDistance.value = Math.hypot(e.touches[0].clientX - e.touches[1].clientX,e.touches[0].clientY - e.touches[1].clientY);}
};const handleZoomMove = (e: TouchEvent) => {if (e.touches.length >= 2 && initialDistance.value > 0) {const currentDistance = Math.hypot(e.touches[0].clientX - e.touches[1].clientX,e.touches[0].clientY - e.touches[1].clientY);// 計算縮放變化(更平滑的算法)const zoomDelta = (currentDistance - initialDistance.value) / 200;let newZoom = currentZoom.value + zoomDelta;newZoom = Math.max(minZoom, Math.min(maxZoom, newZoom));if (newZoom !== currentZoom.value) {currentZoom.value = newZoom;setCameraZoom(newZoom);}initialDistance.value = currentDistance;}
};// 設置相機縮放
const setCameraZoom = (zoom: number) => {const cameraContext = uni.createCameraContext();cameraContext.setZoom({zoom: zoom,success: () => console.log("縮放設置成功:", zoom),fail: (err) => console.error("縮放失敗:", err),});
};// 初始化時設置默認縮放
onMounted(() => {setCameraZoom(1); // 初始化為1x
});// 其他原有方法保持不變(handleTouchStart、handleClick等...)
function handleTouchStart(e: any) {console.log(e, "start");startX.value = e.touches[0].clientX;
}function handleTouchMove(e: any) {endX.value = e.touches[0].clientX;
}function handleTouchEnd() {const diffX = startX.value - endX.value;if (diffX > 50 && currentIndex.value < typeList.length - 1) {currentIndex.value++;} else if (diffX < -50 && currentIndex.value > 0) {currentIndex.value--;}startX.value = endX.value = 0;
}const handleLoop = () => {loopFlag.value = !loopFlag.value;cameraType.value = loopFlag.value ? "front" : "back";
};const handleClick = () => {if (currentIndex.value === 0) {takePhoto();} else {isRecord.value ? stopRecord() : startRecord();}
};const takePhoto = async () => {try {const cameraContext = uni.createCameraContext();cameraContext.takePhoto({quality: "high",success: (res) => {photoPath.value = res.tempImagePath;},fail: console.error,});} catch (e) {console.error("相機異常", e);}
};const startRecord = () => {uni.showToast({ title: "開始錄像", duration: 500 });const cameraContext = uni.createCameraContext();cameraContext.startRecord({timeout: 60000,success: () => (isRecord.value = true),fail: (err) => {isRecord.value = false;console.error("開始錄像失敗", err);},});
};const stopRecord = () => {isRecord.value = false;const cameraContext = uni.createCameraContext();cameraContext.stopRecord({success: (res) => {uni.showToast({ title: "錄像結束", duration: 500 });photoPath.value = res?.tempThumbPath;},fail: console.error,});
};const handleCameraError = (e: any) => {console.error("相機錯誤", e);
};//如果切換拍照、錄像,處于錄像狀態,則停止錄像
watch(currentIndex, (val) => {if (isRecord.value) {stopRecord();}
});
</script><style scoped lang="scss">
.container {display: flex;flex-direction: column;align-items: center;background: black;color: white;width: 100vw;height: 100vh;position: relative;
}.zoom-indicator {position: absolute;top: 20rpx;left: 20rpx;background: rgba(0, 0, 0, 0.5);color: white;padding: 10rpx 20rpx;border-radius: 20rpx;z-index: 10;
}.btn_group {flex: 1;width: 100vw;display: flex;flex-direction: column;box-sizing: border-box;.top {width: 100%;display: flex;align-items: center;justify-content: center;.top_item {width: auto;color: white;margin-right: 32rpx;transition: all 0.3s ease;}}.bottom {margin-top: 20rpx;flex: 1;box-sizing: border-box;padding: 0 60rpx;display: flex;align-items: center;justify-content: space-between;.pic {width: 70rpx;height: 70rpx;border-radius: 12rpx;background: white;color: black;font-size: 20rpx;line-height: 70rpx;text-align: center;}}
}
</style>
希望本文對您實現相機功能有所幫助。注意:沒有加錄制超時邏輯,需要的話自行在startRecord回調中添加!


)

)


)
