注:本文為 “buntu 與 Windows 雙系統及高頻故障解決” 相關文章合輯。
英文引文,機翻未校。
How to install Ubuntu 20.04 and dual boot alongside Windows 10
如何將 Ubuntu 20.04 和雙啟動與 Windows 10 一起安裝
Dave’s RoboShack
Published in Feb 17, 2021
Switching to Linux can be a big decision, depending on how you use your computer. Sometimes, you just need Windows for specific applications, and sometimes you need Linux for other applications. Whether you are just curious or you need it for work or a personal project, having both operating systems on one computer can be useful.
切換到 Linux 可能是一個重大決定,具體取決于您如何使用計算機。有時,您只需要 Windows 來運行特定的應用程序,有時您只需要 Linux 來運行其他應用程序。無論您是好奇還是需要它來工作或個人項目,將兩個作系統放在一臺計算機上都很有用。
In this article, I will explain the steps you need to install Ubuntu 20.04 next to your existing Windows 10 system.
在本文中,我將解釋在現有 Windows 20.04 系統旁邊安裝 Ubuntu 10 所需的步驟。
Get your tools
獲取您的工具
Before you can create an installation media, you first need the right tools to create one. The first thing is to download the Ubuntu ISO file that you want to install. An ISO file is simply a file that contains the actual operating system in a compact format. Go to https://ubuntu.com/download#download and click on the 20.04 LTS button.
在創建安裝媒體之前,您首先需要正確的工具來創建一個安裝媒體。第一件事是下載要安裝的 Ubuntu ISO 文件。ISO 文件只是一個以緊湊格式包含實際作系統的文件。轉到 https://ubuntu.com/download#download 并單擊 20.04 LTS 按鈕。
LTS stands for Long-Term-Support which simply means that this version gets support for 5 year unlike the other releases that are only supported for 9 months. Going for LTS is for many people the best option.
LTS 代表長期支持,這僅僅意味著此版本獲得 5 年的支持,而其他版本僅支持 9 個月。對許多人來說,選擇 LTS 是最好的選擇。

Download page of Ubuntu 20.04
Your browser might ask you if you want to save the file or open it. I’d recommend to save it. The ISO file is about 2.8 GB in size, so be prepared that it will take a while. This is the perfect time to get some tea.
您的瀏覽器可能會詢問您是要保存文件還是打開文件。我建議保存它。ISO 文件的大小約為 2.8 GB,因此請準備好需要一段時間。這是喝茶的最佳時機。
The next tool that you need is a software to create the installation media. There are several tools available such as UNetbootin. or Rufus.. I personally am a big fan of balena Etcher..
您需要的下一個工具是用于創建安裝媒體的軟件。有幾種工具可用,例如 UNetbootin 或 Rufus。我個人是 balena Etcher 的忠實粉絲。

- Website of balena Etcher
https://etcher.balena.io/
Etcher is available on Windows, MacOS and Linux and pretty easy to use. After the download has finished, you need to install it.
Etcher 可在 Windows、MacOS 和 Linux 上使用,并且非常易于使用。下載完成后,您需要安裝它。

Installation of balena Etcher
Getting your system ready
準備您的系統
After you installed Etcher and downloaded the ISO file, you can create the installation media. You can either use a CD (yes, those still exist) or simply a USB stick. Using the USB stick is the most convenient as you do not need a CD drive which start to be come a rare artifact. Make sure the USB stick is empty as all the data will be erased in the next step.
安裝 Etcher 并下載 ISO 文件后,您可以創建安裝介質。您可以使用 CD(是的,那些仍然存在)或簡單地使用 USB 記憶棒。使用 U 盤是最方便的,因為您不需要 CD 驅動器,而 CD 驅動器開始成為一種罕見的產物。確保 U 盤是空的,因為所有數據將在下一步中被刪除。
When you open Etcher, you have a very simple interface.
當您打開 Etcher 時,您有一個非常簡單的界面。

balena Etcher for creating the installation media
First, you select the ISO file that you want to use. You can probably find it in your downloads folder. Just navigate to it and select the ISO file. Then, you need to select the USB stick that you plugged into your computer and that you want to use as installation media. Take care that you select the correct one as you don’t want to wipe your internal hard drive or an external drive. The easiest is to look at the size of the different options and select the one with the memory size that your USB stick has.
首先,選擇要使用的 ISO 文件。您可能可以在下載文件夾中找到它。只需導航到它并選擇 ISO 文件。然后,您需要選擇插入計算機并要用作安裝介質的 U 盤。請注意選擇正確的一個,因為您不想擦除內部硬盤驅動器或外部驅動器。最簡單的方法是查看不同選項的大小,然后選擇具有 U 盤內存大小的選項。
When the ISO and the USB stick are selected, click on the Flash!. button. This will also take a while.
選擇 ISO 和 USB 記憶棒后,單擊 Flash!按鈕。這也需要一段時間。

Flashing the installation media
Getting Windows Ready
為 Windows 做好準備
There is one more step you need to do as preparation before the actual installation. You need to make some free space on your hard drive so your computer knows where to install Ubuntu. For this, you need to open the partitions software with the name “Create and format hard disk partitions”. You can simple type the word “partition” in the search bar of the start menu.
在實際安裝之前,您還需要做一個準備工作。您需要在硬盤驅動器上騰出一些可用空間,以便您的計算機知道將 Ubuntu 安裝在何處。為此,您需要打開名稱為 “Create and format hard disk partitions” 的分區軟件。您只需在開始菜單的搜索欄中鍵入 “partition” 一詞即可。

Start menu for partitioning software
When starting the partitioning software, a new window called Disk Management should open up. This program should show you all the mass storage devices connected to your computer, internally and externally. In my case, I only have one hard drive because I already removed the USB stick and I only have one small hard drive in my demo setup.
啟動分區軟件時,應打開一個名為 “磁盤管理” 的新窗口。該程序應向您顯示連接到您的計算機的所有內部和外部大容量存儲設備。就我而言,我只有一個硬盤驅動器,因為我已經移除了 USB 記憶棒,并且我的演示設置中只有一個小硬盤驅動器。

Disk management tool
Many computers nowadays have one smaller SSD hard drive and a larger HDD hard drive. You will probably want to install Ubuntu on your SSD drive, given that you have enough disk space.
現在許多計算機都有一個較小的 SSD 硬盤驅動器和一個較大的 HDD 硬盤驅動器。如果您有足夠的磁盤空間,您可能希望在 SSD 驅動器上安裝 Ubuntu。
For a bare minimum installation, you should have at least 9 GB. If you also want to install some programs and save some files on Ubuntu, then you probably want a little bit more storage for your Ubuntu system. I would recommend at least 36 GB to make sure you don’t run out of disk space when have all the Ubuntu partitions on one hard drive. You can use less if you want to install Ubuntu on two hard drives: one for the system and one for storing your personal files. More on that later.
對于最低限度的安裝,您至少應有 9 GB。如果您還想在 Ubuntu 上安裝一些程序并保存一些文件,那么您可能希望為您的 Ubuntu 系統增加一點存儲空間。我建議至少 36 GB,以確保當所有 Ubuntu 分區都位于一個硬盤驅動器上時,磁盤空間不會耗盡。如果您想在兩個硬盤驅動器上安裝 Ubuntu,您可以減少使用量:一個用于系統,一個用于存儲您的個人文件。稍后會詳細介紹。
Right click the partition that you want to shrink to make free space available on. Then, click on the “Shrink Volume…” button in the context menu.
右鍵單擊要收縮的分區,使其上有可用空間。然后,單擊 “Shrink Volume…” 按鈕。

Selecting the partition to shrink
Next, you need to choose how much storage you want to make available. Enter the amount of Mega Bytes you want to have for your Ubuntu installation. Again, I would recommend to have at least 36 GB. Click on the “Shrink” button.
接下來,您需要選擇要提供的存儲空間。輸入您希望用于 Ubuntu 安裝的兆字節數。同樣,我建議至少有 36 GB。點擊 “Shrink” 按鈕。

Selecting the size of the empty partition
Creating the new empty partition takes a while and then it should be displayed as Unallocated.
創建新的空分區需要一段時間,然后它應該顯示為 Unallocated。

New empty partition created
After this is done, you can proceed with the installation of Ubuntu. You may now shut down your computer.
完成此作后,您可以繼續安裝 Ubuntu。您現在可以關閉您的計算機。
Installing Ubuntu
安裝 Ubuntu
Now it is time to plug in the flashed USB stick and restart your computer. When the splash screen of your computer’s manufacturer appears, you need to press either F1, F2, F12, ESC or DEL on your keyboard to enter the BIOS menu of your computer. Which key to press depends on the brand of your computer. Your computer might even tell you which key to press. Else, you might need to look it up either in the manual of your computer on online.
現在是時候插入閃存的 USB 記憶棒并重新啟動計算機了。當計算機制造商的啟動畫面出現時,您需要按鍵盤上的 F1、F2、F12、ESC 或 DEL 進入計算機的 BIOS 菜單。按哪個鍵取決于計算機的品牌。您的計算機甚至可能會告訴您要按哪個鍵。否則,您可能需要在線查看計算機的手冊。
Once you entered your BIOS, you need to find the option to change the boot order. The BIOS of each motherboard can be slightly different. You need to navigate through it by yourself to find the option to change the boot order. When you find it, you should place the entry for USB devices on the first position so when you restart the computer it will automatically boot from the USB stick with the Ubuntu installation media.
進入 BIOS 后,您需要找到更改啟動順序的選項。每個主板的 BIOS 可能略有不同。您需要自己瀏覽它以找到更改啟動順序的選項。找到它后,您應該將 USB 設備的條目放在第一個位置,這樣當您重新啟動計算機時,它將自動從 USB 記憶棒和 Ubuntu 安裝介質啟動。

As an alternative, some computers even allow to directly choose the boot device to continue. In that case, you don’t need to change the boot order and you can simply select the USB stick to boot the computer. Again, this depends on the manufacturer of the motherboard.
作為替代方案,某些計算機甚至允許直接選擇啟動設備以繼續。在這種情況下,您無需更改啟動順序,只需選擇 U 盤即可啟動計算機。同樣,這取決于主板的制造商。
Note: If possible, disable the fast-boot option from your BIOS as this can cause trouble when switching from Windows to Linux. The reason is that the fast-boot setting will prevent a full shutdown of the PC and when starting up in a different OS, this could cause some issues. Also, the secure-boot option might need to be disabled. If that is the case, Ubuntu will let you know during the installation process. You will need to type a password during the installation process and then again when rebooting. This password will only be asked once.
注意:如果可能,請從 BIOS 中禁用 fast-boot 選項,因為這可能會在從 Windows 切換到 Linux 時造成麻煩。原因是快速啟動設置會阻止 PC 完全關閉,并且在不同的作系統中啟動時,這可能會導致一些問題。此外,可能需要禁用 secure-boot 選項。如果是這種情況,Ubuntu 會在安裝過程中通知您。您需要在安裝過程中鍵入密碼,然后在重新啟動時再次鍵入密碼。此密碼只會被詢問一次。
When your computer is booting from the USB stick, it will show to you the Ubuntu logo. It might even perform a system check.
當您的計算機從 U 盤啟動時,它會向您顯示 Ubuntu 徽標。它甚至可能會執行系統檢查。

Ubuntu boot screen
After the file check is complete, your computer will show you the Ubuntu welcome screen where you can choose whether you want to “Try Ubuntu” or “Install Ubuntu”. The first option is suited for testing if everything works such as the Wi-Fi drivers or other hardware. You will choose the second option for the installation.
文件檢查完成后,您的計算機將向您顯示 Ubuntu 歡迎屏幕,您可以在其中選擇是要 “試用 Ubuntu” 還是 “安裝 Ubuntu”。第一個選項適用于測試是否一切正常,例如 Wi-Fi 驅動程序或其他硬件。您將選擇第二個安裝選項。

Ubuntu welcome screen
The first thing to do is selecting your keyboard lay out. This can be changed later and you can also add multiple layouts int he settings menu once the installation is finished. If you don’t know what your keyboard layout is, Ubuntu can help you to find your layout.
首先要做的是選擇您的鍵盤布局。這可以稍后更改,您也可以在安裝完成后在設置菜單中添加多個布局。如果您不知道您的鍵盤布局是什么,Ubuntu 可以幫助您找到您的布局。

Ubuntu keyboard selection
After you selected the keyboard layout and pressed on the “Continue” button, you will probably be prompted to select a WiFi network. In my setup, I use a Ethernet connection which is why this step is omitted by the system. Simply select the network and enter the password and that’s it.
選擇鍵盤布局并按下 “繼續” 按鈕后,系統可能會提示您選擇 WiFi 網絡。在我的設置中,我使用以太網連接,這就是系統省略此步驟的原因。只需選擇網絡并輸入密碼即可。
Next, you have the option to install Ubuntu as normal installation or as minimal installation. If you are new to Linux, it doesn’t hurt to install the normal package including Libre Office, some games and some other tools. Also, you should check the boxes for downloading updates during the installation and to install third-party software which include the GPU drivers for Nvidia and codecs for MP3 files.
接下來,您可以選擇將 Ubuntu 安裝為普通安裝或最小安裝。如果您是 Linux 新手,安裝包括 Libre Office、一些游戲和其他一些工具在內的普通軟件包并沒有什么壞處。此外,您還應選中用于在安裝過程中下載更新的復選框,以及安裝第三方軟件,其中包括 Nvidia 的 GPU 驅動程序和 MP3 文件的編解碼器。

Installing updates and third-party software
Now, you need to select how you want to install Ubuntu on your system: wipe your entire disk or install Ubuntu alongside Windows 10. I always use the third option called “Something else” as this gives me more control on how I have my partitions. Also, I have trust issues with the automatic installation alongside Windows.
現在,您需要選擇要如何在系統上安裝 Ubuntu:擦除整個磁盤或將 Ubuntu 與 Windows 10 一起安裝。我總是使用名為 “Something else” 的第三個選項,因為這讓我可以更好地控制我的分區。此外,我對 Windows 的自動安裝存在信任問題。

Ubuntu dual boot setup
Now, you need to manually set up the partitions for the Ubuntu installation. As you can see, you have some free space on your hard drive. This is the space that you freed earlier in Windows.
現在,您需要手動設置 Ubuntu 安裝的分區。如您所見,您的硬盤驅動器上有一些可用空間。這是您之前在 Windows 中釋放的空間。

Ubuntu partition manager
You could also shrink the partitions here, but I recommend doing it on Windows as this allows Windows to shift files around according to the modifications. When doing it here, you risk to overwrite parts of the hard drive that were used for data.
您也可以在此處縮小分區,但我建議在 Windows 上執行此作,因為這允許 Windows 根據修改來移動文件。在此處執行此作時,您可能會覆蓋硬盤驅動器中用于數據的部分。
Just select the free space partition and click on the plus symbol below to add a new partition. The first partition you will make is the SWAP partition. It serves as an extension to your RAM (Random Access Memory) which is the fast memory which it needs immediately to function. If your RAM is full, Ubuntu will then save additional data in the SWAP.
只需選擇可用空間分區,然后單擊下面的加號即可添加新分區。您將創建的第一個分區是 SWAP 分區。它用作 RAM(隨機存取存儲器)的擴展,RAM 是它立即運行所需的快速內存。如果您的 RAM 已滿,Ubuntu 將在 SWAP 中保存其他數據。
Note: Most guides I know of recommend to use double the size of your RAM for your SWAP partition and at least the same amount of memory as your RAM. Technically, you can do without SWAP at all, but it doesn’t hurt to have some SWAP in case your RAM is not that big. Most systems nowadays have at least 8 GB of RAM.
注意:我所知道的大多數指南都建議將 RAM 大小的兩倍用于 SWAP 分區,并且至少與 RAM 相同。從技術上講,您可以完全不使用 SWAP,但如果您的 RAM 不是那么大,有一些 SWAP 并沒有什么壞處。現在大多數系統至少有 8 GB 的 RAM。
The more RAM you have, the less likely you need the SWAP memory. On this computer, I have 8 GB of RAM. Therefore, I use 4 GB for this installation. That should be enough. Choose “Logical” for the partition type and select “swap area” from the drop down menu. Then clock “OK”.
您擁有的 RAM 越多,您就越不需要 SWAP 內存。在這臺計算機上,我有 8 GB 的 RAM。因此,我使用 4 GB 進行此安裝。這應該足夠了。為分區類型選擇 “Logical”,然后從下拉菜單中選擇 “swap area”。然后時鐘 “OK”。

Creating the SWAP partition
Next, you need the so called “root” partition which hosts all your system files necessary by Ubuntu to function. By default, this partition will also contain your personal files, but here we will create a separate partition only for your personal files, such as your “Downloads” folder or “Music” folder. This is why we need to create two more partitions.
接下來,您需要所謂的 “根” 分區,它托管 Ubuntu 運行所需的所有系統文件。默認情況下,此分區還將包含您的個人文件,但在這里我們將僅為您的個人文件創建一個單獨的分區,例如您的 “下載” 文件夾或 “音樂” 文件夾。這就是為什么我們需要再創建兩個分區。
Both partitions will be about 16 GB in size. For the “root” partition, select the “Primary” option for the partition type as this partition needs to be bootable. Then, in the drop down menu, select “Ext4 journaling file system” which is still the default file system for Linux. The mount point must be “/” which stands for the “root” partition.
兩個分區的大小約為 16 GB。對于 “root” 分區,為分區類型選擇 “Primary” 選項,因為此分區需要可引導。然后,在下拉菜單中,選擇 “Ext4 journaling file system”,它仍然是 Linux 的默認文件系統。掛載點必須是 “/” ,它代表 “root” 分區。

Creating the root partition
Your last partition will be the “home” partition. Again, click on the plus icon to create a new partition and dedicate the remaining space to this partition. Again, select it to be a “Logical” partition and again choose the “Ext4” file system. This time, the mount point is “/home”.
您的最后一個分區將是 “home” 分區。再次單擊加號圖標以創建新分區并將剩余空間專用于此分區。再次選擇它作為 “Logical” 分區,然后再次選擇 “Ext4” 文件系統。這一次,掛載點是 “/home”。
This partition will store all your personal files. If you do not create a separate “home” partition, your personal files will be stored inside the “root” partition. The reason why I create it as a separate partition is, that you can follow the same procedure to create a partition on a second hard drive. This is especially useful when your “root” partition is on a SSD drive while your personal files are on a HDD drive. My setup did not have two hard drives, but the procedure would be the same, except that you need to pay attention which free space is used for the “root” and which for the “home” partition.
此分區將存儲您的所有個人文件。如果您不創建單獨的 “home” 分區,您的個人文件將存儲在 “root” 分區中。我將其創建為單獨分區的原因是,您可以按照相同的過程在第二個硬盤驅動器上創建分區。當您的 “根” 分區位于 SSD 驅動器上而您的個人文件位于 HDD 驅動器上時,這尤其有用。我的設置沒有兩個硬盤驅動器,但過程是相同的,只是您需要注意哪些可用空間用于 “root” 分區,哪些用于 “home” 分區。

Creating the home partition
Now that all the partitions have been created, you should not have any free space left. Make sure the boot loader will be installed on the correct hard drive. Usually, this is the same drive where your Windows 10 boot loader is installed. Hit the “Install Now” button and confirm the installation.
現在,所有分區都已創建,您應該不會留下任何可用空間。確保 boot loader 將安裝在正確的硬盤驅動器上。通常,這是安裝 Windows 10 引導加載程序的同一驅動器。點擊 “立即安裝” 按鈕并確認安裝。

Overview of the partitioning
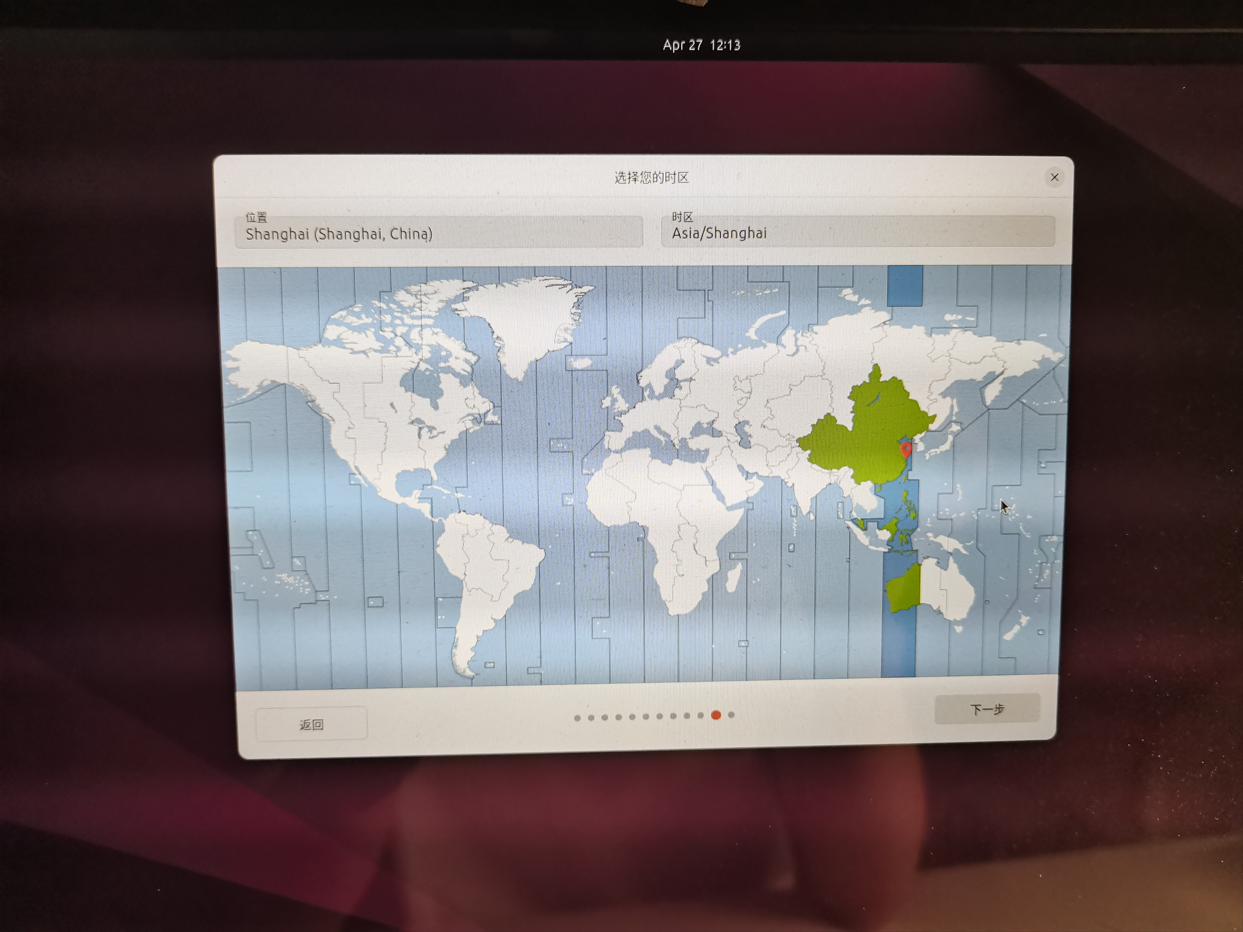
In the next step, you simply select the country where you are. This is simply to set the time zone for your system clock. It also affects how the time is displayed such as the 12-hour format or 24-hour format, depending on your country’s default system.
在下一步中,您只需選擇您所在的國家 / 地區。這只是為了設置系統時鐘的時區。它還會影響時間的顯示方式,例如 12 小時格式或 24 小時格式,具體取決于您所在國家 / 地區的默認系統。

Choose a location
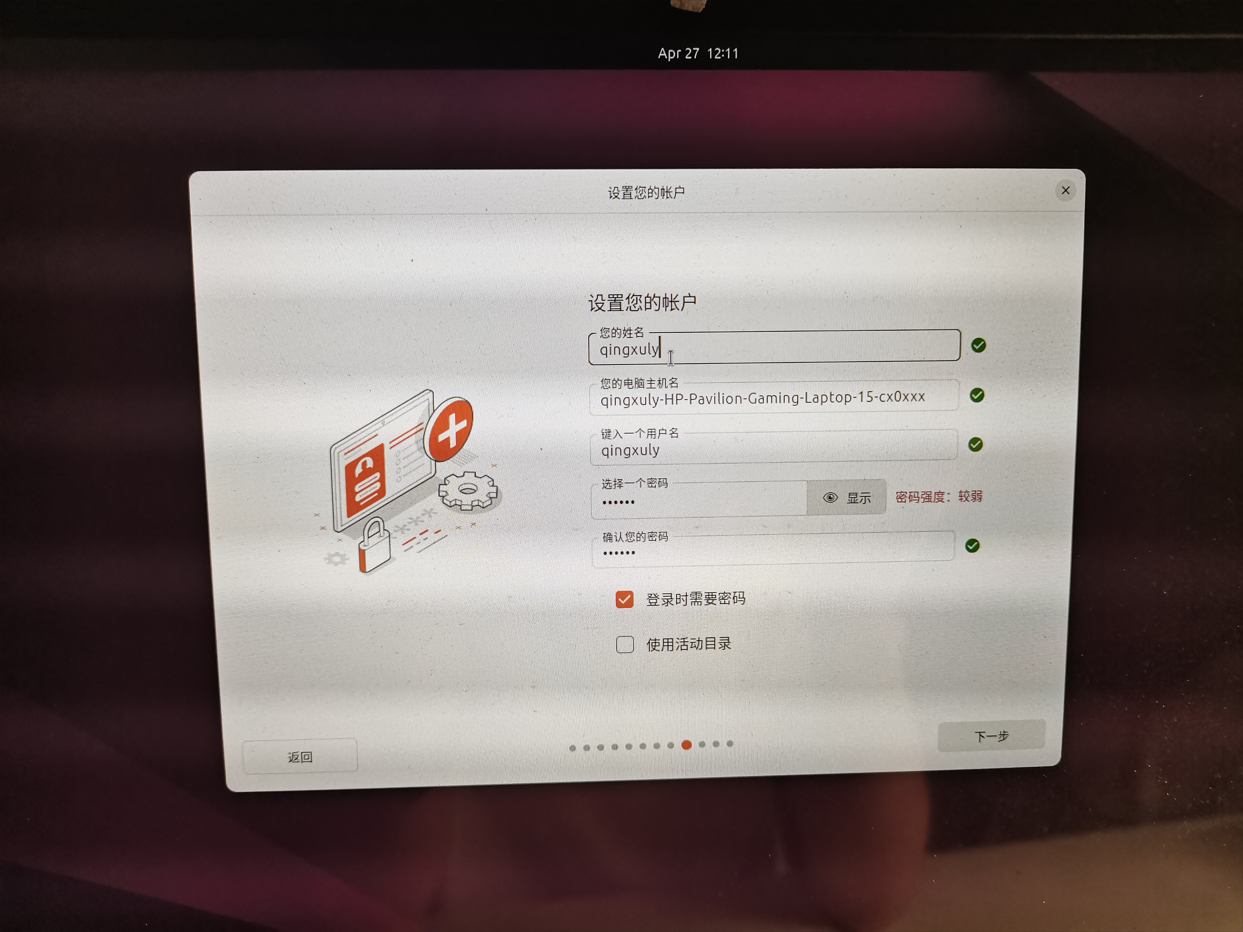
Lastly, you need to create your user account on the system. Fill in your name and verify if the username that is suggested is fine for you. You can also change the name of the computer. In the “Your name:” field, you are supposed to type your full name. Also, you need to set a password. It can be as long as you want, it can contain numbers, letters and symbols. Make sure it is a password you can remember as you will need it every time you install new software or you want to update your system. It should not be too easy though as this would make the password useless.
最后,您需要在系統上創建您的用戶帳戶。填寫您的姓名并驗證建議的用戶名是否適合您。您還可以更改計算機的名稱。在 “Your name:” 字段中,您應該鍵入您的全名。此外,您還需要設置密碼。它可以隨心所欲,它可以包含數字、字母和符號。確保它是您可以記住的密碼,因為每次安裝新軟件或想要更新系統時都需要它。不過,這不應該太容易,因為這會使密碼變得毫無用處。

Create your user account
After you set up your user account, you can click on the “Continue” button and the installation will be executed. Installing Ubuntu will not take a while. This process will probably take around 20 minutes, depending on your system.
設置用戶帳戶后,您可以單擊 “繼續” 按鈕,將執行安裝。安裝 Ubuntu 不會花費一段時間。此過程可能需要大約 20 分鐘,具體取決于您的系統。

Installation of Ubuntu in progress
You do not need to do anything until the installation is finished. A good time for another cup of tea.
在安裝完成之前,您無需執行任何作。這是再喝一杯茶的好時機。
After the installation is finished, you can restart the computer and remove the USB stick. Now, when the computer is starting, it will first show to you the GRUB boot screen.
安裝完成后,您可以重新啟動計算機并取出 USB 記憶棒。現在,當計算機啟動時,它將首先向您顯示 GRUB 啟動屏幕。

GRUB boot screen
The GRUB boot screen will show you the installed systems such as Ubuntu and Windows 10. Now, every time you start your computer, you can select which operating system you want to use. Enjoy your Ubuntu system!
GRUB 啟動屏幕將顯示已安裝的系統,例如 Ubuntu 和 Windows 10。現在,每次啟動計算機時,您都可以選擇要使用的作系統。享受您的 Ubuntu 系統!
Closing Thoughts
結束語
As you can see, the entire process is no wizardry. You just need to know which steps you need to do in order to proceed. There are many interesting Linux distributions such as Manjaro, Solus, Fedora or Elementary OS. The installation procedure is usually quite similar. Of course, you can also go for another Ubuntu flavor such as Kubuntu or the Ubuntu Unity Remix. The choice is up to you.
正如你所看到的,整個過程并不是魔法。您只需要知道需要執行哪些步驟才能繼續。有許多有趣的 Linux 發行版,例如 Manjaro、Solus、Fedora 或 Elementary OS。安裝過程通常非常相似。當然,您也可以選擇其他 Ubuntu 風格,例如 Kubuntu 或 Ubuntu Unity Remix。選擇權在您手中。
If you do not know which one to chose, it is never wrong to pic the default Ubuntu version to get started. It is very user friendly and has a big user base and likewise many tutorials and explanations that you can use as reference.
如果您不知道該選擇哪一個,那么選擇默認的 Ubuntu 版本以開始使用永遠不會錯。它非常用戶友好,擁有龐大的用戶群,同樣有許多教程和解釋可供您參考。
How to Install Ubuntu Alongside Windows 10
如何將 Ubuntu 與 Windows 10 一起安裝
07 Jan 2023
Dual booting Linux with Windows is one of the most convenient ways of enjoying the two operating systems on the same computer.
將 Linux 與 Windows 雙啟動是在同一臺計算機上享受兩個作系統的最便捷方式之一。
You have both OS installed on the disk, on real hardware and when you power on your system, you can choose which operating system to use.
您將作系統安裝在磁盤上,安裝在實際硬件上,當您打開系統電源時,您可以選擇要使用的作系統。

In the dual boot, you can choose which operating system to boot into
In an earlier tutorial, I showed the steps to dual boot Ubuntu with Windows. 7 which comes with an MBR partition. The steps are almost the same for the newer systems that come preinstalled with Windows 10.
在前面的教程中,我展示了使用 Windows 7 雙啟動 Ubuntu 的步驟,Windows 7 附帶一個 MBR 分區。對于預裝 Windows 10 的較新系統,這些步驟幾乎相同。
In this tutorial, I’ll show you how to install Ubuntu with Windows 10 already installed on the system.
在本教程中,我將向您展示如何在系統上已安裝 Windows 10 的情況下安裝 Ubuntu。
💡
Before you start following the tutorial, I advise reading it entirely first. See what you need and what you should do in this tutorial. Once you have a good idea about the procedure and have all the necessary things on hand, start the process. Dual-boot is not a complicated process. It just takes some time and patience.
The steps mentioned here apply to other Ubuntu versions such as Lubuntu, Kubuntu, Xubuntu. and Ubuntu-based Linux distributions such as Linux Mint, elementary OS, etc.
此處提到的步驟適用于其他 Ubuntu 版本,例如 Lubuntu、Kubuntu、Xubuntu 和基于 Ubuntu 的 Linux 發行版,例如 Linux Mint、elementary OS 等。
Dual boot Ubuntu Linux with Windows 10
雙啟動 Ubuntu Linux 與 Windows 10

Compatibility checks
兼容性檢查
This tutorial is suitable for systems that come with Windows 10 pre-installed with UEFI secure boot and GPT partitioning system. Please check whether your system uses GPT or MBR..
本教程適用于預裝了 UEFI 安全啟動和 GPT 分區系統的 Windows 10 系統。請檢查您的系統使用的是 GPT 還是 MBR。
Make sure your system uses UEFI: This tutorial is only applicable for systems with UEFI boot. If you have bought your system in the last 5-6 years, chances are that you should already have a UEFI system on GPT partition. However, there is no harm in verifying that your system uses UEFI.. If your system uses legacy BIOS with MBR partitioning system, please follow this dual boot tutorial..
確保您的系統使用 UEFI:本教程僅適用于具有 UEFI 啟動的系統。如果您在過去 5-6 年內購買了您的系統,那么您很可能已經在 GPT 分區上擁有 UEFI 系統。但是,驗證您的系統是否使用 UEFI 并沒有什么壞處。如果您的系統使用帶有 MBR 分區系統的舊版 BIOS,請按照此雙啟動教程進行作。
Bitlocker encryption process is different: Newer systems with Windows 10 Pro have their disk encrypted with Bitlocker. If you have such a system, please follow this tutorial to dual boot with Bitclocker encryption..
Bitlocker 加密過程不同:使用 Windows 10 專業版的較新系統使用 Bitlocker 加密其磁盤。如果您有這樣的系統,請按照本教程使用 Bitclocker 加密進行雙啟動。
System with both SSD and HDD: If you have a system with both SSD and HDD, i.e. dual disk system, the process is pretty much the same. However, you’ll be a lot better following this dedicated tutorial on dual booting dual disk system..
同時具有 SSD 和 HDD 的系統:如果您的系統同時具有 SSD 和 HDD,即雙磁盤系統,則過程幾乎相同。但是,按照這個關于雙啟動雙磁盤系統的專門教程,你會好得多。
Prerequisites: What do you need?
先決條件:您需要什么?
You’ll need the following things to easily and safely install Linux alongside Windows:
您需要以下物品才能輕松安全地將 Linux 與 Windows 一起安裝:
-
A computer that comes preinstalled with Windows 10.
預裝 Windows 10 的計算機。
-
A USB key (pen drive or USB drive) of at least 4 GB in size and no data on it.
大小至少為 4 GB 且沒有數據的 USB 密鑰(筆式驅動器或 USB 驅動器)。
-
Internet connection (for downloading Ubuntu ISO image and live USB creating tool). You can do this on any system, not necessarily on the system you are dual booting.
互聯網連接(用于下載 Ubuntu ISO 鏡像和實時 USB 創建工具)。您可以在任何系統上執行此作,而不必在要進行雙引導的系統上執行此作。
-
Optional: External USB disk for making back up of your existing data.
可選:用于備份現有數據的外部 USB 磁盤。
-
Optional: Windows recovery or bootable disk (if you encounter any major boot issues, it could be fixed).
可選:Windows 恢復或可啟動磁盤(如果您遇到任何重大啟動問題,可以修復)。
Let’s see the steps of installing Ubuntu alongside Windows 10. I have made a video of the entire process. You may watch that as well.
讓我們看看將 Ubuntu 與 Windows 10 一起安裝的步驟。我制作了整個過程的視頻。你也可以看那個。
- How to Dual Boot Ubuntu and Windows 10 - YouTube
https://www.youtube.com/watch?v=u5QyjHIYwTQ
Step 1: Make a backup of your Windows system [optional]
第 1 步:備份您的 Windows 系統 [可選]
It is always nice to have a backup of your data, just in case you mess up with the system while dealing with disk partitions.
備份數據總是很好的,以防萬一您在處理磁盤分區時弄亂了系統。
I advise copying all the essential data you cannot afford to lose on an external USB disk. You can use an external HDD (slower but cheaper) or SSD (faster but expensive) and copy the important files and folders.
我建議復制您無法承受丟失的所有重要數據在外部 USB 磁盤上。您可以使用外部 HDD(速度較慢但更便宜)或 SSD(更快但價格昂貴)并復制重要文件和文件夾。
Step 2: Download Ubuntu (or whichever Linux distribution you are using)
第 2 步:下載 Ubuntu(或您正在使用的任何 Linux 發行版)

Head over to Ubuntu’s website and download the ISO file. The file should be around 2.5 GB in size. If you need to download Ubuntu via torrents., you can click the ‘alternative downloads.’
前往 Ubuntu 的網站并下載 ISO 文件。文件大小應約為 2.5 GB。如果您需要通過 torrent 下載 Ubuntu,您可以單擊 “替代下載”。
- Download Ubuntu ISO Image
https://ubuntu.com/download/desktop
Step 3: Create a live USB/disk of Ubuntu
第 3 步:創建 Ubuntu 的實時 USB / 磁盤
I presume that you are using Windows to create the live USB. Several free applications allow you to create a live Ubuntu USB.. You can use any of these tools. Since I cannot show all of them, I’ll go with Rufus.
我假設您正在使用 Windows 創建實時 USB。幾個免費的應用程序允許您創建實時 Ubuntu USB。您可以使用這些工具中的任何一個。既然我不能把它們都展示出來,我就選 Rufus 去。
Download Rufus for free from its website. It will download a .exe file.
從其網站免費下載 Rufus。它將下載一個 .exe 文件。
- Download Rufus
https://rufus.ie/
Plug in your USB. This device will be formatted so make sure you don’t have any important data on this USB disk.
插入您的 USB。此設備將被格式化,因此請確保您的 USB 磁盤上沒有任何重要數據。
Run the Rufus tool you just downloaded. It automatically identifies the plugged-in USB but double-check it anyway. Now, browse to the location of the downloaded ISO image and ensure that it uses GPT partitioning scheme and UEFI target system.
運行您剛剛下載的 Rufus 工具。它會自動識別插入的 USB,但還是要仔細檢查它。現在,瀏覽到下載的 ISO 映像的位置,并確保它使用 GPT 分區方案和 UEFI 目標系統。

Hit the start button and wait for the process to complete. Your live Linux USB is ready.
點擊開始按鈕并等待該過程完成。您的實時 Linux USB 已準備就緒。
📋
Installing Ubuntu and creating the live Ubuntu USB process can be done on any computer. But the rest of the process takes on the system on which you are dual booting.
?
安裝 Ubuntu 和創建隨身 Ubuntu USB 進程可以在任何計算機上完成。但是這個過程的其余部分是在雙引導的系統上進行的。
Step 4: Make some free space on your disk for Ubuntu installation
第 4 步:在磁盤上騰出一些可用空間用于 Ubuntu 安裝
In many systems, while installing Ubuntu, it gives the option to make a disk partition for Ubuntu. However, that is not a surety. This is why making the required free space on the disk would be better before starting the installation procedure.
在許多系統中,在安裝 Ubuntu 時,它提供了為 Ubuntu 創建磁盤分區的選項。然而,這并不能保證。這就是為什么在開始安裝過程之前在磁盤上留出所需的可用空間會更好。
In the Windows menu, search for ‘disk partitions’ and go to ‘Create and format hard disk partitions.’
在 Windows 菜單中,搜索 “磁盤分區” 并轉到 “創建和格式化硬盤分區”。

In the Disk Management tool, right-click on the drive which you want to partition and select shrink volume.
在磁盤管理工具中,右鍵單擊要分區的驅動器,然后選擇 shrink volume(壓縮卷)。
If you have just one partition like this, you need to make some free space out of it for Linux. Use any of them except C drive if you have several partitions of considerable size because it may erase the data.
如果你只有一個這樣的分區,你需要為它騰出一些空閑空間供 Linux 使用。如果您有多個相當大的分區,請使用除 C drive 之外的任何一個,因為它可能會刪除數據。
The 256 GB in my system already had several partitions from the manufacturer but mainly for backup and other purposes. The primary partition was the C drive, around 220 GB, where Windows 10 is installed. In my case, I shrank the C drive to make some free space for Linux installation.
我系統中的 256 GB 已經有來自制造商的幾個分區,但主要用于備份和其他目的。主分區是 C 盤,大約 220 GB,安裝了 Windows 10。就我而言,我縮小了 C 盤,以便為 Linux 安裝騰出一些可用空間。

How much space do you need for Linux in dual boot?
雙啟動中的 Linux 需要多少空間?
This depends on how much total disk space you have. You may install Ubuntu on 15 or 20 GB but you’ll soon start running out of disk space. These days, you should have at least 120 GB of disk. In that case, go for 30-40 GB of disk for Linux. If you have 250 GB disk, allocate 60-80 GB or even more. If you have more disk space, allocate even more free space, if you want.
這取決于您擁有的總磁盤空間量。您可以在 15 GB 或 20 GB 上安裝 Ubuntu,但您很快就會開始耗盡磁盤空間。如今,您應該至少有 120 GB 的磁盤。在這種情況下,請為 Linux 選擇 30-40 GB 的磁盤。如果您有 250 GB 的磁盤,請分配 60-80 GB 甚至更多。如果有更多的磁盤空間,如果需要,可以分配更多的可用空間。
What if you have D, E or F drives?
如果您有 D、E 或 F 驅動器怎么辦?
This is a common confusion for many people as they think Ubuntu can only be installed on the C drive. That’s not true. I had only one C drive, so I shrank it. If you have D, E or F drive, you may shrink one of those drives. You may also choose to delete the D, E or F drive. NEVER DELETE C DRIVE.
這是許多人常見的困惑,因為他們認為 Ubuntu 只能安裝在 C 盤上。那不是真的。我只有一個 C 盤,所以我縮小了它。如果您有 D、E 或 F 驅動器,則可以縮小其中一個驅動器。您也可以選擇刪除 D、E 或 F 驅動器。切勿刪除 C 盤。
Step 5: Boot from live Ubuntu USB
第 5 步:從實時 Ubuntu USB 啟動
You created a live Ubuntu USB in step 3. Plug it into the system. Before you go and boot from the live USB, let’s have a quick word about the infamous secure boot.
您在第 3 步中創建了一個實時 Ubuntu USB。將其插入系統。在您開始從 live USB 啟動之前,讓我們簡單介紹一下臭名昭著的安全啟動。
Do I need to disable the secure boot for installing Linux?
安裝 Linux 需要禁用安全啟動嗎?
6-8 years back, the UEFI secure boot was not well-supported by Linux; hence, you had to disable secure boot before installing Linux. Thankfully, Ubuntu and many other Linux distributions currently support secure boot very well. Usually, you should not need to do anything about it. However, if your system doesn’t allow booting from live USB or if you see any other related issue, you may disable the secure boot on Windows..
6-8 年前,Linux 并沒有很好地支持 UEFI 安全啟動;因此,您必須在安裝 Linux 之前禁用安全啟動。值得慶幸的是,Ubuntu 和許多其他 Linux 發行版目前都很好地支持安全啟動。通常,您不需要對此執行任何作。但是,如果您的系統不允許從 live USB 啟動,或者您看到任何其他相關問題,您可以在 Windows 上禁用安全啟動。
Alright! Let’s see how to boot from the USB. You can go to the boot settings by pressing F2/F10 or F12 at the system start time and selecting to boot from the USB. However, some people find it difficult.
好!讓我們看看如何從 USB 啟動。您可以通過在系統啟動時按 F2/F10 或 F12 并選擇從 USB 啟動來進入啟動設置。然而,有些人覺得這很困難。
The longer but an easier step is to access the UEFI boot settings from within Windows.. In the Windows menu, search for UEFI and then click on ‘Change advanced startup options’:
較長但更簡單的步驟是從 Windows 中訪問 UEFI 啟動設置。在 Windows 菜單中,搜索 UEFI,然后單擊 “更改高級啟動選項”:

Go to the *Advanced startup* option and click on *Restart now* button.
轉到高級啟動選項,然后單擊立即重新啟動按鈕。

On the next screen, click on ‘Use a device’:
在下一個屏幕上,單擊 “使用設備”:

Recognize the USB disk with its name and size. It *may also be displayed as EFI USB Device*.
識別 USB 磁盤及其名稱和大小。它也可能顯示為 EFI USB 設備。

Now it will power off your system and reboot into the disk you chose which should be the live USB disk. You should see a screen like this after a few seconds:
現在它將關閉您的系統并重新啟動到您選擇的磁盤,該磁盤應該是實時 USB 磁盤。幾秒鐘后,您應該會看到如下屏幕:

The ‘Try Ubuntu without installing’ option allows you to experience Ubuntu from the live disk. The option to install Ubuntu can be found on the desktop.
“在不安裝的情況下試用 Ubuntu” 選項允許您從實時磁盤體驗 Ubuntu。安裝 Ubuntu 的選項可以在桌面上找到。
The “Install Ubuntu” option will start the Ubuntu installation immediately.
“安裝 Ubuntu” 選項將立即開始 Ubuntu 安裝。
You can opt for either option based on your preference.
您可以根據自己的喜好選擇任一選項。
Step 6: Installing Ubuntu along with Windows 10
第 6 步:將 Ubuntu 與 Windows 10 一起安裝
Start the installation procedure. The first few steps are simple. You choose the language and keyboard layout.
開始安裝過程。前幾個步驟很簡單。您可以選擇語言和鍵盤布局。

On the next screen, choose Normal installation. No need to download updates or install third-party software just yet. You may do it after the installation completes.
在下一個屏幕上,選擇 Normal installation (正常安裝)。目前無需下載更新或安裝第三方軟件。您可以在安裝完成后執行此作。
Hit continue. It may take some time to go to the next step.
點擊繼續。可能需要一些時間才能進行下一步。

Note: Some people try to download updates and install media codes while installing. In my experience, it sometimes creates issues during installation and may also cause the installation to fail. For this reason, I advise against them.
注意:有些人在安裝時嘗試下載更新并安裝媒體代碼。根據我的經驗,它有時會在安裝過程中產生問題,也可能導致安裝失敗。因此,我建議不要使用它們。
Important: Installation takes two approaches based on what you see on the next screen
重要說明:根據您在下一個屏幕上看到的內容,安裝采用兩種方法
Since this is a detailed tutorial, I’ll cover both aspects.
由于這是一個詳細的教程,我將涵蓋這兩個方面。
Approach 1: You see the “Install Ubuntu alongside Windows Boot Manager”
方法 1:您會看到 “將 Ubuntu 與 Windows Boot Manager 一起安裝 Ubuntu”
If you see the “Install Ubuntu alongside Windows Boot Manager” on the Installation type screen, you are in luck. You can select this method and hit continue.
如果您在安裝類型屏幕上看到 “將 Ubuntu 與 Windows Boot Manager 一起安裝 Ubuntu”,那么您很幸運。您可以選擇此方法并點擊 繼續.
 Approach 2: You don’t see ‘Install Ubuntu alongside Windows Boot Manager’ option or it is greyed out
方法 2:您沒有看到 “將 Ubuntu 與 Windows Boot Manager 一起安裝 Ubuntu” 選項或顯示為灰色
But if you are one of the unlucky ones who don’t see this option, no need to worry. Things are not that bad for you. You can still install Ubuntu with Windows.
但是,如果您是沒有看到此選項的不幸者之一,則無需擔心。事情對你來說并沒有那么糟糕。您仍然可以在 Windows 上安裝 Ubuntu。
On the Installation type screen, go with Something Else.
在 Installation type (安裝類型) 屏幕上,選擇 Something Other (其他內容)。

It will take you to the partitioning screen. Remember you had created some free space beforehand?
它將帶您進入分區屏幕。還記得您之前創建了一些空閑空間嗎?
You may allocate the entire free space to root (swapfile and home will be created automatically under root) or separate root, swap and home partitioning. Both methods are acceptable.
您可以將整個空閑空間分配給 root (swapfile 和 home 將在 root 下自動創建)或單獨的 root、swap 和 home 分區。兩種方法都是可以接受的。
I show the steps for creating root, swap and home partitions separately. But feel free to use a single partition for all of them.
我將分別展示創建 root、swap 和 home 分區的步驟。但是請隨意為所有這些 API 使用單個分區。
Select the free space and click on the + sign.
選擇可用空間,然后單擊 + 號。

It will provide you with the option to create a Linux partition. You are creating the Root partition. Anything above 25 GB is more than sufficient for it. Choose the size, select Ext 4 as the file type and / (means root) as the mount point.
它將為您提供創建 Linux 分區的選項。您正在創建 Root 分區。任何超過 25 GB 的東西都綽綽有余。選擇大小,選擇 Ext 4 作為文件類型,選擇 /(表示 root)作為掛載點。

Clicking on OK in the previous step will bring you to the partition screen. Next, create a swap. Like previously, click on the + sign again. This time, use the file type as the Swap area.
單擊上一步中的 OK 將帶您進入分區屏幕。接下來,創建一個交換點。和以前一樣,再次單擊 + 號。這一次,使用文件類型作為 Swap 區域。
Ideal swap size in Linux. is debatable. If you have 2 GB or less RAM, use swap double the size of RAM. If you have 3-6 GB of RAM, use a swap of the same size as RAM. If you have 8 GB or more RAM, you may use swap half the size of RAM (unless you have plenty of disk space, and you want to use hibernation and in that case, use a swap of at least the same size as RAM).
Linux 中理想的交換大小是有爭議的。如果您的 RAM 為 2 GB 或更少,請使用 ram 大小的兩倍的 swap。如果您有 3-6 GB 的 RAM,請使用與 RAM 大小相同的交換空間。如果您有 8 GB 或更多的 RAM,則可以使用 RAM 一半大小的交換空間(除非您有足夠的磁盤空間,并且您想使用休眠,在這種情況下,請使用至少與 RAM 大小相同的交換空間)。
If you feel like you have less swap on your system, don’t worry. You can easily create swapfile and add more swap space to your systems[].(https://itsfoss.com/create-swap-file-linux/).
如果您覺得系統上的交換空間較少,請不要擔心。您可以輕松創建交換文件并向系統添加更多交換空間。

Similarly, create a Home partition. Allocate it maximum space (in fact allocate it the rest of the free space) because this is where you’ll save music, pictures and downloaded files.
同樣,創建一個 Home 分區。為它分配最大的空間(實際上為它分配剩余的可用空間),因為這是您保存音樂、圖片和下載文件的地方。

Once you are ready with Root, Swap and Home, click on Install Now:
準備好 Root、Swap 和 Home 后,單擊立即安裝:

Well, you have almost won the battle. You can smell victory now. Select a timezone when asked.
好吧,你幾乎贏得了這場戰斗。你現在可以聞到勝利的味道了。在詢問時選擇時區。

Next, you’ll be asked to enter a username, hostname (computer’s name) and password.
接下來,系統會要求您輸入用戶名、主機名(計算機名稱)和密碼。

Now it’s just a matter of waiting. It should take 8-10 minutes to complete the installation.
現在只是等待的問題。完成安裝需要 8-10 分鐘。

Once the installation finishes, restart the system.
安裝完成后,重新啟動系統。

Restart after installation completes
You’ll be asked to remove the USB disk. You can remove the disk at this stage without worrying. The system reboots after this.
系統將要求您移除 USB 磁盤。您可以在此階段刪除磁盤,而無需擔心。在此之后,系統將重新啟動。

Remove USB and press enter
💡
You do not need the live USB disk to use Linux anymore. You have installed Ubuntu on your computer’s disk. Remove the USB and keep it for later if you want to use it for installing Linux on some other system. You may also format and use it for regular data storage or transfer.
If everything goes smoothly, you should see the grub screen once the system powers on. Here, you can choose Ubuntu to boot into Ubuntu and Windows boot manager to boot into Windows. Pretty cool, right?
如果一切順利,您應該會在系統開機后看到 grub 屏幕。在這里,您可以選擇 Ubuntu 啟動到 Ubuntu 和 Windows 啟動管理器啟動到 Windows。很酷,對吧?
You can choose the operating system from the grub screen
Dual boot did not succeed? Here are some troubleshooting tips
雙啟動未成功?以下是一些故障排除提示
Life is not even for everyone. For some, the dual boot might not succeed just yet. However, instead of giving up, you may follow a couple of tips and retry the installation procedure.
生活并不適合所有人。對于某些人來說,雙啟動可能還沒有成功。但是,與其放棄,不如按照一些提示重新嘗試安裝程序。
Try changing the USB port
嘗試更改 USB 端口
This may sound ridiculous but sometimes some USB ports cause issue with booting the USB or installing Linux. Changing the USB port could be a trick.
這聽起來可能很荒謬,但有時某些 USB 端口會導致啟動 USB 或安裝 Linux 時出現問題。更改 USB 端口可能是一個技巧。
Try not using internet while installing Linux
安裝 Linux 時盡量不要使用 Internet
I have experienced that sometimes Linux installation throws error if it is connected to the internet. If you encountered a “‘grub-efi-amd64-signed’ package failed to install into /target” error, please try installing Ubuntu without internet.
我經歷過,如果 Linux 安裝連接到 Internet,有時它會引發錯誤。如果您遇到 “‘grub-efi-amd64-signed’ 包無法安裝到 /target” 錯誤,請嘗試在沒有 Internet 的情況下安裝 Ubuntu。
Disable secure boot and/or fast boot
禁用安全啟動和 / 或快速啟動
In some rare cases, secure boot would not allow you to boot from live USB or install Linux. Disable secure boot.. You may also disable fast boot in some cases.
在極少數情況下,安全啟動不允許你從 live USB 啟動或安裝 Linux。禁用安全啟動。在某些情況下,您也可以禁用快速啟動。
Dual boot finished but you don’t see the grub screen to boot into Ubuntu
雙啟動已完成,但您沒有看到啟動到 Ubuntu 的 grub 屏幕
Please check your boot order in the UEFI settings. Do you see Ubuntu/UEFI below Windows Boot Manager? If yes, move it up the order. If you don’t see grub at all, you may carefully try this. or this tutorial..
請在 UEFI 設置中檢查您的啟動順序。您是否在 Windows 啟動管理器下方看到 Ubuntu/UEFI?如果是,請將其向上移動。如果您根本沒有看到 grub,您可以仔細嘗試這個或這個教程。
Grub rescue error or no bootable device found after dual booting
雙引導后出現 Grub 救援錯誤或未找到可引導設備
Use this tutorial for no bootable device found error.. And this one is for grub rescue error..
使用本教程解決 No bootable device found 錯誤。這個是針對 grub rescue 錯誤的。
Additional Tips: You’ll notice that there is a time difference between Windows and Ubuntu You can fix the time gap issue in dual boot easily.. Also, in the grub screen, Ubuntu is up the priority. You can also change the boot order to make Windows default. if you are going to use Windows more often than Linux. If you want to reverse the process, follow this guide to remove Ubuntu from dual boot with Windows..
其他提示: 您會注意到 Windows 和 Ubuntu 之間存在時差您可以輕松修復雙啟動中的時間間隔問題。此外,在 grub 屏幕中,Ubuntu 是優先級。如果您打算更頻繁地使用 Windows,則還可以更改引導順序以將 Windows 設為默認 Windows。如果您想反轉該過程,請按照本指南從 Windows 的雙啟動中刪除 Ubuntu。
How to Disable UEFI Secure Boot to Dual Boot Any System
如何禁用 UEFI 安全引導以雙重引導任何系統
By Gavin Phillips
Published Jul 19, 2019

Have you ever tried to install a second operating system alongside Windows? Depending on the OS, you might have encountered the UEFI Secure Boot feature.
您是否曾經嘗試過在 Windows 旁邊安裝第二個作系統?根據作系統,您可能遇到了 UEFI 安全啟動功能。
If Secure Boot doesn’t recognize the code you’re trying to install, it will stop you. Secure Boot is handy for preventing malicious code running on your system. But it also stops you booting some legitimate operating systems, like Kali Linux, Android x86, or TAILS.
如果 Secure Boot 無法識別您嘗試安裝的代碼,它將停止您。安全啟動對于防止惡意代碼在您的系統上運行非常方便。但它也會阻止您啟動某些合法的作系統,例如 Kali Linux、Android x86 或 TAILS。
But there is a way around it. This short guide will show you how to disable UEFI Secure Boot to let you dual boot any operating system you like.
但有辦法解決這個問題。這個簡短的指南將向您展示如何禁用 UEFI 安全啟動,讓您雙啟動您喜歡的任何作系統。
What Is UEFI Secure Boot?
什么是 UEFI 安全啟動?
Let’s take a second to consider precisely how Secure Boot keeps your system safe.
讓我們花點時間仔細考慮一下 Secure Boot 如何確保您的系統安全。
Secure Boot is a feature of the Unified Extensible Firmware Interface (UEFI). UEFI itself is the replacement for the BIOS interface. found on many devices. UEFI is a more advanced firmware interface with many more customization and technical options.
安全啟動是統一可擴展固件接口 (UEFI) 的一項功能。UEFI 本身是許多設備上 BIOS 界面的替代品。UEFI 是一個更高級的固件接口,具有更多的自定義和技術選項。

Secure Boot is something of a security gate. It analyzes code before you execute it on your system. If the code has a valid digital signature, Secure Boot lets it through the gate. If the code has an unrecognized digital signature, Secure Boot blocks it from running, and the system will require a restart.
安全啟動在某種程度上是一個安全門。它會先分析代碼,然后再在系統上執行代碼。如果代碼具有有效的數字簽名,則安全啟動會允許它通過入口。如果代碼具有無法識別的數字簽名,則安全啟動會阻止它運行,并且系統將需要重新啟動。
At times, code that you know is safe, and comes from a reliable source, might not have a digital signature in the Secure Boot database.
有時,您知道是安全的并且來自可靠來源的代碼可能在安全啟動數據庫中沒有數字簽名。
For example, you can download numerous Linux distributions directly from their developer site, even verifying the distribution checksum to check for tampering. But even with that confirmation, Secure Boot will still reject some operating systems and other types of code (such as drivers and hardware).
例如,您可以直接從他們的開發人員站點下載大量 Linux 發行版,甚至可以驗證發行版校驗和以檢查是否被篡改。但即使進行了確認,安全啟動仍會拒絕某些作系統和其他類型的代碼(例如驅動程序和硬件)。
How to Disable Secure
Boot 如何禁用安全啟動
Now, I don’t advise disabling Secure Boot lightly. It really does keep you safe (check out the Secure Boot vs. NotPetya Ransomware video below, for example), especially from some of the nastier malware variants like rootkits and bootkits (others would contend it was the security measure to stop Windows pirating). That said, sometimes it gets in the way.
現在,我不建議輕易禁用安全啟動。它確實可以保證您的安全(例如,查看下面的 Secure Boot vs. NotPetya Ransomware 視頻),尤其是來自一些更令人討厭的惡意軟件變體,如 rootkit 和 bootkit(其他人會爭辯說這是阻止 Windows 盜版的安全措施)。也就是說,有時它會妨礙你。
Please note that turning Secure Boot back on may require a BIOS reset. This does not cause your system to lose any data. It does, however, remove any custom BIOS settings. Moreover, there are some examples where users are permanently no longer able to turn on Secure Boot, so please bear that in mind.
請注意,重新打開安全啟動可能需要重置 BIOS。這不會導致您的系統丟失任何數據。但是,它確實會刪除任何自定義 BIOS 設置。此外,在一些示例中,用戶永久無法再打開安全啟動,因此請記住這一點。
Okay, here’s what you do:
好的,這是你要做的:
-
Turn your computer off. Then, turn it back on and press the BIOS entry key during the boot process. This varies between hardware types., but is generally F1, F2, F12, Esc, or Del; Windows users can hold Shift while selecting Restart to enter the Advanced Boot Menu. Then select Troubleshoot > Advanced Options: UEFI Firmware Settings.
關閉計算機。然后,在啟動過程中重新打開并按 BIOS 輸入鍵。這因硬件類型而異,但通常是 F1、F2、F12、Esc 或 Del;Windows 用戶可以在按住 Shift 的同時選擇 Restart 進入 Advanced Boot Menu。然后選擇 > 高級選項疑難解答:UEFI 固件設置。
-
Find the Secure Boot option. If possible, set it to Disabled. It is usually found in the Security tab, Boot tab, or Authentication tab.
找到 Secure Boot 選項。如果可能,請將其設置為 Disabled。它通常位于 Security (安全) 選項卡、Boot (啟動) 選項卡或 Authentication (身份驗證) 選項卡中。
-
Save and Exit. Your system will reboot.
保存并退出。您的系統將重新啟動。
You have successfully disabled Secure Boot. Feel free you grab your nearest previously unbootable USB drive and finally explore the operating system. Our list of the best Linux distributions is a great place to start.!
您已成功禁用安全啟動。隨意拿起離您最近的以前無法啟動的 USB 驅動器,最后探索作系統。我們的最佳 Linux 發行版列表是一個很好的起點!
How to Re-Enable Secure Boot
如何重新啟用安全啟動
Of course, you might want to turn Secure Boot back on. After all, it does help protect against malware and other unauthorized code.. If you directly install an unsigned operating system, you’ll need to remove all traces before attempting to turn Secure Boot back on. Otherwise, the process will fail.
當然,您可能希望重新打開安全啟動。畢竟,它確實有助于防止惡意軟件和其他未經授權的代碼。如果直接安裝未簽名的作系統,則需要在嘗試重新打開安全啟動之前刪除所有跟蹤。否則,該過程將失敗。
-
Uninstall any unsigned operating systems or hardware installed when Secure Boot was disabled.
卸載禁用安全引導時安裝的任何未簽名的作系統或硬件。
-
Turn your computer off. Then, turn it back on and press the BIOS entry key during the boot process, as above.
關閉計算機。然后,在啟動過程中重新打開并按下 BIOS 輸入鍵,如上所述。
-
Find the Secure Boot option and set it to Enabled.
找到 Secure Boot 選項并將其設置為 Enabled。
-
If Secure Boot doesn’t enable, try to Reset your BIOS to factory settings. Once you restore factory settings, attempt to enable Secure Boot again.
如果安全啟動未啟用,請嘗試將 BIOS 重置為出廠設置。恢復出廠設置后,嘗試再次啟用安全啟動。
-
Save and Exit. Your system will reboot.
保存并退出。您的系統將重新啟動。
-
In the event the system fails to boot, disable Secure Boot again.
如果系統無法引導,請再次禁用安全引導。
Troubleshooting Secure Boot Enable Failure
安全啟動啟用失敗疑難解答
There are a few small fixes we can try to get your system booting with Secure Boot enabled.
我們可以嘗試一些小修復程序,讓您的系統在啟用安全啟動的情況下啟動。
-
Make sure to turn UEFI settings on in the BIOS menu; this also means making sure Legacy Boot Mode and equivalents are off.
確保在 BIOS 菜單中打開 UEFI 設置;這也意味著確保 Legacy Boot Mode 和等效項處于關閉狀態。
-
Check your drive partition type.. UEFI requires GPT partition style, rather than the MBR used by Legacy BIOS setups. To do this, type Computer Management in your Windows Start menu search bar and select the best match. Select Disk Management from the menu. Now, find your primary drive, right-click, and select Properties. Now, select the Volume. Your partition style is listed here. (If you need to switch from MBR to GPT there is only one option to change the partition style: back up your data and wipe the drive.)
檢查您的驅動器分區類型。UEFI 需要 GPT 分區樣式,而不是傳統 BIOS 設置使用的 MBR。為此,請在 Windows 開始菜單搜索欄中鍵入 Computer Management,然后選擇最佳匹配項。從菜單中選擇 Disk Management。現在,找到您的主驅動器,右鍵單擊并選擇 租房.現在,選擇 卷.您的分區樣式在此處列出。(如果您需要從 MBR 切換到 GPT,只有一個選項可以更改分區樣式:備份數據并擦除驅動器。
-
Some firmware managers have the option to Restore Factory Keys, usually found in the same tab as the other Secure Boot options. If you have this option, restore the Secure Boot factory keys. Then Save and Exit, and reboot.
某些固件管理器具有 Restore Factory Keys 選項,通常與其他安全啟動選項位于同一選項卡中。如果有此選項,請恢復 Secure Boot 出廠密鑰。然后 Save and Exit (保存并退出),然后重新啟動。

Trusted Boot
可信啟動
Trusted Boot picks up where Secure Boot stops, but really only applies to the Windows 10 digital signature. Once UEFI Secure Boot passes the baton, Trusted Boot verifies every other aspect of Windows., including drivers, startup files, and more.
受信任的啟動從安全啟動停止的位置選取,但實際上僅適用于 Windows 10 數字簽名。UEFI 安全啟動傳遞接力棒后,受信任的啟動將驗證 Windows 的所有其他方面,包括驅動程序、啟動文件等。
Much like Secure Boot, if Trusted Boot finds a corrupted or malicious component, it refuses to load. However, unlike Secure Boot, Trusted Boot can at times automatically repair the issue at hand, depending on the severity. The below image explains a little more about where Secure Boot and Trusted Boot fit together in the Windows boot process.
與安全啟動非常相似,如果 Trusted Boot 發現損壞或惡意的組件,它會拒絕加載。但是,與安全啟動不同的是,可信啟動有時可以根據嚴重性自動修復手頭的問題。下圖詳細介紹了安全啟動和受信任啟動在 Windows 啟動過程中的匹配位置。

Should You Turn Off Secure Boot?
您應該關閉安全啟動嗎?
Disabling Secure Boot is somewhat risky. Depending on who you ask, you’re potentially putting your system security at risk.
禁用安全啟動在一定程度上存在風險。根據您詢問的對象,您可能會將系統安全置于風險之中。
Secure Boot is arguably more useful than ever at the current time. Bootloader attacking ransomware is very real. Rootkits and other particularly nasty malware variants are also out in the wild. Secure Boot provides UEFI systems. with an extra level of system validation to give you peace of mind.
安全啟動可以說目前比以往任何時候都更有用。攻擊勒索軟件的 Bootloader 非常真實。Rootkit 和其他特別令人討厭的惡意軟件變體也已廣泛存在。安全啟動為 UEFI 系統提供了額外的系統驗證級別,讓您高枕無憂。
Fix “No Bootable Device Found” Error After Installing Ubuntu Linux
修復安裝 Ubuntu Linux 后出現的 “未找到可啟動設備” 錯誤
Did you install Linux afresh or perhaps dual booted it? And now your system shows ‘no bootable device’ error while booting? Here’s what you could do to fix the issue.
Abhishek Prakash
24 Jan 2023
Usually, I dual boot Ubuntu and Windows. but this time I decided to go for a clean Ubuntu installation., i.e., eliminating Windows completely.
通常,我會雙啟動 Ubuntu 和 Windows,但這次我決定進行全新的 Ubuntu 安裝,即完全消除 Windows。
After the clean install of Ubuntu, I ended up with a screen saying no bootable device found instead of the Grub screen. Clearly, the installation messed up with the UEFI boot settings.
全新安裝 Ubuntu 后,我最終看到一個屏幕,顯示未找到可啟動設備,而不是 Grub 屏幕。顯然,安裝搞亂了 UEFI 引導設置。
My laptop screen looked like this:
我的筆記本電腦屏幕看起來像這樣:

I am going to show you how I fixed no bootable device found error after installing Ubuntu in Acer laptops. It is important that I mention that I am using Acer Aspire R13 because we have to change things in firmware settings and those settings might look different from manufacturer to manufacturer and from device to device.
我將向您展示如何在 Acer 筆記本電腦中安裝 Ubuntu 后修復未找到可啟動設備錯誤。重要的是要提到我正在使用 Acer Aspire R13,因為我們必須更改固件設置中的內容,并且這些設置可能因制造商和設備而異。
So before you go on trying the steps mentioned here, let’s first see what state my computer was in during this error:
因此,在您繼續嘗試此處提到的步驟之前,讓我們先看看我的計算機在此錯誤期間處于什么狀態:
-
My Acer Aspire R13 came preinstalled with Windows and with UEFI boot manager
我的 Acer Aspire R13 預裝了 Windows 和 UEFI 啟動管理器
-
Secure boot was not turned off (my laptop has just come from repair and the service guy had put the secure boot on again, I did not know until I ran up in the problem). You can read this post to know how to disable secure boot in Acer laptops.
安全啟動沒有關閉(我的筆記本電腦剛剛修好,維修人員又打開了安全啟動,直到我遇到問題才知道)。您可以閱讀這篇文章以了解如何在 Acer 筆記本電腦中禁用安全啟動
-
I chose to install Ubuntu by erasing everything i.e. existing Windows, various partitions etc.
我選擇通過擦除所有內容(即現有 Windows、各種分區等)來安裝 Ubuntu。
-
After installing Ubuntu, I saw no bootable device found error while booting from the hard disk. Booting from live USB worked just fine
安裝 Ubuntu 后,我在從硬盤啟動時看到 No bootable device found 錯誤。從 live USB 啟動工作正常
In my opinion, not disabling the secure boot was the reason of this error. However, I have no data to backup my claim. It is just a hunch. Interestingly, dual booting Windows and Linux often ends up in common Grub issues like these two:
在我看來,不禁用安全啟動是導致此錯誤的原因。但是,我沒有數據來支持我的索賠。這只是一種直覺。有趣的是,雙啟動 Windows 和 Linux 通常會導致常見的 Grub 問題,例如以下兩個:
-
error: no such partition grub rescue.
錯誤:沒有這樣的分區 grub rescue -
Minimal BASH like line editing is supported.
支持最小 BASH 類行編輯
If you are in a similar situation, you can try the fix which worked for me.
如果您遇到類似的情況,您可以嘗試對我有效的修復程序。
Fix no bootable device found error after installing Ubuntu
修復安裝 Ubuntu 后未找到可啟動設備錯誤
Pardon me for poor quality images. My OnePlus camera seems to be not very happy with my laptop screen.
請原諒我圖像質量差。我的 OnePlus 相機似乎對我的筆記本電腦屏幕不太滿意。
Step 1
Turn the power off and boot into boot settings. I had to press Fn+F2 (to press F2 key) on Acer Aspire R13 quickly. You have to be very quick with it if you are using SSD hard disk because SSDs are very fast in booting. Depending upon your manufacturer/model, you might need to use Del or F10 or F12 keys.
關閉電源并啟動進入啟動設置。我不得不在 Acer Aspire R2 上快速按 Fn+F2(按 F13 鍵)。如果您使用的是 SSD 硬盤,則必須非常快速地使用它,因為 SSD 的啟動速度非常快。根據您的制造商 / 型號,您可能需要使用 Del 或 F10 或 F12 鍵。
Step 2
In the boot settings, make sure that Secure Boot is turned on. It should be under the Boot tab.
在引導設置中,確保 Secure Boot 已打開。它應該在 Boot 選項卡下。
Step 3
Go to Security tab and look for “Select an UEFI file as trusted for executing” and click enter.
轉到 Security(安全)選項卡并查找 “Select an UEFI file as trusted for executing(選擇受信任的 UEFI 文件執行)”,然后單擊 Enter。

Just for your information, what we are going to do here is to add the UEFI settings file (it was generated while Ubuntu installation) among the trusted UEFI boots in your device. If you remember, UEFI boot’s main aim is to provide security and since Secure Boot was not disabled (perhaps) the device did not intend to boot from the newly installed OS. Adding it as trusted, kind of whitelisting, will let the device boot from the Ubuntu UEFI file.
僅供參考,我們在這里要做的是將 UEFI 設置文件(它是在 Ubuntu 安裝時生成的)添加到您設備中受信任的 UEFI 啟動中。如果您還記得,UEFI 啟動的主要目的是提供安全性,并且由于安全啟動未被禁用(可能),因此設備并不打算從新安裝的作系統啟動。將其添加為受信任的白名單,將允許設備從 Ubuntu UEFI 文件啟動。
💡
Cannot select UEFI file? On Acer devices, you have to set a supervisor password first before it shows the option to select a UEFI file or disable secure boot. You must remember or keep this password safe because if you forget it, you won’t be able to make changes to your BIOS setting ever.
Step 4
You should see your hard disk like HDD0 etc here. If you have more than one hard disk, I hope you remember where did you install Ubuntu. Press Enter here as well.
您應該在此處看到您的硬盤,如 HDD0 等。如果你有多個硬盤,我希望你還記得你在哪里安裝了 Ubuntu。在此處也按 Enter。

Step 5
You should see here. Press enter.
你應該在這里看到 < EFI>。按 Enter。

Step 6
You’ll see in next screen. Don’t get impatient, you are almost there 😃
您將在 < Ubuntu > 下一個屏幕中看到。不要急躁,你快到了:)

Step 7

You’ll see shimx64.efi, grubx64.efi and MokManager.efi file here. The important one is shimx64.efi here. Select it and click enter.
您將在此處看到 shimx64.efi、grubx64.efi 和 MokManager.efi 文件。重要的是這里的 shimx64.efi。選擇它并單擊 Enter。
In next screen, type Yes and click enter.
在下一個屏幕中,鍵入 Yes 并單擊 Enter。

Step 8
Once we have added it as trused EFI file to be executed, press F10 to save and exit.
將其添加為要執行的 trused EFI 文件后,按 F10 保存并退出。

Reboot your system and this time you should be seeing the familiar Grub screen. Even if you do not see Grub screen, you should at least not be seeing “no bootable device found” screen anymore. You should be able to boot into Ubuntu.
重新啟動系統,這次您應該會看到熟悉的 Grub 屏幕。即使您沒有看到 Grub 屏幕,您至少應該不會再看到 “no bootable device found” 屏幕。您應該能夠啟動到 Ubuntu。
If your Grub screen was messed up after the fix but you got to login into it, you can reinstall Grub to boot into the familiar purple Grub screen of Ubuntu.
如果您的 Grub 屏幕在修復后搞砸了,但您可以登錄它,您可以重新安裝 Grub 以啟動到熟悉的 Ubuntu 紫色 Grub 屏幕。
How to Solve: error: no such partition grub rescue in Ubuntu Linux
解決方法:錯誤:Ubuntu Linux 中沒有這樣的分區 grub rescue
Abhishek Prakash
02 Sep 2023
The other day I was trying to extend my root partition of Ubuntu which I dual boot with Windows. The partition extension was successful except that I screwed up the Grub configuration. When I booted in my laptop after the partition changes, I was welcomed by the Death Screen of Linux saying:
前幾天我試圖擴展我的 Ubuntu 根分區,我用 Windows 雙啟動它。分區擴展很成功,只是我搞砸了 Grub 配置。當我在分區更改后啟動筆記本電腦時,Linux 的死屏歡迎我說:
error: no such partition grub rescue
錯誤:沒有這樣的分區 Grub 救援
After googling a bit, I found this mega thread on Ubuntu forum. that helped me. But since it is a very complicated thread, I have re-written the tutorial so that one can follow it easily. So there are some assumption and some requirements to fix the error: no such partition grub rescue problem.
在谷歌上搜索了一會兒后,我在 Ubuntu 論壇上找到了這個對我有幫助的大型線程。但是由于這是一個非常復雜的線程,因此我重新編寫了本教程,以便可以輕松理解它。所以有一些假設和一些要求來修復錯誤:沒有這樣的分區 grub rescue 問題。
Requirements and presumptions:
要求和假設:
-
You must have a live CD/DVD/USB of the same version of OS
您必須擁有相同作系統版本的 live CD/DVD/USB
-
You must have internet connection
您必須有互聯網連接
-
You are dual booting Windows with Ubuntu (no Wubi installation)
您正在使用 Ubuntu 雙啟動 Windows(未安裝 Wubi)
-
You do not have a separate /boot partition
您沒有單獨的 /boot 分區
Now let’s see how can you rescue the grub here.
現在讓我們看看如何拯救這里的蠐螬。
🚧
This element indicates a warning or caution.
How To Fix: error: no such partition grub rescue
修復方法:error: no such partition grub rescue
You’ll be using chroot to rescue grub. The whole concept is that since grub configuration files have been deleted or corrupted, it need to be re-installed. And using the live CD of the exact OS version, we can install the grub configuration again. It will delete all the changes (if any) you have made to the grub.
您將使用 chroot 來拯救 grub。整個概念是,由于 grub 配置文件已被刪除或損壞,因此需要重新安裝它。使用確切 OS 版本的 live CD,我們可以再次安裝 grub 配置。它將刪除您對 grub 所做的所有更改(如果有)。
Please follow these steps to easily fix grub rescue problem in Ubuntu (or other Linux distributions):
請按照以下步驟輕松修復 Ubuntu(或其他 Linux 發行版)中的 grub rescue 問題:
Step 1: Know you root partition
第 1 步:了解你的根分區
Boot from live CD, DVD or USB drive. Try Ubuntu from live disk. Open a terminal (Ctrl+Alt+T) and use the following command:
從 live CD、DVD 或 USB 驅動器啟動。從實時磁盤試用 Ubuntu。打開終端 (Ctrl+Alt+T) 并使用以下命令:
sudo su
fdisk -l
Here, you will see the drive name and partition number. It should look like sdXY. Where X is the drive letter and Y is the partition number. Usually it should be like sdaY. You have to recognize the partition where root has been installed.
在這里,您將看到驅動器名稱和分區號。它應該看起來像 sdXY。其中 X 是驅動器號,Y 是分區號。通常它應該類似于 sdaY。 您必須識別已安裝 root 的分區。
Step 2: Mount the root partition
第 2 步:掛載根分區
Once we have got the partition where root has been installed, we’ll mount the root partition where Ubuntu has been installed. Use the following commands to mount it:
一旦我們獲得了安裝了 root 的分區,我們將掛載安裝了 Ubuntu 的 root 分區。使用以下命令掛載它:
sudo mkdir /mnt/temp
sudo mount /dev/sdXY/mnt/temp
Replace XY with appropriate values.
將 XY 替換為適當的值。
Step 3: Be the CHROOT
第 3 步:成為 CHROOT
Once we have the partition mounted, next step is to mount certain items in preparation of the chroot. Run the following commands one by one:
掛載分區后,下一步是掛載某些項目以準備 chroot。逐個運行以下命令:
for i in /dev/dev/pts/proc /sys; do sudo mount -B i / m n t / t e m p i /mnt/temp i/mnt/tempi; done
sudo cp /etc/resolv.conf/mnt/temp/etc/resolv.conf
sudo chroot /mnt/temp
If the above commands ran successfully, you’ll see root@ubuntu:/# in the terminal indicating that you are in chroot mode.
如果上述命令成功運行,您將在終端中看到 root@ubuntu:/#,表明您處于 chroot 模式。
Step 4: Purge Grub 2 packages
第 4 步:清除 Grub 2 軟件包
Now when we are in chroot environment (you can think of it as if we are behaving as root for the mounted partition)., time to get rid of the Grub 2 packages but before that lets update the repository.
現在,當我們處于 chroot 環境中時(你可以把它看作是作為掛載分區的 root 用戶).,是時候刪除 Grub 2 包了,但在此之前讓我們更新倉庫。
apt-get update
apt-get purge grub grub-pc grub-common
While removing the grub, you’ll see a strange screen asking if you want to remove Grub 2 packages. Press TAB to select Yes. It will be highlighted once selected. Press enter to proceed.
在刪除 grub 時,你會看到一個奇怪的屏幕,詢問你是否要刪除 Grub 2 包。按 Tab 鍵選擇 Yes(是)。選擇后,它將突出顯示。按 enter 鍵繼續。

Step 5: Re-install Grub packages
第 5 步:重新安裝 Grub 軟件包
As we deleted the previous Grub, we deleted the messed up settings as well as any favourite settings stored in it. Now we’ll install a new and fresh Grub. Few things to keep in mind before you go on with the command to install the Grub.
當我們刪除之前的 Grub 時,我們刪除了混亂的設置以及存儲在其中的任何喜歡的設置。現在,我們將安裝一個新的 Grub。在繼續使用命令安裝 Grub 之前,需要記住幾件事。
-
While installing the new Grub, it will ask you to add extra kernel options. Just press TAB to go to OK and press enter to continue.
在安裝新的 Grub 時,它會要求您添加額外的內核選項。只需按 TAB 轉到 OK 并按 Enter 繼續。
-
It will bring you the installation notes. Press Tab to OK followed by enter and continue.
它將為您帶來安裝說明。按 Tab 鍵確定,然后按 Enter 鍵并繼續。
-
When it presents with you the device option (to ask on which partition should it install Grub), choose the option in the format of sdX. DO NOT select the drive partition in 4 letter format i.e. sda4 etc. When you select the partition, it should have an asterisk () before it like [] sdX. If it does not, highlight (with tab) and press SPACE to select it. Tab OK and press enter.
當它向您顯示設備選項(詢問它應該在哪個分區上安裝 Grub)時,請選擇 sdX 格式的選項。不要選擇 4 個字母格式的驅動器分區,例如 sda4 等。當您選擇分區時,它前面應該有一個星號 (),例如 [] sdX。如果沒有,請突出顯示 (帶 Tab) 并按 Space 鍵將其選中。Tab 鍵 OK 并按 Enter。
It should look like this:
它應該看起來像這樣:

Now when you taken all those things in mind, use the command below to install the Grub.
現在,當您牢記所有這些事情后,請使用下面的命令來安裝 Grub。
apt-get install grub-common grub-pc
Update the grub. and exit the chroot:
更新 grub 并退出 chroot:
update-grub
exit
Step 6: Unmount the partition:
第 6 步:卸載分區:
We mounted something at the start, didn’t we? Well lets just unmount them.
我們一開始就安裝了一些東西,不是嗎?好吧,讓我們卸載它們。
for i in /dev/pts/dev /proc/sys; do sudo umount /mnt/temp$i ; done
That’s it. Reboot your system and you should see the good old Grub boot screen as before.
就是這樣。重新啟動系統,您應該能像以前一樣看到舊的 Grub 引導屏幕。
Windows+Ubuntu24.04 雙系統及升級 Ubuntu Pro 教程
五月行秋已于 2024-10-06 17:24:34 修改
準備一個空 U 盤,按如下步驟實現 Windows+Ubuntu 雙系統,并升級至 Ubuntu Pro。
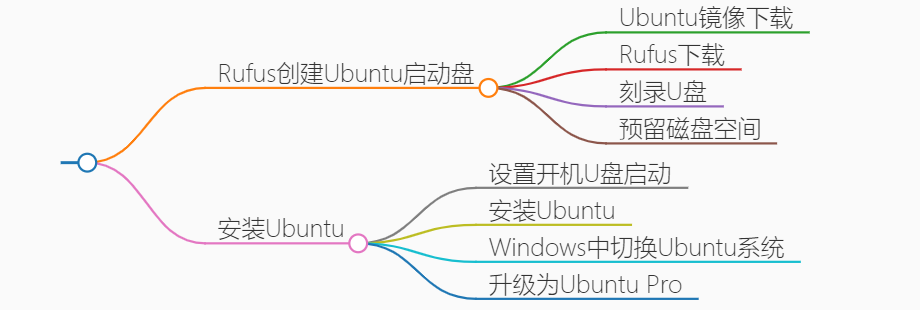
Rufus 創建 Ubuntu 啟動盤
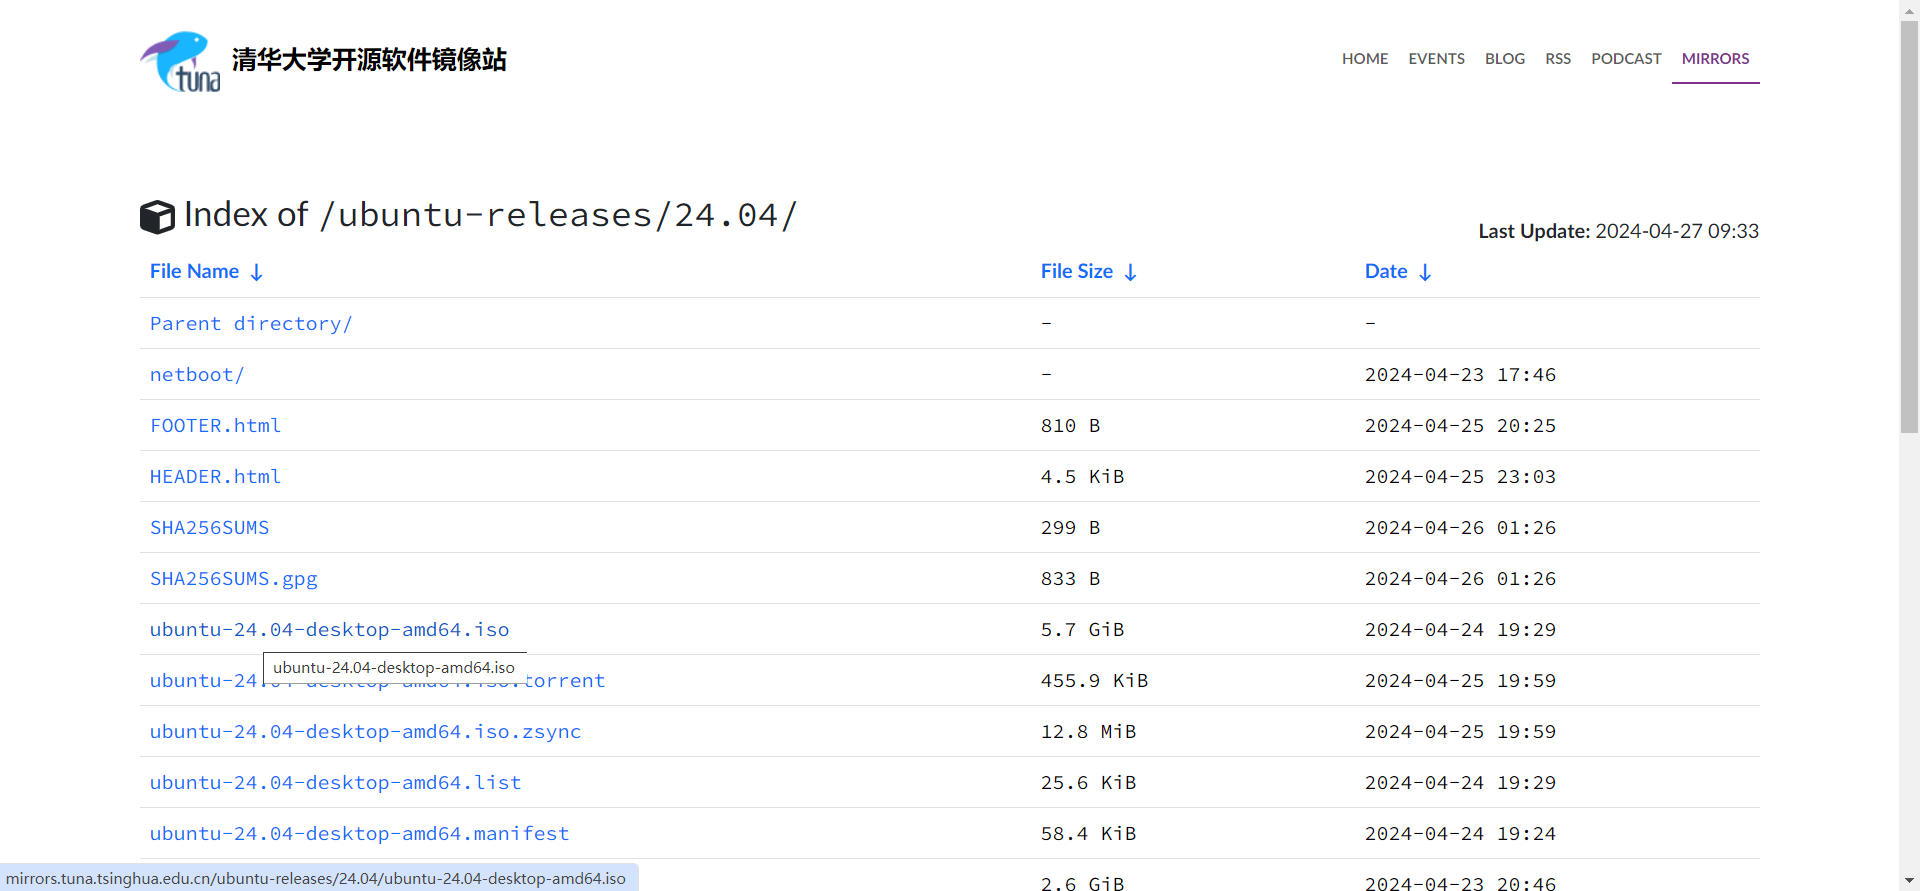
Ubuntu 鏡像下載
- 清華開源鏡像站中下載 Ubuntu
https://mirrors.tuna.tsinghua.edu.cn/ubuntu-releases/
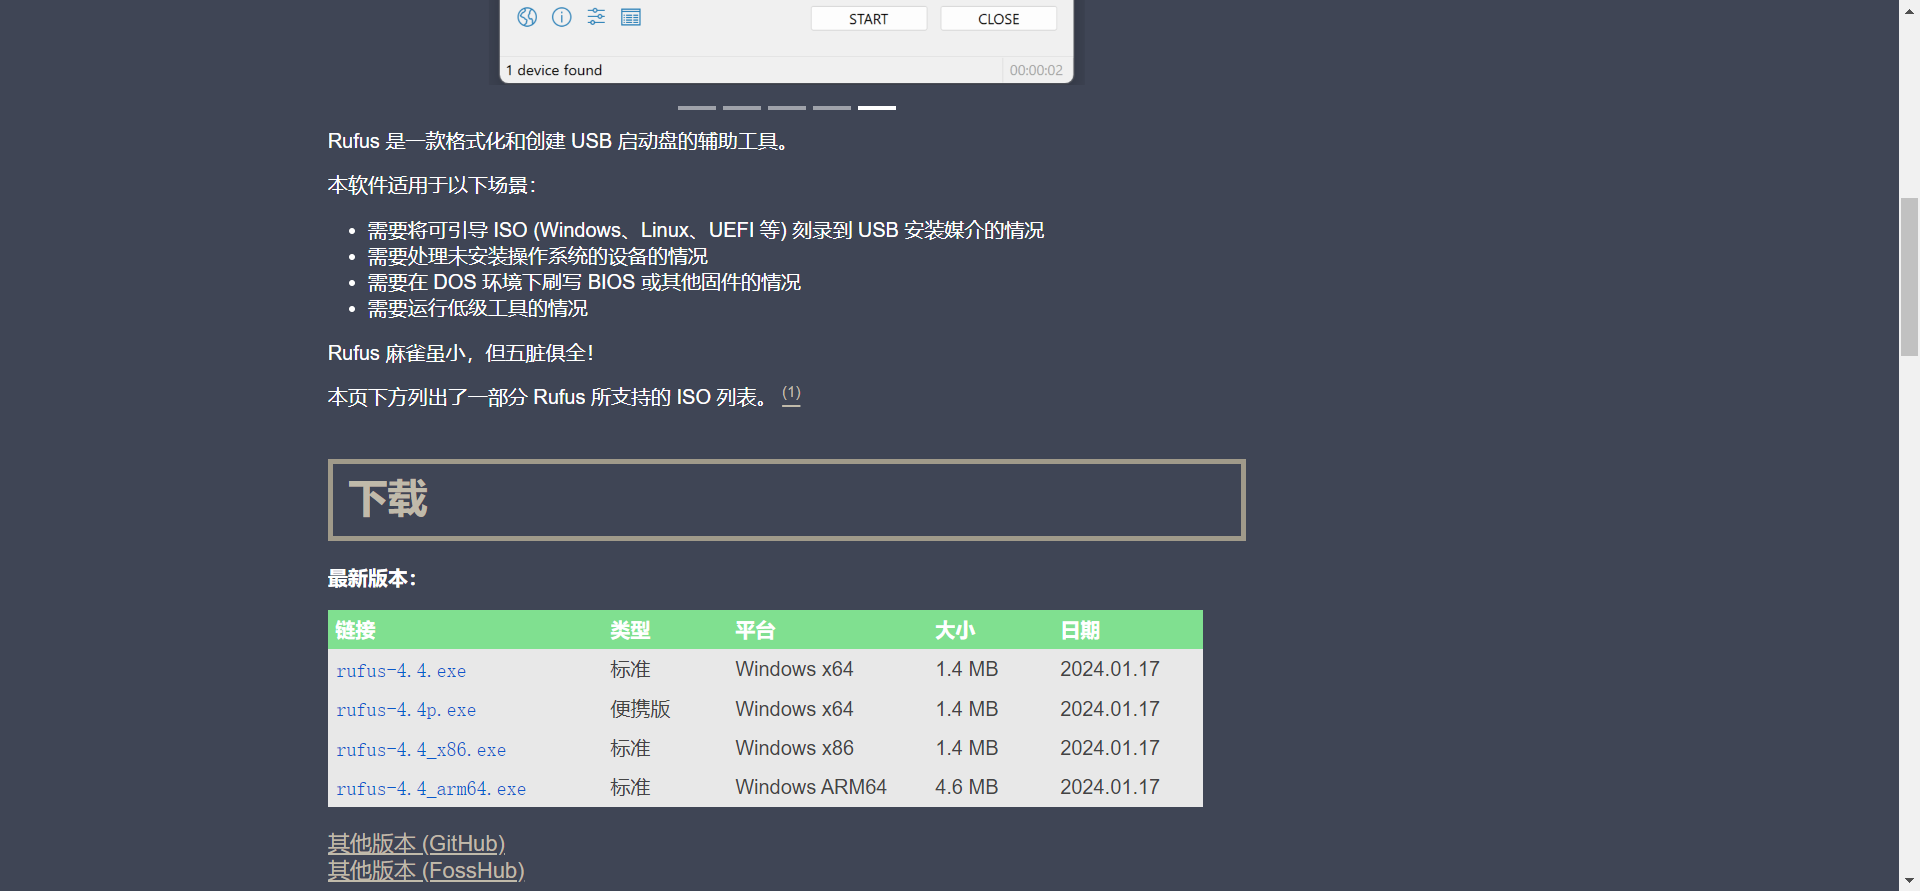
Rufus 下載
-
Rufus 官網
https://rufus.ie/zh/根據電腦系統下載對應版本,我選擇
便攜版下載。
刻錄 U 盤
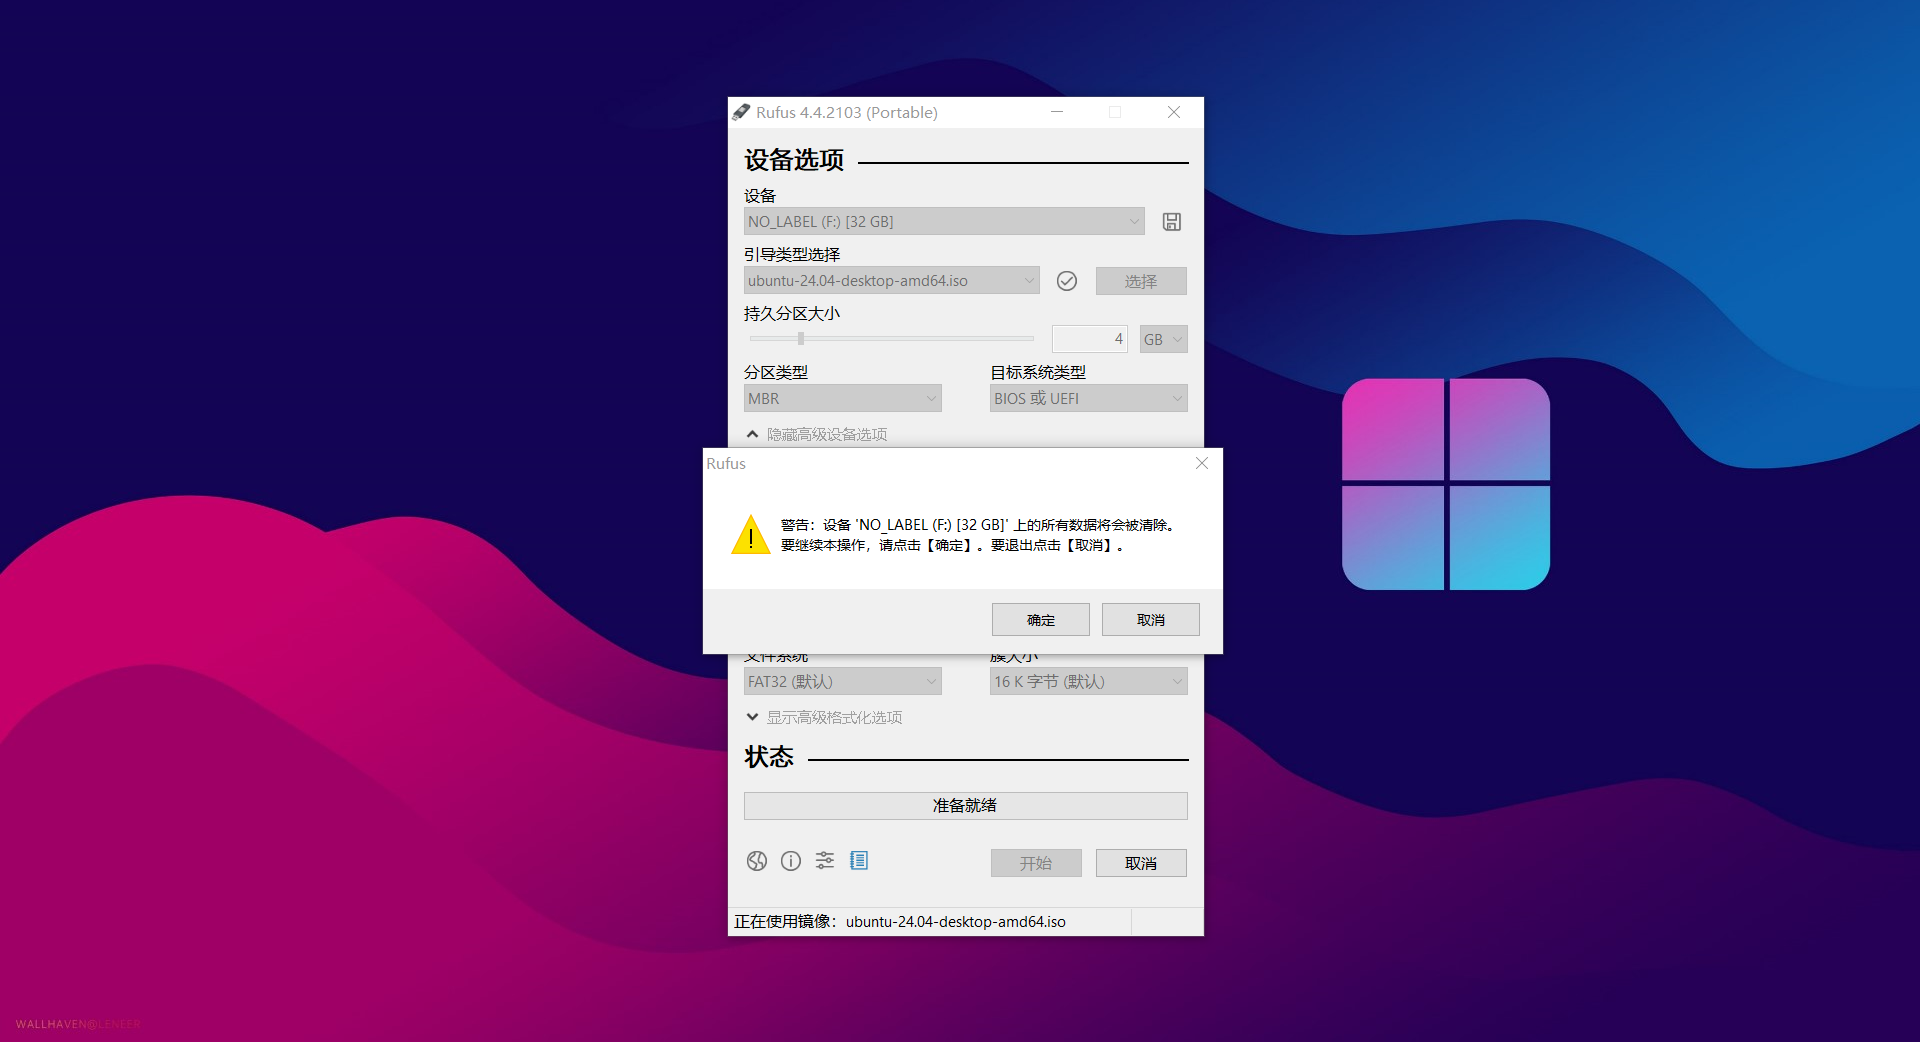
1、打開 Rufus:設置選項
-
引導類型選擇:選擇 Ubuntu 的iso文件。 -
持久區分大小:存儲一些可以在重新啟動之間保留下來的文件和程序。我選擇
4G-
如果只是用來安裝雙系統,可以指定持久分區大小為 0。
-
如果需要創建持久化 U 盤,可以指定持久分區大小。
-
作用:可以使得用戶在使用 USB 驅動器時,將數據保存到持久化分區中,以便在重啟或切換計算機時可以保存數據。
-
-
其它按如圖默認即可。
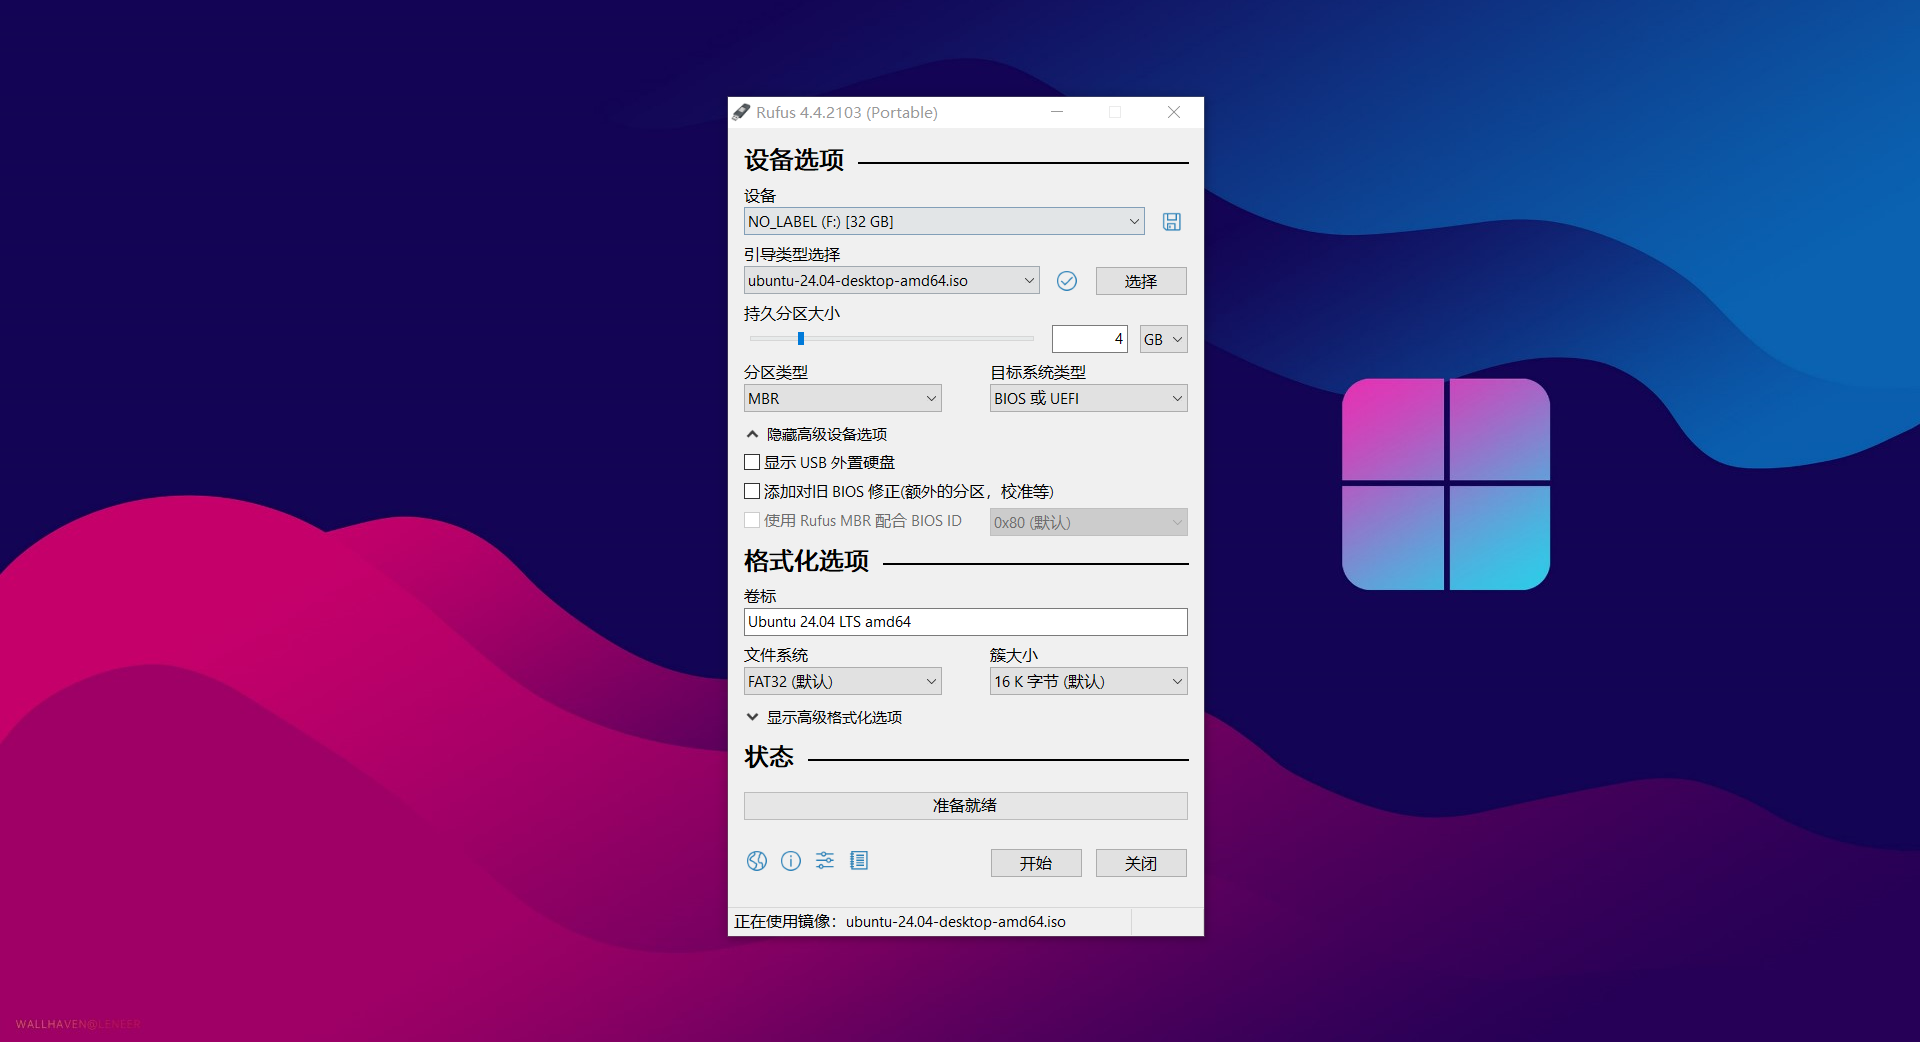
2、 格式化 U 盤:彈出警告,點擊 確認 清除 U 盤內容。
3、等待格式化、鏡像復制。

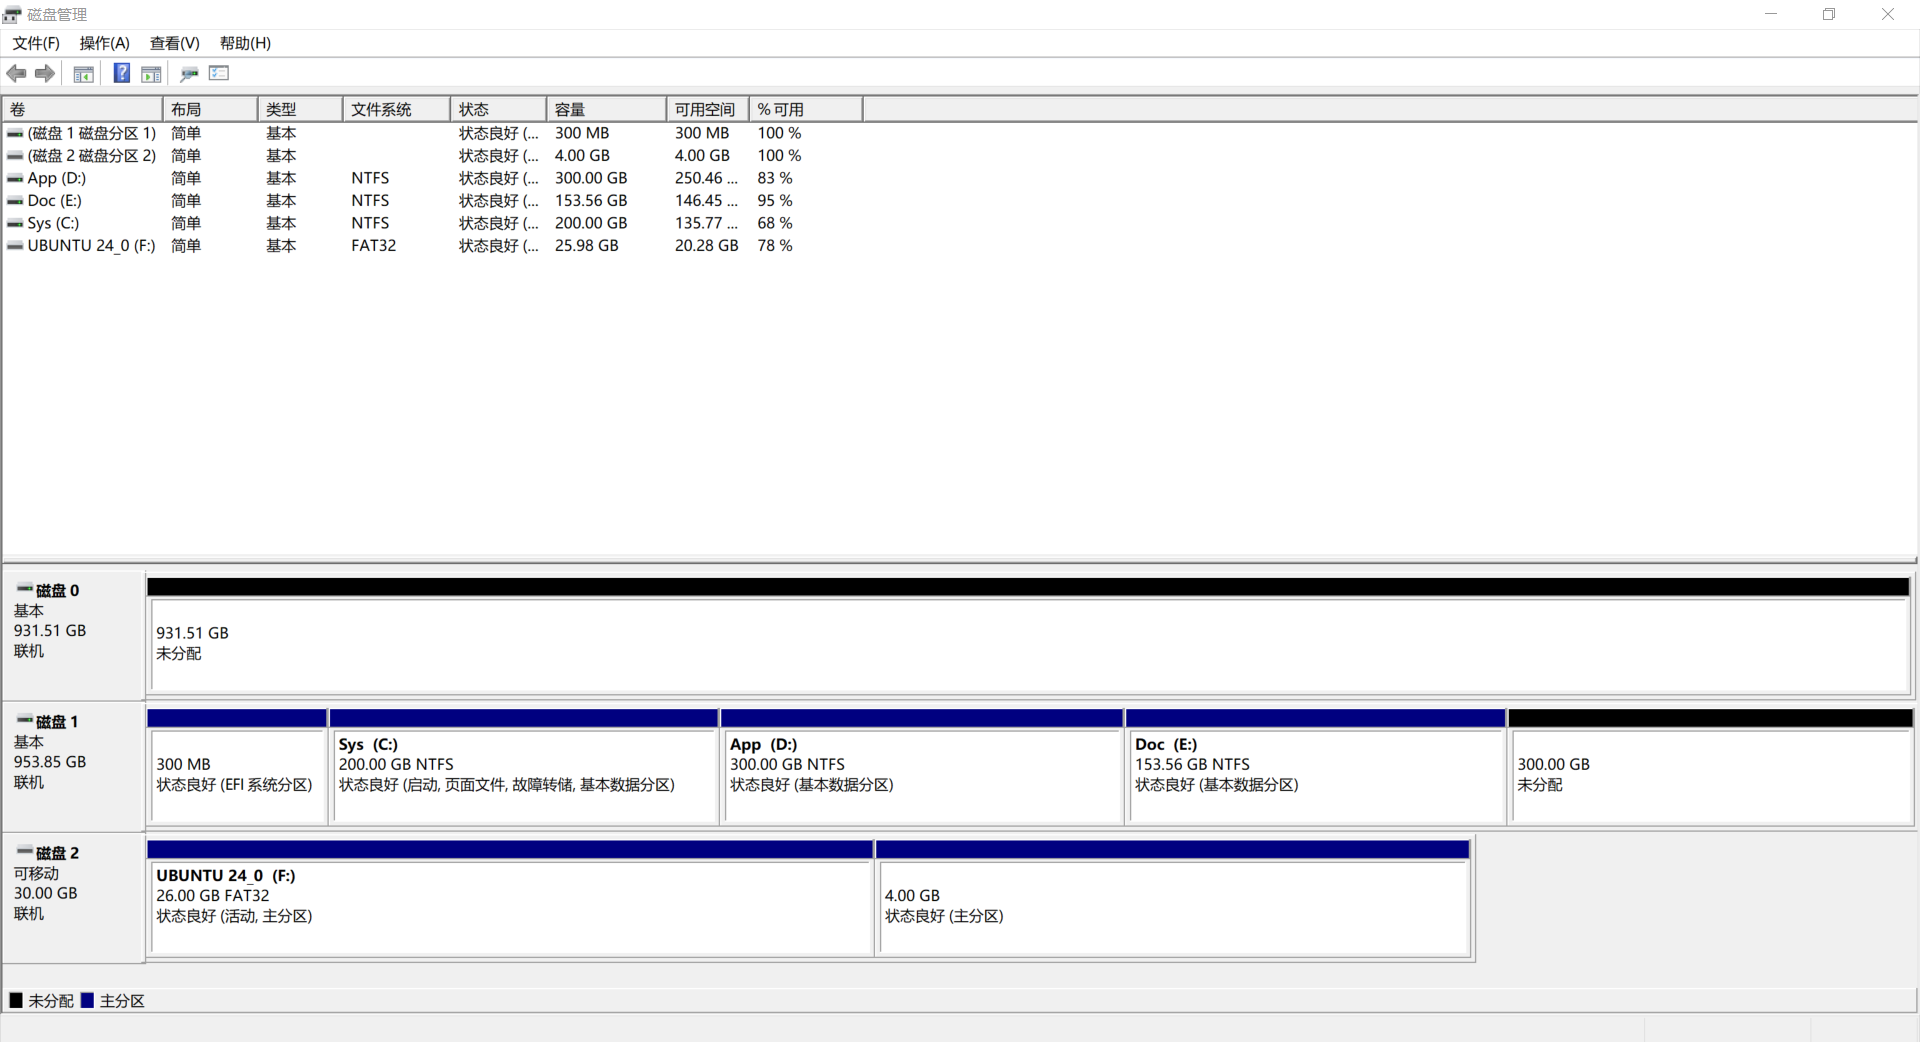
預留磁盤空間
給要安裝的第二個系統 Ubuntu24.04 預留磁盤空間,推薦分出一個磁盤專門給 Ubuntu24.04
管理磁盤空間:Win+X 打開功能菜單,選擇 磁盤管理 或按 K 鍵,進入磁盤關聯頁面。
-
留出空閑空間:可以通過
壓縮卷的方式,壓縮部分空間至未分配區。 -
按需分配磁盤大小:我選擇磁盤 1 中的
300G作為 Ubuntu24.04 的磁盤空間。
安裝 Ubuntu
設置開機 U 盤啟動
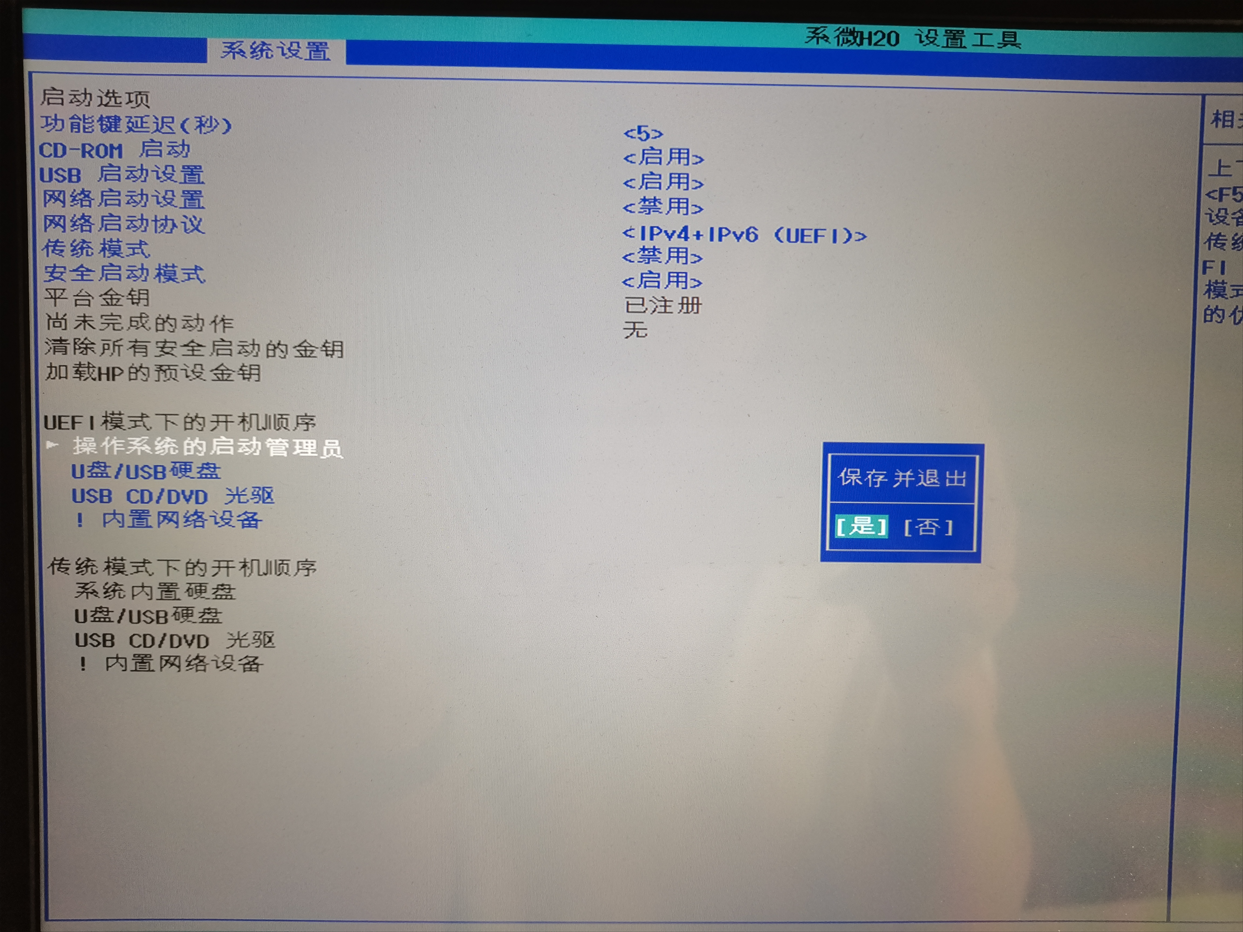
插入 U 盤,關機重啟,進入 BIOS 界面;點擊 系統設置欄,展開 啟動選項。
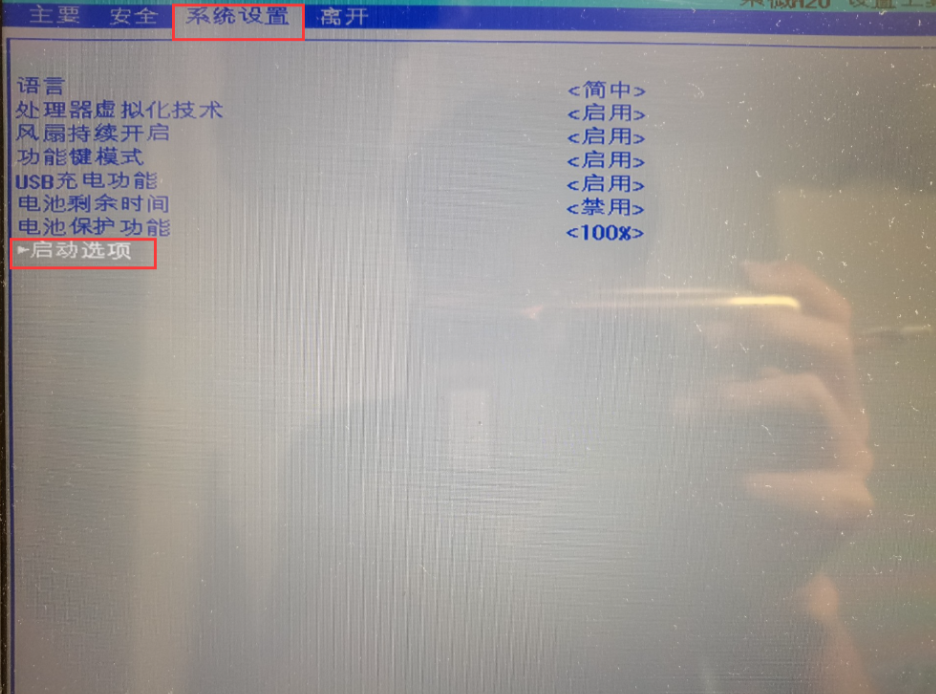
設置 U 盤 / USB 硬盤 為開機順序第一位,并保存設置。

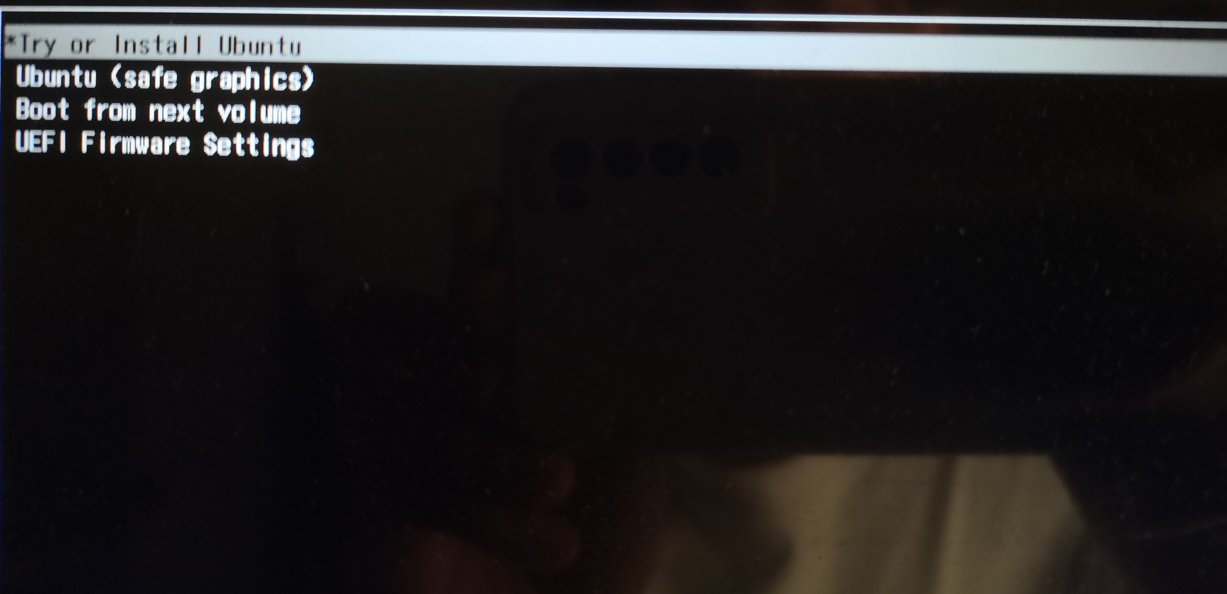
安裝 Ubuntu
1、開機時選擇 Try or Install Ubuntu 進入 Ubuntu 安裝程序。
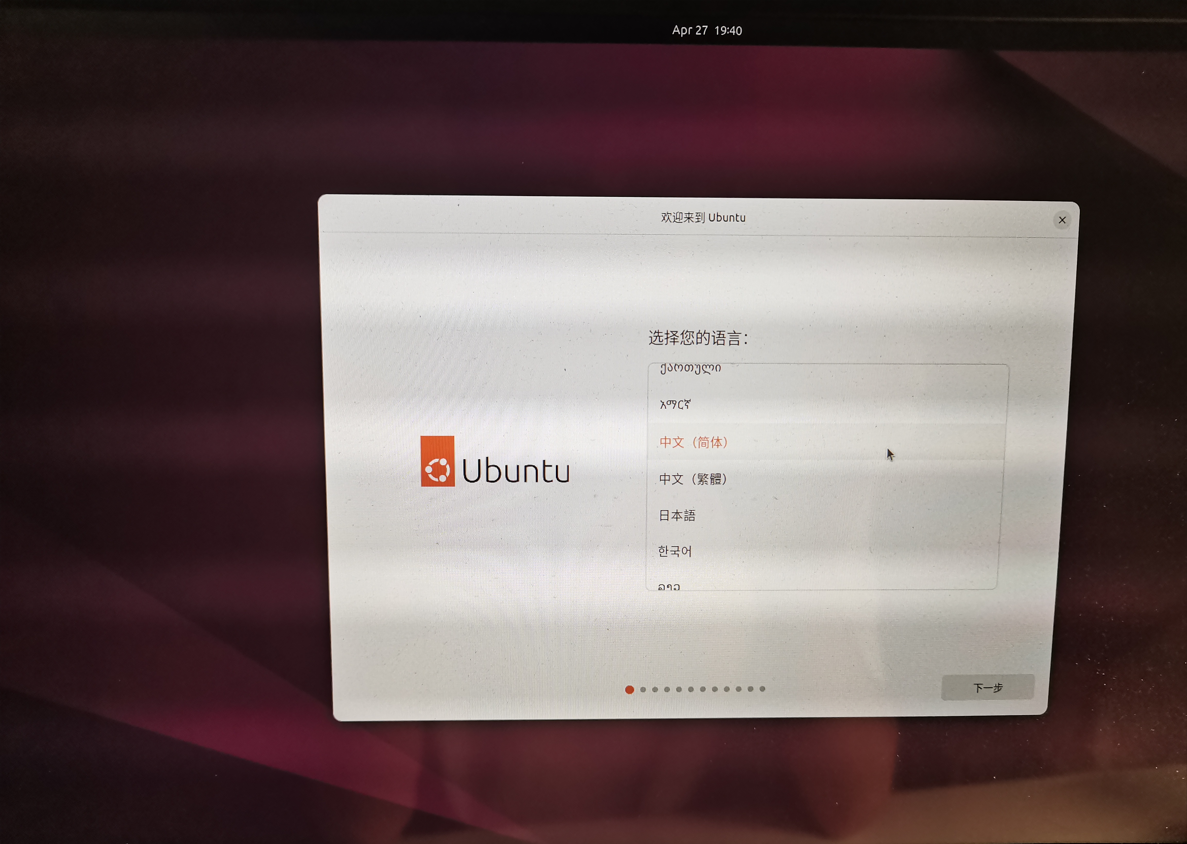
2、安裝時首先會進入選擇語言頁面,選擇你需要的系統語言。
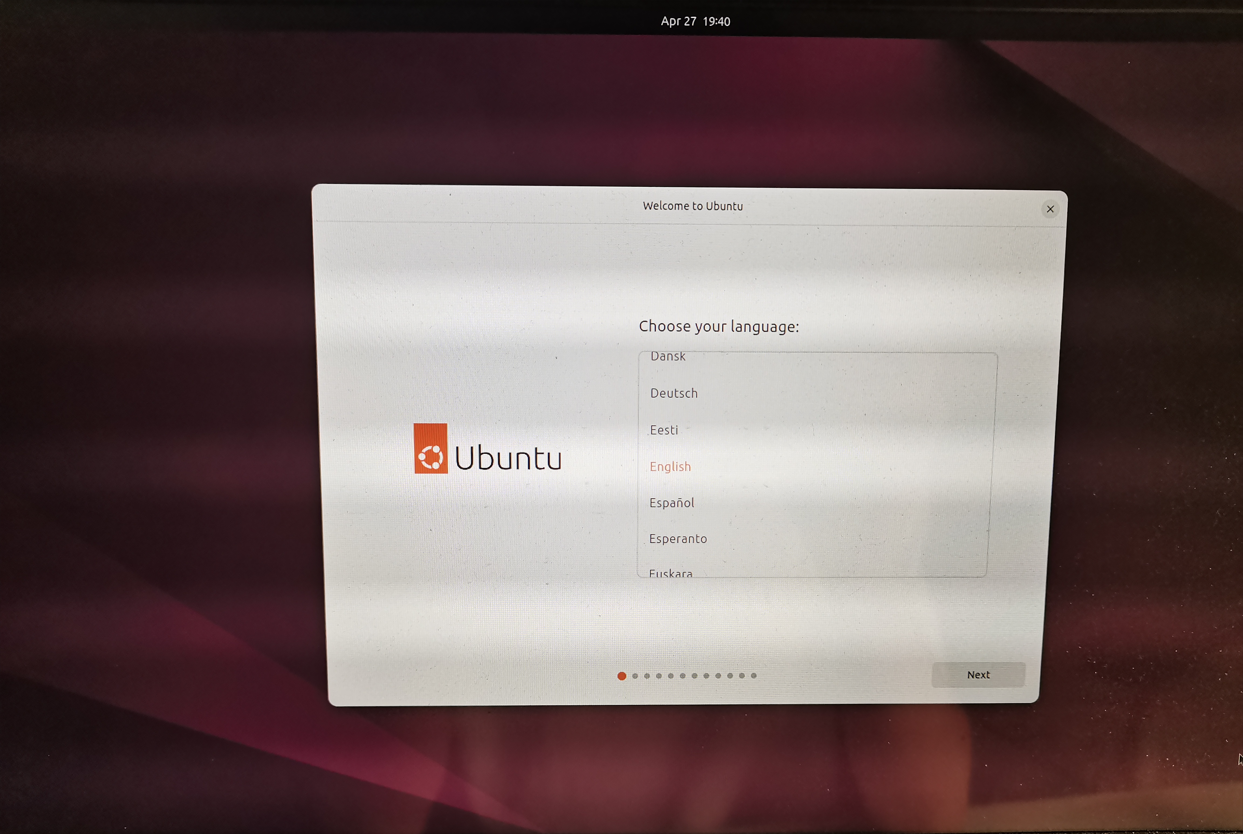
3、我選擇中文(簡體),點擊 下一步。
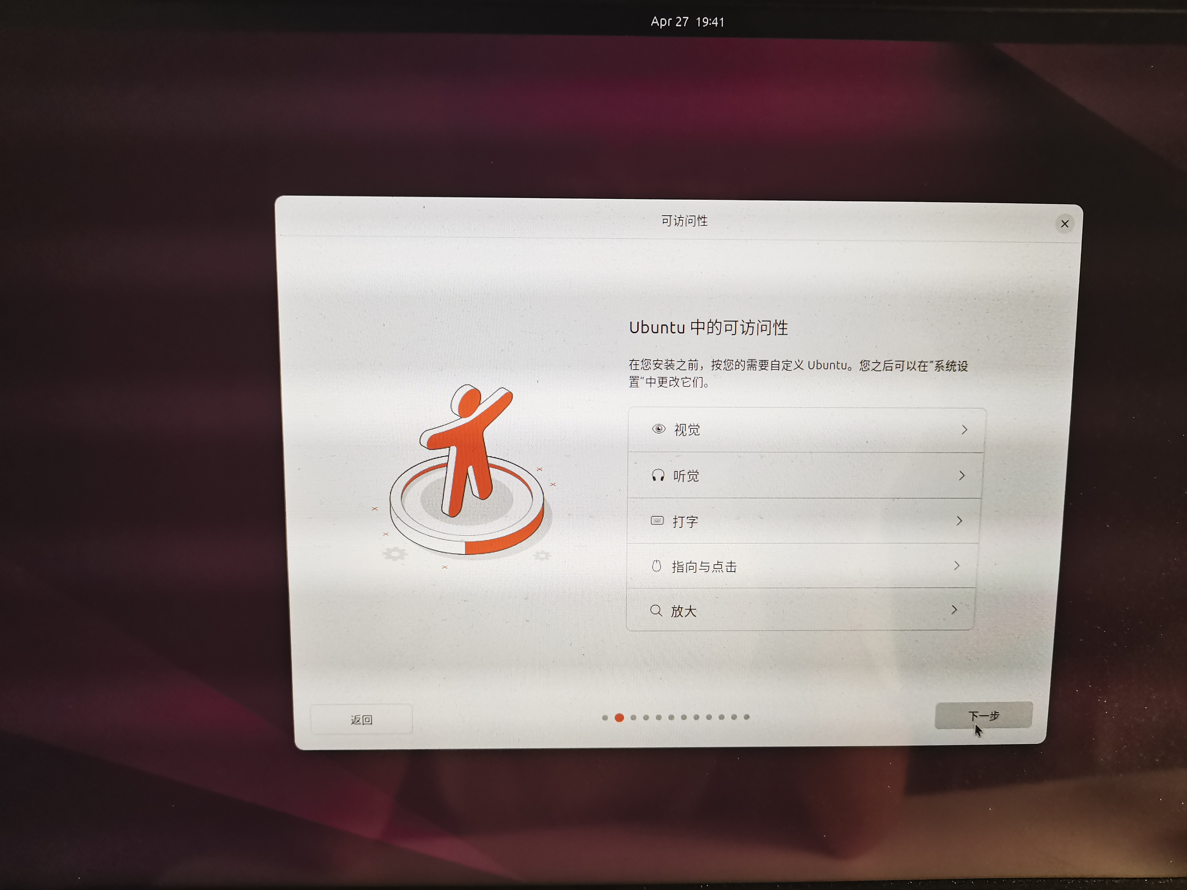
4、可訪問性,保持默認,點擊 下一步。
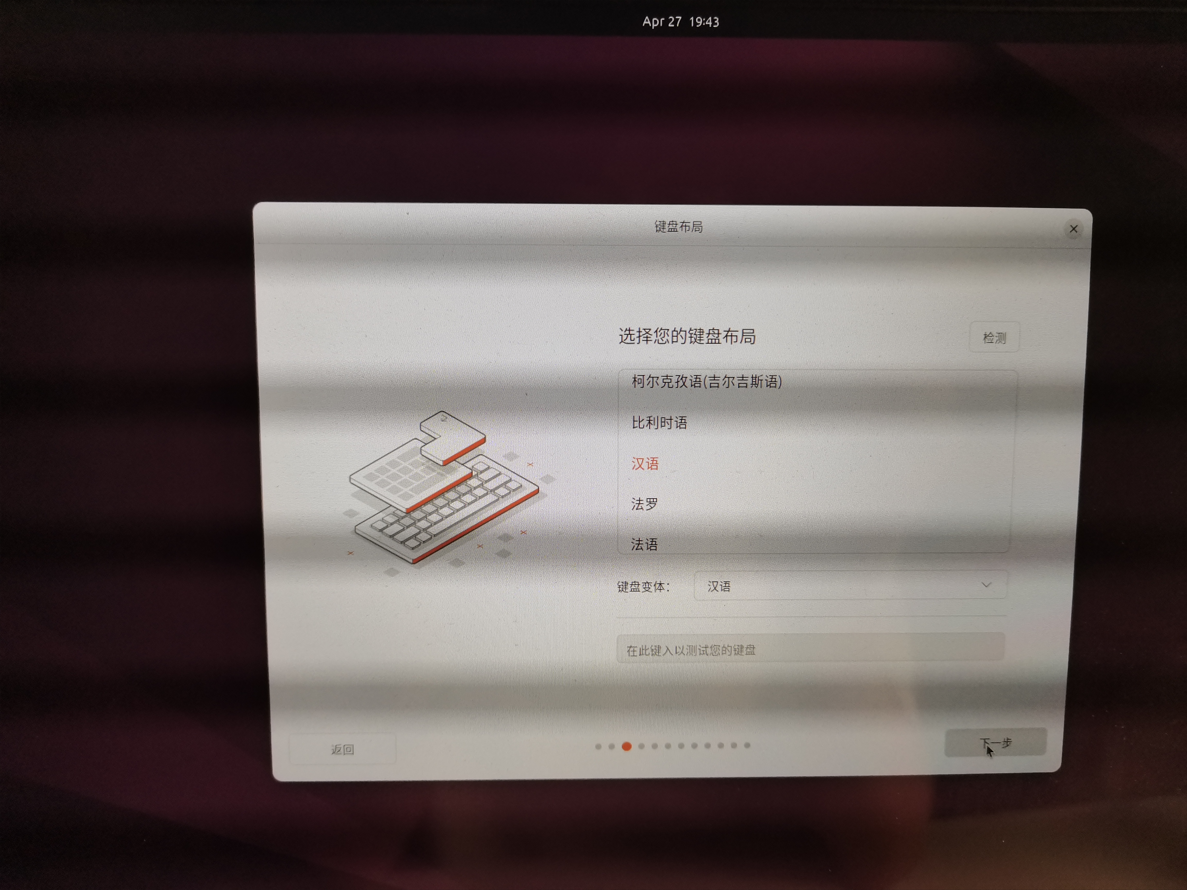
5、鍵盤布局:選擇 漢語,點擊 下一步。
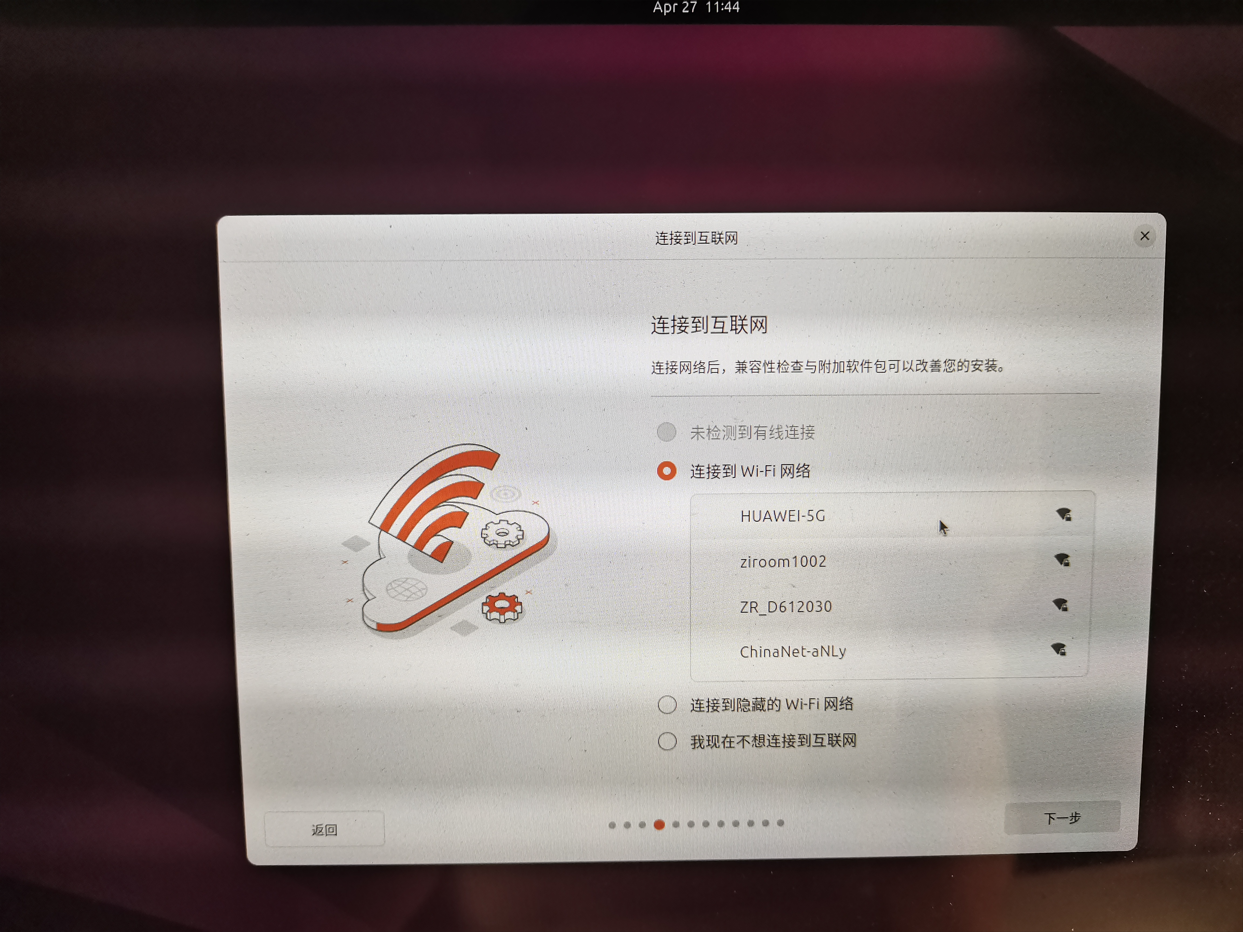
6、連接互聯網:選擇你的網絡再連接即可,點擊 下一步。
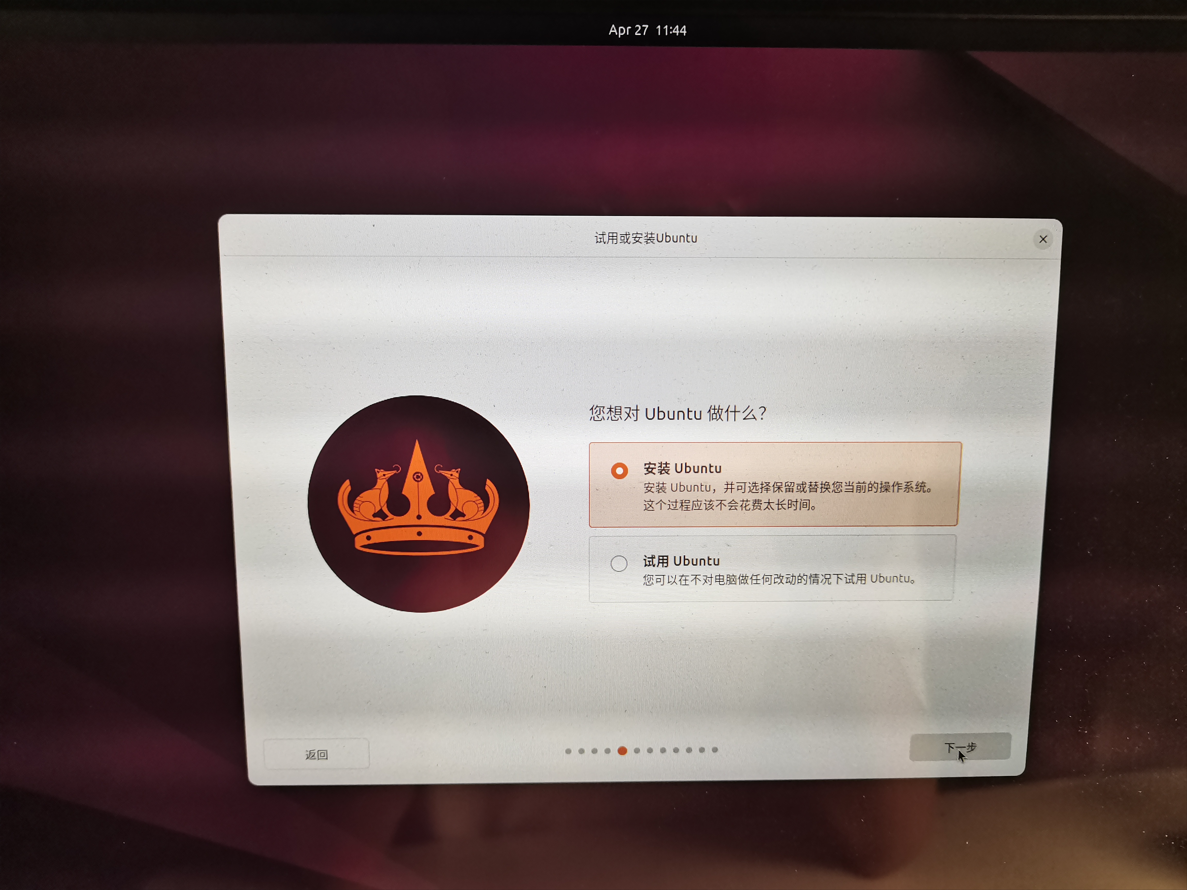
7、安裝 Ubuntu,選擇 安裝 Ubuntu,點擊 下一步。
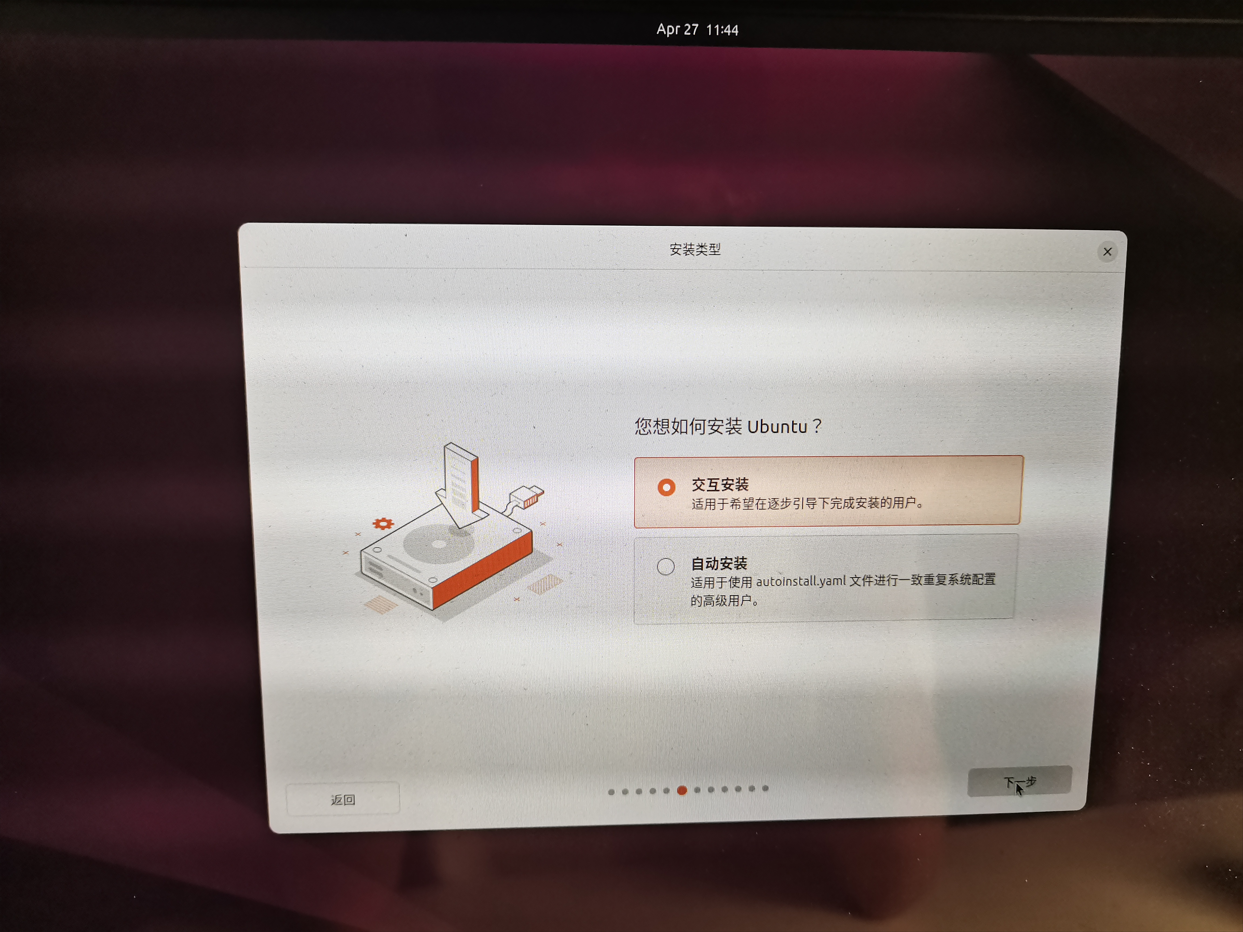
8、交互安裝:選擇 交互安裝,點擊 下一步。
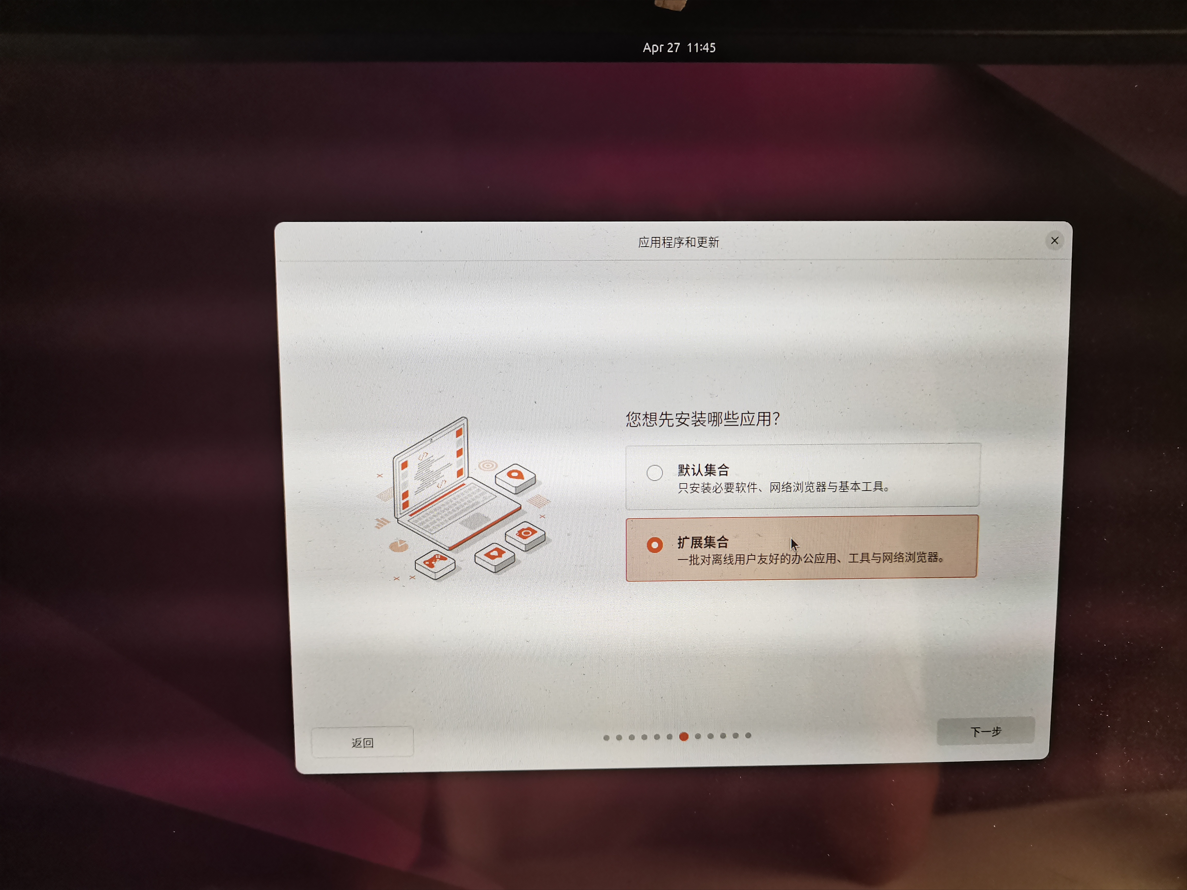
9、安裝擴展:選擇 擴展集合,點擊 下一步。
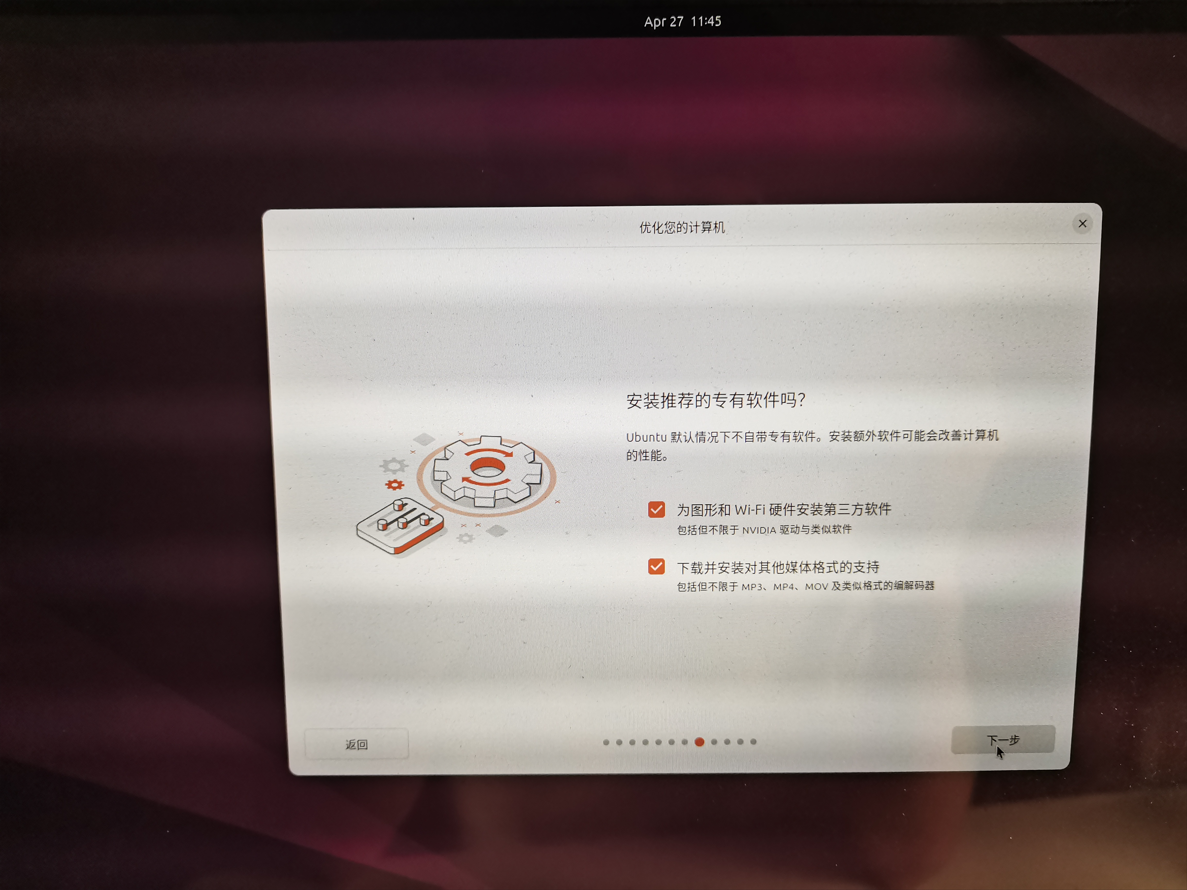
10、安裝額外軟件:勾選 為圖像和 WiFi 硬件安裝第三方軟件、下載并安裝對其他媒體格式的支持,點擊 下一步。
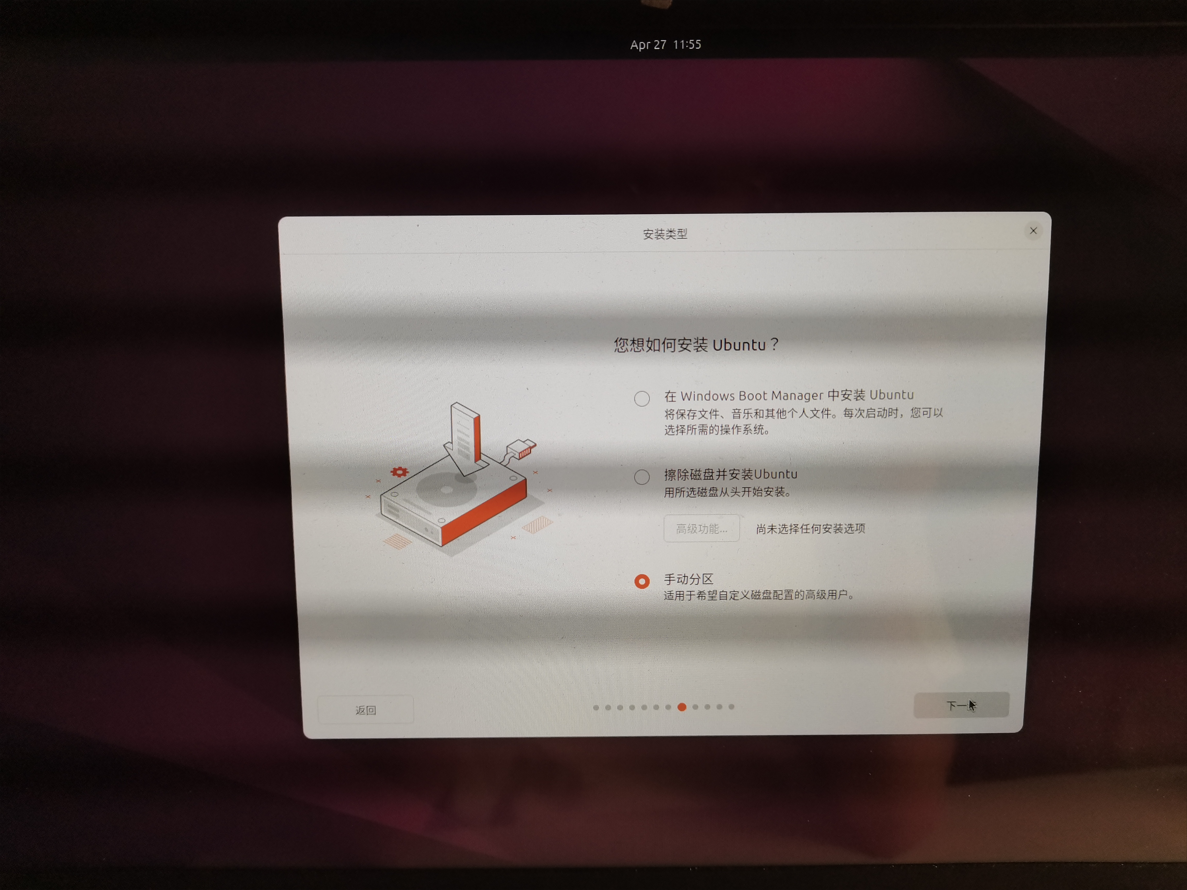
11、手動分區:選擇 手動分區,點擊 下一步。
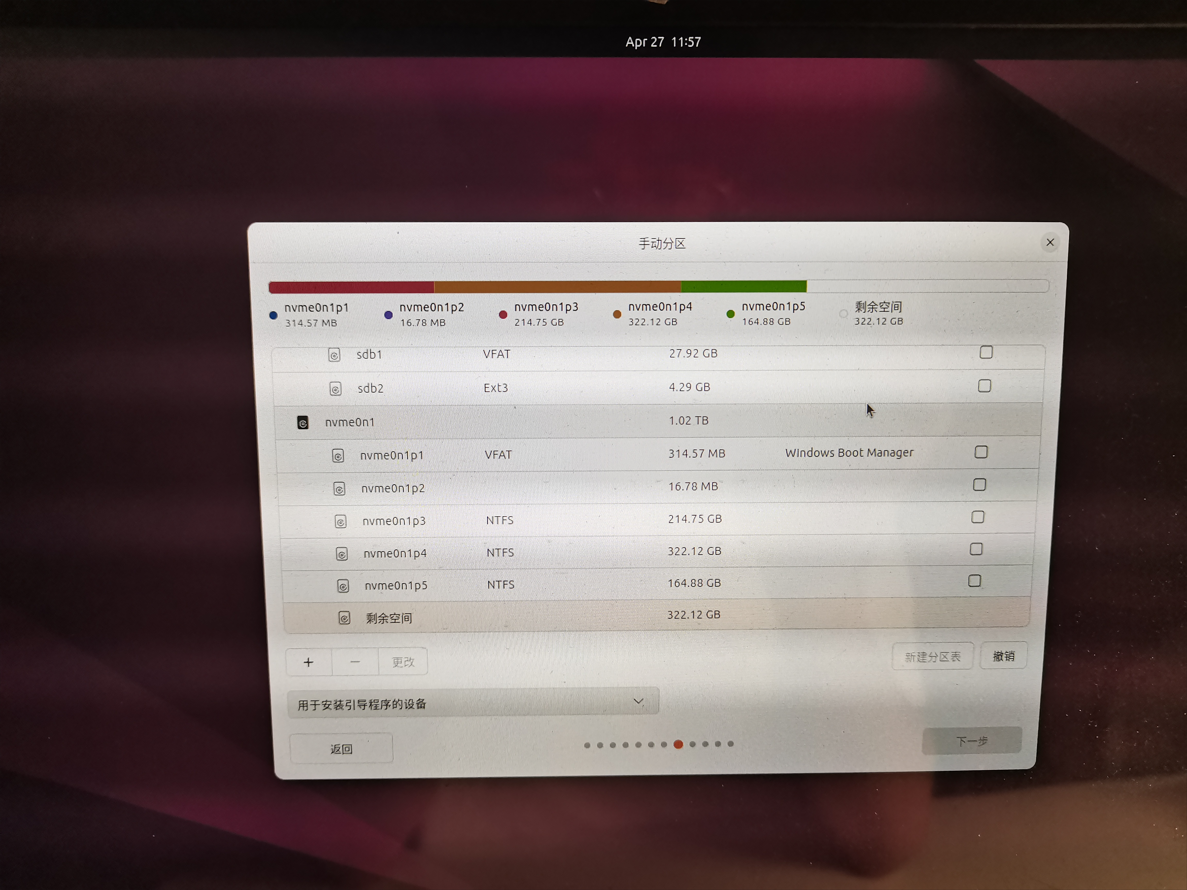
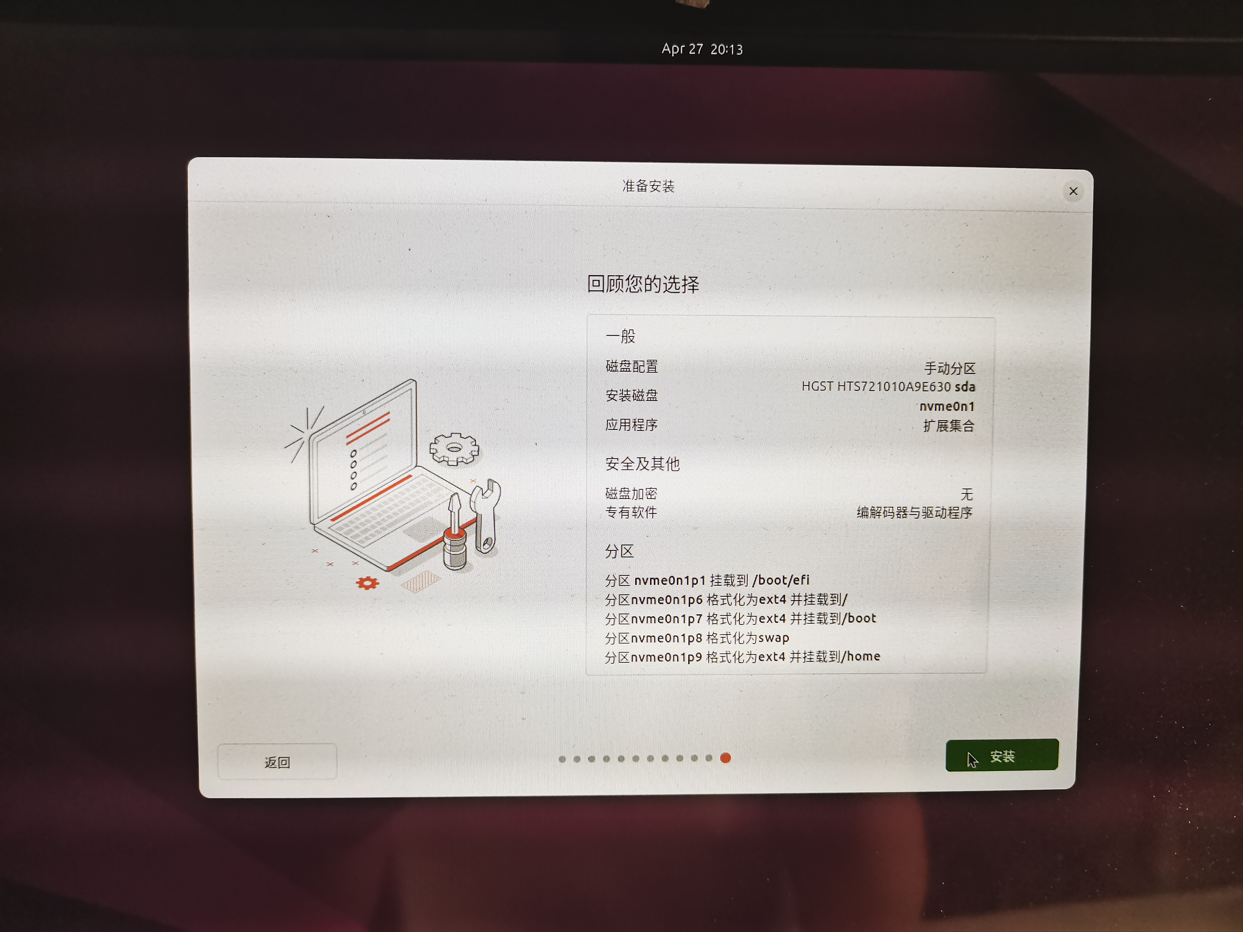
12、設置分區
- 進入手動分區頁面后,選擇上文中預留
300G空間所在的磁盤,我是選擇nvme0n1中的322.12G剩余空間
預留磁盤大小顯示不一致是因為硬盤制造商和操作系統對存儲容量的計算方式不同
-
設置具體分區大小
-
Swap 分區:該分區用于在物理內存不足時,將一部分數據暫時轉移到硬盤上的空間,以虛擬內存的形式釋放物理內存空間,從而避免內存溢出。Swap 分區的大小取決于系統的物理內存大小。我分配 16G。 -
/boot 分區:該分區用于存儲系統啟動時所需的啟動加載器(如 GRUB)和內核文件。分區大小取決于內核版本的數量和大小,以及啟動加載器的需求,通常為 200MB—1GB。我分配 1G。 -
/ 分區:該分區是 Linux 系統的主要分區,包含了系統文件和用戶數據。分區大小取決于軟件的安裝數量和用戶數據的大小。對于大多數桌面用戶,分配 20-25GB 的空間通常是足夠的。我分配 80G。 -
/home 分區:該分區用于存儲用戶的個人數據,如文檔、音樂、視頻等。分區大小建議為磁盤剩余所有空間,以確保有足夠的空間存儲個人文件和文件夾。我分配磁盤剩余大小。
-
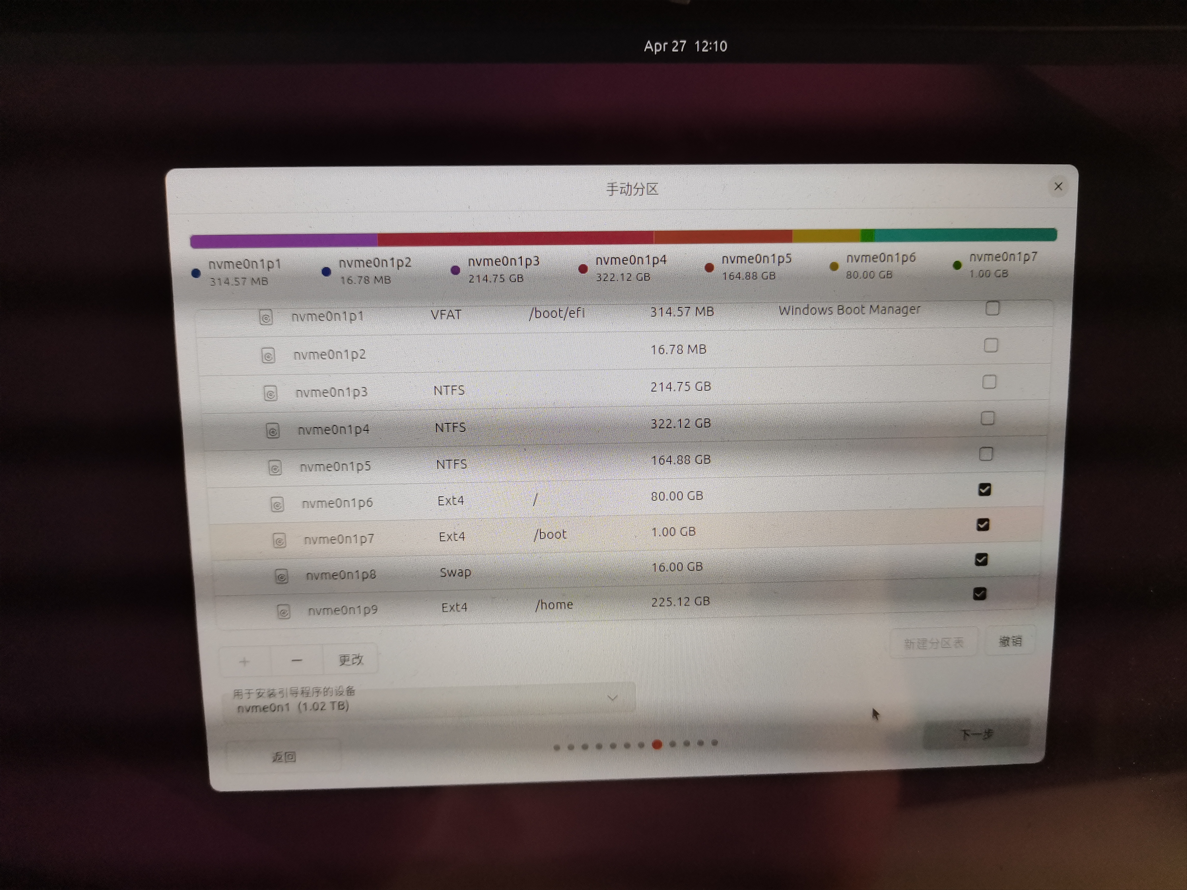
- 分區完成后,點擊
下一步。
13、設置賬戶:設置您的賬戶信息,并勾選 登錄時需要密碼
14、選擇時區:保持默認 Shanghai 即可
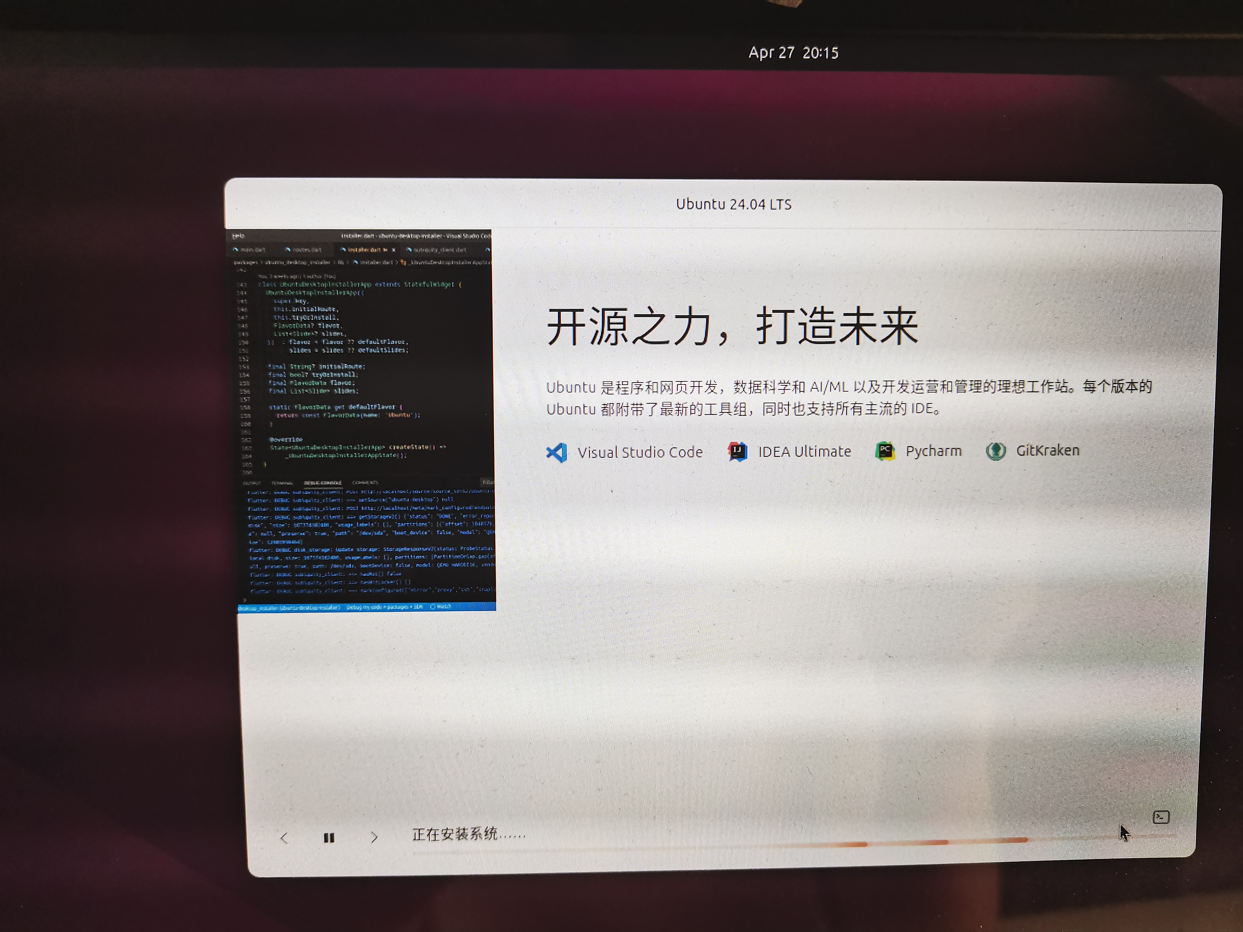
15、安裝 Ubuntu
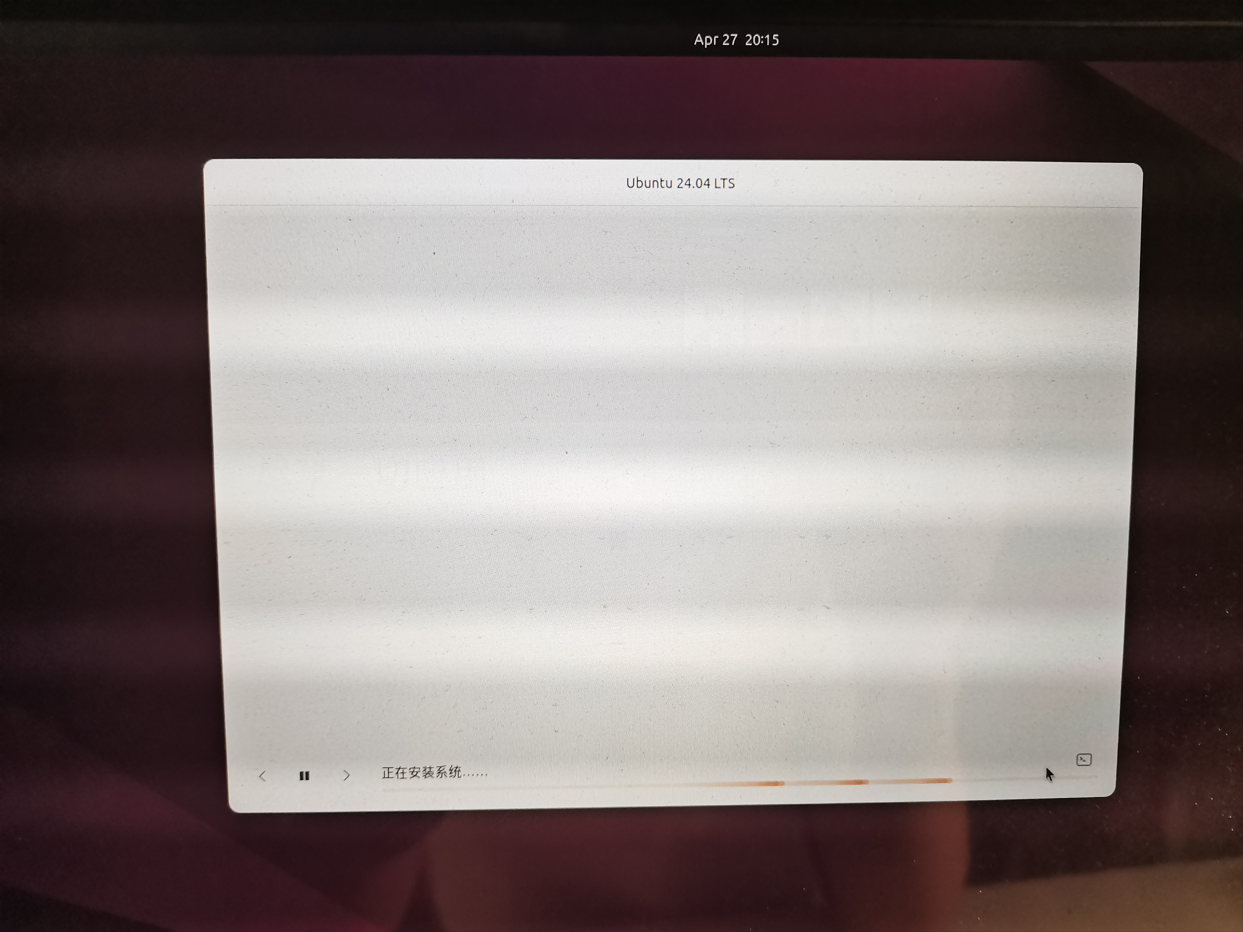
16、安裝中:等待系統安裝,耐心等待~
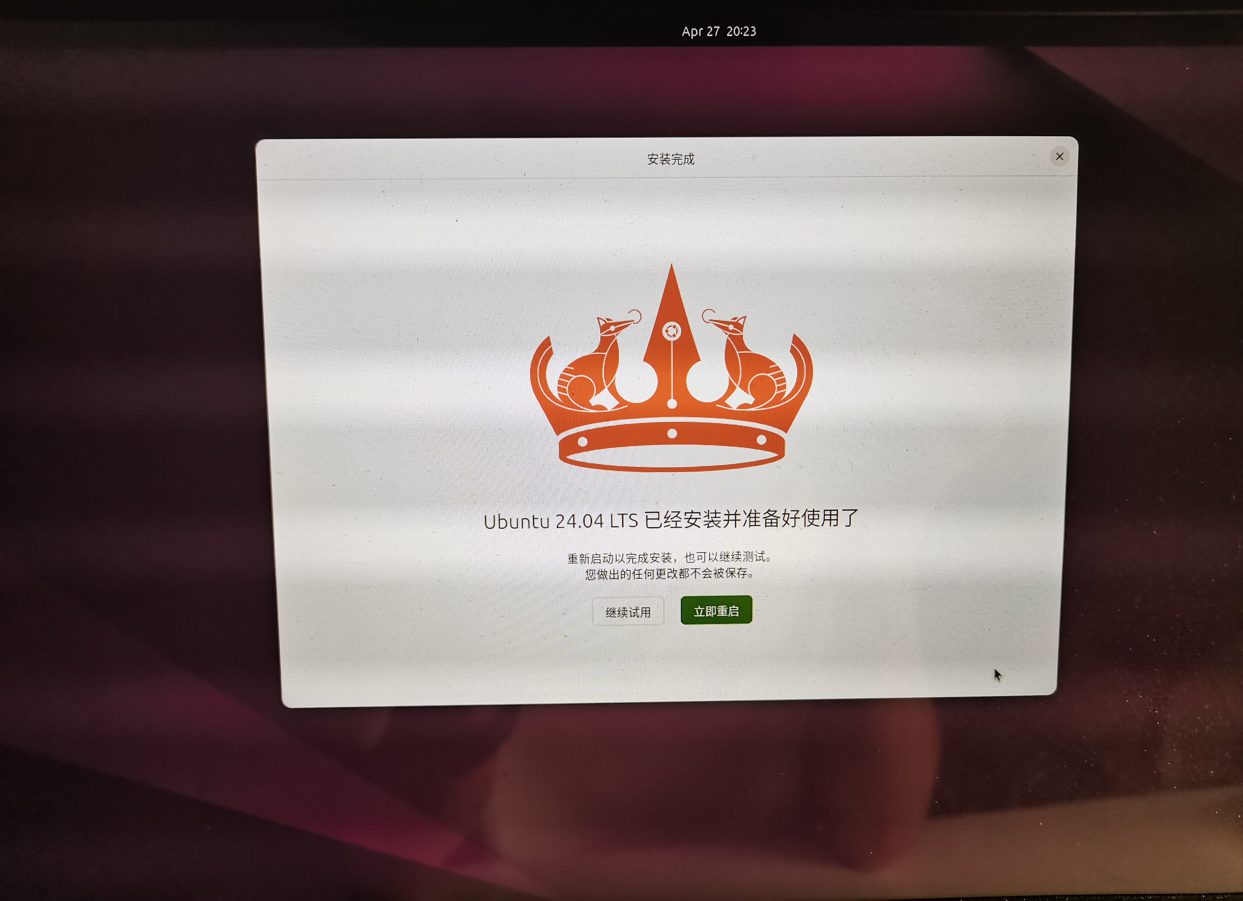
17、安裝完成,點擊 重啟系統,完成安裝
18、重啟時,進入 BIOS 將開機順序設置回去,接著保存設置即可;U 盤可以拔出了。
Windows 中切換 Ubuntu 系統
當前系統是 Windows 開機時,可以通過下列方式去切換到 Ubuntu 系統, 也可以將電腦關機,在電腦啟動時,進入 BIOS 來選擇 Ubuntu 系統開機。
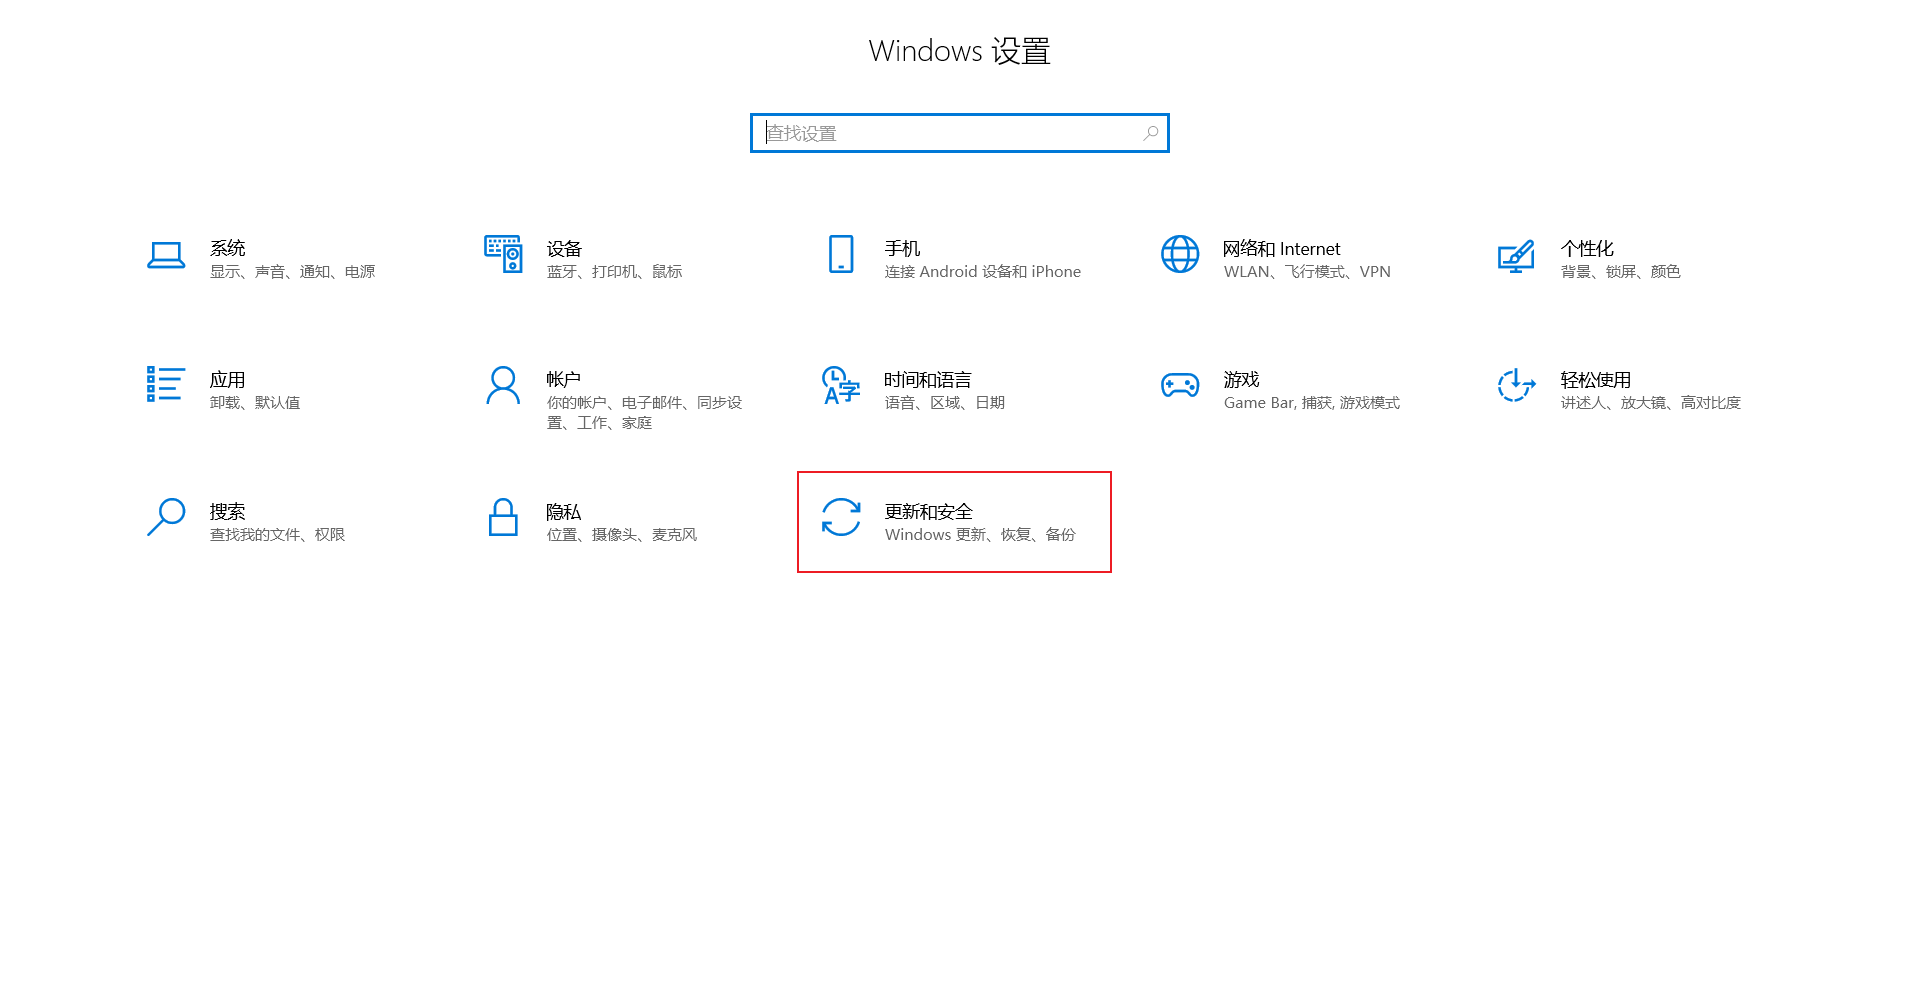
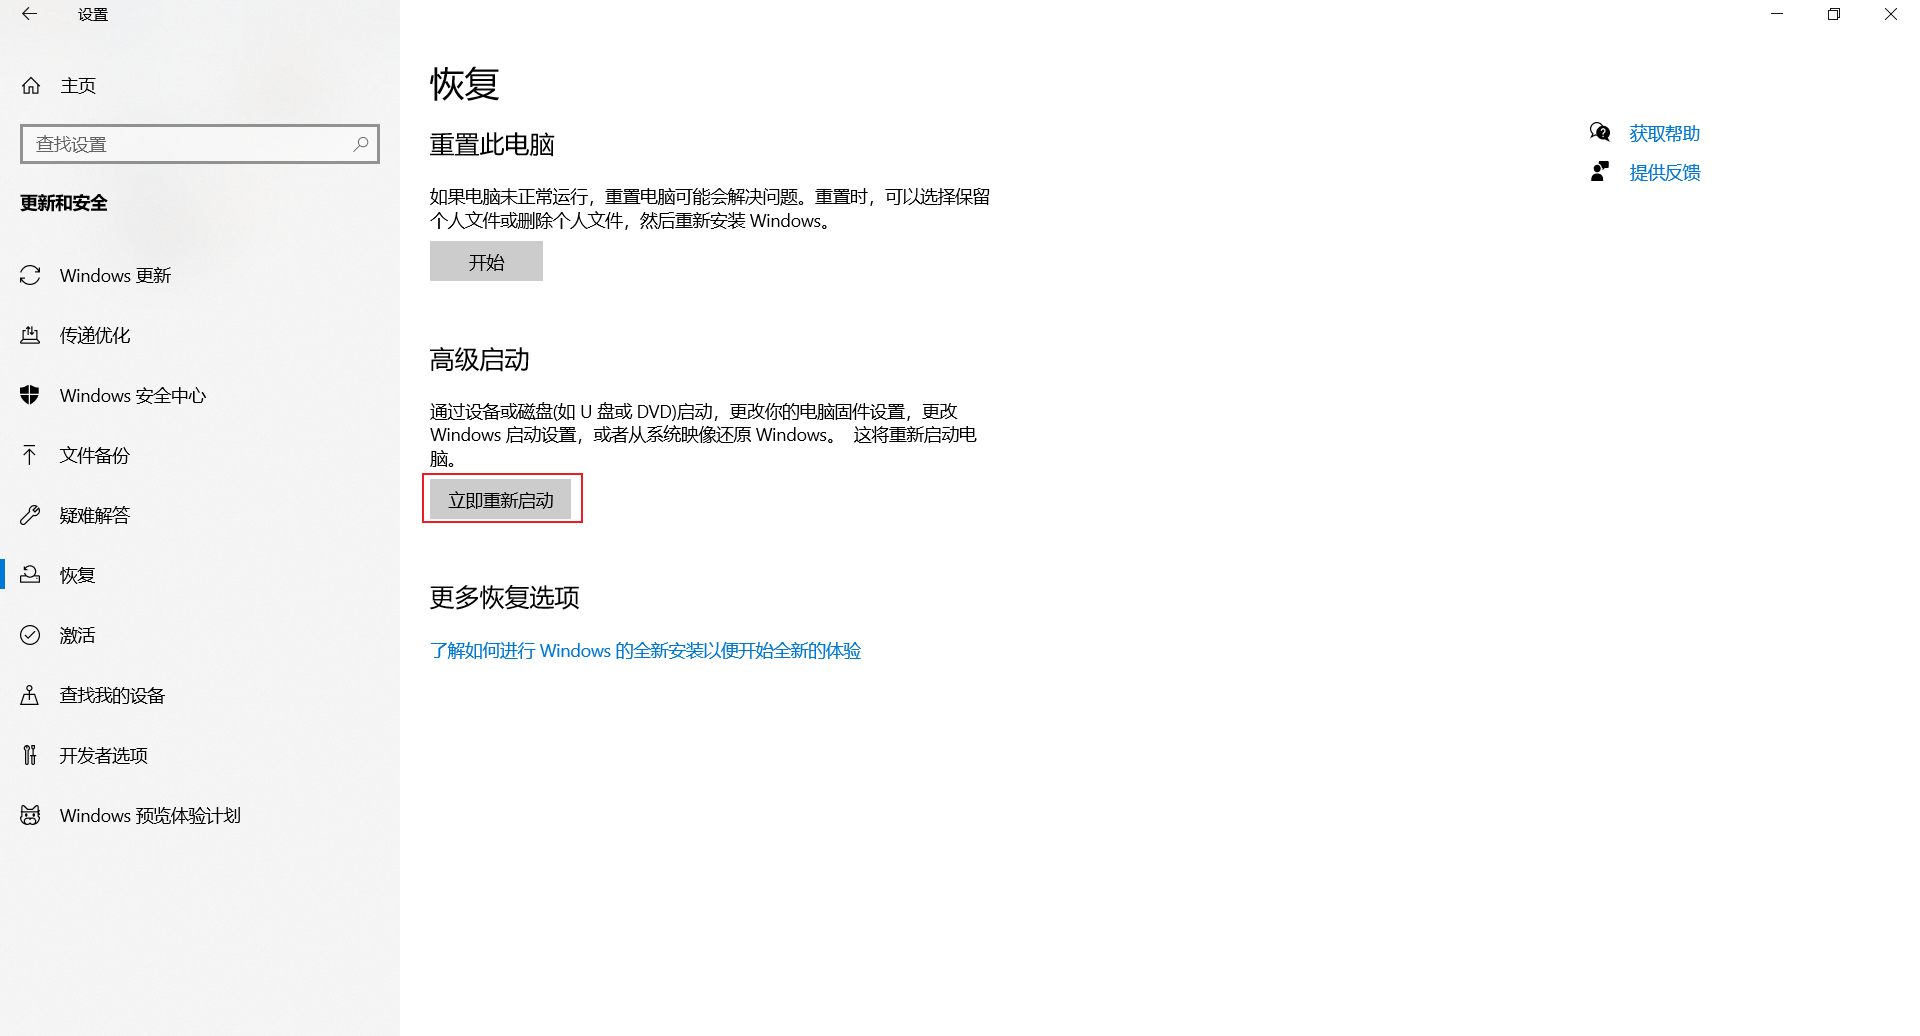
1、開機默認進入 Windows 系統,打開設置中的 系統和安全
2、高級啟動頁面:選擇 恢復 中的 立即重新啟動
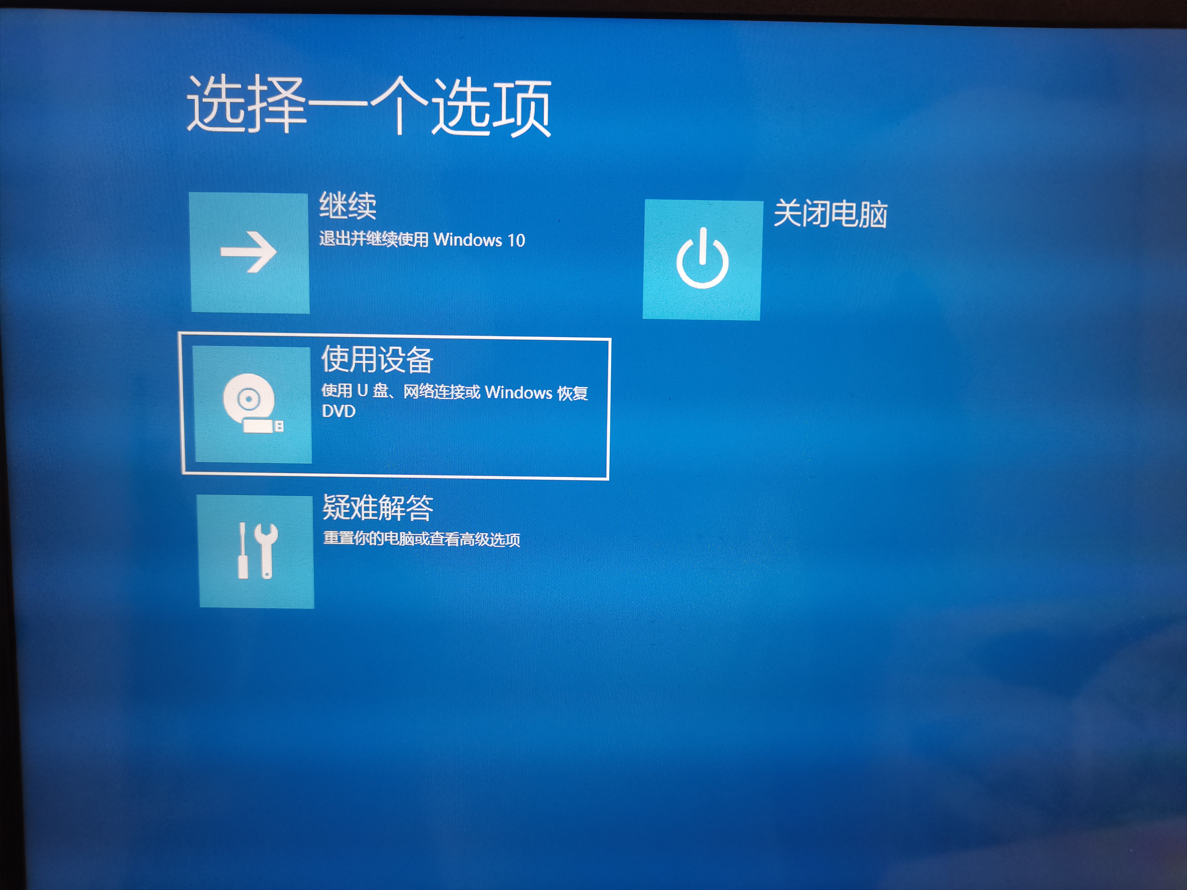
3、點擊 使用設備,進入選擇設備頁面
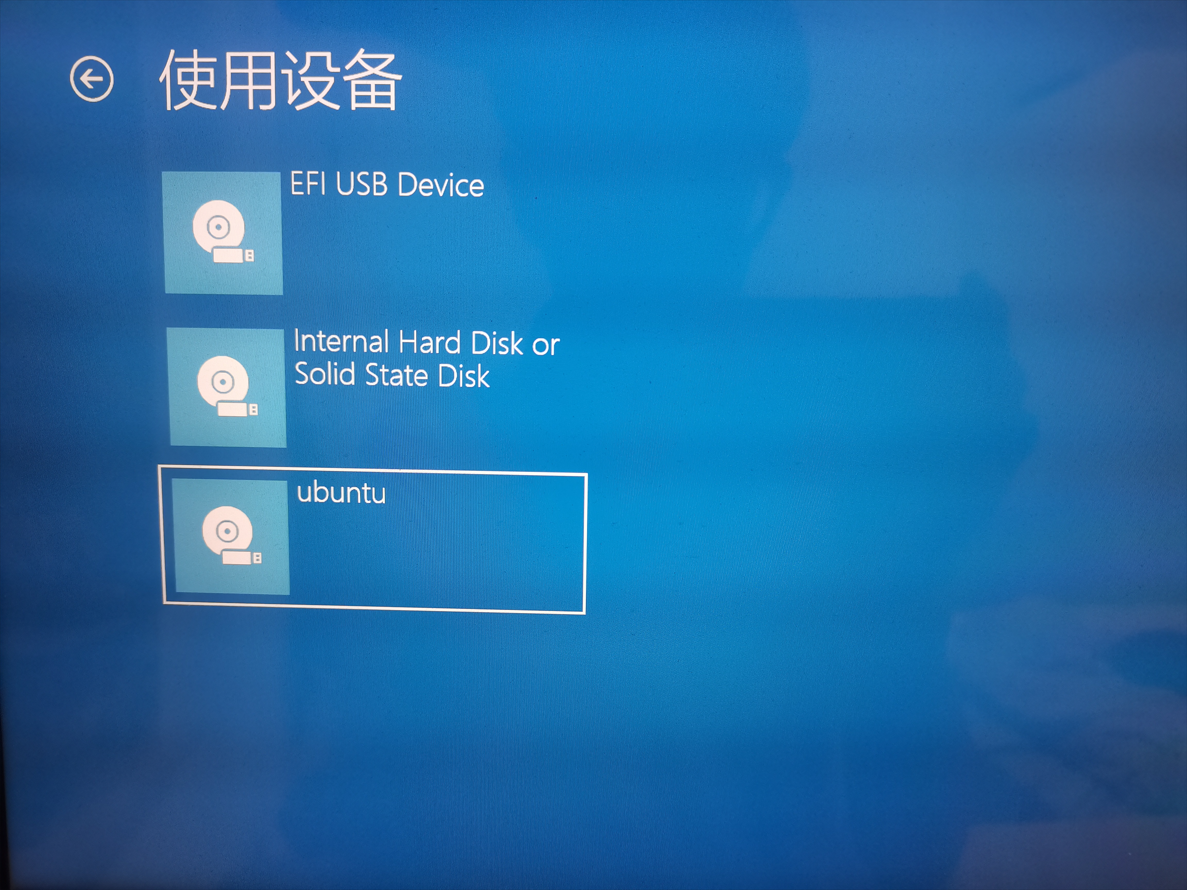
4、進入 Ubuntu 系統:點擊 ubuntu 即可進入 Ubuntu 系統
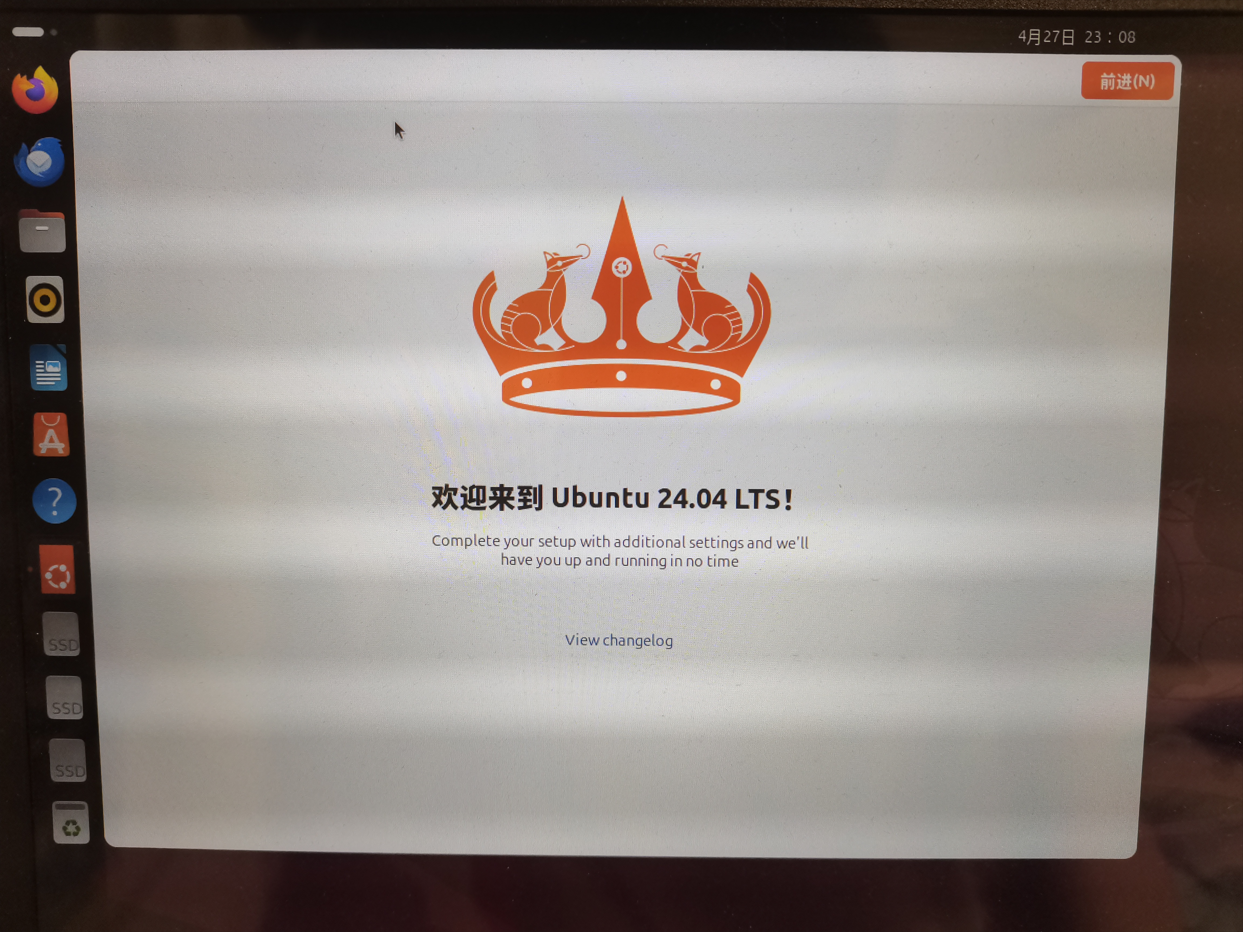
5、輸入賬戶密碼,進入 Ubuntu 歡迎頁
升級為 Ubuntu Pro
長期支持的 Ubuntu 版本可享受針對主要 Ubuntu 資源庫的五年標準安全維護。Ubuntu Pro 將針對主要資源庫和總體資源庫的這一安全維護承諾期限延至 10 年,為企業和最終用戶等提供了一個巨大的安全開源軟件庫。個人可以在最多 5 臺機器上免費使用 Ubuntu Pro。
簡而言之,
Ubuntu 24.04免費升級為UbuntuPro 24.04后可以獲得由 5 年到 10 年的安全維護。
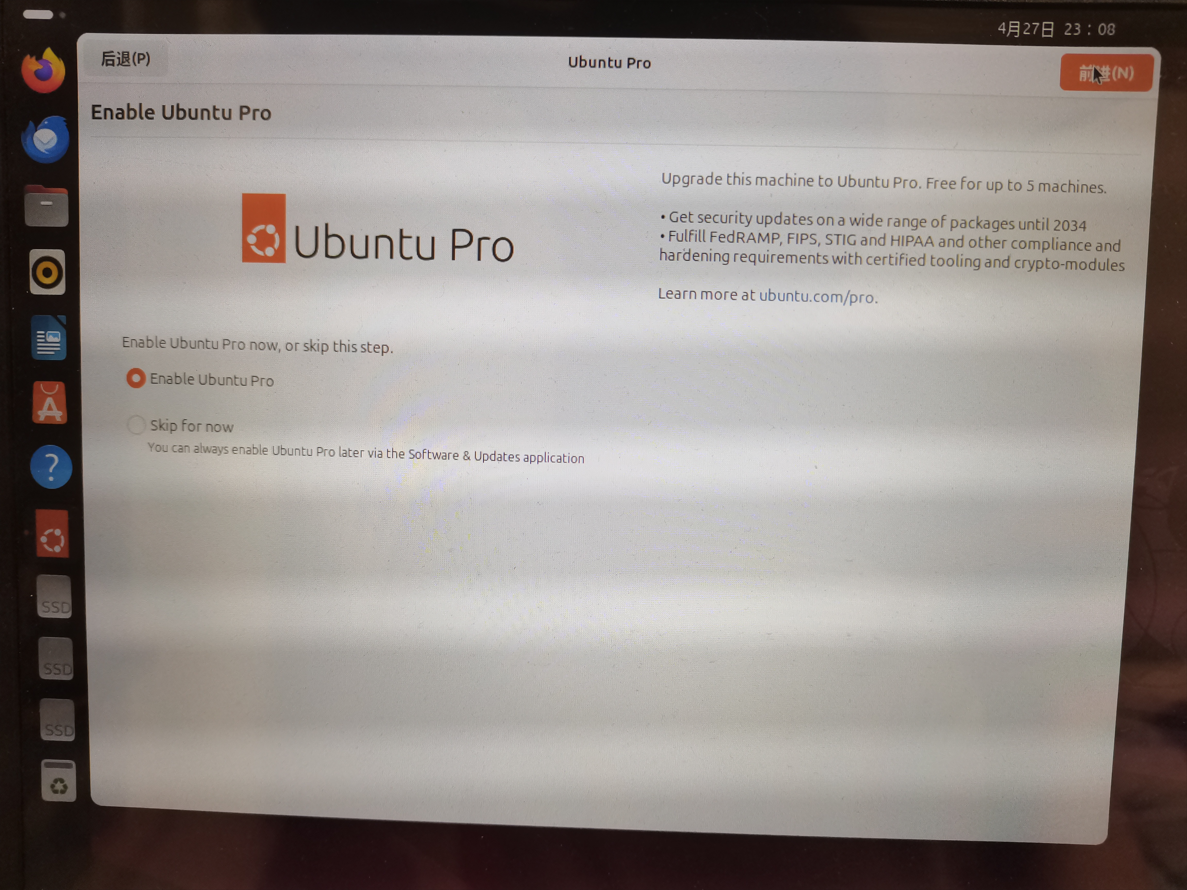
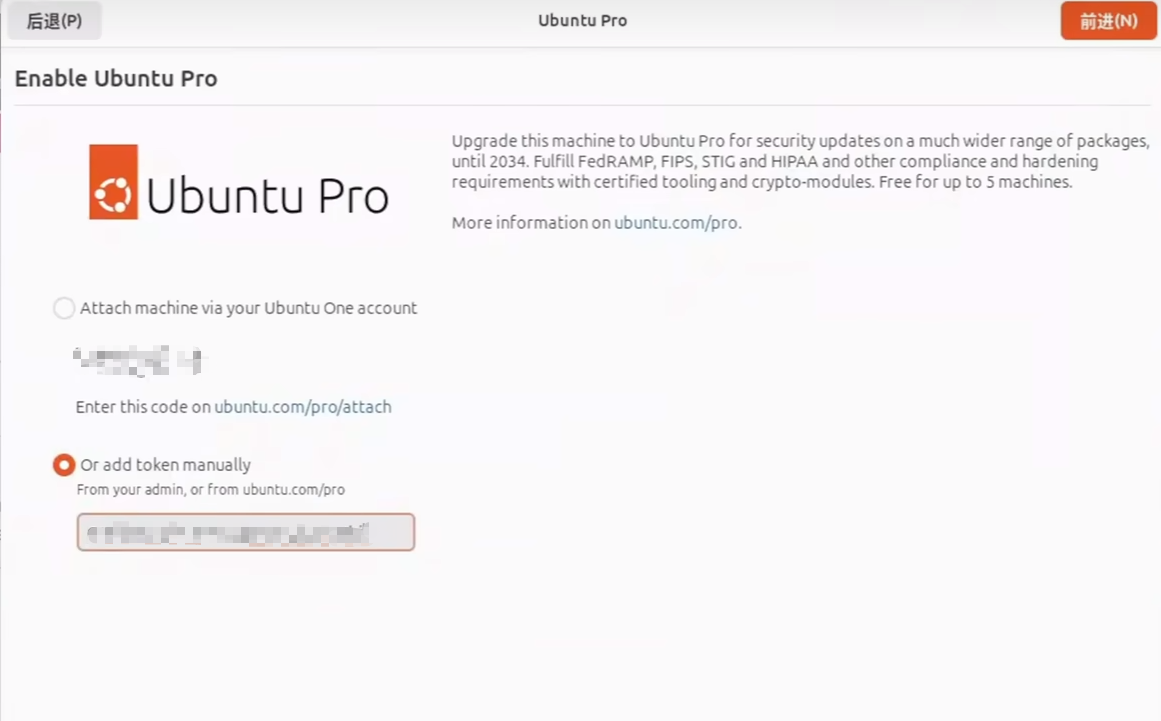
1、歡迎頁點擊 前進 進入是否升級 Ubuntu Pro 的頁面,勾選 Enable Ubunu 后點擊 前進
2、勾選 Or add token manually 后,接下來要獲取 Ubuntu Pro 的 Token

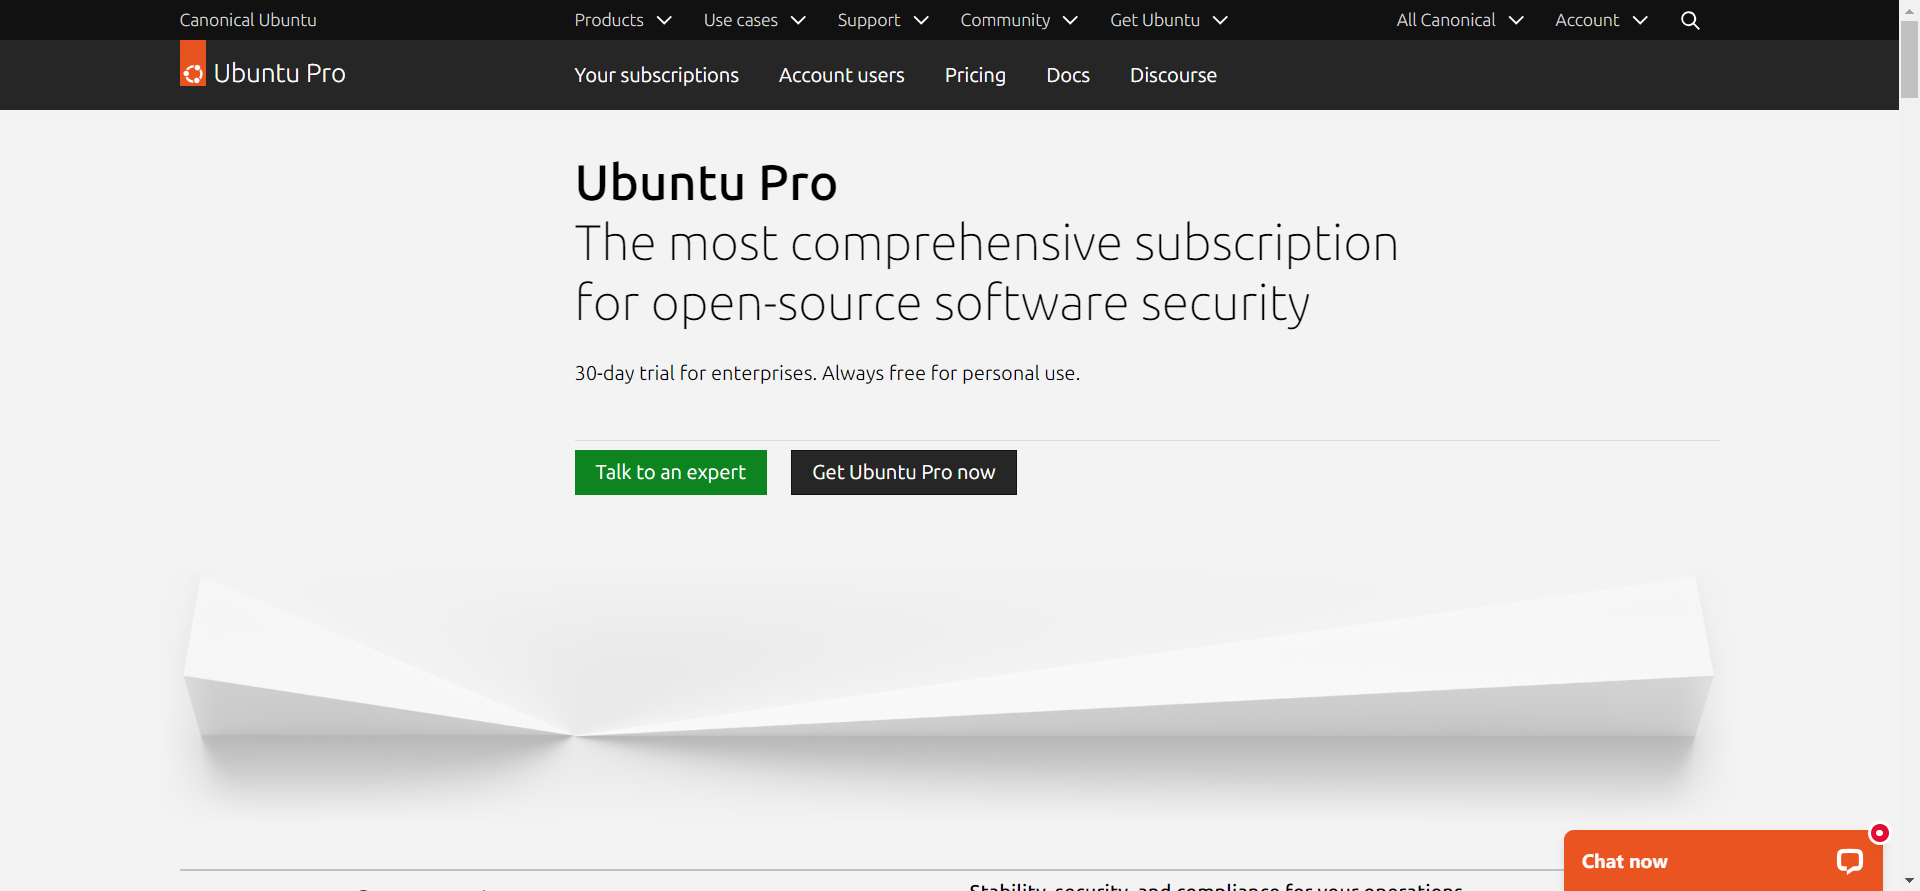
3、點擊左側 火狐瀏覽器,登錄 Ubuntu 專業版官網:注冊賬號,登錄成功后,點擊 立即獲取 Ubuntu Pro
- 沒有賬號可以進入 注冊賬號頁面 注冊 Ubuntu 賬號再登錄
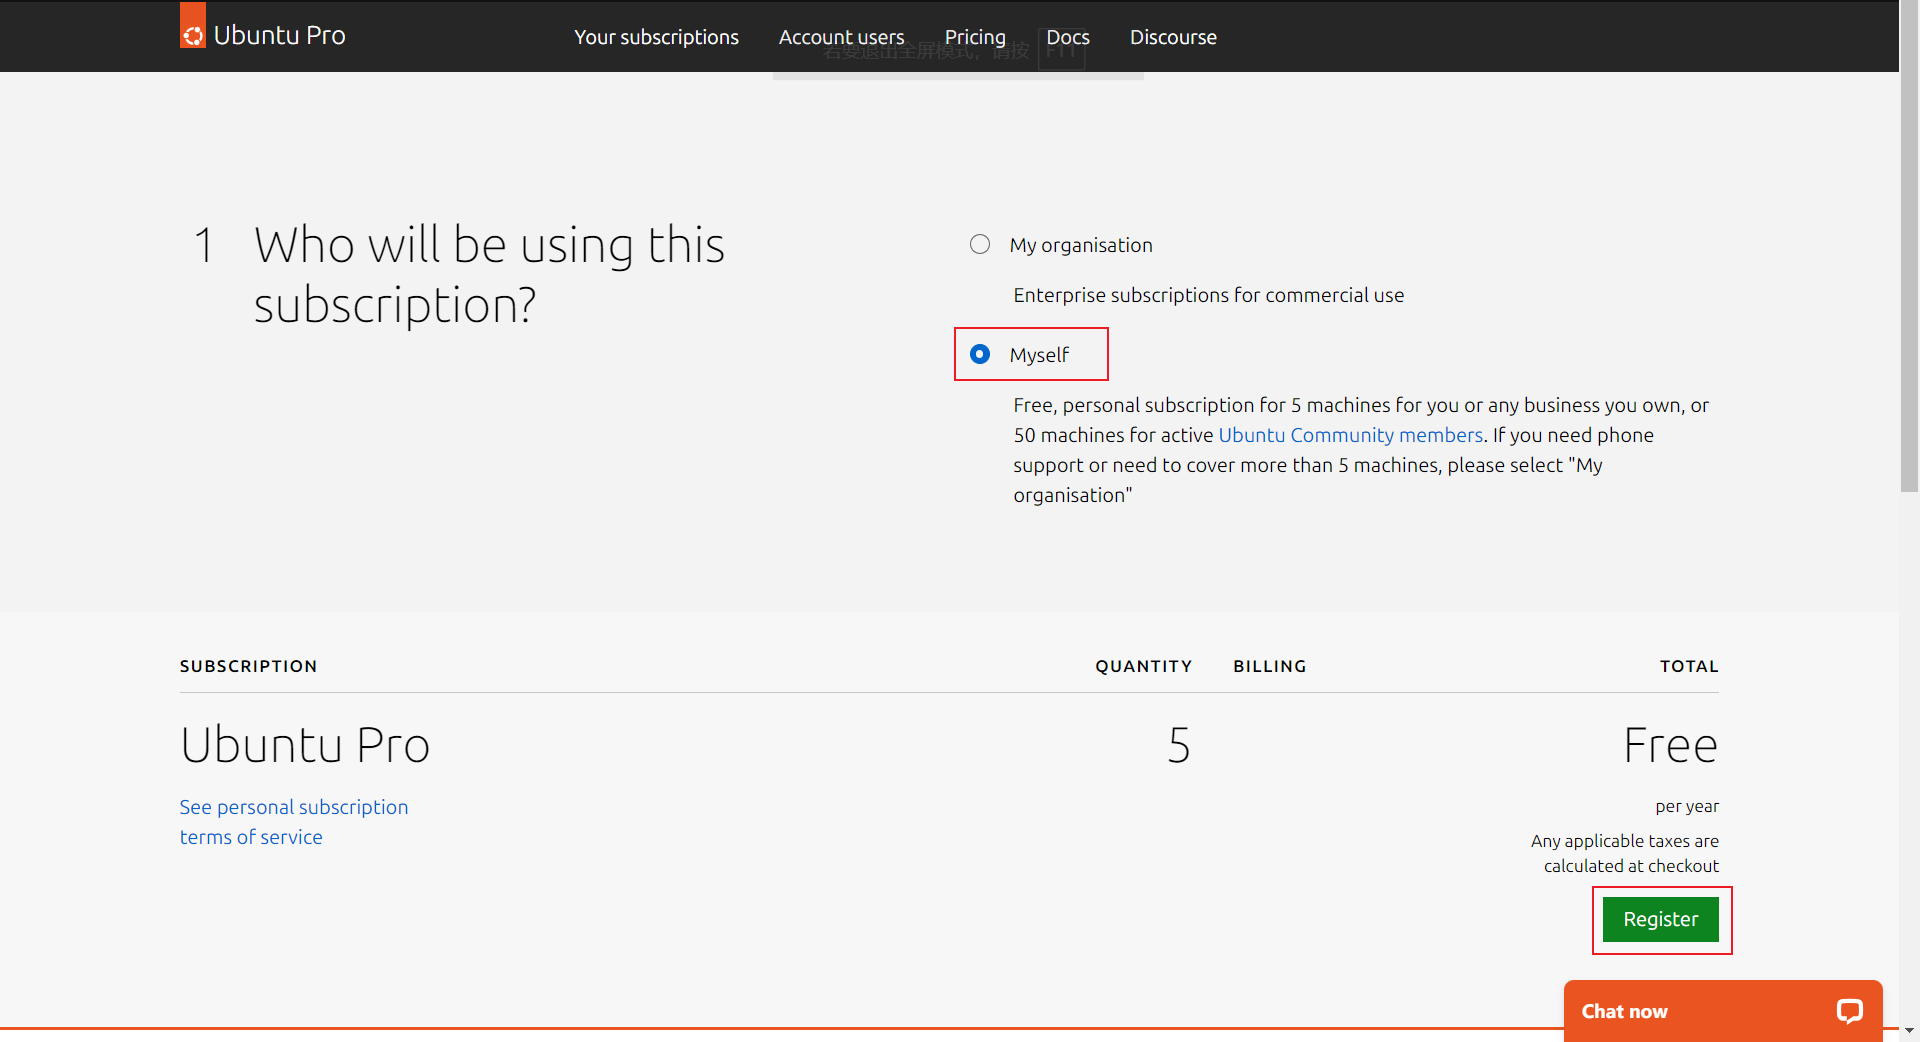
4、勾選 Myself 用于個人使用,再點擊 Register 進入個人訂閱頁面
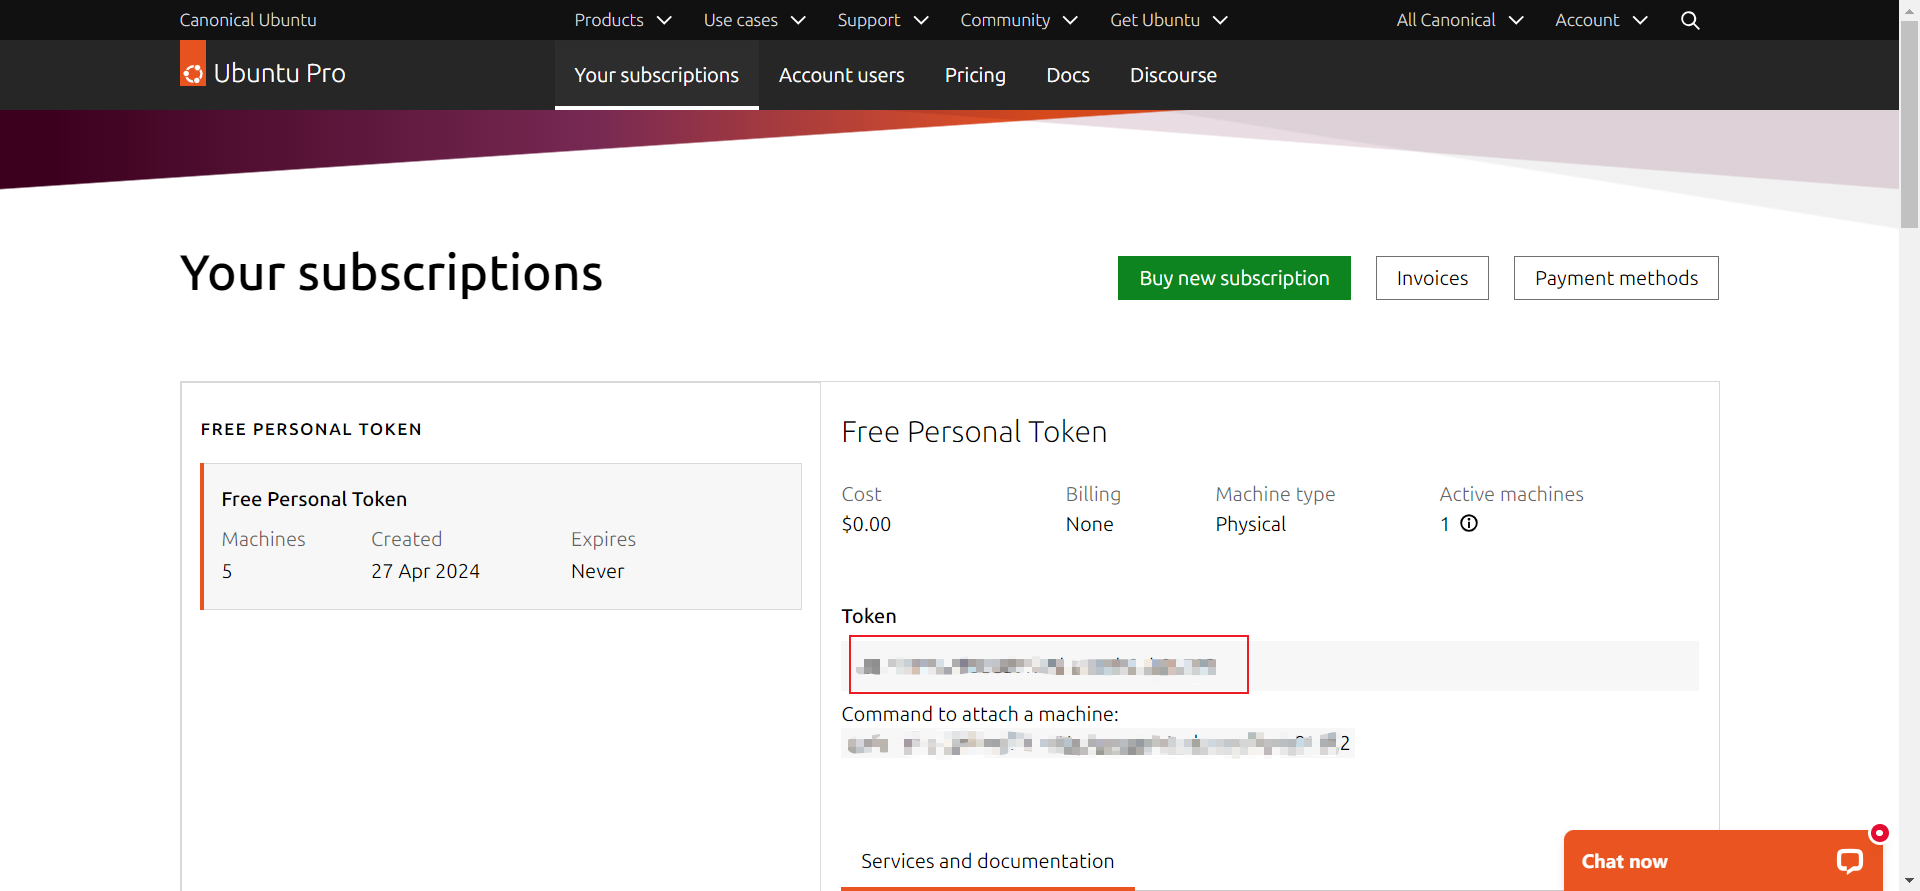
5、獲取 Token:訂閱頁面復制 Free Personal Token 中的 Token
- 如果未顯示 Token,手動輸入網址
https://ubuntu.com/pro/dashboard
6、回到桌面,粘貼復制的 Token 后,點擊 前進
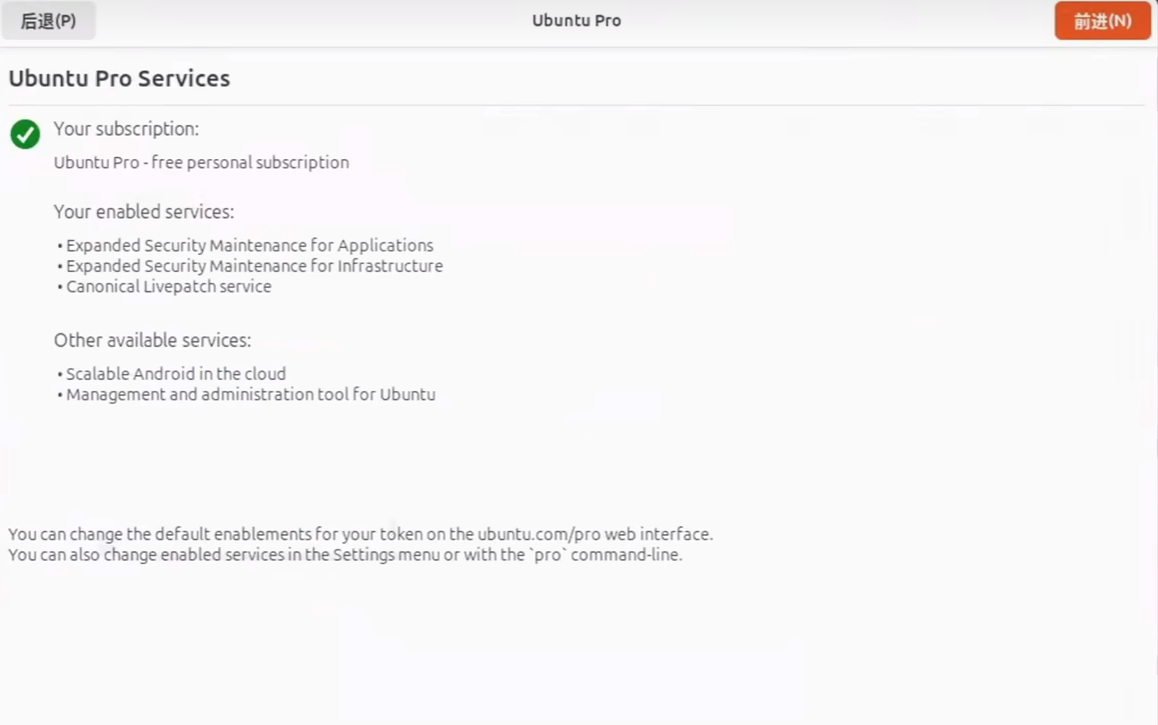
7、進入升級成功頁面
3 分鐘解決進入 Ubuntu 系統時一直卡住或一直加載的問題
五月行秋已于 2024-10-12 19:59:54 修改
問題背景
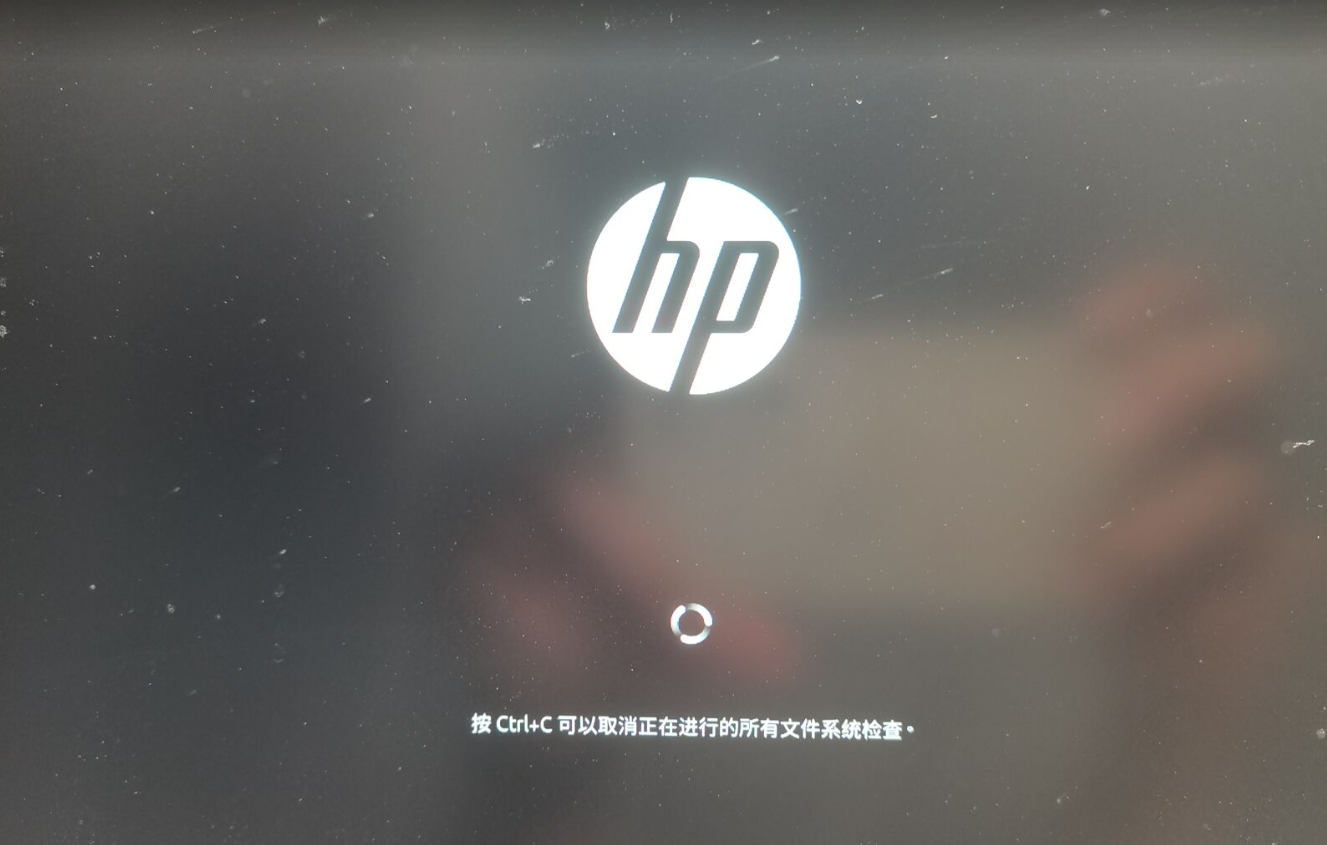
電腦安裝了 Windows10+Ubuntu24.04 雙系統,在打開 Ubuntu 系統的時候,電腦一直處在文件系統檢查頁面,按 Ctrl+C 也取消不了,只能長按電源強制關機。
解決方法
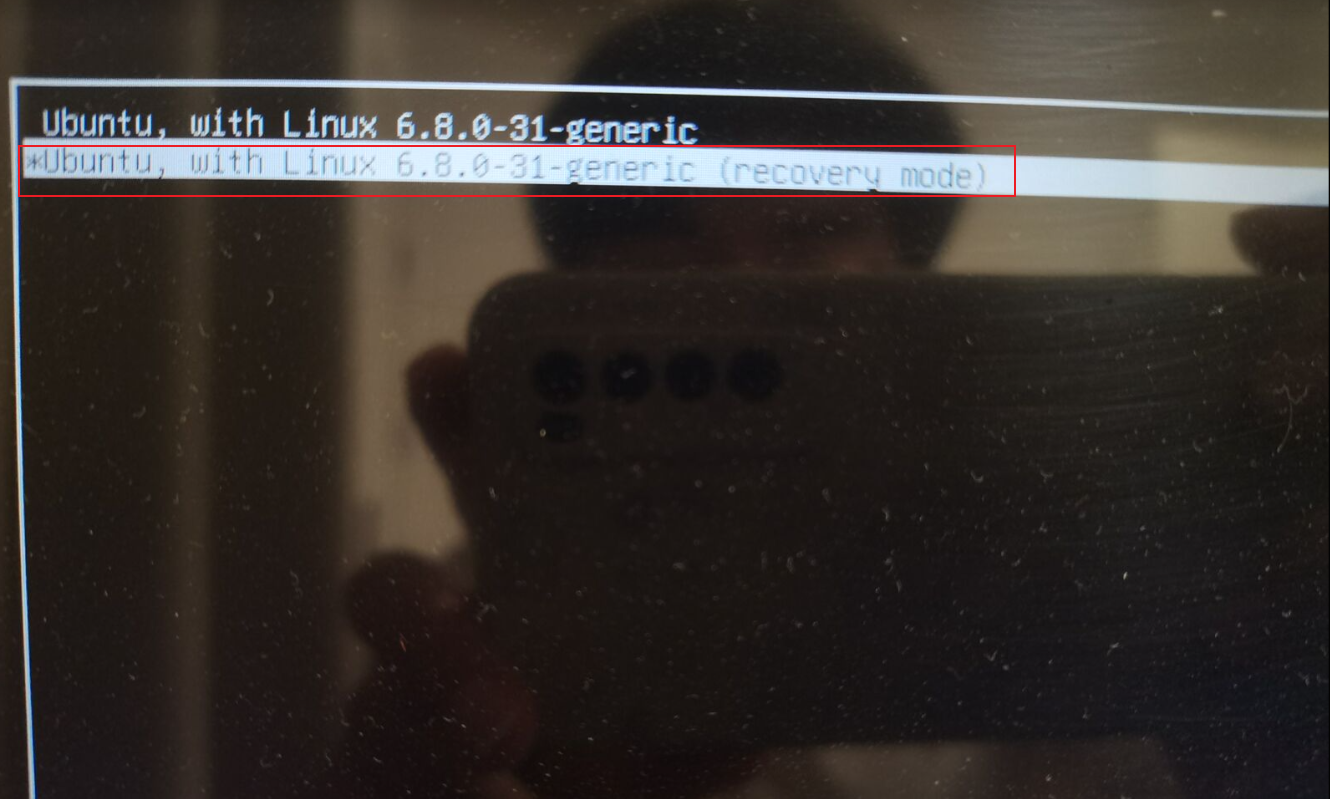
1. 選擇 recovery mode 恢復模式進入 Ubuntu 系統
?
2. 選擇 Advanced options for Ubuntu 打開 Ubuntu 的高級選項
?

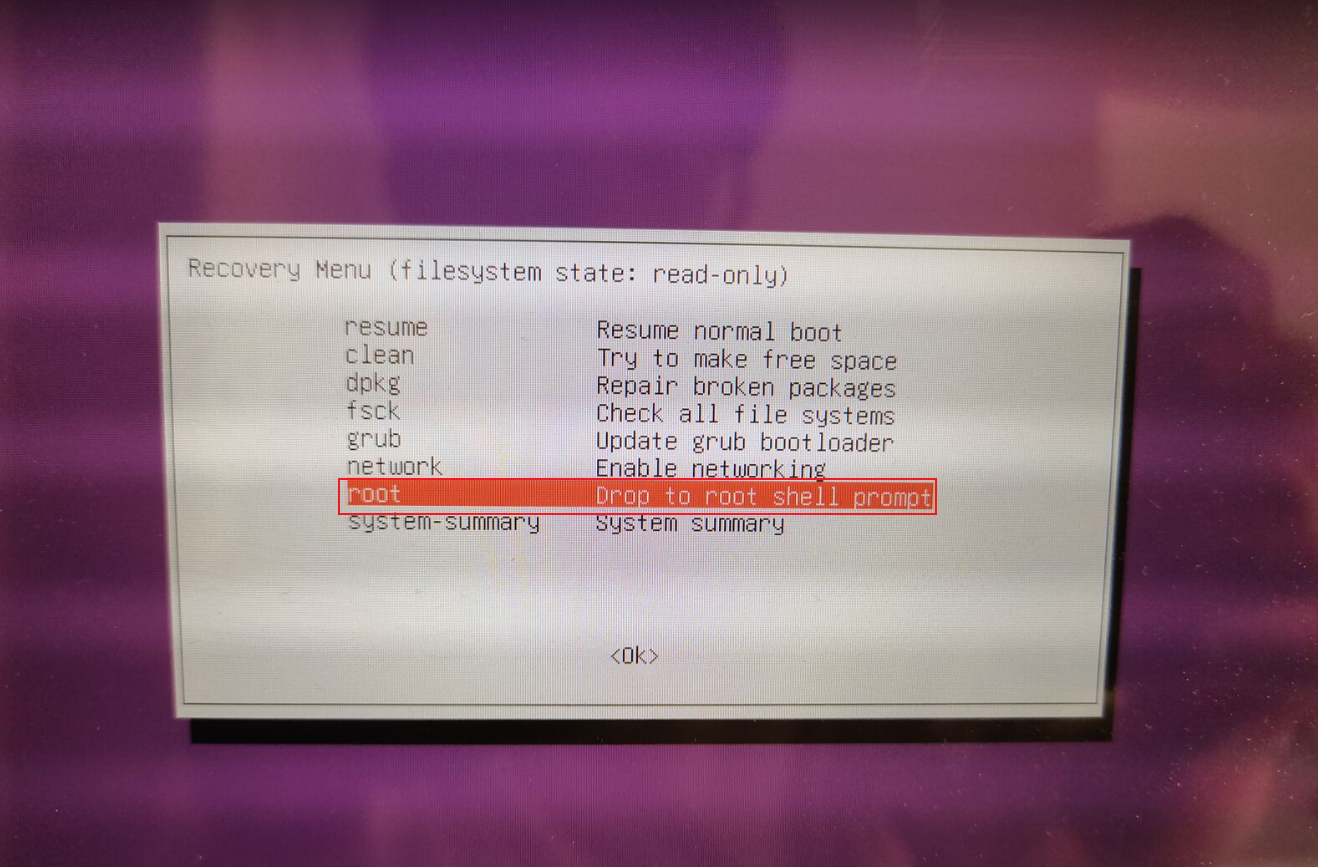
3. 打開 root shell 命令行頁面
選擇 Drop to root shell prompt
?
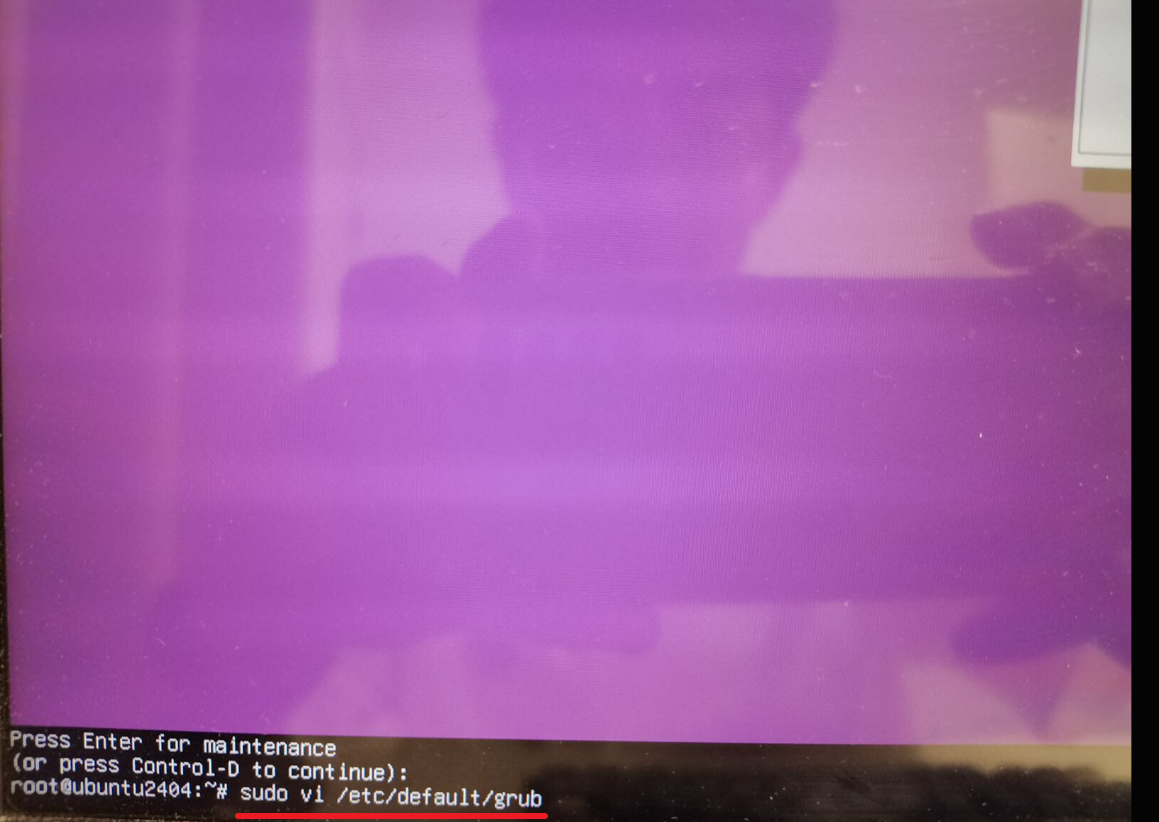
4. 修改 grub 文件
命令行中輸入
sudo vi /etc/default/grub
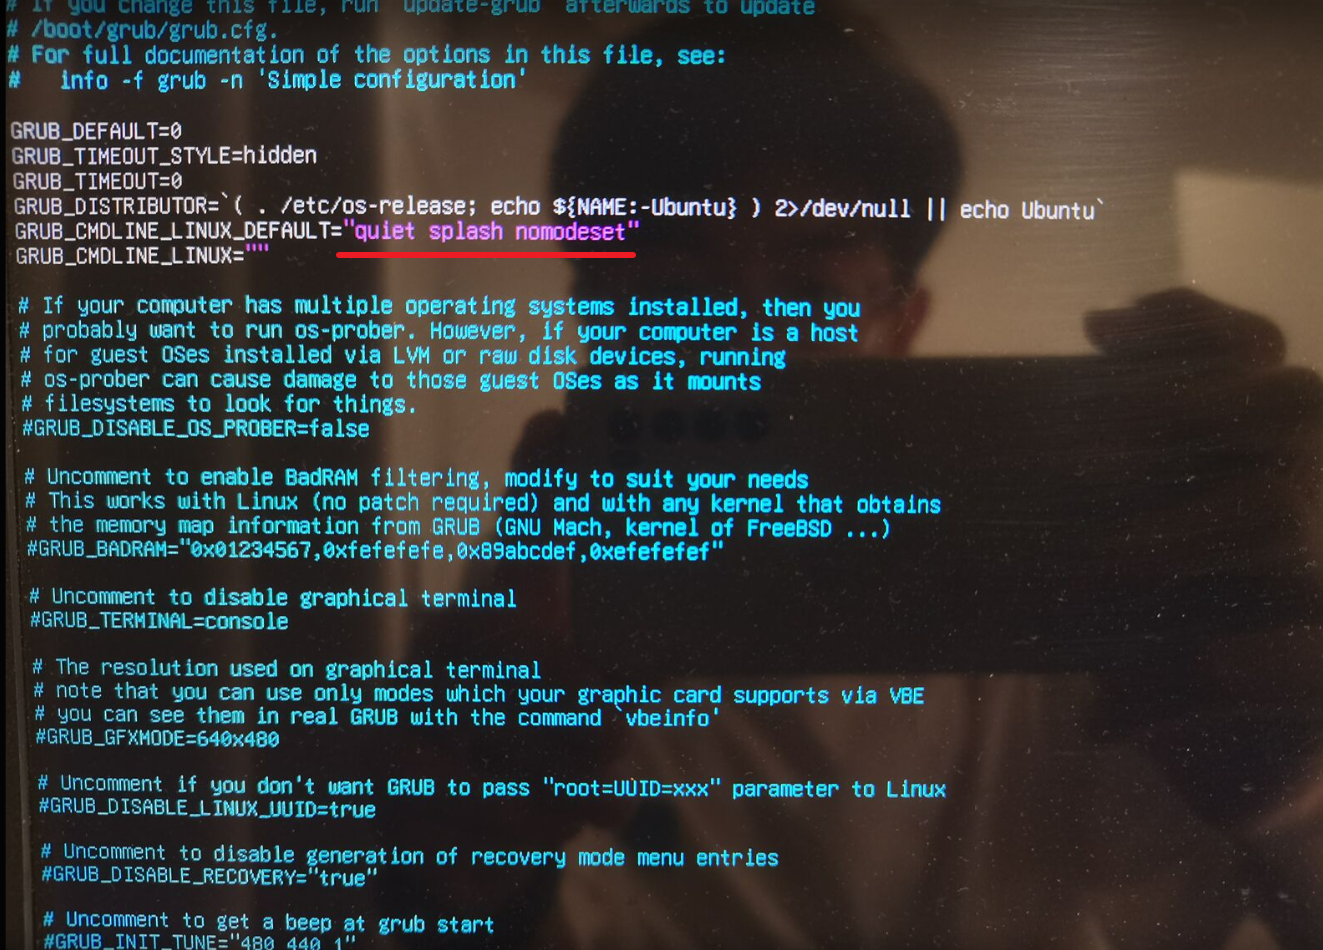
5. 修改 grub 文件
-
輸入
i進入編輯模式,通過鍵盤的上下左右按鍵來移動光標,再編輯文本 -
將
GRUB_CMDLINE_LINUX_DEFAULT="quiet splash"
修改為
GRUB_CMDLINE_LINUX_DEFAULT="quiet splash nomodeset" -
Esc退出編輯模式,再輸入:wq保存 grub 文件
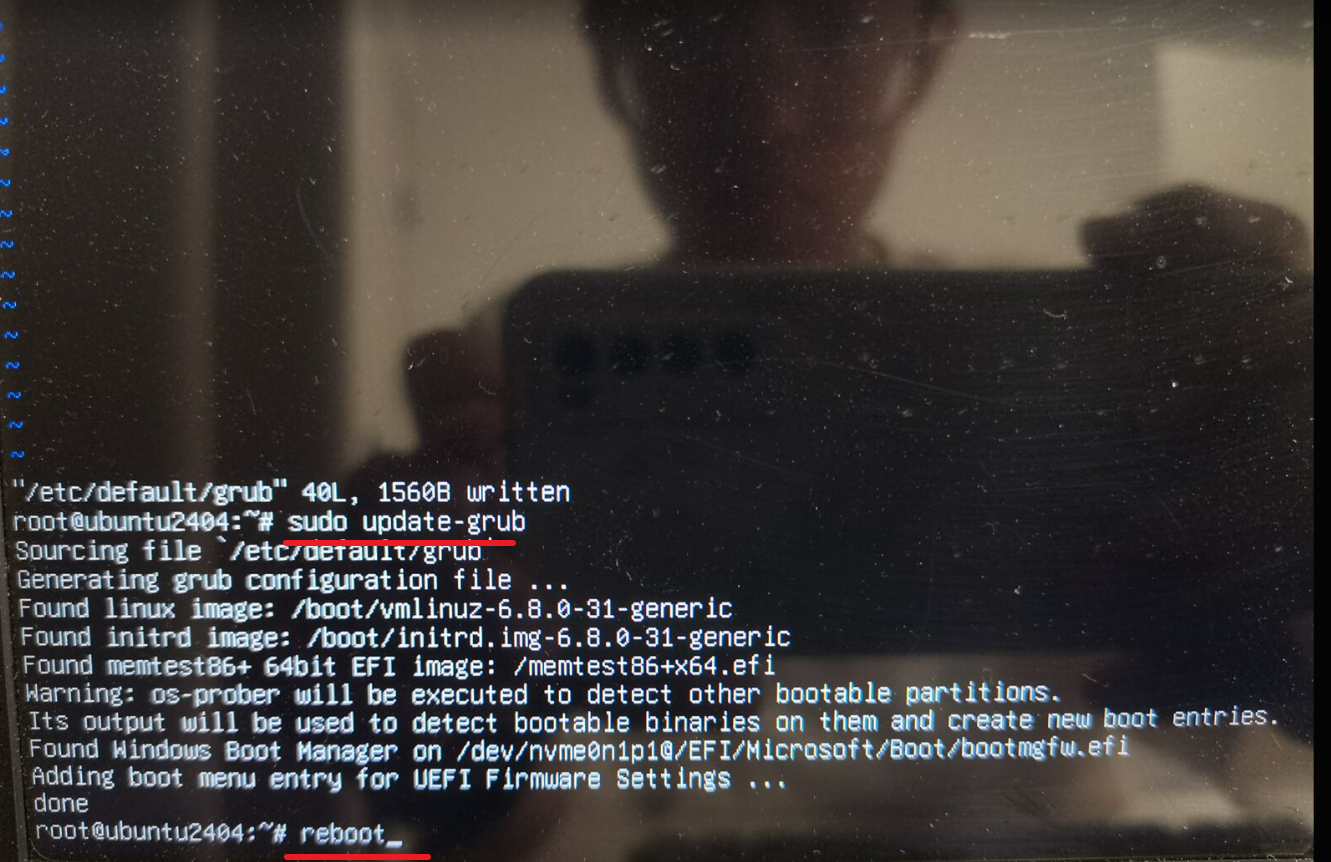
6. 更新文件并重啟
先更新引導程序的配置
sudo update-grub
再重啟 Ubuntu
reboot
7. 等待重啟,即可成功進入 Ubuntu。
via:
-
How to install Ubuntu 20.04 and dual boot alongside Windows 10 | by Dave’s RoboShack | Linux For Everyone | Medium
https://medium.com/linuxforeveryone/how-to-install-ubuntu-20-04-and-dual-boot-alongside-windows-10-323a85271a73 -
Beginners Guide to Install Windows With Ubuntu in Dual Boot
https://itsfoss.com/install-ubuntu-1404-dual-boot-mode-windows-8-81-uefi/ -
How to Disable UEFI Secure Boot to Dual Boot Any System
https://www.makeuseof.com/tag/disable-secure-uefi-dual-boot/ -
[Fixed] “No Bootable Device” Error After Installing Ubuntu
https://itsfoss.com/no-bootable-device-found-ubuntu/ -
[Solved] error: no such partition grub rescue in Ubuntu
https://itsfoss.com/solve-error-partition-grub-rescue-ubuntu-linux/
— -
Windows+Ubuntu24.04 雙系統及升級 Ubuntu Pro 教程 - CSDN 博客
https://blog.csdn.net/qingxuly/article/details/139155827 -
3 分鐘解決進入 Ubuntu 系統時一直卡住或一直加載的問題<_ubuntu 卡在啟動界面進不去 - CSDN 博客>
https://blog.csdn.net/qingxuly/article/details/142875098
— -
輕松管理 EFI/UEFI 啟動項 & 管理 EFI 系統分區 & 修復 EFI 系統啟動問題!- EasyUEFI
https://www.easyuefi.com/index-cn.html -
EasyUEF 下載 - EasyUEFI 版官方免費下載 [2025 最新版]- 下載之家
https://www.downza.cn/soft/212250.html -
使用 easyUEFI 引導從硬盤安裝 Ubuntu 系統<_easy uefi-CSDN 博客>
https://blog.csdn.net/qq_46753404/article/details/120974457 -
thinkpad x13 安裝 Windows 10 + Ubuntu 20.04 雙系統_install ubuntu alongside windows boot manager-CSDN 博客
https://blog.csdn.net/weixin_42409052/article/details/116772155

)


:從寫作到個人IP的體系化構建(完結篇))

)


)


