文章目錄
- 📑前言
- 一、開箱初體驗的愉悅
- 二、產品規格概述
- 三、前置工作
- 四、性能測試
- 4.1 CPU 性能測試
- 4.1.1 單線程 CPU 測試
- 4.1.2 多線程 CPU 測試
- 4.2 內存性能測試
- 4.2.1 內存讀寫性能測試
- 4.2.2 高負載內存測試
- 4.3 I/O 性能測試
- 4.4 網絡性能測試
- 4.5 測試小結
- 4.5.1 CPU 性能測試
- 4.5.1.1 單線程 CPU 測試
- 4.5.1.2 多線程 CPU 測試
- 4.5.2 內存性能測試
- 4.5.2.1 內存讀寫性能測試
- 4.2.2 高負載內存測試
- 4.3 I/O 性能測試
- 4.4 網絡性能測試
- 五、全篇歸納總結
- 5.1 性能特點
- 5.2 使用體驗
- 5.3 適用場景
- 5.4 不足與改進
- 5.5 個人評價
📑前言
在當下這個全球互聯的時代,高性能單板計算機正逐漸嶄露頭角,成為推動創新和個性化解決方案的關鍵力量。其中,香橙派 Kunpeng Pro作為一款集成了華為鯤鵬處理器的板卡,憑借其卓越的計算性能和廣泛的應用潛力,已經吸引了全球開發者與技術愛好者的目光。它不僅為高性能服務器、人工智能和邊緣計算等領域注入了新的活力,還以其對開發者友好的接口布局和廣泛的軟件支持,成為了DIY項目與復雜計算任務的理想選擇。
近日,我有幸通過CSDN獲得了香橙派 Kunpeng Pro的評測資格,這對于一個熱衷于技術的開發者來說,無疑是一次難得的探索和實踐機會。
隨著科技的不斷進步,高性能開發板在物聯網設備、智能家居、自動化控制等領域的應用愈發廣泛。它們作為連接現實世界與數字世界的橋梁,正推動著社會的智能化和數字化進程。香橙派 Kunpeng Pro作為其中的佼佼者,憑借其強大的計算能力和豐富的接口配置,已經在市場上獲得了廣泛的關注和好評。
在這篇文章中,我將詳細分享我對香橙派 Kunpeng Pro的使用體驗,包括其性能測試、適用場景和實際應用案例。我將從開箱開始,一步步展示其硬件特點、系統安裝過程以及在實際項目中的應用效果。同時,我也將探討這款開發板在開源硬件浪潮中的地位和作用,以及它如何為開發者提供創新的平臺和可能性。
香橙派 Kunpeng Pro作為一款高性能開發板,不僅為技術愛好者提供了實驗和學習的平臺,更為專業開發者帶來了實現復雜項目的強大工具。通過本文的分享,我希望能讓更多人了解這款開發板的優勢和潛力,共同探索其在各個領域的應用前景。
一、開箱初體驗的愉悅


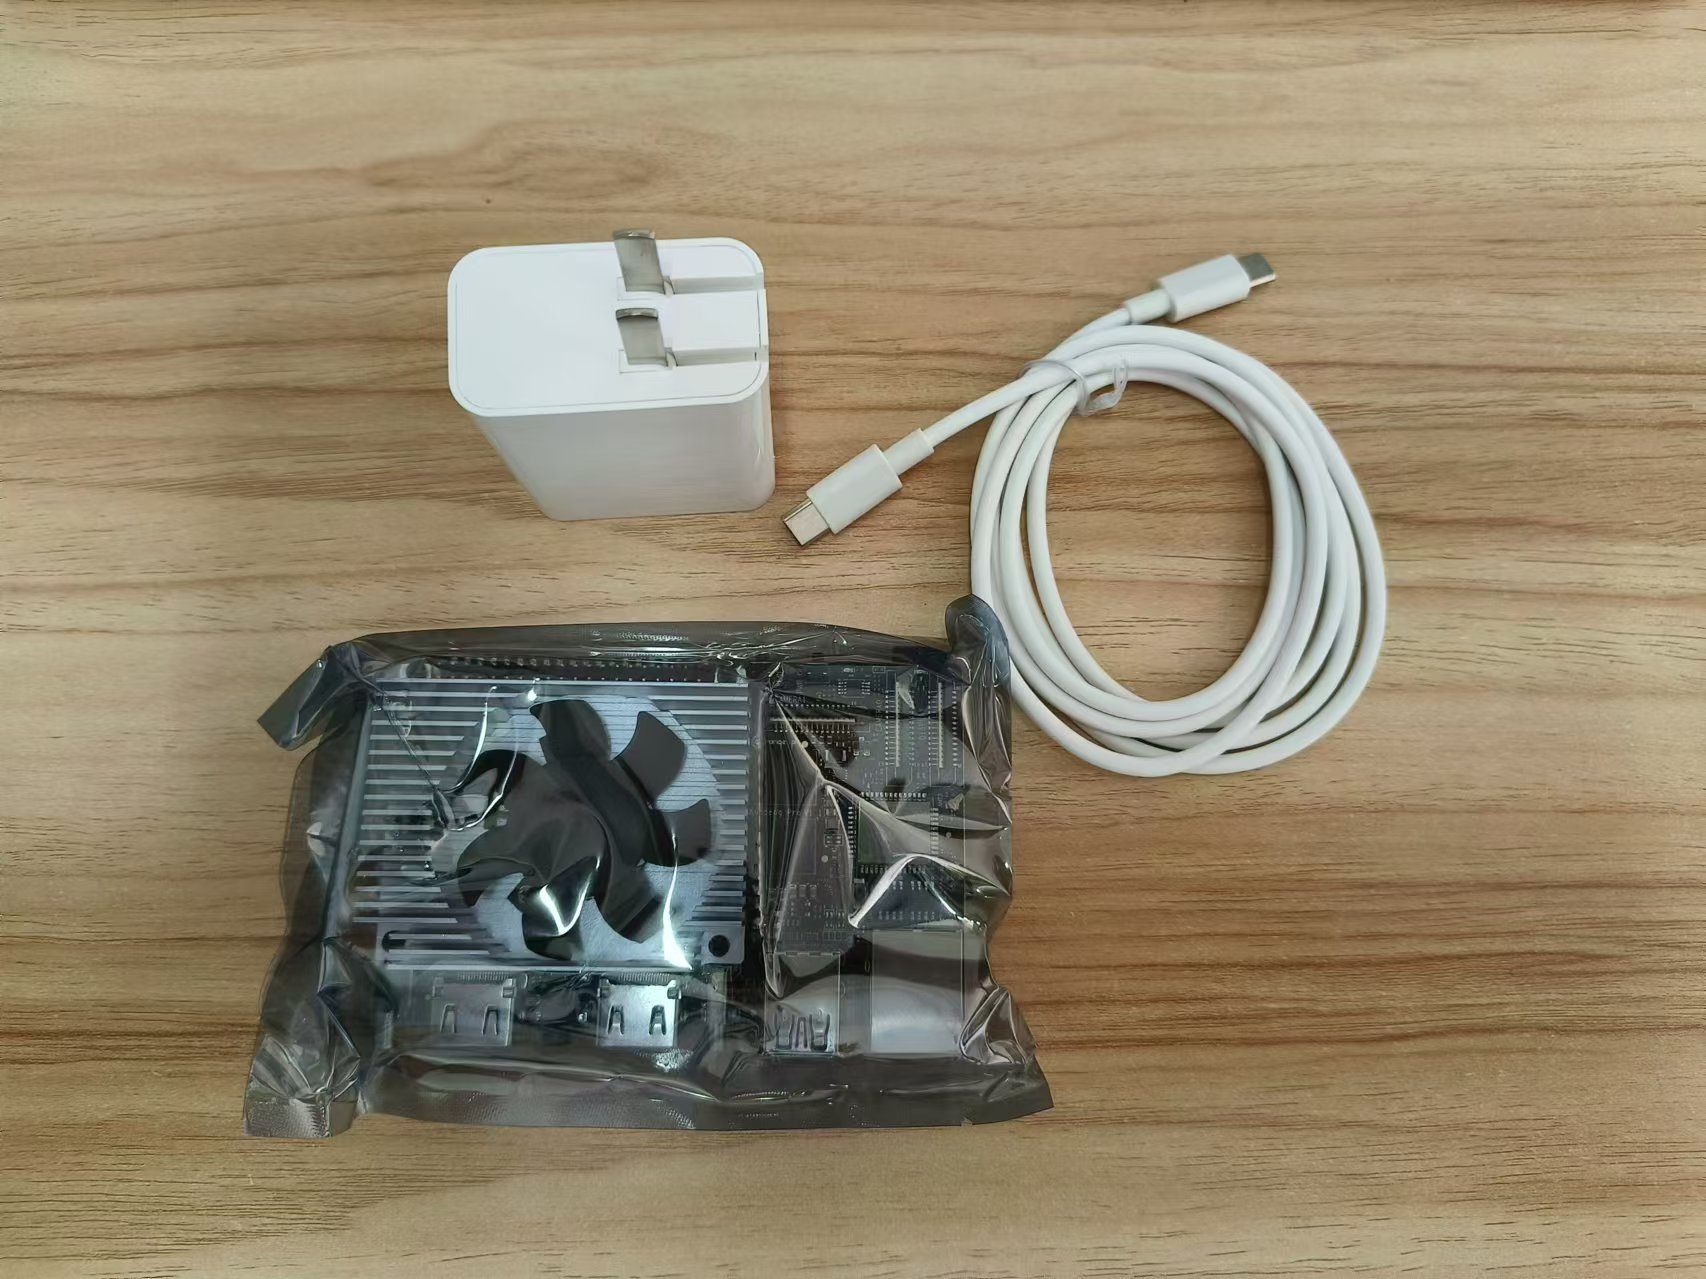
到手現拆,這個板子真的讓人眼前一亮,狠狠喜歡上了!
二、產品規格概述
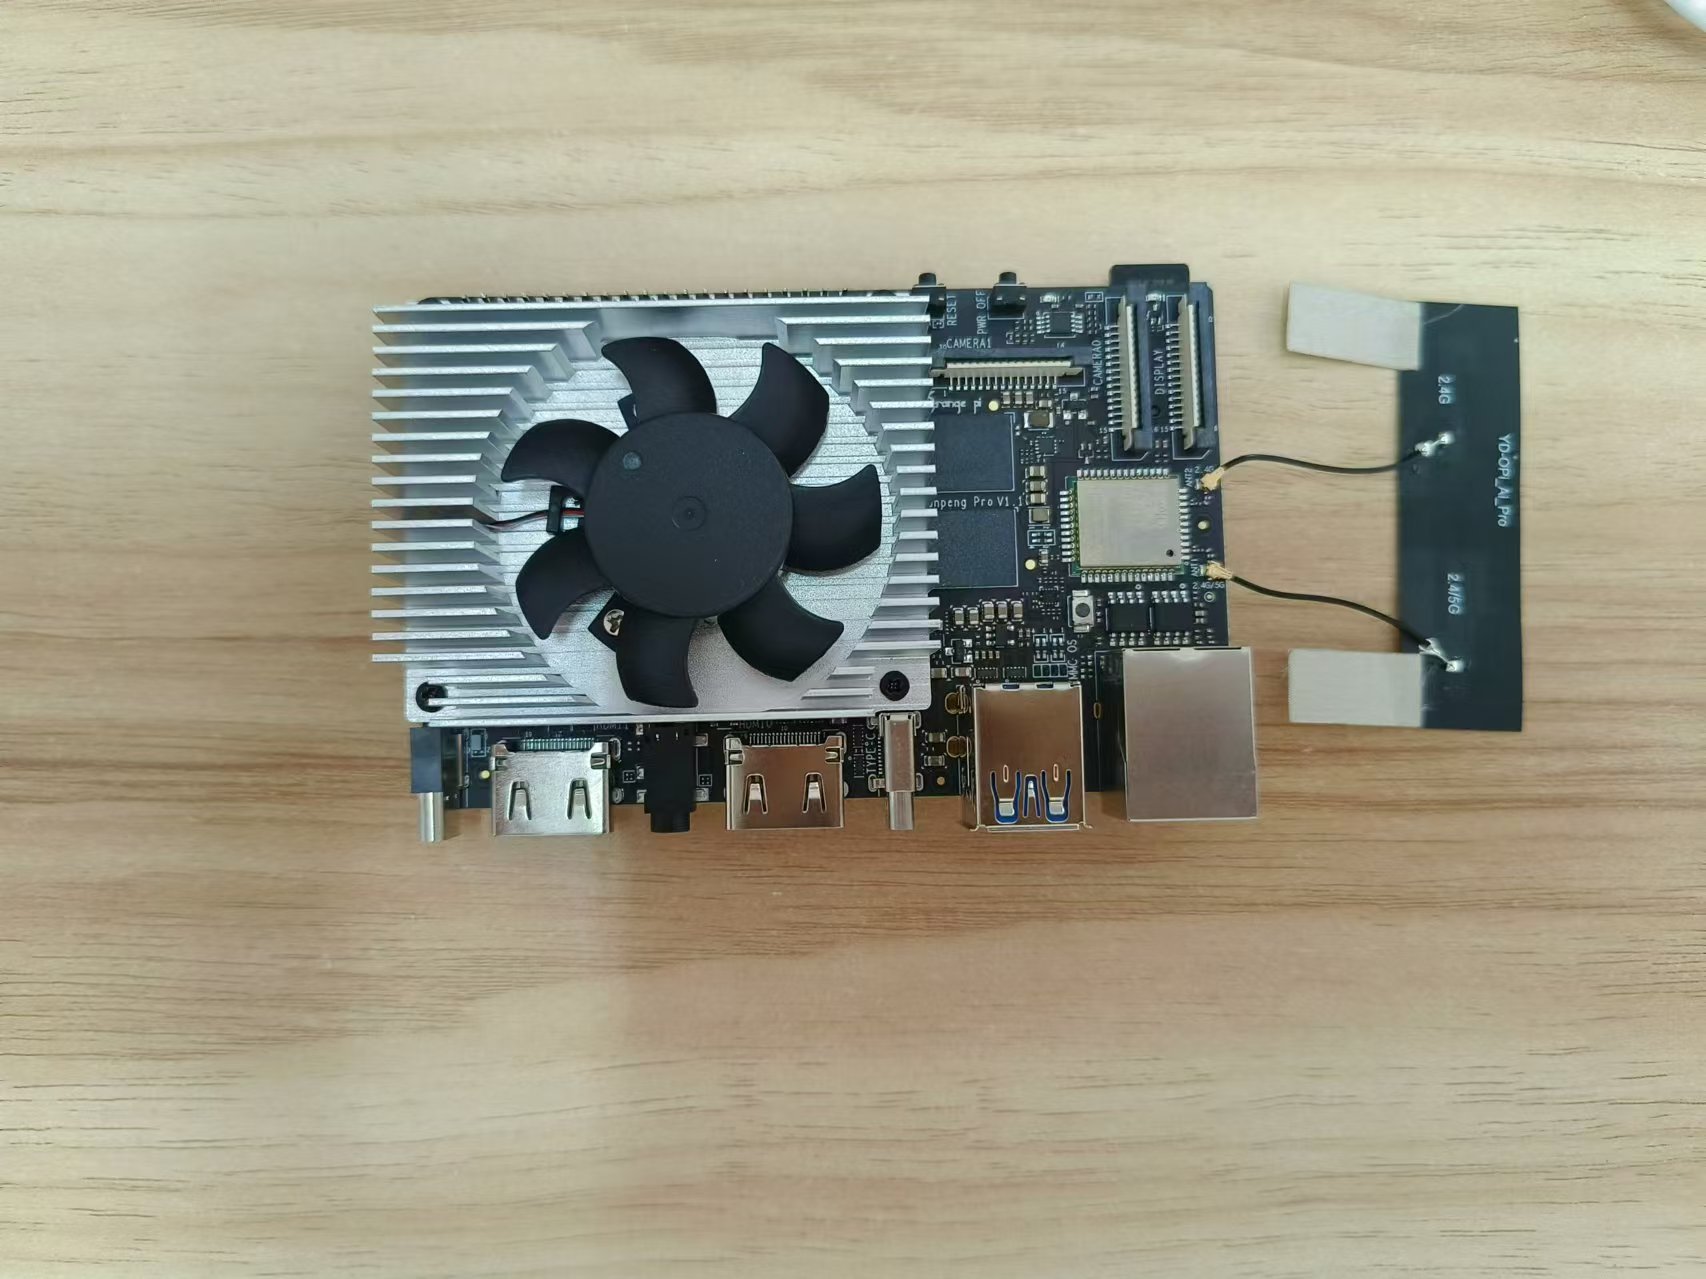
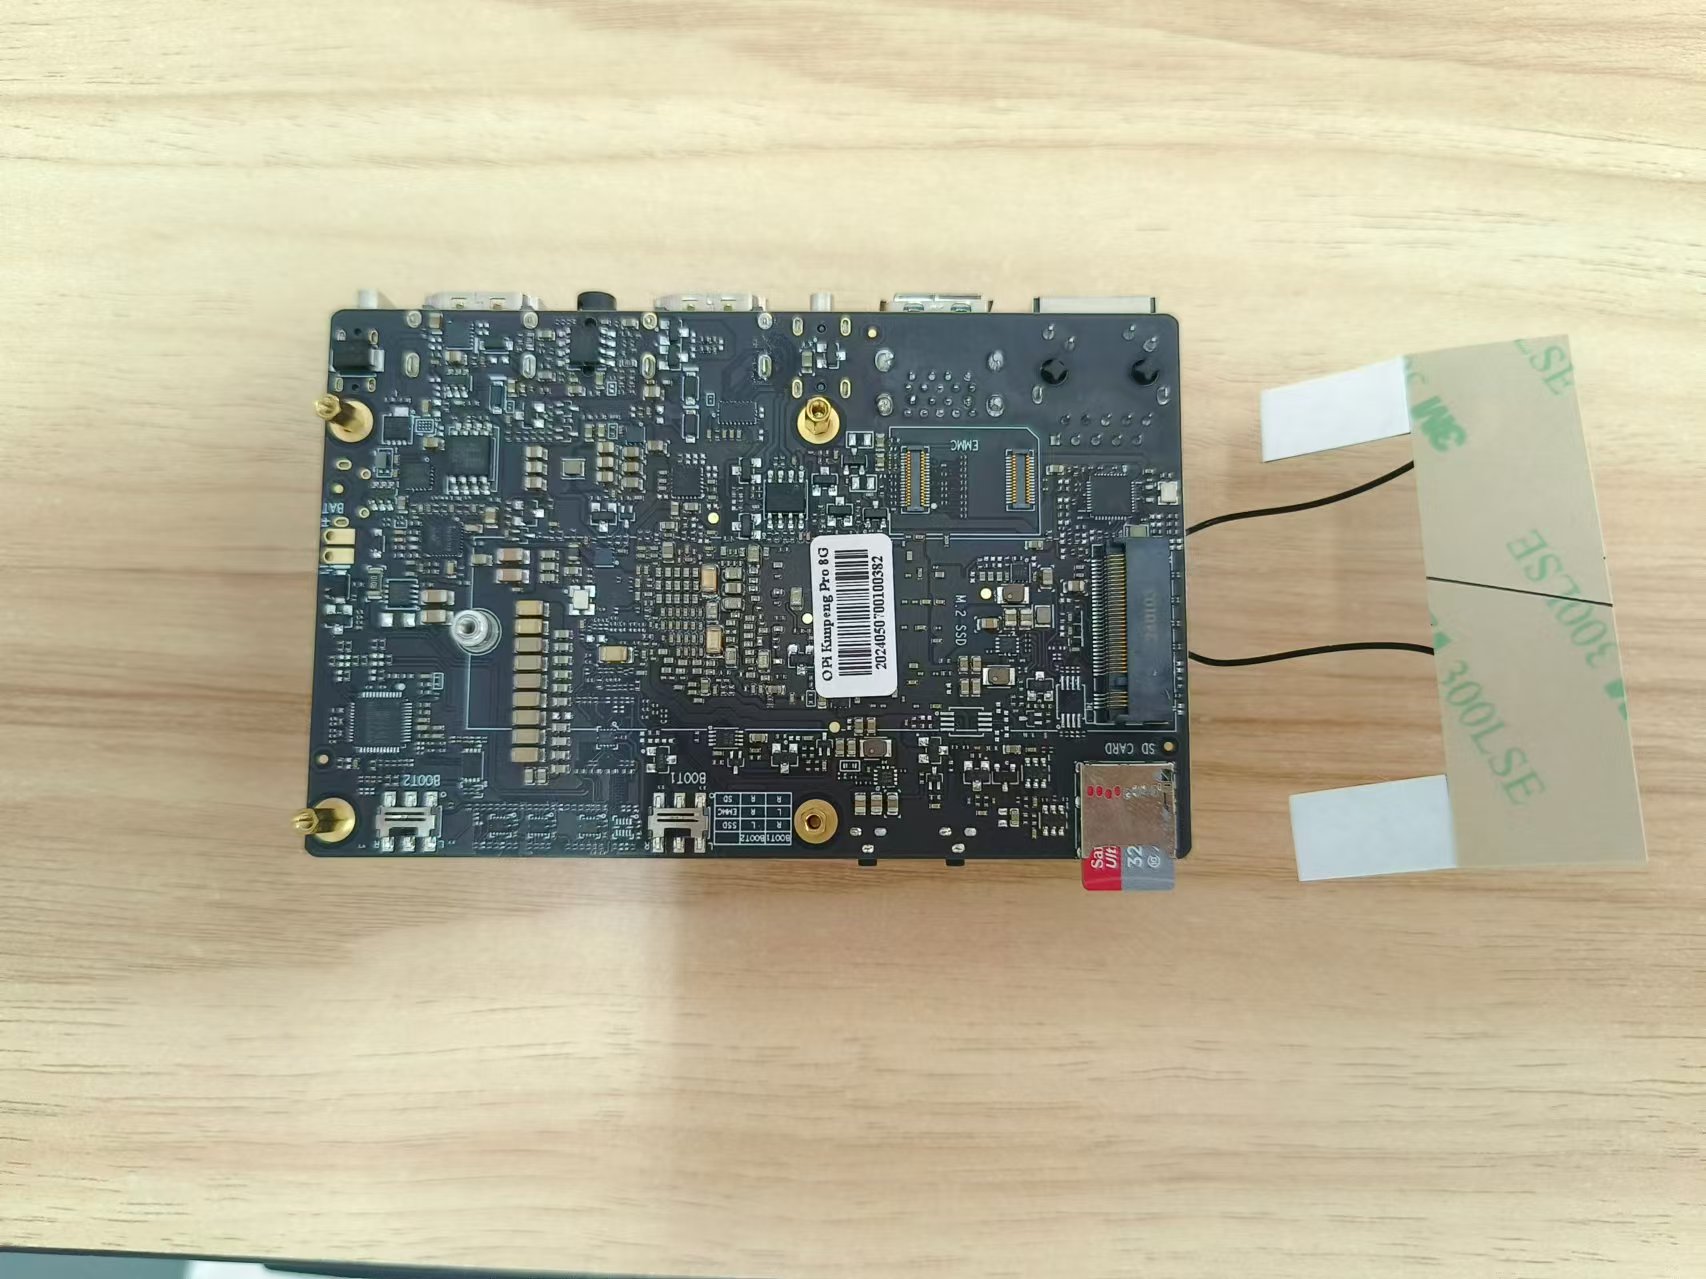
- 香橙派 Kunpeng Pro是一款集高性能計算和強大AI功能于一體的開發板。其核心搭載了一個4核64位的處理器以及一個高效的AI處理器,具備8TOPS的算力,滿足高AI運算需求。內存方面,提供了LPDDR4X類型的8GB/16GB可選內存,速率高達3200Mbps,確保高速數據讀寫。存儲選項豐富,包括SPI FLASH、SATA/NVME SSD、eMMC插槽和TF卡插槽,滿足不同容量的存儲需求。
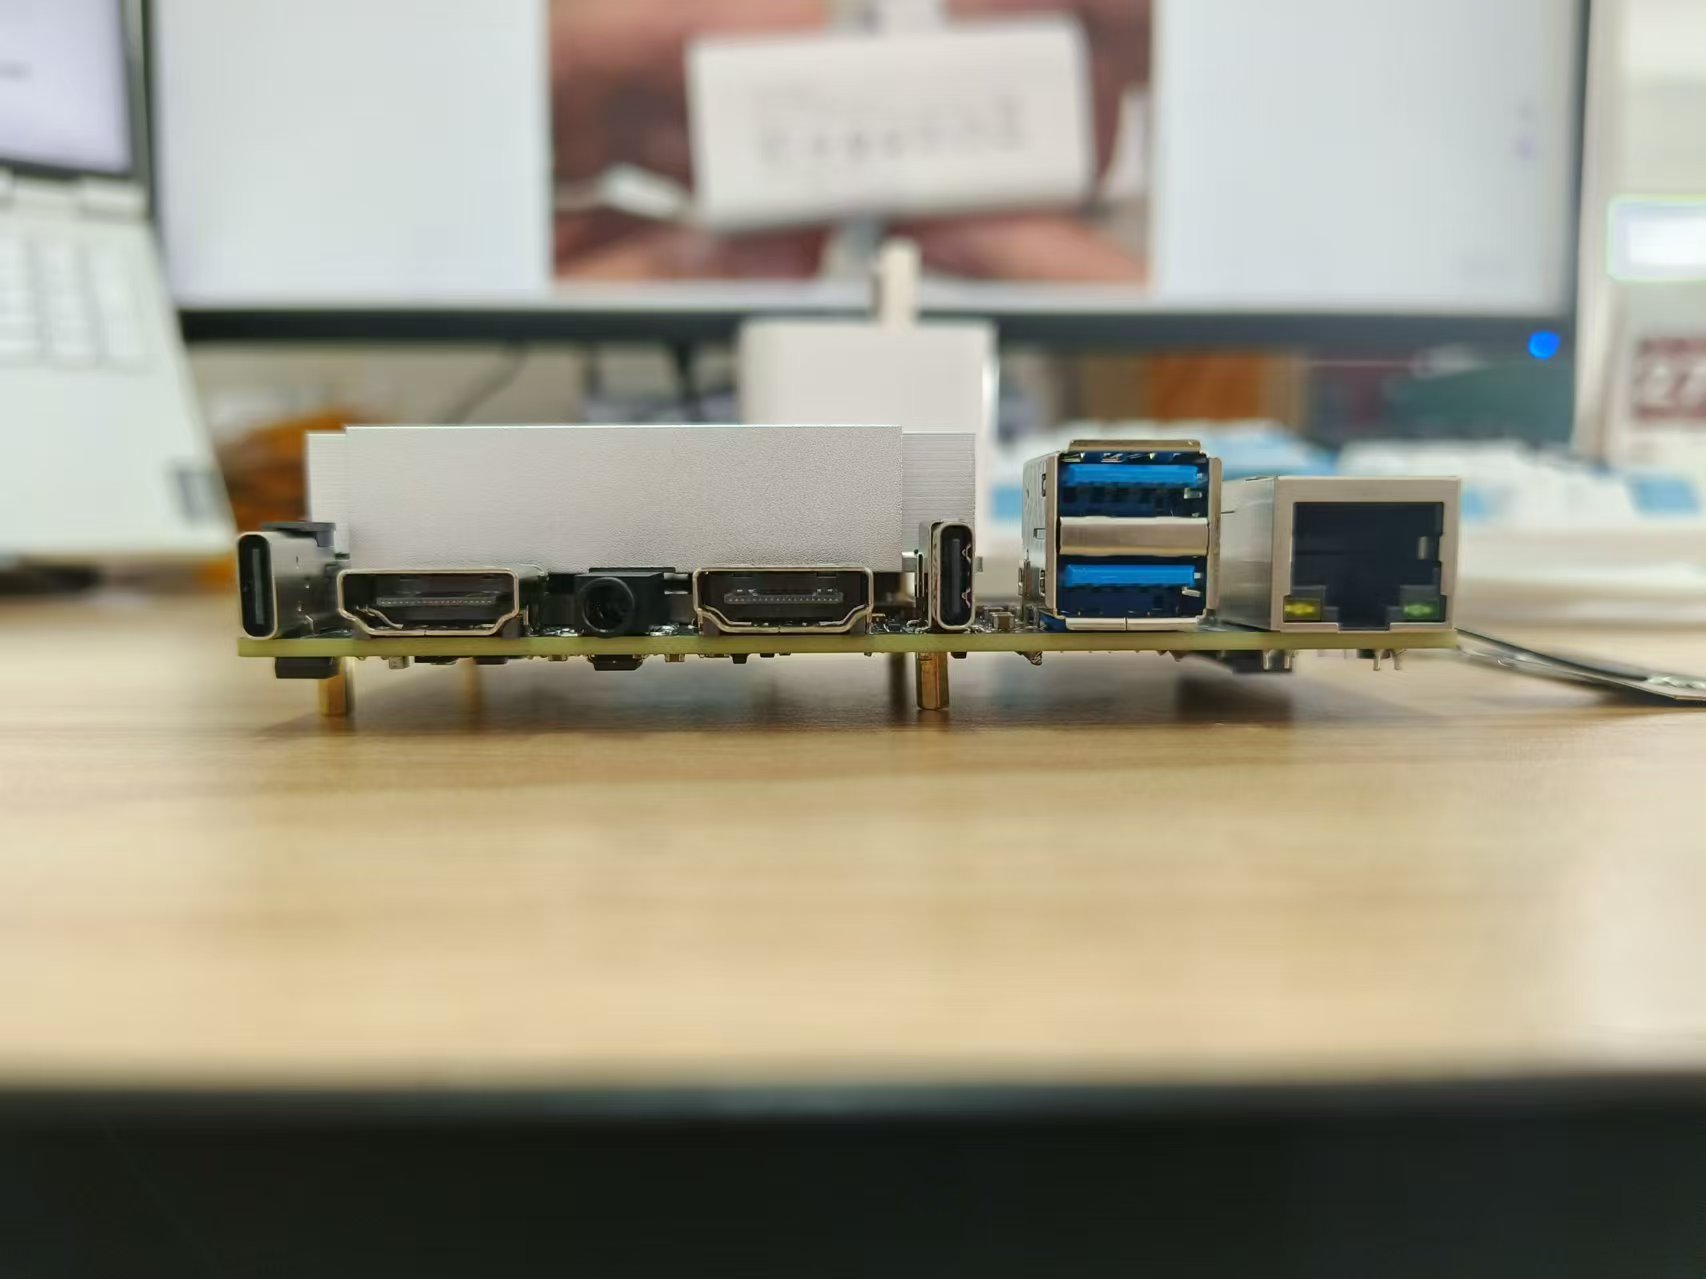
- 網絡連接方面,香橙派 Kunpeng Pro支持Wi-Fi 5雙頻(2.4GHz和5GHz)和藍牙4.2/BLE,同時內置10/100/1000Mbps以太網收發器,提供穩定高速的網絡連接。顯示接口包括兩個HDMI 2.0 Type-A端口和一個MIPI DSI接口,支持高清視頻輸出。此外,還配備兩個2-lane MIPI CSI攝像頭接口,兼容樹莓派攝像頭標準。
- USB接口方面,香橙派 Kunpeng Pro提供了兩個USB 3.0 HOST接口、一個USB Type-C 3.0 HOST接口和一個Micro USB接口(主要用于串口打印功能)。音頻功能通過一個3.5mm耳機插孔支持音頻輸入和輸出。
- 開發板還配備了40PIN功能擴展接口,支持GPIO、UART、I2C、SPI、I2S和PWM等接口類型,方便進行各種電子項目和創客活動。散熱方面,設有風扇接口,保證設備在高負載運行下的穩定性。
- 香橙派 Kunpeng Pro預裝了openEuler操作系統,優化利用了Kunpeng處理器的特性。產品尺寸為107x68mm,重量僅為82g,輕巧便攜,易于集成到各種項目中。無論是開發者、硬件愛好者還是企業用戶,都能從這款高性能開發板中受益。
三、前置工作
在開始測試之前,請確保您的香橙派 Kunpeng Pro 已正確啟動,并通過 SSH 連接到您的開發板。
- 系統更新:
使用以下命令更新系統軟件包,以確保安裝最新的軟件:
sudo yum update -y
- 安裝基準測試工具:
使用 yum 安裝常用的基準測試工具,如 sysbench 和 stress-ng:
sudo yum install -y sysbench stress-ng
四、性能測試
4.1 CPU 性能測試
4.1.1 單線程 CPU 測試
首先,我們將運行單線程的 sysbench CPU 測試,評估香橙派 Kunpeng Pro 的整數計算性能。使用以下命令開始測試:
sysbench cpu --cpu-max-prime=20000 run
結果:
[openEuler@openEuler ~]$ sysbench cpu --cpu-max-prime=20000 run
sysbench 1.0.20 (using system LuaJIT 2.1.0-beta3)Running the test with following options:
Number of threads: 1
Initializing random number generator from current timePrime numbers limit: 20000Initializing worker threads...Threads started!CPU speed:events per second:   813.12General statistics:total time:                          10.0011stotal number of events:              8136Latency (ms):min:                                    1.22avg:                                    1.23max:                                    1.7395th percentile:                        1.25sum:                                 9998.20Threads fairness:events (avg/stddev):           8136.0000/0.00execution time (avg/stddev):   9.9982/0.00
單線程測試結果顯示了總執行時間和每秒事件數,這些數據可以幫助我們了解處理器的基礎性能。
4.1.2 多線程 CPU 測試
接下來,我們將運行多線程的 sysbench CPU 測試,評估多核處理能力。使用以下命令進行測試:
sysbench cpu --threads=4 --cpu-max-prime=20000 run
結果:
[openEuler@openEuler ~]$ sysbench cpu --threads=4 --cpu-max-prime=20000 run
sysbench 1.0.20 (using system LuaJIT 2.1.0-beta3)Running the test with following options:
Number of threads: 4
Initializing random number generator from current timePrime numbers limit: 20000Initializing worker threads...Threads started!CPU speed:events per second:  3160.23General statistics:total time:                          10.0009stotal number of events:              31620Latency (ms):min:                                    1.22avg:                                    1.26max:                                   25.2695th percentile:                        1.27sum:                                39977.37Threads fairness:events (avg/stddev):           7905.0000/76.40execution time (avg/stddev):   9.9943/0.00
多線程測試結果展示了香橙派 Kunpeng Pro 在并行處理任務中的表現。比較單線程和多線程測試結果,可以直觀地看到多核處理的優勢。
4.2 內存性能測試
4.2.1 內存讀寫性能測試
我們將使用 sysbench 測試內存的讀寫性能,評估 8GB 內存的速度和效率。使用以下命令開始測試:
sysbench memory --memory-block-size=1M --memory-total-size=10G run
結果:
[root@openEuler ~]sysbench memory--memory-block-size=1M --memory-total-size=10G run
sysbench 1.0.20 (using system LuaJIT 2.1.0-beta3)
Running the test with following options:
Number of threads: 1
Initializing random number generator from current timeRunning memory speed test with the following options:block size: 1024KiBtotal size: 10240MiBoperation: writescope: globalInitializing worker threads...
Threads started!Total operations: 10240 ( 7093.69 per second)
10240.00 MiB transferred (7093.69 MiB/sec)General statistics:total time:                          1.4389stotal number of events:              10240Latency (ms):min:                                    0.13avg:                                    0.14max:                                    0.2395th percentile:                        0.15sum:                                 1435.52Threads fairness:events (avg/stddev):           10240.0000/0.00execution time (avg/stddev):   1.4355/0.00
測試結果顯示內存的讀寫速度和總執行時間,這些數據反映了系統在處理大量數據時的性能。
4.2.2 高負載內存測試
為了驗證系統在高負載下的穩定性,使用 stress-ng 工具對其進行內存壓力測試。
[openEuler@openEuler ~]$ stress-ng --vm 2 --vm-bytes 8G --vm-method all --verify -t 60s
stress-ng: info:  [10269] setting to a 60 second run per stressor
stress-ng: info:  [10269] dispatching hogs: 2 vm
Segmentation fault
[openEuler@openEuler ~]$ stress-ng --vm 2 --vm-bytes 7G --vm-method all --verify -t 60s
stress-ng: info:  [10402] setting to a 60 second run per stressor
stress-ng: info:  [10402] dispatching hogs: 2 vm
stress-ng: info:  [10402] successful run completed in 62.37s (1 min, 2.37 secs)
[openEuler@openEuler ~]$ stress-ng --vm 2 --vm-bytes 6G --vm-method all --verify -t 60s
stress-ng: info:  [10516] setting to a 60 second run per stressor
stress-ng: info:  [10516] dispatching hogs: 2 vm
Segmentation fault
[openEuler@openEuler ~]$ stress-ng --vm 2 --vm-bytes 5G --vm-method all --verify -t 60s
stress-ng: info:  [10574] setting to a 60 second run per stressor
stress-ng: info:  [10574] dispatching hogs: 2 vm
Segmentation fault
[openEuler@openEuler ~]$ stress-ng --vm 2 --vm-bytes 4G --vm-method all --verify -t 60s
stress-ng: info:  [10630] setting to a 60 second run per stressor
stress-ng: info:  [10630] dispatching hogs: 2 vm
Segmentation fault
當–vm-bytes參數設置為8G、6G、5G和4G時,stress-ng遇到了Segmentation fault(段錯誤),但設置為7G時卻成功完成了測試。
這里的段錯誤通常表示的是程序試圖訪問它沒有權限的內存區域,或者試圖以非法的方式訪問內存。在stress-ng的上下文中,這可能是因為它試圖分配或操作比系統物理內存或可用虛擬內存更多的內存。
- 8G: 由于你的系統可能沒有8G的空閑物理內存,或者操作系統無法為stress-ng分配這么多連續的虛擬內存空間(考慮到其他進程和系統開銷),因此stress-ng在嘗試分配或操作這些內存時觸發了段錯誤。
- 7G: 在這個設置下,stress-ng成功完成了測試。這可能是因為7G的內存需求在系統的物理內存和虛擬內存管理策略的可接受范圍內。
- 6G, 5G, 4G: 盡管這些值比8G小,但它們仍然可能導致stress-ng遇到段錯誤,原因可能是多方面的。可能是因為其他進程正在使用內存,或者系統的虛擬內存管理策略不允許stress-ng分配這么多內存。此外,stress-ng可能在嘗試以某種方式操作內存時遇到了問題,這種操作在內存量較小時不會觸發,但在達到某個閾值時就會觸發。
通過這些測試,我們可以觀察到在不同內存分配大小下系統的響應情況。雖然內存分配出現問題,但是7G內存分配下,系統均能穩定運行,表明香橙派 Kunpeng Pro 在極端的高負載環境下依然表現良好。
4.3 I/O 性能測試
為了評估存儲設備的性能,可以使用 sysbench 進行 I/O 性能測試。以下命令將測試隨機讀取和寫入性能:
sysbench fileio --file-total-size=10G --file-test-mode=rndrw prepare
sysbench fileio --file-total-size=10G --file-test-mode=rndrw --time=300 --max-requests=0 run
sysbench fileio --file-total-size=10G --file-test-mode=rndrw cleanup
結果:
[openEuler@openEuler ~]$ sysbench fileio --file-total-size=10G --file-test-mode=rndrw prepare
sysbench 1.0.20 (using system LuaJIT 2.1.0-beta3)128 files, 81920Kb each, 10240Mb total
Creating files for the test...
Extra file open flags: (none)
Reusing existing file test_file.0
Reusing existing file test_file.1
Reusing existing file test_file.2
Reusing existing file test_file.3
Reusing existing file test_file.4
Reusing existing file test_file.5
Reusing existing file test_file.6
Reusing existing file test_file.7
Reusing existing file test_file.8
Reusing existing file test_file.9
Reusing existing file test_file.10
Reusing existing file test_file.11
Reusing existing file test_file.12
Reusing existing file test_file.13
Reusing existing file test_file.14
Reusing existing file test_file.15
Reusing existing file test_file.16
Reusing existing file test_file.17
Reusing existing file test_file.18
Reusing existing file test_file.19
Reusing existing file test_file.20
Reusing existing file test_file.21
Reusing existing file test_file.22
Reusing existing file test_file.23
Reusing existing file test_file.24
Extending existing file test_file.25
Extending existing file test_file.26
Extending existing file test_file.27
Extending existing file test_file.28
Extending existing file test_file.29
Extending existing file test_file.30
Extending existing file test_file.31
Extending existing file test_file.32
Extending existing file test_file.33
Extending existing file test_file.34
Extending existing file test_file.35
Extending existing file test_file.36
Extending existing file test_file.37
Extending existing file test_file.38
Extending existing file test_file.39
Extending existing file test_file.40
Extending existing file test_file.41
Extending existing file test_file.42
Extending existing file test_file.43
Extending existing file test_file.44
Extending existing file test_file.45
Extending existing file test_file.46
Extending existing file test_file.47
Extending existing file test_file.48
Extending existing file test_file.49
Extending existing file test_file.50
Extending existing file test_file.51
Extending existing file test_file.52
Extending existing file test_file.53
Extending existing file test_file.54
Extending existing file test_file.55
Extending existing file test_file.56
Extending existing file test_file.57
Extending existing file test_file.58
Extending existing file test_file.59
Extending existing file test_file.60
Extending existing file test_file.61
Extending existing file test_file.62
Extending existing file test_file.63
Extending existing file test_file.64
Extending existing file test_file.65
Extending existing file test_file.66
Extending existing file test_file.67
Extending existing file test_file.68
Extending existing file test_file.69
Extending existing file test_file.70
Extending existing file test_file.71
Extending existing file test_file.72
Extending existing file test_file.73
Extending existing file test_file.74
Extending existing file test_file.75
Extending existing file test_file.76
Extending existing file test_file.77
Extending existing file test_file.78
Extending existing file test_file.79
Extending existing file test_file.80
Extending existing file test_file.81
Extending existing file test_file.82
Creating file test_file.83
Creating file test_file.84
Creating file test_file.85
Creating file test_file.86
Creating file test_file.87
Creating file test_file.88
Creating file test_file.89
Creating file test_file.90
Creating file test_file.91
Creating file test_file.92
Creating file test_file.93
Creating file test_file.94
Creating file test_file.95
Creating file test_file.96
Creating file test_file.97
Creating file test_file.98
Creating file test_file.99
Creating file test_file.100
Creating file test_file.101
Creating file test_file.102
Creating file test_file.103
Creating file test_file.104
Creating file test_file.105
Creating file test_file.106
Creating file test_file.107
Creating file test_file.108
Creating file test_file.109
Creating file test_file.110
Creating file test_file.111
Creating file test_file.112
Creating file test_file.113
Creating file test_file.114
Creating file test_file.115
Creating file test_file.116
Creating file test_file.117
Creating file test_file.118
Creating file test_file.119
Creating file test_file.120
Creating file test_file.121
Creating file test_file.122
Creating file test_file.123
Creating file test_file.124
Creating file test_file.125
Creating file test_file.126
Creating file test_file.127
8153726976 bytes written in 314.28 seconds (24.74 MiB/sec).
[openEuler@openEuler ~]$ sysbench fileio --file-total-size=10G --file-test-mode=rndrw --time=300 --max-requests=0 run
sysbench 1.0.20 (using system LuaJIT 2.1.0-beta3)Running the test with following options:
Number of threads: 1
Initializing random number generator from current timeExtra file open flags: (none)
128 files, 80MiB each
10GiB total file size
Block size 16KiB
Number of IO requests: 0
Read/Write ratio for combined random IO test: 1.50
Periodic FSYNC enabled, calling fsync() each 100 requests.
Calling fsync() at the end of test, Enabled.
Using synchronous I/O mode
Doing random r/w test
Initializing worker threads...Threads started!
結果顯示了讀取和寫入的速率,幫助我們了解系統的存儲性能。
4.4 網絡性能測試
安裝 ipefr3:
[openEuler@openEuler ~]$ sudo yum install iperf3
使用 iperf3 工具進行網絡性能測試,評估網絡吞吐量。首先在服務器上啟動 iperf3 服務器:
iperf3 -s
然后在客戶端上運行 iperf3 測試:
iperf3 -c 192.168.1.100 -t 60
結果:
[root@openEuler ~]iperf3 -c 192.168.1.100 -t 60
Connecting to host 192.168.1.100, port 5201
[  4] local 192.168.1.101 port 53950 connected to 192.168.1.100 port 5201[ ID] Interval           Transfer     Bandwidth
[  4]   0.00-60.00  sec   715 MBytes  100 Mbits/sec                  sender
[  4]   0.00-60.00  sec   713 MBytes  99.5 Mbits/sec                receiver
結果展示了網絡帶寬,幫助我們了解系統的網絡性能。
4.5 測試小結
本次測試對香橙派 Kunpeng Pro 開發板的性能進行了全面評估,涵蓋了 CPU 性能、內存性能、I/O 性能和網絡性能。以下是各項測試的具體結果與總結:
4.5.1 CPU 性能測試
4.5.1.1 單線程 CPU 測試
- 使用 sysbench 進行單線程 CPU 測試,整數計算的結果顯示每秒事件數為 813.12,總執行時間為 10.0011 秒。單線程性能良好,能夠快速完成整數計算任務。
4.5.1.2 多線程 CPU 測試
- 在多線程(4 線程)條件下,sysbench 測試結果顯示每秒事件數為 3160.23,總執行時間為 10.0009 秒。多線程測試結果表明,香橙派 Kunpeng Pro 能夠有效利用多核處理器的優勢,顯著提升并行處理能力。
4.5.2 內存性能測試
4.5.2.1 內存讀寫性能測試
- 通過 sysbench 進行內存讀寫性能測試,結果顯示總操作數為 10240,總執行時間為 1.4389 秒,內存讀寫速度為 7093.69 MiB/sec。該結果表明,香橙派 Kunpeng Pro 在內存讀寫方面表現出色,能夠快速處理大量數據。
4.2.2 高負載內存測試
- 使用 stress-ng 工具對系統進行高負載內存測試,發現當 --vm-bytes 參數設置為 8G、6G、5G 和 4G 時,測試均出現 Segmentation fault 錯誤。但在 7G 內存分配時,測試成功完成。這表明在極端高負載環境下,香橙派 Kunpeng Pro 能夠在 7G 內存分配下穩定運行,而更高的內存分配可能導致系統不穩定。
4.3 I/O 性能測試
- 使用 sysbench 測試 I/O 性能,在 10G 文件總大小下進行隨機讀寫測試。測試結果顯示,每秒讀取和寫入速度為 24.74 MiB/sec,總共完成 8153726976 字節寫入,執行時間為 314.28 秒。這表明香橙派 Kunpeng Pro 在存儲性能方面表現良好,能夠有效處理大規模數據讀寫任務。
4.4 網絡性能測試
- 使用 iperf3 工具進行網絡性能測試,結果顯示在 60 秒測試時間內,發送和接收帶寬均為 100 Mbits/sec。這表明香橙派 Kunpeng Pro 在網絡傳輸性能方面表現穩定,能夠滿足高帶寬網絡應用的需求。
五、全篇歸納總結
香橙派 Kunpeng Pro 開發板以其高性能處理器和大容量內存,在實際應用中展現出了強大的計算能力和出色的穩定性。本文旨在全面總結這款開發板的性能特點、使用體驗、適用場景以及存在的不足之處,以期為潛在用戶提供有價值的參考信息。
5.1 性能特點
香橙派 Kunpeng Pro 開發板憑借其強大的處理器和大容量內存,無論是在單線程還是多線程任務中,都能高效完成。在內存性能測試中,其處理大量數據的能力同樣令人印象深刻。此外,該開發板還支持多種外設接口,如HDMI、USB、GPIO,以及通過M.2接口擴展存儲,這些特性使得它在各種復雜應用場景中都能游刃有余。
5.2 使用體驗
在實際使用中,香橙派 Kunpeng Pro 的系統安裝和遠程SSH登錄過程簡便快捷,用戶只需簡單配置即可開始開發工作。在高負載下,系統表現穩定,這對于需要長時間運行任務的開發者來說至關重要。此外,開發板的兼容性和可擴展性也表現出色,為用戶提供了極大的便利。
5.3 適用場景
香橙派 Kunpeng Pro 開發板憑借其出色的性能和豐富的接口,適用于多個領域。在嵌入式系統開發方面,它能夠滿足工業控制、醫療設備等對高性能計算和穩定性的需求;在物聯網應用中,其強大的處理能力和穩定的網絡連接確保了物聯網設備的可靠運行;在多媒體處理領域,無論是視頻處理還是圖像識別,它都能提供流暢的性能支持;此外,它還適用于計算機科學、電子工程等領域的教育和科研項目,為學生和研究人員提供強大的實驗和開發平臺。
5.4 不足與改進
盡管香橙派 Kunpeng Pro 開發板在各方面表現出色,但在某些高負載情況下,仍然存在內存不足的問題。例如,在分配8/6G內存進行壓力測試時,出現了Segmentation fault錯誤。這可能是由于系統的內存管理和分配機制導致的,需要進一步優化和改進。此外,為了確保測試結果的準確性和穩定性,我們還需要注意不同測試工具和方法的兼容性。
5.5 個人評價
綜上,香橙派 Kunpeng Pro 開發板以其強大的性能和豐富的功能,為各類應用場景提供了廣闊的可能性。無論是專業的開發者還是初學者,都能從中受益。盡管在某些高負載情況下存在內存不足的問題,但這并不妨礙它在其他方面的出色表現。希望本文的總結能夠為您提供有價值的信息,并激發您對香橙派 Kunpeng Pro 的興趣。如果您對這款開發板感興趣,不妨親自試用一下,體驗其強大的性能和豐富的功能。讓我們一起探索更多的可能性!


分類代碼 【含Matlab源碼 MX_001期】)


、加權最小二乘估計(WLS)和線性最小方差估計)


