目錄
一、實驗
1.環境
2.Termius連接云主機
3.網絡連通性與安全機制
4.云主機部署docker
5.云主機配置linux內核路由轉發與網橋過濾
6.云主機部署cri-dockerd
7.云主機部署kubelet,kubeadm,kubectl
8.kubernetes集群初始化
9.容器網絡(CNI)部署
10.證書管理
二、問題
1.云主機如何部署阿里云CLI
2.ECS實例如何內網通信
3.?cri-dockerd 安裝失敗
4.kubelet kubeadm kubectl 安裝報錯
5.K8S 初始化報錯
一、實驗
1.環境
(1)主機
表1 云主機
| 主機 | 系統 | 架構 | 版本 | IP | 備注 |
| master | CentOS Stream9 | K8S master節點 | 1.30.1 | 172.17.59.254(私有) 8.219.188.219(公) | |
| node | CentOS Stream9 | K8S node節點 | 1.30.1 | 172.17.1.22(私有) 8.219.58.157(公) |
(2)查看輕量應用服務器
阿里云查看

2.Termius連接云主機
(1)連接
master

node

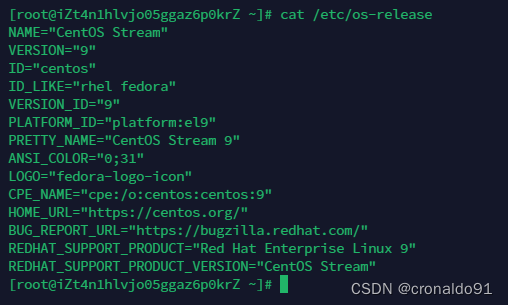
(2) 查看系統
cat /etc/os-releasemaster

node
3.網絡連通性與安全機制
(1)查閱
https://www.alibabacloud.com/help/zh/simple-application-server/product-overview/regions-and-network-connectivity#:~:text=%E5%86%85%E7%BD%91%20%E5%90%8C%E4%B8%80%E8%B4%A6%E5%8F%B7%E5%90%8C%E4%B8%80%E5%9C%B0%E5%9F%9F%E4%B8%8B%EF%BC%8C%E5%A4%9A%E5%8F%B0%E8%BD%BB%E9%87%8F%E5%BA%94%E7%94%A8%E6%9C%8D%E5%8A%A1%E5%99%A8%E7%9A%84%E5%AE%9E%E4%BE%8B%E9%BB%98%E8%AE%A4%E5%A4%84%E4%BA%8E%E5%90%8C%E4%B8%80%E4%B8%AAVPC%E5%86%85%E7%BD%91%E7%8E%AF%E5%A2%83%EF%BC%8C%E5%A4%9A%E5%AE%9E%E4%BE%8B%E9%97%B4%E7%9A%84%E4%BA%92%E8%81%94%E4%BA%92%E9%80%9A%E5%8F%AF%E4%BB%A5%E9%80%9A%E8%BF%87%E5%86%85%E7%BD%91%E5%AE%9E%E7%8E%B0%EF%BC%8C%E4%BD%86%E4%B8%8E%E5%85%B6%E4%BB%96%E4%BA%A7%E5%93%81%E7%9A%84%E5%86%85%E7%BD%91%E9%BB%98%E8%AE%A4%E4%BA%92%E4%B8%8D%E7%9B%B8%E9%80%9A%E3%80%82,%E4%B8%8D%E5%90%8C%E5%9C%B0%E5%9F%9F%E5%86%85%E7%9A%84%E8%BD%BB%E9%87%8F%E5%BA%94%E7%94%A8%E6%9C%8D%E5%8A%A1%E5%99%A8%E5%86%85%E7%BD%91%E4%B9%9F%E4%B8%8D%E4%BA%92%E9%80%9A%E3%80%82%20%E5%A6%82%E6%9E%9C%E9%9C%80%E8%A6%81%E8%BD%BB%E9%87%8F%E5%BA%94%E7%94%A8%E6%9C%8D%E5%8A%A1%E5%99%A8%E4%B8%8E%E4%BA%91%E6%9C%8D%E5%8A%A1%E5%99%A8ECS%E3%80%81%E4%BA%91%E6%95%B0%E6%8D%AE%E5%BA%93%E7%AD%89%E5%85%B6%E4%BB%96%E5%A4%84%E4%BA%8E%E4%B8%93%E6%9C%89%E7%BD%91%E7%BB%9CVPC%E4%B8%AD%E7%9A%84%E9%98%BF%E9%87%8C%E4%BA%91%E4%BA%A7%E5%93%81%E5%86%85%E7%BD%91%E4%BA%92%E9%80%9A%EF%BC%8C%E6%82%A8%E5%8F%AF%E4%BB%A5%E9%80%9A%E8%BF%87%E8%AE%BE%E7%BD%AE%E5%86%85%E7%BD%91%E4%BA%92%E9%80%9A%E5%AE%9E%E7%8E%B0%E4%BA%92%E8%81%94%E4%BA%92%E9%80%9A%E3%80%82(2)ping測試
master 連接 node
ping 172.17.59.254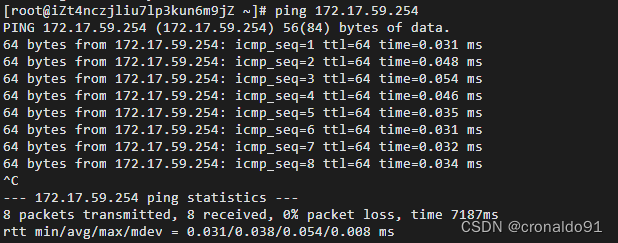
(3) 關閉防火墻
systemctl stop firewalld.service
systemctl disable firewalld.service
master

node

(4) 關閉交換分區
sudo swapoff -a
free -h
master
node

(5) 關閉安全機制
vim  /etc/selinux/config
SELINUX=disabled
master
![]()
![]()
node
![]()
![]()
4.云主機部署docker
(1) master部署docker
獲取官方源
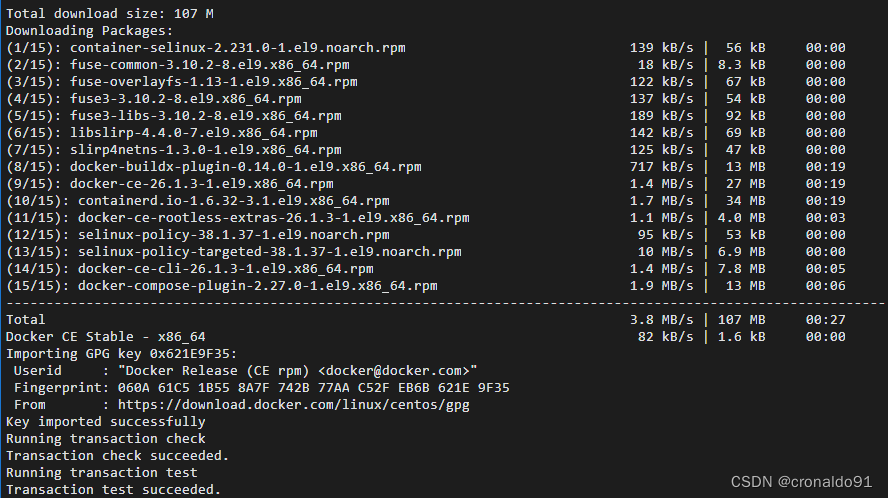
wget -P /etc/yum.repos.d/ https://download.docker.com/linux/centos/docker-ce.repo安裝
yum install -y docker-ce



配置國內鏡像倉庫
vim /etc/docker/daemon.jsonXXXXXXXX為個人的阿里云鏡像加速
{"exec-opts": ["native.cgroupdriver=systemd"], "registry-mirrors": ["https://XXXXXXXX.mirror.aliyuncs.com","http://hub-mirror.c.163.com","https://docker.mirrors.ustc.edu.cn"]
}

啟動docker
systemctl start docker
![]()
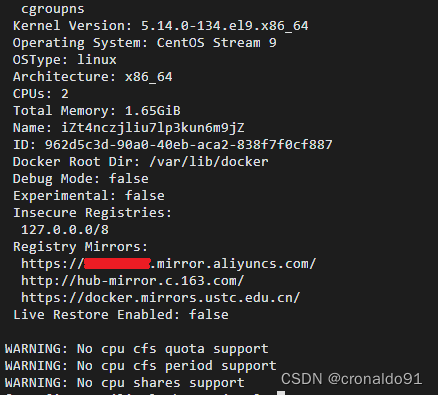
查看
docker info
(2)node部署docker
?獲取官方源
wget -P /etc/yum.repos.d/ https://download.docker.com/linux/centos/docker-ce.repo
安裝
yum install -y docker-ce
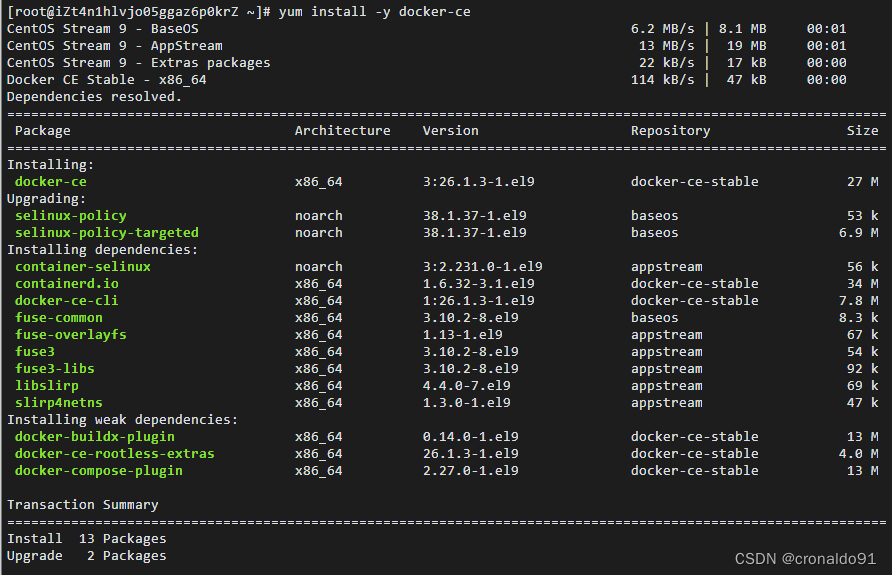


配置國內鏡像倉庫
vim /etc/docker/daemon.json![]()
XXXXXXXX為個人的阿里云鏡像加速
{"exec-opts": ["native.cgroupdriver=systemd"], "registry-mirrors": ["https://XXXXXXXX.mirror.aliyuncs.com","http://hub-mirror.c.163.com","https://docker.mirrors.ustc.edu.cn"]
}

啟動docker
systemctl start docker
?![]()
查看
docker info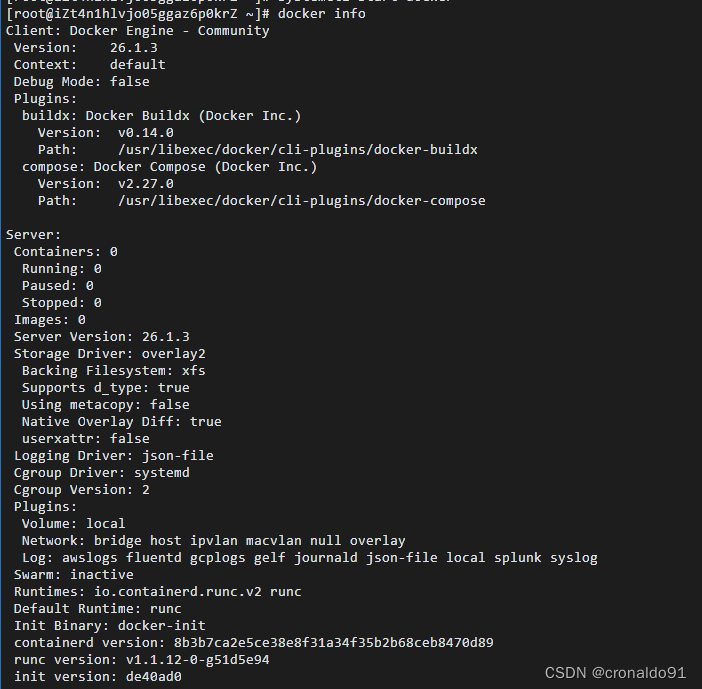
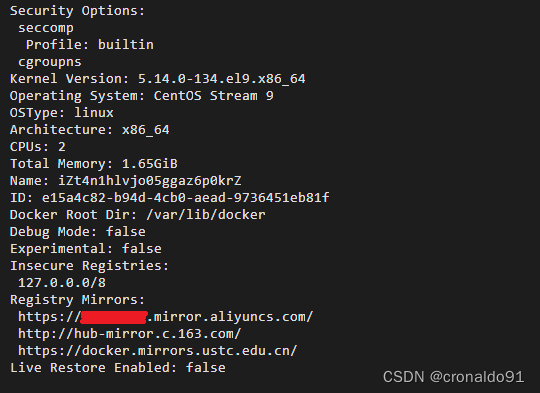
5.云主機配置linux內核路由轉發與網橋過濾
(1)修改配置文件并加載
master
vim /etc/sysctl.d/k8s.conf
![]()

#加載
modprobe  br_netfilter
#查看
lsmod |grep  br_netfilter
#配置加載
sysctl -p
node
vim /etc/sysctl.d/k8s.conf


#加載
modprobe  br_netfilter
#查看
lsmod |grep  br_netfilter
#配置加載
sysctl -p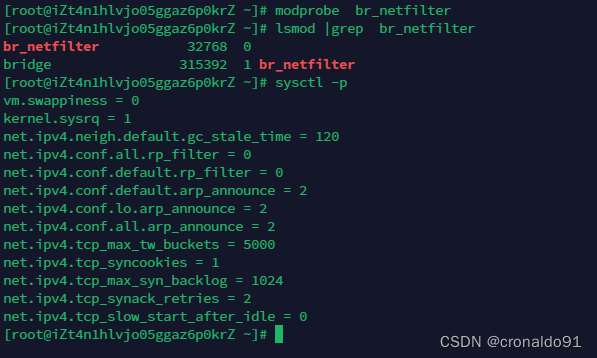
(2)安裝配置ipset,ipvsadm
yum install ipset ipvsadm
master

node

6.云主機部署cri-dockerd
(1)查閱
https://github.com/Mirantis/cri-dockerd/releases最新版為v0.3.14

(2)下載
wget https://github.com/Mirantis/cri-dockerd/releases/download/v0.3.14/cri-dockerd-0.3.14-3.el8.x86_64.rpmmaster

node

(3)依賴環境安裝
master
#下載依賴環境
wget http://mirror.centos.org/centos/8-stream/BaseOS/x86_64/os/Packages/libcgroup-0.41-19.el8.x86_64.rpm#安裝
rpm  -ivh  libcgroup-0.41-19.el8.x86_64.rpm

node


(4)部署cri-dockerd
master
rpm -ivh cri-dockerd-0.3.14-3.el8.x86_64.rpm


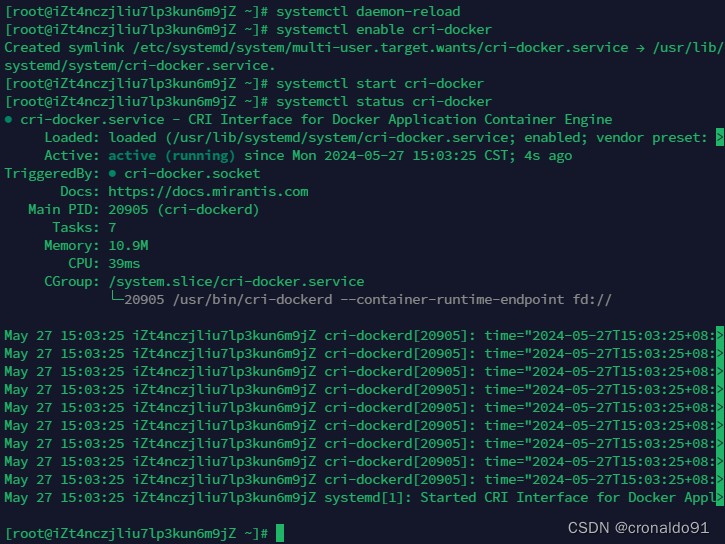
(5) 啟動
systemctl daemon-reload
systemctl enable cri-docker
systemctl start cri-docker
systemctl status cri-docker
master
node

7.云主機部署kubelet,kubeadm,kubectl
(1) 查閱
https://mirrors.aliyun.com/kubernetes-new/core/stable/v1.30/rpm/repodata/?spm=a2c6h.25603864.0.0.2d32281ci7ZyIM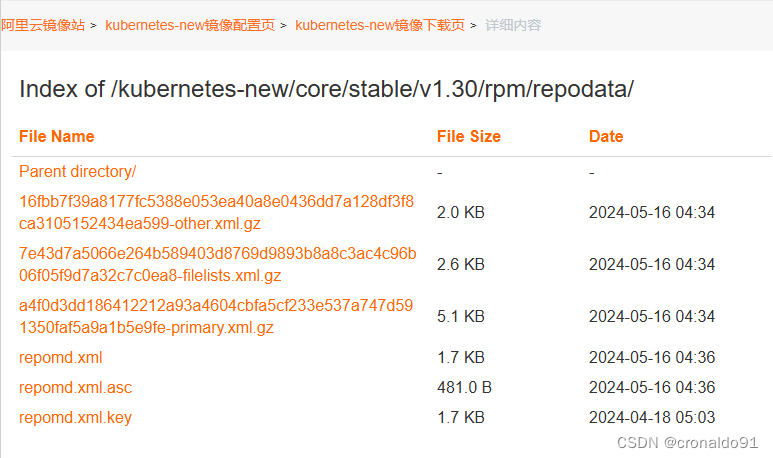
(2)創建源文件
vim /etc/yum.repos.d/kubernetes.repo#成阿里云的源
[kubernetes]
name=Kubernetes
baseurl=https://mirrors.aliyun.com/kubernetes-new/core/stable/v1.30/rpm/
enabled=1
gpgcheck=1
gpgkey=https://mirrors.aliyun.com/kubernetes-new/core/stable/v1.30/rpm/repodata/repomd.xml.key
master
![]()

node
![]()

(3)更新源
yum clean all && yum makecachemaster

node

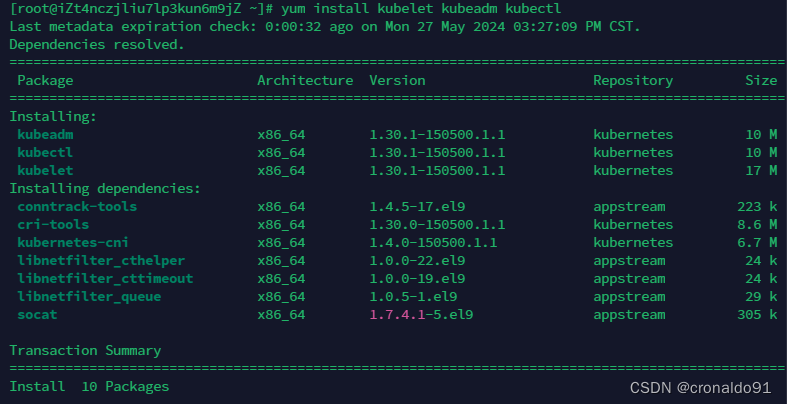
(3)安裝
yum install kubelet kubeadm kubectlmaster


node


(4)查看版本
kubectl version
kubeadm version
kubelet --version
master
node

(5)修改配置文件
vim /etc/sysconfig/kubelet#修改
KUBELET_EXTRA_ARGS="--cgroup-driver=systemd"
master
![]()
![]()
node
![]()
(6)啟動
systemctl enable kubelet
systemctl start kubelet
master

node

(5)master下載K8S依賴的鏡像
#阿里云下載
docker pull registry.aliyuncs.com/google_containers/kube-apiserver:v1.30.1
docker pull registry.aliyuncs.com/google_containers/kube-controller-manager:v1.30.1
docker pull registry.aliyuncs.com/google_containers/kube-scheduler:v1.30.1
docker pull registry.aliyuncs.com/google_containers/kube-proxy:v1.30.1
docker pull registry.aliyuncs.com/google_containers/coredns:v1.11.1
docker pull registry.aliyuncs.com/google_containers/pause:3.9
docker pull registry.aliyuncs.com/google_containers/etcd:3.5.12-0


(5) 查看鏡像
master
[root@iZt4nczjliu7lp3kun6m9jZ ~]# docker images
REPOSITORY                                                        TAG        IMAGE ID       CREATED         SIZE
registry.aliyuncs.com/google_containers/kube-apiserver            v1.30.1    91be94080317   12 days ago     117MB
registry.aliyuncs.com/google_containers/kube-scheduler            v1.30.1    a52dc94f0a91   12 days ago     62MB
registry.aliyuncs.com/google_containers/kube-controller-manager   v1.30.1    25a1387cdab8   12 days ago     111MB
registry.aliyuncs.com/google_containers/kube-proxy                v1.30.1    747097150317   12 days ago     84.7MB
registry.aliyuncs.com/google_containers/etcd                      3.5.12-0   3861cfcd7c04   3 months ago    149MB
registry.aliyuncs.com/google_containers/coredns                   v1.11.1    cbb01a7bd410   9 months ago    59.8MB
registry.aliyuncs.com/google_containers/pause                     3.9        e6f181688397   19 months ago   744kB
(7)master鏡像重新打標簽
#配置默認tag
docker tag 91be94080317 registry.k8s.io/kube-apiserver:v1.30.1
docker tag cbb01a7bd410 registry.k8s.io/coredns/coredns:v1.11.1
docker tag e6f181688397  registry.k8s.io/pause:3.9
docker tag 3861cfcd7c04  registry.k8s.io/etcd:3.5.12-0
docker tag 747097150317  registry.k8s.io/kube-proxy:v1.30.1
docker tag 25a1387cdab8  registry.k8s.io/kube-controller-manager:v1.30.1
docker tag a52dc94f0a91  registry.k8s.io/kube-scheduler:v1.30.1
(8) master再次查看鏡像
docker images
8.kubernetes集群初始化
(1) 安裝iproute
yum install iproute-tc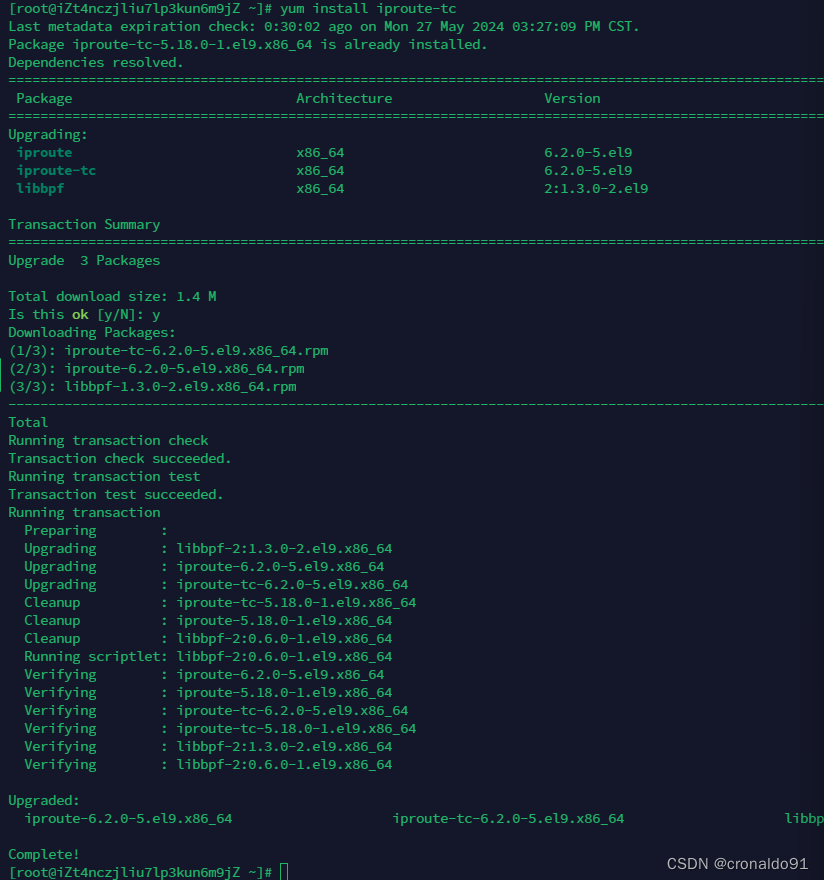
(2)master初始化 (如報錯可以參考后續的問題集)
kubeadm init --kubernetes-version=v1.30.1 --pod-network-cidr=10.244.0.0/16 --apiserver-advertise-address=172.17.59.254 --cri-socket unix:///var/run/cri-dockerd.sock --ignore-preflight-errors=Mem


完成初始化記錄如下:
[root@iZt4nczjliu7lp3kun6m9jZ ~]# kubeadm init --kubernetes-version=v1.30.1 --pod-network-cidr=10.244.0.0/16 --apiserver-advertise-address=172.17.59.254  --cri-socket unix:///var/run/cri-dockerd.sock --ignore-preflight-errors=Mem
[init] Using Kubernetes version: v1.30.1
[preflight] Running pre-flight checks[WARNING Mem]: the system RAM (1689 MB) is less than the minimum 1700 MB
[preflight] Pulling images required for setting up a Kubernetes cluster
[preflight] This might take a minute or two, depending on the speed of your internet connection
[preflight] You can also perform this action in beforehand using 'kubeadm config images pull'
[certs] Using certificateDir folder "/etc/kubernetes/pki"
[certs] Generating "ca" certificate and key
[certs] Generating "apiserver" certificate and key
[certs] apiserver serving cert is signed for DNS names [izt4nczjliu7lp3kun6m9jz kubernetes kubernetes.default kubernetes.default.svc kubernetes.default.svc.cluster.local] and IPs [10.96.0.1 172.17.59.254]
[certs] Generating "apiserver-kubelet-client" certificate and key
[certs] Generating "front-proxy-ca" certificate and key
[certs] Generating "front-proxy-client" certificate and key
[certs] Generating "etcd/ca" certificate and key
[certs] Generating "etcd/server" certificate and key
[certs] etcd/server serving cert is signed for DNS names [izt4nczjliu7lp3kun6m9jz localhost] and IPs [172.17.59.254 127.0.0.1 ::1]
[certs] Generating "etcd/peer" certificate and key
[certs] etcd/peer serving cert is signed for DNS names [izt4nczjliu7lp3kun6m9jz localhost] and IPs [172.17.59.254 127.0.0.1 ::1]
[certs] Generating "etcd/healthcheck-client" certificate and key
[certs] Generating "apiserver-etcd-client" certificate and key
[certs] Generating "sa" key and public key
[kubeconfig] Using kubeconfig folder "/etc/kubernetes"
[kubeconfig] Writing "admin.conf" kubeconfig file
[kubeconfig] Writing "super-admin.conf" kubeconfig file
[kubeconfig] Writing "kubelet.conf" kubeconfig file
[kubeconfig] Writing "controller-manager.conf" kubeconfig file
[kubeconfig] Writing "scheduler.conf" kubeconfig file
[etcd] Creating static Pod manifest for local etcd in "/etc/kubernetes/manifests"
[control-plane] Using manifest folder "/etc/kubernetes/manifests"
[control-plane] Creating static Pod manifest for "kube-apiserver"
[control-plane] Creating static Pod manifest for "kube-controller-manager"
[control-plane] Creating static Pod manifest for "kube-scheduler"
[kubelet-start] Writing kubelet environment file with flags to file "/var/lib/kubelet/kubeadm-flags.env"
[kubelet-start] Writing kubelet configuration to file "/var/lib/kubelet/config.yaml"
[kubelet-start] Starting the kubelet
[wait-control-plane] Waiting for the kubelet to boot up the control plane as static Pods from directory "/etc/kubernetes/manifests"
[kubelet-check] Waiting for a healthy kubelet. This can take up to 4m0s
[kubelet-check] The kubelet is healthy after 503.8172ms
[api-check] Waiting for a healthy API server. This can take up to 4m0s
[api-check] The API server is healthy after 8.001714086s
[upload-config] Storing the configuration used in ConfigMap "kubeadm-config" in the "kube-system" Namespace
[kubelet] Creating a ConfigMap "kubelet-config" in namespace kube-system with the configuration for the kubelets in the cluster
[upload-certs] Skipping phase. Please see --upload-certs
[mark-control-plane] Marking the node izt4nczjliu7lp3kun6m9jz as control-plane by adding the labels: [node-role.kubernetes.io/control-plane node.kubernetes.io/exclude-from-external-load-balancers]
[mark-control-plane] Marking the node izt4nczjliu7lp3kun6m9jz as control-plane by adding the taints [node-role.kubernetes.io/control-plane:NoSchedule]
[bootstrap-token] Using token: m926rd.ejaz92v7hhmgt7p0
[bootstrap-token] Configuring bootstrap tokens, cluster-info ConfigMap, RBAC Roles
[bootstrap-token] Configured RBAC rules to allow Node Bootstrap tokens to get nodes
[bootstrap-token] Configured RBAC rules to allow Node Bootstrap tokens to post CSRs in order for nodes to get long term certificate credentials
[bootstrap-token] Configured RBAC rules to allow the csrapprover controller automatically approve CSRs from a Node Bootstrap Token
[bootstrap-token] Configured RBAC rules to allow certificate rotation for all node client certificates in the cluster
[bootstrap-token] Creating the "cluster-info" ConfigMap in the "kube-public" namespace
[kubelet-finalize] Updating "/etc/kubernetes/kubelet.conf" to point to a rotatable kubelet client certificate and key
[addons] Applied essential addon: CoreDNS
[addons] Applied essential addon: kube-proxyYour Kubernetes control-plane has initialized successfully!To start using your cluster, you need to run the following as a regular user:mkdir -p $HOME/.kubesudo cp -i /etc/kubernetes/admin.conf $HOME/.kube/configsudo chown $(id -u):$(id -g) $HOME/.kube/configAlternatively, if you are the root user, you can run:export KUBECONFIG=/etc/kubernetes/admin.confYou should now deploy a pod network to the cluster.
Run "kubectl apply -f [podnetwork].yaml" with one of the options listed at:https://kubernetes.io/docs/concepts/cluster-administration/addons/Then you can join any number of worker nodes by running the following on each as root:kubeadm join 172.17.59.254:6443 --token m926rd.ejaz92v7hhmgt7p0 \--discovery-token-ca-cert-hash sha256:e108c1809c7e4e0316ff25407d06fed0f60241dc3767524672977d9042312c92
(3)創建配置目錄
mkdir -p $HOME/.kube
sudo cp -i /etc/kubernetes/admin.conf $HOME/.kube/config
sudo chown $(id -u):$(id -g) $HOME/.kube/config
(4)生成token
#默認初始化生成token有效期是24小時,所以用自己的生成不過期的token,node節點加入需要用到
kubeadm token create --ttl 0  --print-join-command

(5) node節點加入
1)添加節點需要指定cri-dockerd接口–cri-socket ,這里是使用cri-dockerd
kubeadm join 172.17.59.254:6443 --token 9jvebb.vtuw3utmxfkhrpwf --discovery-token-ca-cert-hash sha256:e108c1809c7e4e0316ff25407d06fed0f60241dc3767524672977d9042312c92 --cri-socket=unix:///var/run/cri-dockerd.sock2)如果是containerd則使用–cri-socket unix:///run/containerd/containerd.sock
(6)K8S master節點查看集群
1)查看node
kubectl get node2)查看node詳細信息
kubectl get node -o wide
狀態為NotReady,因為網絡插件沒有安裝。


9.容器網絡(CNI)部署
(1)下載Calico配置文件
https://github.com/projectcalico/calico/blob/v3.27.3/manifests/calico.yaml(2)修改里面定義Pod網絡(CALICO_IPV4POOL_CIDR)
vim calico.yaml① ?修改前:

②修改后:
與前面kubeadm init的 --pod-network-cidr指定的一樣
(3)部署
kubectl apply -f calico.yaml

(4)查看
kubectl get pods -n kube-system
(5) 查看pod(狀態已變更為Ready)
kubectl get node10.證書管理
(1)查看
openssl x509 -in /etc/kubernetes/pki/apiserver.crt -noout -text | grep Not
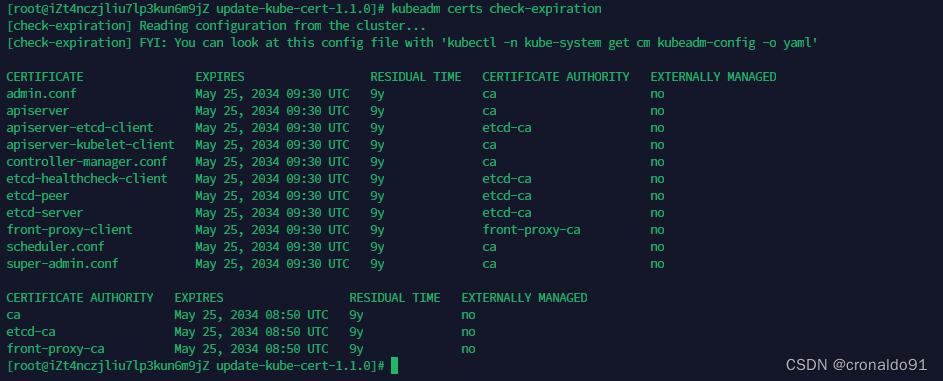
kubeadm certs check-expiration

(2)查閱工具
https://github.com/yuyicai/update-kube-cert(3)下載
wget https://github.com/yuyicai/update-kube-cert/archive/refs/tags/v1.1.0.tar.gz
(4) 解壓
tar zxvf v1.1.0.tar.gz 
(5)執行(延長證書使用時間)
cd update-kube-cert-1.1.0/
./update-kubeadm-cert.sh all
(6)再次查看
openssl x509 -in /etc/kubernetes/pki/apiserver.crt -noout -text | grep Not
kubeadm certs check-expiration
(7)最后查看pod
kubectl get pod -o wide
(8)查看內存使用情況
master

node

二、問題
1.云主機如何部署阿里云CLI
(1)查閱
https://help.aliyun.com/zh/cli/install-cli-on-linux?spm=0.0.0.i2#task-592837最新版為v3.0.207
![]()
下載
1)官網
https://aliyuncli.alicdn.com/aliyun-cli-linux-latest-amd64.tgz2) GitHub
https://github.com/aliyun/aliyun-cli/releases
(2)master部署阿里云CLI
創建目錄
mkdir -p $HOME/aliyun
cd  $HOME/aliyun
下載
wget https://github.com/aliyun/aliyun-cli/releases/download/v3.0.207/aliyun-cli-linux-3.0.207-amd64.tgz
解壓
tar xzvf aliyun-cli-linux-3.0.207-amd64.tgz 
將aliyun程序復制到/usr/local/bin目錄中
sudo cp aliyun /usr/local/bin
![]()
(3)node部署阿里云CLI
?創建目錄
mkdir -p $HOME/aliyun
cd  $HOME/aliyun
下載
wget https://github.com/aliyun/aliyun-cli/releases/download/v3.0.207/aliyun-cli-linux-3.0.207-amd64.tgz
解壓
tar xzvf aliyun-cli-linux-3.0.207-amd64.tgz 
將aliyun程序復制到/usr/local/bin目錄中
sudo cp aliyun /usr/local/bin
![]()
2.ECS實例如何內網通信
(1)查閱
https://help.aliyun.com/zh/ecs/authorize-internal-network-communication-between-ecs-instances-in-different-accounts-by-using-the-api(2)策略
通過CLI調用API增加入方向安全組規則實現實例內網通信。
3.?cri-dockerd 安裝失敗
(1)報錯

(2)原因分析
缺少依賴。
(3)解決方法
查閱
https://centos.pkgs.org/8-stream/centos-baseos-x86_64/libcgroup-0.41-19.el8.x86_64.rpm.html
下載依賴
wget https://github.com/Mirantis/cri-dockerd/releases/download/v0.3.14/cri-dockerd-0.3.14-3.el8.x86_64.rpm
安裝依賴
rpm -ivh libcgroup-0.41-19.el8.x86_64.rpm

成功安裝cri-dockerd:

4.kubelet kubeadm kubectl 安裝報錯
(1) 報錯

(2)原因分析
repo源中的?gpgkey地址錯誤。
(3)解決方法
修改配置文件

更新源
yum clean all && yum makecache
成功:

5.K8S 初始化報錯
(1)報錯

(2)原因分析
cpu cgroups由于某些原因被禁用了,需要手動啟用它。
(3)解決方法
1)修改 GRUB 配置
如果發現 CPU cgroups 沒有啟用,你可以通過編輯 GRUB 的啟動參數來啟用它。執行以下命令來編輯 GRUB 配置文件:
sudo vim /etc/default/grub在文件中找到 GRUB_CMDLINE_LINUX 這一行,確保包含以下參數:
cgroup_enable=cpu2)更新
sudo grub2-mkconfig -o /boot/grub2/grub.cfg3)重啟
reboot


停止中:
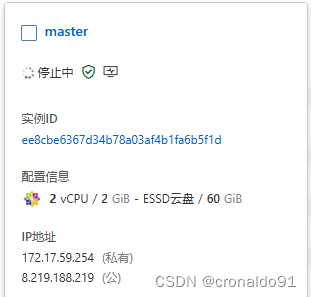
運行
 、
、
繼續報錯

卸載cri-docker
rpm -qa | grep -i cri-docker
rpm -e cri-dockerd-0.3.14-3.el8.x86_64
下載并重新安裝(master與node節點都要操作)
1)下載安裝最新版的cri-dockerd
wget https://github.com/Mirantis/cri-dockerd/releases/download/v0.3.14/cri-dockerd-0.3.14.amd64.tgz
tar xf cri-dockerd-0.3.14.amd64.tgz
mv cri-dockerd/cri-dockerd  /usr/bin/
rm -rf  cri-dockerd  cri-dockerd-0.3.8.amd64.tgz2)配置啟動項
cat > /etc/systemd/system/cri-docker.service<<EOF
[Unit]
Description=CRI Interface for Docker Application Container Engine
Documentation=https://docs.mirantis.com
After=network-online.target firewalld.service docker.service
Wants=network-online.target
Requires=cri-docker.socket
[Service]
Type=notify
# ExecStart=/usr/bin/cri-dockerd --container-runtime-endpoint fd://
# 指定用作 Pod 的基礎容器的容器鏡像(“pause 鏡像”)
ExecStart=/usr/bin/cri-dockerd --pod-infra-container-image=registry.k8s.io/pause:3.9 --container-runtime-endpoint fd://
ExecReload=/bin/kill -s HUP $MAINPID
TimeoutSec=0
RestartSec=2
Restart=always
StartLimitBurst=3
StartLimitInterval=60s
LimitNOFILE=infinity
LimitNPROC=infinity
LimitCORE=infinity
TasksMax=infinity
Delegate=yes
KillMode=process
[Install]
WantedBy=multi-user.target
EOFcat > /etc/systemd/system/cri-docker.socket <<EOF
[Unit]
Description=CRI Docker Socket for the API
PartOf=cri-docker.service
[Socket]
ListenStream=%t/cri-dockerd.sock
SocketMode=0660
SocketUser=root
SocketGroup=docker
[Install]
WantedBy=sockets.target
EOF3)重新加載并設置自啟動
systemctl daemon-reload
systemctl enable cri-docker && systemctl start cri-docker && systemctl status cri-docker


目前還有1個報錯

忽略Mem
kubeadm init --kubernetes-version=v1.30.1 --pod-network-cidr=10.244.0.0/16 --apiserver-advertise-address=172.17.59.254 --cri-socket unix:///var/run/cri-dockerd.sock --ignore-preflight-errors=Mem
![]()
成功:


)

、Average Accuracy(AAcc)計算公式)
)


