https://catlikecoding.com/unity/tutorials/custom-srp/baked-light/
本篇教程介紹將靜態光照烘焙到 light map 和 light prob 中.
首先貼上我遇到的問題,希望遇到的同學幫忙解答:
實踐本教程過程中,定義的 MetaPass 沒有效果, Unity 始終在使用默認的 meta pass,我使用的是 unity2022.3.14
1 Baking Satic Light
現在的光照都是在運行時實時計算的,除此以外,還可以離線計算光照并存儲到 light map / probe 中.有兩個原因使用離線方式:1.降低運行時到計算量,2.支持不能實時計算的間接光照.后者也是大家熟知的全局光照:光不是直接來自光源,而是來自間接反射,環境,或自發光表面.
烘焙光照的缺點是運行時不可以改變,而且增加了包體大小和內存占用.
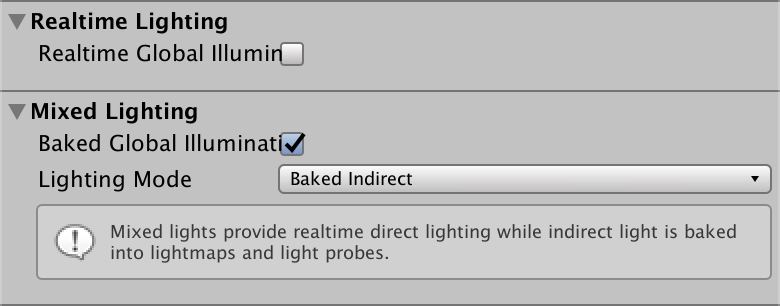
1.1 Scene Lighting Settings
全局光照通過 Lighting 窗口的 Scene 面板,對每個場景進行配置.通過?Mixed Lighting/Baked Global Illumination?選項開關啟用烘焙光照,并將 Lighting Mode 選項配置為 Baked Indirect,烘焙靜態間接光.
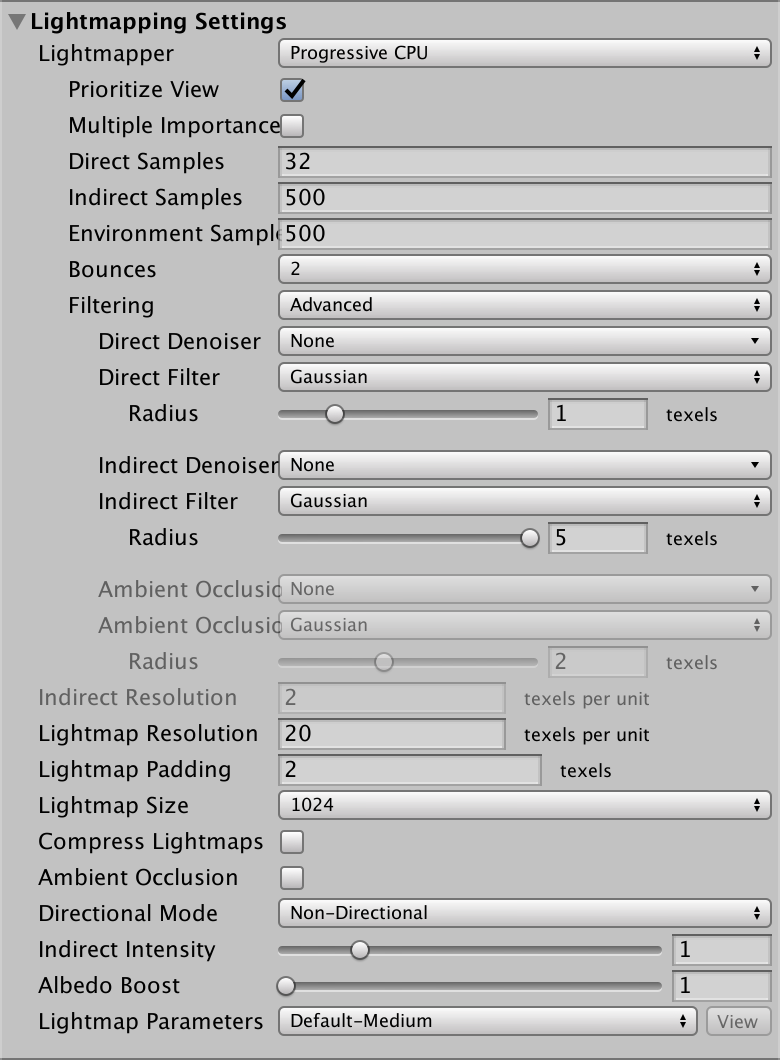
再下面是 Lightmapping Settings 區域,來配置烘焙過程,大部分用默認值,除了
Lightmap Resolution 降低到 20
Compress Lightmaps 禁用
Directional Mode 設置為 Non-Directional
啟用 Progressive GPU lightmapper
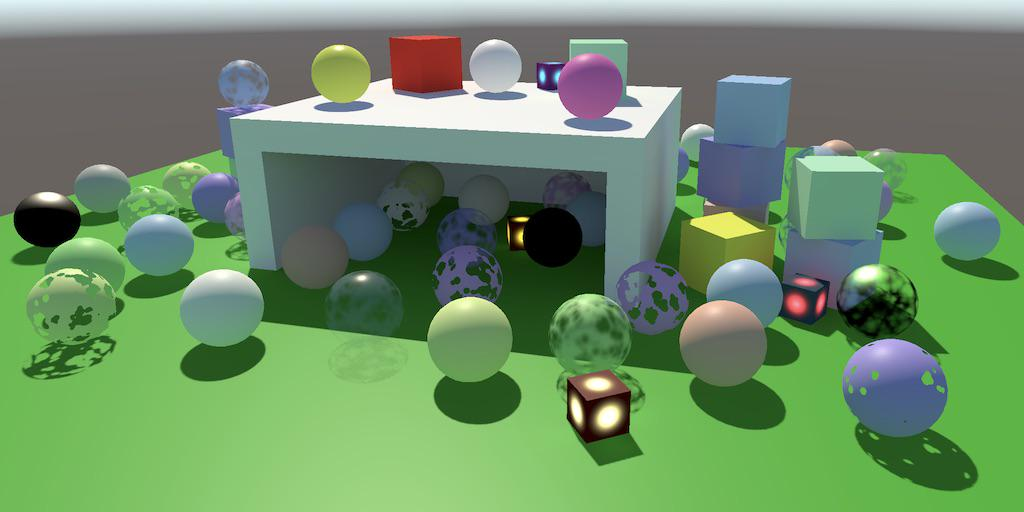
1.2 Static Object
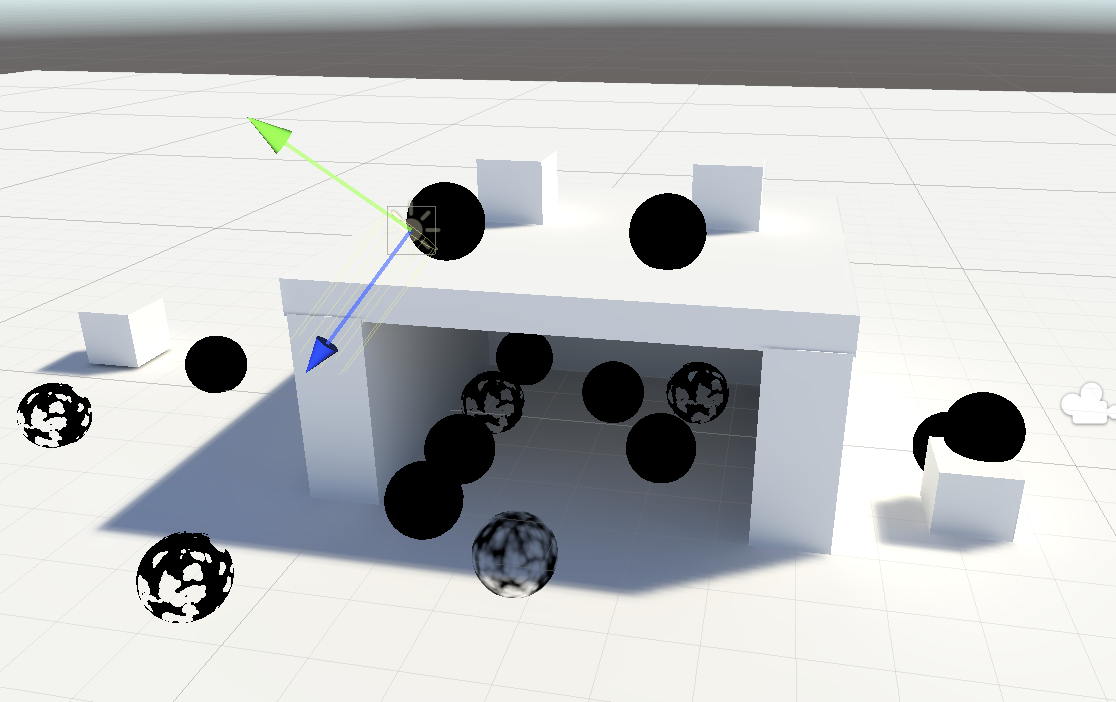
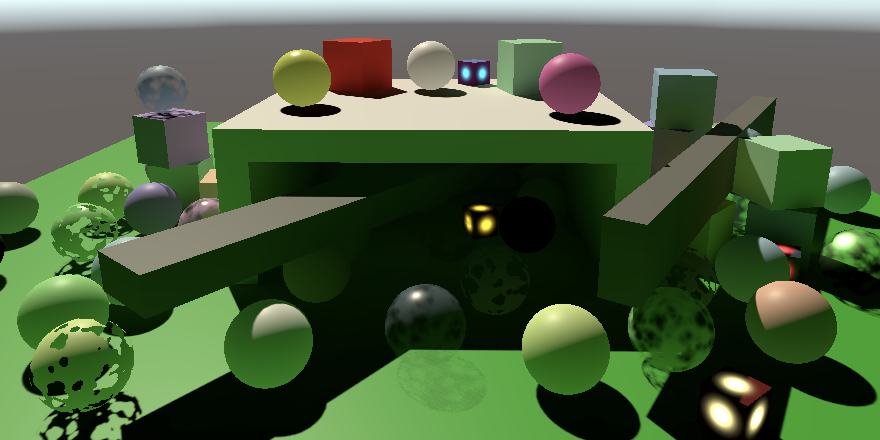
為了展示烘焙光照,需要創建一個場景,包含了一個車庫,以及一些簡單幾何體.這些集合體有的在車庫內,有的在外.
同時該場景只有一個方向光,并且將 Mode 設置為 Mixed, 即混合模式, Unity 會將該光源的間接光烘焙的 light map 中,直接光照依然是實時計算的.
將包括構成車庫在內的所有的立方體/長方體,配置為參與到烘焙過程中,光線將會從這些對象的表面反彈,形成間接光.通過啟用 MeshRenderer 上的 Contribute Global Illumination 選項開關,來完成配置.開啟該選項會自動切換 Receive Gobal Illumination 模式為 Light Map,意味著到達該表面的間接光會被烘焙到 Light Map 中.也可以通過對象 Static 下拉列表中,啟用 Contribute GI 來啟用 bake.
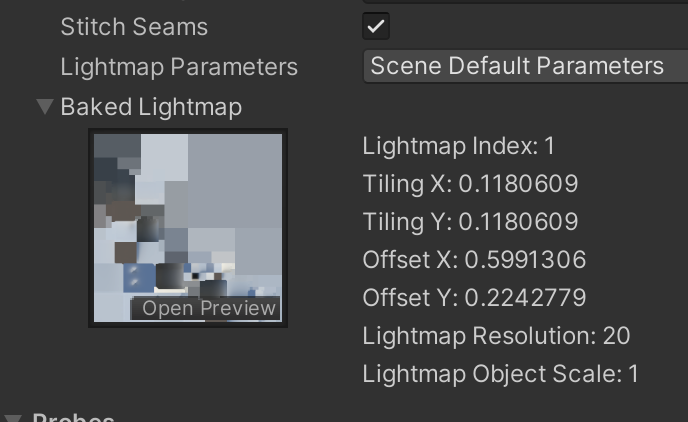
如果 Lighting 面板的 Auto Generate 選項開啟,開啟對象的烘焙后,場景會馬上開始烘焙,否則就需要按下 Generate Lighting 按鈕啟用烘焙.Lightmapping 設置在 MeshRenderer 上也會顯示,也會顯示包含該對象的 lightmap.
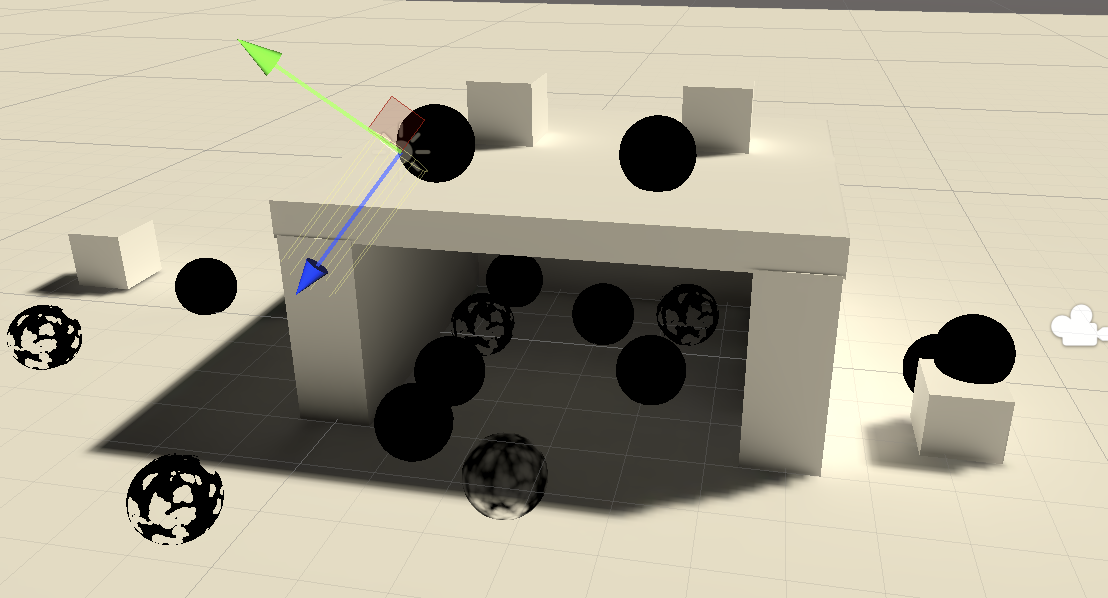
烘焙的光偏藍,是受到了天空盒的影響.天空盒代表了環境的天空的間接光照.靠近建筑的地方更亮一些,是因為這里有很多幾何體,光在地面和這些幾何體之間發生反彈,產生了間接光.
1.3 Fully-Baked Light
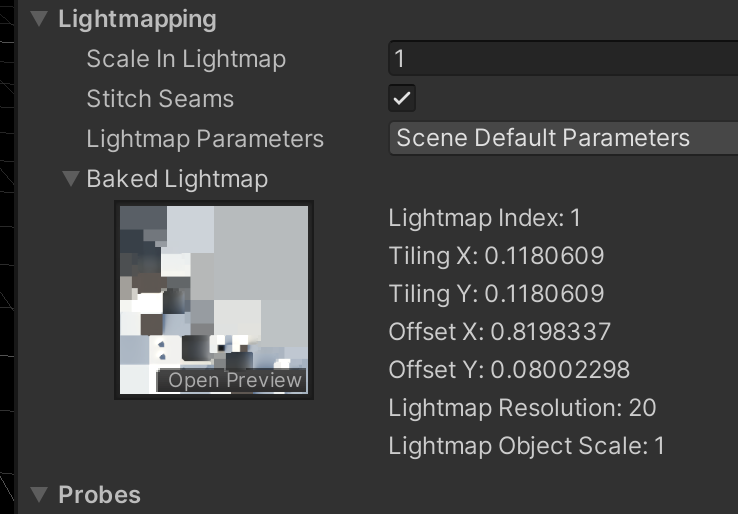
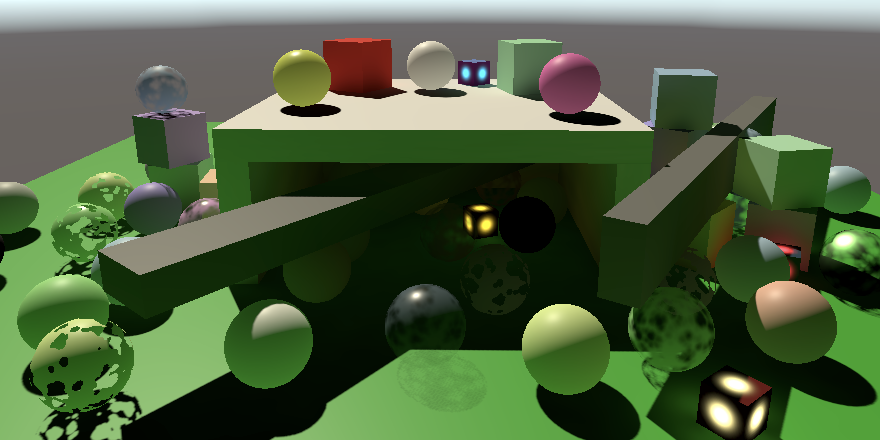
也可以將方向光的光照模式,從 Mixed 改為 Baked,那該光源不再參與實時光照,直接光,間接光全都烘焙到 light map 上了.我們的材質現在還沒有采樣 light map,因此上全黑的.
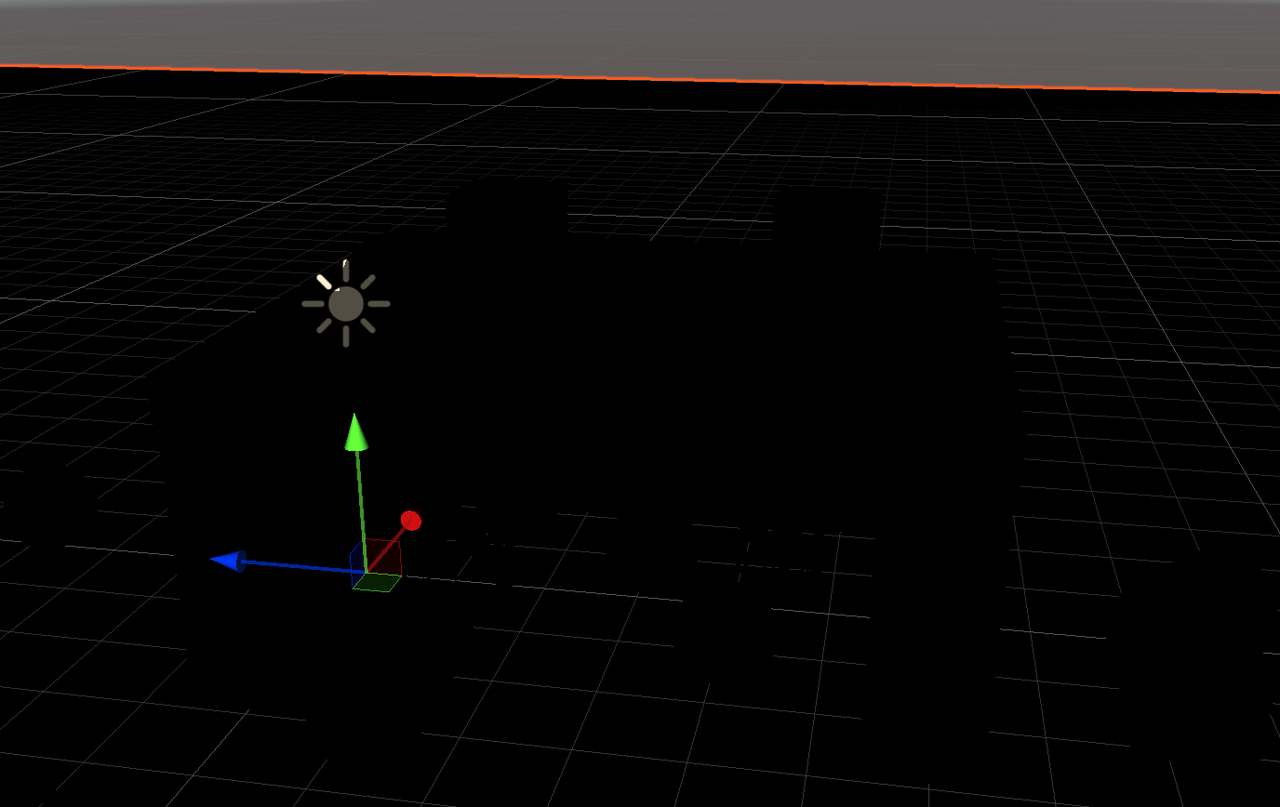
實際上,直接光照也被當作間接光照一樣處理,因此 light map 更亮了.
2 Sampling Baked Light
2.1 Global Illumination
創建 ShaderLibrary/GI.hlsl,GI相關的代碼都會放到該文件.定義 GI 結構體,并定義 GetGI 函數,接受一個 light map UV坐標,返回該結構體.間接光是從所有方向來的光,所以是 diffuse ,沒有 specular,因此為 GI 增加 diffuse 成員.目前我們先把 UV 作為顏色返回.
#ifndef GI_INCLUDED
#define GI_INCLUDEDstruct GI
{float3 diffuse;
};GI GetGI(float2 lightmapUV)
{GI gi;gi.diffuse = float3(lightmapUV.x, lightmapUV.y, 0);return gi;
}#endif
specular GI 通常是通過 reflection probes 來提供的,后面會介紹
給 GetLighting 函數增加 GI 參數,在color累加光照前,用 GI.diffuse 來初始化 color.現在還不需要用 GI.diffuse * surface.diffuse,這樣可以觀察到接受到的 light map 光照.
float3 GetLighting(Surface surfaceWS, BRDF brdf, GI gi)
{ShadowData shadowData = GetShadowData(surfaceWS);float3 color = gi.diffuse;...
}
2.2 Light map coordinates
通過 DrawSettings 的參數,通知 unity 將 light map UV 作為頂點數據傳到 GPU. 后面我們需要 light probe 等數據時,可以通過為 perObjectData 或上更多選項標記來實現
drawingSettings.perObjectData = PerObjectData.Lightmaps;Unity 將多個物體的 lightmap 烘焙到同一張 lightmap 上,而mesh的lightmap uv 是模型獨自空間里的,因此其頂點傳過來的UV,需要根據偏移和縮放,計算在 lightmap 上的 UV.這些參數通過 UnityPerDraw 來接收
CBUFFER_START(UnityPerDraw)
...
float4 unity_LightmapST;           // 當前版本使用該參數來變換 lightmap uv
float4 unity_DynamicLightmapST;    // 該參數被廢棄,但是必須保留否則出錯
CBUFFER_END
材質需要支持 lightmap 和 realtime lighting,因此在 Lit.shader 中需要為其定義 keywords:
#pragma multi_compile _ _LIGHTMAP_ONLightmpa uv 是頂點數據,并且需要被傳遞到像素著色器,因此需要為 Attributes 和 Varyings 增加 UV 參數.由于同時要支持實時光照,因此我們定義一些宏來區分.GI.hlsl
#if defined(LIGHTMAP_ON)#define GI_ATTRIBUTE_DATA float2 lightMapUV : TEXCOORD1;#define GI_VARYINGS_DATA float2 lightMapUV : VAR_LIGHT_MAP_UV;#define TRANSFER_GI_DATA(input, output) output.lightMapUV = input.lightMapUV;#define TRANSFER_GI_DATA(input, output) \output.lightMapUV = input.lightMapUV * \unity_LightmapST.xy + unity_LightmapST.zw;
#else#define GI_ATTRIBUTE_DATA#define GI_VARYINGS_DATA#define TRANSFER_GI_DATA(input, output)#define GI_FRAGMENT_DATA(input) 0.0
#endif
然后修改 Attributes Varyings,并在像素著色器中,取出 lightmap uv 作為參數獲取 GI 數據
...
#include "../ShaderLibrary/GI.hlsl"
#include "../ShaderLibrary/Lighting.hlsl"
...
struct Attributes
{...GI_ATTRIBUTE_DATAUNITY_VERTEX_INPUT_INSTANCE_ID
};struct Varyings
{...GI_VARYINGS_DATAUNITY_VERTEX_INPUT_INSTANCE_ID
};float4 LitPassFragment(Varyings input) : SV_TARGET
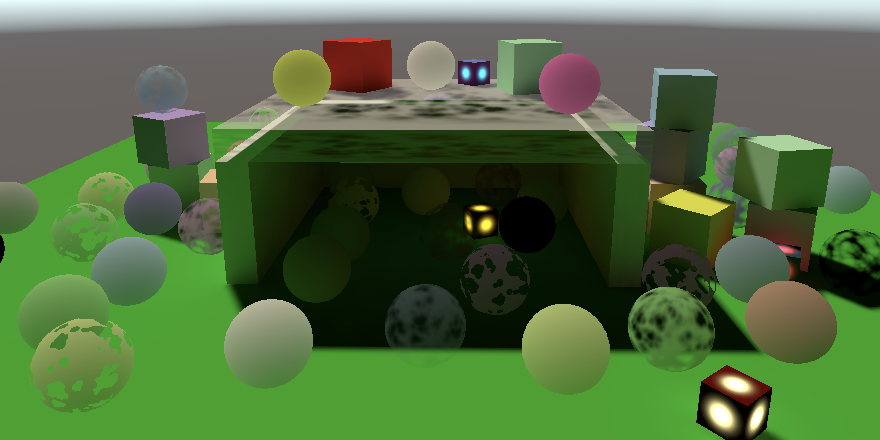
{...GI gi = GetGI(GI_FRAGMENT_DATA(input));float3 color = GetLighting(surface, brdf, gi);return float4(color, surface.alpha);
}...如圖可以看到,參與gi的立方體對象顯示了它們的LightMap up,其它的都是黑色。
2.3 Sampling LightMap
unity 中lightmap 及其采樣器為 unity_Lightmap 和 samplerunity_Lightmap。
同時包含 Core RP library 中的 EntityLighting.hlsl,我們需要利用其返回 light data。
#include "Packages/com.unity.render-pipelines.core/ShaderLibrary/EntityLighting.hlsl"TEXTURE2D(unity_Lightmap);
SAMPLER(samplerunity_Lightmap);
通過SampleSingleLightmap來采樣Lightmap
第一二兩個參數是貼圖及其采樣器,我們用TEXTURE2D_ARGS來傳遞。
第三個參數是 Lightmap uv
第四個參數是 uv 變換參數,我們已經處理了變換,因此,實參為1,1,0,0
第五個參數是 lightmap 是否壓縮了.如果沒有定義 UNITY_LIGHTMAP_FULL_HDR,則會壓縮
最后一個參數是 float4 包含了解碼指令. 指定 x 分量為 LIGHTMAP_HDR_MULTIPLIER, y 分量為 LIGHTMAP_HDR_EXPONENT,其它設置為 0.
定義SampleLightMap函數,如果啟用Lightmap就采樣,否則返回0
float3 SampleLightMap (float2 lightMapUV)
{#if defined(LIGHTMAP_ON)#if defined(UNITY_LIGHTMAP_FULL_HDR)bool compressed = false;#elsebool compressed = true;#endifreturn SampleSingleLightmap(TEXTURE2D_ARGS(unity_Lightmap, samplerunity_Lightmap),lightMapUv, float4(1.0,1.0,0.0,0.0),compressed,float4(LIGHTMAP_HDR_MULTIPLIER, LIGHTMAP_HDR_EXPONENT, 0.0, 0.0));
#elsereturn 0.0;
#endif
}GI GetGI (float2 lightMapUV)
{GI gi;gi.diffuse = SampleLightMap(lightMapUV);return gi;
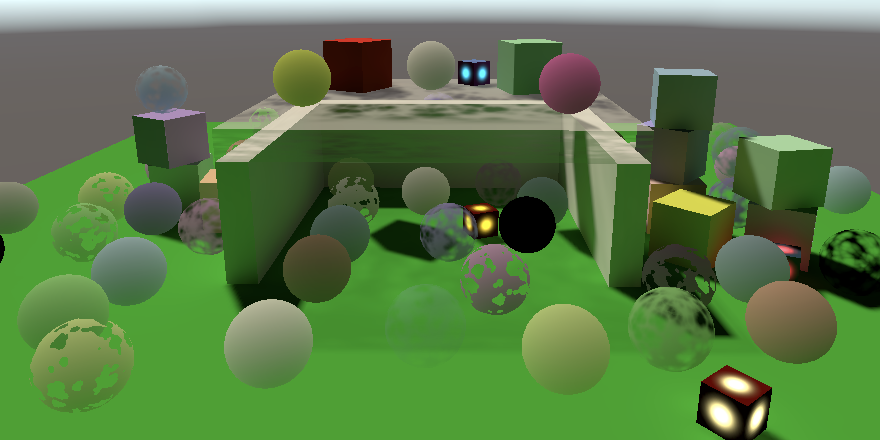
}可以看到場景被 lightmap 照亮了
2.5 Disabling Environment Lighting
烘焙的光照很亮,這是因為光照包含了天空盒提供的天光.在 Lighting 窗口的 Environment 頁簽,可以把天空盒強度設置為0,去掉天光的影響.

可以看到,車庫內部也被主要來自地面的間接光照亮了.
3 Light Probes
動態對象不參與烘焙GI,但是可以通過 light probes 使其受GI的影響。light probe 是場景中的一個點,通過三階多項式,尤其是球面諧波近似,將入射光烘焙下來。light probes 擺放到場景中,unity針對每個對象選擇light probe并進行插值,近似像素位置的光照。
3.1 light probe group
通過game object/light/ light probe group 向場景中添加 light probe。將會創建一個擁有 LightProbeGroup組件的game object,并且默認包含了6個 probes。由于它們也是 game object,所以當開啟 Edit Light Probe Positions時,可以像普通對象一樣移動,新建,刪除.
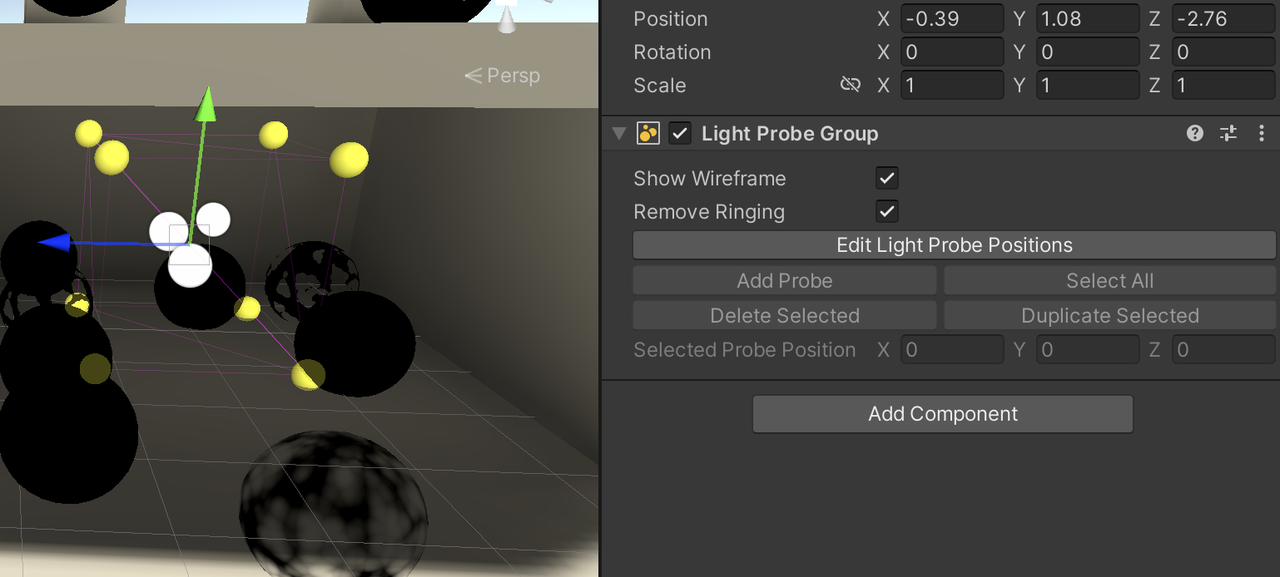
場景中可以有多個 Light Probe Group,Unity會把所有的 Probe 收集起來,并創建連接他們的四面體,每個動態對象最終會在一個四面體中.基于頂點上的4個 probe 進行差值,最終得到物體的光照.如果對象在所有四面體之外,那么就會照一個距離最近的三角面來插值,因此效果會有點怪.
默認情況下,選中一個動態對象后,其 Gizmos 會顯示影響它的 Probes,以及在對象位置處的插值結果.
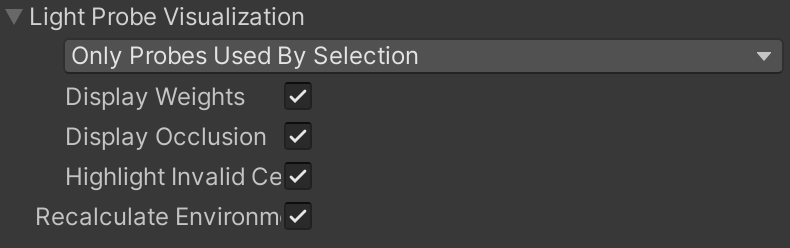
通過 Lighting 窗口 Scene 頁簽下的 Light Probe Visualization 來改變默認行為
Light Probe 的放置依賴場景.
首先,只需要放到動態物體會去的地方
第二,放到光線發生變化的地方.每個 Probe 都是插值點,因此放到要放到光照變化的地方.
第三,不要放到被烘焙的對象內部,否則它就是黑色的
最后,對象都會進行插值,因此如果光照在墻的兩側不同,那么在墻的兩側放置 Probe.這樣,對象不會在兩側進行插值(要么在墻外的四面體內,要么在墻內的四面體內).
3.2 Sampling Probes
每個對象插值的 light probe 數據需要提交給 GPU,也是通過 drawingSettings 參數來完成的.
drawingSettings.perObjectData = PerObjectData.Lightmaps | PerObjectData.LightProbe;UnityPerDraw 需要7個 float4,用來表示四面體的紅,綠,藍光.
CBUFFER_START(UnityPerDraw)
...
float4 unity_SHAr;
float4 unity_SHAg;
float4 unity_SHAb;
float4 unity_SHBr;
float4 unity_SHBg;
float4 unity_SHBb;
float4 unity_SHC;
CBUFFER_END
在 GI.hlsl 中,創建一個新的函數 SampleLightProbe 來完成 Probe 的采樣.該函數需要一個方向,因此為其聲明世界空間的 surface 參數.
如果這個對象啟用了 lightmap,就返回0.否則返回 SampleSH9,同時保證大于等于0.該函數需要 probe data 和 法線作為參數. probe data 需要以系數數組的形式提供.
同時為 GetGI 也添加 surface 參數,并調用 SampleLightProbe,將結果累加到 gi.diffuse 上.
float3 SampleLightProbe(Surface surfaceWS)
{
#if defined(LIGHTMAP_ON)return 0.0;
#elsefloat4 coefficients[7];coefficients[0] = unity_SHAr;coefficients[1] = unity_SHAg;coefficients[2] = unity_SHAb;coefficients[3] = unity_SHBr;coefficients[4] = unity_SHBg;coefficients[5] = unity_SHBb;coefficients[6] = unity_SHC;return max(0.0, SampleSH9(coefficients, surfaceWS.normal));
#endif
}GI GetGI (float2 lightMapUV, Surface surfaceWS)
{GI gi;gi.diffuse = SampleLightMap(lightMapUV) + SampleLightProbe(surfaceWS);return gi;
}
像素著色器中調用 GetGI 的地方也要修改:
float4 LitPassFragment(Varyings input) : SV_TARGET
{...GI gi = GetGI(GI_FRAGMENT_DATA(input), surface);float3 color = GetLighting(surface, brdf, gi);return float4(color, surface.alpha);
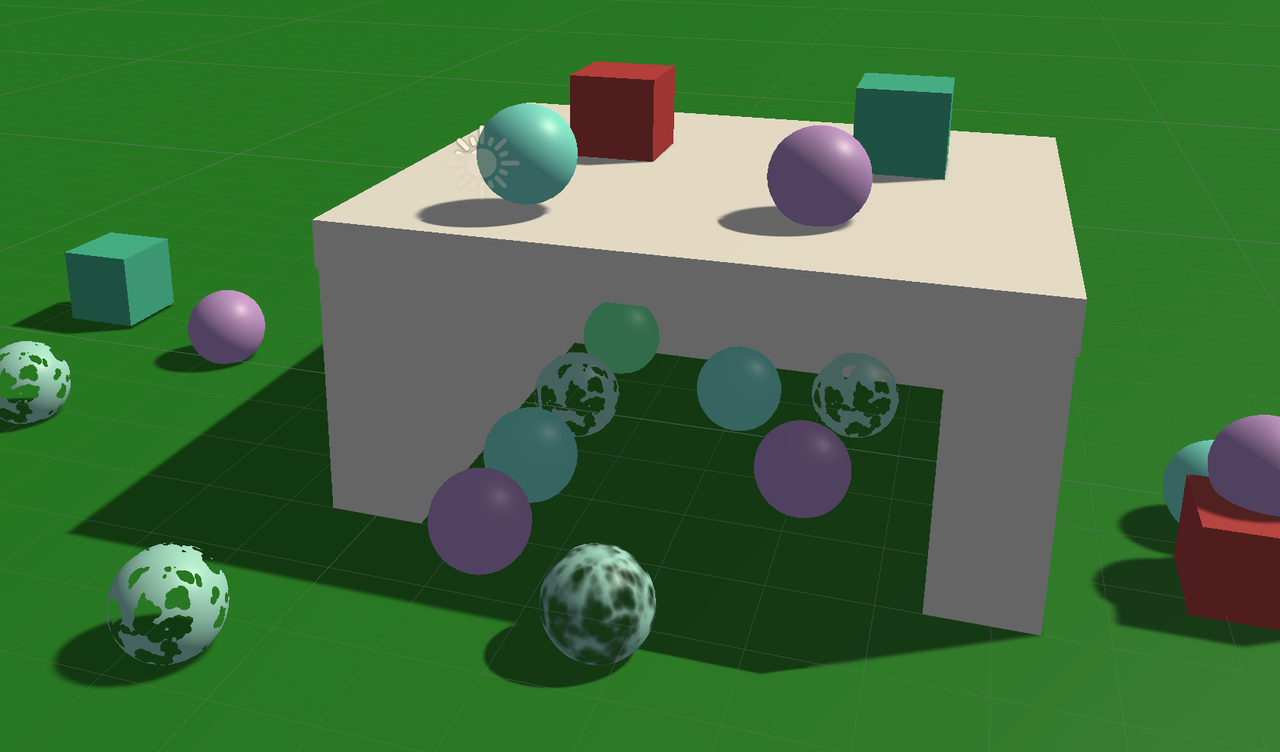
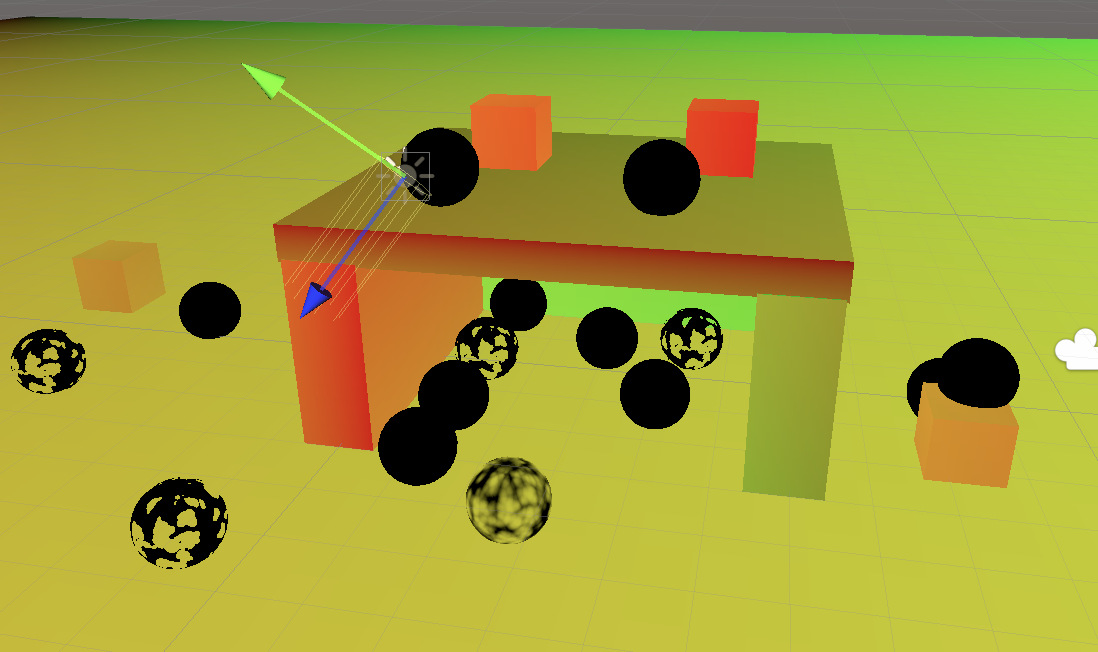
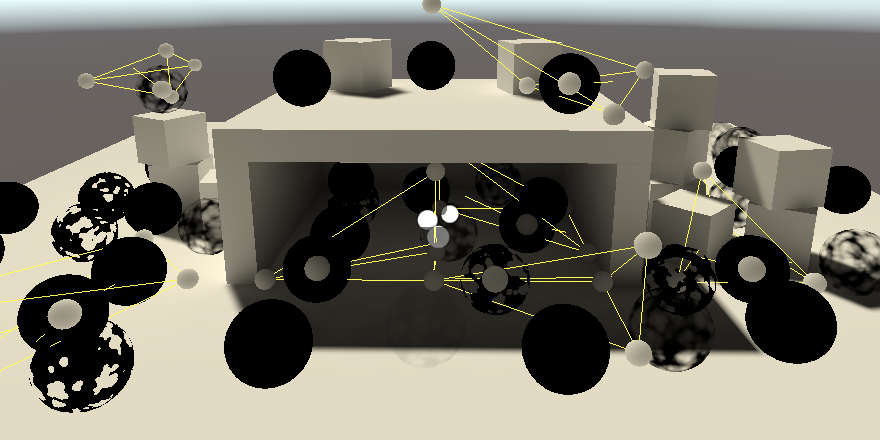
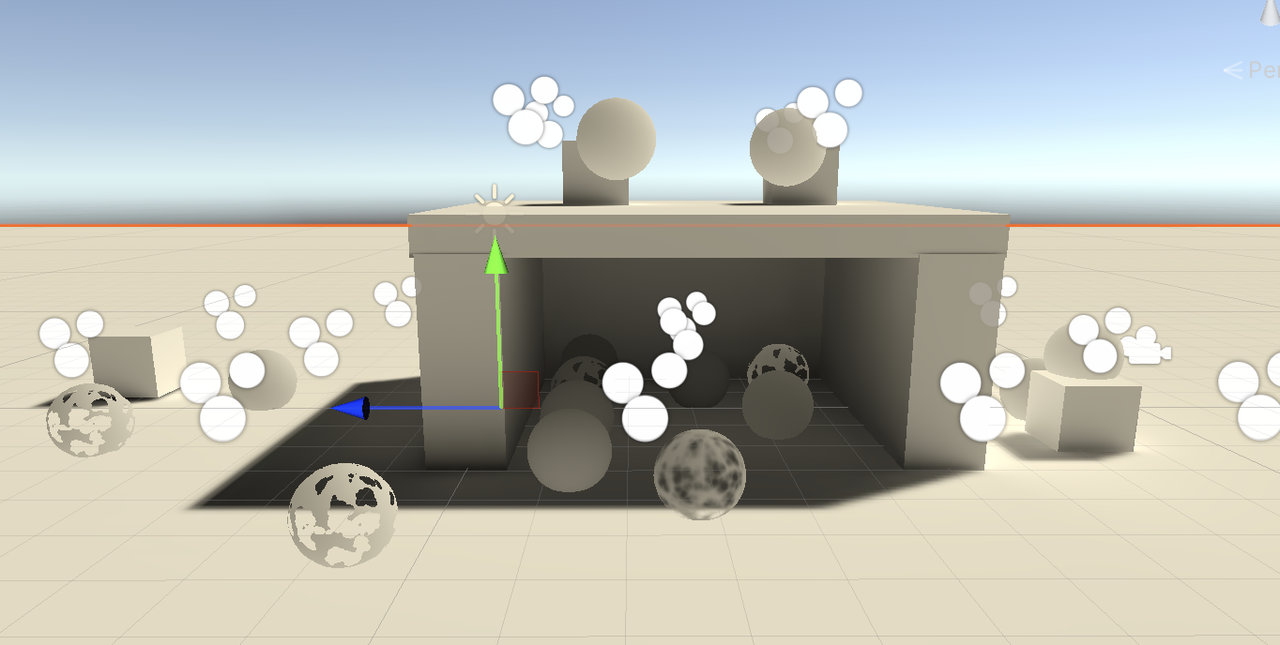
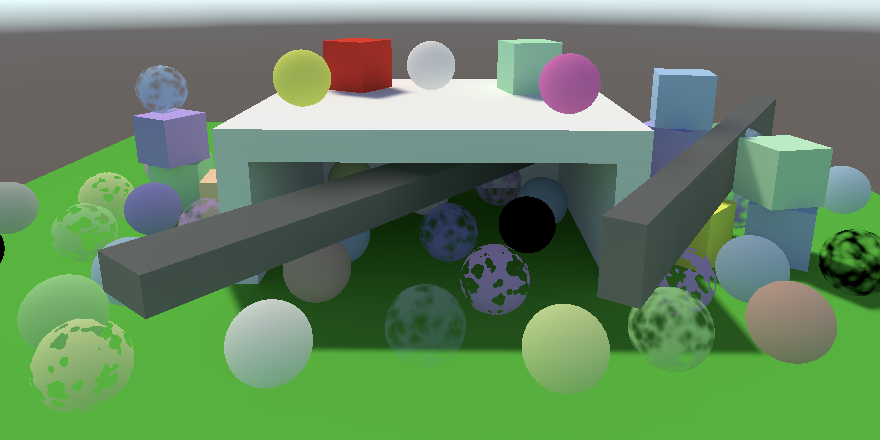
}可以看到,動態物體(所有的小球),都被照亮了,同時車庫內的更暗些.
3.3 Light Probe Proxy Volumes
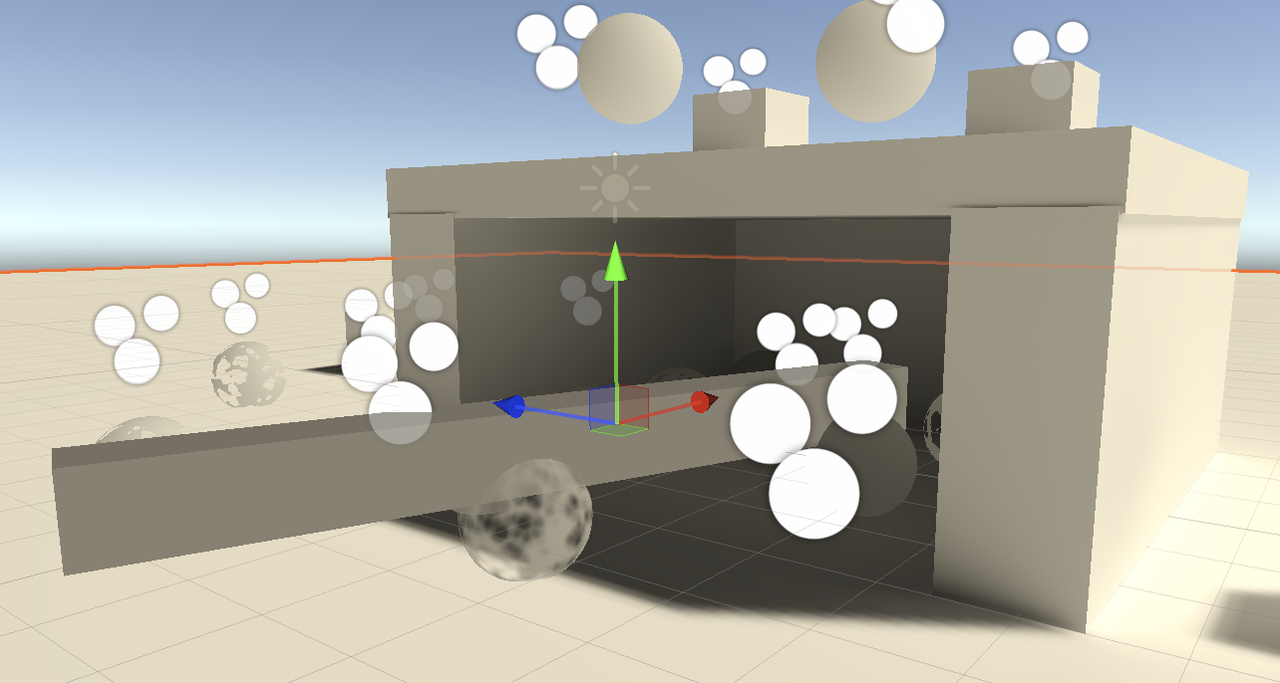
Light Probe 對于那些比較小的物體比較適合.對于那些比較大的物體,由于 Light Probe 是基于單一位置計算 Light Probe Data 的,因此效果會不正確,比如上圖中的長條物體,其車庫外面的部分同車庫內,使用了同樣的光照.
通過使用 light probe proxy volume 即 LPPV 來解決該問題,為該對象添加一個 LPPV 組件,并將其 Renderer 組件的 Probe Mode 改為 Use Proxy Volume

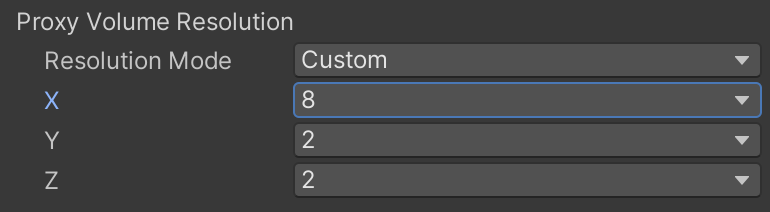
有多種方式可以配置 Volume,這里我們用 custom resolution mode 來沿著邊緣放置 sub-probes
3.4 Sampling LPPV
采樣 LPPV 同樣需要向GPU提交數據,還是 DrawingSettings,這次是 PerObjectData.LightProbeProxyVolume
drawingSettings.perObjectData = PerObjectData.Lightmaps | PerObjectData.LightProbe| PerObjectData.LightProbeProxyVolume;同樣,向 UnityPerDraw 中添加成員來接收數據
CBUFFER_START(UnityPerDraw)
...
float4 unity_ProbeVolumeParams;            // light probe proxy volume 參數
float4x4 unity_ProbeVolumeWorldToObject;
float4 unity_ProbeVolumeSizeInv;
float4 unity_ProbeVolumeMin;
CBUFFER_END
Volumes 數據存儲在一張 3D float 貼圖中: unity_ProbeVolumeSH, 在 GI.hlsl 中,通過 TEXTURE3D_FLOAT 聲明貼圖,同時聲明采樣器
TEXTURE3D_FLOAT(unity_ProbeVolumeSH);
SAMPLER(samplerunity_ProbeVolumeSH);
使用 light probe 還是 LPPV 由 unity_ProbeVolumeParams 的 x 分量確定.如果不是0,就利用 SampleProbeVolumeSH4 來采樣 LPPV:
首先傳入貼圖和采樣器,還是用一個宏來包裝:TEXTURE3D_ARGS
然后是像素的世界空間位置及法線
變換矩陣,即 UnityPerDraw 的 unity_ProbeVolumeWorldToObject?
其它 UnityPerDraw 傳入的參數,使用方式見下面的代碼
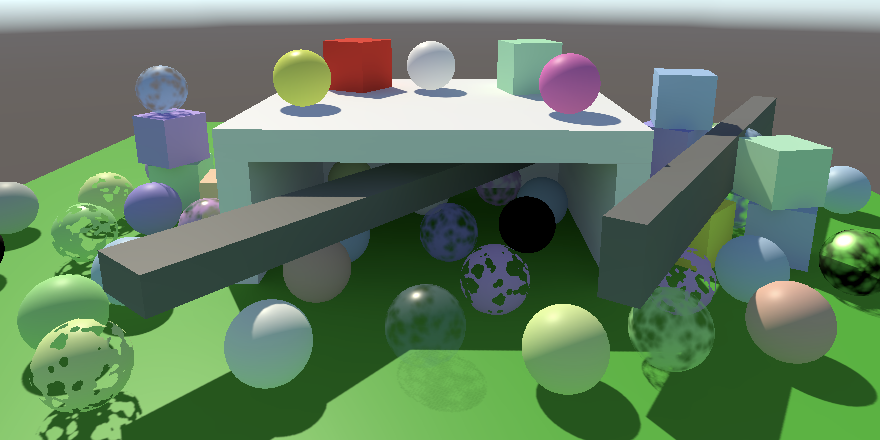
float3 SampleLightProbe(Surface surfaceWS)
{
#if defined(LIGHTMAP_ON)return 0.0;
#elseif (unity_ProbeVolumeParams.x) {return SampleProbeVolumeSH4(TEXTURE3D_ARGS(unity_ProbeVolumeSH, samplerunity_ProbeVolumeSH),surfaceWS.position, surfaceWS.normal,unity_ProbeVolumeWorldToObject,unity_ProbeVolumeParams.y, unity_ProbeVolumeParams.z,unity_ProbeVolumeMin.xyz, unity_ProbeVolumeSizeInv.xyz);}else{float4 coefficients[7];coefficients[0] = unity_SHAr;coefficients[1] = unity_SHAg;coefficients[2] = unity_SHAb;coefficients[3] = unity_SHBr;coefficients[4] = unity_SHBg;coefficients[5] = unity_SHBb;coefficients[6] = unity_SHC;return max(0.0, SampleSH9(coefficients, surfaceWS.normal));}
#endif
}
現在,可以看到長條對象,在車庫內的部分是暗的,外面是亮的(不明顯是因為我的場景布置不合理)
采樣 LPPV 需要變換到 Volume 空間,還需要一些其它的計算,需要采樣 volume texture,以及應用球協.該例子中應用了 L1 球協,因此精度沒有那么高,但是已經在一個對象上體現出了光照的差異.
4 Meta Pass
間接漫反射光是從表面反彈出來的,因此應該受到表面反射率的影響,目前還沒有處理.unity 使用特殊的 meta pass 來確定烘焙的反射光.由于我們沒有定義,因此 unity 使用默認的 meta pass,其返回白色.
4.1 Unified Input
MetaPass 也需要和 LitPass 一樣的UnityPerMaterial,以及基礎貼圖和采樣器,因此從 LitPass.hlsl 中提取出來,放到 LitInput.hlsl 中,讓這兩個 pass 共享.
同時我們定義了一系列函數,將 instance 相關的代碼隱藏起來,這些函數都以 float2 uv 作為參數,但是有些函數可能不會用到.
#ifndef CUSTOM_LIT_INPUT_INCLUDED
#define CUSTOM_LIT_INPUT_INCLUDEDUNITY_INSTANCING_BUFFER_START(UnityPerMaterial)
float4 _BaseColor;
float4 _BaseMap_ST;
float _Cutoff;
float _Metallic;
float _Smoothness;
UNITY_INSTANCING_BUFFER_END(UnityPerMaterial)TEXTURE2D(_BaseMap);
SAMPLER(sampler_BaseMap);float2 TransformBaseUV(float2 baseUV)
{float4 baseST = UNITY_ACCESS_INSTANCED_PROP(UnityPerMaterial, _BaseMap_ST);return baseUV * baseST.xy + baseST.zw;
}float4 GetBase(float2 baseUV)
{float4 map = SAMPLE_TEXTURE2D(_BaseMap, sampler_BaseMap);float4 color = UNITY_ACCESS_INSTANCED_PROP(UnityPerMaterial, _BaseColor);return map * color;
}float GetCutoff (float2 baseUV)
{return UNITY_ACCESS_INSTANCED_PROP(UnityPerMaterial, _Cutoff);
}float GetMetallic (float2 baseUV)
{return UNITY_ACCESS_INSTANCED_PROP(UnityPerMaterial, _Metallic);
}float GetSmoothness (float2 baseUV)
{return UNITY_ACCESS_INSTANCED_PROP(UnityPerMaterial, _Smoothness);
}#endif
在.shader subpass 開始的地方,在HLSLINCLUDE ENDHLSL 之間,包含 common.hlsl , lit input.hlsl ,這樣所有pass都會首先包含這兩個文件。
HLSLINCLUDE
#include "../ShaderLibrary/Common.hlsl"
#include "LitInput.hlsl"
ENDHLSL
移除litpass.hlsl 中重復的包含和 buffer texture sampler 定義,并將相關代碼替換成在 lit input.hlsl中定義的函數。
對ShadowCasterPass做同樣的處理。
4.2 Unlit
unlit 相關的材質文件也做同樣的處理。
復制lit input 并改名為 unlit input.hlsl,移除金屬度和光滑度,修改對應函數返回0,然后在unlit.shader中包含文件。
4.3 Meta Light Mode
向 Lit Unlit shader 中添加新 pass,設置其 light mode 為 meta。cull mode 為 off。不需要 multi compile 指令。
Pass
{Name "META"Tags { "LightMode" = "Meta" }Cull OffHLSLPROGRAM#pragam target 3.5#pragam vertex MetaPassVertex#pragma fragment MetaPassFragment#include "MetaPass.hlsl"ENDHLSL
}
下面是 MetaPass.hlsl 代碼
#ifndef CUSTOM_META_PASS_INCLUDED
#define CUSTOM_META_PASS_INCLUDED// BRDF 及其依賴的頭文件
#include "../ShaderLibrary/Surface.hlsl"
#include "../ShaderLibrary/Shadow.hlsl"
#include "../ShaderLibrary/Light.hlsl"
#include "../ShaderLibrary/BRDF.hlsl"struct Attributes {float3 positionOS : POSITION;float2 baseUV : TEXCOORD0;float2 lightMapUV : TEXCOORD1;    // 需要 light map uv
};struct Varyings {float4 positionCS : SV_POSITION;float2 baseUV : VAR_BASE_UV;
};// meta pass 控制參數,用來告訴 shader 要生成什么數據
// x :生成漫反射反射率
// y :
bool4 unity_MetaFragmentControl;
// unity 對計算結果進行放大的參數
float unity_OneOverOutputBoost;
// 限制最大值
float unity_MaxOutputValue;Varyings MetaPassVertex(Attributes input)
{Varyings output;// 對象空間位置的 XY 坐標,由 light map uv 計算得來input.positionOS.xy =input.lightMapUV * unity_LightmapST.xy + unity_LightmapST.zw;// 必須在代碼中顯式訪問 Z,否則 OpenGL 不渲染input.positionOS.z = input.positionOS.z > 0.0 ? FLT_MIN : 0.0;output.positionCS = TransformWorldToHClip(input.positionOS);output.baseUV = TransformBaseUV(input.baseUV);return output;
}float4 MetaPassFragment(Varyings input) : SV_TARGET {float4 base = GetBase(input.baseUV);Surface surface;ZERO_INITIALIZE(Surface, surface);surface.color = base.rgb;surface.metallic = GetMetallic(input.baseUV);surface.smoothness = GetSmoothness(input.baseUV);BRDF brdf = GetBRDF(surface);float4 meta = 0.0;if (unity_MetaFragmentControl.x) {// 返回 BRDF 的漫反射meta = float4(brdf.diffuse, 1.0);// 配合 unity boost,對結果預處理一下meta.rgb += brdf.specular * brdf.roughness * 0.5;// unity boostmeta.rgb = min(PositivePow(meta.rgb, unity_OneOverOutputBoost), unity_MaxOutputValue);}return meta;
}#endif
在 Lighting.hlsl 的 GetLighting 中,累加間接和實時漫反射
float3 GetLighting(Surface surfaceWS, BRDF brdf, GI gi)
{ShadowData shadowData = GetShadowData(surfaceWS);float3 color = gi.diffuse * brdf.diffuse;for(int i = 0; i < GetDirectionalLightCount(); ++i){Light light = GetDirectionalLight(i, surfaceWS, shadowData);color += GetLighting(surfaceWS, brdf, light);}return color;
}
備注:在我自己的實踐中, MetaPass 始終沒生效, Unity 總是使用默認的返回白色的漫反射,如果誰知道怎么解決該問題,還請留言.
最后,設置光的模式為混合模式
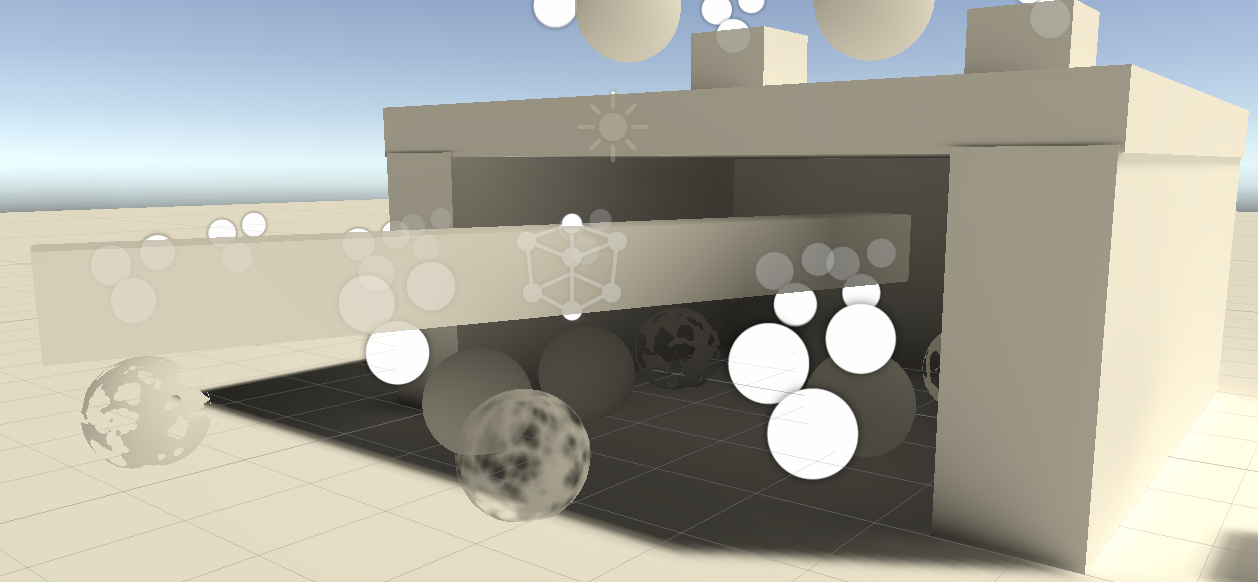
5 Emissive Surfaces?
自發光可以簡單的在光照計算的最后,疊加上一個顏色來實現.因為不是真正的光源,因此不會影響其它表面,但是他們可以在 lightmap 中貢獻烘焙光.
5.1 Emitted Light
自發光需要增加兩個材質屬性:自發光貼圖和顏色.
自發光貼圖上 ST,使用與 base map 相同的值,因此增加 [NoScaleOffset] 來告訴 unity 不為其定義/上傳數據.
為來支持更亮的自發光,需要定義 HDR 顏色,通過 [HDR] 修飾屬性來實現,這允許設置超過1的顏色值.
emissive map 我們使用默認的粒子貼圖
_BaseMap("Texture", 2D) = "white" {}
[NoScaleOffset]_EmissionMap("Emission", 2D) = "white"{}
[HDR]_EmissionColor("Emission", Color) = (0.0,0.0,0.0,0.0)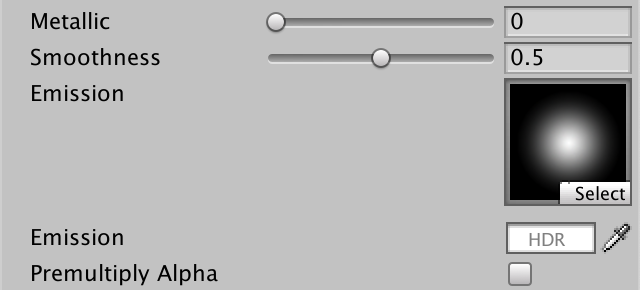
在 LitInput.hlsl 中,增加自發光貼圖變量,并為材質數據增加自發光顏色.同時實現 GetEmission 函數:
UNITY_INSTANCING_BUFFER_START(UnityPerMaterial)
...
float4 _EmissionColor;
UNITY_INSTANCING_BUFFER_END(UnityPerMaterial)TEXTURE2D(_BaseMap);
TEXTURE2D(_EmissionMap);
SAMPLER(sampler_BaseMap);float3 GetEmission(float2 baseUV)
{float4 map = SAMPLE_TEXTURE2D(_EmissionMap, sampler_BaseMap, baseUV);float4 color = UNITY_ACCESS_INSTANCED_PROP(UnityPerMaterial, _EmissionColor);return map.rgb * color.rgb;
}
在 LitPass.hlsl 中,像素著色器最后,返回之間,調用 GetEmission 并將顏色疊加上去
float4 LitPassFragment(Varyings input) : SV_TARGET
{float3 color = GetLighting(surface, brdf, gi);color += GetEmission(input.uv);return float4(color, surface.alpha);
}
對于 Unlit.hlsl 我們的 GetEmission 只是簡單的調用 GetBase.
最后,不要忘記我們的 PerObjectMaterialProperties 腳本,緩存 shader property id,定義自發光顏色.由于要支持HDR,因此用到了 ColorUsage 語義,有兩個參數:第一個指示是否顯示 alpha 通道,我們不需要因此是 false,第二個是否支持 HDR,因此是 true.
static int emissionColorId = Shader.PropertyToID("_EmissionColor");
// ColorUsage(show alpha channel, use hdr)
[SerializeField, ColorUsage(false, true)]
private Color emissioncolor = Color.black;private void OnValidate()
{...matPropBlock.SetColor(emissionColorId, emissioncolor);GetComponent<Renderer>().SetPropertyBlock(matPropBlock);
}
5.2 Baked Emission
自發光通過單獨的 pass 烘焙,即 unity_MetaFragmentControl.y 是 true 時烘焙自發光
if (unity_MetaFragmentControl.x)
{...
}
else if(unity_MetaFragmentControl.y)
{meta = float4(GetEmission(input.uv), 1.0);
}
要烘焙自發光,需要為材質顯示指定烘焙自發光.通過調用 MaterialEditor.LightmapEmissionProperty().因此需要在OnGUI 中調用.
MaterialEditor.LightmapEmissionProperty() 僅僅是在材質面板上顯示選項,并初始設置為 None.盡管名字跟 Emission 無關(Global Illumination) ,但選擇 Baked 確實是告訴 unity 用獨立的 pass 來烘焙自發光.另外的 Realtime 選項已經廢棄了,不用管它.
這些依然不夠,Unity 在烘焙時傾向于避免單獨的 emission pass.如果材質的 emission 是 0, 那么就會忽略,但這沒有考慮每個對象的材質屬相.我們可以在 emission mode 改變時,去掉選擇的材質的 globalIlluminationFlags 的 MaterialGlobalIlluminationFlags.EmissiveIsBlack 來解決
public override void OnGUI(MaterialEditor matEditor, MaterialProperty[] props)
{...properties = props;BakedEmission();...
}void BakedEmission()
{EditorGUI.BeginChangeCheck();materialEditor.LightmapEmissionProperty();if (EditorGUI.EndChangeCheck()){foreach (Material material in materialEditor.targets)material.globalIlluminationFlags &= ~MaterialGlobalIlluminationFlags.EmissiveIsBlack;}
}
6 Baked Transparency
半透明對象也可以烘焙,不過現在的效果還不對,需要增加些內容.如下圖,半透明的屋頂,被當作不透明來烘焙的
Unity 是通過一種硬編碼的方式來處理半透明材質的,通過 Queue 隊列來判斷材質是 opaque, clipped, transparent 的,然后乘上貼圖以及顏色的 alpha 的到透明度, clipping 則使用 _Cutoff.目前我們的 shader 處理了第三種情況,前兩種還沒有處理.
在材質上增加 _MainText _MainColor 兩個屬性,并用[HideInInspector]修飾,這兩個屬性不需要在材質面板上編輯,我們在材質編輯器代碼中復制 _BaseMap _BaseColor 的屬性.
在 Lit.shader 中
_Cutoff("Alpha Cutoff", Range(0.0, 1.0)) = 0.5
[HideInInspector]_MainTex("Testure for lightmap", 2D) = "white"{}
[HideInInspector]_Color("Color for lightmap", Color) = (1.0,1.0,1.0,1.0)
在 CustomShaderGUI.cs 中,復制材質屬性
public override void OnGUI(MaterialEditor matEditor, MaterialProperty[] props)
{...if (EditorGUI.EndChangeCheck()){// 如果有修改,則更新陰影通道SetShadowCasterPass();CopyLightmappingProperties();}
}void CopyLightmappingProperties()
{MaterialProperty propMainTex = FindProperty("_MainTex", properties, false);MaterialProperty propBaseTex  = FindProperty("_BaseMap", properties, false);if (propMainTex != null && propBaseTex != null){propMainTex.textureValue = propBaseTex.textureValue;propMainTex.textureScaleAndOffset  = propBaseTex.textureScaleAndOffset;}MaterialProperty propColor = FindProperty("_Color", properties, false);MaterialProperty propBaseColor = FindProperty("_BaseColor", properties, false);if (propColor != null && propBaseColor != null){propColor.colorValue = propBaseColor.colorValue;}
}
如下圖,半透明已經烘焙正確了
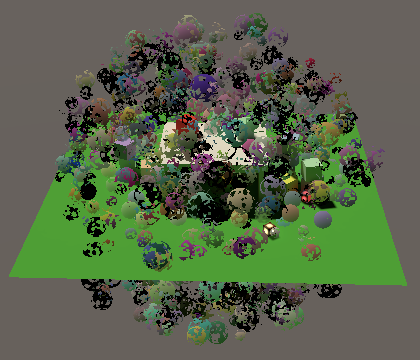
7 Mesh Ball
接下來我們要讓由 MeshBall 腳本生成的 instance ball 支持全局光照.由于 balls 是在運行時生成的,不能參與到烘焙中,但是可以讓他們受到 light probes 的影響.
7.1 Light Probes
通過另一個 DrawMeshInstanced 接口來指示使用 light probes,這個接口需要5個額外的參數:
第一個(第六個)是陰影投射模式,我們設置成 On
然后是 layer 使用默認值 0
第三個是指定渲染的攝像機,傳入 null 表示他們需要被所有攝像機渲染
最后設置 light probe mode,只能使用 LightProbeUsage.CustomProvided,因為light probes 是通過材質數據上傳的,而不是實例自身.
void Update()
{Graphics.DrawMeshInstanced(mesh, 0, material, matrices, 1023, matPropBlock,ShadowCastingMode.On, true, 0, null, LightProbeUsage.CustomProvided);
}
然后,需要為所有實例手動生成插值 light probes,并添加到 material property block 中
private void Awake()
{...// 生成 interpolated light probes 數據并拷貝到 material property block// 首先獲得實例的位置var positions = new Vector3[1023];for (int i = 0; i < 1023; i++){positions[i] = matrices[i].GetColumn(3);}// 生成 interpolated light probesvar lightProbes = new SphericalHarmonicsL2[1023];// 參數1: 位置熟知// 參數2: 返回 SphericalHarmonicsL2 數據// 參數3: 返回 Occlusion 數據,這里不需要,傳 nullLightProbes.CalculateInterpolatedLightAndOcclusionProbes(positions, lightProbes, null);// 將數據拷貝到 material property blockmatPropBlock.CopySHCoefficientArraysFrom(lightProbes);
}
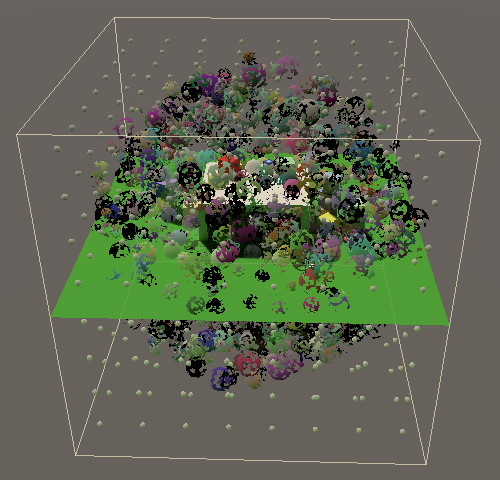
7.2 LPPV
另一種方式是通過 LPPV 實現 instance 的 GI, 這需要將場景中的 instance 放置到一個緊密的空間.這種方式讓我們不必進行上面那些計算,同時可以實時改變 instance 的位置,而不需要每幀計算 interpolated light probes 并上傳,前提是他們始終在我們定義的 LPPV 內部.
為 MeshBall.cs 增加一個 LightProbeProxyVolume 成員,如果該成員被使用了,就不用計算 light probes 數據了.然后調整 DrawMeshInstanced 參數:
[SerializeField] LightProbeProxyVolume lightProbeProxyVolume = null;private void Awake()
{...if (lightProbeProxyVolume == null){// 生成 interpolated light probes 數據并拷貝到 material property block...}}void Update()
{LightProbeUsage probeUsage = lightProbeProxyVolume ? LightProbeUsage.UseProxyVolume : LightProbeUsage.CustomProvided;Graphics.DrawMeshInstanced(mesh, 0, material, matrices, 1023, matPropBlock,ShadowCastingMode.On, true, 0, null, probeUsage, lightProbeProxyVolume);
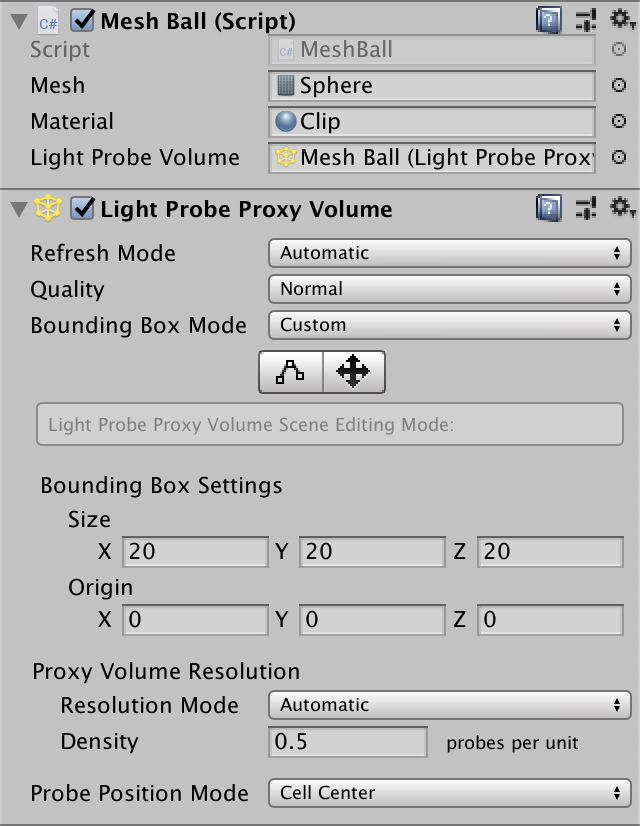
}然后,為 MeshBall 所在的對象添加 LPPV 組件,并配置 Bounding Box Mode 為 Custom,以定義世界空間的區域.并將其賦值給 MeshBall 組件.
![[Python]PTA:實驗2-3-1-for 求1到100的和](http://pic.xiahunao.cn/[Python]PTA:實驗2-3-1-for 求1到100的和)

)


)

Stand-In:一種輕量化、即插即用的身份控制方法用于視頻生成)


