Node的學習
- Node的基礎
- 上述是關于Node的一些基礎,總結的還行;
利用Node書寫接口并操作數據庫
1. 初始化項目
- 創建新的項目文件夾,并初始化 package.json
mkdir my-backend
cd my-backend
npm init -y
2. 安裝必要的依賴
- 安裝Express.js(用于處理http請求)
npm install express
- 安裝CORS,支持跨域請求
npm install cors
- 安裝nodemon,使用開發模式(自動重啟服務); s
npm install --save-dev nodemon
3. 創建主程序文件index.js
- 目前是絕大多數邏輯都寫在了主程序文件index.js中,后續會將里面絕大部分內容抽離開來,比如路由信息、中間件、控制器等;
const db = require('./db'); // 有幾個常用的操作路徑的方式需要注意;// 引入必要模塊
const express = require('express');
const cors = require('cors');const app = express(); // 創建 Express 應用實例
const PORT = 3000; // 設置服務端口// 中間件配置
app.use(cors()); // 允許跨域
app.use(express.json()); // 解析 JSON 格式的請求體
app.use(express.urlencoded({ extended: true })); // 解析 URL 編碼的請求體// 路由
app.get('/', (req, res) => {res.send('Hello, World! Welcome to the Node.js backend!');
});app.post('/data', (req, res) => {const { name, age } = req.body; // 從請求體中獲取數據res.json({ message: `Received data for ${name}, age ${age}` });
});/***  擴展功能:1. 增加更多路由;或者說查詢路由*/
app.get('/users', (req, res) => {db.query('SELECT * FROM users', (err, results) => {if (err) {res.status(500).json({ error: 'Database query failed' });return;}res.json(results);});
});// 2. 插入用戶數據
app.post('/addUser', (req, res) => {// const { id, username, password } = req.body;db.query('INSERT INTO users (id, username, password) VALUES (?, ?, ?)', [id, username, password], (err, result) => {if (err) {res.status(500).json({ error: 'Failed to insert user' });return;}res.json({ message: 'User created successfully', userId: result.insertId });});
})// post請求一般都會解析用戶數據;
app.post('/users', (req, res) => {const { name } = req.body;res.json({ message: `User ${name} created successfully!` });
});// 啟動服務
app.listen(PORT, () => {console.log(`Server is running on http://localhost:${PORT}`);
});
4. 主程序中連接數據庫操作
- 安裝數據庫
npm install mongoose    # MongoDB
npm install mysql2      # MySQL
- 連接數據庫 db.js
const mysql = require('mysql2');// 創建數據庫連接
const db = mysql.createConnection({host: 'localhost',user: 'root',password: '123456',database: 'my_db_01'
});// 連接數據庫
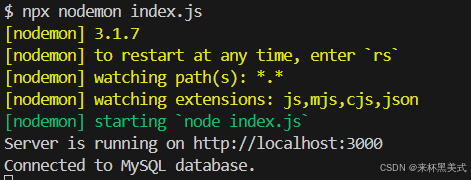
db.connect((err) => {if (err) {console.error('Error connecting to the database:', err);return;}console.log('Connected to MySQL database.');
});module.exports = db; // 導出數據庫連接實例
5. 運行服務器
npx nodemon index.js
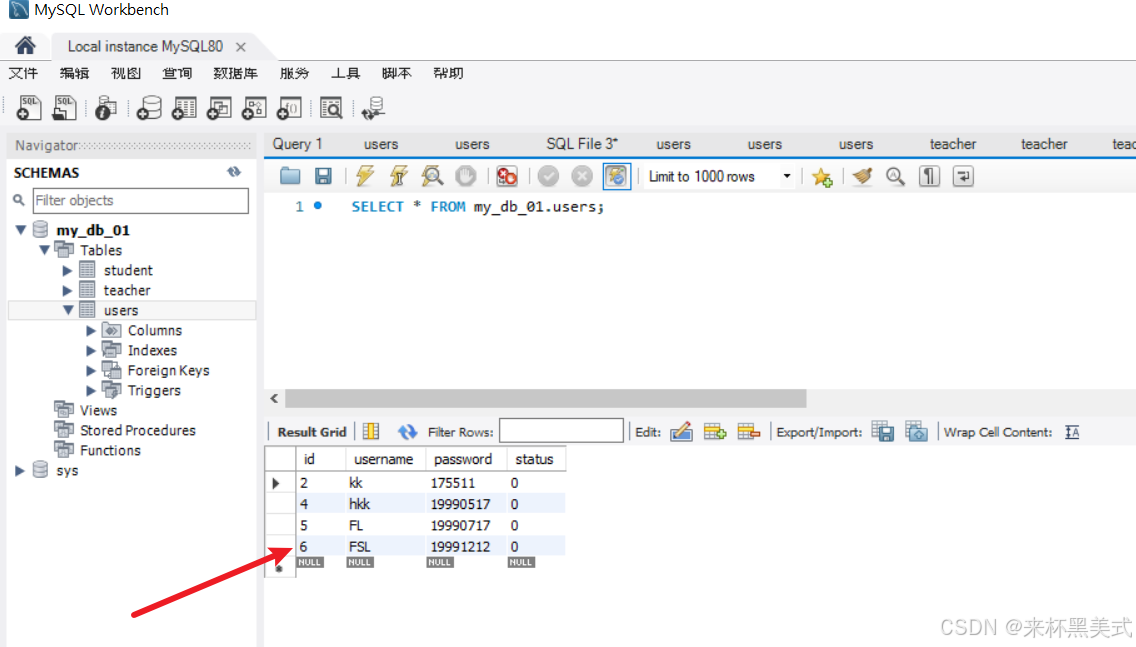
- 結果圖
6. 測試
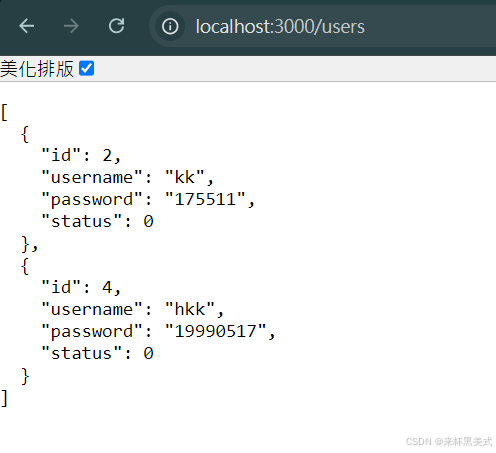
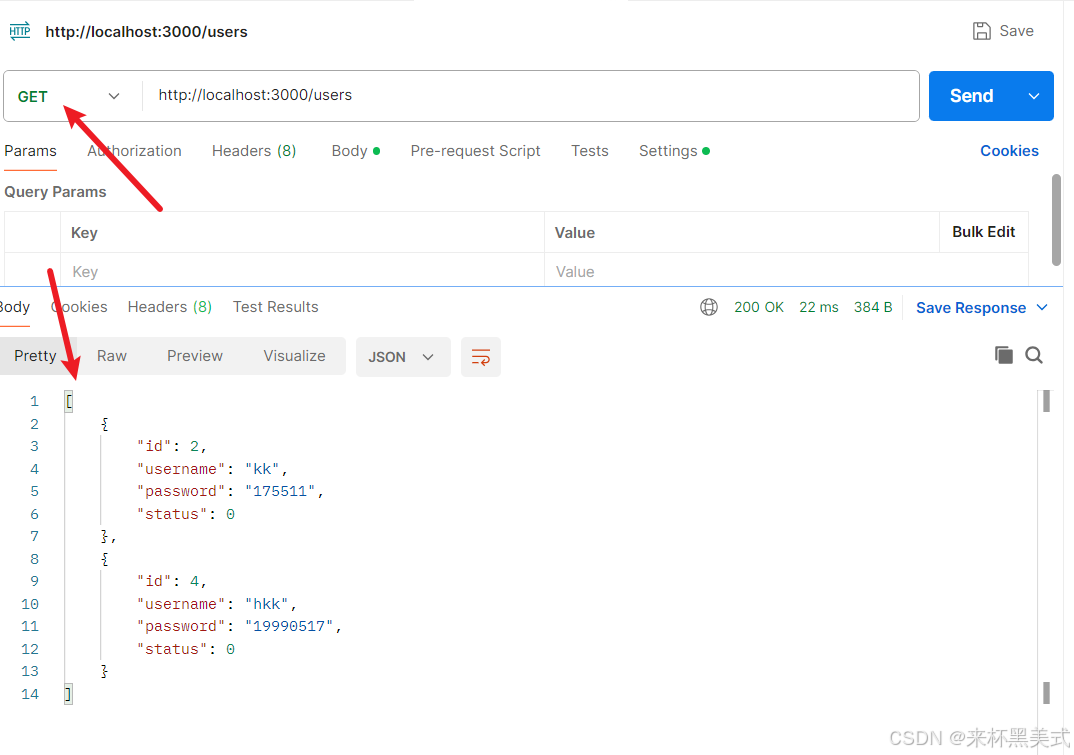
get接口方法測試
- 在瀏覽器測試; 輸入:http://localhost:3000/users
- postman測試
post接口方法測試
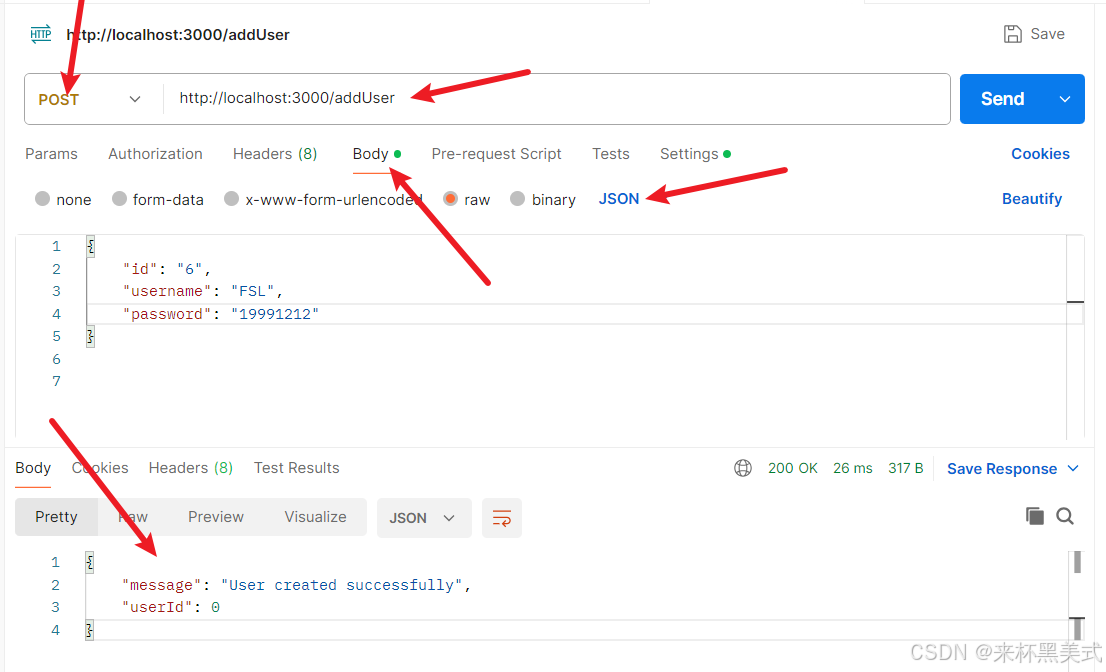
- 在發送請求以后,即可在數據庫中查看到新添加的數據
Node項目的規范化
- 上面的Node項目已經可以完成一個較為試水的項目了,但是項目結構需要優化下:

路由模塊寫法
- 將原先寫在app.js(index.js)中的路由信息分開寫,分為users.js和students.js
- 以users.js為例,其路由信息的js書寫如下:
// 用戶路由
const express = require('express');
const router = express.Router();
const db = require('../db');  // 引入數據庫配置信息// 獲取所有用戶數據
router.get('/users', (req, res) => {db.query('SELECT * FROM users', (err, results) => {if (err) {res.status(500).json({ error: 'Database query failed' });return;}res.json(results);});});// 添加用戶信息
router.post('/addUser', (req, res) => {const { id, username, password } = req.body;db.query('INSERT INTO users (id, username, password) VALUES (?, ?, ?)', [id, username, password], (err, result) => {if (err) {res.status(500).json({ error: 'Failed to insert user' });return;}res.json({ message: 'User created successfully', userId: result.insertId });});})module.exports = router;
- 添加到app.js的路由書寫如下:
// app.js 作為入口文件;const express = require('express');
const cors = require('cors');
const userRoutes = require('./routes/users'); // 引入用戶路由
const studentsRoutes = require('./routes/students'); // 引入學生路由const app = express();
const PORT = 3000; // 中間件配置
app.use(cors()); // 允許跨域
app.use(express.json()); // 處理JSON格式
app.use(express.urlencoded({ extended: true })); // 處理URL編碼// 基礎路由
app.get('/', (req, res) => {res.send('Hello, World! Welcome to the Node.js backend!');
});// 使用路由模塊
app.use('/api', userRoutes); // 將用戶相關路由掛載到/api中;
app.use('/api', studentsRoutes); // 啟動服務
app.listen(PORT, () => {console.log(`Server is running on http://localhost:${PORT}`);
});
- 問題:為什么使用路由模塊需要將用戶相關路由掛載到 /apo中,而不是直接/ 呢
- RESTful風格標準(現代web開發的一種標準)
- 防止命名沖突,如果項目中沒有統一前綴,路由很容易與其他資源沖突
- 前端調用時的統一管理,有利于集中管理API
控制器寫法
- 其實控制器就是在路由的基礎上進一步優化,這一點非常關鍵;
- 具體見操作數據庫的代碼
路徑參數和查詢參數的比較
- 路徑參數 和 查詢參數 是兩種不同的傳參方式,需要在路由定義和請求中保持一致。
路徑參數
- 路徑參數:通過id查詢
router.get('/getStudentsById/:id', getStudentById);
- Postman 請求示例
GET http://localhost:3000/api/getStudentsById/101
const getStudentById = (req, res) => {console.log('req.params', req.params); const { id } = req.params; // 從路徑參數中獲取 idconsole.log('我已經獲取到了id是', id);db.query('SELECT * FROM student WHERE id = ?', [id], (err, results) => {if (err) {res.status(500).json({ error: 'Database query failed' });return;}if (results.length === 0) {return res.status(404).json({ message: 'Student not found' });}res.json(results[0]);});
};
查詢參數
- 如果想通過
?id=101這樣的查詢參數傳值,那么需要修改控制器中的代碼,從req.query中獲取參數。 - 路由定義:
router.get('/getStudentsById', getStudentById); // 無需路徑參數
- Postman 請求示例:
GET http://localhost:3000/api/getStudentsById?id=101
- 控制器代碼修改:
const getStudentById = (req, res) => {console.log('req.query', req.query); const { id } = req.query; // 從查詢參數中獲取 idconsole.log('我已經獲取到了id是', id);if (!id) {return res.status(400).json({ error: 'Student ID is required' });}db.query('SELECT * FROM student WHERE id = ?', [id], (err, results) => {if (err) {res.status(500).json({ error: 'Database query failed' });return;}if (results.length === 0) {return res.status(404).json({ message: 'Student not found' });}res.json(results[0]);});
};
兩種方式的總結
-
路徑參數(推薦):
- URL 格式:
/getStudentsById/:id - 請求示例:
GET /api/getStudentsById/101 - 后端通過
req.params獲取參數。
- URL 格式:
-
查詢參數:
- URL 格式:
/getStudentsById?id=101 - 請求示例:
GET /api/getStudentsById?id=101 - 后端通過
req.query獲取參數
- URL 格式:
總結:使用 路徑參數 更符合 RESTful 風格,代碼更語義化。


第三期)


)


)


