一.前置條件
克隆Dify v0.6.9代碼:
git clone https://github.com/langgenius/dify.git
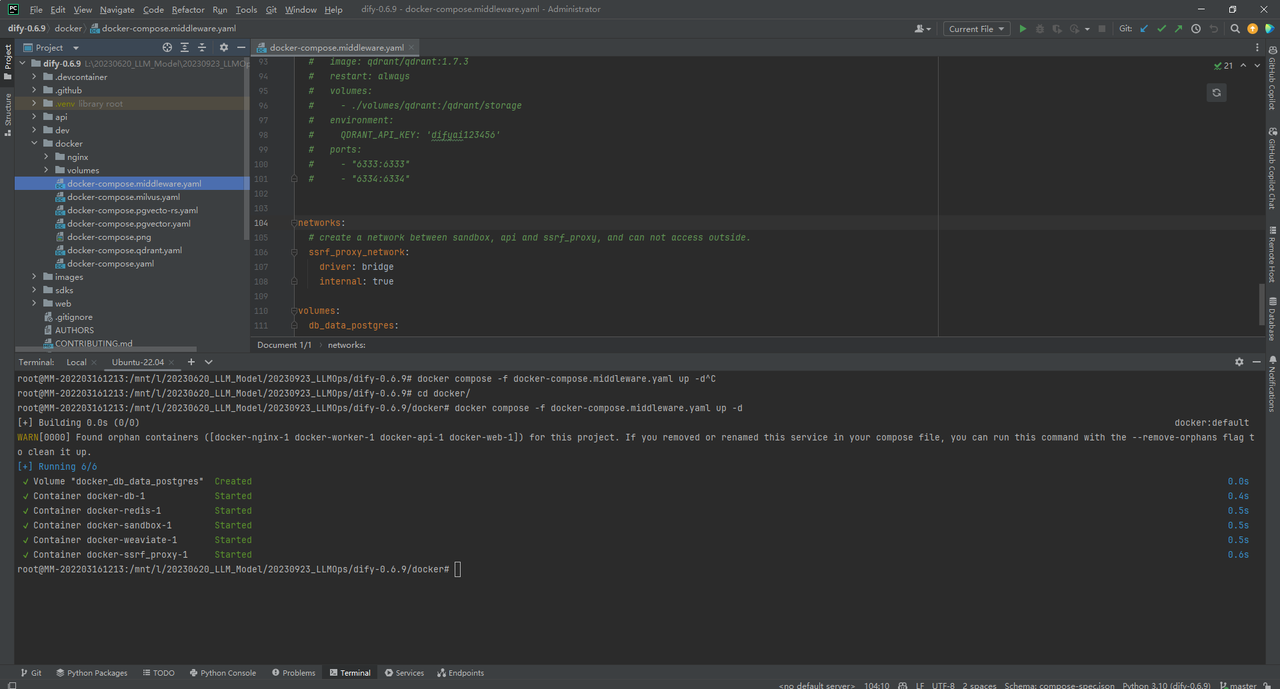
在啟用業務服務之前,需要先部署 PostgresSQL / Redis / Weaviate(如果本地沒有的話),可以通過以下命令啟動:
cd docker
docker compose -f docker-compose.middleware.yaml up -d
增加數據卷db_data_postgres:
version: '3'
services:# The postgres database.db:image: postgres:15-alpinerestart: alwaysenvironment:# The password for the default postgres user.POSTGRES_PASSWORD: difyai123456# The name of the default postgres database.POSTGRES_DB: dify# postgres data directoryPGDATA: /var/lib/postgresql/data/pgdatavolumes:- db_data_postgres:/var/lib/postgresql/dataports:- "5432:5432"
volumes:db_data_postgres:
PyCharm界面如下所示:
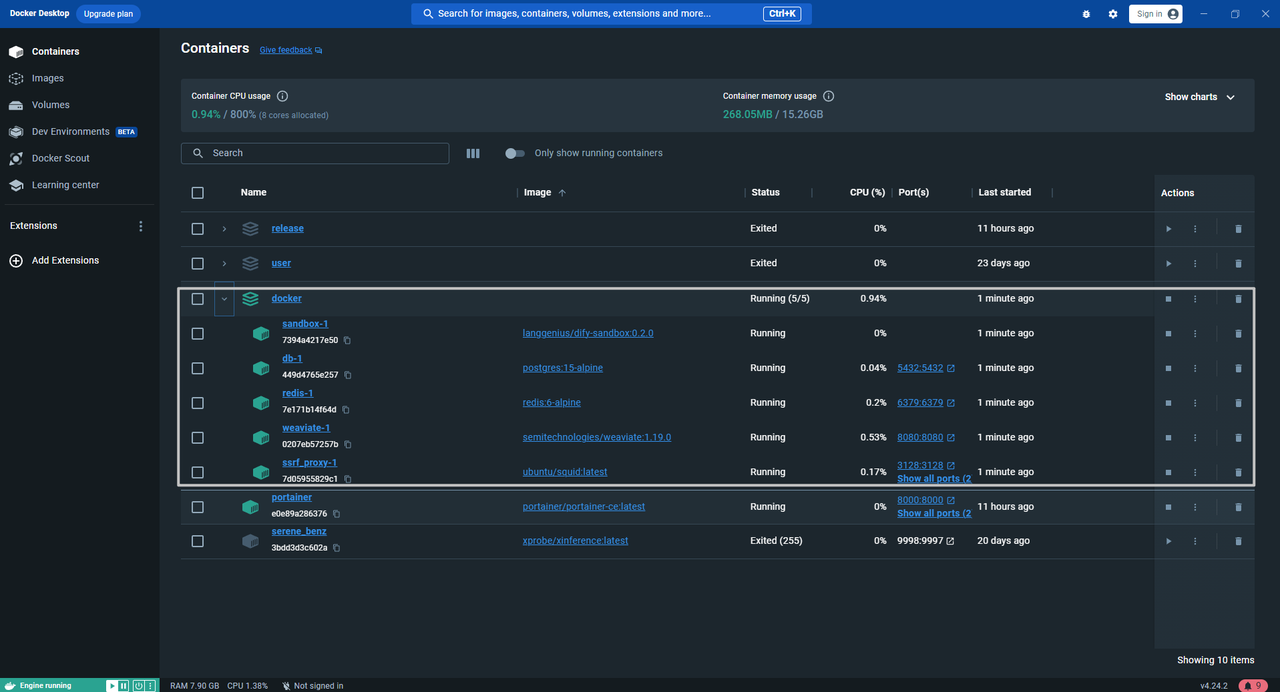
Docker Desktop界面如下所示:
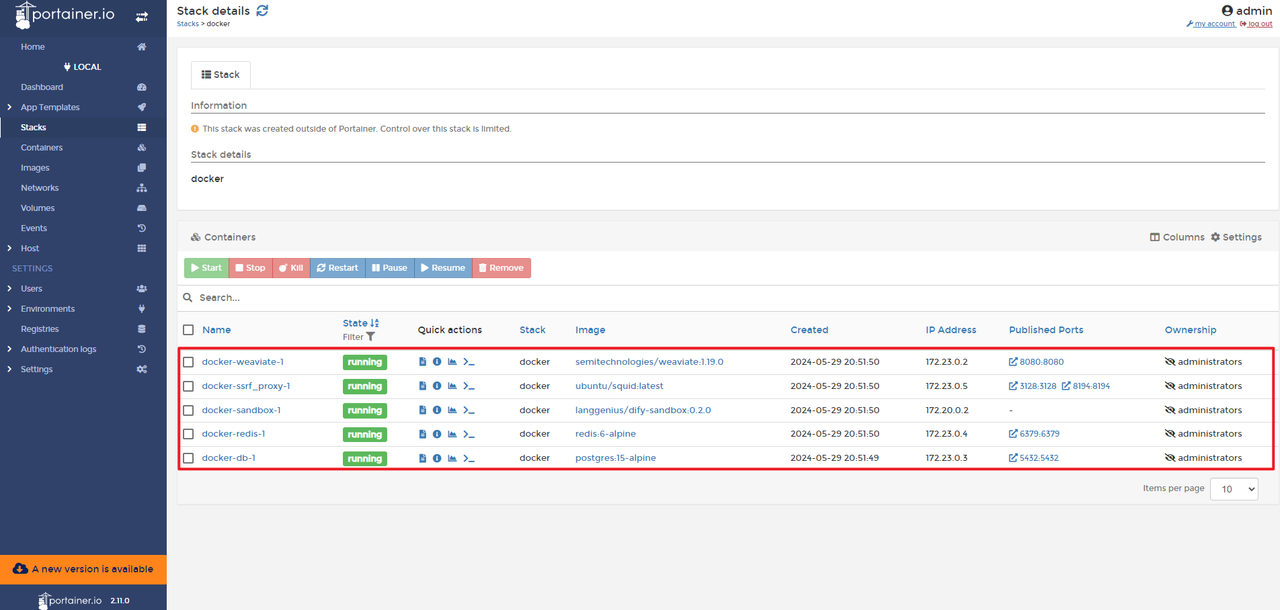
Portainer界面如下所示:
二.服務端部署
1.進入 api 目錄
cd api
2.復制環境變量配置文件
cp .env.example .env
3.生成隨機密鑰,并替換 .env 中 SECRET_KEY 的值
openssl rand -base64 42
sed -i 's/SECRET_KEY=.*/SECRET_KEY=<your_value>/' .env
4.安裝依賴包
pip install -r requirements.txt
5.執行數據庫遷移
將數據庫結構遷移至最新版本。
flask db upgrade
6.啟動 API 服務
flask run --host 0.0.0.0 --port=5001 --debug
正確輸出:
(dify-0.6.9) root@MM-202203161213:/mnt/l/20230620_LLM_Model/20230923_LLMOps/dify-0.6.9/api# flask run --host 0.0.0.0 --port=5001 --debug
None of PyTorch, TensorFlow >= 2.0, or Flax have been found. Models won't be available and only tokenizers, configuration and file/data utilities can be used.
/root/.virtualenvs/dify-0.6.9/lib/python3.10/site-packages/pydub/utils.py:170: RuntimeWarning: Couldn't find ffmpeg or avconv - defaulting to ffmpeg, but may not workwarn("Couldn't find ffmpeg or avconv - defaulting to ffmpeg, but may not work", RuntimeWarning)* Debug mode: on
INFO:werkzeug:WARNING: This is a development server. Do not use it in a production deployment. Use a production WSGI server instead.* Running on all addresses (0.0.0.0)* Running on http://127.0.0.1:5001* Running on http://172.29.255.17:5001
INFO:werkzeug:Press CTRL+C to quit
INFO:werkzeug: * Restarting with stat
None of PyTorch, TensorFlow >= 2.0, or Flax have been found. Models won't be available and only tokenizers, configuration and file/data utilities can be used.
/root/.virtualenvs/dify-0.6.9/lib/python3.10/site-packages/pydub/utils.py:170: RuntimeWarning: Couldn't find ffmpeg or avconv - defaulting to ffmpeg, but may not workwarn("Couldn't find ffmpeg or avconv - defaulting to ffmpeg, but may not work", RuntimeWarning)
WARNING:werkzeug: * Debugger is active!
INFO:werkzeug: * Debugger PIN: 130-911-538

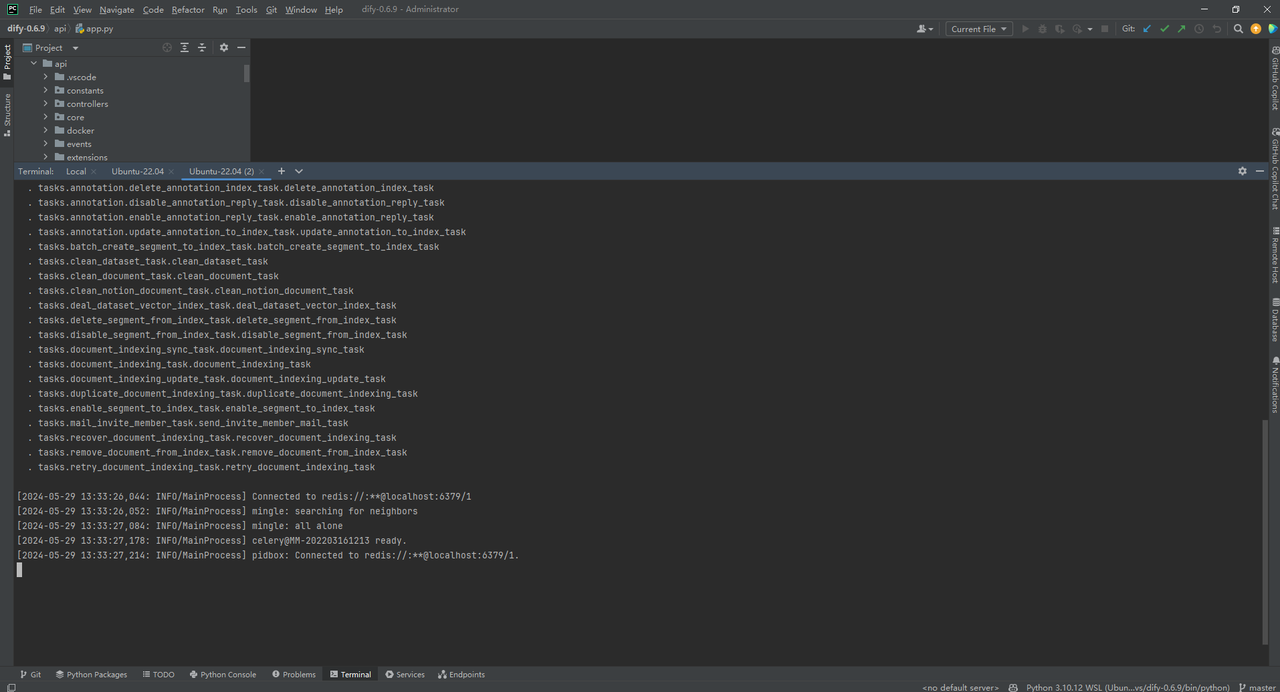
7.啟動 Worker 服務
用于消費異步隊列任務,如數據集文件導入、更新數據集文檔等異步操作。 Linux / MacOS 啟動:
celery -A app.celery worker -P gevent -c 1 -Q dataset,generation,mail --loglevel INFO
解釋命令如下所示:
| 參數 | 解釋 |
|---|---|
| celery | Celery 命令行工具。 |
| -A app.celery | 指定 Celery 應用實例的位置,這里是 app.celery,表示在 app 模塊中的 celery 實例。 |
| worker | 啟動一個 Celery worker 進程。 |
| -P gevent | 指定并發池為 gevent,這是一個基于協程的并發庫,用于處理并發任務。 |
| -c 1 | 指定并發工作進程的數量為 1。 |
| -Q dataset,generation,mail | 指定這個 worker 處理的任務隊列為 dataset、generation 和 mail。 |
| –loglevel INFO | 將日志級別設置為 INFO,以獲取詳細的運行信息。 |
如果使用 Windows 系統啟動,請替換為該命令:
celery -A app.celery worker -P solo --without-gossip --without-mingle -Q dataset,generation,mail --loglevel INFO
正確輸出:
三.前端頁面部署
Web 前端服務啟動的基礎條件推薦為需要用到 Node.js v18.x (LTS) 、NPM 版本 8.x.x 或 Yarn。
1.進入 web 目錄
cd web
2.安裝依賴包
npm install
3.配置環境變量
在當前目錄下創建文件 .env.local,并復制.env.example中的內容。根據需求修改這些環境變量的值:
# For production release, change this to PRODUCTION
NEXT_PUBLIC_DEPLOY_ENV=DEVELOPMENT
# The deployment edition, SELF_HOSTED
NEXT_PUBLIC_EDITION=SELF_HOSTED
# The base URL of console application, refers to the Console base URL of WEB service if console domain is
# different from api or web app domain.
# example: http://cloud.dify.ai/console/api
NEXT_PUBLIC_API_PREFIX=http://localhost:5001/console/api
# The URL for Web APP, refers to the Web App base URL of WEB service if web app domain is different from
# console or api domain.
# example: http://udify.app/api
NEXT_PUBLIC_PUBLIC_API_PREFIX=http://localhost:5001/api# SENTRY
NEXT_PUBLIC_SENTRY_DSN=
NEXT_PUBLIC_SENTRY_ORG=
NEXT_PUBLIC_SENTRY_PROJECT=
4.構建代碼
npm run build
5.啟動 Web 服務
npm run dev
正常啟動后,終端會輸出如下信息:
PS L:\20230620_LLM_Model\20230923_LLMOps\dify-0.6.9\web> npm run dev  > dify-web@0.6.9 dev
> next dev          ▲ Next.js 14.1.0- Local:        http://localhost:3000- Environments: .env.local           automatically enabled Fast Refresh for 1 custom loader? Ready in 17.1s
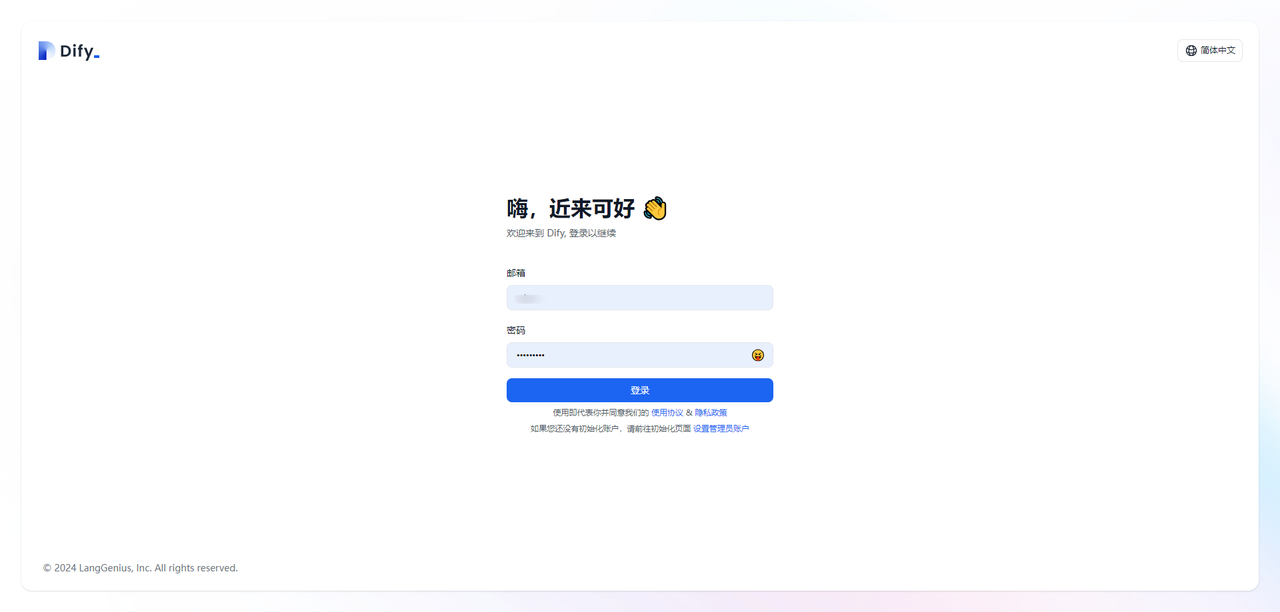
訪問 http://127.0.0.1:3000 即可使用本地部署的 Dify。設置管理員密碼:

根據郵箱和密碼登錄Dify平臺:
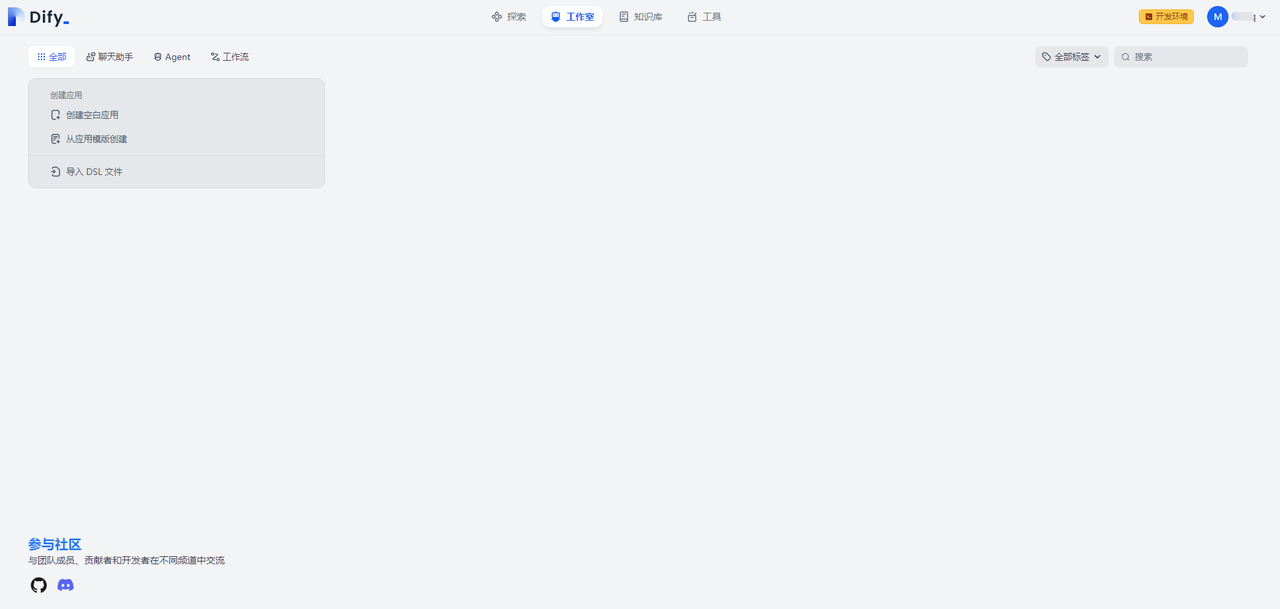
然后可看到探索、工作室、知識庫、工具界面:
四.Dify數據表
1.Dify技術棧
Dify平臺用到技術棧主要是Celery、Docker、Flask、Nginx、Postgresql、Python、React Flow、React、Redis、Weaviate等。分析源碼系統比較核心的還是搞懂數據表結構和業務操作流程,相對來說前后端數據庫框架還是比較固定和成熟的。
2.Dify表結構
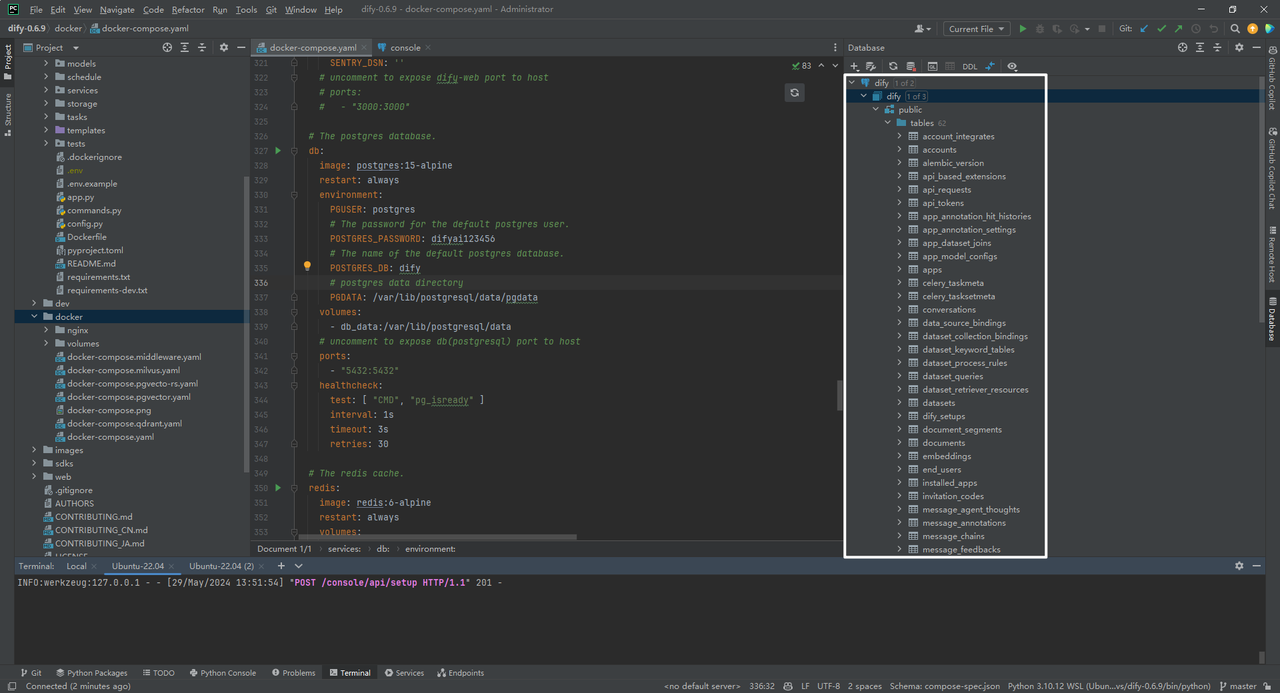
SELECT table_name
FROM information_schema.tables
WHERE table_schema = 'public';
已經生成包含兩列(表名字和解釋)的詳細表格,如下所示:
| 表名字 | 解釋 |
|---|---|
| alembic_version | Alembic 版本控制表 |
| account_integrates | 賬號整合信息表 |
| api_requests | API 請求記錄表 |
| app_dataset_joins | 應用數據集關聯表 |
| celery_taskmeta | Celery 任務元數據表 |
| celery_tasksetmeta | Celery 任務集合元數據表 |
| dataset_process_rules | 數據集處理規則表 |
| dataset_queries | 數據集查詢記錄表 |
| dify_setups | Dify 設置表 |
| end_users | 終端用戶表 |
| installed_apps | 已安裝應用表 |
| invitation_codes | 邀請碼表 |
| message_chains | 消息鏈表 |
| message_feedbacks | 消息反饋表 |
| operation_logs | 操作日志表 |
| pinned_conversations | 置頂會話表 |
| saved_messages | 保存的消息表 |
| accounts | 賬戶信息表 |
| data_source_bindings | 數據源綁定表 |
| tool_providers | 工具提供商表 |
| document_segments | 文檔分段表 |
| provider_models | 提供商模型表 |
| tenant_default_models | 租戶默認模型表 |
| tenant_preferred_model_providers | 租戶首選模型提供商表 |
| providers | 提供商表 |
| provider_orders | 提供商訂單表 |
| documents | 文檔表 |
| dataset_retriever_resources | 數據集檢索資源表 |
| api_tokens | API 令牌表 |
| api_based_extensions | 基于 API 的擴展表 |
| upload_files | 上傳文件表 |
| datasets | 數據集表 |
| dataset_collection_bindings | 數據集集合綁定表 |
| message_annotations | 消息注釋表 |
| app_annotation_hit_histories | 應用注釋命中歷史表 |
| app_annotation_settings | 應用注釋設置表 |
| tenants | 租戶表 |
| tool_builtin_providers | 工具內置提供商表 |
| tool_published_apps | 工具發布應用表 |
| tool_model_invokes | 工具模型調用表 |
| tool_conversation_variables | 工具對話變量表 |
| tool_files | 工具文件表 |
| message_files | 消息文件表 |
| app_model_configs | 應用模型配置表 |
| tenant_account_joins | 租戶賬戶關聯表 |
| dataset_keyword_tables | 數據集關鍵字表 |
| embeddings | 嵌入表 |
| workflow_app_logs | 工作流應用日志表 |
| workflow_node_executions | 工作流節點執行表 |
| workflow_runs | 工作流運行表 |
| workflows | 工作流表 |
| apps | 應用表 |
| conversations | 會話表 |
| messages | 消息表 |
| message_agent_thoughts | 消息代理想法表 |
| tag_bindings | 標簽綁定表 |
| tags | 標簽表 |
| recommended_apps | 推薦應用表 |
| sites | 站點表 |
| tool_api_providers | 工具 API 提供商表 |
| tool_label_bindings | 工具標簽綁定表 |
| tool_workflow_providers | 工具工作流提供商表 |
3.Postgres數據庫
(1)information_schema
information_schema 是一個符合 SQL 標準的模式,它包含了視圖,這些視圖提供關于數據庫元數據的信息,如表、列、視圖和約束等。它提供了數據庫的自描述能力,使得應用程序可以查詢這些視圖來發現數據庫結構和約束。
(2)pg_catalog
pg_catalog 是 PostgreSQL 的系統模式,包含了系統表和視圖,這些系統表和視圖存儲了關于數據庫系統對象和元數據的信息。這些對象包括表、列、索引、函數和數據類型等。pg_catalog 是 PostgreSQL 特有的,提供了對數據庫對象的低級訪問。
(3)public
public 是 PostgreSQL 中的默認模式,所有新創建的數據庫對象如果沒有指定模式名,就會被放置在public模式中。用戶通常在public模式中創建他們的表、視圖、序列和函數等。
最后就可以愉快的打斷點調試源代碼了。
參考文獻
[1] 本地源碼啟動:https://docs.dify.ai/v/zh-hans/getting-started/install-self-hosted/local-source-code
[2] 本地部署相關:https://docs.dify.ai/v/zh-hans/learn-more/faq/install-faq
[3] 文本轉語音遇到這個錯誤怎么辦:https://docs.dify.ai/v/zh-hans/learn-more/faq/install-faq#id-15.-wen-ben-zhuan-yu-yin-yu-dao-zhe-ge-cuo-wu-zen-mo-ban


如何在 MyBatis 中使用 XML 和注解混合配置方式)
)
)

)
- 模型微調之自定義訓練循環)


基礎介紹)


![[AI 大模型] OpenAI ChatGPT](http://pic.xiahunao.cn/[AI 大模型] OpenAI ChatGPT)
)
