導讀
????本文主要介紹如何使用YOLOv10在自定義數據集訓練實現車牌檢測 (數據集+訓練+預測 保姆級教程)。??
YOLOv10簡介
? ? YOLOv10是清華大學研究人員在Ultralytics Python包的基礎上,引入了一種新的實時目標檢測方法,解決了YOLO以前版本在后處理和模型架構方面的不足。通過消除非最大抑制(NMS)和優化各種模型組件,YOLOv10在降低計算像素數的同時實現了相當的性能。大量實驗證明,YOLOv10在多個模型上實現了卓越的精度-延遲權衡。
概述
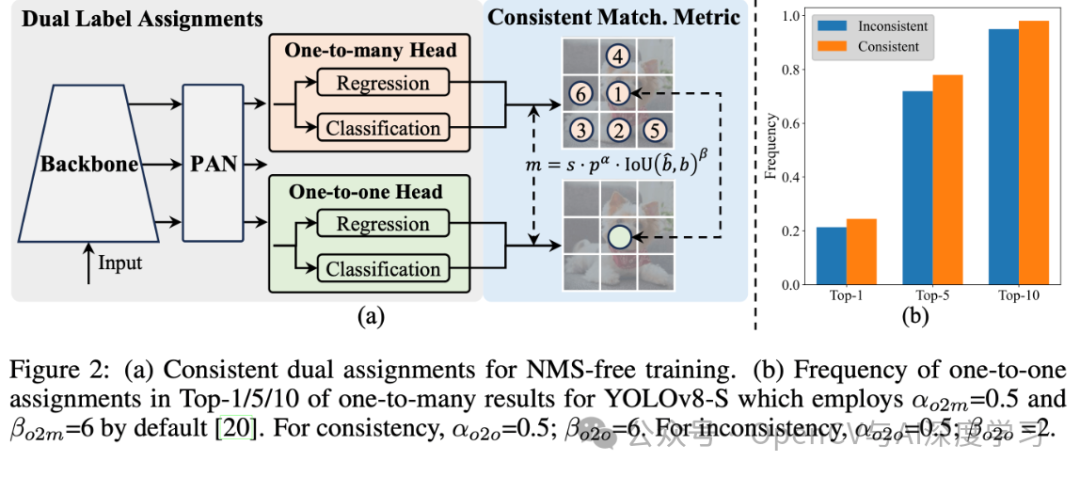
????實時目標檢測旨在優先延遲準確的預測圖像中的物體類別和位置。YOLO 系列在性能和效率之間取得了平衡,因此一直處于較低水平。然而,對 NMS 的依賴和架構的低效阻礙了性能的實現。YOLOv10 通過為無 NMS 訓練引入了一致的雙重分配并以提高準確性為導向的核心模型設計策略,解決了答案。
網絡架構
??? YOLOv10 的結構建立在以前YOLO模型的基礎上,同時引入了幾項關鍵創新。模型架構由以下部分組成:
-
-
主干網:?YOLOv10中的主干網負責特征提取,它使用了增強版的CSPNet(跨階段部分網絡),以改善梯度流并減少計算能力。
-
頸部:頸部設計用于匯聚不同的尺度成果,并將其傳遞到頭部。它包括PAN(路徑聚合網絡)層,可實現有效的多尺度特征融合。
-
一對多頭:在訓練過程中為每個對象生成多個預測,以提供豐富的監督信號并提高學習準確性。
-
一頭:在推理過程中選擇一個對象,無需NMS,從而減少并提高結果質量。
-
主要功能
-
-
無NMS 模式:利用一致的配置來消除對NMS 的需求,從而減少錯誤判斷。
-
整體模型設計:從業人員績效評估和績效評價模塊,包括輕量級數據分析、通道去耦和質量引導設計。
-
增強的模型功能:應對大數據和部分自覺模塊,在不增加大量計算成本的情況下提高性能。
-
模型支持:
YOLOv10有多種模型,可滿足不同的應用需求:
-
-
YOLOv10-N:用于資源極其有限的環境的納米版本。
-
YOLOv10-S:兼顧速度和精度的小型版本。
-
YOLOv10-M:通用中型版本。
-
YOLOv10-B:平衡型,寬度增加,精度更高。
-
YOLOv10-L:大型版本,精度更高,但計算資源增加。
-
YOLOv10-X:超大型版本可實現高精度和性能。
-
特性
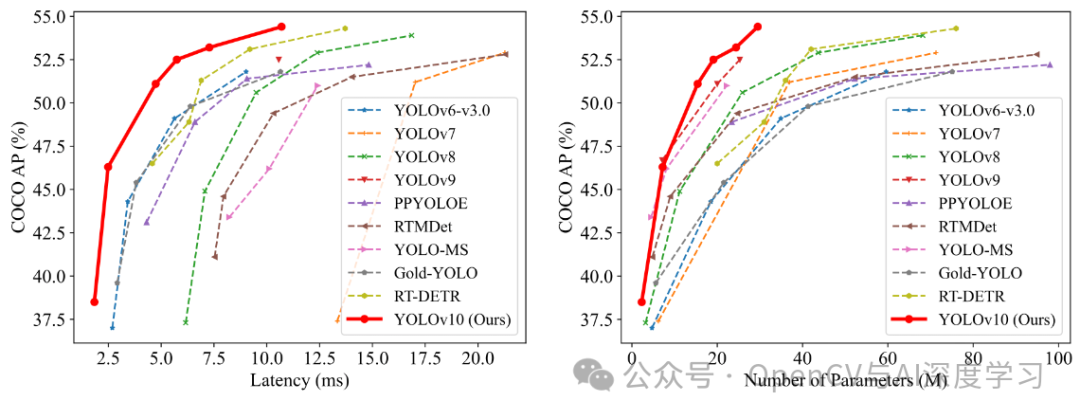
????在準確性和效率方面,YOLOv10 優于YOLO 以前的版本和其他模型。例如,在 COCO 數據集上,YOLOv10-S 的速度是 RT-DETR-R18 的 1.8 倍,而 YOLOv10-B 與 YOLOv9-C 相比,在性能相同的條件下,延遲瀏覽器打開 46%,參數瀏覽器打開 25%。下圖是使用 TensorRT FP16 在 T4 GPU 上的測試結果:

實驗和結果
??? YOLOv10 在 COCO 等標準基準上進行了廣泛測試,證明了卓越的性能和準確性。與先前的版本和其他當代版本相比,YOLOv10 在延遲和準確性方面都有顯著提高。
? ? ??
YOLOv10自定義數據集訓練
? ??【1】準備數據集。數據集標注使用LabelImg,具體使用和標注可參考下面文章:
實戰 | YOLOv8自定義數據集訓練實現手勢識別 (標注+訓練+預測 保姆級教程)
????這里直接給出數據集,大家可以自行下載:
https://github.com/AarohiSingla/YOLOv10-Custom-Object-Detection/tree/main/custom_dataset/dataset????數據集包含300張圖片樣本,訓練集210張,驗證集60張,測試集30張。

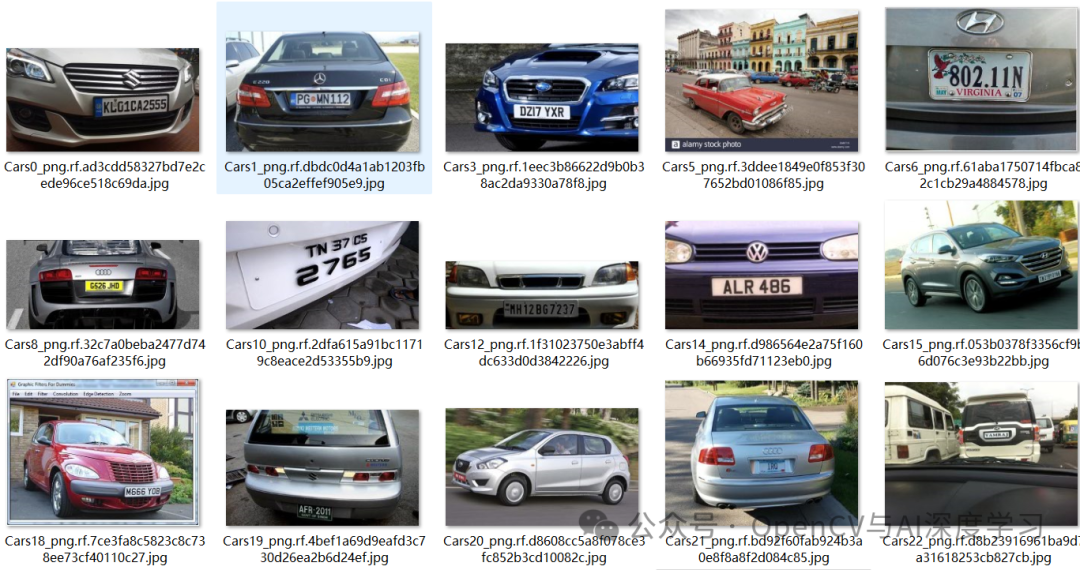
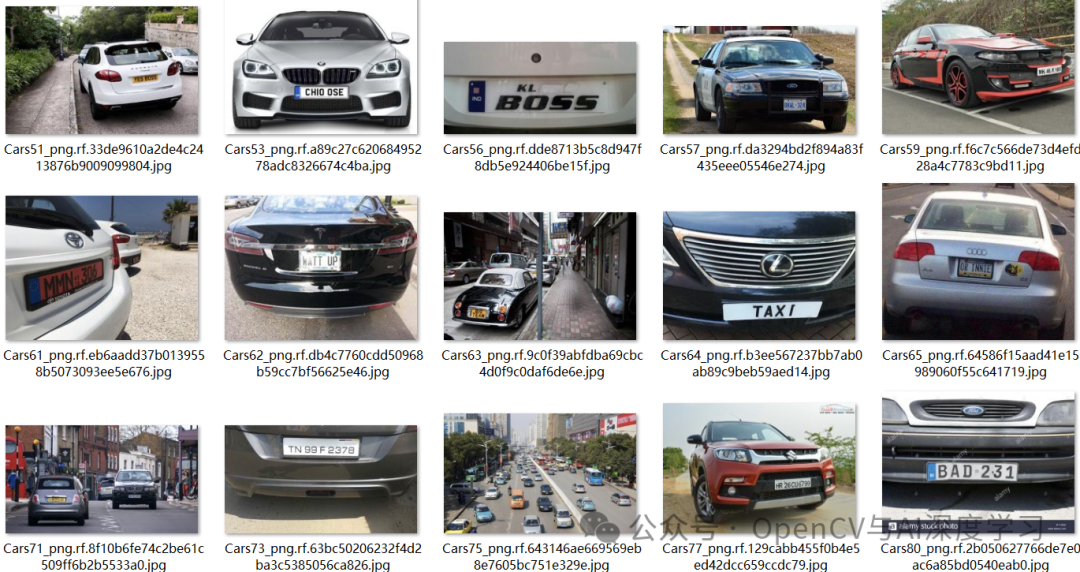

????類別只有1類,所以序號都為0。
? ??【2】配置訓練環境。
????①?下載yoloV10項目:
git clone https://github.com/THU-MIG/yolov10.git????②?解壓后切換到yoloV10目錄下,安裝依賴項:
cd yolov10pip install .
????③?下載預訓練模型:

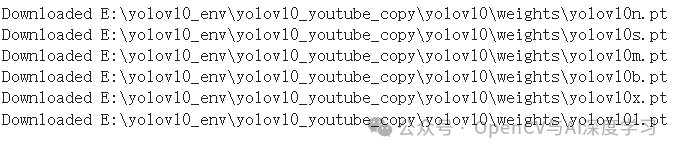
import osimport urllib.request# Create a directory for the weights in the current working directoryweights_dir = os.path.join(os.getcwd(), "weights")os.makedirs(weights_dir, exist_ok=True)# URLs of the weight filesurls = ["https://github.com/jameslahm/yolov10/releases/download/v1.0/yolov10n.pt","https://github.com/jameslahm/yolov10/releases/download/v1.0/yolov10s.pt","https://github.com/jameslahm/yolov10/releases/download/v1.0/yolov10m.pt","https://github.com/jameslahm/yolov10/releases/download/v1.0/yolov10b.pt","https://github.com/jameslahm/yolov10/releases/download/v1.0/yolov10x.pt","https://github.com/jameslahm/yolov10/releases/download/v1.0/yolov10l.pt"]# Download each filefor url in urls:file_name = os.path.join(weights_dir, os.path.basename(url))urllib.request.urlretrieve(url, file_name)print(f"Downloaded {file_name}")
????【3】模型訓練:
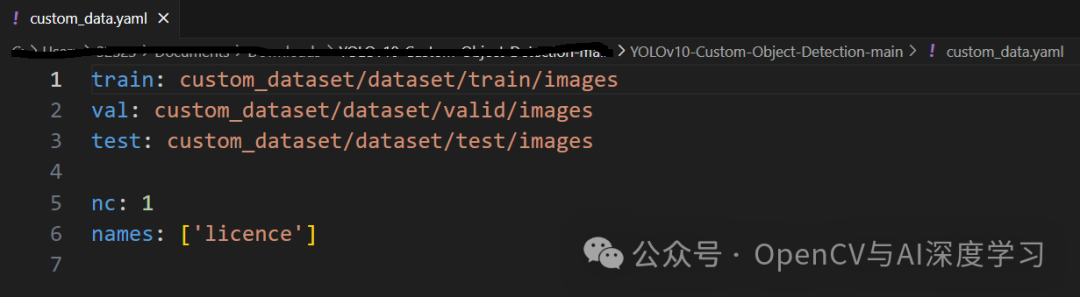
yolo task=detect mode=train epochs=100 batch=16 plots=True model=weights/yolov10n.pt data=custom_data.yaml??? custom_data.yaml配置如下:
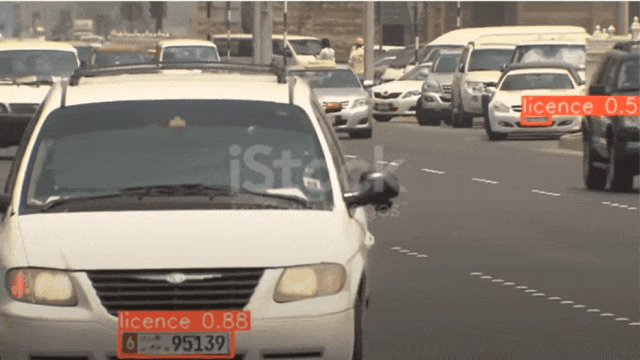
????【4】?模型推理:
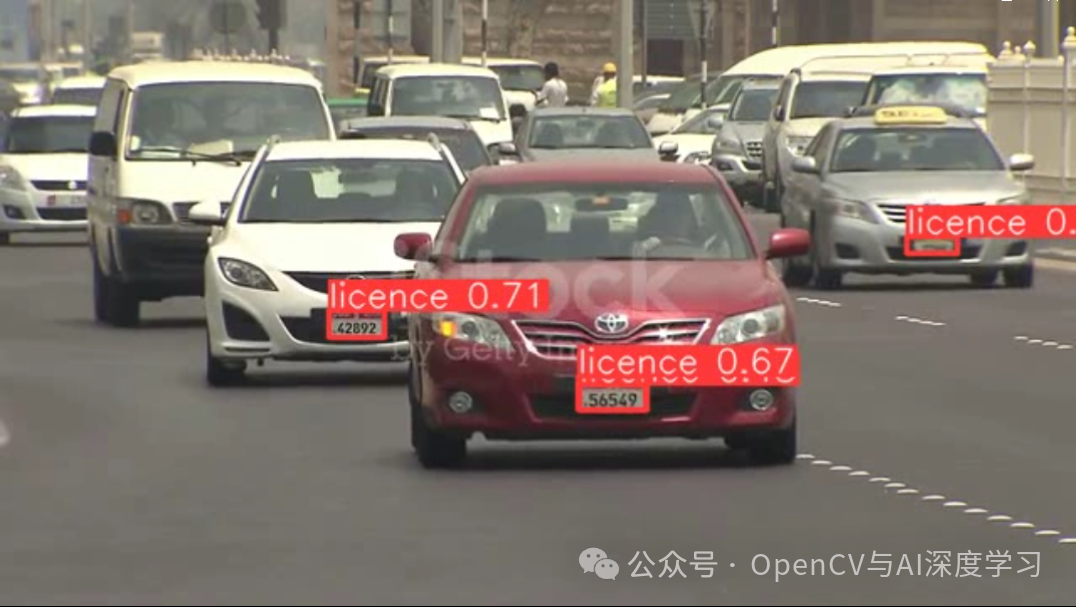
????圖片推理:
yolo task=detect mode=predict conf=0.25 save=True model=runs/detect/train/weights/best.pt source=test_images_1/veh2.jpg???????
from ultralytics import YOLOv10import supervision as svimport cv2classes = {0: 'licence'}model = YOLOv10('runs/detect/train/weights/best.pt')image = cv2.imread('test_images_1/veh2.jpg')results = model(source=image, conf=0.25, verbose=False)[0]detections = sv.Detections.from_ultralytics(results)box_annotator = sv.BoxAnnotator()labels = [f"{classes[class_id]} {confidence:.2f}"for class_id, confidence in zip(detections.class_id, detections.confidence)]annotated_image = box_annotator.annotate(image.copy(), detections=detections, labels=labels)cv2.imshow('result', annotated_image)cv2.waitKey()cv2.destroyAllWindows()
? ? 視頻推理:
yolo task=detect mode=predict conf=0.25 save=True model=runs/detect/train/weights/best.pt source=b.mp4from ultralytics import YOLOv10import supervision as svimport cv2classes = {0: 'licence'}model = YOLOv10('runs/detect/train/weights/best.pt')def predict_and_detect(image):results = model(source=image, conf=0.25, verbose=False)[0]detections = sv.Detections.from_ultralytics(results)box_annotator = sv.BoxAnnotator()labels = [f"{classes[class_id]} {confidence:.2f}"for class_id, confidence in zip(detections.class_id, detections.confidence)]annotated_image = box_annotator.annotate(image.copy(), detections=detections, labels=labels)return annotated_imagedef create_video_writer(video_cap, output_filename):# grab the width, height, and fps of the frames in the video stream.frame_width = int(video_cap.get(cv2.CAP_PROP_FRAME_WIDTH))frame_height = int(video_cap.get(cv2.CAP_PROP_FRAME_HEIGHT))fps = int(video_cap.get(cv2.CAP_PROP_FPS))# initialize the FourCC and a video writer objectfourcc = cv2.VideoWriter_fourcc(*'MP4V')writer = cv2.VideoWriter(output_filename, fourcc, fps,(frame_width, frame_height))return writervideo_path = 'b.mp4'cap = cv2.VideoCapture(video_path)output_filename = "out.mp4"writer = create_video_writer(cap, output_filename)while True:success, img = cap.read()if not success:breakframe = predict_and_detect(img)writer.write(frame)cv2.imshow("frame", frame)if cv2.waitKey(1)&0xFF ==27: #按下Esc鍵退出breakcap.release()writer.release()
—THE END—


部署YOLOv5-YOLOv7步驟詳解)


)


模型基礎筆記0.1.096)

:命令行參數解析器ArgumentParser)
