詳細實現操作步驟
具體實現內容:我們運用 Spring6 和 MyBatis 實現一個轉賬操作(該轉賬操作,進行一個事務上的控制,運用 MyBatis 執行 SQL 語句)。
-
第一步:準備數據庫表
-
使用t_act表(賬戶表)
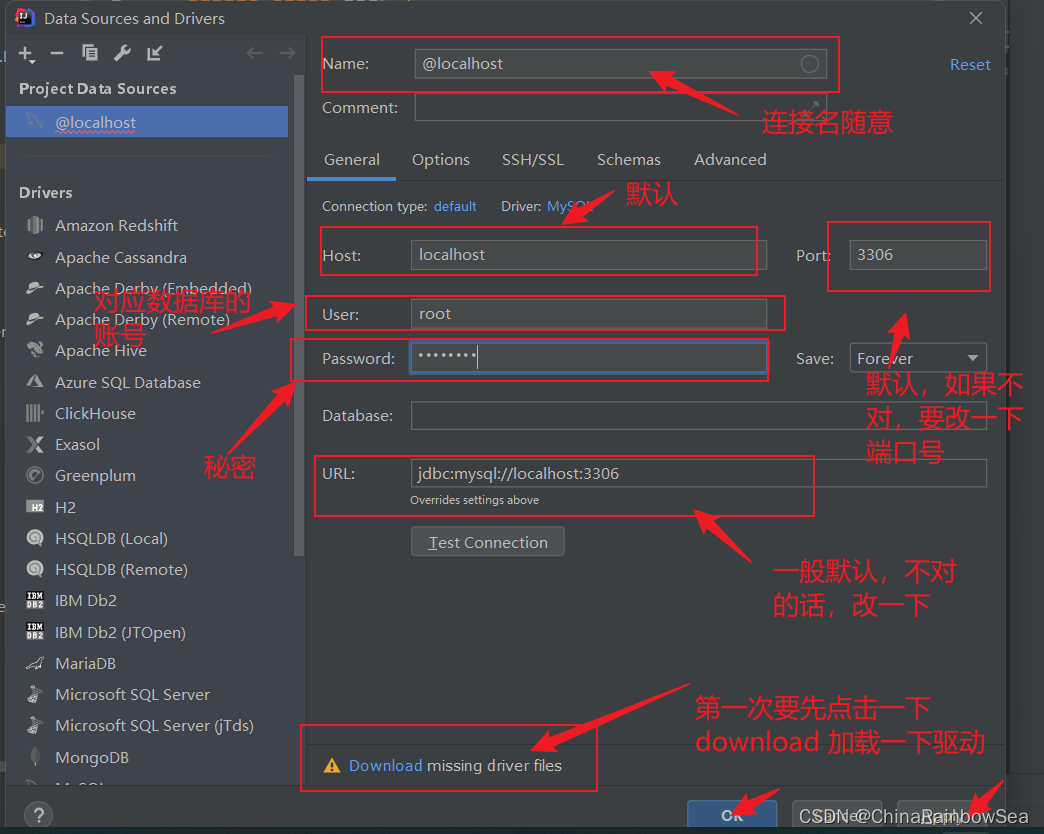
連接數據庫的工具有很多,這里我們可以使用IDEA工具自帶的 DataBase 插件。可以根據下圖提示自行配置:
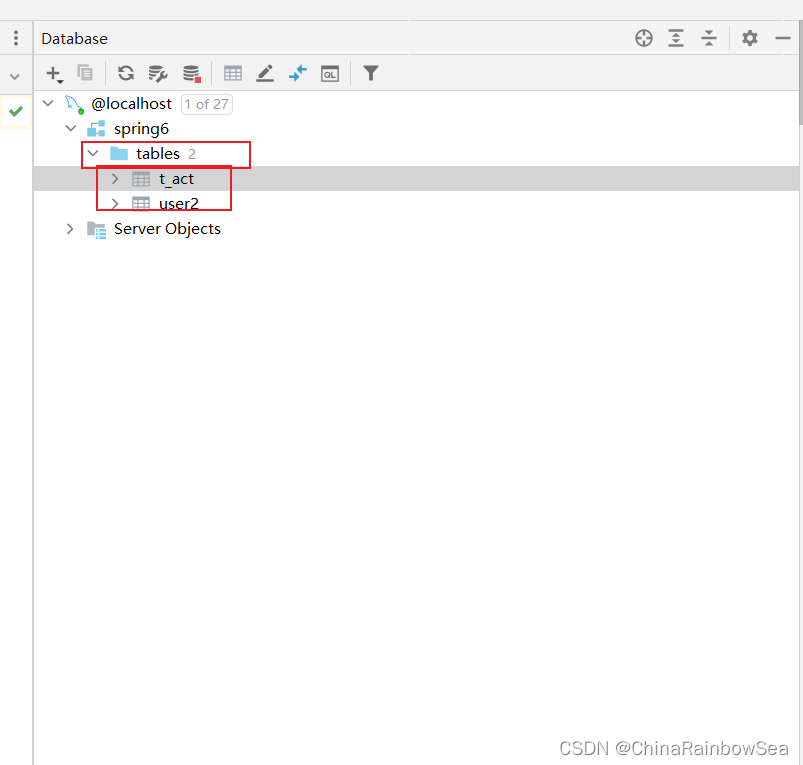
一般是在 IDEA 的左邊,DataBase


如下是 t_act 的表結構

如下是 t_act 的表數據內容:

-
第二步:IDEA中創建一個模塊,并引入依賴
-
spring-context
spring-jdbc
mysql驅動
mybatis
mybatis-spring:mybatis提供的與spring框架集成的依賴
德魯伊連接池
junit
我們先在pom.xml?配置文件當中導入相關的?jar?包信息:

<?xml version="1.0" encoding="UTF-8"?>
<project xmlns="http://maven.apache.org/POM/4.0.0"xmlns:xsi="http://www.w3.org/2001/XMLSchema-instance"xsi:schemaLocation="http://maven.apache.org/POM/4.0.0 http://maven.apache.org/xsd/maven-4.0.0.xsd"><modelVersion>4.0.0</modelVersion><groupId>com.rainbowsea</groupId><artifactId>spring6-016-mybaits</artifactId><version>1.0-SNAPSHOT</version><packaging>jar</packaging><properties><maven.compiler.source>17</maven.compiler.source><maven.compiler.target>17</maven.compiler.target></properties><!--倉庫--><repositories><!--spring里程碑版本的倉庫--><repository><id>repository.spring.milestone</id><name>Spring Milestone Repository</name><url>https://repo.spring.io/milestone</url></repository></repositories><dependencies><dependency><groupId>org.springframework</groupId><artifactId>spring-context</artifactId><version>6.0.0-M2</version></dependency><dependency><groupId>org.springframework</groupId><artifactId>spring-jdbc</artifactId><version>6.0.0-M2</version></dependency><dependency><groupId>mysql</groupId><artifactId>mysql-connector-java</artifactId><version>8.0.30</version></dependency><dependency><groupId>org.mybatis</groupId><artifactId>mybatis</artifactId><version>3.5.11</version></dependency><dependency><groupId>org.mybatis</groupId><artifactId>mybatis-spring</artifactId><version>2.0.7</version></dependency><dependency><groupId>com.alibaba</groupId><artifactId>druid</artifactId><version>1.2.13</version></dependency><dependency><groupId>junit</groupId><artifactId>junit</artifactId><version>4.13.2</version><scope>test</scope></dependency></dependencies></project>-
第三步:基于三層架構實現,所以提前創建好所有的包
-
com.powernode.bank.mapper
com.powernode.bank.service
com.powernode.bank.service.impl
com.powernode.bank.pojo


-
第四步:編寫pojo
-
Account,屬性私有化,提供公開的setter getter和toString。

-
第五步:編寫mapper接口
-
AccountMapper接口,定義方法

package com.rainbowsea.bank.mapper;import com.rainbowsea.bank.pojo.Account;import java.util.List;// 該接口的實現類不需要寫,是mybatis通過動態代理機制生成的實現類
public interface AccountMapper {// 這就是DAO,只要編寫CRUD方法即可/*** 新增賬戶* @param account* @return*/int insert(Account account);/*** 根據賬戶刪除賬戶* @param actno* @return*/int deleteByActno(String actno);/*** 根據賬戶更新* @param account* @return*/int update(Account account);/*** 根據賬戶查詢賬戶* @param actno* @return*/Account selectByActno(String actno);/*** 查詢所有的賬戶* @return*/List<Account> selectAll();}-
第六步:編寫mapper配置文件
-
在配置文件中配置命名空間,以及每一個方法對應的sql。
一定要注意,按照下圖提示創建這個目錄。注意是 斜杠(因為是創建目錄) 不是點兒。在resources目錄下新建。并且要和Mapper接口包對應上。因為只有這樣,MyBatis 才會進行動態代理這個接口。
同時:如果接口叫做AccountMapper,配置文件必須是 AccountMapper.xml,名稱要保持一致。
總結兩點:就是路徑位置要保持一致,對應的名稱也要保持一致。后綴名不同。


同時在?AccountMapper.xml?當中編寫 SQL 語句內容。

<?xml version="1.0" encoding="UTF-8" ?>
<!DOCTYPE mapperPUBLIC "-//mybatis.org//DTD Mapper 3.0//EN""http://mybatis.org/dtd/mybatis-3-mapper.dtd">
<mapper namespace="com.rainbowsea.bank.mapper.AccountMapper"><insert id="insert">insert into t_act(actno,balance) values(#{actno}, #{balance})</insert><delete id="deleteByActno">delete from t_act where actno = #{actno}</delete><update id="update">update t_act set balance = #{balance} where actno = #{actno}</update><select id="selectByActno" resultType="Account">select * from t_act where actno = #{actno}</select><select id="selectAll" resultType="Account">select * from t_act</select>
</mapper>-
第七步:編寫service接口和service接口實現類
-
AccountService
AccountServiceImpl
編寫 AccountService 業務接口,定義約束,規范,進行一個業務上的轉賬操作。

package com.rainbowsea.bank.service;import com.rainbowsea.bank.pojo.Account;
import org.springframework.transaction.annotation.Transactional;import java.util.List;public interface AccountService {/*** 開戶* @param account* @return*/int save(Account account);/*** 根據賬號銷戶* @param actno* @return*/int deleteByActno(String actno);/*** 修改賬戶* @param act* @return*/int update(Account act);/*** 根據賬號獲取賬戶* @param actno* @return*/Account getByActno(String actno);/*** 獲取所有賬戶* @return*/List<Account> getAll();/*** 轉賬* @param fromActno* @param toActno* @param money*/void transfer(String fromActno, String toActno, double money);
}
注意:要將編寫的service實現類納入IoC容器管理,同時注意需要開啟事務@Transactional


package com.rainbowsea.bank.service.impl;import com.rainbowsea.bank.mapper.AccountMapper;
import com.rainbowsea.bank.pojo.Account;
import com.rainbowsea.bank.service.AccountService;
import org.springframework.beans.factory.annotation.Autowired;
import org.springframework.stereotype.Service;
import org.springframework.transaction.annotation.Transactional;import java.util.List;@Service(value = "accountServiceImpl")
@Transactional  // 放在類中,下面的類中的所有方法都開啟了事務
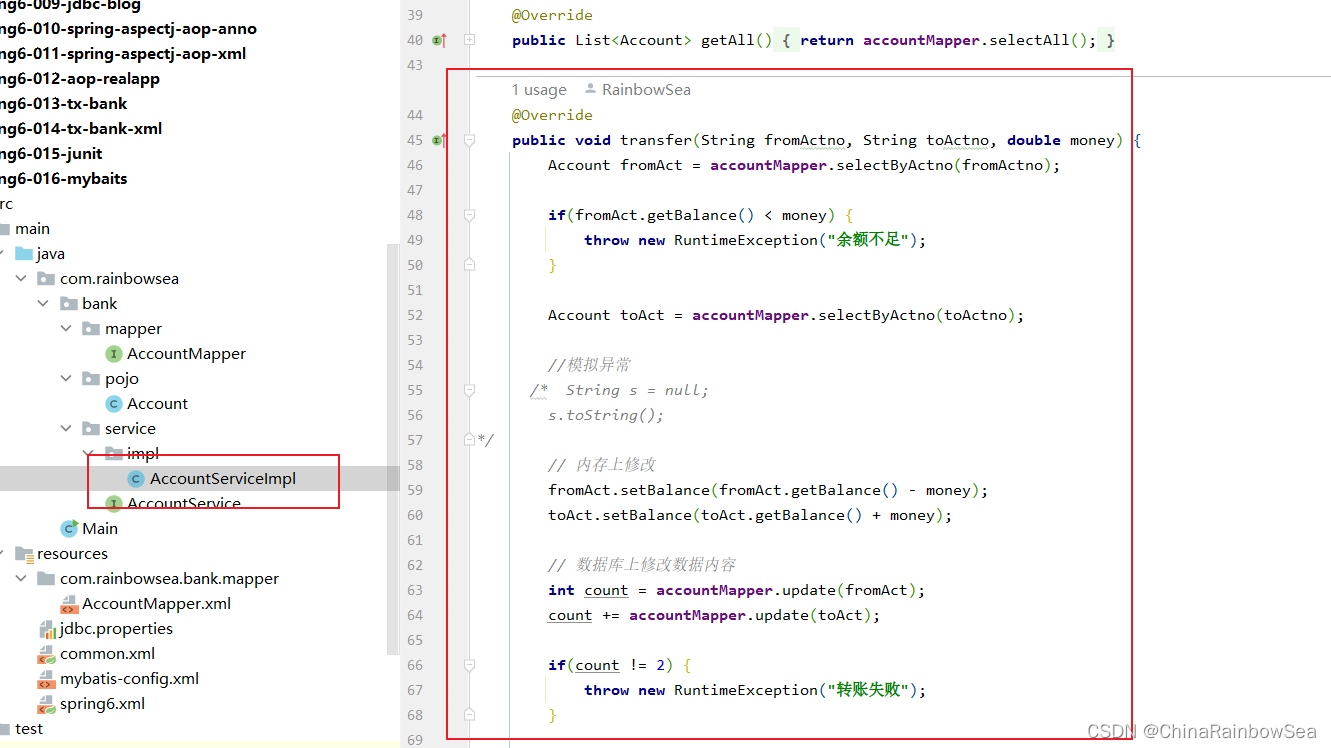
public class AccountServiceImpl implements AccountService {// Could not find bean with name 'org.mybatis.spring.SqlSessionFactoryBean#0@Autowired // 非簡單類型自動裝配private AccountMapper accountMapper;@Overridepublic int save(Account account) {return accountMapper.insert(account);}@Overridepublic int deleteByActno(String actno) {return accountMapper.deleteByActno(actno);}@Overridepublic int update(Account act) {return accountMapper.update(act);}@Overridepublic Account getByActno(String actno) {return accountMapper.selectByActno(actno);}@Overridepublic List<Account> getAll() {return accountMapper.selectAll();}@Overridepublic void transfer(String fromActno, String toActno, double money) {Account fromAct = accountMapper.selectByActno(fromActno);if(fromAct.getBalance() < money) {throw new RuntimeException("余額不足");}Account toAct = accountMapper.selectByActno(toActno);//模擬異常/*  String s = null;s.toString();
*/// 內存上修改fromAct.setBalance(fromAct.getBalance() - money);toAct.setBalance(toAct.getBalance() + money);// 數據庫上修改數據內容int count = accountMapper.update(fromAct);count += accountMapper.update(toAct);if(count != 2) {throw new RuntimeException("轉賬失敗");}}
}-
第八步:在 resources 的根路徑下,編寫jdbc.properties配置文件
-
數據庫連接池相關信息,賬號,密碼,同時注意要加上?
jdbc, 同時注意不要加任何的空格,同時是 放在類的根路徑(resources )下

jdbc.driver=com.mysql.cj.jdbc.Driver
jdbc.url=jdbc:mysql://localhost:3306/spring6
jdbc.username=root
jdbc.password=MySQL123-
第九步:編寫mybatis-config.xml配置文件
-
該文件可以沒有,大部分的配置可以轉移到spring配置文件中。
如果遇到mybatis相關的系統級配置,還是需要這個文件。
放在類的根路徑(resources )下,只開啟日志,其他配置到spring.xml中。

<?xml version="1.0" encoding="UTF-8" ?>
<!DOCTYPE configurationPUBLIC "-//mybatis.org//DTD Config 3.0//EN""http://mybatis.org/dtd/mybatis-3-config.dtd">
<configuration>
<!-- 幫助我們打印mybatis的日志信息。sql語句等--><settings><setting name="logImpl" value="STDOUT_LOGGING"/></settings></configuration>-
第十步:編寫spring.xml配置文件
-
組件掃描
引入外部的屬性文件
數據源
SqlSessionFactoryBean配置
注入mybatis核心配置文件路徑
指定別名包
注入數據源
Mapper掃描配置器
指定掃描的包
事務管理器DataSourceTransactionManager
注入數據源
啟用事務注解
注入事務管理器
-
同樣,我們還是將其防止到 類的根路徑下(resources )
注意:當你在spring.xml文件中直接寫標簽內容時,IDEA會自動給你添加命名空間

<?xml version="1.0" encoding="UTF-8"?>
<beans xmlns="http://www.springframework.org/schema/beans"xmlns:xsi="http://www.w3.org/2001/XMLSchema-instance"xmlns:context="http://www.springframework.org/schema/context"xmlns:tx="http://www.springframework.org/schema/tx"xsi:schemaLocation="http://www.springframework.org/schema/beanshttp://www.springframework.org/schema/beans/spring-beans.xsdhttp://www.springframework.org/schema/contexthttps://www.springframework.org/schema/context/spring-context.xsdhttp://www.springframework.org/schema/txhttp://www.springframework.org/schema/tx/spring-tx.xsd"><!--    組件掃描,--><context:component-scan base-package="com.rainbowsea.bank"></context:component-scan><!--    引入外部的屬性配置文件--><context:property-placeholder location="jdbc.properties"></context:property-placeholder><!--    數據源--><bean id="dataSource" class="com.alibaba.druid.pool.DruidDataSource"><property name="driverClassName" value="${jdbc.driver}"></property><property name="url" value="${jdbc.url}"></property><property name="username" value="${jdbc.username}"></property><property name="password" value="${jdbc.password}"></property></bean><!--    配置SqlSessionFactoryBean  "org.mybatis.spring.SqlSessionFactoryBean"--><bean class="org.mybatis.spring.SqlSessionFactoryBean"><!--        注入數據源--><property name="dataSource" ref="dataSource"></property><!--        指定mybatis 核心配置文件--><property name="configLocation" value="mybatis-config.xml"></property><!--        指定別名--><property name="typeAliasesPackage" value="com.rainbowsea.bank.pojo"></property></bean><!--    Mapper 掃描配置器,主要掃描Mapper 接口,生成代理類--><bean class="org.mybatis.spring.mapper.MapperScannerConfigurer"><property name="basePackage" value="com.rainbowsea.bank.mapper"></property></bean><!--    事務管理器--><bean id="txManger" class="org.springframework.jdbc.datasource.DataSourceTransactionManager"><!--        配置數據源--><property name="dataSource" ref="dataSource"></property></bean><!--    啟用事務注解,事務管理器--><tx:annotation-driven transaction-manager="txManger"></tx:annotation-driven>
</beans>-
第十一步:編寫測試程序,并添加事務,進行測試


package com.rainbowsea.spring6.test;import com.rainbowsea.bank.service.AccountService;
import org.junit.Test;
import org.springframework.context.ApplicationContext;
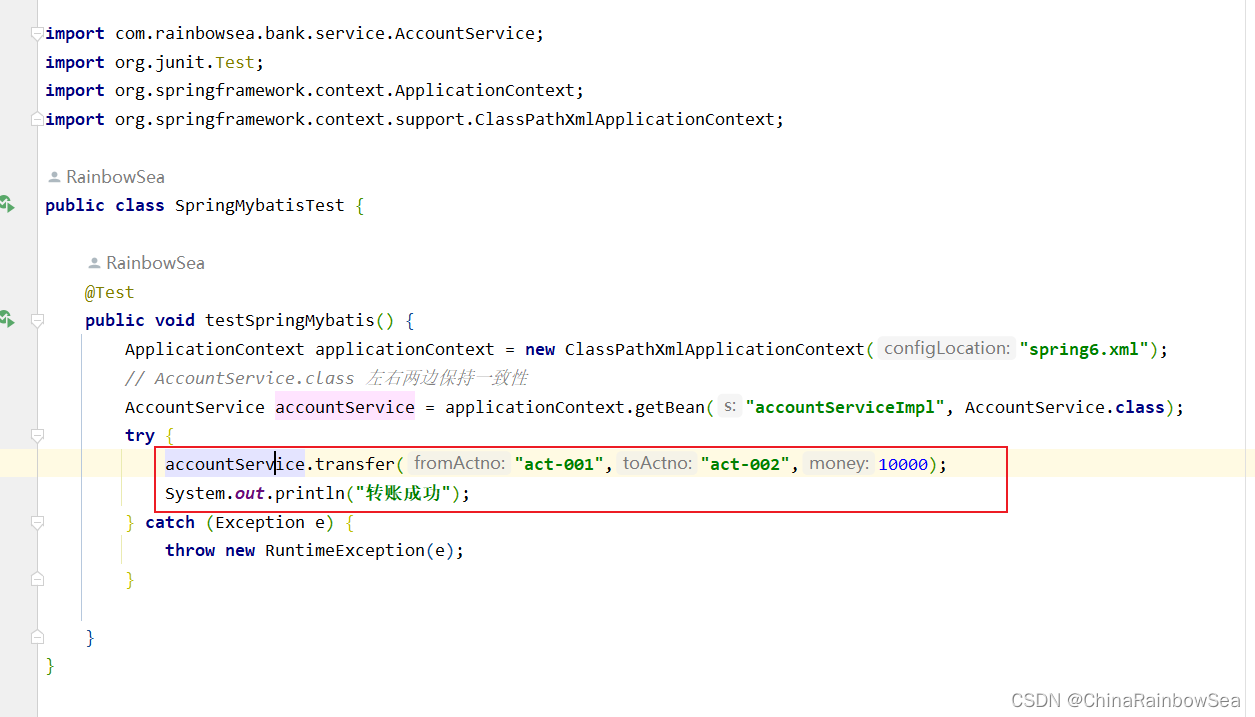
import org.springframework.context.support.ClassPathXmlApplicationContext;public class SpringMybatisTest {@Testpublic void testSpringMybatis() {ApplicationContext applicationContext = new ClassPathXmlApplicationContext("spring6.xml");// AccountService.class 左右兩邊保持一致性AccountService accountService = applicationContext.getBean("accountServiceImpl", AccountService.class);try {accountService.transfer("act-001","act-002",10000);System.out.println("轉賬成功");} catch (Exception e) {throw new RuntimeException(e);}}
}
沒有異常,看是否能轉賬成功

模擬異常,看是否,能夠進行正常的事務回滾

運行測試:


4. Spring配置文件的 import,導入外部xml 配置
如果 spring 配置文件有多個,可以在 spring 的核心配置文件中使用?import?進行引入,我們可以將組件掃描單獨定義到一個配置文件中,如下:我們將一個《組件掃描》,定義到一個單獨的名為common.xml的配置文件當中去,并導入,引入到 spring 的配置文件當中使用。如下:

使用<import>?標簽進行一個導入

<!-- 在Spring 的核心配置文件中引入其他的子 spring 配置文件--><import resource="common.xml"></import>把模擬異常去了,測試,是否能夠轉賬成功。如下:


注意:在實際開發中,service 單獨配置到一個文件中,dao單獨配置到一個文件中,然后在核心配置文件中引入,養成好習慣。
5. 總結:
Spring6 對集成MyBatis 開發:這里總的來說是十步,完成的。
一定要注意,按照下圖提示創建這個目錄。注意是 斜杠(因為是創建目錄) 不是點兒。在resources目錄下新建。并且要和Mapper接口包對應上。因為只有這樣,MyBatis 才會進行動態代理這個接口。
同時:如果接口叫做AccountMapper,配置文件必須是 AccountMapper.xml,名稱要保持一致。
總結兩點:就是路徑位置要保持一致,對應的名稱也要保持一致。后綴名不同。
Spring 當中使用
<import>?標簽導入外部xml 配置。
文章轉載自:Rainbow-Sea
原文鏈接:https://www.cnblogs.com/TheMagicalRainbowSea/p/18211700
體驗地址:引邁 - JNPF快速開發平臺_低代碼開發平臺_零代碼開發平臺_流程設計器_表單引擎_工作流引擎_軟件架構


:從搭建實驗環境到實戰演練的全面教程)


JNI方式 獲取)


:Linux 系統上 C 程序的編譯與調試)
)
-鎖和事務語句)
