ChatGLM3 (ChatGLM3-6B)
項目地址
https://github.com/THUDM/ChatGLM3
大模型是很吃CPU和顯卡的,所以,要不有一個好的CPU,要不有一塊好的顯卡,顯卡盡量13G+,內存基本要32GB+。
清華大模型分為三種(ChatGLM3-6B-Base,ChatGLM3-6B,ChatGLM3-6B-32K)
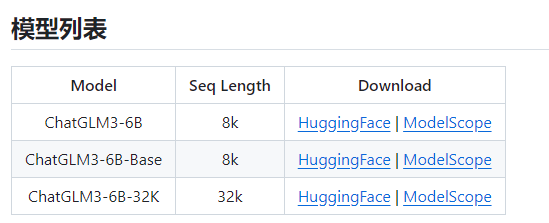
從上圖也可以看到,ChatGLM3-6B-32K的話是最高配的模型,而ChatGLM3-6B-Base是最低配的模型。
一般會選擇 ChatGLM3-6B普通模型來使用,當然,如果配置高,可以用32K的,會更好。
使用方式
環境安裝
首先需要下載本倉庫:
# 可以訪問github的話,直接git clone即可
git clone https://github.com/THUDM/ChatGLM3
# 如果不能訪問的話,利用代理加速, 使用下面命令即可
git clone https://www.gitclone.com/github.com/THUDM/ChatGLM3
cd ChatGLM3
我是安裝在Conda虛擬環境下, Conda的搭建安裝可以參考我的【Win安裝Conda及其環境配置(包含pip、conda換源)】
第一步,創建虛擬環境
請安裝 Anaconda,然后用下面的命令創建名為 chatglm3 的虛擬環境:
conda create --name chatglm3 python=3.10
conda activate chatglm3
第二步,然后使用 pip 安裝依賴:
pip install -r requirements.txt
# 國內建議使用指定國內鏡像進行安裝
pip install -r requirements.txt -i https://mirror.sjtu.edu.cn/pypi/web/simple
第三步,安裝 pytorch
為了保證 torch 的版本正確,請嚴格按照 官方文檔 的說明安裝。
查看本機顯卡驅動和cuda版本
nvcc --versionnvcc: NVIDIA (R) Cuda compiler driver
Copyright (c) 2005-2022 NVIDIA Corporation
Built on Wed_Sep_21_10:41:10_Pacific_Daylight_Time_2022
Cuda compilation tools, release 11.8, V11.8.89
Build cuda_11.8.r11.8/compiler.31833905_0nvidia-smiThu May 23 09:57:00 2024
+-----------------------------------------------------------------------------------------+
| NVIDIA-SMI 551.61                 Driver Version: 551.61         CUDA Version: 12.4     |
|-----------------------------------------+------------------------+----------------------+
| GPU  Name                     TCC/WDDM  | Bus-Id          Disp.A | Volatile Uncorr. ECC |
| Fan  Temp   Perf          Pwr:Usage/Cap |           Memory-Usage | GPU-Util  Compute M. |
|                                         |                        |               MIG M. |
|=========================================+========================+======================|
|   0  NVIDIA GeForce GTX 1070 Ti   WDDM  |   00000000:01:00.0  On |                  N/A |
|  0%   50C    P8              9W /  180W |     777MiB /   8192MiB |      6%      Default |
|                                         |                        |                  N/A |
+-----------------------------------------+------------------------+----------------------+
# 安裝對應pytorch版本命令
conda install pytorch==2.1.2 torchvision==0.16.2 torchaudio==2.1.2 pytorch-cuda=11.8 -c pytorch -c nvidia# 查找torch是否安裝成功
import torch
print(torch.__version__)
print(torch.cuda.is_available()) # True
print(torch.version.cuda)
第四步,下載模型
可以從Huggingface, Modelsope, SwanHub三個平臺下載模型。
使用 Huggingface 下載模型
git lfs install
git clone https://huggingface.co/THUDM/chatglm3-6b.git
使用 Modelscope 下載模型,沒工具的情況下,用Modelscope下載最快
git lfs install
git clone https://www.modelscope.cn/ZhipuAI/chatglm3-6b.git
使用 SwanHub 下載模型
git lfs install
git clone https://swanhub.co/ZhipuAI/chatglm3-6b.git
第五步,使用本地模型運行示例
5.1、基本對話示例
模型路徑: E:\AI\code\models\chatglm3-6b,修改basic_demo目錄中的cli_demo.py、web_demo_gradio.py、web_demo_streamlit.py模型路徑代碼。
# cli_demo.py、web_demo_gradio.py、web_demo_streamlit.py
MODEL_PATH = os.environ.get('MODEL_PATH', 'E:\\AI\\code\\models\\chatglm3-6b')
5.2、低成本部署
模型量化
默認情況下,模型以 FP16 精度加載,運行上述代碼需要大概 13GB 顯存。如果你的 GPU 顯存有限,可以嘗試以量化方式加載模型,使用方法如下:
model = AutoModel.from_pretrained("THUDM/chatglm3-6b", trust_remote_code=True).quantize(4).cuda()
模型量化會帶來一定的性能損失,經過測試,ChatGLM3-6B 在 4-bit 量化下仍然能夠進行自然流暢的生成。
CPU 部署
如果你沒有 GPU 硬件的話,也可以在 CPU 上進行推理,但是推理速度會更慢。使用方法如下(需要大概 32GB 內存)
model = AutoModel.from_pretrained("THUDM/chatglm3-6b", trust_remote_code=True).float()
Mac 部署
對于搭載了 Apple Silicon 或者 AMD GPU 的 Mac,可以使用 MPS 后端來在 GPU 上運行 ChatGLM3-6B。需要參考 Apple 的 官方說明 安裝 PyTorch-Nightly(正確的版本號應該是2.x.x.dev2023xxxx,而不是 2.x.x)。
目前在 MacOS 上只支持從本地加載模型。將代碼中的模型加載改為從本地加載,并使用 mps 后端:
model = AutoModel.from_pretrained("your local path", trust_remote_code=True).to('mps')
加載半精度的 ChatGLM3-6B 模型需要大概 13GB 內存。內存較小的機器(比如 16GB 內存的 MacBook Pro),在空余內存不足的情況下會使用硬盤上的虛擬內存,導致推理速度嚴重變慢。
5.3、命令行demo
python basic_demo/cli_demo.py


)


)


的使用)
