初學Vue之記事本案例
- 案例功能需求
- 相關Vue知識
- 案例實現
- 1.實現方法及代碼
- 2.演示
- 案例收獲與總結
案例功能需求
基于Vue實現記事功能(不通過原生JS實現)
1.點擊保存按鈕將文本框的內容顯示在特定位置,且清空文本框內容
2.點擊清空按鈕,將文本框內容清空,并把計數歸0
3.能夠對增添的每條信息進行刪除操作,并依次遞增有序排列
相關Vue知識
(一)選項式API的核心選項
1.data():定義組件的狀態即響應式數據
2.methods:定義組件內的方法
3.computed:計算屬性,返回數據
(二)指令
1.v-for:渲染列表指令,可以基于數組、對象重復生成元素
2.v-on:綁定事件監聽器指令,監聽點擊、鍵盤輸入等事件
3.v-model:雙向數據綁定
(三)文本插值
通過雙大括號將數據插入Html頁面中
案例實現
1.實現方法及代碼
(一)通過給文本框添加v-model=”msg“指令,進行數據的雙向綁定,msg就成為了文本框中輸入的內容。
保存功能:添加v-on指令,指定實現方法save。對msg進行判斷,若不為空則通過.push()將其添加在已經創建的數組后,進行頁面的渲染(基于v-for指令)
清空功能:依舊添加v-on指令,指定實現方法del。將msg的值設為空(由于msg空,因而計數值為0)
(二)刪除功能:通過findIndex()遍歷存儲信息的數組,找到要刪除信息的下標,通過splice()進行刪除
(三)計數實現:通過computed屬性,返回msg的長度
(四)信息的渲染:通過對li添加v-for指令,并將數組存儲的id作為key
(五)細節處理:1.對文本框添加修飾符@keyup.enter,指定實現方法,實現回車進行保存。2.在保存的判斷中,若為空,則彈出彈框顯示輸入為空
整合代碼:(html、css、js全為一個文件)
<template><div class="dd1"><h1>記事本</h1><div><div class="d2"><textarea name="" id="" v-model="msg" @keyup.enter="save" placeholder="記錄生活每一天"></textarea><label for="" class="lab_01">{{cou}}/200字</label></div><span><button @click="save">保存</button><label for="" @click="del">清空</label></span></div><div class="dd2"><ol ><li v-for="item in list" :key="item.id" >{{item.contextid}}<input type="submit" value="刪除" @click="del1(item.contextid)"></li></ol></div></div>
</template><script>console.log(new Date())export default {data() {return {msg:"",list:[{id:new Date() ,contextid:'VUE創始人'},{id:new Date(),contextid:'漸進式框架'}]}},methods:{del1(contextid){const l1=this.list.findIndex(item=>item.contextid === contextid)this.list.splice(l1,1)},save(){if(this.msg.trim()!==""){this.list.push({id:new Date(),contextid:this.msg})this.msg=""}else{alert('輸入為空')}},del(){this.msg=""}},computed:{cou(){return this.msg.length}}}
</script><style>*{margin: 0;padding: 0;}h1{text-align: center;}.dd1{border-radius: 30px;background-color: rgb(201, 196, 196);width: 350px;height: 505px;margin: 20px auto;}.dd2{border-radius: 20px;background-color: rgb(231, 173, 173,0.5);width: 90%;height: 275px;margin: 3px auto;overflow-x:hidden ;overflow-y: auto;padding-left: 30px;padding-top: 5px;}.d2{position: relative}textarea{resize: none;display: block;margin: 10px auto;width: 330px;height: 120px;font-size: 20px;outline: none;}button{margin: 0 40%;margin-right: 0;width: 50px;height: 30px;font-size: 17px;}label{margin-left: 5px;cursor: pointer;}label:hover{color: red;}ol{display: block;font-size: 17px;margin-left: 5px;}ol li{position: relative}input{opacity: 0;position: absolute;left: 87%;background-color: rgb(8, 126, 216,0.3);}ol li:hover input{opacity: 1;}.lab_01{font-size: 15px;position: absolute;left: 75.5%;top: 77%;}.lab_01:hover{color: black;cursor:auto}
</style>
2.演示
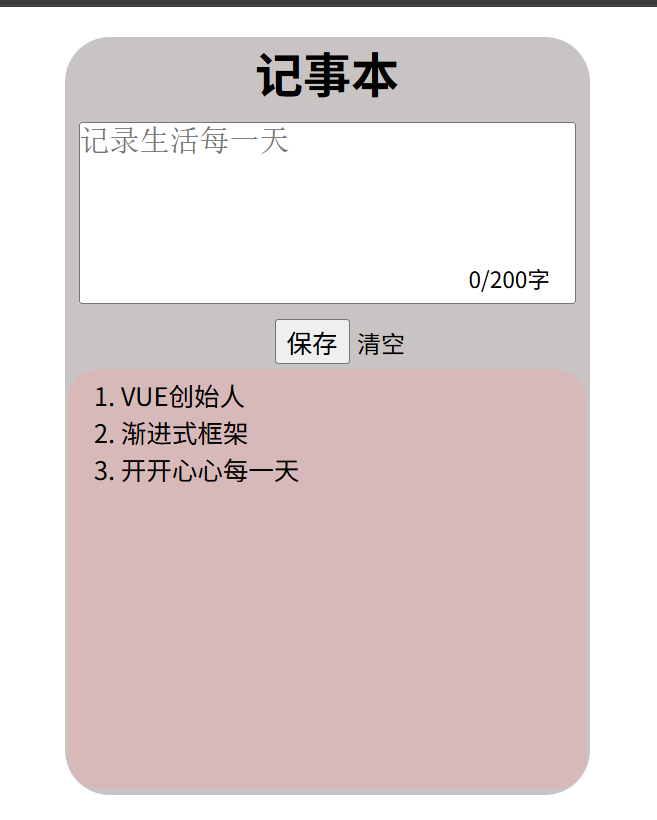
首頁
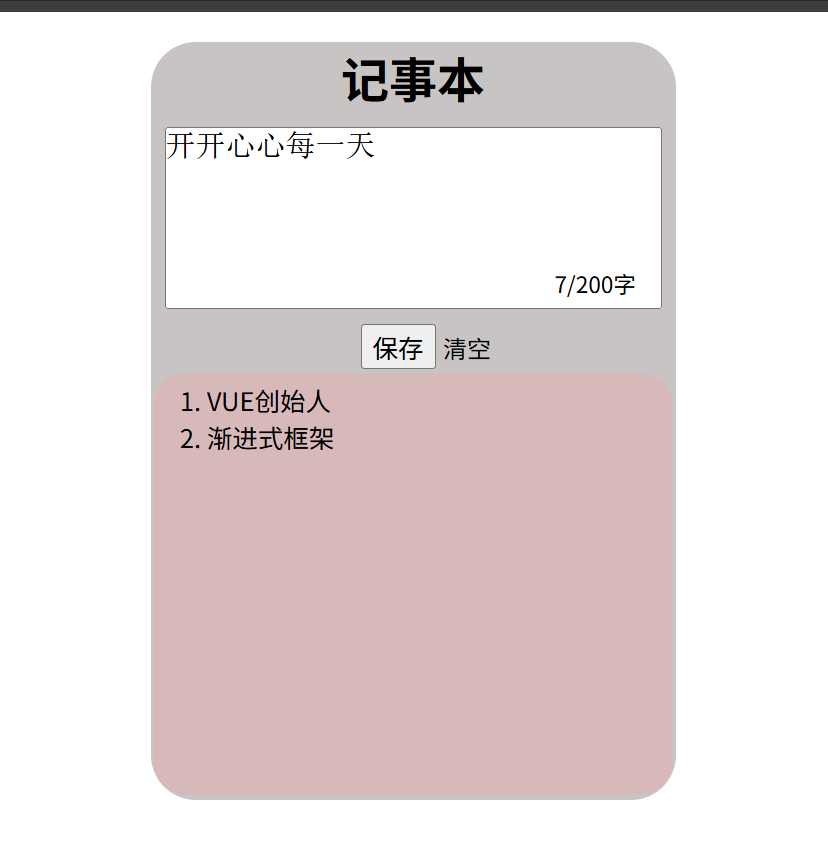
保存
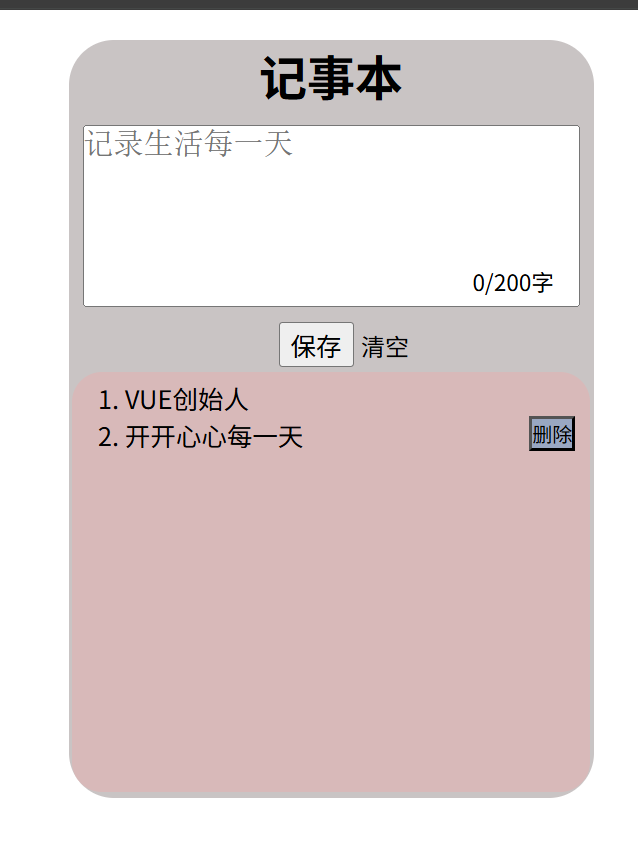
刪除
案例收獲與總結
1.當前的Vue3支持選項式API以及組合式API,二者具有顯著區別。組合式是Vue3的新特性,二者具有各自的優缺點。(不展開)
2.v-on指令可以縮寫成@ (@click="f1"或v-on:click=“f1”)
3.使用v-for指令,若寫了index,就要在key中用到,否則頁面會發生報錯
4.使用修飾符@keyup.enter監聽回車事件,能夠提高開發速度,若通過普通方法實現,需要對e進行判斷
5.若想直觀的感受v-model的雙向數據綁定,可以下載相應的插件、擴展進行調試


)

)
)


)
![[藍橋杯 2021 省 AB] 砝碼稱重 Java](http://pic.xiahunao.cn/[藍橋杯 2021 省 AB] 砝碼稱重 Java)


:檢索增強生成原理與LLM對比分析)
