- 官方主頁?MLflow | MLflow
- 官方文檔?MLflow: A Tool for Managing the Machine Learning Lifecycle | MLflow
0. 簡介
MLflow 是一個開源平臺,專門為了幫助機器學習的從業者和團隊處理機器學習過程中的復雜性而設計。MLflow 關注機器學習項目的完整生命周期,確保每個階段都是可管理的、可追溯的和可復現的。
MLflow 目前提供了幾個關鍵的組件:
MLflow AI Gateway:通過安全、簡單的API與最先進的 LLM 進行交互。
MLflow LLM Evaluate:簡化LLM和提示的評估。
MLflow Tracking:記錄和查詢實驗:代碼、數據、配置和結果。
MLflow Projects:將數據科學代碼打包成一種格式,可以在任何平臺上重現運行。
MLflow Models:在不同的服務環境中部署機器學習模型。
Model Registry:在一個中心倉庫中存儲、注釋、發現和管理模型。
1. 安裝 MLFlow
pip install mlflow
2. 啟動 Tracking UI
mlflow server --host 127.0.0.1 --port 8080
?端口可以任意指定一個本地可用端口即可。
瀏覽器輸入 http://localhost:5000?訪問:
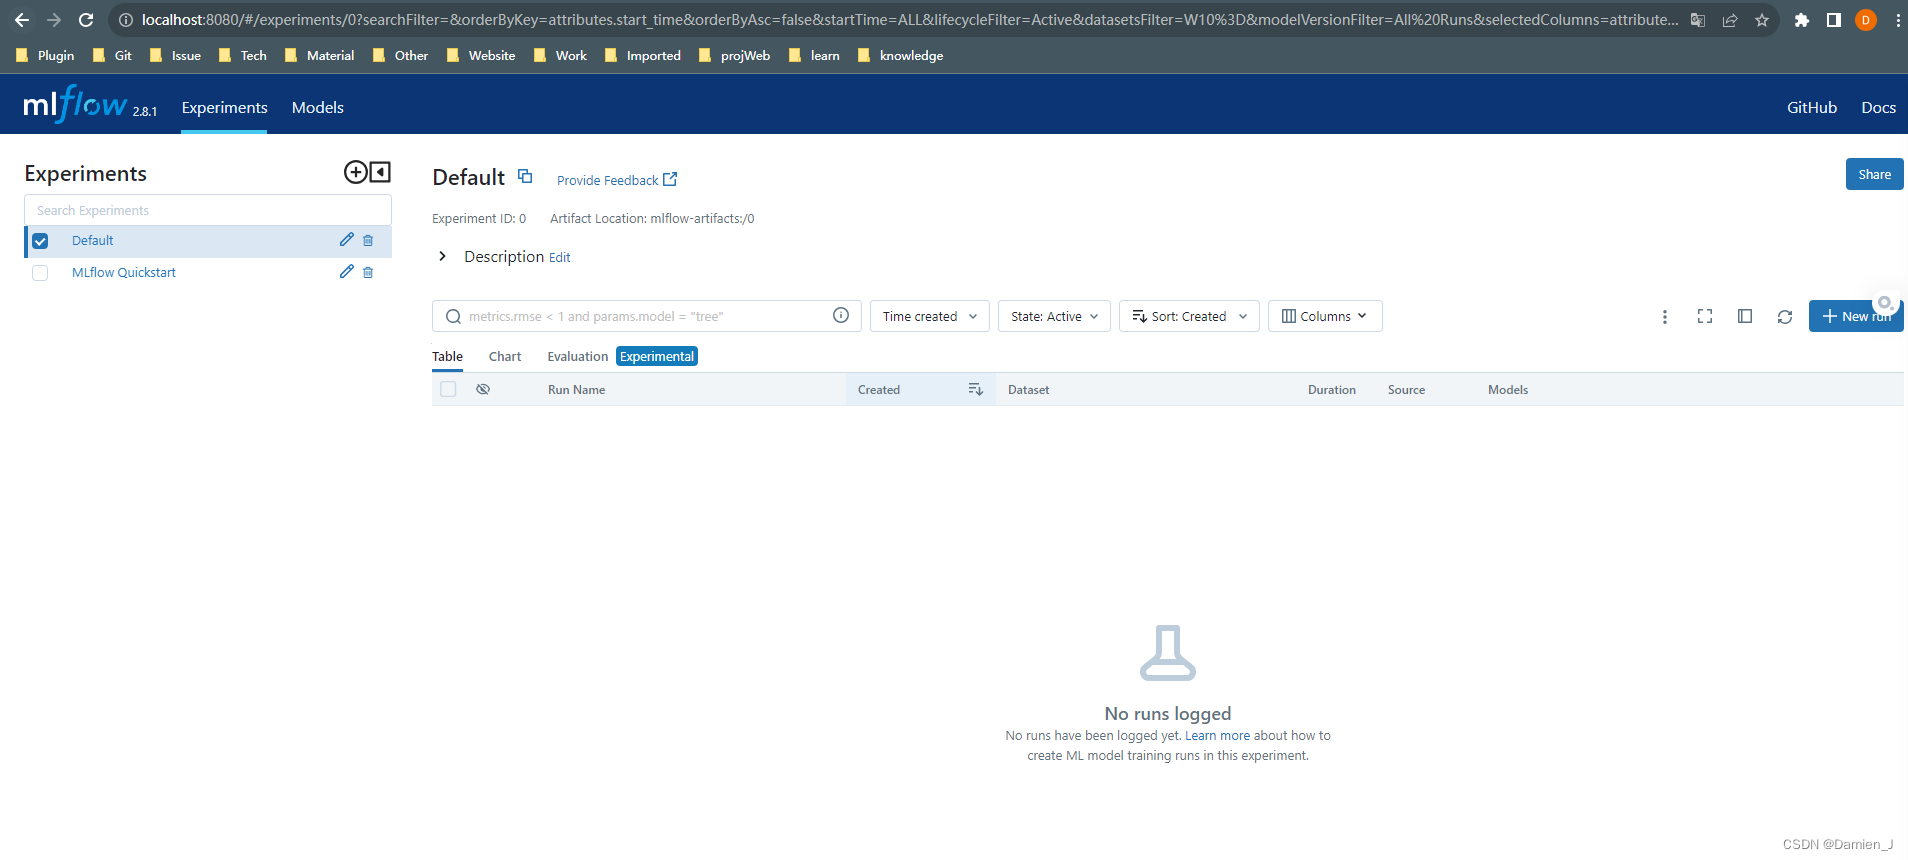
3. 創建實驗
這里的實驗類似于我們的project,獨立的實驗可以方便進行管理和查看?
from mlflow import MlflowClient
client = MlflowClient(tracking_uri="http://127.0.0.1:8080")
all_experiments = client.search_experiments()default_experiment = [{"name": experiment.name, "lifecycle_stage": experiment.lifecycle_stage}for experiment in all_experimentsif experiment.name == "Default"
][0]
# Provide an Experiment description that will appear in the UI
experiment_description = ("This is the grocery forecasting project. ""This experiment contains the produce models for apples."
)# Provide searchable tags that define characteristics of the Runs that
# will be in this Experiment
experiment_tags = {"project_name": "grocery-forecasting","store_dept": "produce","team": "stores-ml","project_quarter": "Q3-2023","mlflow.note.content": experiment_description,
}# Create the Experiment, providing a unique name
produce_apples_experiment = client.create_experiment(name="Apple_Models", tags=experiment_tags
)
在 Tracking UI 里面可以看到剛創建的實驗。
4. Model準備
下面是一個邏輯回歸的模型。
import mlflow
from mlflow.models import infer_signatureimport pandas as pd
from sklearn import datasets
from sklearn.model_selection import train_test_split
from sklearn.linear_model import LogisticRegression
from sklearn.metrics import accuracy_score, precision_score, recall_score, f1_score# Load the Iris dataset
X, y = datasets.load_iris(return_X_y=True)# Split the data into training and test sets
X_train, X_test, y_train, y_test = train_test_split(X, y, test_size=0.2, random_state=42
)# Define the model hyperparameters
params = {"solver": "lbfgs","max_iter": 1000,"multi_class": "auto","random_state": 8888,
}# Train the model
lr = LogisticRegression(**params)
lr.fit(X_train, y_train)# Predict on the test set
y_pred = lr.predict(X_test)# Calculate metrics
accuracy = accuracy_score(y_test, y_pred)
5.?Model記錄
下面我們添加 MLflow 代碼,記錄模型信息。
import mlflow
from mlflow.models import infer_signatureimport pandas as pd
from sklearn import datasets
from sklearn.model_selection import train_test_split
from sklearn.linear_model import LogisticRegression
from sklearn.metrics import accuracy_score, precision_score, recall_score, f1_score# Load the Iris dataset
X, y = datasets.load_iris(return_X_y=True)# Split the data into training and test sets
X_train, X_test, y_train, y_test = train_test_split(X, y, test_size=0.2, random_state=42
)# Define the model hyperparameters
params = {"solver": "lbfgs","max_iter": 1000,"multi_class": "auto","random_state": 8888,
}# Train the model
lr = LogisticRegression(**params)
lr.fit(X_train, y_train)# Predict on the test set
y_pred = lr.predict(X_test)# Calculate metrics
accuracy = accuracy_score(y_test, y_pred)
這里訓練好了一個邏輯回歸的模型。Model記錄
import mlflow
from mlflow.models import infer_signatureimport pandas as pd
from sklearn import datasets
from sklearn.model_selection import train_test_split
from sklearn.linear_model import LogisticRegression
from sklearn.metrics import accuracy_score, precision_score, recall_score, f1_score# Load the Iris dataset
X, y = datasets.load_iris(return_X_y=True)# Split the data into training and test sets
X_train, X_test, y_train, y_test = train_test_split(X, y, test_size=0.2, random_state=42
)# Define the model hyperparameters
params = {"solver": "lbfgs","max_iter": 1000,"multi_class": "auto","random_state": 8888,
}# Train the model
lr = LogisticRegression(**params)
lr.fit(X_train, y_train)# Predict on the test set
y_pred = lr.predict(X_test)# Calculate metrics
accuracy = accuracy_score(y_test, y_pred)#2nd part code# Set our tracking server uri for logging
mlflow.set_tracking_uri(uri="http://127.0.0.1:8080")# Create a new MLflow Experiment
mlflow.set_experiment("MLflow Quickstart")# Start an MLflow run
with mlflow.start_run():# Log the hyperparametersmlflow.log_params(params)# Log the loss metricmlflow.log_metric("accuracy", accuracy)# Set a tag that we can use to remind ourselves what this run was formlflow.set_tag("Training Info", "Basic LR model for iris data")# Infer the model signaturesignature = infer_signature(X_train, lr.predict(X_train))# Log the modelmodel_info = mlflow.sklearn.log_model(sk_model=lr,artifact_path="iris_model",signature=signature,input_example=X_train,registered_model_name="tracking-quickstart",)
其實也可以把訓練模型和其他邏輯的代碼放進 start_run 里面,但是官方不建議這么做,因為如果你訓練或者其他邏輯代碼報錯有什么問題,會導致之前出現空或者無效記錄,就需要手動去UI里面進行清理了。
設置鏈接的方式使用的是?mlflow.set_tracking_uri(uri="http://127.0.0.1:8080"),其實還有一種方式?client = MlflowClient(tracking_uri="http://127.0.0.1:8080")。client方式更加靈活,可以一份代碼里面有多個跟蹤服務器,另一種適合一份代碼只有一個跟蹤服務器來使用。?
6. 調用Model
import mlflow
from mlflow.models import infer_signatureimport pandas as pd
from sklearn import datasets
from sklearn.model_selection import train_test_split
from sklearn.linear_model import LogisticRegression
from sklearn.metrics import accuracy_score, precision_score, recall_score, f1_score# Load the Iris dataset
X, y = datasets.load_iris(return_X_y=True)# Split the data into training and test sets
X_train, X_test, y_train, y_test = train_test_split(X, y, test_size=0.2, random_state=42
)# Define the model hyperparameters
params = {"solver": "lbfgs","max_iter": 1000,"multi_class": "auto","random_state": 8888,
}# Train the model
lr = LogisticRegression(**params)
lr.fit(X_train, y_train)# Predict on the test set
y_pred = lr.predict(X_test)# Calculate metrics
accuracy = accuracy_score(y_test, y_pred)
print(accuracy)# Set our tracking server uri for logging
mlflow.set_tracking_uri(uri="http://127.0.0.1:8080")# Create a new MLflow Experiment
mlflow.set_experiment("MLflow Quickstart")# Start an MLflow run
with mlflow.start_run():# Log the hyperparametersmlflow.log_params(params)# Log the loss metricmlflow.log_metric("accuracy", accuracy)# Set a tag that we can use to remind ourselves what this run was formlflow.set_tag("Training Info", "Basic LR model for iris data")# Infer the model signaturesignature = infer_signature(X_train, lr.predict(X_train))# Log the modelmodel_info = mlflow.sklearn.log_model(sk_model=lr,artifact_path="iris_model",signature=signature,input_example=X_train,registered_model_name="tracking-quickstart",)print(f'{model_info.model_uri}')# Load the model back for predictions as a generic Python Function modelloaded_model = mlflow.pyfunc.load_model(model_info.model_uri)predictions = loaded_model.predict(X_test)iris_feature_names = datasets.load_iris().feature_namesresult = pd.DataFrame(X_test, columns=iris_feature_names)result["actual_class"] = y_testresult["predicted_class"] = predictionsprint(result[:4])
7. 發布模型(Serving)
MLflow 模型發布,可以docker或k8s容器發布。首先介紹最簡單的獨立發布。
? ? ? ? ?
首先我們需要配置環境變量 MLFLOW_TRACKING_URI,值為你本地mlflow server啟動的地址,默認情況就是http://127.0.0.1:8080。
然后是保證你mlflow中是有記錄模型的,然后執行下面命令(需要有flask環境,沒有的話需要pip install flask)
mlflow models serve -m models:/{model_name}/{version} --no-conda -p 5001 -h 0.0.0.0mlflow models serve命令是用來在本地部署一個MLflow模型的。它會啟動一個Flask服務器,提供一個REST API來預測模型的輸出。這上面的參數來指定了模型的位置,端口號,主機名,以及是否使用conda環境:
-m 或 --model-uri:模型的URI,可以是本地文件系統,S3,Azure ML等。
-p 或 --port:服務器的端口號,默認是5000。
-h 或 --host:服務器的主機名,默認是127.0.0.1。
–no-conda:如果指定了這個參數,那么不會使用conda環境來運行模型,而是使用當前的Python環境。
執行命令之后看到這個輸出代表啟動成功了
?![]()
mlflow models serve 命令部署模型到本地,只需要訪問一個 api,就是 /invocations。這個 api 用于接收模型的輸入數據,并返回預測結果。不需要自己定義這個 api,它是由 mlflow 自動生成的。
可以用curl或者postman進行測試
curl -X POST -H "Content-Type:application/json" --data '{"input":[[0,0]]}' http://localhost:5001/invocations
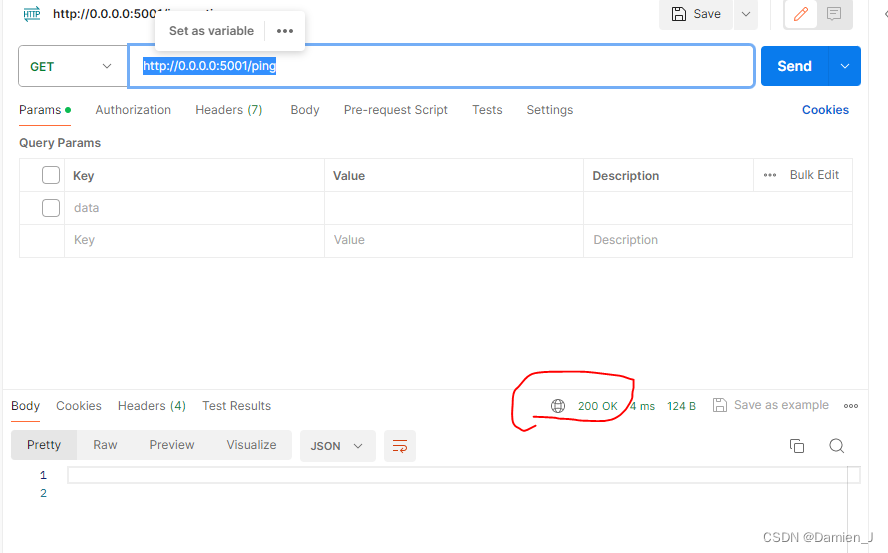
如果想知道是否正常運行的model service,可以call它的/ping routepoint?
如果返回是200的話代表模型正常運行,如果其他狀態碼就表明有問題了。
參考鏈接:
https://blog.csdn.net/Damien_J_Scott/article/details/134602472
https://blog.csdn.net/scgaliguodong123_/article/details/124802396


)


