目錄結構
- Ollama是什么
- 安裝 Ollama
- 下載大模型
- 運行模型
- Java和IDEA版本
- 創建一個springboot項目
- 創建一個簡單的對話接口
- 啟動spring boot
- 流式對話輸出
- 用原生 HTML 打造可交互前端
- 接入 OpenAI、DeepSeek 等云模型(可選)
原文地址傳送門
我是想做一個大模型本地部署輔助工具,類似當前手機上各家廠商的AI助手,結合 MCP(Model Context Protocol)協議,可實現 AI 與文件系統交互、自動生成文件等強大能力。
但是這篇文章中的內容比較精煉,很多細節容易踩坑,所以記錄一下
Ollama是什么
Ollama 是一個簡潔好用的本地大模型運行工具,你可以在自己的電腦上直接部署和運行 LLM。
安裝 Ollama
訪問官網下載安裝(支持 Windows/Mac/Linux):
https://ollama.com/download
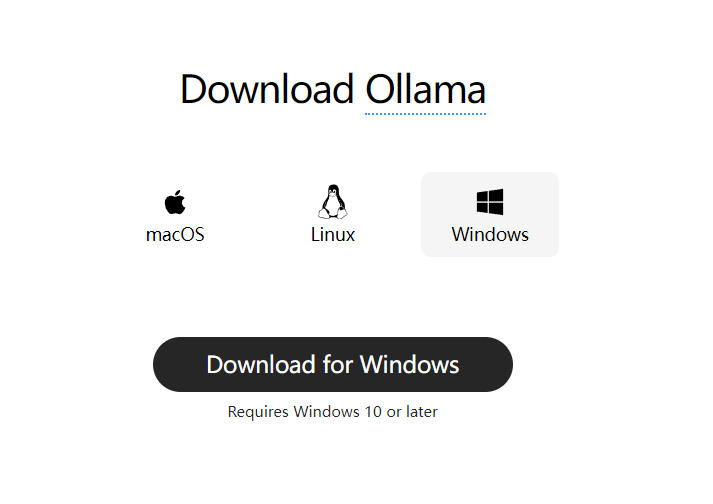
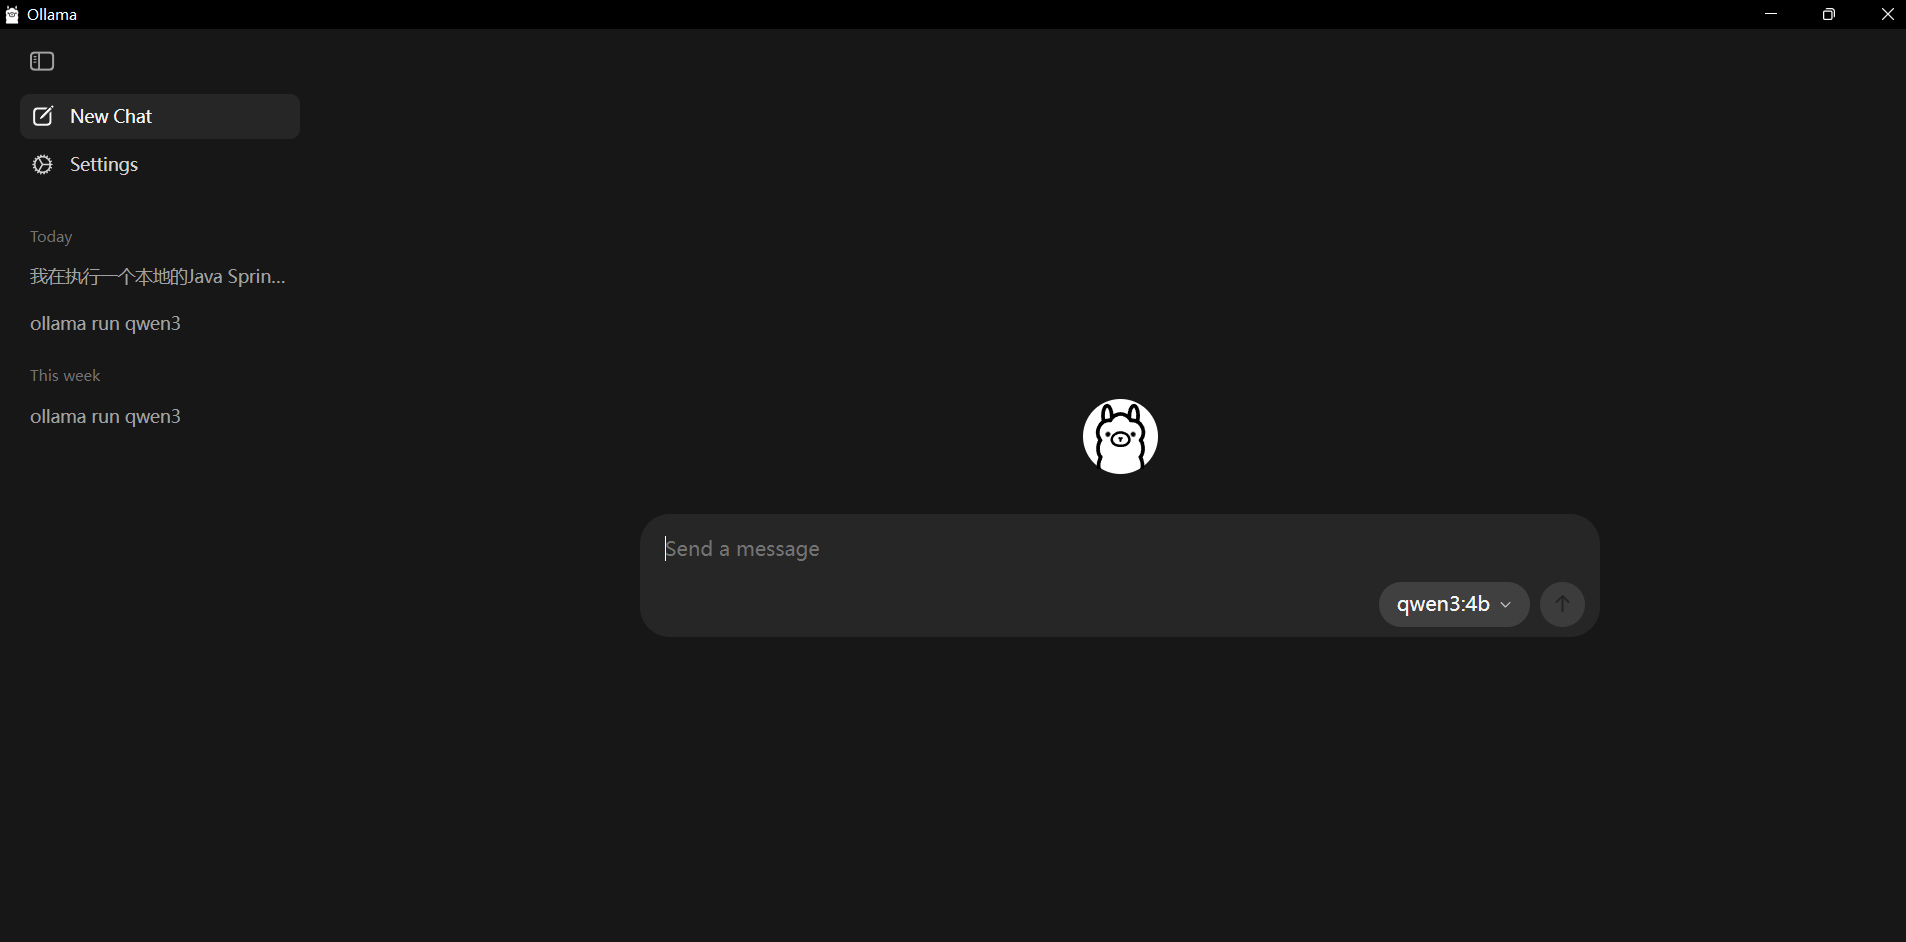
下載好安裝包后會一鍵安裝到C盤(不能改路徑是我沒想到的)
啟動客戶端就是一個和AI的對話框
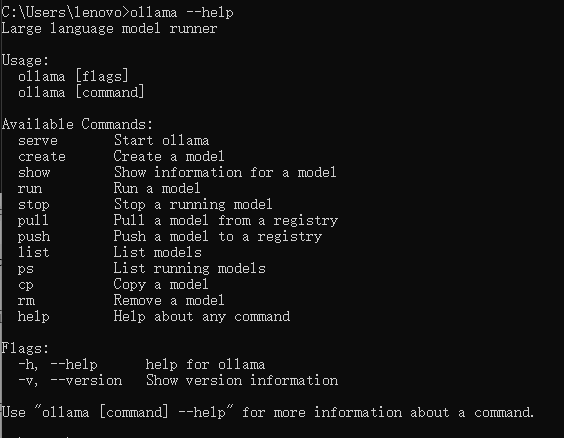
在命令行cmd中輸入
ollama --help
出現如下提示證明安裝成功
下載大模型
依舊是在cmd中輸入指令
ollama pull qwen3
其中qwen3是我準備使用的模型,原文中使用的是gemma3:1b,但后續我準備接入MCP,當前Qwen3是支持的,所以我選擇它。
如果沒用梯子可以使用阿里云鏡像
ollama pull qwen3 --registry https://hub.aliyun.com # 阿里云鏡像站

最后出現TLS超時
- 核心原因:中國網絡環境對 TLS 通信有特殊限制(防火墻/網絡策略)
- Ollama 默認用國際 Hugging Face 倉庫 → 國內訪問會超時
- Qwen3 模型在 Hugging Face 上的國際地址 → 中國網絡無法正常 TLS 握手
但我實際使用下來還是可以正常運行,證明自己安裝成功指令如下
ollama list

出現自己想要的模型名稱,證明安裝成功
運行模型
依舊cmd執行命令,ollama會自動下載相關的內容并執行
ollama run qwen3
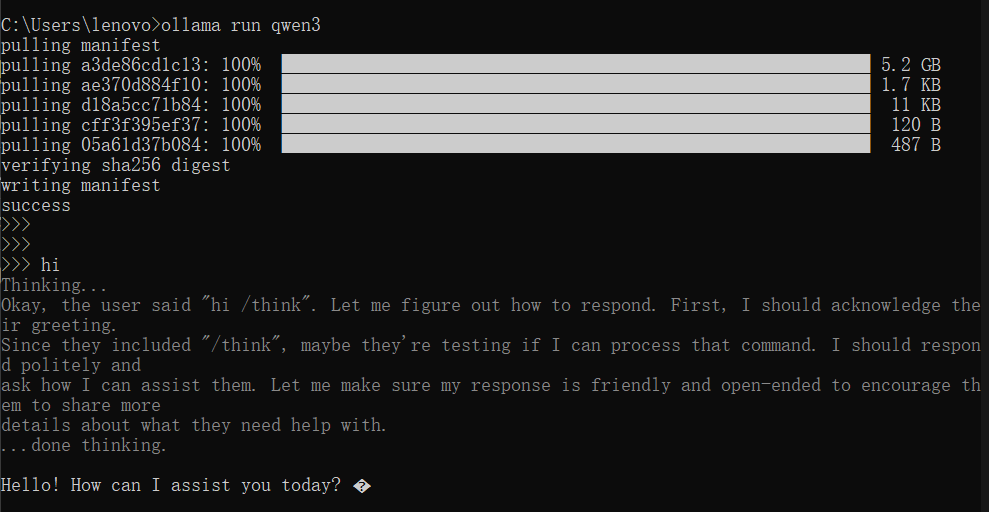
實測能夠進行中文問答,并且有思考過程和最終呈現內容
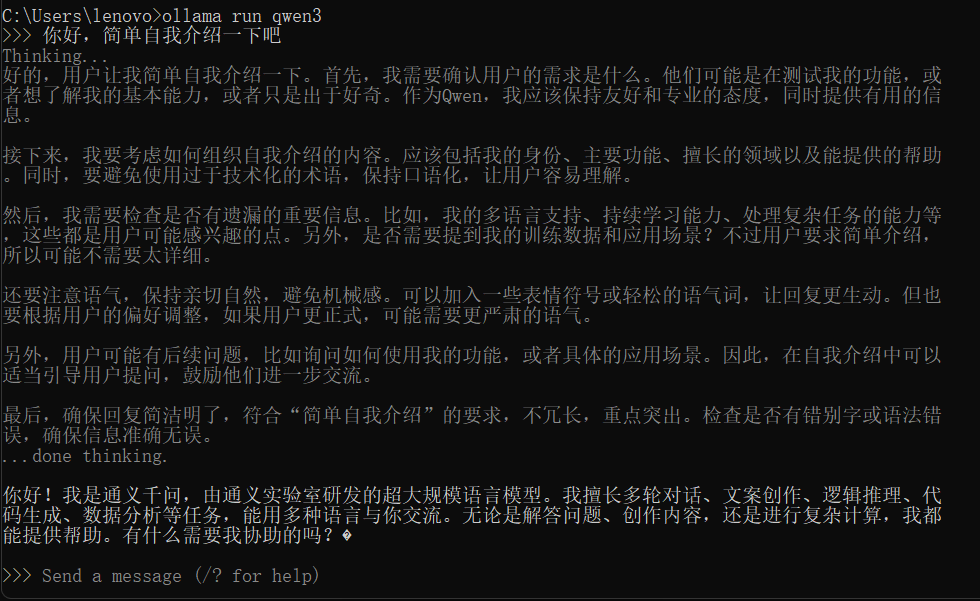
使用 /bye 結束對話
至此,本地模型就算是搭建好了暫時不要關閉,等待spring boot調用這個接口
Java和IDEA版本
使用Spring AI 1.0.1 要求Java 17 ,我當前的Java還是老掉牙的8,所以去升級了一下,參考教程
值得一提的是,Java已經有24的版本了,我還糾結了要不要安裝最新的,以防后期又要安裝新版本,問了下AI
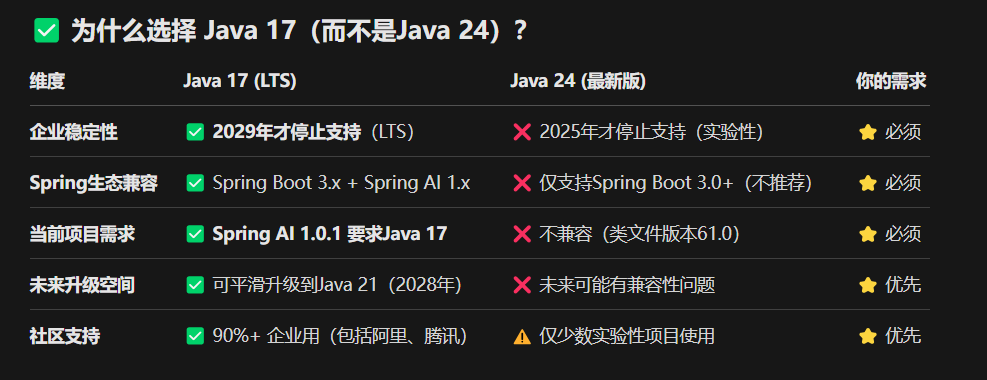
在用上Java17之后,我又發現IDEA出現了報錯

本來以為是Java17沒安裝好,實際結合參考文章
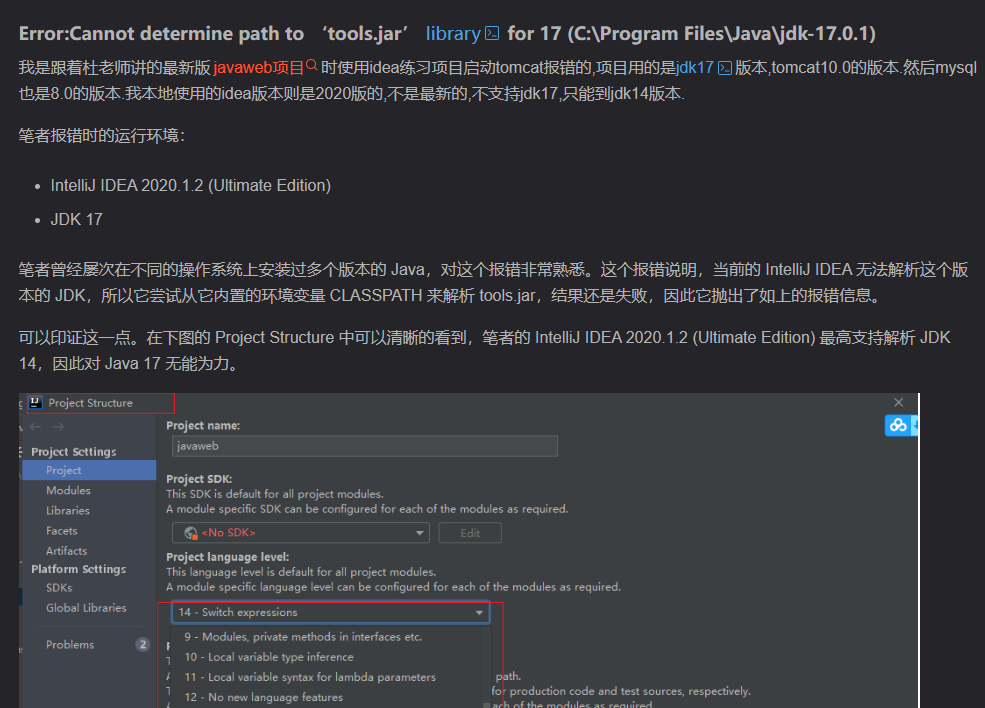
我確實是在用IDEA2020,太老啦,無法解析了,所以又去更新IDEA,參考文章
徹底卸載舊的IDEA,安裝最新的2025版本,說起來2020版本已經陪我度過5年了,真不容易
maven版本也需要升級一下,Spring Boot 3.2.1 要求Maven 3.8.x
參考文章
文章最后要記得使用Java17,并且<\mirror>標簽貌似有問題,我把完整的mirror文件粘貼如下
<?xml version="1.0" encoding="UTF-8"?><!--
Licensed to the Apache Software Foundation (ASF) under one
or more contributor license agreements.  See the NOTICE file
distributed with this work for additional information
regarding copyright ownership.  The ASF licenses this file
to you under the Apache License, Version 2.0 (the
"License"); you may not use this file except in compliance
with the License.  You may obtain a copy of the License athttp://www.apache.org/licenses/LICENSE-2.0Unless required by applicable law or agreed to in writing,
software distributed under the License is distributed on an
"AS IS" BASIS, WITHOUT WARRANTIES OR CONDITIONS OF ANY
KIND, either express or implied.  See the License for the
specific language governing permissions and limitations
under the License.
--><!--| This is the configuration file for Maven. It can be specified at two levels:||  1. User Level. This settings.xml file provides configuration for a single user,|                 and is normally provided in ${user.home}/.m2/settings.xml.||                 NOTE: This location can be overridden with the CLI option:||                 -s /path/to/user/settings.xml||  2. Global Level. This settings.xml file provides configuration for all Maven|                 users on a machine (assuming they're all using the same Maven|                 installation). It's normally provided in|                 ${maven.conf}/settings.xml.||                 NOTE: This location can be overridden with the CLI option:||                 -gs /path/to/global/settings.xml|| The sections in this sample file are intended to give you a running start at| getting the most out of your Maven installation. Where appropriate, the default| values (values used when the setting is not specified) are provided.||-->
<settings xmlns="http://maven.apache.org/SETTINGS/1.2.0"xmlns:xsi="http://www.w3.org/2001/XMLSchema-instance"xsi:schemaLocation="http://maven.apache.org/SETTINGS/1.2.0 https://maven.apache.org/xsd/settings-1.2.0.xsd"><!-- localRepository| The path to the local repository maven will use to store artifacts.|| Default: ${user.home}/.m2/repository<localRepository>/path/to/local/repo</localRepository>--><localRepository>F:\Environment\apache-maven-3.8.9\maven_repositroy</localRepository><!-- interactiveMode| This will determine whether maven prompts you when it needs input. If set to false,| maven will use a sensible default value, perhaps based on some other setting, for| the parameter in question.|| Default: true<interactiveMode>true</interactiveMode>--><!-- offline| Determines whether maven should attempt to connect to the network when executing a build.| This will have an effect on artifact downloads, artifact deployment, and others.|| Default: false<offline>false</offline>--><!-- pluginGroups| This is a list of additional group identifiers that will be searched when resolving plugins by their prefix, i.e.| when invoking a command line like "mvn prefix:goal". Maven will automatically add the group identifiers| "org.apache.maven.plugins" and "org.codehaus.mojo" if these are not already contained in the list.|--><pluginGroups><!-- pluginGroup| Specifies a further group identifier to use for plugin lookup.<pluginGroup>com.your.plugins</pluginGroup>--></pluginGroups><!-- proxies| This is a list of proxies which can be used on this machine to connect to the network.| Unless otherwise specified (by system property or command-line switch), the first proxy| specification in this list marked as active will be used.|--><proxies><!-- proxy| Specification for one proxy, to be used in connecting to the network.|<proxy><id>optional</id><active>true</active><protocol>http</protocol><username>proxyuser</username><password>proxypass</password><host>proxy.host.net</host><port>80</port><nonProxyHosts>local.net|some.host.com</nonProxyHosts></proxy>--></proxies><!-- servers| This is a list of authentication profiles, keyed by the server-id used within the system.| Authentication profiles can be used whenever maven must make a connection to a remote server.|--><servers><!-- server| Specifies the authentication information to use when connecting to a particular server, identified by| a unique name within the system (referred to by the 'id' attribute below).|| NOTE: You should either specify username/password OR privateKey/passphrase, since these pairings are|       used together.|<server><id>deploymentRepo</id><username>repouser</username><password>repopwd</password></server>--><!-- Another sample, using keys to authenticate.<server><id>siteServer</id><privateKey>/path/to/private/key</privateKey><passphrase>optional; leave empty if not used.</passphrase></server>--></servers><!-- mirrors| This is a list of mirrors to be used in downloading artifacts from remote repositories.|| It works like this: a POM may declare a repository to use in resolving certain artifacts.| However, this repository may have problems with heavy traffic at times, so people have mirrored| it to several places.|| That repository definition will have a unique id, so we can create a mirror reference for that| repository, to be used as an alternate download site. The mirror site will be the preferred| server for that repository.|--><mirrors><!-- mirror| Specifies a repository mirror site to use instead of a given repository. The repository that| this mirror serves has an ID that matches the mirrorOf element of this mirror. IDs are used| for inheritance and direct lookup purposes, and must be unique across the set of mirrors.|<mirror><id>mirrorId</id><mirrorOf>repositoryId</mirrorOf><name>Human Readable Name for this Mirror.</name><url>http://my.repository.com/repo/path</url></mirror>--><mirror><id>nexus-aliyun</id><mirrorOf>central</mirrorOf><name>Nexus aliyun</name><url>http://maven.aliyun.com/nexus/content/groups/public</url></mirror><!--     <mirror><id>maven-default-http-blocker</id><mirrorOf>external:http:*</mirrorOf><name>Pseudo repository to mirror external repositories initially using HTTP.</name><url>http://0.0.0.0/</url><blocked>true</blocked></mirror> --></mirrors><!-- profiles| This is a list of profiles which can be activated in a variety of ways, and which can modify| the build process. Profiles provided in the settings.xml are intended to provide local machine-| specific paths and repository locations which allow the build to work in the local environment.|| For example, if you have an integration testing plugin - like cactus - that needs to know where| your Tomcat instance is installed, you can provide a variable here such that the variable is| dereferenced during the build process to configure the cactus plugin.|| As noted above, profiles can be activated in a variety of ways. One way - the activeProfiles| section of this document (settings.xml) - will be discussed later. Another way essentially| relies on the detection of a system property, either matching a particular value for the property,| or merely testing its existence. Profiles can also be activated by JDK version prefix, where a| value of '1.4' might activate a profile when the build is executed on a JDK version of '1.4.2_07'.| Finally, the list of active profiles can be specified directly from the command line.|| NOTE: For profiles defined in the settings.xml, you are restricted to specifying only artifact|       repositories, plugin repositories, and free-form properties to be used as configuration|       variables for plugins in the POM.||--><profiles><!-- profile| Specifies a set of introductions to the build process, to be activated using one or more of the| mechanisms described above. For inheritance purposes, and to activate profiles via <activatedProfiles/>| or the command line, profiles have to have an ID that is unique.|| An encouraged best practice for profile identification is to use a consistent naming convention| for profiles, such as 'env-dev', 'env-test', 'env-production', 'user-jdcasey', 'user-brett', etc.| This will make it more intuitive to understand what the set of introduced profiles is attempting| to accomplish, particularly when you only have a list of profile id's for debug.|| This profile example uses the JDK version to trigger activation, and provides a JDK-specific repo.<profile><id>jdk-1.4</id><activation><jdk>1.4</jdk></activation><repositories><repository><id>jdk14</id><name>Repository for JDK 1.4 builds</name><url>http://www.myhost.com/maven/jdk14</url><layout>default</layout><snapshotPolicy>always</snapshotPolicy></repository></repositories></profile>-->
<profile><!-- 以下配置會自動使用Java 17 --><profile><id>java-17</id><activation><activeByDefault>true</activeByDefault></activation><properties><project.build.sourceEncoding>UTF-8</project.build.sourceEncoding><maven.compiler.source>17</maven.compiler.source><maven.compiler.target>17</maven.compiler.target></properties></profile>
</profile><!--| Here is another profile, activated by the system property 'target-env' with a value of 'dev',| which provides a specific path to the Tomcat instance. To use this, your plugin configuration| might hypothetically look like:|| ...| <plugin>|   <groupId>org.myco.myplugins</groupId>|   <artifactId>myplugin</artifactId>||   <configuration>|     <tomcatLocation>${tomcatPath}</tomcatLocation>|   </configuration>| </plugin>| ...|| NOTE: If you just wanted to inject this configuration whenever someone set 'target-env' to|       anything, you could just leave off the <value/> inside the activation-property.|<profile><id>env-dev</id><activation><property><name>target-env</name><value>dev</value></property></activation><properties><tomcatPath>/path/to/tomcat/instance</tomcatPath></properties></profile>--></profiles><!-- activeProfiles| List of profiles that are active for all builds.|<activeProfiles><activeProfile>alwaysActiveProfile</activeProfile><activeProfile>anotherAlwaysActiveProfile</activeProfile></activeProfiles>-->
</settings>
我使用的是
Java 17 + Maven 3.8.9 + Spring Boot 3.2.1 + Spring AI 1.0.1
創建一個springboot項目
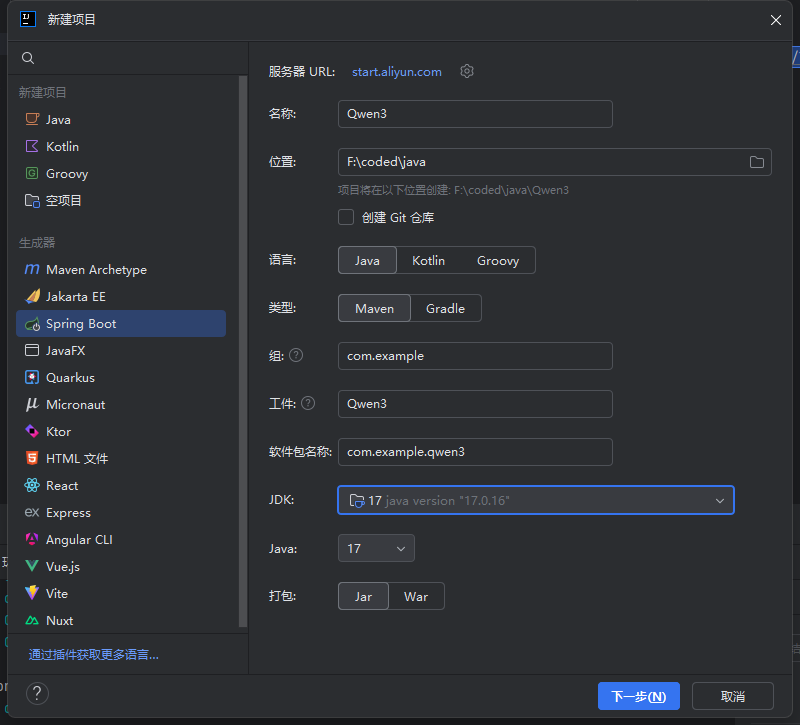
修改pom.xml文件,并且maven編譯,以下是我的,可以參考一下
<?xml version="1.0" encoding="UTF-8"?>
<project xmlns="http://maven.apache.org/POM/4.0.0"xmlns:xsi="http://www.w3.org/2001/XMLSchema-instance"xsi:schemaLocation="http://maven.apache.org/POM/4.0.0https://maven.apache.org/xsd/maven-4.0.0.xsd"><modelVersion>4.0.0</modelVersion><groupId>com.example</groupId><artifactId>Qwen3</artifactId><version>0.0.1-SNAPSHOT</version><name>Qwen3</name><description>Qwen3</description><parent><groupId>org.springframework.boot</groupId><artifactId>spring-boot-starter-parent</artifactId><version>3.2.1</version></parent><properties><java.version>17</java.version><project.build.sourceEncoding>UTF-8</project.build.sourceEncoding><project.reporting.outputEncoding>UTF-8</project.reporting.outputEncoding></properties><dependencies><dependency><groupId>org.springframework.boot</groupId><artifactId>spring-boot-starter-data-jpa</artifactId></dependency><dependency><groupId>org.springframework.boot</groupId><artifactId>spring-boot-starter-web</artifactId></dependency><dependency><groupId>org.springframework.boot</groupId><artifactId>spring-boot-starter-jdbc</artifactId></dependency><dependency><groupId>com.mysql</groupId><artifactId>mysql-connector-j</artifactId><scope>runtime</scope></dependency><dependency><groupId>org.projectlombok</groupId><artifactId>lombok</artifactId><optional>true</optional></dependency><dependency><groupId>org.springframework.boot</groupId><artifactId>spring-boot-starter-test</artifactId><scope>test</scope></dependency><!-- Spring AI Ollama Starter necessary--><dependency><groupId>org.springframework.ai</groupId><artifactId>spring-ai-starter-model-ollama</artifactId></dependency></dependencies><dependencyManagement><dependencies><dependency><groupId>org.springframework.ai</groupId><artifactId>spring-ai-bom</artifactId><version>1.0.1</version><type>pom</type><scope>import</scope></dependency></dependencies></dependencyManagement><build><plugins><plugin><groupId>org.apache.maven.plugins</groupId><artifactId>maven-compiler-plugin</artifactId><version>3.8.1</version><configuration><source>17</source><target>17</target><encoding>UTF-8</encoding></configuration></plugin><plugin><groupId>org.springframework.boot</groupId><artifactId>spring-boot-maven-plugin</artifactId><configuration><mainClass>com.example.qwen3.Qwen3Application</mainClass></configuration></plugin></plugins></build>
</project>
修改/src/main/resources下application.propertity為application.yml
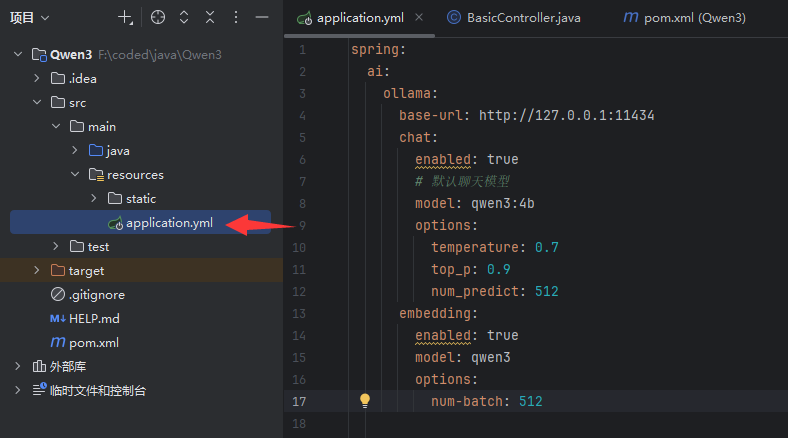
spring:ai:ollama:base-url: http://127.0.0.1:11434chat:enabled: true# 默認聊天模型model: qwen3:4boptions:temperature: 0.7top_p: 0.9num_predict: 512embedding:enabled: truemodel: qwen3options:num-batch: 512# MCP 配置(用于插件/擴展對接)mcp:client:stdio:servers-configuration: classpath:config/mcp-servers.jsonserver:port: 8181
為了方便后面接入MCP,我直接加上去了,注意我這里的端口是8181,默認應該是8080,為了避免后續沖突,我使用8181端口
創建一個簡單的對話接口
在controller下創建Java文件LocalAIInvokeTest
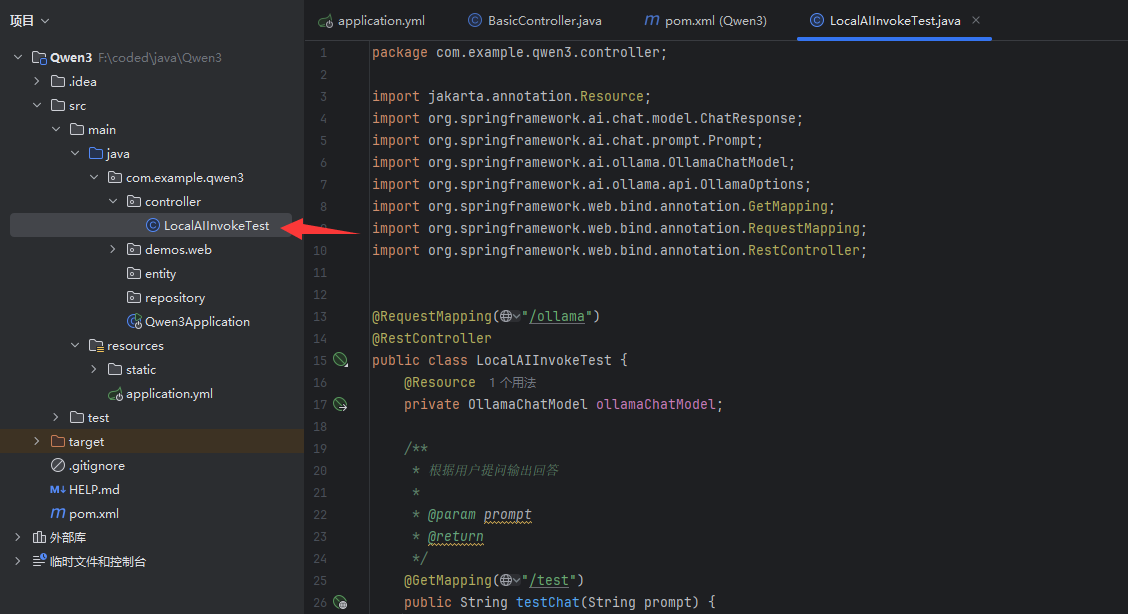
原文中沒用指明包,我這里把全文都粘貼上,以免包導入的不對
package com.example.qwen3.controller;import jakarta.annotation.Resource;
import org.springframework.ai.chat.model.ChatResponse;
import org.springframework.ai.chat.prompt.Prompt;
import org.springframework.ai.ollama.OllamaChatModel;
import org.springframework.ai.ollama.api.OllamaOptions;
import org.springframework.http.MediaType;
import org.springframework.web.bind.annotation.GetMapping;
import org.springframework.web.bind.annotation.RequestMapping;
import org.springframework.web.bind.annotation.RestController;
import reactor.core.publisher.Flux;@RequestMapping("/ollama")
@RestController
public class LocalAIInvokeTest {@Resourceprivate OllamaChatModel ollamaChatModel;/*** 根據用戶提問輸出回答** @param prompt* @return*/@GetMapping("/test")public String testChat(String prompt) {ChatResponse chatResponse= ollamaChatModel.call(new Prompt(prompt,OllamaOptions.builder().model("qwen3:4b").build()));return chatResponse.getResult().getOutput().getText();}@GetMapping(value = "/testStream", produces = MediaType.TEXT_EVENT_STREAM_VALUE)public Flux<ChatResponse> testChatStream(String prompt) {return ollamaChatModel.stream(new Prompt(prompt, OllamaOptions.builder().model("qwen3:4b").build()));}
}
啟動spring boot
啟動spring boot項目,在瀏覽器中輸入
http://localhost:8181/test?prompt=你好
過一會就會有相應
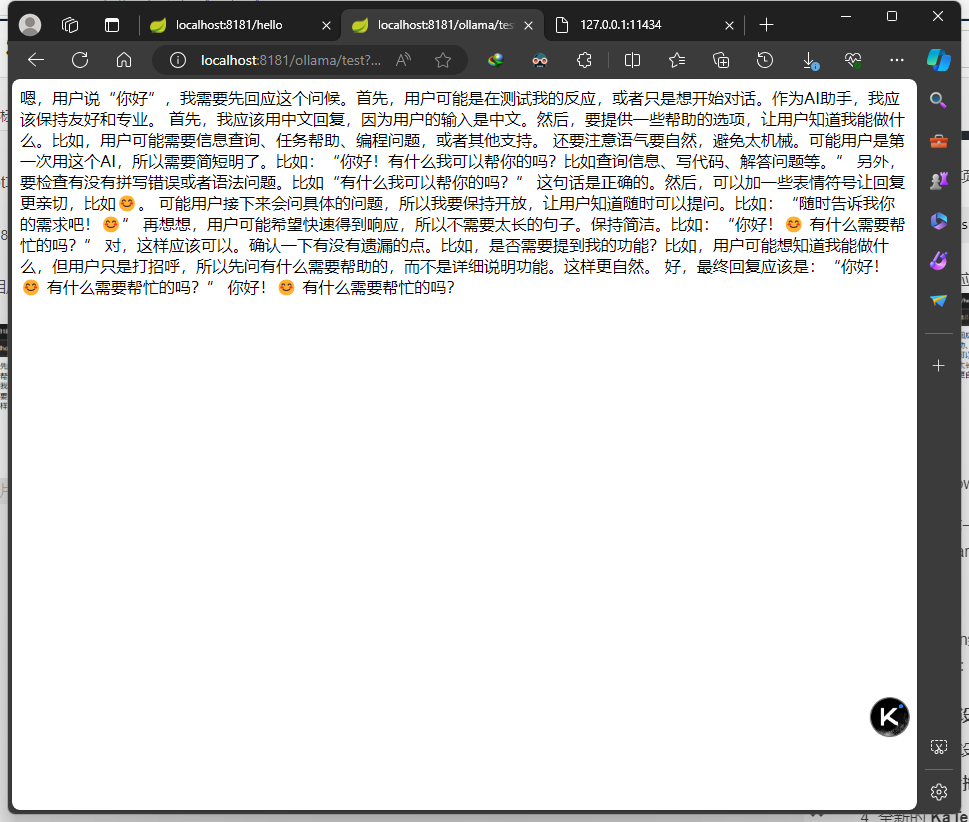
可以看到思考過程也是呈現出來的,證明我們連接成功
流式對話輸出
普通對話是要等很久一次性輸出內容,我們當前的AI大多都已經能夠逐字輸出,更加人信匯,使用springboot中的Flux + TEXT_EVENT_STREAM_VALUE就能實現,在參考文章中也有
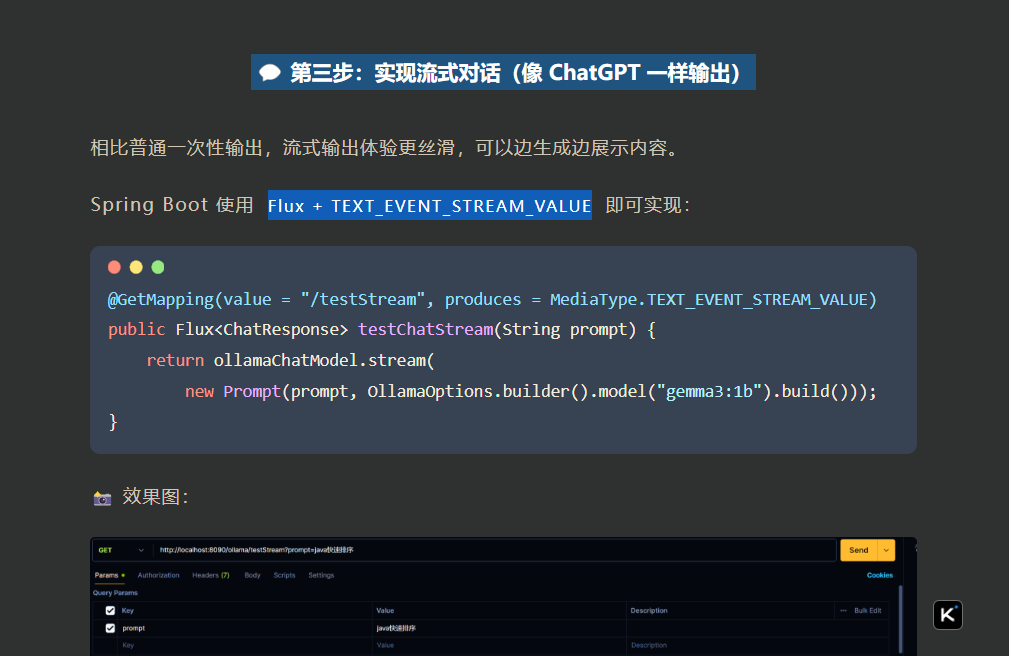
在原來test映射后面加入上面這段內容,我上面的代碼已經給出了,alt+回車導入依賴就行,重啟springboot項目后,在瀏覽器可以使用
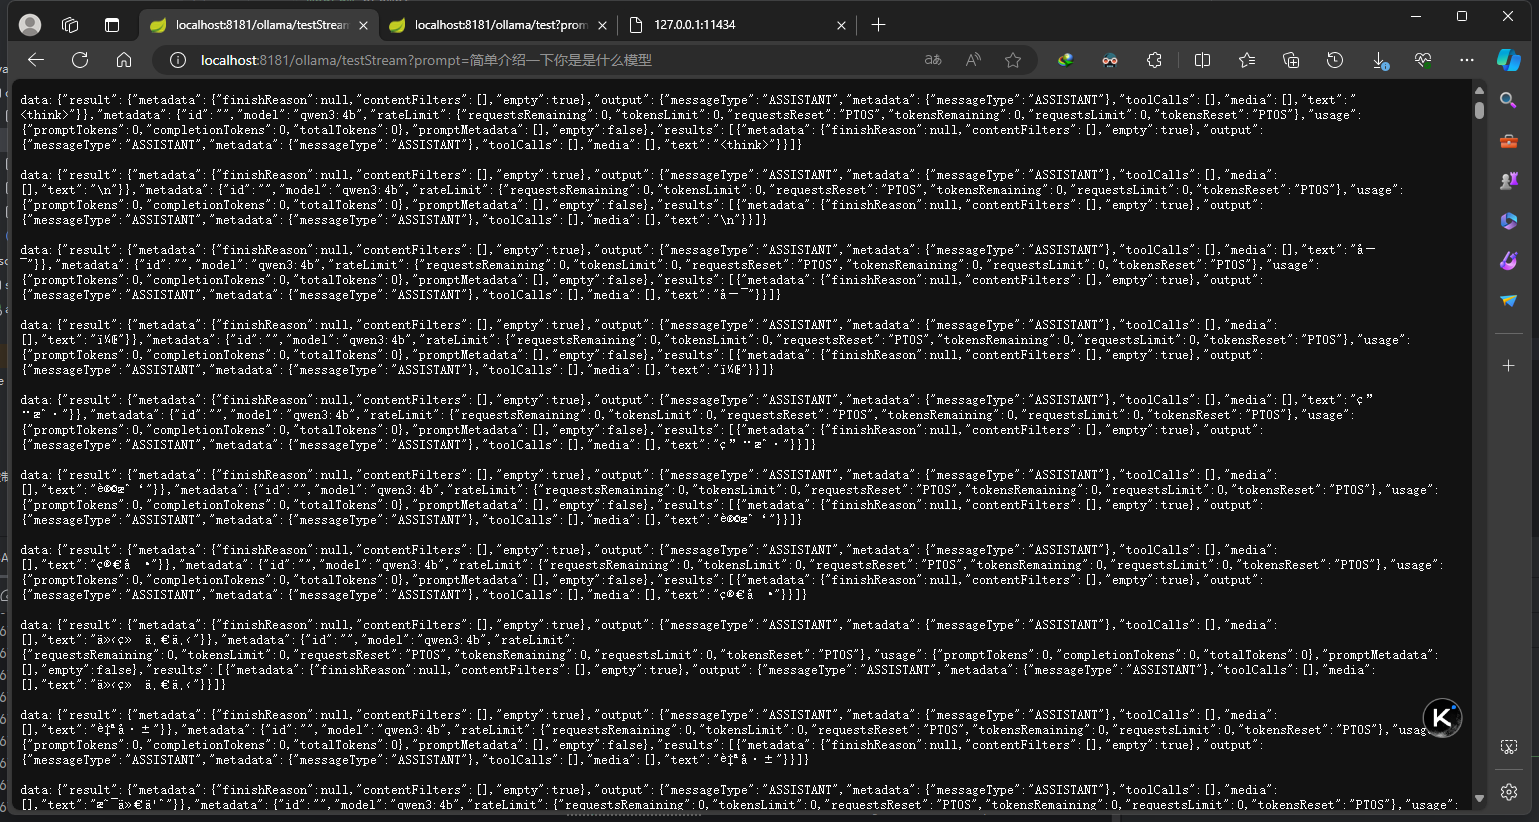
http://localhost:8181/ollama/testStream?prompt=你是什么模型
測試一下,結果確實是返回了很多json,瀏覽器沒有解析而已,符合預期。
用原生 HTML 打造可交互前端
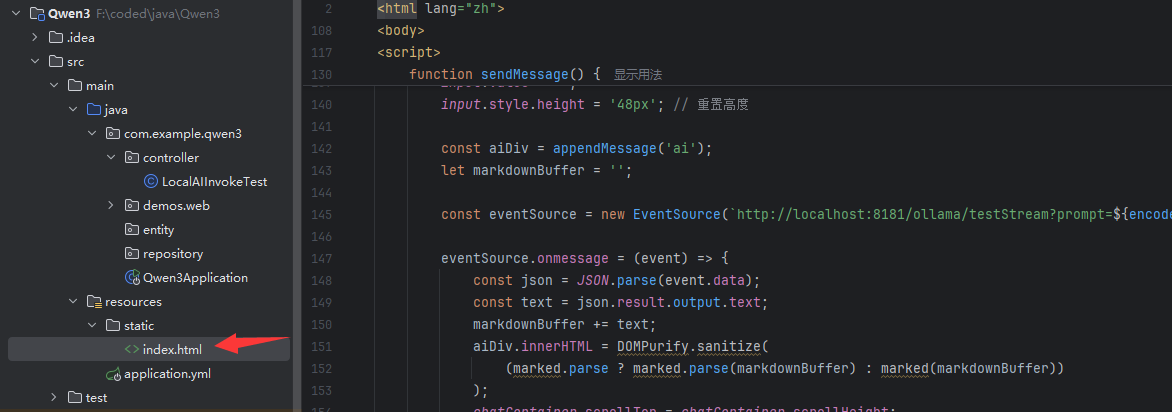
由于原文中的代碼很多缺少空格導致編譯器沒法識別,我粘貼我使用的代碼,具體就是把spring boot自帶的index.html改成如下
我在原來代碼基礎上優化了思考內容和正文的顯示樣式,并且
<!DOCTYPE html>
<html lang="zh">
<head><meta charset="UTF-8" /><title>本地 AI 對話系統</title><script src="https://cdn.jsdelivr.net/npm/marked/marked.min.js"></script><script src="https://cdn.jsdelivr.net/npm/dompurify@3.0.5/dist/purify.min.js"></script><style>* { box-sizing: border-box; }body {font-family: "Helvetica Neue", Arial, sans-serif;background: #f4f4f4;margin: 0;padding: 48px;display: flex;justify-content: center;align-items: center;height: 100vh;}.chat-wrapper {display: flex;flex-direction: column;width: 100%;max-width: 1200px;height: 100%;background: #fff;border-radius: 16px;box-shadow: 0 0 12px rgba(0, 0, 0, 0.1);overflow: hidden;}.chat-container {flex: 1;overflow-y: auto;padding: 24px;display: flex;flex-direction: column;}.message {max-width: 70%;padding: 12px 16px;margin: 8px 0;border-radius: 16px;word-break: break-word;line-height: 1.5;}.user {align-self: flex-end;background-color: #dcfce7;color: #0f5132;border: 1px solid #badbcc;}.ai {align-self: flex-start;background-color: #f8f9fa;border: 1px solid #dee2e6;display: flex;flex-direction: column;}.ai-thought {font-size: 12px;color: #6c757d;margin-bottom: 6px;font-style: italic;animation: blink 5s infinite;}@keyframes blink {0%, 50%, 100% { opacity: 0.3; }25%, 75% { opacity: 1; }}.ai-reply {font-size: 16px;color: #212529;line-height: 1.6;}.input-bar {display: flex;padding: 16px 24px;border-top: 1px solid #ddd;background-color: #ffffff;}#promptInput {flex: 1;padding: 12px;font-size: 16px;border: 1px solid #ccc;border-radius: 8px;resize: none;height: 48px;line-height: 1.5;}#sendBtn {margin-left: 12px;padding: 12px 20px;font-size: 16px;background-color: #4caf50;color: white;border: none;border-radius: 8px;cursor: pointer;transition: background-color 0.2s ease;}#sendBtn:hover { background-color: #45a049; }pre code {background: #f6f8fa;padding: 8px;border-radius: 6px;display: block;overflow-x: auto;}/* 新增表格樣式 */.ai-reply table {border-collapse: collapse;width: 100%;margin: 8px 0;background-color: #fff;border: 1px solid #dee2e6;}.ai-reply th,.ai-reply td {border: 1px solid #dee2e6;padding: 8px;text-align: left;}.ai-reply th {background-color: #e9ecef;font-weight: bold;}.ai-reply tr:nth-child(even) {background-color: #f8f9fa;}.ai-reply tr:hover {background-color: #e9ecef;}</style>
</head>
<body>
<div class="chat-wrapper"><div class="chat-container" id="chatContainer"></div><div class="input-bar"><textarea id="promptInput" placeholder="請輸入你的問題..." rows="3"></textarea><button id="sendBtn">發送</button></div>
</div><script>const chatContainer = document.getElementById('chatContainer');const input = document.getElementById('promptInput');const button = document.getElementById('sendBtn');// 創建消息容器function appendMessage(className) {const div = document.createElement('div');div.className = `message ${className}`;chatContainer.appendChild(div);chatContainer.scrollTop = chatContainer.scrollHeight;return div;}// 顯示用戶消息function displayUserMessage(text) {if (!text) return;const userDiv = appendMessage('user');userDiv.textContent = text;input.value = '';input.style.height = '48px';}// 顯示AI消息(包括思考過程和回復)function displayAIMessage(prompt) {const aiDiv = appendMessage('ai');const thoughtDiv = document.createElement('div');thoughtDiv.className = 'ai-thought';thoughtDiv.textContent = '思考中...';aiDiv.appendChild(thoughtDiv);const replyDiv = document.createElement('div');replyDiv.className = 'ai-reply';aiDiv.appendChild(replyDiv);let inThought = false;let thoughtBuffer = '';let answerBuffer = '';const eventSource = new EventSource(`http://localhost:8181/ollama/testStream?prompt=${encodeURIComponent(prompt)}`);eventSource.onmessage = (event) => {const json = JSON.parse(event.data);const textChunk = json.result.output.text;if (textChunk.includes('<think>')) {inThought = true;return;}if (textChunk.includes('</think>')) {inThought = false;thoughtDiv.textContent = thoughtBuffer.trim();return;}if (inThought) {thoughtBuffer += textChunk;thoughtDiv.textContent = thoughtBuffer.trim();} else {answerBuffer += textChunk;replyDiv.innerHTML = DOMPurify.sanitize(marked.parse ? marked.parse(answerBuffer) : marked(answerBuffer));if (!inThought && thoughtDiv.textContent !== '') {thoughtDiv.remove();}}chatContainer.scrollTop = chatContainer.scrollHeight;};eventSource.onerror = () => {eventSource.close();if (thoughtDiv.textContent !== '') {thoughtDiv.remove();}};}// 發送用戶消息并觸發AI回復function sendUserMessage() {const prompt = input.value.trim();if (!prompt) return;displayUserMessage(prompt);displayAIMessage(prompt);}// 顯示AI開場白function sendAIGreeting() {const greeting = '你好,有什么可以幫你?';const aiDiv = appendMessage('ai');const replyDiv = document.createElement('div');replyDiv.className = 'ai-reply';replyDiv.textContent = greeting;aiDiv.appendChild(replyDiv);}// 點擊發送按鈕button.onclick = sendUserMessage;// 按回車鍵發送(Shift+Enter換行)input.addEventListener('keydown', (e) => {if (e.key === 'Enter' && !e.shiftKey) {e.preventDefault();sendUserMessage();}});// 自動調整 textarea 高度input.addEventListener('input', () => {input.style.height = 'auto';input.style.height = input.scrollHeight + 'px';});// 頁面加載時顯示AI開場白window.onload = () => {setTimeout(() => {sendAIGreeting();}, 400);};
</script>
</body>
</html>
注意在184行那邊要寫自己的大模型訪問接口,就是上面我們測試流式輸出的url地址
然后我們重啟springboot,瀏覽器訪問
localhost:8181
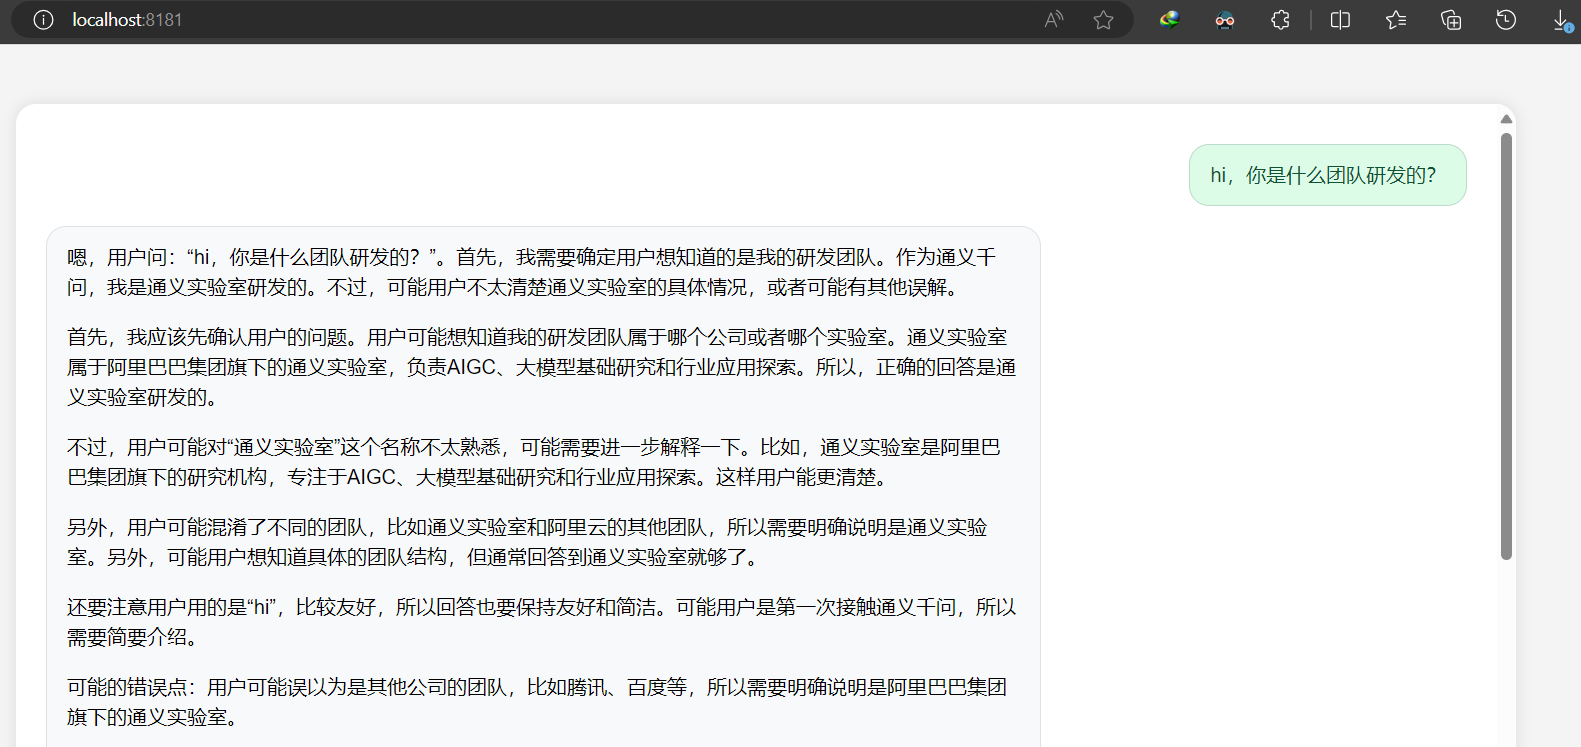
就可以順利對話了
接入 OpenAI、DeepSeek 等云模型(可選)
這個部分我就沒有繼續嘗試了,因為我想做成本地部署的模型,操作自己的文件,使用在線大冒險多少會有安全風險,感興趣可以看教程進行探索


概率論基礎知識-伽馬函數·上)


)


)
和生命期管理)


