? ?作為初學者對于Vue框架的學習筆記?總結了Vue框架的核心知識點,包括:1. 基礎概念:漸進式框架、兩種使用方式、Vue實例創建流程、模板語法和響應式特性。2. 常用指令:詳細介紹了v-html、v-show/v-if、v-for、v-on、v-bind、v-model等10個指令的功能和用法。3. 組件開發:組件結構、注冊方式(全局/局部)、數據傳遞(Props)、組件通信(自定義事件/插槽)、生命周期鉤子和動態組件。4. 進階特性:計算屬性、偵聽器、依賴注入和異步組件。5. 工程化應用:項目結構、應用實例創建和公共資源管理。文章通過大量代碼示例演示了各知識點的實際應用,適合Vue初學者系統學習框架核心概念。?
1 快速上手
? 1.1 Vue概念
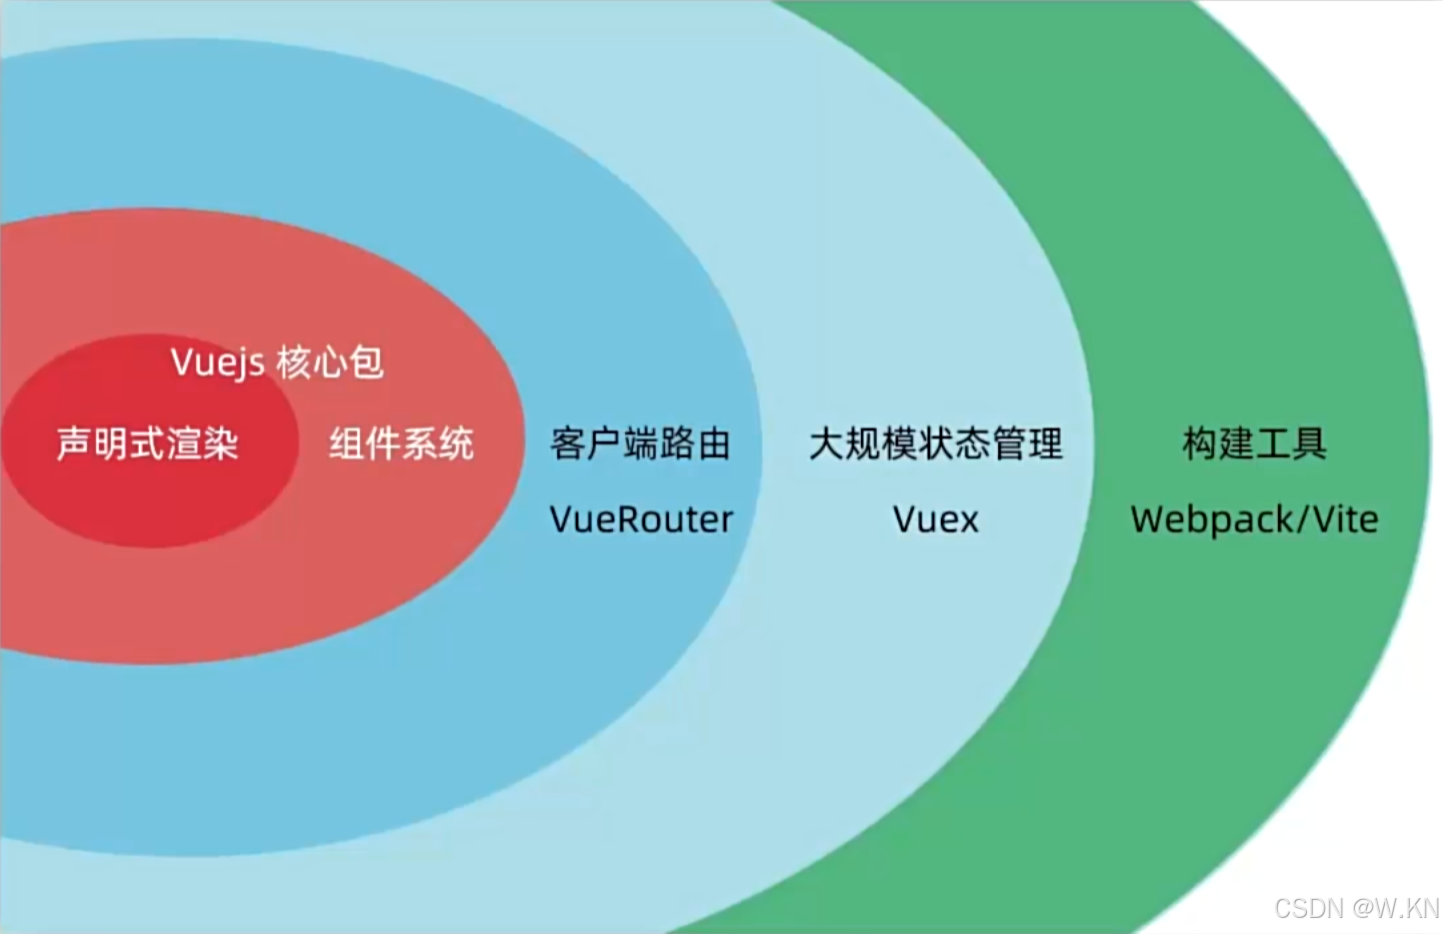
?Vue是一個用于構建用戶界面的漸進式框架
用戶界面:基于數據渲染用戶看到的界面
漸進式:循序漸進??
框架:一套完整的項目解決方案 提升開發效率
兩種使用方式:①Vue核心包 ②Vue核心包加插件 工程化開發
 ??
??
1.2 Vue實例 初始化渲染
1.準備容器
2.引包(生產環境/開發環境)
3. 創建實例 new Vue()
4.指定配置項:
? ① el 指定掛載點
? ② data 提供數據
<!DOCTYPE html>
<html lang="en">
<head><meta charset="UTF-8"><meta name="viewport" content="width=device-width, initial-scale=1.0"><title>Document</title>
</head>
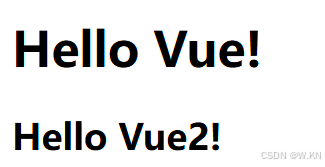
<body><div id ='app'><h1>{{message}}</h1><h2>{{message2}}</h2></div><script src="https://cdn.jsdelivr.net/npm/vue/dist/vue.js"></script><script>var app = new Vue({el: '#app',data: {message: 'Hello Vue!',message2:'Hello Vue2!'}})</script>
</body>
</html>?1.3 模板語法 插值表達式
插值表達式 {{ }} 是Vue的模板語法
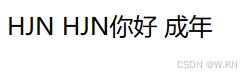
作用:利用表達式(可以被求值的代碼)插值 進行數據渲染
?注意:1 數據必須存在 2 支持的是表達式而非語句 3 不能在標簽中使用
<!DOCTYPE html>
<html lang="en">
<head><meta charset="UTF-8"><meta name="viewport" content="width=device-width, initial-scale=1.0"><title>Document</title>
</head>
<body><div id ='app'><!-- {{}} 模板語法 用于表達式插值渲染 -->{{ message }}{{ message + "你好"}}{{ age > 18 ? '成年' : '未成年' }}</div><script src="https://cdn.jsdelivr.net/npm/vue/dist/vue.js"></script><script>var app = new Vue({el: '#app',data: {message: 'HJN',age: 20,}})</script>
</body>
</html>
1.4 響應式特性?
響應式:數據變化 視圖自動更新
訪問/修改
訪問:實例名.屬性名
修改:實例名.屬性名 = 值
1.5 開發者工具
使用官方網站或者極簡插件中搜索安裝?
安裝 解壓 打開瀏覽器拓展程序 拖動 安裝?
2 Vue指令
Vue會根據不同的指令,針對標簽實現不同的功能
指令:前綴帶有v-的特殊標簽屬性 常用的有10個
2.1 指令簡介
| 名稱 | 綁定值類型 | 作用 | 介紹 |
|---|---|---|---|
| v - html | 字符串 | 更新元素的 innerHTML。 | 將數據作為 HTML 解析并渲染到指定元素上,使用時需注意安全問題,防止 XSS 攻擊。 |
| v - show | 布爾值 | 根據表達式的值顯示或隱藏元素。 | 通過修改元素的 CSS 的display屬性來控制元素的顯示和隱藏,元素始終會存在于 DOM 中。 |
| v - if | 布爾值 | 根據表達式的值條件性地渲染元素或組件。 | 當表達式的值為true時,元素或組件會被渲染到 DOM 中;為false時,對應的元素或組件以及其子元素都會從 DOM 中移除。 |
| v - else | 無 | 與v - if配套使用,提供 “else” 分支。 | 必須緊跟在帶v - if或v - else - if的元素之后,當前面的v - if或v - else - if表達式為false時,渲染該元素。 |
| v - else - if | 布爾值 | 與v - if配套使用,提供 “else if” 分支。 | 必須緊跟在帶v - if的元素之后,按順序判斷表達式的值,當表達式為true時,渲染該元素。 |
| v - for | 數組、對象、數字等可迭代數據 | 基于源數據多次渲染元素或組件。 | 可以遍歷數組、對象等可迭代的數據結構,為每一項渲染對應的元素或組件,例如v - for="(item, index) in items",items是數組,item是數組元素,index是索引。 |
| v - on | 函數名或 JavaScript 表達式 | 監聽 DOM 事件。 | 縮寫為@,例如v - on:click="handleClick"或@click="handleClick",當元素觸發click事件時,會調用handleClick方法。 |
| v - bind | 任何類型 | 動態綁定一個或多個特性,或一個組件 prop 到表達式。 | 縮寫為:,用于將數據綁定到 HTML 元素的屬性上,如<img :src="imageUrl">,會根據imageUrl的值動態設置img標簽的src屬性。 |
| v - model | 基本數據類型(如字符串、數字、布爾值)、對象等 | 在表單元素上創建雙向數據綁定。 | 語法糖,它會根據不同的表單元素類型,自動處理input和change等事件以及value等屬性的綁定,例如<input v - model="message">,message數據改變會更新輸入框的值,輸入框的值改變也會更新message數據。 |
| ?v - slot | 無 | 用于具名插槽或需要接收 prop 的插槽。 | Vue 2 中使用slot - scope配合v - slot,Vue 3 簡化了語法,用于在父組件中向子組件傳遞內容,指定插槽的名稱和數據綁定等,例如<template v - slot:header>,定義名為header的插槽。 |
2.2?v-html
作為 HTML 解析并渲染到指定元素上
<!DOCTYPE html>
<html lang="en">
<head><meta charset="UTF-8"><meta name="viewport" content="width=device-width, initial-scale=1.0"><title>Document</title>
</head>
<body><div id ='app'><p v-html="message"></p></div><script src="https://cdn.jsdelivr.net/npm/vue/dist/vue.js"></script><script>var app = new Vue({el: '#app',data: {message: '<a href="http://www.baidu.com">百度</a>'}})</script>
</body>
</html>
2.3 v-show 與?v-if
v-show :改元素的 CSS 的
display屬性來控制元素的顯示和隱藏v-if:當表達式的值為
true時,元素或組件會被渲染到 DOM 中;為false時,對應的元素或組件以及其子元素都會從 DOM 中移除* 兩者都是通過布爾值來判斷是否顯示 但是兩者的區別是底層原理不同
<!DOCTYPE html>
<html lang="en">
<head><meta charset="UTF-8"><meta name="viewport" content="width=device-width, initial-scale=1.0"><title>Document</title>
</head>
<style>.box {width: 100px;height: 100px;background-color: blue;border: 1px solid #000;border-radius: 10px;}
</style>
<body><!-- v-show和v-if的區別 --><!-- v-show是通過display屬性來控制元素的顯示和隱藏,元素始終會被渲染到頁面中,只是通過display屬性來控制元素的顯示和隱藏 --><!-- v-if是通過DOM元素的添加和刪除來控制元素的顯示和隱藏,元素不會被渲染到頁面中 --><div id ='app'><div v-show="flag" class = "box">這是v-show顯示的盒子</div><br><div v-if = "flag" class = "box">這是v-if顯示的盒子</div></div><script src="https://cdn.jsdelivr.net/npm/vue/dist/vue.js"></script><script>var app = new Vue({el: '#app',data: {flag: false}})</script>
</body>
</html>
2.4 v-else 與 v-else-if
輔助v-if進行判斷渲染 語法 :v-else = “表達式”
<!DOCTYPE html>
<html lang="en">
<head><meta charset="UTF-8"><meta name="viewport" content="width=device-width, initial-scale=1.0"><title>Document</title>
</head>
<body><div id="app"><p v-if="sex === 1">性別:男</p><p v-else>性別:女</p><hr><p v-if="score>=90">等級 A</p><p v-else-if="score>=80 && score<90">等級 B</p><p v-else-if="score>=70 && score<80">等級 C</p><p v-else>等級 D</p></div><script src="https://cdn.jsdelivr.net/npm/vue/dist/vue.js"></script><script>var app = new Vue({el: '#app',data: {sex:1,score: 80}})</script>
</body>
</html>
?2.5 v-on
1 作用:注冊事件 = 添加監聽 + 提供處理邏輯
2 語法:① v-on:事件名=“內聯語句”
? ? ? ? ? ? ? ② v-on:事件名=“methods中的函數名”?
3 簡寫:@事件名
4 事件修飾符:
Vue為v-on提供了幾個常用的事件修飾符
| 修飾符 | 用途說明 | 用法示例 |
|---|---|---|
| ??.stop?? | 阻止事件冒泡(停止事件向上級元素傳播) | @click.stop="handleClick"點擊子元素不會觸發父元素的點擊事件 |
| ??.prevent?? | 阻止默認行為(阻止元素原生動作,如表單提交) | @submit.prevent="onSubmit"提交表單時阻止頁面刷新 |
| ??.once?? | 事件僅觸發一次(執行一次后自動解除事件監聽) | @click.once="doSomething"按鈕點擊僅生效一次 |
| ??.enter?? | 鍵盤事件限定鍵(僅當按下特定鍵時觸發) | @keyup.enter="submitForm"在input中按回車鍵時提交表單 |
| ??.capture?? | 使用捕獲模式(事件在捕獲階段觸發,而非冒泡階段) | @click.capture="captureHandler"從外層元素開始向下觸發 |
| ??.self?? | 僅當事件源是元素自身時觸發(忽略內部元素冒泡) | @click.self="selfClick"只有點擊元素本身(非子元素)時觸發 |
| ??.passive?? | 提升滾動性能(告知瀏覽器不阻止默認行為) | @scroll.passive="onScroll"優化移動端滾動性能 |
阻止默認事件:
<template>
<div><a @click.prevent="clickHandle" href="https:…………">WKN</a></div>
</template>
<script>
export default{data(){return{}},methods:{clickHandle(e){//e.preventDefault();console.log(111);}}
}
</script>
阻止事件冒泡:
內聯語句
<!DOCTYPE html>
<html lang="en">
<head><meta charset="UTF-8"><meta name="viewport" content="width=device-width, initial-scale=1.0"><title>Document</title>
</head>
<body><div id="app" ><button @click = "number--">-</button><span>{{ number }}</span><button v-on:click = "number++">+</button></div><script src="https://cdn.jsdelivr.net/npm/vue/dist/vue.js"></script><script>var app = new Vue({el: '#app',data: {number: 100,}})</script>
</body>
</html>
?methods的函數名 (methods函數this指向Vue實例)
<!DOCTYPE html>
<html lang="en">
<head><meta charset="UTF-8"><meta name="viewport" content="width=device-width, initial-scale=1.0"><title>Document</title>
</head>
<body><div id="app" ><button @click="fn">切換顯示與隱藏</button><span v-show="flag">顯示樣例</span></div><script src="https://cdn.jsdelivr.net/npm/vue/dist/vue.js"></script><script>var app = new Vue({el: '#app',data: {number: 100,flag: true,},methods: {fn(){app.flag = !app.flag}}})</script>
</body>
</html>
調用傳參?
@click fn(參數1,參數2)?
<!DOCTYPE html>
<html lang="en">
<head><meta charset="UTF-8"><meta name="viewport" content="width=device-width, initial-scale=1.0"><title>小黑售貨機</title>
</head>
<style></style>
<body><div id="app" ><div v-if="flag"><h1>小黑售貨機</h1><p>當前商品數量:{{number}}</p><button @click="fn(5)">可樂 (5元)</button><button @click="fn(4)">雪碧 (4元)</button></div><div>余額 :{{ money}}</div><script src="https://cdn.jsdelivr.net/npm/vue/dist/vue.js"></script><script>var app = new Vue({el: '#app',data: {number: 100,flag: true,money: 100},methods: {fn(price){if(this.number <= 0){alert('商品已售罄')this.flag = falsereturn}if(this.money < price){alert('余額不足')return}this.number = this.number - 1this.money = this.money - pricealert('購買成功')}}})</script>
</body>
</html>
2.6 v-bind
1 作用:動態設置html的標簽屬性 url src title...
2 語法:v-bind:屬性名=“表達式”
3 簡寫::src
<!DOCTYPE html>
<html lang="en">
<head><meta charset="UTF-8"><meta name="viewport" content="width=device-width, initial-scale=1.0"><title>圖片切換</title>
</head><body><div id="app"><img v-bind:src="imgUrl"><button @click="imgUrl='https://cdn.pixabay.com/photo/2018/01/14/23/12/nature-3082832_1280.jpg'">切換圖片</button></div>
</body><script src="https://cdn.jsdelivr.net/npm/vue/dist/vue.js"></script><script>var app = new Vue({el: '#app',data: {imgUrl: 'img01.png'}})</script>
</html>
Vue 為樣式控制 擴展了語法?針對class類名和style行內樣式進行控制
語法? :class=“對象/數組”
①對象 鍵是類名 值是布爾值
<div class="box" claas:"{類名1:布爾值,類名2:布爾值}"></div>適用場景:一個類型 來回切換
②數組 數組中所有的類都會添加到盒子上 本質就是一個class列表
<div calss:box calss:"[ 類名1,類名2 ]"></div>?適用場景:批量添加和刪除類
案列 tab導航欄高亮顯示
<!DOCTYPE html>
<html lang="en">
<head><meta charset="UTF-8"><meta name="viewport" content="width=device-width, initial-scale=1.0"><title>高亮顯示</title>
</head>
<body><div id="app" class="box"><ul><li v-for="(item,index) in list" :key="item.id" @click="avtiveIndex = index"><a href="#" :class="{ active: index === avtiveIndex }">{{item.content}} </a></li></ul></div>
</body>
<style>.active{color: red;}li{list-style: none;}a{text-decoration: none;}a:hover{color: blue;}.box{width: 200px;height: 200px;display: flex;justify-content: center;align-items: center;}
</style>
<script src="https://cdn.jsdelivr.net/npm/vue/dist/vue.js"></script>
<script>var app = new Vue({el : '#app',data : {avtiveIndex : 0,list : [{id : 1,content : '第一欄'},{id : 2,content : '第二欄'},{id : 3,content : '第三欄'},]}})
</script>
</html>
語法 :style="樣式對象"
<div class="box" style=" CSS屬性名1:CSS屬性值 CSS屬性名2:CSS屬性值"></div>
案例 進度條展示
<!DOCTYPE html>
<html lang="en">
<head><meta charset="UTF-8"><meta name="viewport" content="width=device-width, initial-scale=1.0"><title>進度條展示</title>
</head>
<body><div id="app"><div class="progress"><div class="progress-bar" :style="{width : width + '%'}"></div><span>{{width}}%</span></div></div>
</body>
<style>.progress{width: 100%;height: 20px;background-color: #f5f5f5;border-radius: 10px;margin-top: 20px;}.progress-bar{width: 0%;height: 100%;background-color: #00ff00;border-radius: 10px;transition: width 1s;}
</style>
<script src="https://cdn.jsdelivr.net/npm/vue/dist/vue.js"></script>
<script>var app = new Vue({el : '#app',data : {width : 0},mounted(){this.timer = setInterval(() => {this.width += 10if(this.width >= 100){clearInterval(this.timer)}}, 1000)}})
</script>
</html>
2.7 v-for
1 作用 基于數據循環 多次渲染整個元素
2 遍歷數組語法 v-for="(item,index) in 數組"? item 每一項 index 下標
<!DOCTYPE html>
<html lang="en">
<head><meta charset="UTF-8"><meta name="viewport" content="width=device-width, initial-scale=1.0"><title>水果店</title>
</head>
<body><div id="app" class="box"><h1>水果店</h1><p>歡迎來到水果店</p><ul><li v-for="(item, index) in list">{{ index }} - {{ item }}</li></ul></div>
</body><script src="https://cdn.jsdelivr.net/npm/vue/dist/vue.js"></script><script>var app = new Vue({el: '#app',data: {list: ['蘋果', '香蕉', '橘子', '橙子']}})</script>
</html>
案例:書架 顯示與刪除功
<!DOCTYPE html>
<html lang="en">
<head><meta charset="UTF-8"><meta name="viewport" content="width=device-width, initial-scale=1.0"><title>案例書架練習</title>
</head>
<body><div id="app"><ul><li v-for="book in books">書名:{{book.name}} 價格:{{book.price}}<button @click="del(book.name)">刪除</button></li></ul>
</body><script src="https://cdn.jsdelivr.net/npm/vue/dist/vue.js"></script><script>var app = new Vue({el : '#app',data : {books : [{name : '《JavaScript高級程序設計》',price : 100},{name : '《JavaScript權威指南》',price : 200},{name : '《JavaScript從入門到入土》',price : 300},{name : '《javaScript進階版秘籍》',price : 400},]},methods : {<!-- 刪除書籍 -->del : function(name){this.books = this.books.filter(function(book){return book.name !== name})}}})
</script>
</html>
v-for 中的key
key屬性 = “唯一標識”
唯一標識 進行列表項的排序復用?有唯一性 在沒有key時 會優先考慮原地復用
2.8 v-model
1 作用 給表單元素使用 雙向數據綁定? 可以快速獲取或設置表單內容
? ? 數據變化 --> 視圖自動更新? ? ? ? ? ? ? ? ? 視圖更新 --> 數據自動變化
2 語法 v-model = '變量'
<!DOCTYPE html>
<html lang="en">
<head><meta charset="UTF-8"><meta name="viewport" content="width=device-width, initial-scale=1.0"><title>v-model</title>
</head>
<body><div id="app"><input type="text" v-model="username" placeholder="請輸入用戶名"><input type="password" v-model="password" placeholder="請輸入密碼"><button @click="login">登錄</button><button @click="reset">重置</button></div>
</body><script src="https://cdn.jsdelivr.net/npm/vue/dist/vue.js"></script><script>var app = new Vue({el : '#app',data : {username : '',password : ''},methods: {login : function(){alert('用戶名:' + this.username + '密碼:' + this.password)},reset : function(){this.username = ''this.password = ''}}})</script>
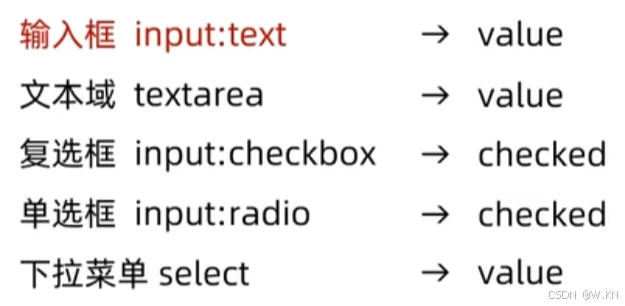
</html>作用于其他表單元素
<!DOCTYPE html>
<html lang="en">
<head><meta charset="UTF-8"><meta name="viewport" content="width=device-width, initial-scale=1.0"><title>表單元素</title>
</head><body><div id="#app"><span>姓名:</span><input type="text" v-model="msg" placeholder="請輸入內容"><br><br>是否單身:<input type="checkbox" v-model="isSingle"><br><br>性別:<input v-model = "gander" type="radio" name = "gander" value="1">男<input v-model = "gander" type="radio" name = "gander" value="2">女<br><br>所在城市:<select v-model="city"><option value="101">北京</option><option value="102">上海</option><option value="103">廣州</option><option value="104">深圳</option></select>自我描述:<textarea v-model="desc">請輸入內容描述</textarea><br><br><button @click="submit">立刻注冊</button></div></body><script src="https://cdn.jsdelivr.net/npm/vue/dist/vue.js"></script><script>var app = new Vue({el : '#app',data : {msg : '',isSingle : false,gander : '1',city : '101',desc : ''}})
</script>
</html>
案例 記事本
功能需求
① 列表渲染 ② 刪除功能 ③添加功能 ④底部統計清空功能?
功能實現
<!DOCTYPE html>
<html lang="en">
<head><meta charset="UTF-8"><meta name="viewport" content="width=device-width, initial-scale=1.0"><title>記事本</title>
</head>
<body><!--  ① 列表渲染 ② 刪除功能 ③添加功能 ④底部統計清空功能? --><div id="app"><input type="text" v-model="content" placeholder="請輸入內容"><button @click="add" style="color: aqua;">添加</button><ul><div v-for="(item,index) in list"><span>{{ index + 1 }}</span>              {{item.content}}<button @click="del(item.id)">刪除</button></div></ul><div>總數:{{list.length}} <button @click="clear">清空</button></div></body><script src="https://cdn.jsdelivr.net/npm/vue/dist/vue.js"></script><script>var app = new Vue({el : '#app',data : {content : '',list : [{id : 1,content : '學習Vue'},{id : 2,content : '學習React'},{id : 3,content : '學習Angular'},{id : 4,content : '學習Node'},]},methods : {add : function(){this.list.push({id : this.list.length + 1,content : this.content})this.content = ''},del : function(id){this.list = this.list.filter(function(item){return item.id !== id})},clear : function(){this.list = []}}})
</script>
</html>
2.9 computed 計算屬性
概念:基于現在已有的數據 計算新的屬性 依賴的數據變化 自動重新計算
語法: ① 聲明在computed的配置項中 一個計算屬性對應一個函數
? ? ? ? ? ? ② 使用和普通函數一樣 使用{{ 計算屬性名 }}
<!DOCTYPE html>
<html lang="en">
<head><meta charset="UTF-8"><meta name="viewport" content="width=device-width, initial-scale=1.0"><title>屬性計算</title>
</head>
<body><div id="app"><table><tr><th>名稱</th><th>數量</th></tr><tr v-for="(item,index) in items" :key="index"><td>{{ item.name }}</td><td>{{ item.amount}}</td></tr></table><p>總數量:{{ total }} 個</p></div>
</body>
<script src="https://cdn.jsdelivr.net/npm/vue/dist/vue.js"></script>
<script>var app = new Vue({el: '#app',data: {items : [{id: 1, name: '書', amount: 1},{id: 2,name: '筆', amount: 4},{id: 3,name: '電腦', amount: 3}],},computed: {total () {// 求值邏輯 可以使用this直接訪問到Vue實例let num = this.items.reduce((pre,cur) => {return pre + cur.amount},0)return num}}})
</script>
</html>
?computed計算屬性與methods方法
?computed計算屬性
作用:封裝了一段對于事件的處理 求得一個結果
語法:直接寫在computed中 直接使用 this.計算屬性 {{ 計算屬性 }}
緩存特性:會對計算出來的結果進行緩存 再次使用直接讀取緩存?
methods方法
作用:給實例一個業務方法 調用處理業務邏輯
語法:寫在methods配置項中 使用 this.方法名 {{ 方法名 }} @事件名= 方法名
計算屬性的完整寫法
計算屬性的默認簡寫 只能訪問不能修改 想要修改就要完整寫法
fun :{get(){// 計算邏輯return 1},set(){ // 修改的值// 設置邏輯}2.10?指令修飾符
通過 . 指明了一些指令后綴,不同的后綴封裝了不同的處理操作(簡化代碼)
① 按鍵修飾符
? ? @keyup.enter ->鍵盤回車監聽
② v-model修飾符
? ? v-model.trim -> 去除前后空格
③事件修飾符?
? ?@事件名.stop -> 阻止事件冒泡
? ?@事件名.prevent? -> 阻止默認行為
<!DOCTYPE html>
<html lang="en">
<head><meta charset="UTF-8"><meta name="viewport" content="width=device-width, initial-scale=1.0"><title>指令修飾符</title>
</head>
<body><div id="app"><h3> v-model 修飾符 .trim .number </h3><input type="text" v-model.trim="msg" placeholder="請輸入內容"><!-- 去除前后的空格--><input type="text" v-model.number="num" placeholder="請輸入數字"><!-- 字符串轉換為數字--><h3> @事件名.stop  阻止事件冒泡 </h3><div @click="fatherFn" class="boxF"><div @click.stop="sonFn" class="boxS"> 子元素 </div></div><h3> @事件名.prevent 阻止默認行為 </h3></div>
</body>
<style>.boxF{width: 200px;height: 200px;background-color: blanchedalmond;}.boxS{width: 100px;height: 100px;background-color: gold;}
</style>
<script src="https://cdn.jsdelivr.net/npm/vue/dist/vue.js"></script>
<script>var app = new Vue({el : '#app',data : {msg : '',num : 0},methods : {fatherFn(){alert('父元素被點擊')},sonFn(){alert('子元素被點擊')}}})
</script>
</html>
2.11 watch
偵聽器: 可以使用watch選項在每次響應式屬性發生變化時觸發一個函數
<template>
<h3>偵聽器</h3>
<p>{{message}}</p>
<button @click="updateHandle">修改數據</button>
</template><Script>export default{data(){return{message:"hello"}},methods:{updateHandle(){this.message="python"}},//偵聽器watch:{//函數名必須與偵聽的數據對象保持一致message(newValue,oldValue){//數據發生變化,自動執行的函數console.log(newValue,oldValue);}}}
</Script>
3 Vue組件
3.1 組件組成
? 組件最大的優勢是可復用性。當使用構建步驟時,我們一般會將Vue組件定義在一個單獨的vue文件中,這叫做單文件組件(SFC)
?3.1.1 組件組成結構
?承載所有的HTML標簽:
<template> <div> 承載系統 </div> </template>
承載所有業務邏輯
<script> export default{} </script>
承載所有樣式:
<style scoped>
</style>
<template>
<div class="container">{{message}}</div> </template>
?
<script>
export default{data(){return{message:"組件基礎構成"}}
}
</script>
?
<!--scoped:生效作用域,讓當前樣式只在當前組件里生效-->
<style scoped>
.container{font-size:30px;color:red;}
</style>
3.1.2 組件引用
<template>
<!--第三步:顯示組件-->
<MyComponent/>
</template>
?
<script>
//第一步:引入組件
import MyComponent from "./components/MyComponment.vue"
export default{//第二步:注入組件components:{MyComponent}
}
</script>
3.1.3 組件嵌套關系
? 組件允許我們將UI劃分為獨立的、可重用的部分,并且可以對每個部分進行獨立的思考。在實際應用中,組件常常被組織成層層嵌套的樹狀結構
? 這和我們嵌套HTML元素的方式類似,Vue實現了自己的組件模型,使我們可以在每個組件內封裝自定義內容與邏輯
創建組件及引用關系
Header
<template><h3>Header</h3>
</template>
<style scoped>h3{width:100%;height:100px;border:5px solid #999;text-align:center;line-height:100px;box-sizing:border-box;}
?
</style>
Main
<template><div class="main"><h3>Main</h3><Article/><Article/></div>
</template>
?
<script>
import Article from "./pages/Article.vue"
export default{components:{Article}
}
</script>
<style scoped>.main{float:left;width:70%;height:400px;border:5px solid #999;box-sizing:border-box;}
</style>
Aside
<template><div class="aside"><h3>Aside</h3><Item/><Item/><Item/></div>
</template>
?
<script>
import Item from "./pages/Item.vue"
export default{components:{Item}
}
</script>
?
<style scoped>.aside{float:right;width:30%;height:600px;border:5px solid #999;box-sizing:border-box;}
</style>
Article
<template><h3>Article</h3>
</template>
<style scoped>
h3{width:80%;margin:0 auto;text-align:center;line-height:100px;box-sizing:border-box;margin-top:50px;background:#999;}
</style>
Item
<template><h3>Item</h3>
</template>
<style scoped>h3{width:80%;margin:0 auto;text-align:center;line-height:100px;box-sizing:border-box;margin-top:10px;background:#999;}
</style>App
<template><Header/><Main /><Aside/>
</template>
?
<script>
import Header from "./pages/Header.vue"
import Main from "./pages/Main.vue"
import Aside from "./pages/Aside.vue"
export default{components:{Header,Main,Aside}
}
</script>
3.2 組件注冊
? 一個vue組件在使用前需要先被注冊,這樣vue才能在渲染模板時找到其對應的實現。組件注冊有兩種方式:全局注冊和局部注冊
3.2.1 全局注冊
在main.js里注冊
import {createApp} from 'vue'
import App from './App.vue'
import GlobalComponent from "./components/GlobalComponent.vue"
?
const app=createApp(App);
//在這個中間寫組件的注冊
app.component("GlobalComponent",GlobalComponent)
app.mount('#app');//掛載
3.2.2 局部注冊
全局注冊雖然方便,但可能有以下幾個問題:
全局注冊,但并沒有被使用的組件無法在生產打包時被自動移除,如果你全局注冊了一個組件,即使它并沒有被實際使用,他仍然會出現在打包后的js文件中
全局注冊在大型項目中使項目的依賴關系變得不那么明確。在父組件中使用子組件時,不太容易定位子組件的實現。和使用過多的全局變量一樣,這可能會影響應用長期的可維護性。
局部注冊時需要使用components選項
<template><GlobalComponent />
</template>
<script>
import GlobalComponent from "./components/GlobalComponent.vue"
export default{components:{GlobalComponent}
}
</script>
<style>
</style>
3.3 數據傳遞
3.3.1 Props數據傳遞
? 組件與組件之間不是完全獨立的,而是有交集的,那就是組件與組件之間是可以傳遞數據的,傳遞數據的解決方案就是props (傳遞數據個數無限制?)
child.vue<template><h3>Child</h3><p>{{title}}</p>
</template>
<script>
export default{data(){return{}},props:["title"]
}
</script>
parent.vue<template><h3>Child</h3><Child title="parent數據"/>
</template>
<script>
import Child from "/Child.vue "
export default{data(){return{}},components:{Child}
}
</script>
3.3.2 動態傳遞數據
可以動態的傳遞數據 注意:Props傳遞數據,只能從父級傳遞給子級,不能反其道而行。
Parent.vue<template><h3>Child</h3><Child v-bind:title="message"/>
</template>
<script>
import Child from "/Child.vue "
export default{data(){return{message:"parent數據!"}},components:{Child}
}
</script>
child.vue<template><h3>Child</h3><p>{{title}}</p>
</template>
<script>
export default{data(){return{}},props:["title"]
}
</script>
3.3.3 多種數據類型傳遞
? 通過props傳遞數據,不僅可以傳遞字符串類型的數據,還可以是其他類型,例如:數字、對象、數組等,但實際上任何類型的值都可以作為props的值被傳遞
3.3.3.1 Number
parent.vue<template><h3>Child</h3><Child v-bind:title="message" :age="age"/>
</template>
<script>
import Child from "/Child.vue "
export default{data(){return{message:"parent數據!",age:20}},components:{Child}
}
</script>
child.vue<template><h3>Child</h3><p>{{title}}</p><p>{{age}}</p>
</template>
<script>
export default{data(){return{}},props:["title","age"]
}
</script>
3.3.3.2 Array
parent.vue<template><h3>Child</h3><Child v-bind:title="message" :age="age" :names="names"/>
</template>
<script>
import Child from "/Child.vue "
export default{data(){return{message:"parent數據!",age:20,names:["iwen","ime","frank"]}},components:{Child}
}
</script>
child.vue<template><h3>Child</h3><p>{{title}}</p><p>{{age}}</p><ul><li v-for="(item,index)of names" :key="index">{{item}}</li></ul>
</template>
<script>
export default{data(){return{}},props:["title","age","names"]
}
</script>
3.3.3.3 Object
parent.vue<template><h3>Child</h3><Child v-bind:title="message" :age="age" :names="names" :userInfo="userInfo"/>
</template>
<script>
import Child from "/Child.vue "
export default{data(){return{message:"parent數據!",age:20,names:["iwen","ime","frank"],userInfo:{name:"iwen",age:20}}},components:{Child}
}
</script>
child.vue<template><h3>Child</h3><p>{{title}}</p><p>{{age}}</p><ul><li v-for="(item,index)of names" :key="index">{{item}}</li></ul><p>{{userInfo.name}}</p><p>{{userInfo.age}}</p>
</template>
<script>
export default{data(){return{}},props:["title","age","names","userInfo"]
}
</script>
3.3.4?組件傳遞Props效驗
vue組件可以更細致的聲明對傳入的props的效驗要求
ComponentA.vue<template><h3>ComponentA</h3><ComponentB :title="title"/>
</template>
<Script>
import ComponentB from "./ComponentB.vue"
export default{data(){return{title:"標題"}},components:{ComponentB}
}
</Script>
ComponentB.vue<template><h3>ComponentB</h3><p>{{title}} </p><p>{{age}}</p><p v-for="(item,index) of names" :key="index">{{item}}</p>
</template>
<Script>
export default{data(){return{}},props:{title:{type:String//type:[String,Number,Object,Array]},age:{type:Number,default:0//若A給B傳了,則顯示傳遞后的值,若未傳,則顯示默認值0},//數字和字符串可以直接default,但是如果是數組和對象,必須通過工廠函數返回默認值names:{type:Array,default(){return["空"]}}}
}
</Script>
必選項
componentA.vue<template><h3>ComponentA</h3><ComponentB :title="title"/>
</template>
<Script>
import ComponentB from "./ComponentB.vue"
export default{data(){return{title:"標題"}},components:{ComponentB}
}
</Script>
ComponentB.vue<template><h3>ComponentB</h3><p>{{title}} </p><p>{{age}}</p><p v-for="(item,index) of names" :key="index">{{item}}</p>
</template>
<Script>
export default{data(){return{}},props:{title:{type:String//type:[String,Number,Object,Array]required:true//必選項,如果不傳遞的話,就會報警報},age:{type:Number,default:0//若A給B傳了,則顯示傳遞后的值,若未傳,則顯示默認值0},//數字和字符串可以直接default,但是如果是數組和對象,必須通過工廠函數返回默認值names:{type:Array,default(){return["空"]}}}
}
</Script>
注意:props是只讀的!!
3.4 組件間數據傳遞
3.4.1 常規組件數據傳遞
組件之間傳遞數據的方案:父傳子:props ; 子傳父:自定義事件(this.$emit)
組件事件配合v-model使用
如果是用戶輸入,我們希望在獲取數據的同時發送數據配合v-model來使用
searchCom.vue<template>搜索:<input type="text" v-model="search">
</template>
<script>
export default{data(){return{search:""//獲取到搜索內容}},//偵聽器watch:{search(newvalue,oldvalue){this.$emit("searchEvent",newvalue)}}
}
</script>
main.vue<template><h3>Main</h3><p>搜索內容為:{{search}}</p><searchCom ?@searchEvent="getSearch"/>
</template>
<script>
import SearchCom from "./SearchCom"
export default{data(){return{search:""}},components:{SearchCom},methods:{getSearch(data){this.search=data;}}
}
</script>
組件數據傳
props也可以實現子傳父
ComA.vue<template><h3>ComA</h3><ComB :onEvent="dataFn"/><p>{{message}}</p>
</template>
<script>
import ComB from "./ComB.vue"
export default{data(){return{message:""}},components:{ComB},methods:{dataFn(data){// console.log(data);this.message=data}}
}
</script>
ComB.vue<template><h3>ComB</h3><p>{{onEvent("傳遞數據")}}</p>
</template>
<script>
export default{data(){return{}},props:{onEvent:Function}
}
</script>
3.4.2 Attributes
透傳Attributes
? “透傳 attribute”指的是傳遞給一個組件,卻沒有被該組件聲明為props或emits的attribute或者v-on事件監聽器。最常見的例子是class、style和id
? 當一個組件以單個元素為根作渲染時,透傳的attribute會自動被添加到根元素上
AttrCom.vue<template><!--必須是唯一根元素--><h3>透傳屬性</h3>
</template>
<style>.attr-container{color:red}
</style>
App.vue<template><AttrCom class="attr-container" />
</template>
<script>
import AttrCom from "./AttrCom.vue"
export default{components:{AttrCom}
}
</script>
? Attributes繼承
<template><!--必須是唯一根元素--><h3>透傳屬性</h3>
</template>
<script>
export default{inheritAttrs:false//禁用
}
</script>
<style>.attr-container{color:red}
</style>
3.4.4 插槽slots*
? ?我們已經了解到組件能夠接受任意類型的JavaScript值作為props,但組件要如何接收模板內容呢?在某些場景中,我們可能想要為子組件傳遞一些模板片段,讓子組件在它們的組件中渲染這些片段。
SlotsBase.vue<template><h3>插槽</h3><slot></slot>
</template>
App.vue<template><SlotsBase><div><h3>插槽標簽</h3><p>插槽內容</p></div></SlotsBase>
</template>
<script>
import SlotsBase from "./SlotsBase.vue"
export default{components:{SlotsBase}
}
</script>
slot元素是一個插槽的出口,標示了父元素提供的插槽內容將在哪里被渲染
3.4.4.1 渲染作用域
插槽內容可以訪問到父組件的數據作用域,因為插槽內容本身是在父組件模板中定義的
App.vue<template><SlotsTwo><div><h3>{{message}}</h3></div></SlotsTwo>
</template>
<script>
import SlotsTwo from "./SlotsTwo.vue"
export default{data(){return{message:"插槽內容續集"}},components:{SlotsTwo}
}
</script>
SlotsTwo.vue<template><h3>插槽</h3><slot></slot>
</template>
3.4.4.2 默認內容
在外部沒有提供任何內容的情況下,可以為插槽指定默認內容
<template><h3>插槽</h3><slot>插槽默認值</slot>
</template>
3.4.4.3 具名插槽
v-slot有對應的簡寫#,因此<template v-slot:header>可簡寫為<template #header>.其意思就是將這部分模板片段傳入子組件的header插槽中
App.vue<template><SlotsTwo><template v-slot:header><h3>{{message}}</h3></template><template v-slot:main><p>內容</p></template> ? </SlotsTwo>
</template>
<script>
import SlotsTwo from "./SlotsTwo.vue"
export default{data(){return{message:"插槽內容續集"}},components:{SlotsTwo}
}
</script>
SlotsTwo.vue<template><h3>插槽</h3><slot name="header">插槽默認值</slot><hr><slot name="main">插槽默認值</slot>
</template>
3.4.4.4 插槽中的數據傳遞
在某些場景下插槽可能想要同時使用父組件域內和子組件域內的數據。要做到這一點,我們需要一種方法來讓子組件在渲染時將一部分數據提供給插槽
可以像對組件傳遞Props那樣,向一個插槽的出口傳遞attributes
SlotsAttr.vue<template><h3>插槽續集</h3><slot :msg="childMessage"></slot>
</template>
<script>
export default{data(){return{childMessage:"子元素"//先傳遞給父元素,接收后,再傳遞}}
}
</script>
App.vue<template><SlotsAttr v-slot="slotProps"><h3>{{message}}-{{slotProps.msg}}</h3> ?</SlotsAttr>
</template>
<script>
import SlotsAttr from "./SlotsAttr.vue"
export default{data(){return{message:"測試內容"}},components:{SlotsAttr}
}
</script>
3.4.4.5 具名插槽傳遞數據
App.vue<template><SlotsAttr v-slot="slotProps"><template #header="slotProps"><h3>{{message}}-{{slotProps.msg}}</h3> ?</template></SlotsAttr>
</template>
<script>
import SlotsAttr from "./SlotsAttr.vue"
export default{data(){return{message:"測試內容"}},components:{SlotsAttr}
}
</script>
SlotsAttr.vue<template><h3>插槽續集</h3><slot name="header" :msg="childMessage"></slot>
</template>
<script>
export default{data(){return{childMessage:"子元素"//先傳遞給父元素,接收后,再傳遞}}
}
</script>
3.4.5 組件事件
? 在組件的模板表達式中,可以直接使用$emit方法觸發自定義事件,觸發自定義事件的目的是組件之間傳遞數據
App.vue<template><ComponentEvent />
</template>
<script>
import ComponentEvent from "./ComponentEvent.vue"
export default{data(){components:{ComponentEvent}}
}
</script>
Component.vue<template><h3>組件事件</h3><Child @someEvent="getHandle"/ ><p>父元素:{{message}}</p>
</template>
<script>
import Child from "./Child.vue"
export default{data(){return{message:""}}Components:{components:{Child},methods:{getHandle(data){console.log("觸發了",data);this.message=data;}}}
}
</script>
Child.vue<template><h3>Child</h3><button @click="clickEventHandle">傳遞數據</button>
</template>
<script>
export default{methods:{clickEventHandle(){//自定義事件this.$emit("someEvent","Child數據")}}
}
</script>
3.5?組件生命周期
? 每個Vue組件實例在創建時都需要經歷一系列的初始化步驟,比如:設置好數據監聽、編譯模板、掛載實例到DOM,以及在數據改變時更新DOM。再此過程中,他也會運行被稱為生命周期鉤子的函數,讓開發者有機會在特定階段運行自己的代碼
App.vue
<template><h3>組件的生命周期</h3><p>{{message}}</p><button @click="updateHandle">更新數據</button>
</template>
<script>
/**
生命周期函數:創建期:beforeCreate created掛載期:beforeMount mounted更新期:beforeUpdate updated銷毀期:beforeUnmount unmounted
*/
export default{data(){return{message:"更新之前"}},methods:{updateHandle(){this.message="更新之后"}},beforeCreate(){console.log("組件創建之前");},created(){console.log("組件創建之后");},beforeMount(){console.log("組件渲染之前");},mounted(){console.log("組件渲染之后");},beforeUpdate(){console.log("組件更新之前");},updated(){console.log("組件更新之后");},beforeUnmount(){console.log("組件銷毀之前");},unmounted(){console.log("組件銷毀之后");}
}
</script>
3.5.1 生命周期應用
組件的生命周期會隨著我們對vue的了解越多,也會越來越重要,這里我們先講兩個常用的應用場景:
通過ref獲取元素DOM結構
模擬網絡請求渲染數據
通過ref獲取元素DOM結構
App.vue<template>
<UserCom />
</template>
<script>
import UserCom from "./UserCom.vue"
export default{components:{UserCom}
}
</script>
UserCom.vue<template><h3>組件生命周期函數應用</h3><p ref="name">百戰程序員</p>
</template>
<script>
export default{beforeMount(){console.log(this.$refs.name);//undefined},mounted(){console.log(this.$refs.name);}
}
</script>
模擬網絡請求渲染數據
UserCom.Vue<template><h3>組件生命周期函數應用</h3><p ref="name">百戰程序員</p><ul><li v-for="(item,index) of banneer" :key="index"><h3>{{item.title}}</h3><p>{{item.content}}</p></li></ul>
</template>
<script>
export default{data(){return{banner:[]}},
?beforeMount(){console.log(this.$refs.name);//undefined},mounted(){console.log(this.$refs.name);//模擬網絡請求this.banner=["title":"我在愛爾蘭","content":"我在愛爾蘭愛你"]}
}
</script>
3.5.2 動態組件?
有些場景會需要在兩個組件之間來回切換 需要使用動態組件
ComA.vue<template><h3>ComA</h3>
</template>
ComB.vue<template><h3>ComB</h3>
</template>
App.vue<template><component :is="tabComponent"></component><button @click="changeHandle">切換組件</button>
</template>
<script>
import ComA from "./ComA.vue"
import ComB from "./ComB.vue"
export default{data(){return{tabComponent:"ComA"} ?},components:{ComA,ComB},methods:{changeHandle(){this.tabComponent=this.tabComponent=="ComA"?"ComB":"ComA"}}
}
</script>
?組件保持存活:
當使用<component :is="">來在多個組件之間做切換時,被切換掉的組件會被卸載。我們可以通過<keep alive>組件強制被切換掉的組件仍然保持“存活”的狀態
組件被卸載
ComA.vue<template><h3>ComA</h3>
</template>
<script>
export default{beforeUnmount(){console.log("組件卸載之前");},unmounted(){console.log("組件被卸載之后");}
}
</script>
ComB.vue<template><h3>ComB</h3>
</template>
App.vue<template><component :is="tabComponent"></component><button @click="changeHandle">切換組件</button>
</template>
<script>
import ComA from "./ComA.vue"
import ComB from "./ComB.vue"
export default{data(){return{tabComponent:"ComA"} ?},components:{ComA,ComB},methods:{changeHandle(){this.tabComponent=this.tabComponent=="ComA"?"ComB":"ComA"}}
}
</script>
保持存活
ComA.vue<template><h3>ComA</h3><p>{{message}}</p><button @click="updateHandle">更新數據</button>
</template>
<script>
export default{data(){return{message:"老數據"}},beforeUnmount(){console.log("組件卸載之前");},unmounted(){console.log("組件被卸載之后");},methods:{updateHandle(){this.message="新數據"}}
}
</script>
ComB.vue<template><h3>ComB</h3>
</template>
App.vue<template><keep-alive><component :is="tabComponent"></component></keep-alive><button @click="changeHandle">切換組件</button>
</template>
<script>
import ComA from "./ComA.vue"
import ComB from "./ComB.vue"
export default{data(){return{tabComponent:"ComA"} ?},components:{ComA,ComB},methods:{changeHandle(){this.tabComponent=this.tabComponent=="ComA"?"ComB":"ComA"}}
}
</script>
3.5.3?異步組件
? ?在大型項目中,我們可能需要拆分應用煒更小的塊,并僅在需要時再從服務器加載相關組件。Vue提供了DefineAsyncComponent方法來實現此功能
ComA.vue<template><h3>ComA</h3><p>{{message}}</p><button @click="updateHandle">更新數據</button>
</template>
<script>
export default{data(){return{message:"老數據"}},beforeUnmount(){console.log("組件卸載之前");},unmounted(){console.log("組件被卸載之后");},methods:{updateHandle(){this.message="新數據"}}
}
</script>
ComB.vue<template><h3>ComB</h3>
</template>
App.vue<template><keep-alive><component :is="tabComponent"></component></keep-alive><button @click="changeHandle">切換組件</button>
</template>
<script>
import {defineAsyncComponent} from 'vue'
import ComA from "./ComA.vue"
//import ComB from "./ComB.vue"
//異步加載組件
const ComB=defineAsyncComponent(()=>import("./ComB.vue"))
export default{data(){return{tabComponent:"ComA"} ?},components:{ComA,ComB},methods:{changeHandle(){this.tabComponent=this.tabComponent=="ComA"?"ComB":"ComA"}}
}
</script>
3.5.4 依賴注入
? 通常情況下,當我們需要從父組件向子組件傳遞數據時,會使用props。想象一下這樣的結構:有一些多層級嵌套的組件,形成了一顆巨大的組件樹,而某個深層的子組件需要一個較遠的祖先組件中的部分數據。在這種情況下,如果僅使用props則必須將其沿著組件鏈逐級傳遞下去,這會非常麻煩。
? 這一問題被稱為“props逐級透傳”
? provide和inject可以幫助我們解決這一問題。一個父組件相對于其所有的后代組件,會作為依賴提供者。任何后代的組件樹,無論層級有多深,都可以注入由父組件提供給整條鏈路的依賴。
parent.vue<template><h3>Parent</h3><Child />
</template>
<script>
import Child from "./Child.vue"
export default{components:{Child}
}
</script>
child.vue<template><h3>Child</h3><p>{{message}}</p><p>{{fullMsg}}</p>
</template>
<script>
export default{inject["message"]data(){return{fullMsg:this.message}}
}
</script>
App.vue<template><h3>祖先</h3><Parent />
</template>
<script>
import Parent from "./Parent.vue"
export default{data(){return{message:"爺爺的財產"}},//provide:{//  message:"爺爺的財產"//};provide(){return{message:this.message}},components:{Parent}}
</script>
注意:provide和inject只能由上往下傳遞
Provide除了在一個組件中提供依賴,還可以在整個應用層面提供依賴
main.jsimport {createApp} from 'vue'
import App from "./App.vue"
const app=createApp(App)
app.provide("global")
app.mount('#app')
4 Vue應用?
4.1 工程結構
my-vue-project/
├── public/ ? ? ? ? ? ? ? ? ? ? ? ? # 靜態資源(不經過 webpack 處理)
│ ? ├── favicon.ico ? ? ? ? ? ? ? ?# 網站圖標
│ ? └── index.html ? ? ? ? ? ? ? ? # 主入口 HTML 模板
│
├── src/ ? ? ? ? ? ? ? ? ? ? ? ? ? # 項目核心代碼
│ ? ├── assets/ ? ? ? ? ? ? ? ? ? ?# 靜態資源(經過 webpack 處理)
│ ? │ ? ├── images/ ? ? ? ? ? ? ? ?# 公共圖片
│ ? │ ? ├── fonts/ ? ? ? ? ? ? ? ? # 字體文件
│ ? │ ? └── scss/ ? ? ? ? ? ? ? ? ?# 全局樣式
│ ? │ ? ? ? ├── variables.scss ? ? # SCSS 變量
│ ? │ ? ? ? └── mixins.scss ? ? ? ?# SCSS 混合
│ ? │
│ ? ├── components/ ? ? ? ? ? ? ? ?# 公共組件(全項目通用)
│ ? │ ? ├── UI/ ? ? ? ? ? ? ? ? ? ?# 基礎 UI 組件
│ ? │ ? │ ? ├── AppButton.vue ? ? ?# 按鈕組件
│ ? │ ? │ ? └── AppModal.vue ? ? ? # 模態框組件
│ ? │ ? └── layout/ ? ? ? ? ? ? ? ?# 布局組件
│ ? │ ? ? ? ├── AppHeader.vue
│ ? │ ? ? ? └── AppFooter.vue
│ ? │
│ ? ├── views/ ? ? ? ? ? ? ? ? ? ? # 頁面級組件(路由對應視圖)
│ ? │ ? ├── HomeView.vue
│ ? │ ? ├── User/
│ ? │ ? │ ? ├── ProfileView.vue
│ ? │ ? │ ? └── SettingsView.vue
│ ? │ ? └── Product/
│ ? │ ? ? ? ├── ListView.vue
│ ? │ ? ? ? └── DetailView.vue
│ ? │
│ ? ├── router/ ? ? ? ? ? ? ? ? ? ?# 路由配置
│ ? │ ? └── index.js
│ ? │
│ ? ├── store/ ? ? ? ? ? ? ? ? ? ? # Vuex 狀態管理(可模塊化)
│ ? │ ? ├── modules/ ? ? ? ? ? ? ? # 狀態模塊
│ ? │ ? │ ? ├── user.js
│ ? │ ? │ ? └── cart.js
│ ? │ ? └── index.js ? ? ? ? ? ? ? # 主 store 文件
│ ? │
│ ? ├── services/ ? ? ? ? ? ? ? ? ?# API 服務層
│ ? │ ? ├── api.js ? ? ? ? ? ? ? ? # Axios 實例
│ ? │ ? ├── auth.js ? ? ? ? ? ? ? ?# 認證相關 API
│ ? │ ? └── product.js ? ? ? ? ? ? # 產品相關 API
│ ? │
│ ? ├── utils/ ? ? ? ? ? ? ? ? ? ? # 工具函數庫
│ ? │ ? ├── formValidators.js
│ ? │ ? ├── dateUtils.js
│ ? │ ? └── request.js ? ? ? ? ? ? # 請求攔截器
│ ? │
│ ? ├── directives/ ? ? ? ? ? ? ? ?# 自定義指令
│ ? │ ? └── focus.js
│ ? │
│ ? ├── plugins/ ? ? ? ? ? ? ? ? ? # Vue 插件
│ ? │ ? └── element-ui.js ? ? ? ? ?# UI 框架初始化
│ ? │
│ ? ├── App.vue ? ? ? ? ? ? ? ? ? ?# 根組件
│ ? └── main.js ? ? ? ? ? ? ? ? ? ?# 應用入口(初始化實例)
│
├── tests/ ? ? ? ? ? ? ? ? ? ? ? ? # 測試文件
│ ? ├── unit/ ? ? ? ? ? ? ? ? ? ? ?# 單元測試
│ ? └── e2e/ ? ? ? ? ? ? ? ? ? ? ? # 端到端測試
│
├── .env.development ? ? ? ? ? ? ? # 開發環境變量
├── .env.production ? ? ? ? ? ? ? ?# 生產環境變量
├── .eslintrc.js ? ? ? ? ? ? ? ? ? # ESLint 配置
├── babel.config.js ? ? ? ? ? ? ? ?# Babel 配置
├── vue.config.js ? ? ? ? ? ? ? ? ?# Vue 專屬配置
└── package.json ? ? ? ? ? ? ? ? ? # 項目依賴和腳本
4.2 應用實例
每個Vue應用都是通過createApp函數創建一個新的應用實例
import {createApp} from 'vue'
?
//app:vue的實例對象
//在一個vue項目中,有且僅有一個Vue的實例對象
const app=createApp(App)({/*根組件選項*/
})
4.3 根組件
我們傳入createApp的對象實際上是一個組件,每個應用都需要一個“根組件”,其他組件講作為其子組件
import {createApp} from 'vue'
//從一個單文件組件中導入根組件
import App from "./App.vue"
const app=createApp(App)
?4.4 掛載應用
應用實例必須在調用了.mount()方法后才會渲染出來。該方法接收一個“容器”參數,可以是一個實際的DOM元素,或是一個CSS選擇器字符串
app.mount('#app')
<div id="app"></div>
瀏覽器可執行文件:HTML 、CSS、JavaScript、Image
構架工具:vite、Webpack
4.5 公共資源
在src目錄下的assets文件夾的作用就是存放公共資源,例如:圖片、公共CSS或者字體圖標等
學習時間 2025.01.24


SpringBoot+Vue3】)


)
