
目錄
發送方確認
添加配置
常量類
聲明隊列和交換機并綁定二者關系
confirm確認模式?
編寫生產消息代碼
生產消息1
解決方法
多次生產消息2
解決方法
生產消息3
return 模式
編寫生產消息代碼(路由正確)
生產消息1
編寫生產消息代碼(路由錯誤)
生產消息2
面試題
發送方確認
在使? RabbitMQ的時候, 可以通過消息持久化來解決因為服務器的異常崩潰?導致的消息丟失, 但是還有?個問題, 當消息的?產者將消息發送出去之后, 消息到底有沒有正確地到達服務器呢? 如果在消息到達服務器之前已經丟失(?如RabbitMQ重啟, 那么RabbitMQ重啟期間?產者消息投遞失敗), 持久化操作也解決不了這個問題,因為消息根本沒有到達服務器,何談持久化?
RabbitMQ為我們提供了兩種解決?案:
a. 通過事務機制實現
b. 通過發送?確認(publisher confirm) 機制實現
事務機制?較消耗性能, 在實際?作中使?也不多, 下面主要介紹confirm機制來實現發送?的確認.
RabbitMQ為我們提供了兩個?式來控制消息的可靠性投遞:
1. confirm確認模式
2. return退回模式
添加配置
spring:application:name: rabbit-extensions-demorabbitmq:addresses: amqp://study:study@47.98.109.138:5672/extensionpublisher-confirm-type: correlated #消息發送確認
常量類
public class Constants {//發送方確認public static final String CONFIRM_QUEUE = "confirm.queue";public static final String CONFIRM_EXCHANGE = "confirm.exchange";
}
聲明隊列和交換機并綁定二者關系
import org.springframework.amqp.core.*;
import org.springframework.beans.factory.annotation.Qualifier;
import org.springframework.context.annotation.Bean;
import org.springframework.context.annotation.Configuration;
import rabbitextensionsdemo.constant.Constants;@Configuration
public class RabbitMQConfig {//發送方確認@Bean("confirmQueue")public Queue confirmQueue(){return QueueBuilder.durable(Constants.CONFIRM_QUEUE).build();}@Bean("confirmExchange")public DirectExchange confirmExchange(){return ExchangeBuilder.directExchange(Constants.CONFIRM_EXCHANGE).build();}@Bean("confirmBinding")public Binding confirmBinding(@Qualifier("confirmQueue") Queue queue, @Qualifier("confirmExchange") Exchange exchange){return BindingBuilder.bind(queue).to(exchange).with("confirm").noargs();}
}
confirm確認模式?
Producer 在發送消息的時候, 對發送端設置?個ConfirmCallback的監聽, ?論消息是否到達
Exchange, 這個監聽都會被執?, 如果Exchange成功收到, ACK( Acknowledge character , 確認字符)為true, 如果沒收到消息, ACK就為false。
RabbitTemplate.ConfirmCallback 和 ConfirmListener 區別
在RabbitMQ中, ConfirmListener和ConfirmCallback都是?來處理消息確認的機制, 但它們屬于不同的客?端庫, 并且使?的場景和?式有所不同.
1. ConfirmListener 是 RabbitMQ Java Client 庫中的接?. 這個庫是 RabbitMQ 官?提供的?個直接與RabbitMQ服務器交互的客?端庫. ConfirmListener 接?提供了兩個?法: handleAck 和handleNack, ?于處理消息確認和否定確認的事件.
2. ConfirmCallback 是 Spring AMQP 框架中的?個接?. 專?為Spring環境設計. ?于簡化與
RabbitMQ交互的過程. 它只包含?個 confirm ?法,?于處理消息確認的回調.
在 Spring Boot 應?中, 通常會使? ConfirmCallback, 因為它與 Spring 框架的其他部分更加整合, 可以利? Spring 的配置和依賴注?功能. ?在使? RabbitMQ Java Client 庫時, 則可能會直接實現ConfirmListener 接?, 更直接的與RabbitMQ的Channel交互
編寫生產消息代碼
import org.springframework.amqp.rabbit.connection.CorrelationData;
import org.springframework.amqp.rabbit.core.RabbitTemplate;
import org.springframework.beans.factory.annotation.Autowired;
import org.springframework.web.bind.annotation.RequestMapping;
import org.springframework.web.bind.annotation.RestController;
import rabbitextensionsdemo.constant.Constants;import java.util.Date;@RequestMapping("/producer")
@RestController
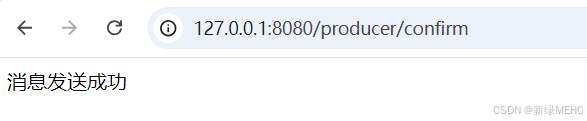
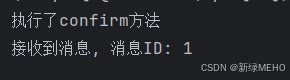
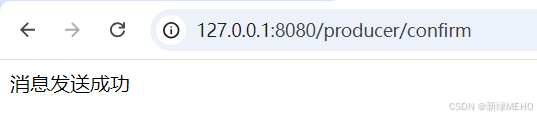
public class ProducerController {@Autowiredprivate RabbitTemplate confirmRabbitTemplate;@RequestMapping("/confirm")public String confirm() {confirmRabbitTemplate.setConfirmCallback(new RabbitTemplate.ConfirmCallback() {@Overridepublic void confirm(CorrelationData correlationData, boolean ack, String cause) {System.out.println("執行了confirm方法");if (ack){System.out.printf("接收到消息, 消息ID: %s \n", correlationData==null? null: correlationData.getId());}else {System.out.printf("未接收到消息, 消息ID: %s, cause: %s \n", correlationData==null? null: correlationData.getId(), cause);//相應的業務處理}}});CorrelationData correlationData = new CorrelationData("1");confirmRabbitTemplate.convertAndSend(Constants.CONFIRM_EXCHANGE, "confirm", "confirm test...", correlationData);return "消息發送成功";}
}public interface ConfirmCallback {????????/**????????* 確認回調????????* @param correlationData: 發送消息時的附加信息 , 通常?于在確認回調中識別特定的消 息????????* @param ack: 交換機是否收到消息 , 收到為 true, 未收到為 false????????* @param cause: 當消息確認失敗時 , 這個字符串參數將提供失敗的原因 . 這個原因可以?于調 試和錯誤處理 .????????* 成功時 , cause 為 null????????*/????????void confirm ( @Nullable CorrelationData correlationData, boolean ack,????????@Nullable String cause);}
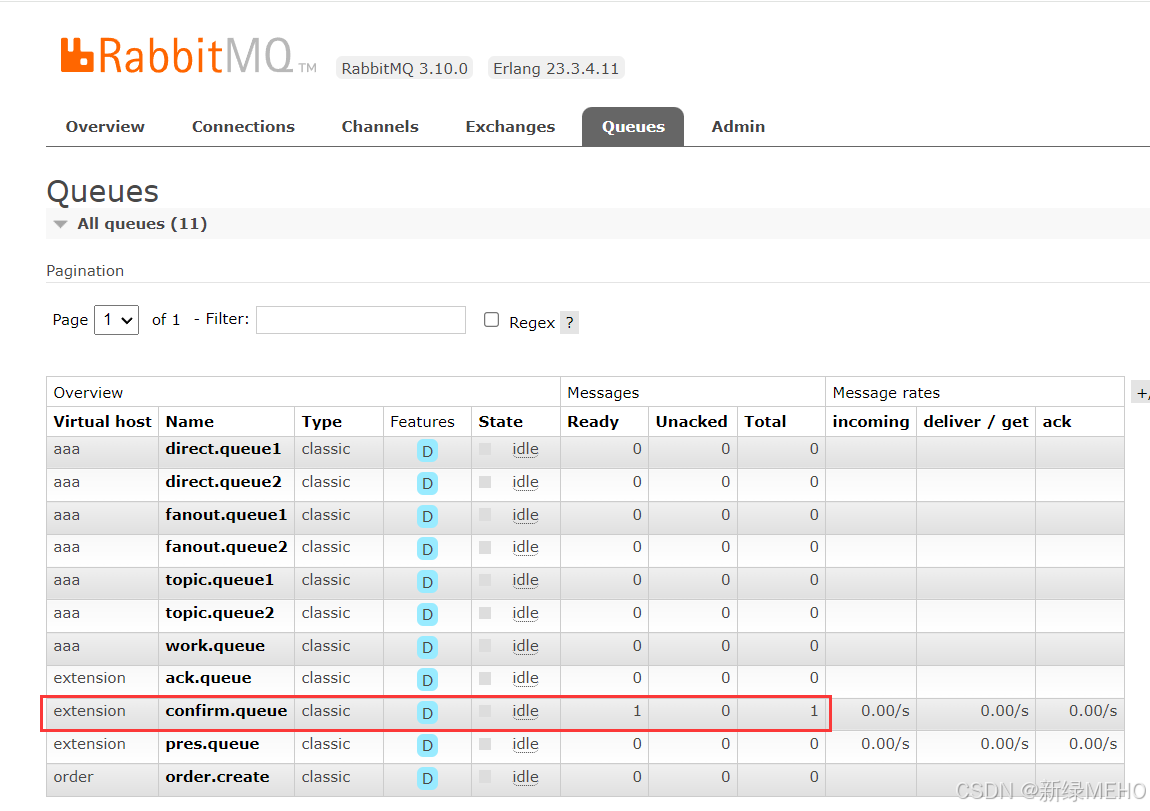
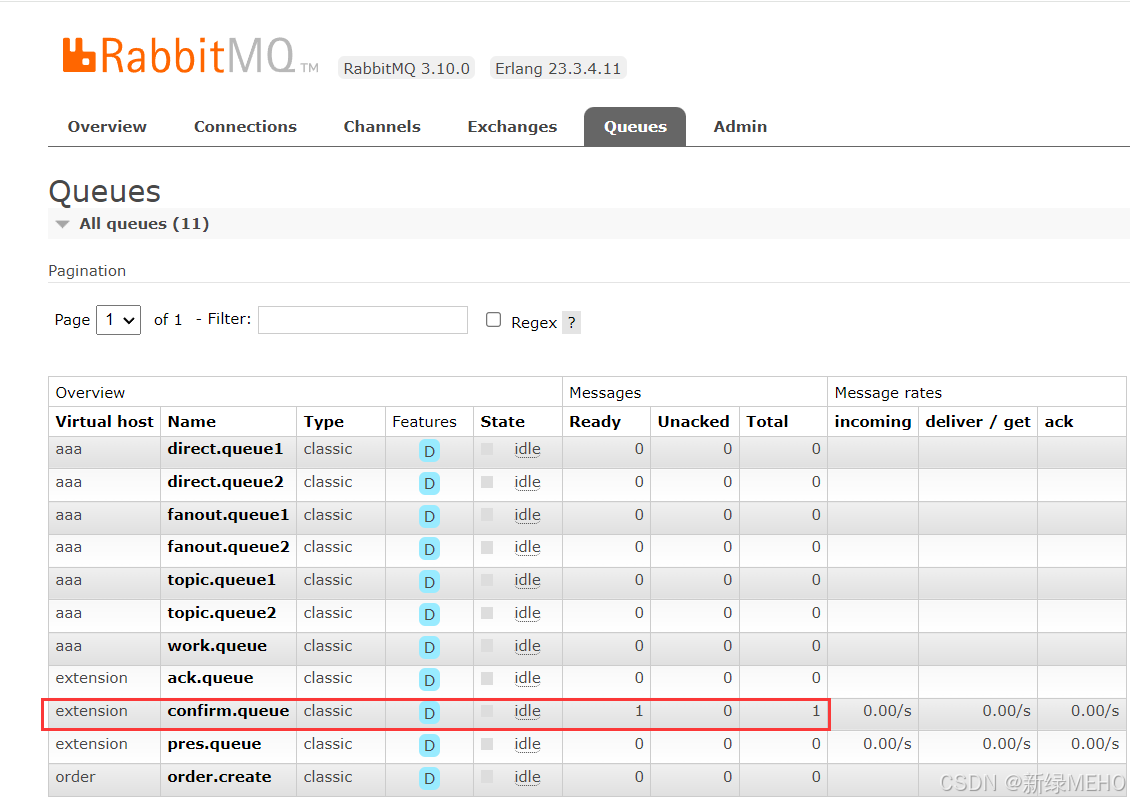
生產消息1
第一次生產消息

第二次生產消息
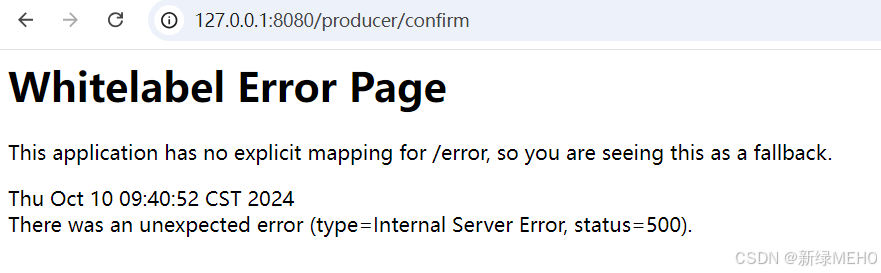

此時我們看到,第一次生產消息時能夠正常生產消息,但是當我們第二次生產消息時卻拋異常了,異常信息為:java.lang.IllegalStateException: Only one ConfirmCallback is supported by each RabbitTemplate
解決方法
是為什么呢?從異常信息中我們可以看到,ConfirmCallback只能被設置一次,但是從我們的代碼中可以看到,我們每次生產消息時都會設置一次ConfirmCallback,顯然這就是問題所在。
下面我們把剛剛的ConfirmCallback提取出來,重新設置RabbitTemplate。
RabbitTemplateConfig
import org.springframework.amqp.rabbit.connection.ConnectionFactory;
import org.springframework.amqp.rabbit.connection.CorrelationData;
import org.springframework.amqp.rabbit.core.RabbitTemplate;
import org.springframework.context.annotation.Bean;
import org.springframework.context.annotation.Configuration;@Configuration
public class RabbitTemplateConfig {@Beanpublic RabbitTemplate confirmRabbitTemplate(ConnectionFactory connectionFactory){RabbitTemplate rabbitTemplate = new RabbitTemplate(connectionFactory);//設置回調方法rabbitTemplate.setConfirmCallback(new RabbitTemplate.ConfirmCallback() {@Overridepublic void confirm(CorrelationData correlationData, boolean ack, String cause) {System.out.println("執行了confirm方法");if (ack){System.out.printf("接收到消息, 消息ID: %s \n", correlationData==null? null: correlationData.getId());}else {System.out.printf("未接收到消息, 消息ID: %s, cause: %s \n", correlationData==null? null: correlationData.getId(), cause);//相應的業務處理}}});return rabbitTemplate;}
}
ProducerController
import org.springframework.amqp.core.Message;
import org.springframework.amqp.core.MessageDeliveryMode;
import org.springframework.amqp.core.MessageProperties;
import org.springframework.amqp.rabbit.connection.CorrelationData;
import org.springframework.amqp.rabbit.core.RabbitTemplate;
import org.springframework.beans.factory.annotation.Autowired;
import org.springframework.web.bind.annotation.RequestMapping;
import org.springframework.web.bind.annotation.RestController;
import rabbitextensionsdemo.constant.Constants;@RequestMapping("/producer")
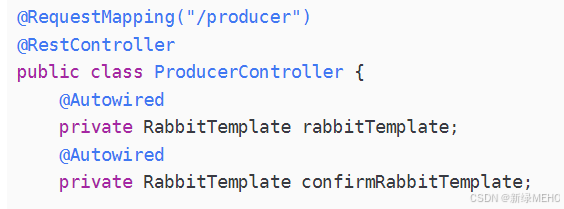
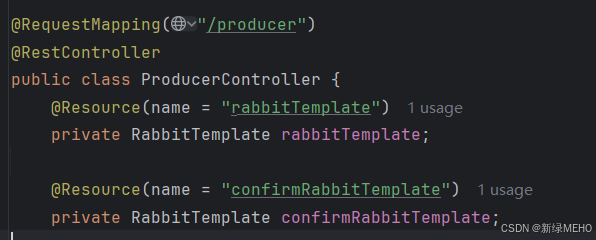
@RestController
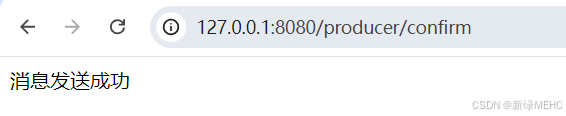
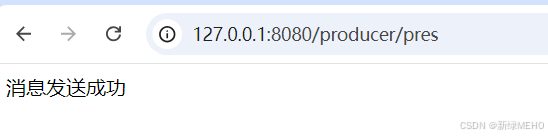
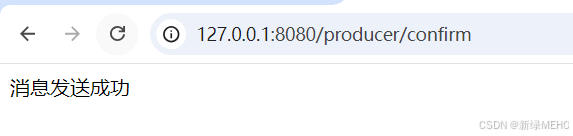
public class ProducerController {@Autowiredprivate RabbitTemplate rabbitTemplate;@Autowiredprivate RabbitTemplate confirmRabbitTemplate;@RequestMapping("/pres")public String pres() {Message message = new Message("Presistent test...".getBytes(), new MessageProperties());//消息持久化message.getMessageProperties().setDeliveryMode(MessageDeliveryMode.PERSISTENT);System.out.println(message);rabbitTemplate.convertAndSend(Constants.PRES_EXCHANGE, "pres", message);return "消息發送成功";}@RequestMapping("/confirm")public String confirm() {CorrelationData correlationData = new CorrelationData("1");confirmRabbitTemplate.convertAndSend(Constants.CONFIRM_EXCHANGE, "confirm", "confirm test...", correlationData);return "消息發送成功";}
}生產消息
多次生產消息2
此時我們可以看到,我們解決了前面多次生產消息導致的ConfirmCallback被設置多次的問題,但是我們此時的代碼就真的沒有問題了嗎?

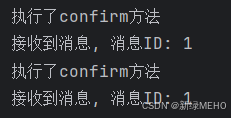
當我們生產其它消息時,發現我們并沒有給這個生產消息的方法設置ConfirmCallback啊,但是為什么在控制臺上看到執行了我們設置的ConfrimCallback,這是為什么呢?
是因為我們在前面設置了RabbitTemplate,而且使用了@Autowired注解注入了RabbitTemplate,雖然我們注入了兩個,一個是rabbitTemplate,一個是confirmRabbitTemplate,但是這兩個都是同一個RabbitTemplate。
解決方法
解決辦法:我們在RabbitTemplateConfig中設置兩個RabbitTemplate.
import org.springframework.amqp.rabbit.connection.ConnectionFactory;
import org.springframework.amqp.rabbit.connection.CorrelationData;
import org.springframework.amqp.rabbit.core.RabbitTemplate;
import org.springframework.context.annotation.Bean;
import org.springframework.context.annotation.Configuration;@Configuration
public class RabbitTemplateConfig {@Beanpublic RabbitTemplate rabbitTemplate(ConnectionFactory connectionFactory){RabbitTemplate rabbitTemplate = new RabbitTemplate(connectionFactory);return rabbitTemplate;}@Beanpublic RabbitTemplate confirmRabbitTemplate(ConnectionFactory connectionFactory){RabbitTemplate rabbitTemplate = new RabbitTemplate(connectionFactory);//設置回調方法rabbitTemplate.setConfirmCallback(new RabbitTemplate.ConfirmCallback() {@Overridepublic void confirm(CorrelationData correlationData, boolean ack, String cause) {System.out.println("執行了confirm方法");if (ack){System.out.printf("接收到消息, 消息ID: %s \n", correlationData==null? null: correlationData.getId());}else {System.out.printf("未接收到消息, 消息ID: %s, cause: %s \n", correlationData==null? null: correlationData.getId(), cause);//相應的業務處理}}});return rabbitTemplate;}
}
與此同時,我們修改注入方式:
此時,當再次使用/producer/pres來生產消息時,就沒問題了。
生產消息3
下面我們修改一下生產消息時給消息設置的路由規則:
@RequestMapping("/confirm")public String confirm() {CorrelationData correlationData = new CorrelationData("1");confirmRabbitTemplate.convertAndSend(Constants.CONFIRM_EXCHANGE, "confirm111", "confirm test...", correlationData);return "消息發送成功";}生產消息
我們知道,上面生產消息時給消息設置的路由規則并不存在,按道理說,應該會打印“未收到消息”而非“收到消息”,原因是因為,上面的confirm確認模式是用來確定生產消息是否到達了交換機,而上面的路由規則是針對消息從交換機到隊列的,解決上面的路由問題使用到另一種確認模式。
return 模式
消息到達Exchange之后, 會根據路由規則匹配, 把消息放?Queue中. Exchange到Queue的過程, 如果?條消息?法被任何隊列消費(即沒有隊列與消息的路由鍵匹配或隊列不存在等), 可以選擇把消息退回給發送者. 消息退回給發送者時, 我們可以設置?個返回回調?法, 對消息進?處理。
修改RabbitTemplateConfig,設置消息退回的回調方法
import org.springframework.amqp.core.ReturnedMessage;
import org.springframework.amqp.rabbit.connection.ConnectionFactory;
import org.springframework.amqp.rabbit.connection.CorrelationData;
import org.springframework.amqp.rabbit.core.RabbitTemplate;
import org.springframework.context.annotation.Bean;
import org.springframework.context.annotation.Configuration;@Configuration
public class RabbitTemplateConfig {@Beanpublic RabbitTemplate rabbitTemplate(ConnectionFactory connectionFactory){RabbitTemplate rabbitTemplate = new RabbitTemplate(connectionFactory);return rabbitTemplate;}@Beanpublic RabbitTemplate confirmRabbitTemplate(ConnectionFactory connectionFactory){RabbitTemplate rabbitTemplate = new RabbitTemplate(connectionFactory);//設置回調方法rabbitTemplate.setConfirmCallback(new RabbitTemplate.ConfirmCallback() {@Overridepublic void confirm(CorrelationData correlationData, boolean ack, String cause) {System.out.println("執行了confirm方法");if (ack){System.out.printf("接收到消息, 消息ID: %s \n", correlationData==null? null: correlationData.getId());}else {System.out.printf("未接收到消息, 消息ID: %s, cause: %s \n", correlationData==null? null: correlationData.getId(), cause);//相應的業務處理}}});//消息被退回時, 回調方法rabbitTemplate.setMandatory(true);rabbitTemplate.setReturnsCallback(new RabbitTemplate.ReturnsCallback() {@Overridepublic void returnedMessage(ReturnedMessage returned) {System.out.println("消息退回:"+returned);}});return rabbitTemplate;}
}
使?RabbitTemplate的setMandatory?法設置消息的mandatory屬性為true(默認為false). 這個屬性
的作?是告訴RabbitMQ, 如果?條消息?法被任何隊列消費, RabbitMQ應該將消息返回給發送者, 此時 ReturnCallback 就會被觸發。
回調函數中有?個參數: ReturnedMessage, 包含以下屬性:
public class ReturnedMessage {????????//返回的消息對象,包含了消息體和消息屬性????????private final Message message;????????//由 Broker 提供的回復碼 , 表?消息?法路由的原因 . 通常是?個數字代碼,每個數字代表不同 的含義 .????????private final int replyCode;????????//?個?本字符串 , 提供了?法路由消息的額外信息或錯誤描述 .????????private final String replyText;????????//消息被發送到的交換機名稱????????private final String exchange;????????//消息的路由鍵,即發送消息時指定的鍵????????private final String routingKey;}
編寫生產消息代碼(路由正確)
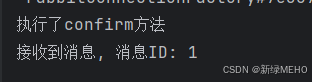
@RequestMapping("/returns")public String returns() {CorrelationData correlationData = new CorrelationData("5");confirmRabbitTemplate.convertAndSend(Constants.CONFIRM_EXCHANGE, "confirm", "returns test...", correlationData);return "消息發送成功";}生產消息1

編寫生產消息代碼(路由錯誤)
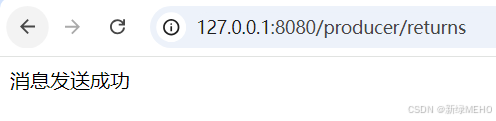
@RequestMapping("/returns")public String returns() {CorrelationData correlationData = new CorrelationData("5");confirmRabbitTemplate.convertAndSend(Constants.CONFIRM_EXCHANGE, "confirm111", "returns test...", correlationData);return "消息發送成功";}生產消息2

此時我們可以看到,隊列中依舊是只有1條消息,而且代碼執行了消息退回,而且消息退回時打印了消息信息,顯然我們可以看到,消息的路由規則是錯誤的,不會入隊列。
面試題
如何保證RabbitMQ消息的可靠傳輸?

從這個圖中, 可以看出, 消息可能丟失的場景以及解決?案:
1. ?產者將消息發送到 RabbitMQ失敗
????????a. 可能原因: ?絡問題等
????????b. 解決辦法: [發送?確認-confirm確認模式]
2. 消息在交換機中?法路由到指定隊列:
????????a. 可能原因: 代碼或者配置層?錯誤, 導致消息路由失敗
????????b. 解決辦法: [發送?確認-return模式]
3. 消息隊列??數據丟失
????????a. 可能原因: 消息到達RabbitMQ之后, RabbitMQ Server 宕機導致消息丟失.
????????b. 解決辦法: [持久性]. 開啟 RabbitMQ持久化, 就是消息寫?之后會持久化到磁盤, 如果RabbitMQ 掛了, 恢復之后會?動讀取之前存儲的數據. (極端情況下, RabbitMQ還未持久化就掛了, 可能導致少量數據丟失, 這個概率極低, 也可以通過集群的?式提?可靠性)
4. 消費者異常, 導致消息丟失
????????a. 可能原因: 消息到達消費者, 還沒來得及消費, 消費者宕機. 消費者邏輯有問題.
????????b. 解決辦法: [消息確認]. RabbitMQ 提供了 消費者應答機制 來使 RabbitMQ 能夠感知到消費者是否消費成功消息. 默認情況下消費者應答機制是?動應答的, 可以開啟?動確認, 當消費者確認消費成功后才會刪除消息, 從?避免消息丟失. 除此之外, 也可以配置重試機制, 當消息消費異常時, 通過消息重試確保消息的可靠性。
歡迎大家來訪問我的主頁----》鏈接


)


:移動應用核心指標解析與用戶分層營收策略)


)

)

)