【Linux應用】Linux系統日志上報服務,以及thttpd的配置、發送函數
文章目錄
- thttpd服務
- 安裝thttpd
- 配置thttpd服務
- thttpd函數
- 日志效果和文件
- 附錄:開發板快速上手:鏡像燒錄、串口shell、外設掛載、WiFi配置、SSH連接、文件交互(RADXA ZERO 3為例)
- ZERO 3燒錄
- ZERO 3串口shell
- 外設掛載
- 連接WiFi
- SSH連接
- SSH的文件交互
- 換源
thttpd服務
通過thttpd可以進行日志上報等服務
thttpd 是一個簡單,小型,可移植,快速且安全的 HTTP 服務器,thttpd搭建的Web服務器支持認證、CGI等服務,功能都比較齊全,常用于嵌入式或桌面系統搭建web服務器使用。
從官網即可下載
下載thttpd
安裝thttpd
安裝共分以下幾步
1. 解壓 進入目錄
2. ./configure
3. sudo make
4. sudo make install
5. 檢驗 sudo thttpd -V
6. 添加服務
對應步驟shell為:
tar -xzvf thttpd-2.29.tar.gz
cd thttpd-2.29/
./configure
sudo make
sudo make install
sudo thttpd -V
cd ..
sudo chmod 777 thttpd.conf
sudo chmod 777 thttpd-with-timezone.service
sudo cp thttpd.conf /etc/
sudo cp thttpd-with-timezone.service /etc/systemd/system
cd /etc/systemd/system/
sudo systemctl enable thttpd-with-timezone.service
配置thttpd服務
.conf文件配置內容如下:
# This section overrides defaults
dir=/usr/local/thttpd/www/log
chroot
#user=www# default = nobody
logfile=/var/log/thttpd.log
pidfile=/var/run/thttpd.pid
# This section _documents_ defaults in effect
port=80
# nosymlink# default = !chroot
# novhost
# nocgipat
# nothrottles
host=0.0.0.0
# charset=iso-8859-1.service服務文件如下:
Description=thttpd Web Server with Timezone Setup
After=network.target local-fs.target[Service]
Type=forking
ExecStartPre=/usr/bin/timedatectl set-timezone Asia/Shanghai
ExecStart=/usr/local/sbin/thttpd -C /etc/thttpd.conf
User=root
Group=root
PIDFile=/var/run/thttpd.pid
Restart=on-failure[Install]
WantedBy=multi-user.target
thttpd函數
log.h和log.cpp
包含以下API:
#include <stdio.h>
#include <stdlib.h>
#include <time.h>
#include <sys/stat.h>
#include <fcntl.h>
#include <unistd.h>
#include <string.h>
#include <errno.h>
void init_log_file();
void write_log(const char* format, ...);
void log_debug(const char* format, ...);
void log_info(const char* format, ...);
void log_warn(const char* format, ...);
void log_error(const char* format, ...);
常用log_info即可 其與printf一樣

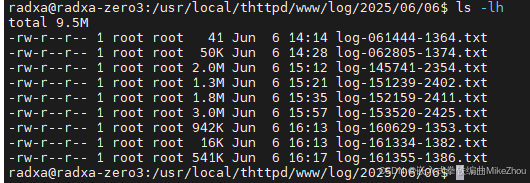
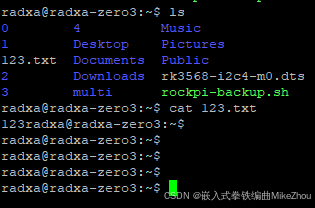
日志效果和文件
最后的日志效果:
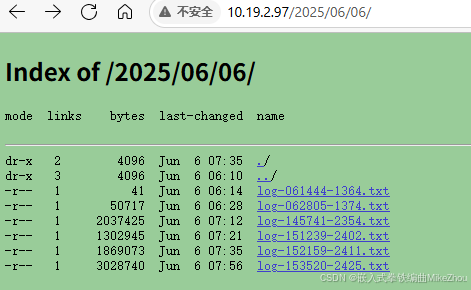
保存在如下目錄下:

目錄按日期進行存儲
附錄:開發板快速上手:鏡像燒錄、串口shell、外設掛載、WiFi配置、SSH連接、文件交互(RADXA ZERO 3為例)
開發板快速上手:鏡像燒錄、串口shell、外設掛載、WiFi配置、SSH連接、文件交互(RADXA ZERO 3為例)
ZERO 3燒錄
ZERO 3有兩種 最本質的就是一個帶WiFi一個不帶WiFi

ZERO 3作為一個Linux板 其存儲支持從sd卡EFI啟動
系統安裝則直接通過Balena Etcher來進行
可以使用其Windows版本即可
官方文檔:
官方文檔快速上手描述
鏡像下載則也可以使用官方鏡像:
Radxa ZERO 3 Debian Build 6
該鏡像是最初的鏡像 很多依賴都沒有
如果開發的話 可以直接下載第三方鏡像 或者自己在原有官方鏡像上去安裝鏡像包等等
燒錄很簡單 直接用工具選擇U盤 選擇鏡像即可
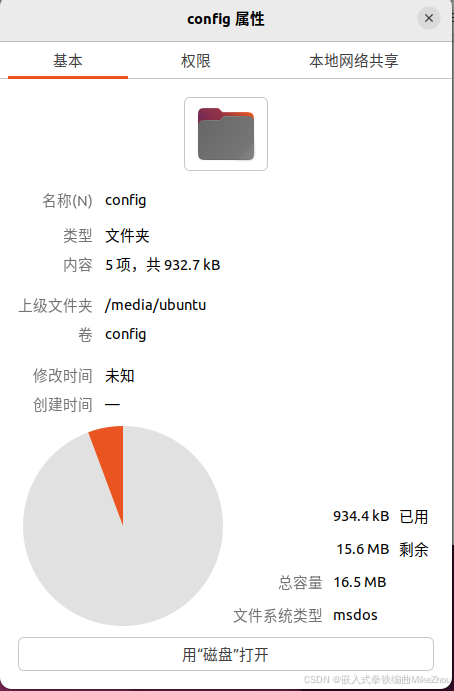
下圖為燒錄好了的sd卡
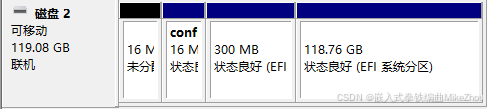
除了系統分區外 就是一個config分區 其掛載根根目錄名稱即為config
ZERO 3串口shell
串口與ZERO 3鏈接如下圖:
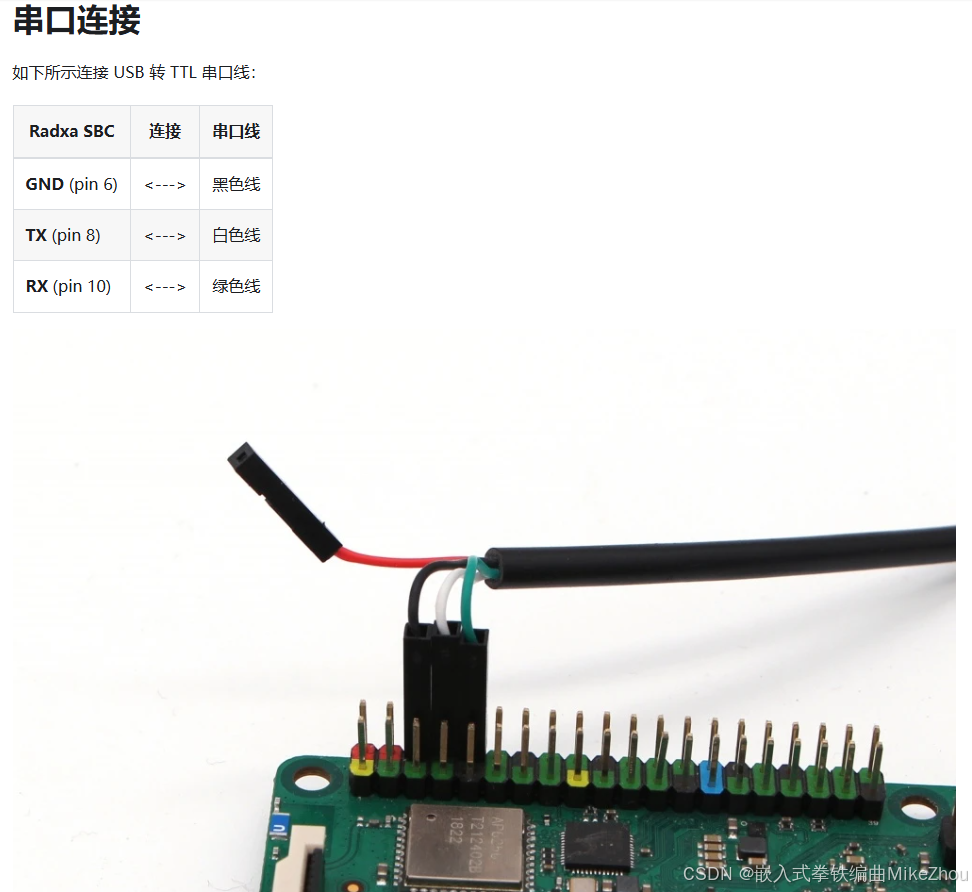
鏈接后 配置串口為
baudrate: 1500000
data bit: 8
stop bit: 1
parity  : none
flow control: none
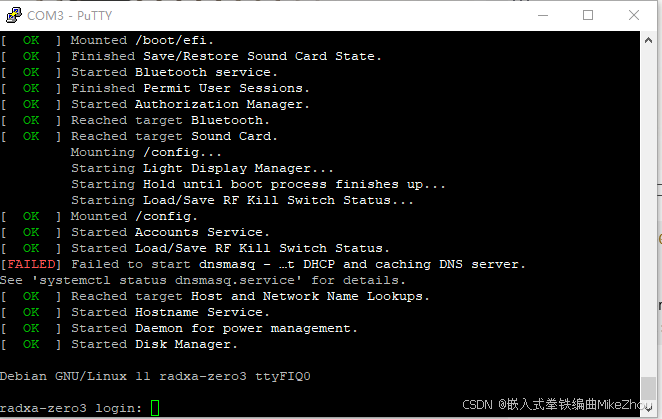
啟動后 用戶名和密碼都為radxa
外設掛載
根據df命令查詢系統掛載點
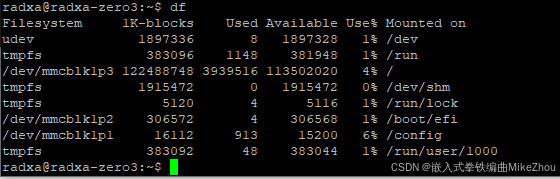
其做好了的U盤外部存儲空間為/config

連接WiFi
使用如下指令鏈接WiFi:
nmcli device wifi                                           #掃描WiFi
sudo nmcli device wifi connect <ssid> password <passwd>     #連接WiFi

連上后 使用ip a命令即可查看連接狀態和ip

SSH連接
使用命令sudo systemctl status ssh查看ssh狀態
前提是要安裝ssh
如果沒有安裝 則通過shell安裝ssh:
sudo apt-get update
sudo apt-get install openssh-server openssh-sftp-server
根據Active判斷是否需要重啟ssh服務:
重啟ssh服務:
sudo systemctl restart ssh
啟動后如下:
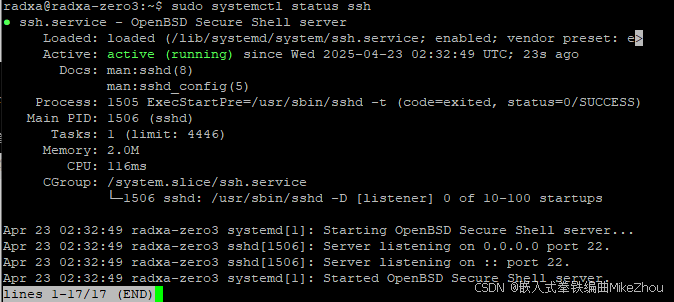
Active狀態就被設置為了running
開機自啟動ssh則使用命令:
sudo systemctl enable --now ssh
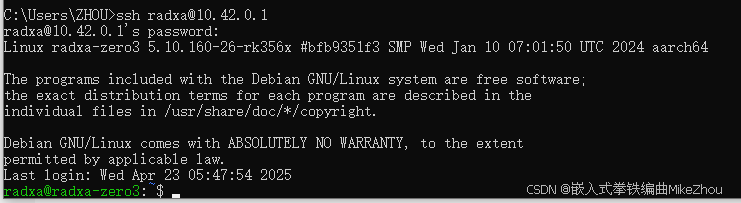
在PC上 支持ssh的設備中 使用以下指令鏈接到板子:
ssh [username]@[IP address] # or ssh [username]@[hostname]
如下圖:
SSH的文件交互
若是在PC上作為主機去訪問設備
那么就是在PC的cmd中運行shell
有的終端軟件配備了ssh的文件管理傳輸功能
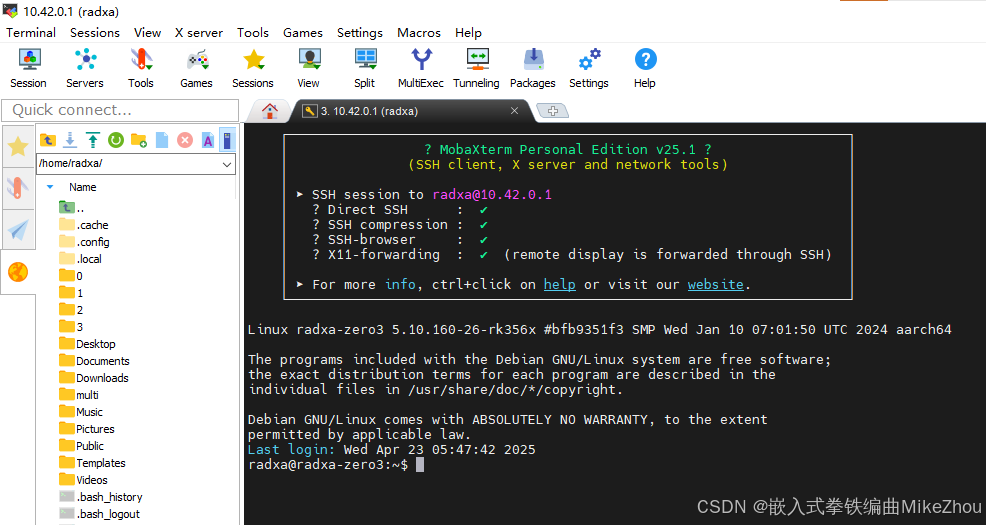
連上以后就可以直接搜素到當前目錄下的各類文件 以便于實現文件管理
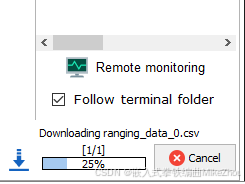
并且可以直接download
# 復制 Windows 文件到 Linux
scp D:\data\1.txt root@192.168.88.161:/root/data
# 復制 Windows 目錄到 Linux(記得加 -r)
scp -r D:\data root@192.168.88.161:/root/data# 復制 Linux 文件到 Windows
scp root@192.168.88.161:/root/data/1.txt D:\data
# 復制 Linux 目錄到 Windows(記得加 -r)
scp -r root@192.168.88.161:/root/data D:\data
前提是設備開啟了ssh可以被鏈接
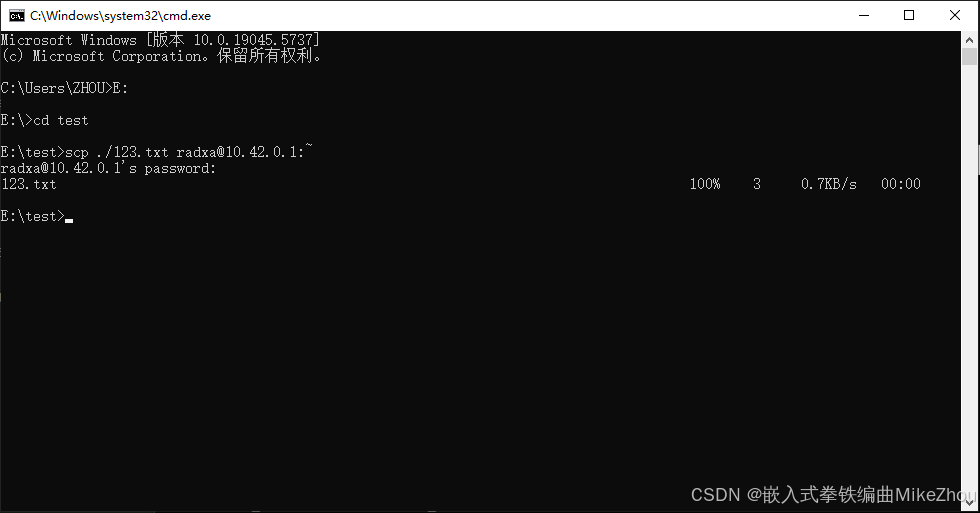
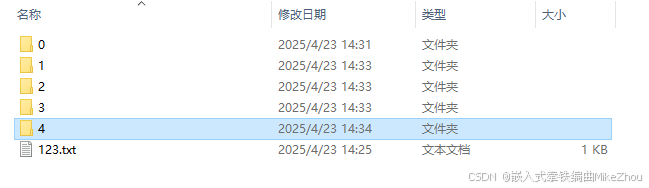
發過去后便能在板子上看到:
回傳文件夾:

如果是Linux設備去連接Windows設備 則需要在Windows里面設置對應的服務 相關教程很多 這里不過多贅述
如果是Linux設備訪問Linux設備 則主設備也要指定IP
scp root@192.168.88.161:/root/1.txt root@192.168.88.162:/root# 如果設置了Linux之間的免密登錄,可這樣寫:
scp 192.168.88.161:///root/1.txt 192.168.88.162:///root
換源
Linux系統的源都在/etc/apt/下 一般有兩個文件
一個是sources.list 另外一個是sources.list.d目錄下的品牌list文件
如樹莓派需要備份原本的源:
sudo cp /etc/apt/sources.list /etc/apt/sources.list.bak
sudo cp /etc/apt/sources.list.d/raspi.list /etc/apt/sources.list.d/raspi.list.bak
而radxa的則是:
sudo cp /etc/apt/sources.list /etc/apt/sources.list.bak
sudo cp /etc/apt/sources.list.d/radxa.list /etc/apt/sources.list.d/radxa.list.bak
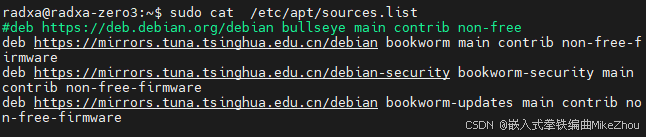
將原本的文件進行編輯:
sudo nano /etc/apt/sources.list
注釋掉最初的源 并添加新的源:
deb https://mirrors.tuna.tsinghua.edu.cn/debian bookworm main contrib non-free-firmware
deb https://mirrors.tuna.tsinghua.edu.cn/debian-security bookworm-security main contrib non-free-firmware
deb https://mirrors.tuna.tsinghua.edu.cn/debian bookworm-updates main contrib non-free-firmware
如圖:
然后再換子目錄下的源
sudo nano /etc/apt/sources.list.d/raspi.list
替換成:
deb https://mirrors.tuna.tsinghua.edu.cn/raspberrypi/ bullseye main
不過很可惜 清華源沒有radxa 但是可以換debian的源(/etc/apt/sources.list):
deb https://mirrors.tuna.tsinghua.edu.cn/debian/ bullseye main contrib non-free
deb-src https://mirrors.tuna.tsinghua.edu.cn/debian/ bullseye main contrib non-free
deb https://mirrors.tuna.tsinghua.edu.cn/debian/ bullseye-updates main contrib non-free
deb-src https://mirrors.tuna.tsinghua.edu.cn/debian/ bullseye-updates main contrib non-free
deb https://mirrors.tuna.tsinghua.edu.cn/debian/ bullseye-backports main contrib non-free
deb-src https://mirrors.tuna.tsinghua.edu.cn/debian/ bullseye-backports main contrib non-free
deb https://mirrors.tuna.tsinghua.edu.cn/debian-security bullseye-security main contrib non-free
deb-src https://mirrors.tuna.tsinghua.edu.cn/debian-security bullseye-security main contrib non-free
換源后 執行
sudo apt-get upgrade
sudo apt-get update


)


![[10-1]I2C通信協議 江協科技學習筆記(17個知識點)](http://pic.xiahunao.cn/[10-1]I2C通信協議 江協科技學習筆記(17個知識點))


